


We may receive a commission when you use our affiliate links. However, this does not impact our recommendations.
 A hassle-free fast track to frameless cabinets.
 A hassle-free fast track to frameless cabinets.
I’ve always liked the clean, modern look of cabinets built without face frames. My early attempts involved building plywood boxes first and applying hardwood edging later. But cutting, fitting, gluing and clamping each edging piece was frustratingly slow.

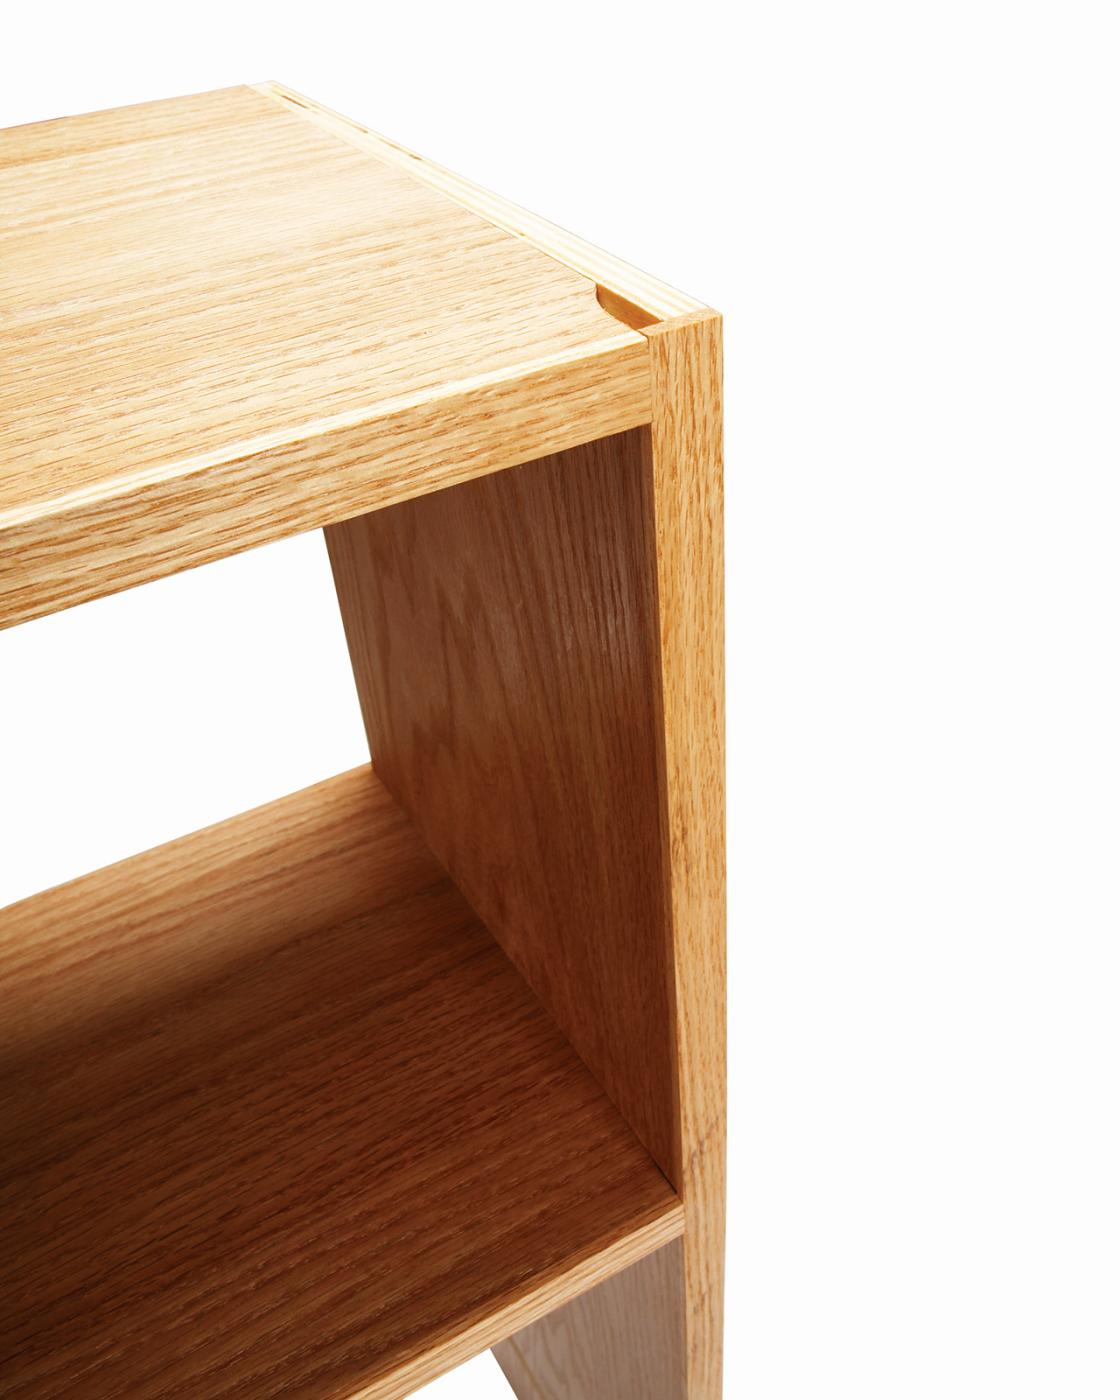
This blind dado joint is quck to make and nearly invisible
But that was nothing compared to leveling the edging flush with the plywood. This was especially aggravating on the inside corners.
 I almost gave up making this style of cabinet when I learned a new technique that streamlines construction. It allows you to put the edging on before assembly. Flushing up the edging is no problem. I can even pre-finish the cabinet parts before gluing them together. I get perfect looking butt joints and an almost invisible line where the edging joins the plywood.
Here’s how it works

1. Cut all dadoes and rabbets with a router, a pattern bit and a simple dado jig. A couple of offcuts are all you need to perfectly size your dadoes without fussy trial and error set-ups.
Cut all your cabinet parts to size. Leave one shelf about 1/2- in. long to use later for test cuts.
Cut all the rabbets and dadoes (Photo 1). Because this technique requires consistent dado depth I prefer to use a router and a jig rather than a tablesaw.
2. Glue a single strip of hardwood edging to two panels at once. The single piece of edging is slightly thicker than the plywood and a saw kerf thickness more than twice the desired thickness of the finished edge. Scrap wood protects the plywood edges.
Glue the hardwood edges to the side panels and shelves by sandwiching a single piece of hardwood between two panels (Photo 2). The hardwood piece is twice as thick as the finish thickness of the edging plus an extra 1/8-in. for the saw kerf. For example: For a 3/16- in. thick hardwood edge use a 1/2-in. thick piece of hardwood. I like the looks of a thin edge and it still offers plenty of protection for the plywood edge.
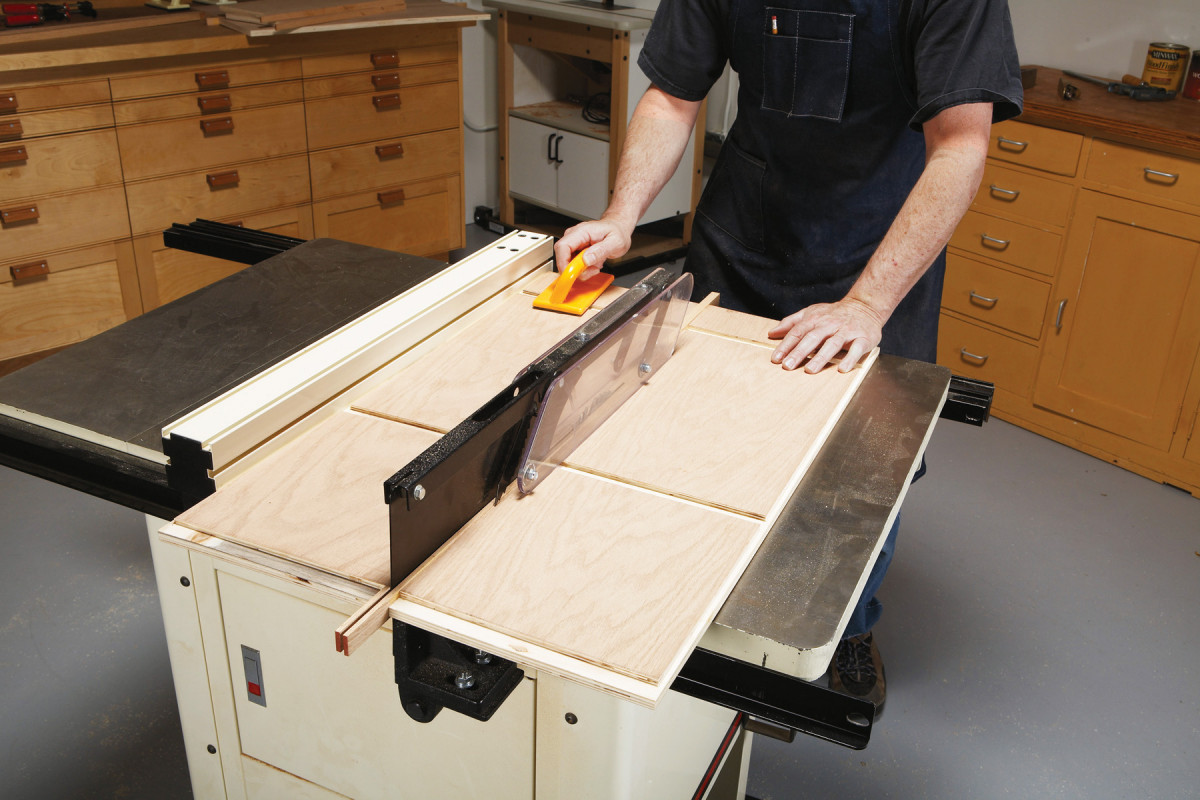
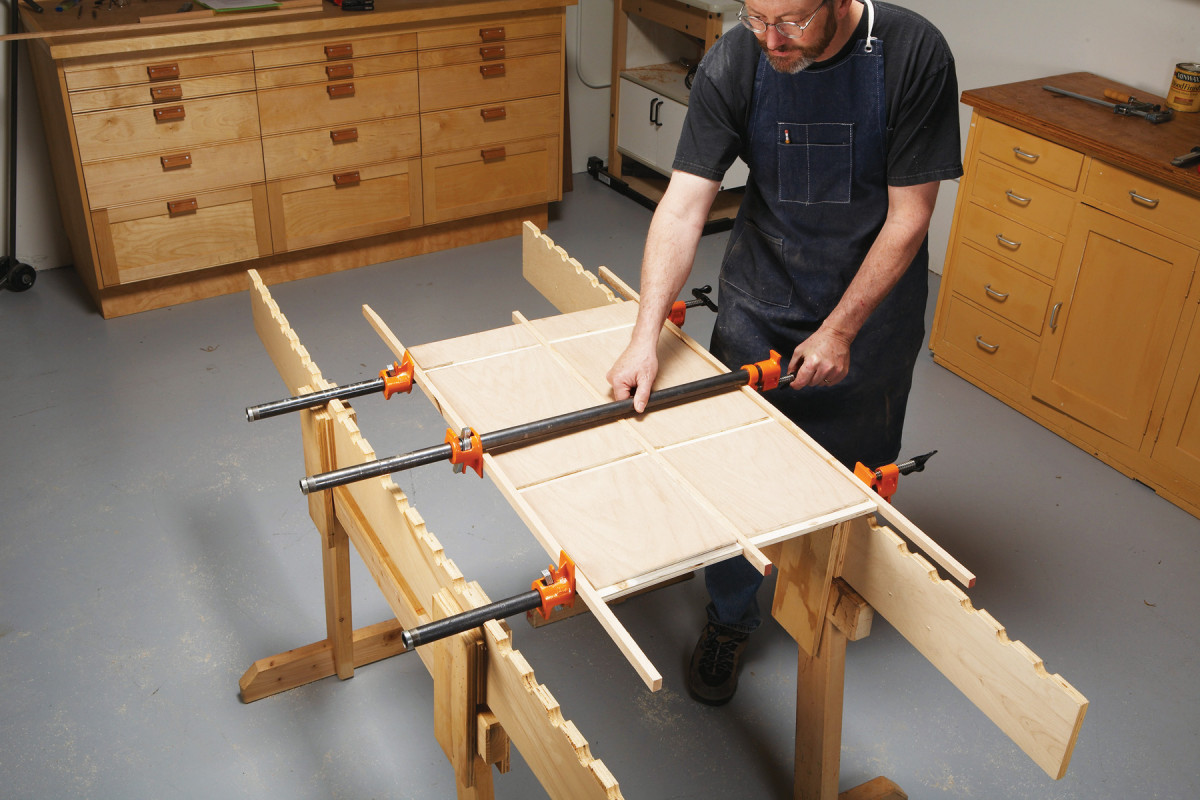
3. Rip the panels down the middle of the edging.
Rip the glued-together panels free (Photo 3). The hardwood edge on the cabinet sides creates stopped dados and rabbets.

4. Plane the edging flush with the panel sides. A block plane gives better control than a power sander. Set the blade for a light cut and ride the plane’s heel on the panel.
Flush up the edging with the panels. Using a power sander is asking for a sand through on the veneer, so I always start with a block plane (Photo 4) and finsih with a light sanding.
Trim the edging to length with a handsaw.

5. Test cut a notch on the leading edge of a shelf that’s been cut extra long. The jointer’s depth of cut must exactly equal the dado’s depth. It takes a little trial and error to get the right setting on the jointer.
Use the extra long shelf to set up your jointer for notching the plywood (Photo 5). It’ll take some trial and error to get the setting just right. The extra length on the shelf allows you to trim and retest the joints’ fit.

6. Slide the shelf forward in the joint to test the depth of the notch. The notch is cut long enough to leave no trace of the cutterhead radius on the hardwood edge.
Test the shelf’s fit by sliding it forward in the rabbet (Photo 6). If the notch butts into the back of the side’s edging, the cut needs to be made deeper. If the notch slides over the side’s edging and leaves a gap, the jointer needs to be set to make a shallower cut. I aim for a fit that’s just a hair on the shallow side to insure tight joints all around.
Once you get the right fit, go ahead and notch all the shelves.
Dry fit the cabinet to check for any problem areas. An open joint is almost always the result of a high spot in a dado.
Do any finish sanding on the edges while the cabinet is clamped together. It’s too easy to ruin the fit if you sand the edging when the cabinet is apart.
Disassemble the cabinet and finish sand the flat panels taking care not to round the corners on the hardwood edges at the joints.
At this point, you can reassemble the cabinet with glue or prefinish the panels and then assemble. Be sure to tape off glue areas and be careful not to build the finish on the shelves so much they no longer fit the dado. I often stain and seal before assembly, then add the last coat or two when the cabinet is glued together.
Here are some supplies and tools we find essential in our everyday work around the shop. We may receive a commission from sales referred by our links; however, we have carefully selected these products for their usefulness and quality.


