We may receive a commission when you use our affiliate links. However, this does not impact our recommendations.
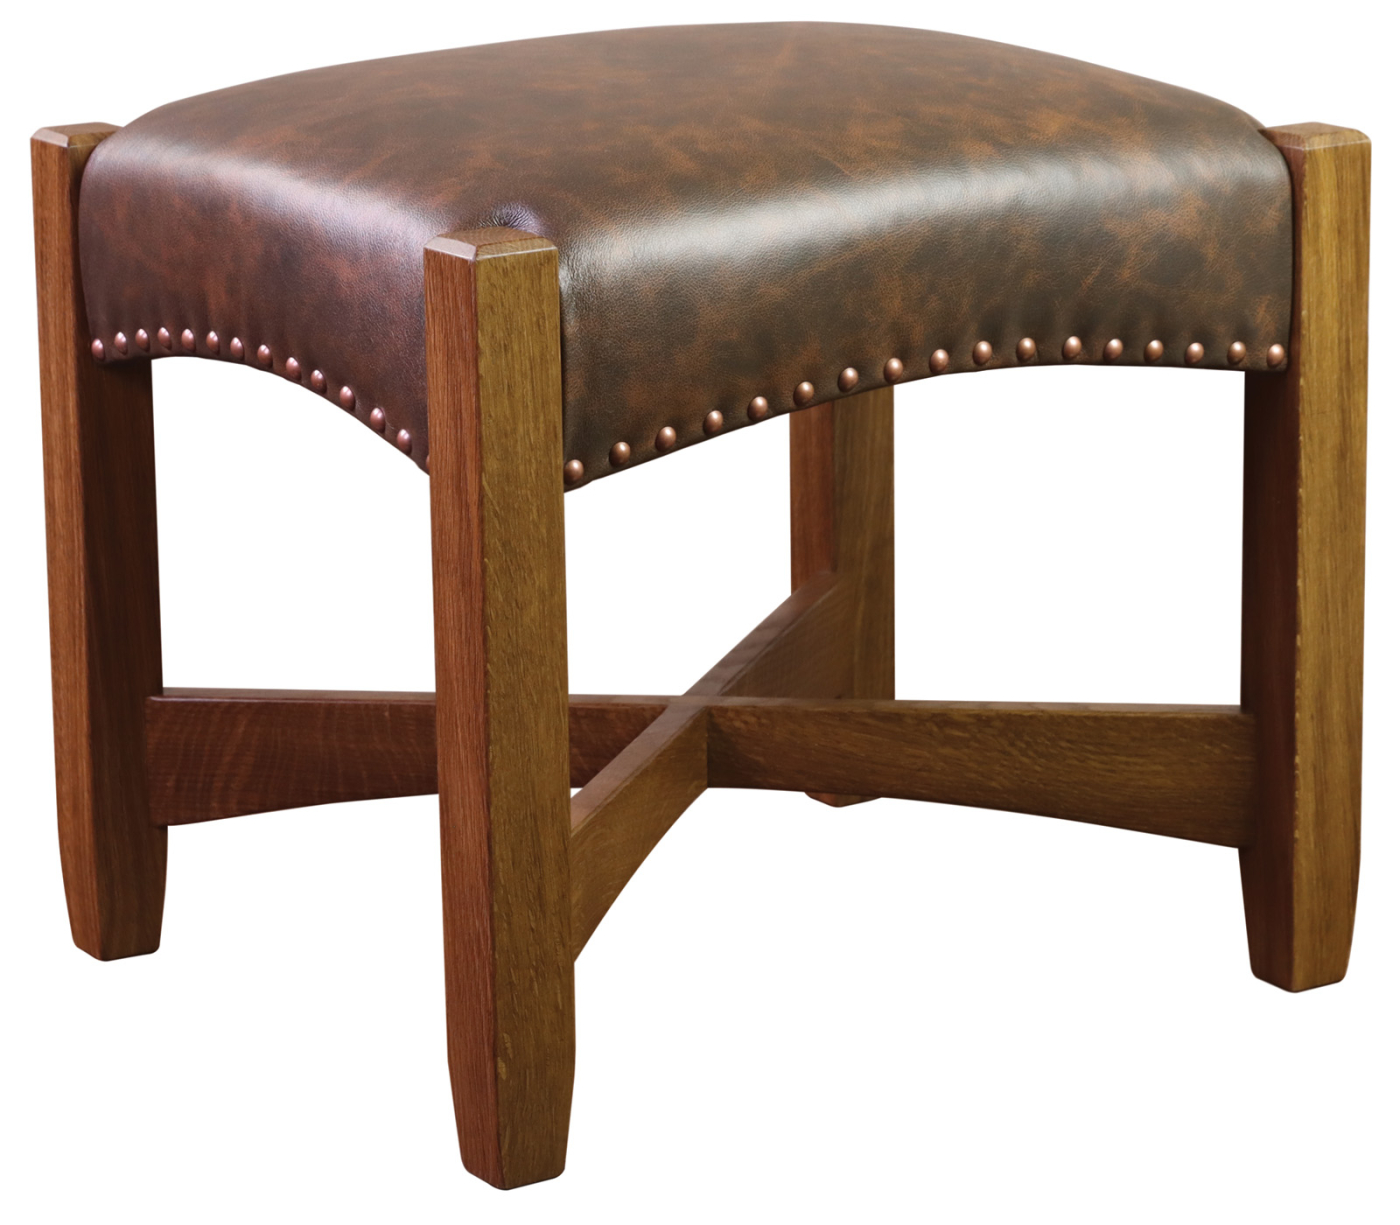
 After the woodworking is done, finish your project with upholstery to match.
The topic of DIY upholstery interests many woodworkers, however, few have access to detailed tutorials. Tacking a “no-sew” project like this Eastwood Ottoman can be a good confidence builder and a great place to start learning the craft of upholstery. If you get the upholstery details right, it will elevate the look and comfort of the piece. If nothing else, you can familiarize yourself with the basic terminology and techniques so you can accurately describe what you want from a professional upholsterer. But if you have any interest in doing the ottoman upholstery yourself, I bet you’ll succeed on your very first try.
There are two common types of upholstery for Arts and Crafts style ottomans. One is a drop-in cushion that uses a wooden web frame with jute webbing or springs as the base support. The other type is integral upholstery, where jute webbing is attached directly to the frame of the ottoman. The leather or fabric covers the wood rails with integral upholstery, and decorative tacks (deco tacks) are often used. One advantage of integral upholstery is the fact that the rails are padded, which makes the ottoman comfortable even if you sit towards the edge. One potential disadvantage of this type of upholstery, I suppose, is that it can only be re-upholstered so many times. Functionally though, I don’t think that’s much of an issue, as I’ve stripped 100-year-old leather chairs that still had the original leather upholstery intact.
Supplies Needed
• 22-gauge fine wire upholstery staples
• Antique copper finish decorative tacks
• 14 feet of jute webbing – Red strip webbing for seating applications
• 1 yard of batting – High-loft Dacron upholstery style
• Foam, 1″ thick x 20″ wide x 17″ high – 2245 high density, medium firmness
Start with Jute Webbing
Jute webbing is a strong material traditionally used for chairs and seat bases. Use the stronger red stripe variety for seating applications and reserve black-strip jute webbing for backrests. Use a webbing stretcher to adequately tension the material before stapling it to the other side. Normally jute webbing is doubled-over before fastening, but in this, we’ll just attach a single layer to avoid telegraphing the shape of the webbing through the finished upholstery. Proceed with additional straps in the same direction. Then switch to the jute webbing running in the opposite direction. Install these strips in a basket-weave fashion for maximum support. If your jute webbing is the typical 3.5“ wide, you’ll fit four rows on the long rails and three on the short rails.
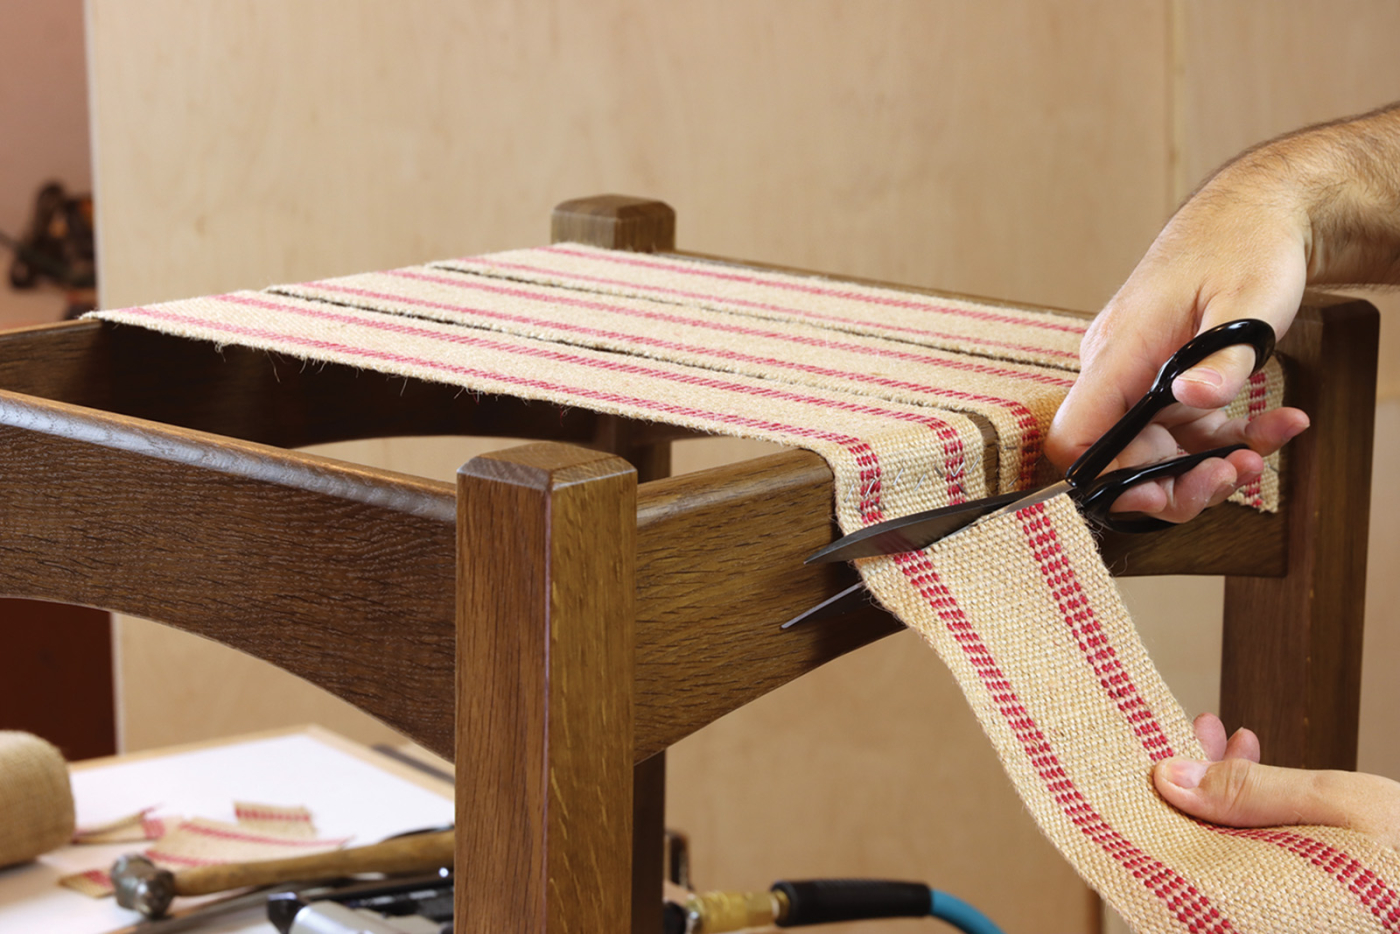
1 Anchor one side with staples and tension it with a webbing stretcher. Trim the excess webbing 1″ from the bottom of the rail.
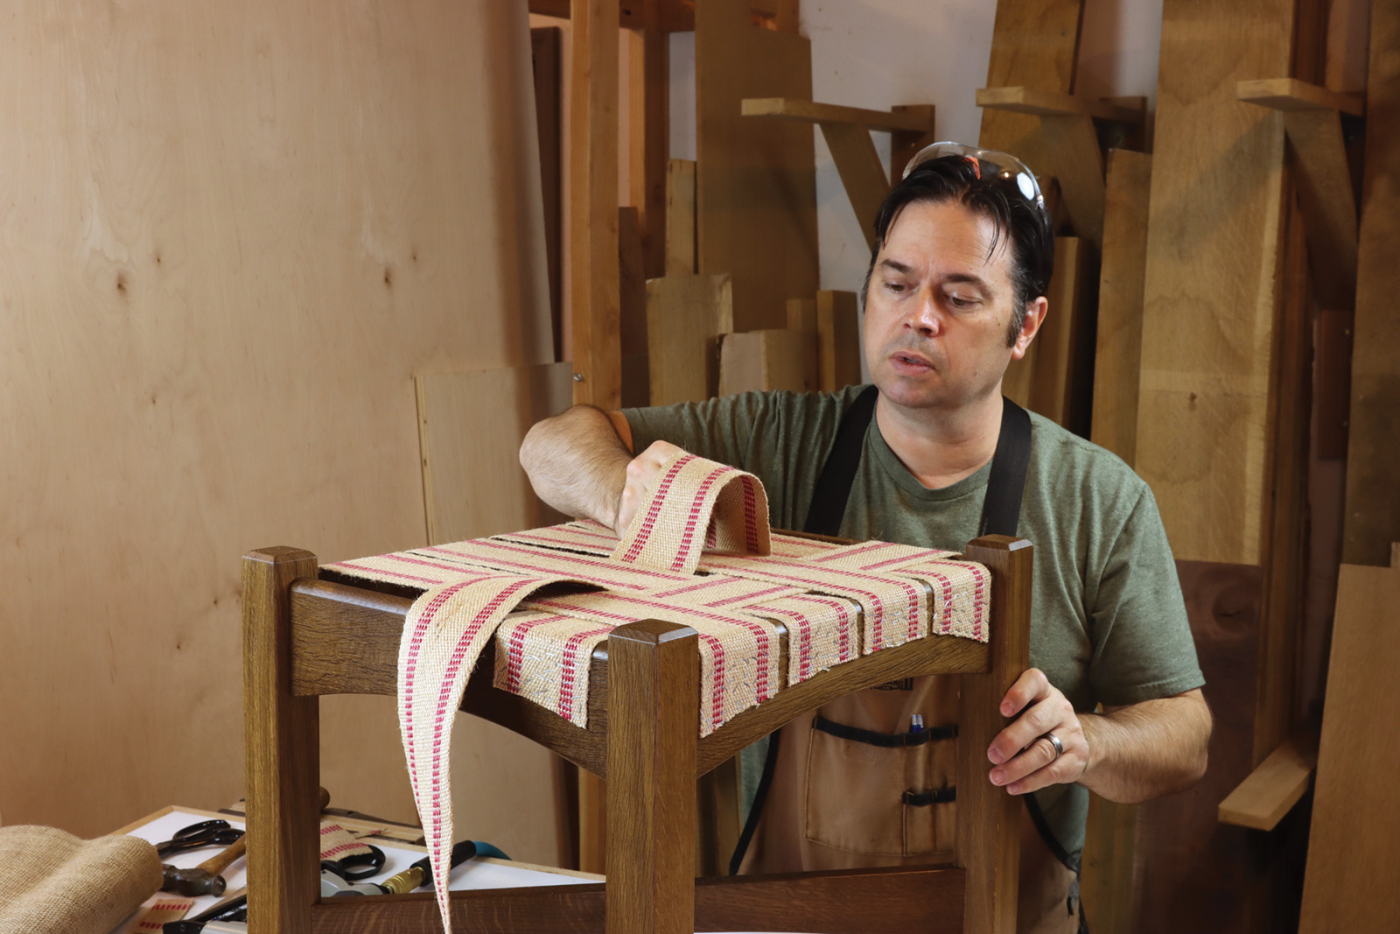
2 Weave additional strips in the opposite direction. For maximum strength, alternate the direction of the weave on adjacent runs.
The next job is to add two layers of burlap over the jute webbing. This step is often overlooked, but it’s an important part of the cushion layering process. From years of tearing apart antique Gustav Stickley and Charles Limbert chairs, I’ve found both natural burlap fibers or thin cardboard for this layer. The purpose of adding the burlap is to prevent the padding from protruding through the checkered squares by the jute webbing. The weave pattern is pretty tight on this ottoman project, so it isn’t too critical, but I’ve seen the stuffing fail in chairs with a sparse jute pattern. Cut the burlap to cover the top of the rails and notch the corners around the posts. Staple the two layers of burlap onto the top of the rails, making sure to draw out excess slack as you work.
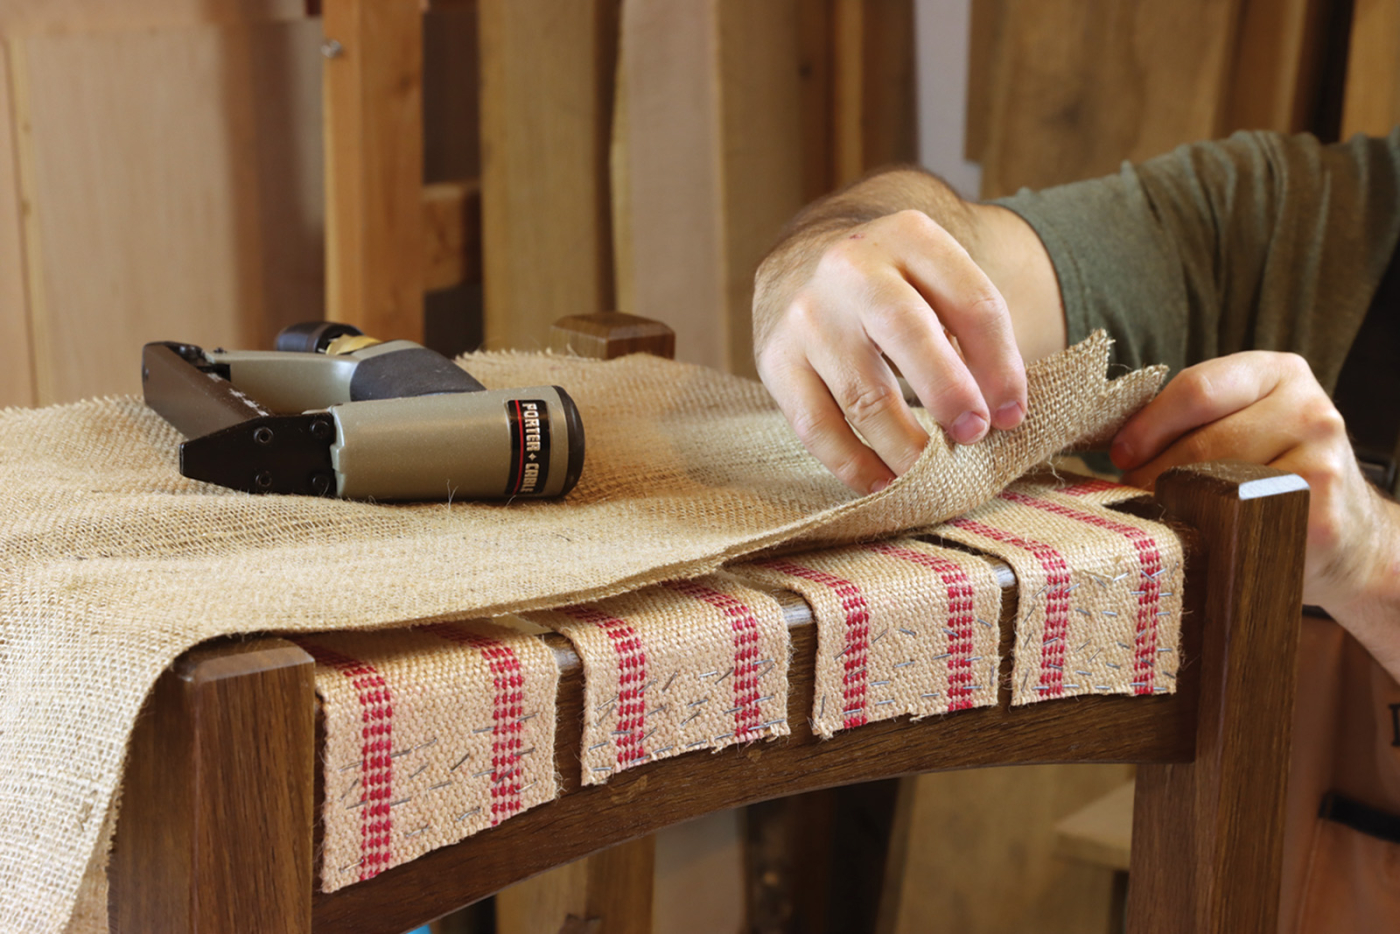
3 Add two layers of burlap to cover the voids in the webbing base. Notch around the posts and staple the burlap in place.
Initial Batting to Crown the Cushion
The next step is adding an undersized piece of polyester battering (aka Dacron) right on top of the burlap. This acts to crown the cushion slightly and give it a more natural look. Cut a piece of batting 12“ x 15” and attach it to the burlap with spray adhesive. Many products will work, but I prefer 3M Super 77 for foam and batting because it tacks over quickly. Spray both mating surfaces and press the batting in place. All of the batting used in this project is the high-loft variety with an uncompressed thickness of approximately 3/4“. When you purchase polyester batting, it may be described as weight by yard number, such as 10-ounce batting. I find these numbers unreliable because it describes the weight of the batting per lineal yard, and batting rolls can be anyway from 30“ to 50“ wide. As long as it’s described as 100% polyester batting appropriate for upholstery, you probably found the right product.
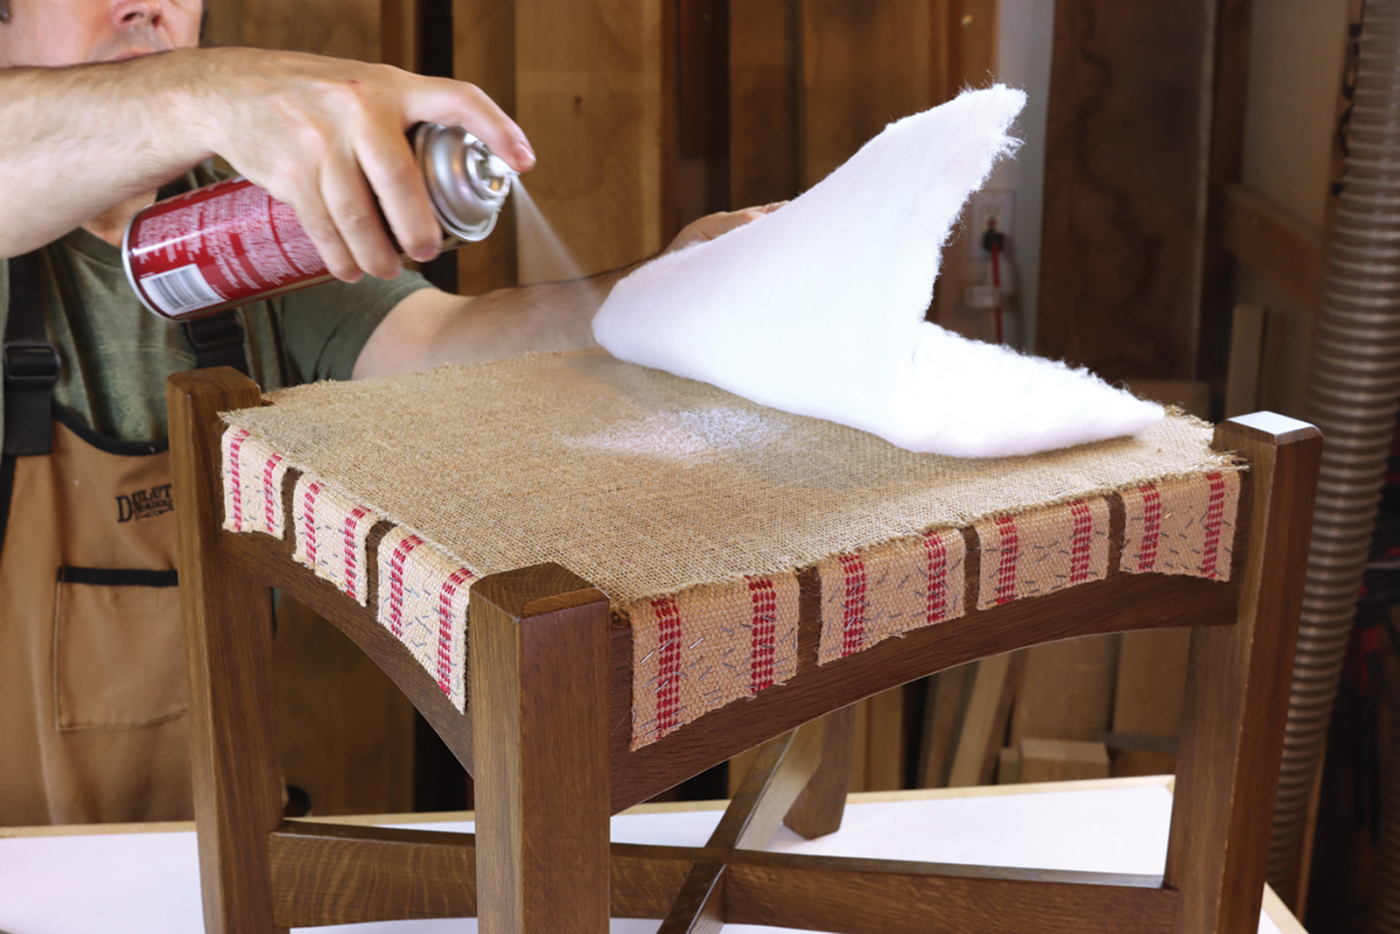
4 To help crown the cushion, add an undersized piece of batting over the burlap. Secure with spray adhesive.
Foam Provides the Bulk of the Cushion
Now select some 1“ thick upholstery-grade foam for the ottoman. Since there’s only one inch of thickness, I chose a dense, medium-firm 2245 foam. The first two numbers describe the density of the foam or 2.2 lbs per cubic foot in this case. The second two numbers describe the firmness of the foam, which commonly ranged from 18 (very soft backrest cushion) to 70 (uncomfortably hard seat cushion). I’ve discovered that most fabric stores and online retailers carry very low-quality foam. The most common mistake in DIY upholstery is to skimp on foam. My advice is to visit an upholstery shop in person where you can feel and see the different foam types. If the seller doesn’t describe the foam with four numbers, it probably isn’t worth buying.
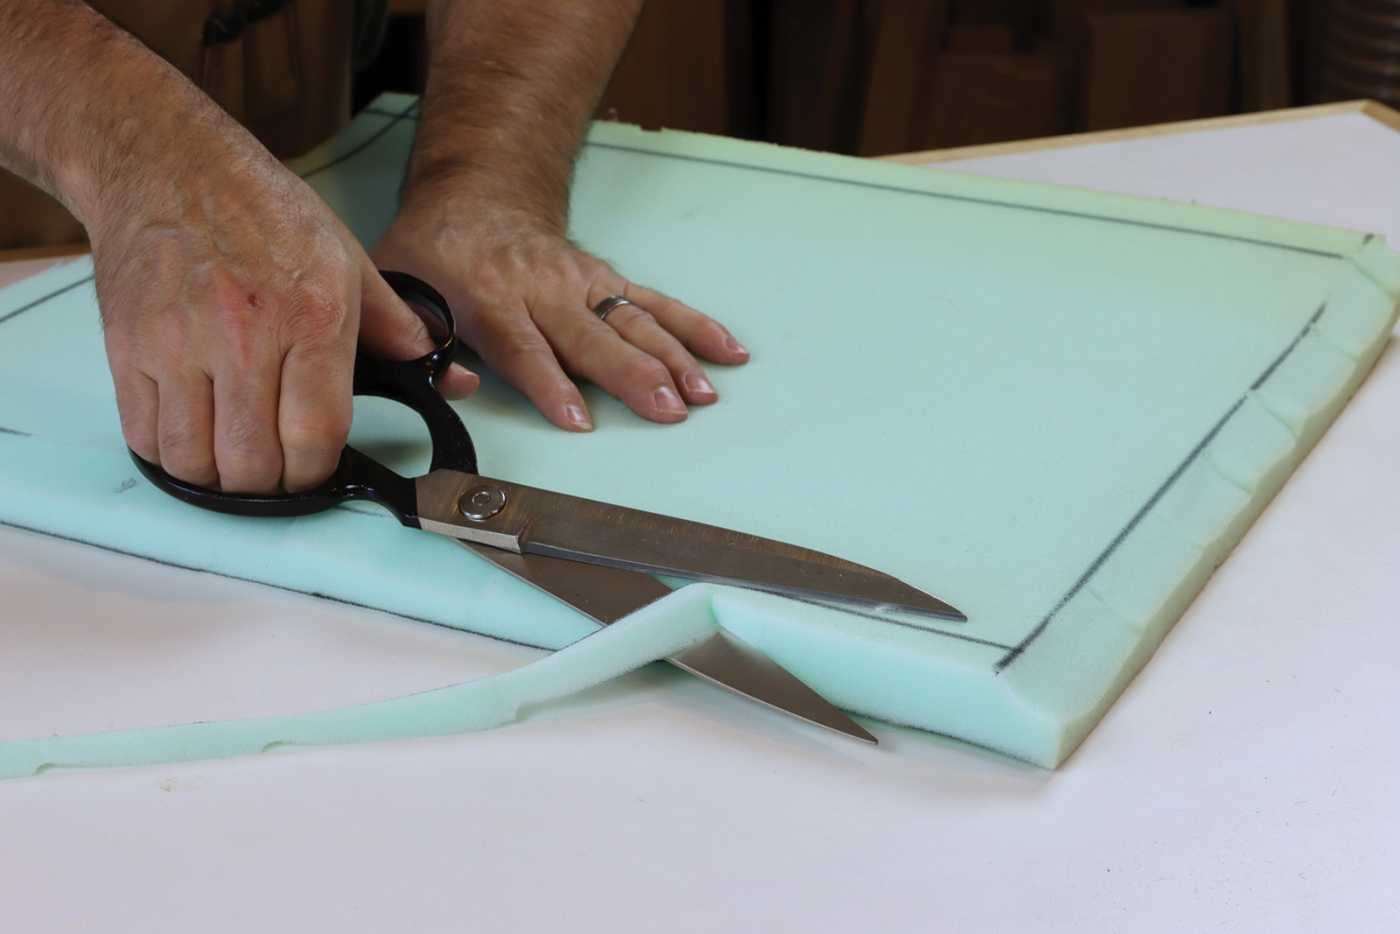
5 Measure and cut a piece of foam. Bevel all 4 sides at approximately 45° to a line marked 1″ from the edge.
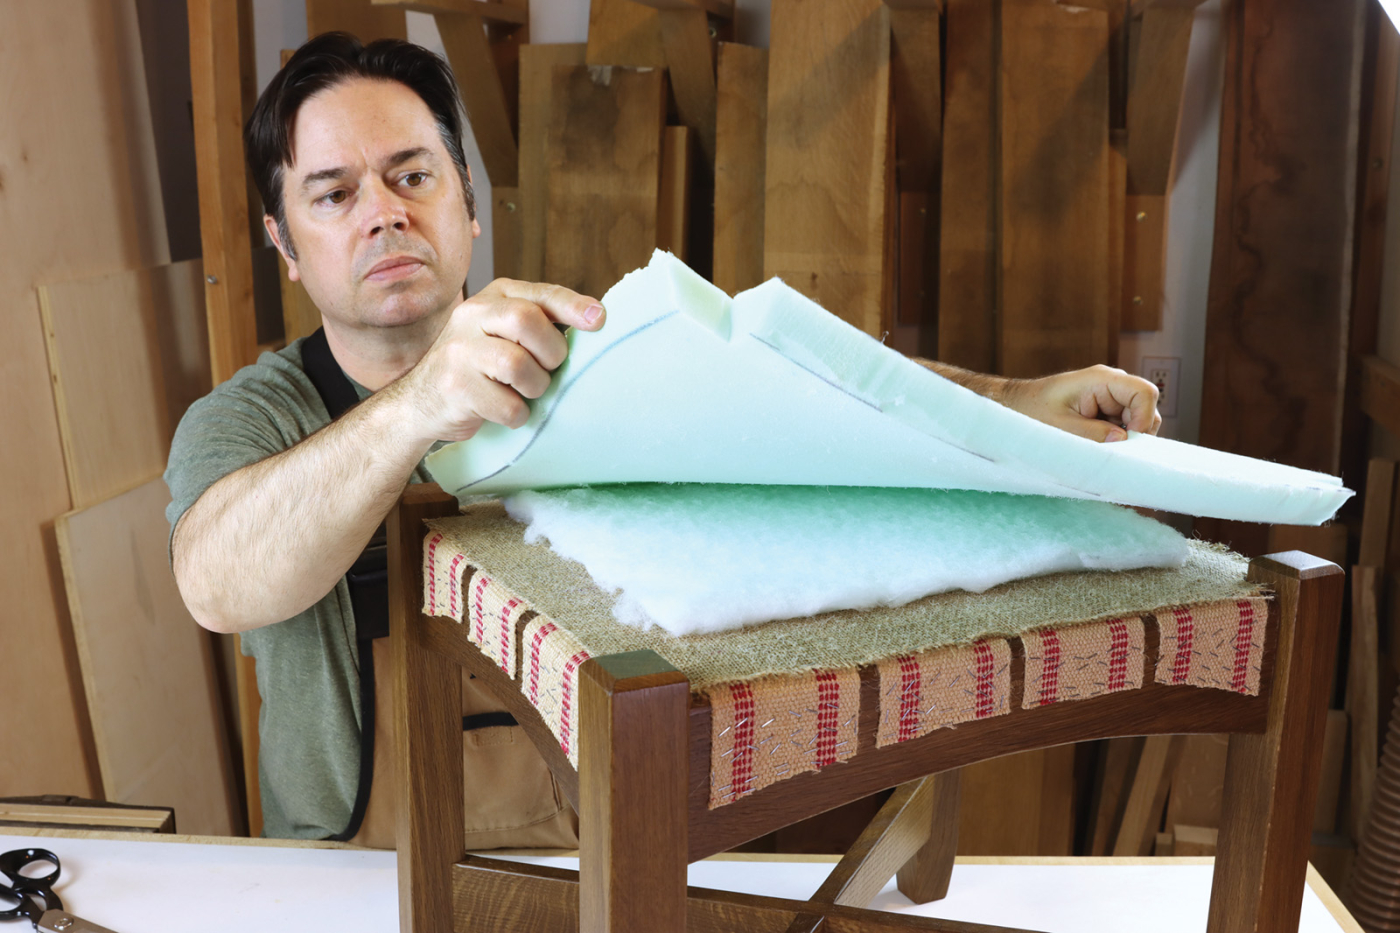
6 Notch the corners around the legs. Adhere with beveled edges down.
Cut a piece of foam 20“ x 17“ and notch the corners to fit around the legs. Back-bevel the underside of the foam to a knife-edge. There are several ways to do this, including sharp upholstery shears, an electric turkey knife, or even a regular band saw. If you have a band saw with a table that tilts to 45° I think you’ll be amazed at how well it cuts foam. Again, you spray glue to secure the foam over the ottoman. You might need to mask the legs to prevent spray adhesive from landing on the finished wood. Don’t worry if the foam edges stick up at this point, as we’ll take care of that in the next step.
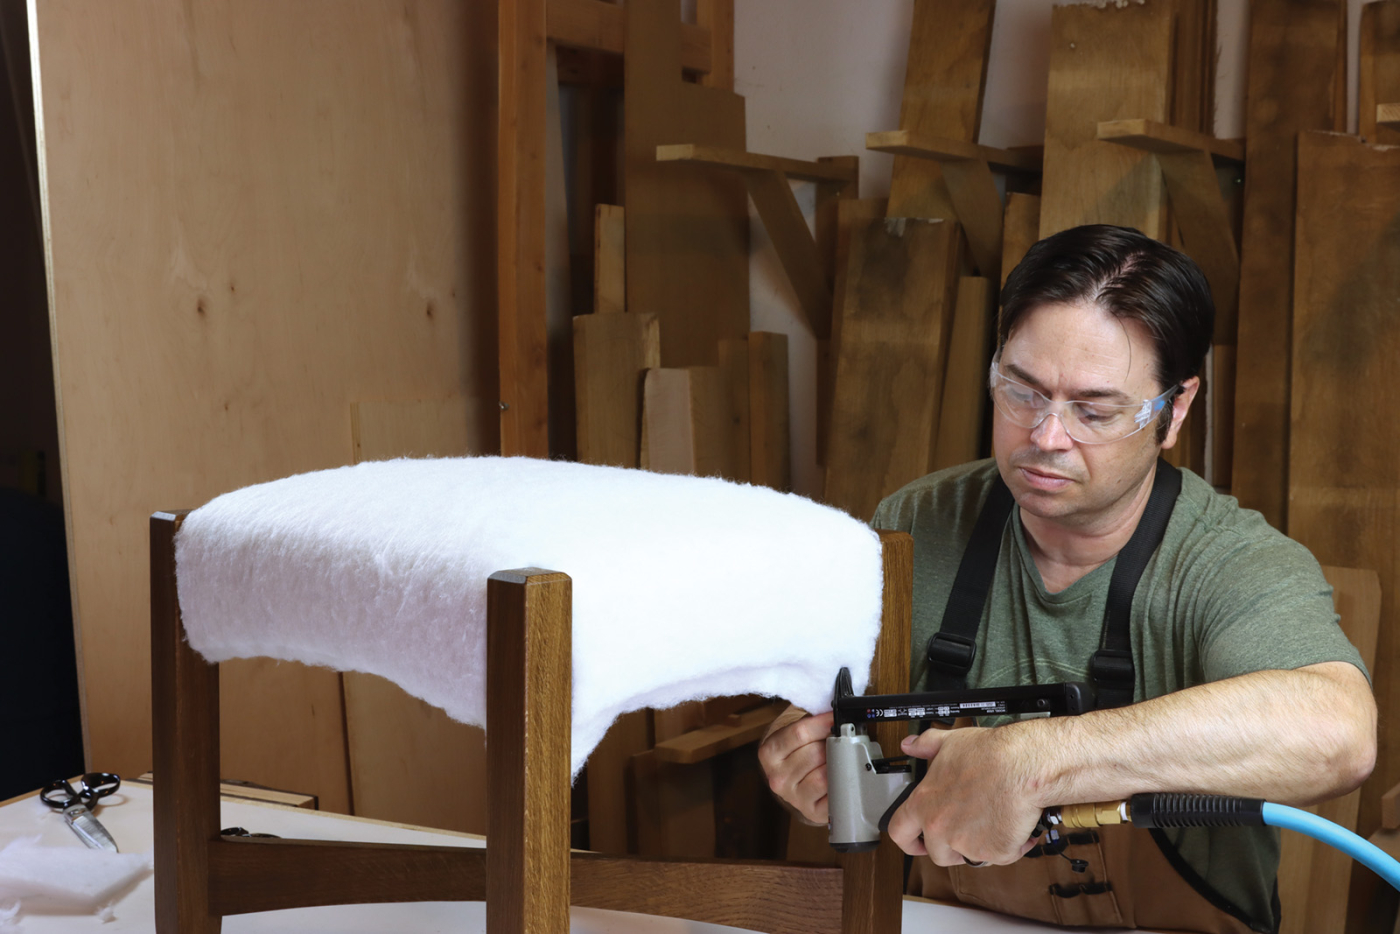
7 Secure the main batting with staples under the rails. Trim excess.
Batting Round Two
Cut a piece of batting 30“ x 26“ and notch the corners. Pull the batting down to slightly compress the foam and place a staple to secure it under one rail. Stretch it to the opposite side and place another staple or two. Repeat this process in the other direction, as if you were upholstering a dining chair. Basically, you want to fix the batting in four cardinal directions before working towards the corners. First, focus on getting the corners to look right, with symmetrical shape to the overall cushion. Use the same care and attention to detail that you’d use on the finished leather. If you leave uneven lumps in the batting, it may show in the finished product. Once the batting is installed, trim the excess with a safety razor.
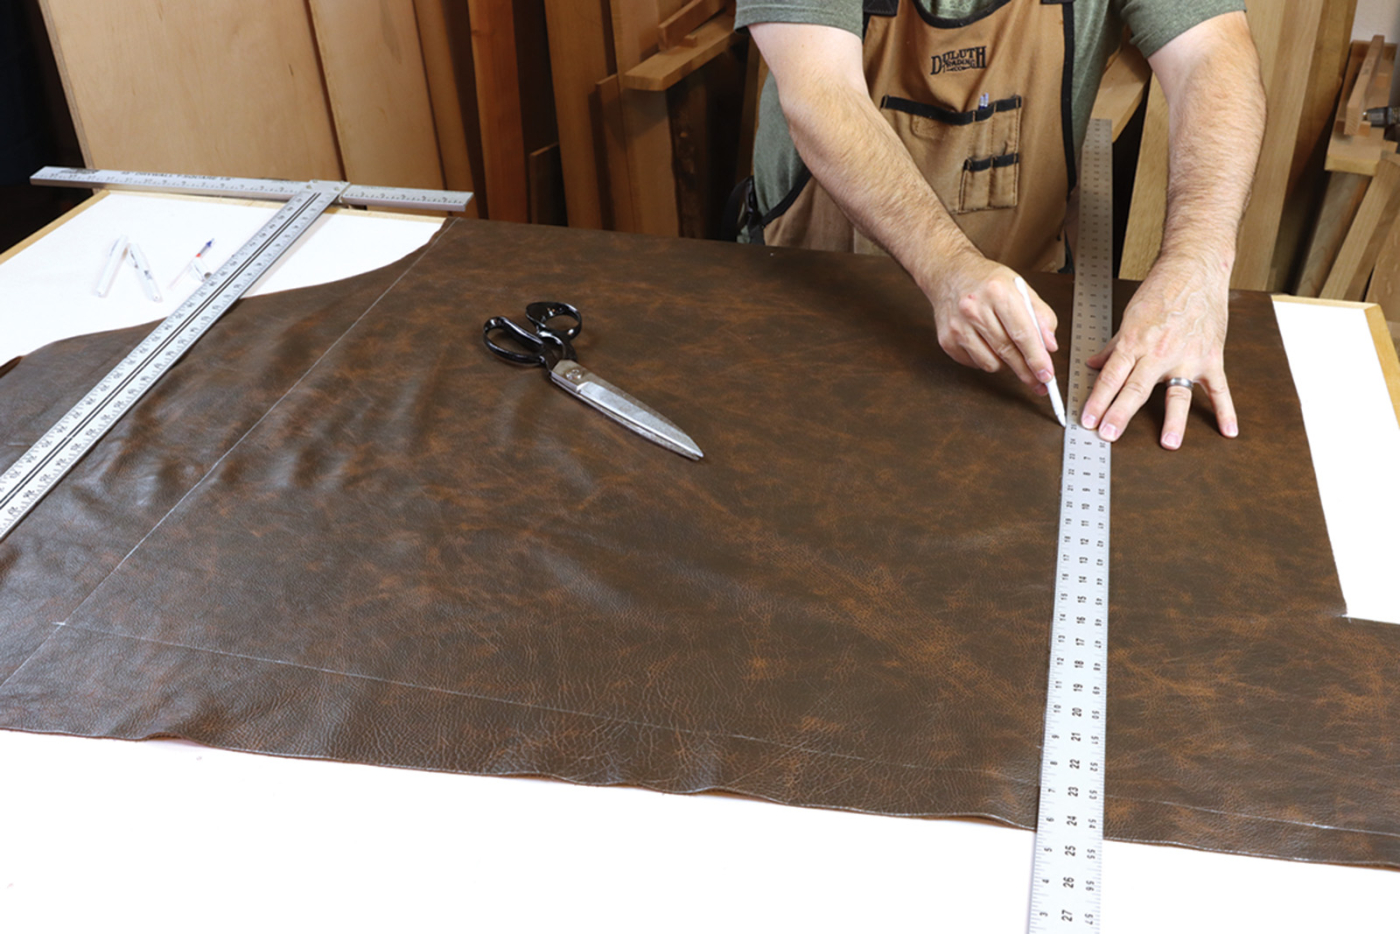
8 Use a leather marking pen and straightedge to mark layout lines.
Leather Cover
Working with leather seems to intimidate people for some reason. If you’re working on a sewn leather cushion, it requires a heavy-duty walking foot sewing machine. For no-sew projects like this, I prefer working with leather. Vinyl has many problems, including the fact that it stretches more in one direction than the other. Cloth upholstery fabric will do, but it rarely replicates the arts and crafts look I’m after.
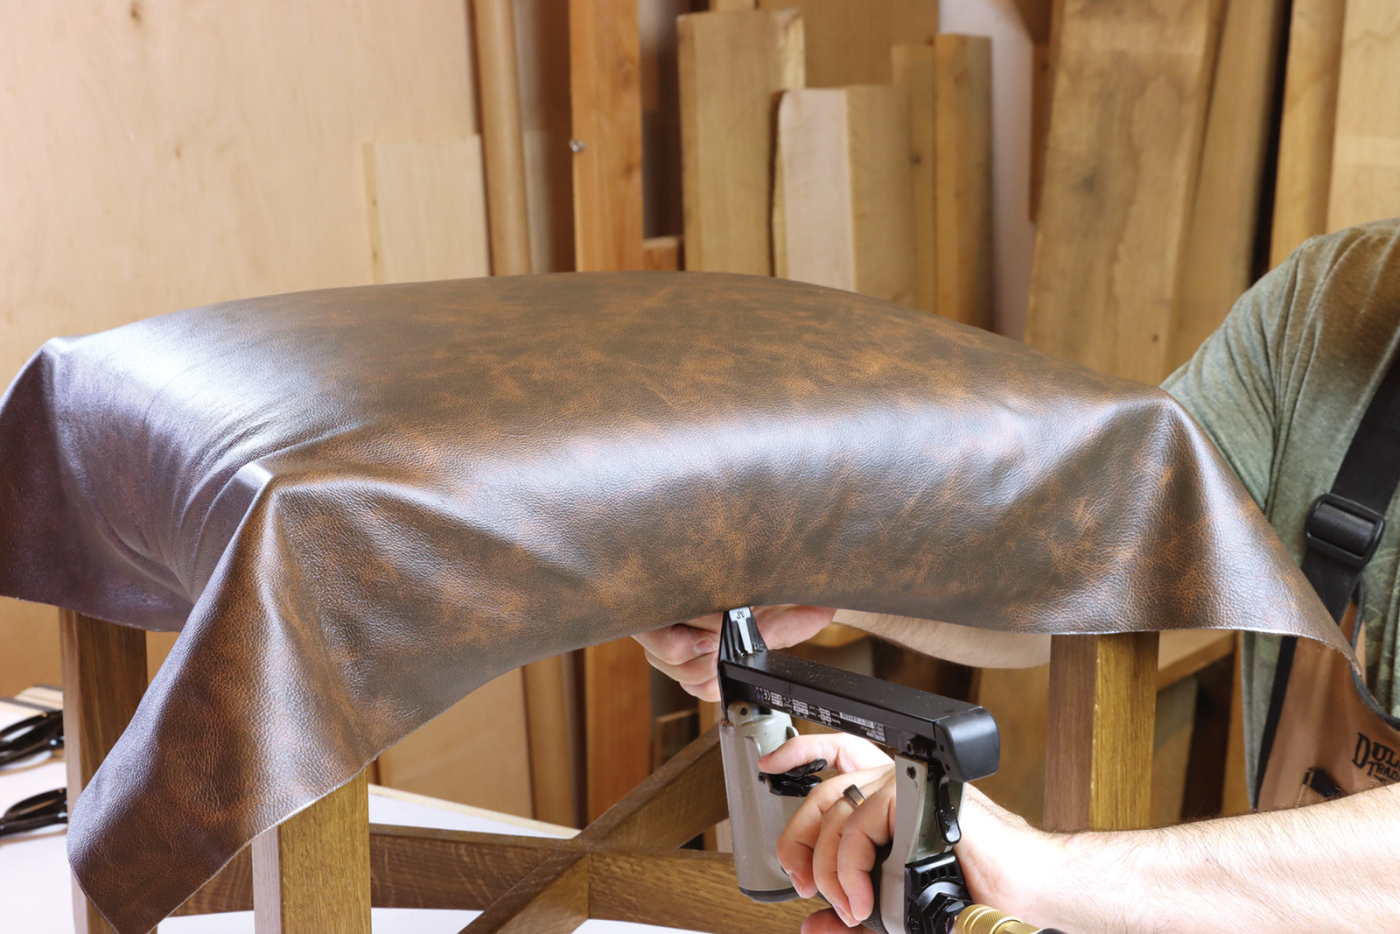
9 Attach the 4 cardinal directions. Draw out the slack as you work.
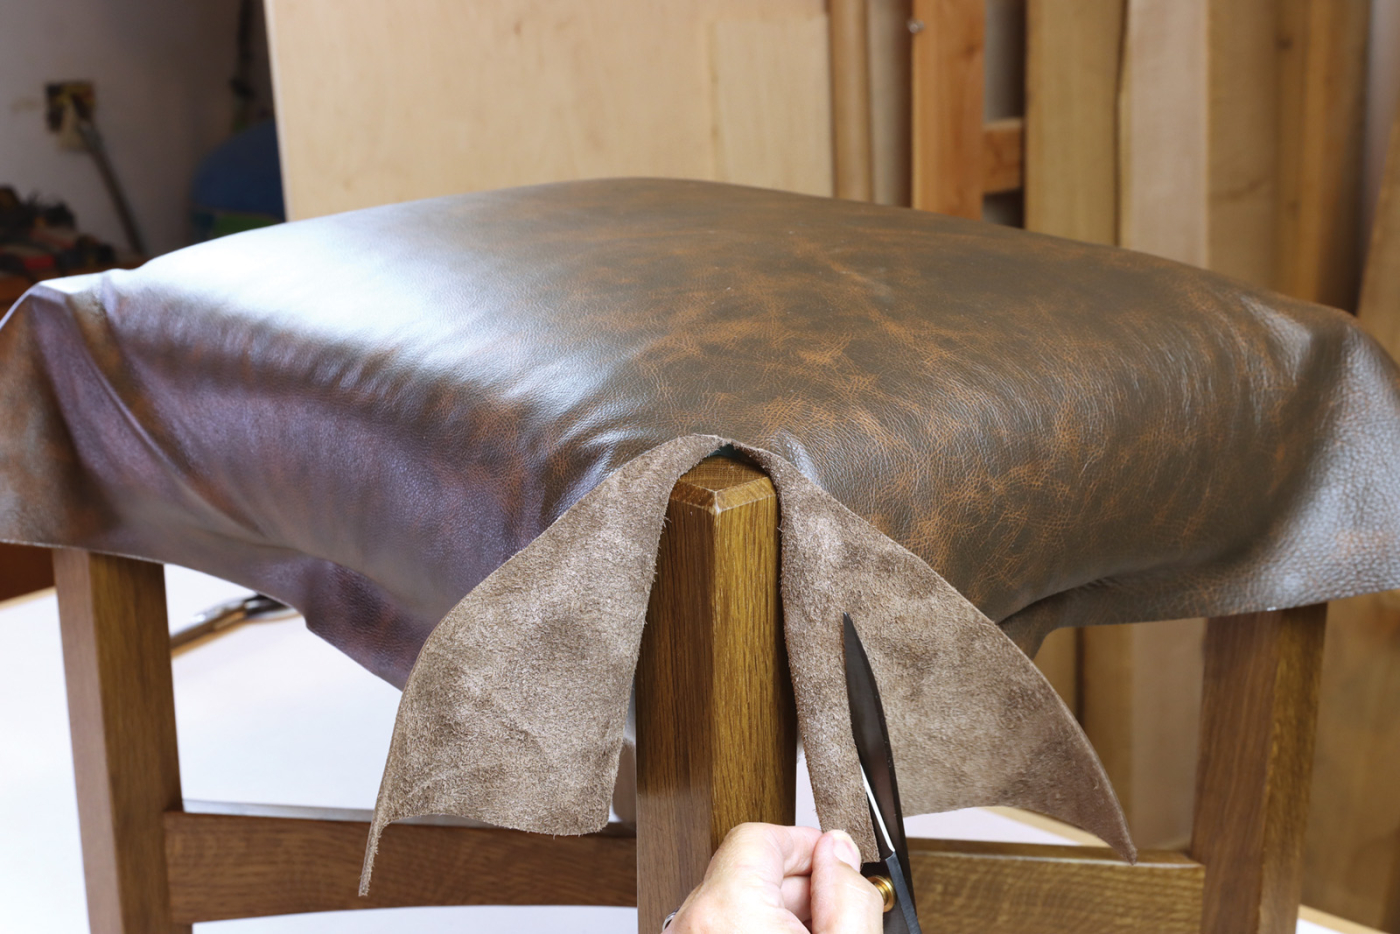
10 Make a relief cut in the corners, cutting nearly to the inside corner of the leg. Fold the ears back. Make a vertical cut to remove the waste. Leave approximately 1/2″ of leather to fold under
Cut the leather to a rough size of 27“ x 31“ and secure it to the ottoman at the center of each rail. The batting has already established the overall shape of the cushion, so you won’t have to work very hard to install it. Fold back one corner so you’re looking at the sueded side. Make a relief cut at a 45° angle. Continue the cut nearly to the inside corner of the leg. I usually stop about 1/2” away from the leg initially and do some test fitting. Trim a little further and retest until the corner can be trimmed without any puckering. If the leather wants to pucker on the inside corner of the leg, you’ll need to make the relief cut a little deeper.
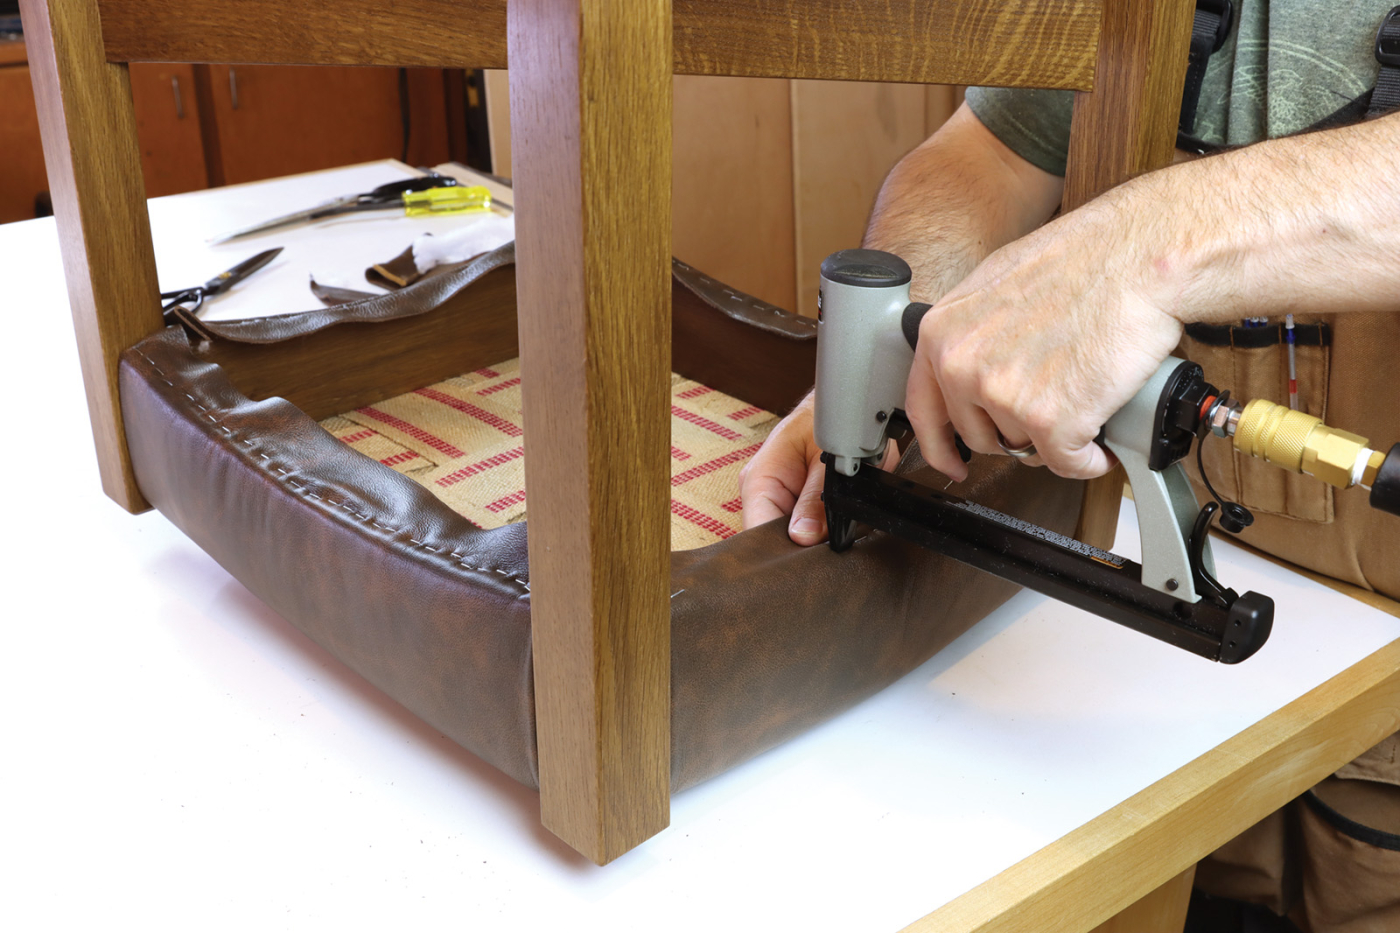
11 Finish stapling the leather from underneath and trim the excess.
Now fold the excess leather back and make a vertical cut to remove it. If you don’t like the way something lays, trim a little more. Once you think you’ve got the corners trimmed, finish stapling the leather.
A Bit About Staple Guns
When most people embark on their upholstery project, it usually involves a manual staple gun or electric stapler. The problem with these tools is they don’t set the staple fully in hardwood. So you’ll find yourself hammering in staples afterwards and hoping the material doesn’t shift, which can be frustrating!
Save yourself the headache and start with pneumatic staples that can reliably set the staples full depth. For occasional upholstery work, a T50-style pneumatic stapler will work fine. They’re quite inexpensive and work well. If you imagine yourself getting serious about upholstery, buy a fine wire upholstery stapler. Usually, they shoot 22-gauge staples, so just be aware that you may need to special order the staples. You’ll need 3/8“ long staples for general work and 1/2“ long staples for webbing or securing thicker layers of leather.
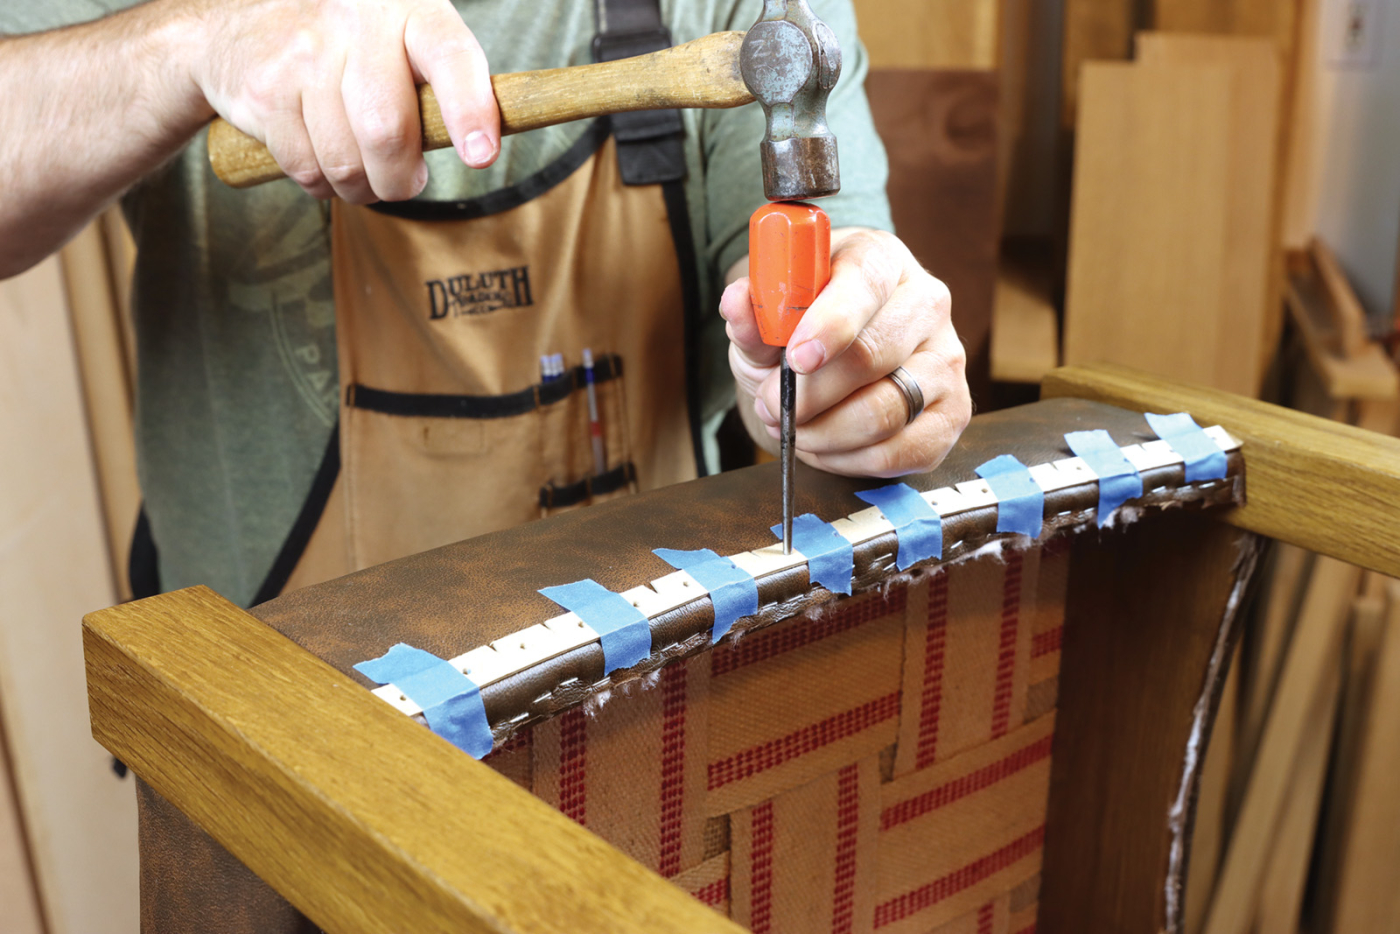
12 Use a cardboard tack strip as a template to punch holes in the leather. It may be notched to allow it to follow the ottoman’s curved rail.
Getting Down to Brass Tacks
For some people, this saying means ‘important details to be discussed,’ but in upholstery, it means we’re almost done. Use 1/2“ wide upholstery tack straps to make a template that will help space the deco tacks 1“ apart. Use an awl to punch a hole 3/8“ from one end of the template, then every inch from there on. Trim the template 3/8“ past your last hole and cut relief notches as needed to allow the template to follow the curved rail. You should be able to use the long template for the shorter rail as well.
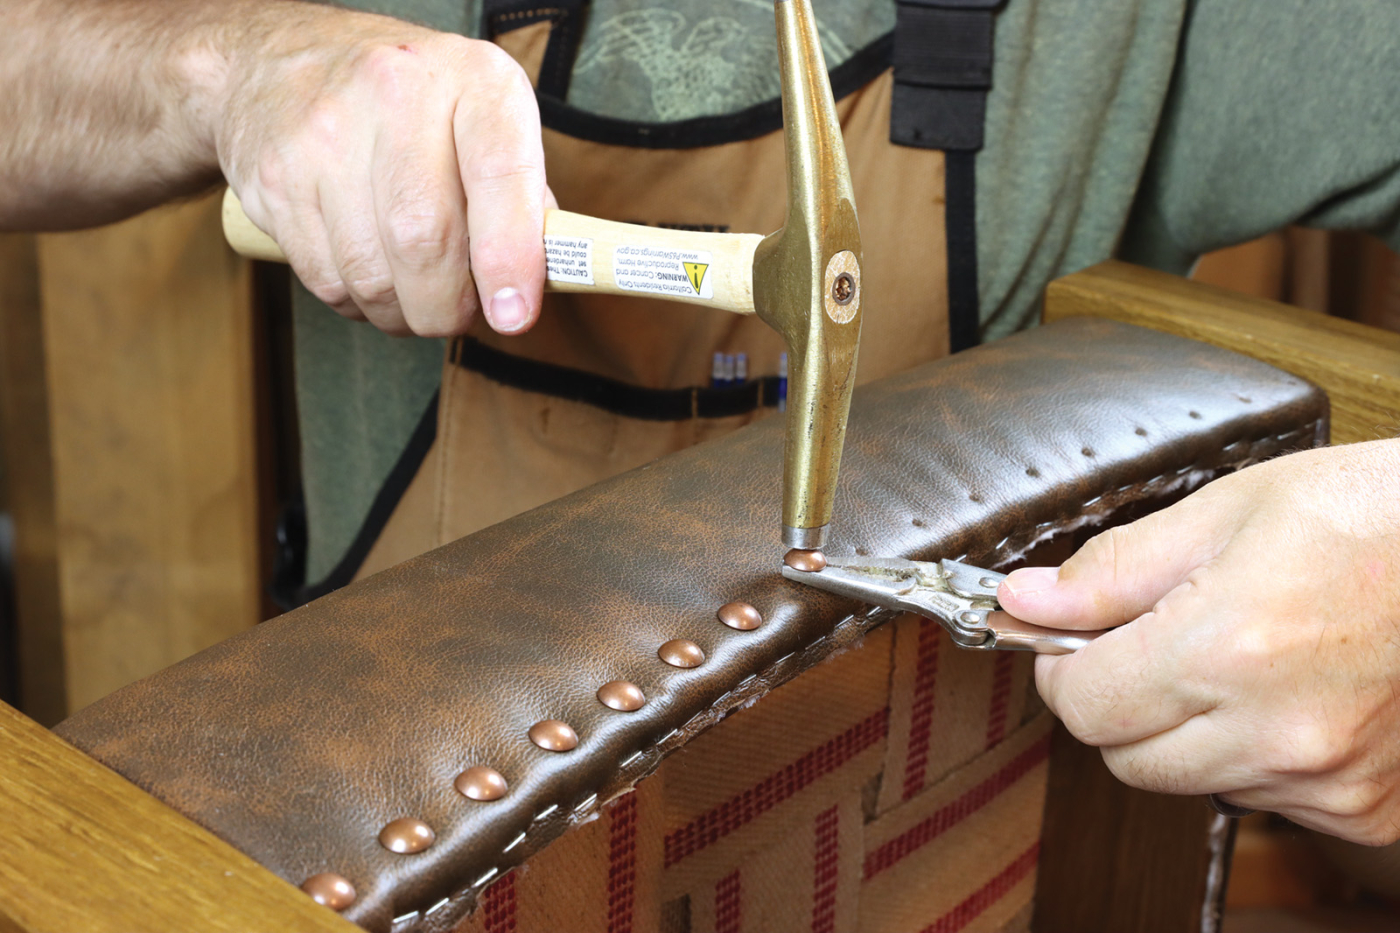
13 To get deco tacks started, grip firmly with needle nose Vise-Grips and tap a tack hammer. Remove pilers and finish driving the fasteners in.
Adhere the template to the project with painter’s tape and use the awl to transfer the tack locations to the leather. Remove the template and install the tacks in these pre-punched locations. Use needle-nose locking pliers to guide and support the tack to get it stacked. This trick seems to prevent most problems with hammering tacks into hardwood. One word of caution: don’t pre-drill the tack holes with a twist bit, as it can bunch the batting inside. If you have a tricky tack that needs to be pre-drilled, chuck a trim nail into your drill and use the nail like a drill bit.
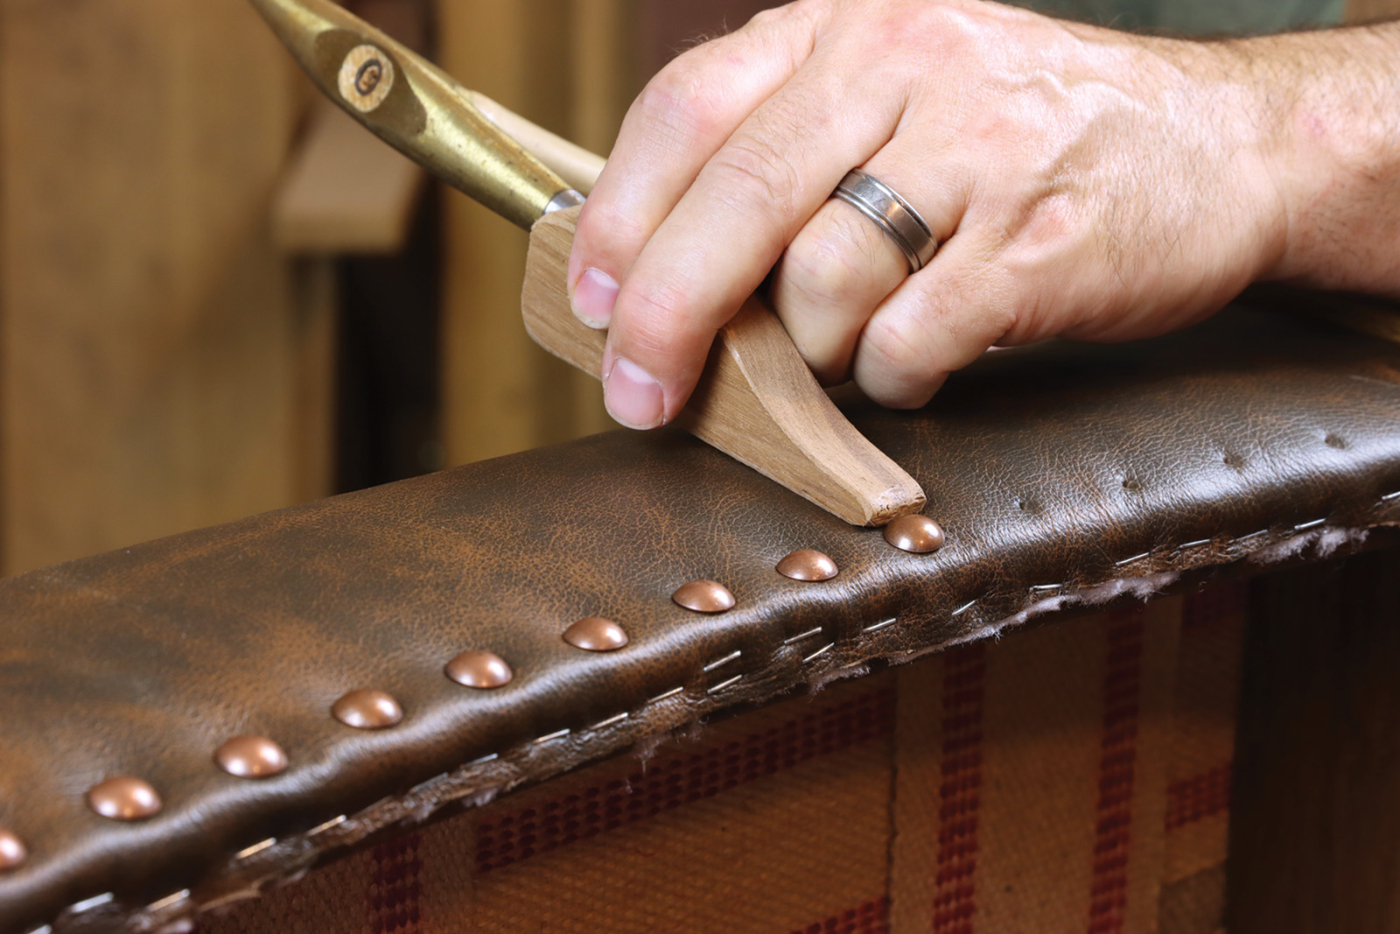
14 Make a “duck” or small wooden block shaped like a duck head to straighten any wayward tasks without marring the finish.
Often a dust cambric is added under chairs and furniture pieces to prevent fibers from falling to the floor. However, with this particular footstool, I fear a dust cover would quickly be torn, as the tendency is to grab it from underneath to move it. For that reason, I decided to forgo a dust cover with this one. Besides, all you see from underneath is authentic-looking jute webbing and burlap. On one last note, it’s my sincere hope that you give DIY upholstery a try. It’ll compliment all the beautiful chairs you’ve built or plan to.
Here are some supplies and tools we find essential in our everyday work around the shop. We may receive a commission from sales referred by our links; however, we have carefully selected these products for their usefulness and quality.


 After the woodworking is done, finish your project with upholstery to match.


