


We may receive a commission when you use our affiliate links. However, this does not impact our recommendations.
 Cut lists are dull subjects and always seem to be an afterthought; they shouldn’t be. The time to consider cut lists and material lists is before you begin to model a project. Doing so will dramatically shorten the time you spend creating them, and make your cut list and material list much more useful. In this post I am going to outline some strategies to use and things to consider.
First, think about the type of project you are going to model. I tend to break my projects into three classes or types: furniture pieces, custom cabinets and structures. Structures may even be sub-divided into stick frame, post and beam, and timber frame. I am going to limit our conversation to stick frame.
Second, think about a component naming convention. I am referring to SketchUp components, instances of which are individual parts. For example, a table leg might have a component name of Leg and an instance name, or part name, of Left Back Leg. You will see that the component naming convention you use can be very helpful when creating a cut list – or it can be a hindrance.
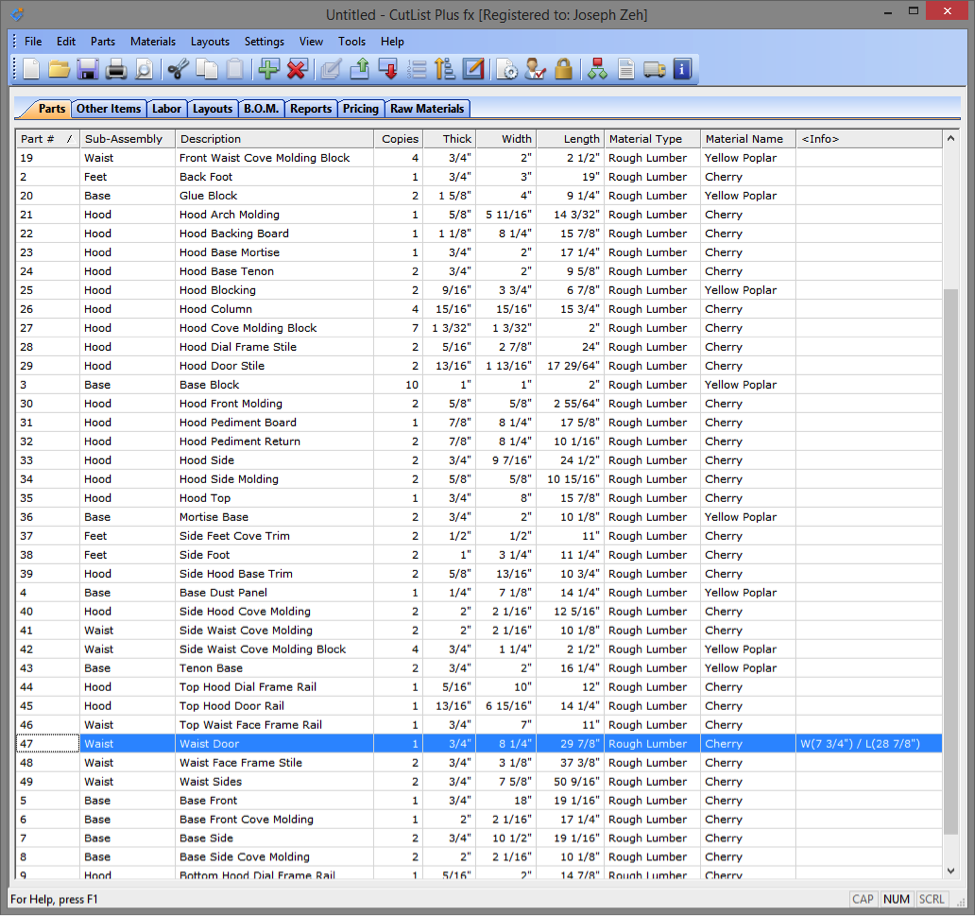
Third, think about the sub-assemblies that make up the project. Some projects have natural sub-assemblies such as tall clocks: feet, base, waist and hood. Others, such as a home, unless it is a modular home, don’t have obvious sub-assemblies, though with thought we can create some that help immensely.
Creating Cutlists with the CutList Bridge Extension
If you are going to use a SketchUp extension such as my CutList Bridge 3 extension, you need to consider how you are going to assign attributes to each component. You certainly don’t want to assign attributes to each component, one component at a time. This could take you forever, especially if the project is something large like a home or home addition.
To make things easier consider pre-fixing the component names with the sub-assembly name. This will greatly enhance your ability to choose all components in a sub-assembly simply by typing the sub-assembly name into the Outliner’s dialog box filter field.
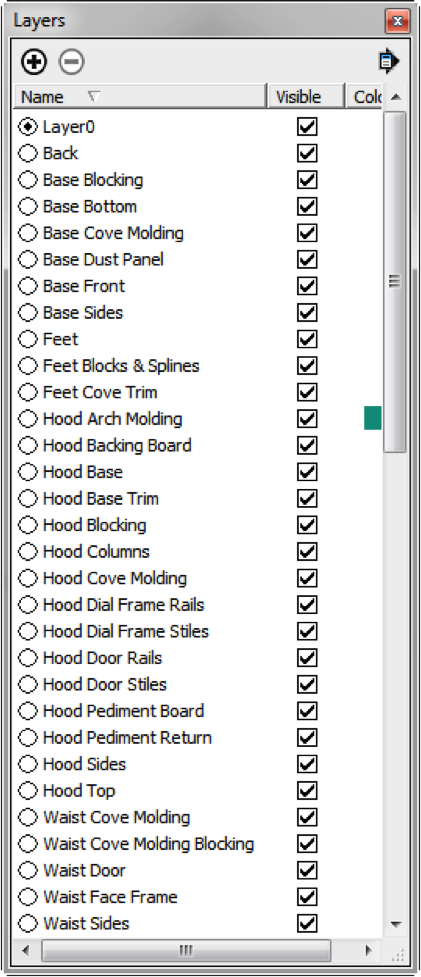
In addition, for some types of projects you might want to pre-fix the layer names with the sub-assembly names. This is particularly true if you place one component, or similar types of components, on a layer. For example, all leg components on a Legs layer.
CutList Bridge requires you follow a few rules:
- All model parts must be a component. CutList Bridge does not support groups (groups are a bad habit that should be broken).
- There must be no nesting of components. Components contain only primitives and no components or groups.
- Attributes are assigned to a component; hence all instances of a component have the same attributes.
- Make all attribute changes in SketchUp using the Extended Entity Info dialog box. This keeps all design parameters and attributes in the design (.skp) file where they belong.
Now let’s discuss strategies specific to a specific type of project.
Furniture Pieces
 When naming components of furniture pieces I try to stick to names that are common or standard furniture names. For example, the vertical pieces of a drawer opening are stiles; the horizontal pieces are rails. The sides, front and back of a table are aprons. A tall clock has a pediment over its hood door. Using standard terminology greatly helps if you are going to share your plans and expect others to understand them.
A furniture piece may have multiple parts (instances) that are physically the same (component) but used in different places. Use position adjectives to name the instance name of a component. For example, a table might have two front legs and two back legs. The joinery is the same for each back leg but different than the joinery in the front legs. For component names you might use Front Leg and Back Leg. For part (or instance) names you might use Right Front Leg, Left Front Leg, Right Back Leg, and Left Back Leg.
Furniture pieces often have natural sub-assembly names. As previously mentioned a tall clock has feet, base, waist and hood. A table with only one drawer might have just two sub-assemblies: carcass and drawer. A hutch has feet, base, cupboard and doors. Whatever your furniture piece it will likely have at least two sub-assemblies. Consider using the sub-assembly names to prefix a component name.
Layer names should also be strategically chosen. I usually name a layer using the concatenation of sub-assembly and component name; component name plural if more than one component is on the layer. For example, the sides of a tall clock waist would go on the Waist Sides layer. The legs of a table would reside on the Carcass Legs layer.
Other Project Types
You will want to use similar strategies to ensure easy to understand and follow cutlists in other types of projects. In a another post, I will discuss these strategies as they apply to projects like custom cabinets and structures.
Here are some supplies and tools we find essential in our everyday work around the shop. We may receive a commission from sales referred by our links; however, we have carefully selected these products for their usefulness and quality.


The requirement for no nested components is a bit of a killer, and goes against good modelling practice. For example in a chest of drawers I would expect to model a drawer as a component, consisting of side, back, front and bottom sub-components. This is particularly useful where you have multiple drawers of the same size, of multiple drawers which can use the same side and/or bottom components even when the drawers differ in some dimensions.
There is a free SU to CutList plugin, called CutList, available from the extensions warehouse which does not impose this requirement.