


We may receive a commission when you use our affiliate links. However, this does not impact our recommendations.
 The ideal way to create SketchUp models of furniture from pictures is to take front-on and end-on views with a digital camera. Also take overall measurements. Then the .jpg images can then be imported to SketchUp and placed on the Red/ Blue and Green/Blue planes and scaled. From there it is a simple matter of drawing over top of the images and reconstructing the furniture piece.
One of my students sent me the image above and asked how I might model it in SketchUp with dimensions of 23” high, 30” long and 20” deep. I don’t know whether the image in the picture has these dimensions or he just wanted his to be this size. And obviously this is neither a front-on nor end-on view. There is no way to import this into SketchUp with the image aligned to either the Red/Blue or Green/Blue plane. So what is one to do?
No need to panic; simply import the image into a blank SketchUp model on to the Red/Green plane as is. Hint: Open a new model, choose Camera/Parallel Projection and front view; drag and drop the image onto the Red/Blue plane. Orient one leg corner on the origin as close as possible. Use the Tape Measure tool to measure a dimension you want to specify. In my case, I measured the longest part of the top and it came to approximately 4 inches. Before changing context I typed 20” and Enter. A dialog box asked if I wanted to scale the entire model and I answered yes. I then re-measured the top as accurately as possible and got ~29 63/64 – close enough for my purposes. I then measured the height of the table and got ~29 25/64, not 23” as my student wanted. Hey! You can’t have everything. So I had to wing it.
I took as many measurements as I could, using the Tape Measure tool. In particular I wanted the size of the legs at the bottom and top so that the taper came out right. I couldn’t accurately measure the taper angle so I made some assumptions. I assumed that if the top had the same length and width but was a perfect rectangle (instead of rounded at the ends) that the corner of the top would align in the Blue axis with the outside corner of the leg. Then I simply measured from the end edge and front edge of the top to where the leg ended on the top surface.
I assumed that the joinery was mortise and tenon for the aprons and legs. The wedge joinery I intentionally exaggerated (made large) for visual purposes; in the shop this would be a hand cut with no measurements, only by eye. The resulting model is shone below.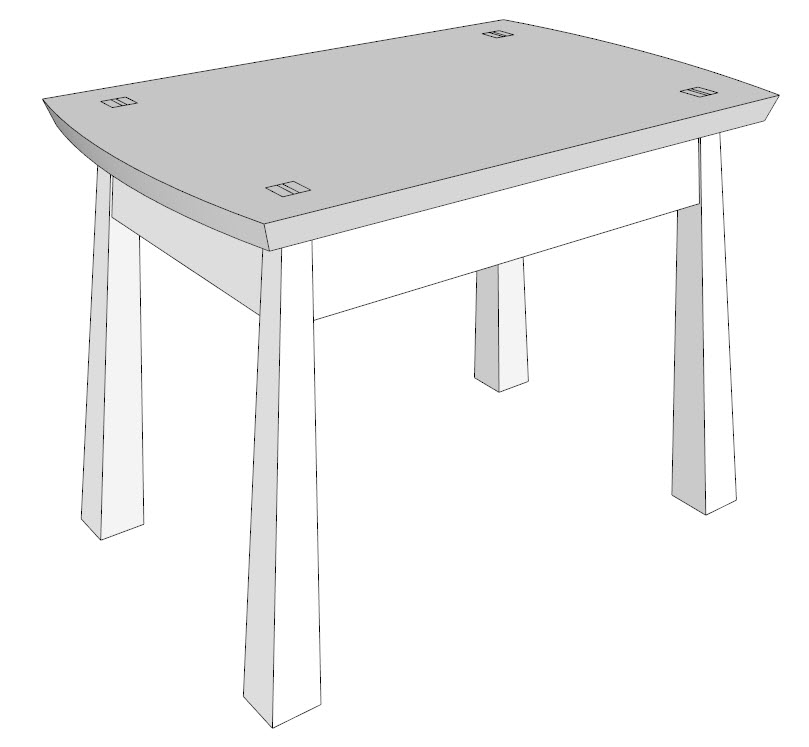
This was a quick modeling effort. Had I spent more time I could have gotten better results. But this is just one more example of how you can easily construct precise shop drawings from a set of pictures and measurements; in this case one picture with a less than ideal photo angle and desired measurements.
Learn more about SketchUp in Joe Zeh’s Popular Woodworking University course, SketchUp Comprehensive. You’ll get nine weeks of expert instruction and lifetime access to the course materials.
Here are some supplies and tools we find essential in our everyday work around the shop. We may receive a commission from sales referred by our links; however, we have carefully selected these products for their usefulness and quality.


https://www.youtube.com/watch?v=fSuDoX8SPtU There is a way.
The point of Sketchup is not just to “make a drawing”. You are right that using a hand sketch for a “sketch” of a project, or even a single page shop drawing would be the fastest, but the many tools and capabilities of Sketchup go quite a way beyond that. I recently had to exactly duplicate a 1904 drafting stool with a screw type seat adjuster (like an old piano bench). All I was given was an oblique angle photo of the original. Using the technique that Joe was describing, I was not only able to recreate the original dimensions accurately, but Sketchup also allowed me to create a 20 page shop drawing with detailed and annotated drawings for each component, all from that initial measured layout. This whole exercise took less than an hour (thanks to a video tutorial Joe published on his blog several years ago). The initial layout only took 15 minutes, tops. You couldn’t accomplish that many detail drawings by hand any faster. Also, keep in mind that any changes made to the main layout will immediately be reflected in the component drawings without any work at all, no erasures involved.. This process also allows one to test fit and adjust dimensions and record unusual angles in mortises or tapers before one has begun cutting wood. Using Cutlist (a free addon) or Joe’s add-on you can have an instant cutlist, including, cutting diagrams.(eta 1 minute),
As my old drafting teacher taught me over 50 years ago, a clean, readable drawing will go a long way to assuring less errors and waste during construction (and a longer period of employment as a bonus).
Or you could use the Match Photo tool in Sketchup, which is designed to help you make 3D models from pictures like the one above.
1. You could draw this is about 1minute with pencil and paper, or spend an hour fussing with it in SketchUp.
2. SketchUp drawings lack life.
3. In 300 years, will anyone be enthralled with a SketchUp image? See the Lost Arts Press blog for Original Plans for an 18th century Spice Box – http://blog.lostartpress.com/2015/08/28/original-plans-for-an-18th-century-spice-box-starting-at-15000/ .
4. Drawing by hand teaches your hands to translate what is in your head into a visual format. That in an of itself is important to learn and is part of the process of developing the hand – eye coordination necessary to all woodwork – both hand tool and machine based.
5. My word, but I am getting cranky in my old age.