


We may receive a commission when you use our affiliate links. However, this does not impact our recommendations.
 A system as elegant as the joint itself.
 A system as elegant as the joint itself.
Compound-angle dovetails are some of the most beguiling joints in all woodworking. But, as John Lennon once suggested, they can be as difficult to make as “fixing a hole in the ocean.” Well, maybe not that hard—but it all begins with figuring out those odd angles.
I’ve developed a system that makes layout easy. It’s based on very simple and familiar geometry (see “The Basics”, below). It’s universal, too: This system works for a project with any amount of splay and for dovetails of any pitch.
Before laying out the dovetails, your boards must be cut at the correct compound angle to form tight-fitting butt joints.
We’ll lay out the pins first, rather than the tails. As you follow the photos, there are a couple of small details that I’d like to emphasize. First, be sure to draw the dovetail triangles (Photo 3) on the inside face of the pin boards. (If you draw them on the outside face, the angles you transfer to the edge of the boards will come out backwards.) Second, always keep track of which side of your sliding bevel is facing up or out. I use a piece of tape to mark one side—just to be sure. Now, let’s start.
The Basics
When it comes right down to it, there are only two things you have to know about compound-angle dovetails.
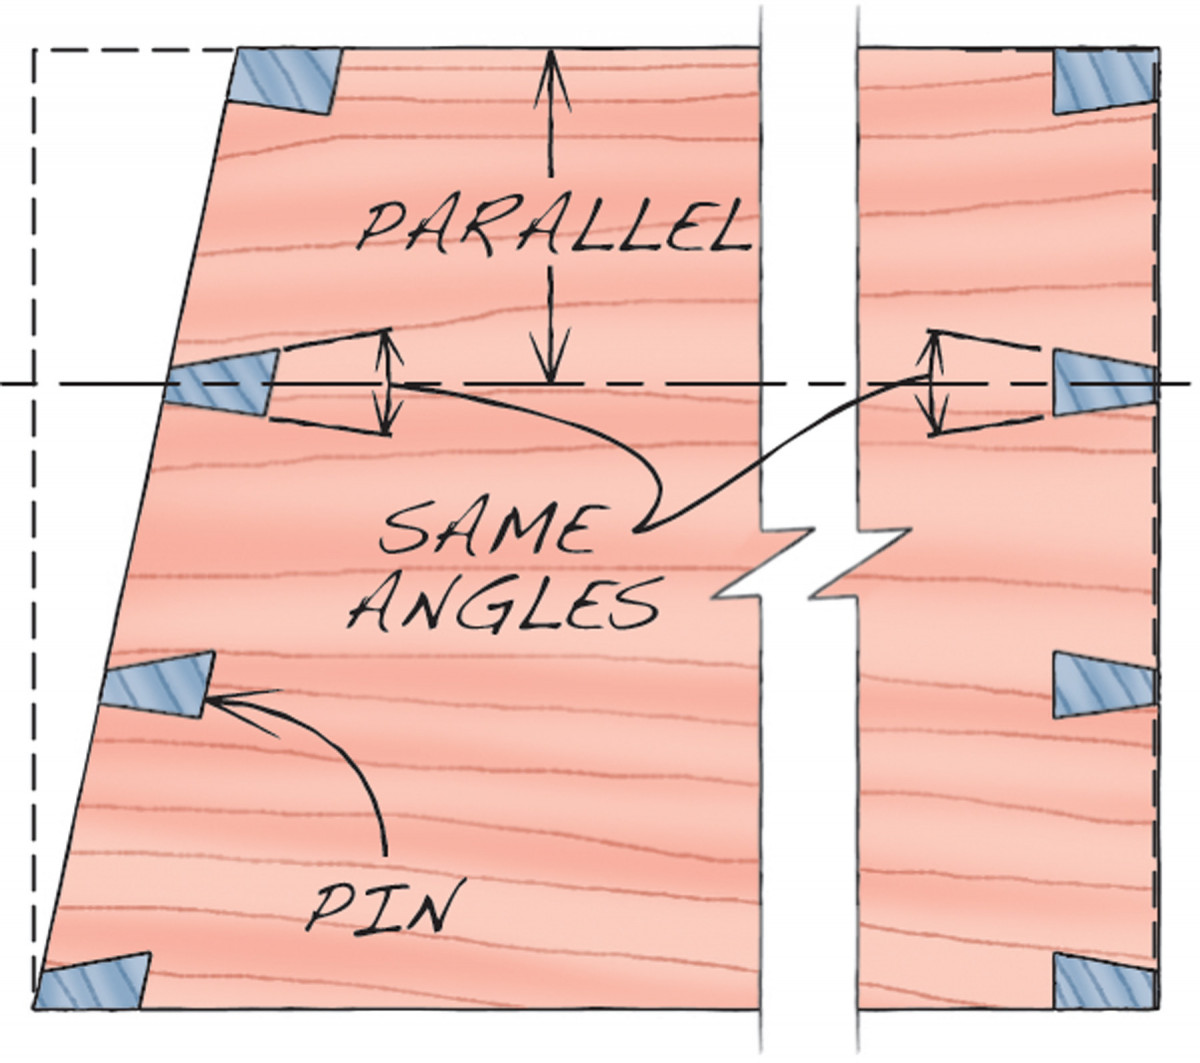 First, the ends of the pins (upper left) slant just like standard through dovetails (upper right). It’s the tapered side of the board that makes the angles look strange.
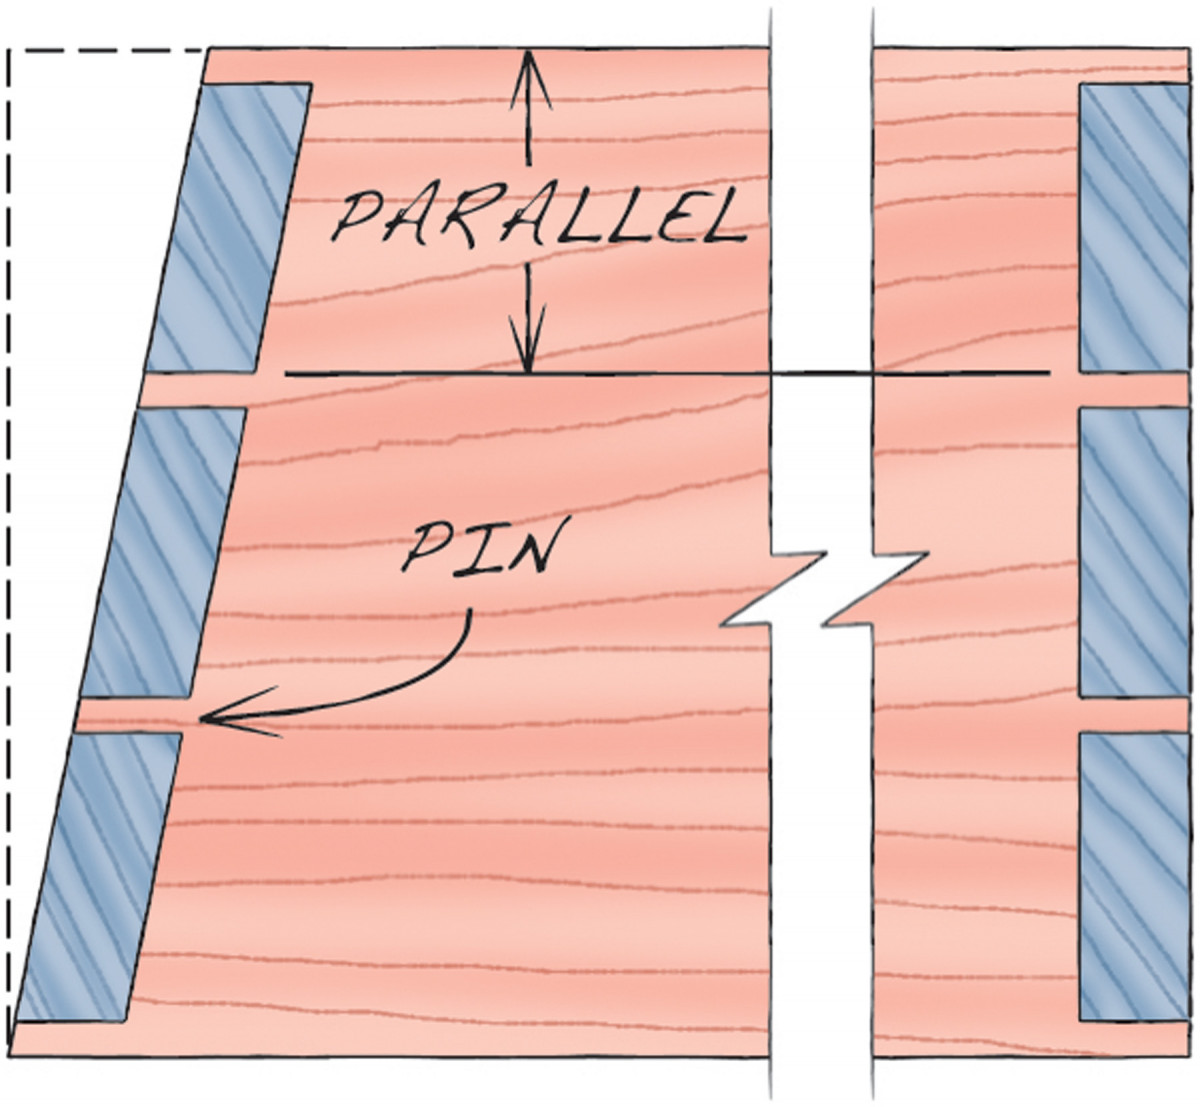 Second, the sides of the pins (lower left) are parallel to the top and bottom edges of the board, just like standard dovetails (lower right).
Step-By-Step

1 Draw a horizontal line across the inside face of one of the pin boards. The exact position of the line isn’t important.

2 Mark the rise and run of the dovetails on the line. These dovetails have a pitch of 1:6, but you can use any pitch you wish.

3 Draw two triangles. Think of these as representing the ends of really large pins.

4 Adjust a sliding bevel to match the right side of a triangle. Put a piece of tape on your square—this side should always face out or up in the next steps.

5 Mark the right sides of all the pins. If necessary, you can rotate the bevel to draw a line, but always keep its taped side facing up.

6 Reset the sliding bevel to the left side of the triangle.

7 Draw the left sides of all of the pins. Note that the line on the far right is actually the left side of a half pin.

8 Reset the bevel to the splay angle of the board.

9 Draw the sides of the pins. Repeat the same process, starting with Photo 4, on the other end of the board.

10 Adjust a marking gauge to the width of one edge. Note that this is slightly longer than the thickness of the board.

11 Scribe the shoulders of the pins on both sides of the board.

12 Shade in the pins and compare opposing sides. If all the pins slant the correct way, start sawing!
Here are some supplies and tools we find essential in our everyday work around the shop. We may receive a commission from sales referred by our links; however, we have carefully selected these products for their usefulness and quality.


