


We may receive a commission when you use our affiliate links. However, this does not impact our recommendations.
For many woodturning operations, a chuck performs the essential job of holding the work securely and safely. These operations often present unique requirements, so a dizzying array of manufactured and shop-made chucks have evolved to grasp, expand, screw, compress, trap, pull, jam, stick—and even to move the work through an eccentric pattern. Knowing which chuck to use can be confusing, especially because most are designed for specific applications, so they all have strengths and weaknesses. Learning about chucks will expand your capabilities and make your turning safer, to boot.
Critical Concerns
Always keep three rules in mind whenever you use a chuck.
Safety: Turning’s prime directive is to keep the work on the lathe. Using the wrong chuck or improperly mounting a blank can lead to disaster. Countless pieces have been damaged or destroyed and many turners seriously injured—some even fatally—by a chucking failure. Above all, remember that no chuck is 100% reliable. Therefore, when using a chuck, it’s imperative to wear a full face shield that’s rated with an ANSI Z87+. Also, pay special attention to the speed of the lathe—excessive speed is the most common denominator in lathe accidents.
Craftsmanship: A completed turning should show no trace of being affixed to the lathe. Screw holes and other mounting marks left by a chuck are evidence of mediocre work. Filling them or covering them with felt patches doesn’t cut it. And never let the chuck determine key dimensions of your piece. (When I first started turning, the bases on all my bowls were 3″ in diameter, because I always turned the outsides down to the 3″ faceplate that I had.) Even a footed bowl on which the dimensions of the foot are based on the chuck that held it is an example of pedestrian design.
Accuracy: Failing to accurately center a piece in or on a chuck can cause problems that may be impossible to correct. Using a chuck that doesn’t run true will produce similar frustrating results. Make it a practice to avoid worn or poorly-made chucks.
Types of Chucks
As your turning skills increase and your projects become more adventurous, you’ll keep encountering different chucks and chucking methods, most of which were devised by pioneering turners. Every chuck type has variations. And there’s a turner-made version of (or that pre-dates) virtually every commercial chuck. The chucks that follow are just the tip of the iceberg.
Chucks that Grasp
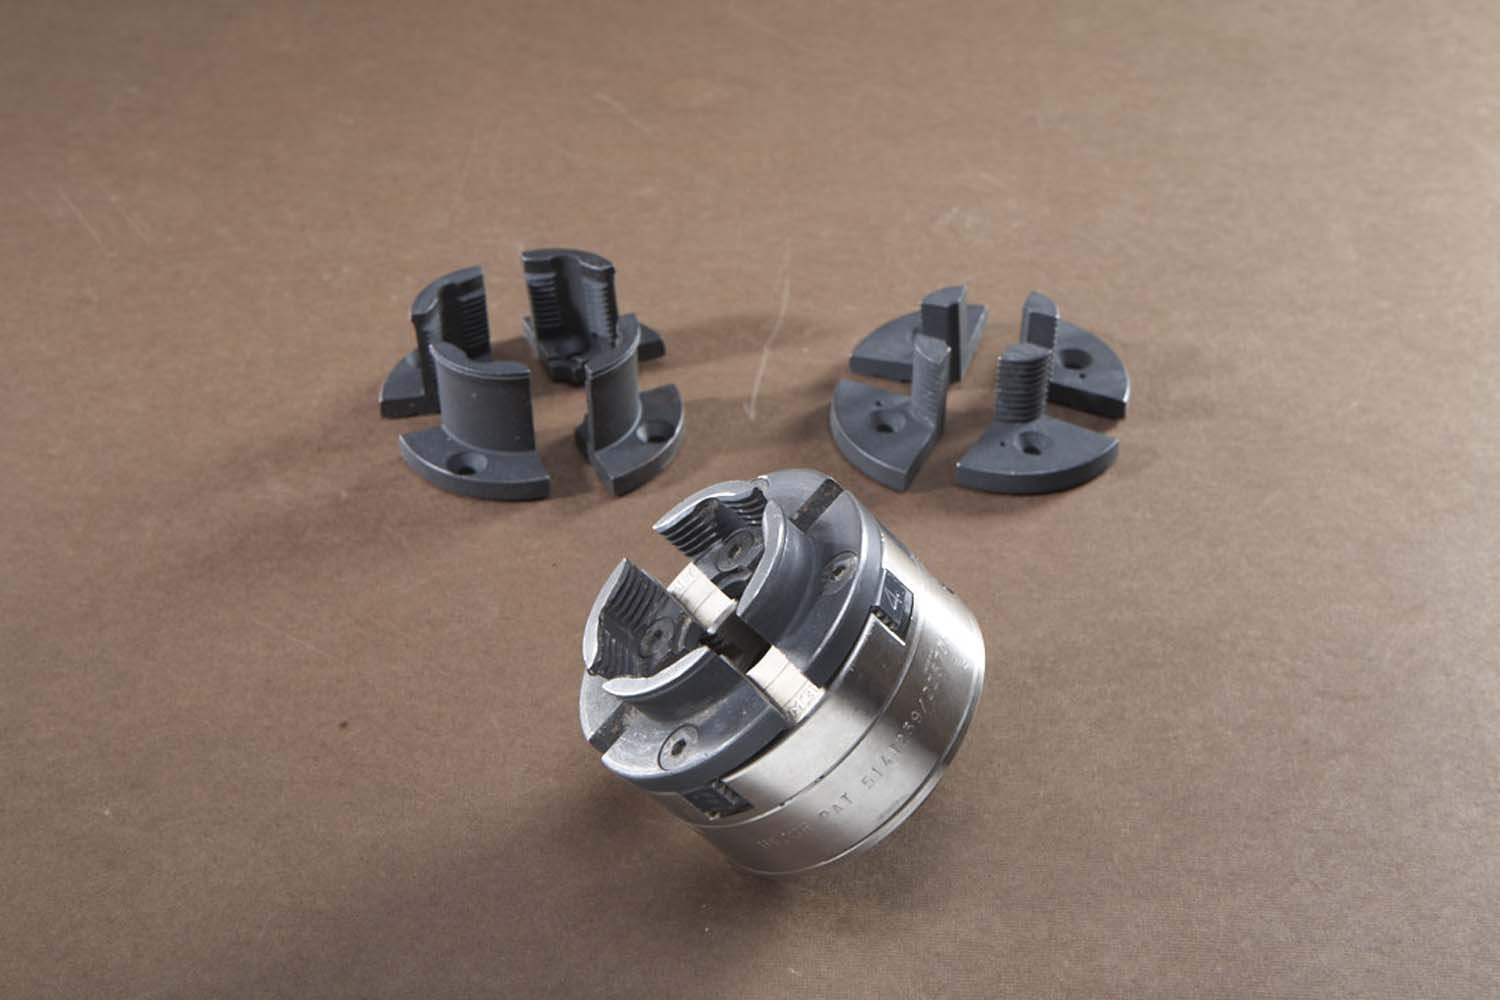
Photo 1. A four-jaw scroll chuck has jaws that scroll in and out to fit turning blanks of different sizes. Most scroll chucks offer a variety of jaws and other options—including the ability to hold other types of chucks.
Four-jaw scrolling chucks are probably the biggest advancements in chuck technology (Photo 1). The better scroll chucks currently on the market have largely solved problems associated with the early versions, including issues with accuracy, wear of critical metal surfaces and a nasty tendency to loosen while turning. However, modern scroll chucks still have some quirks that are important to know about.
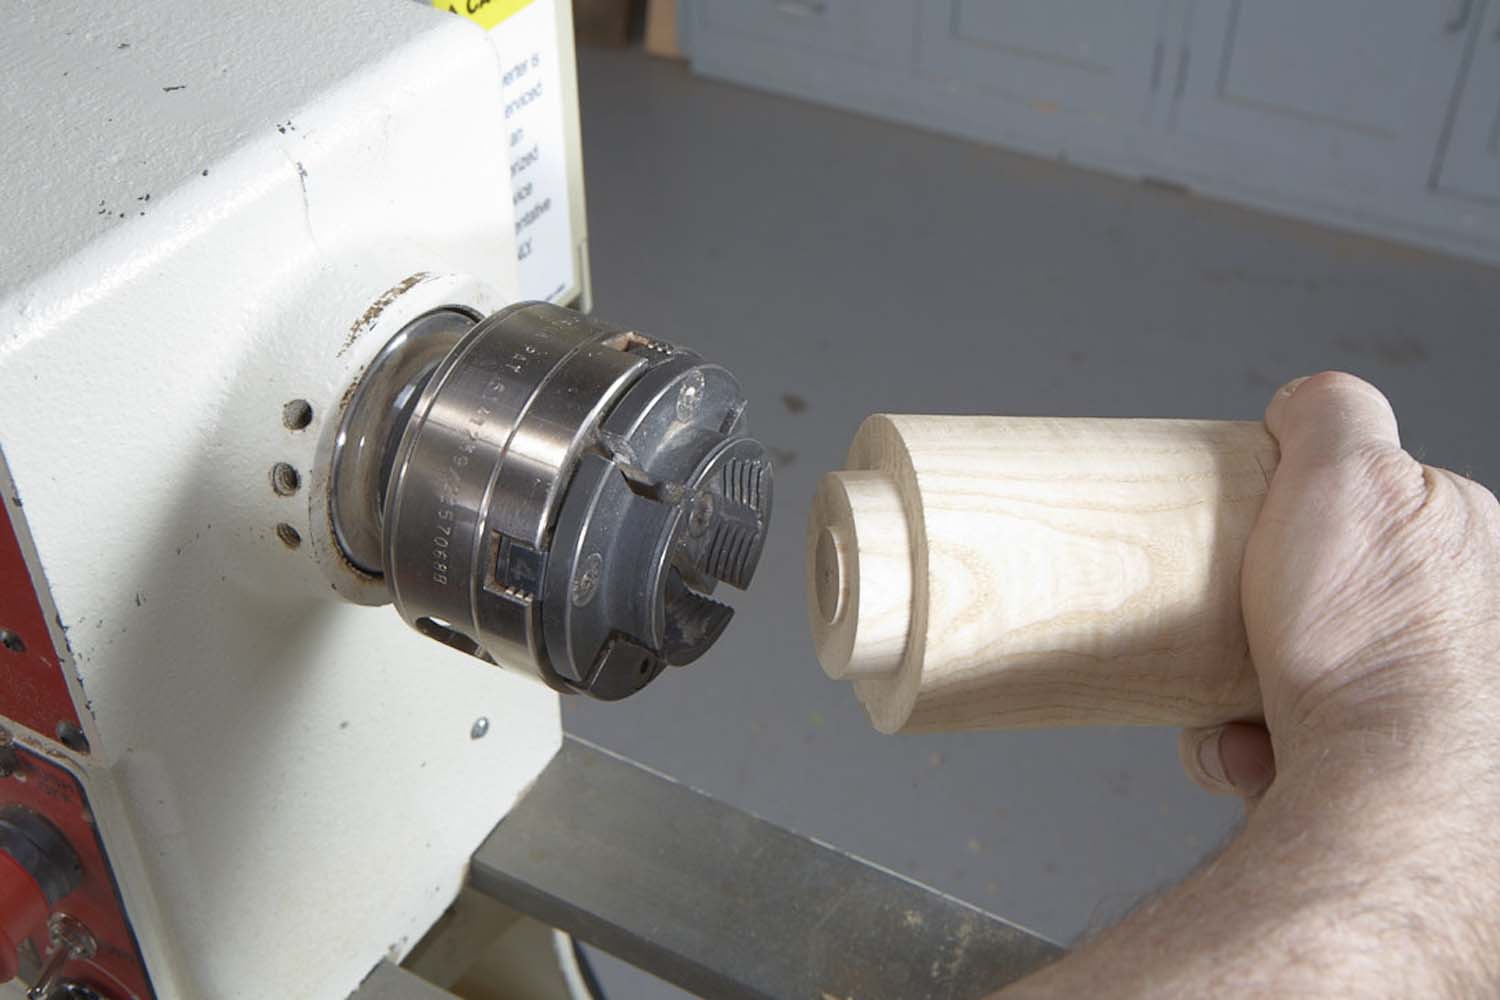
Photo 2. To mount a blank on a scroll chuck, turn a tenon as large and long as the jaws allow, with a slightly concave bearing shoulder. Keep the scroll mechanism within the chuck’s body.
- Grain direction matters (see Lacer’s First Law of Chucking). Short-grain weakness is a critical factor when a scroll chuck is used for face-grain turning, because a catch at the wrong point can cause the wood to fracture—especially wood that’s dry or brittle or wood that naturally splits easily, such as oak.
- Maximize the chuck’s grip (Photo 2). Always use a suitably sized chuck and suitably sized jaws. (As the size and weight of the blank increases, the contact area between the wood and the chuck must also increase.) Shape the mounting point so the chuck’s jaws grip as much surface area (diameter and length) as possible. Create a shoulder that rests on top of the jaws as a bearing surface. And use serrated jaws.
- Safely house the jaws. To avoid contacting the scrolling mechanisms’ sharp spinning corners, keep the mechanisms scrolled inside the body of the chuck. This also keeps the jaws from being extended too far, so they don’t fly out of the chuck.
Chucks that Expand
Often the same scroll chuck that closes on work is also designed to expand into a recess. This is most helpful when a shallow recess is the only available mount (as when turning a plate or a platter) or when chucking into a drilled or turned opening (as when turning a pepper mill). These chucks work reasonably well, as long as the outward pressure exerted while mounting doesn’t split the wood. However, excessive force exerted by a catch or dig-in while turning can split the wood and break the work away from the chuck.
Chucks that Screw
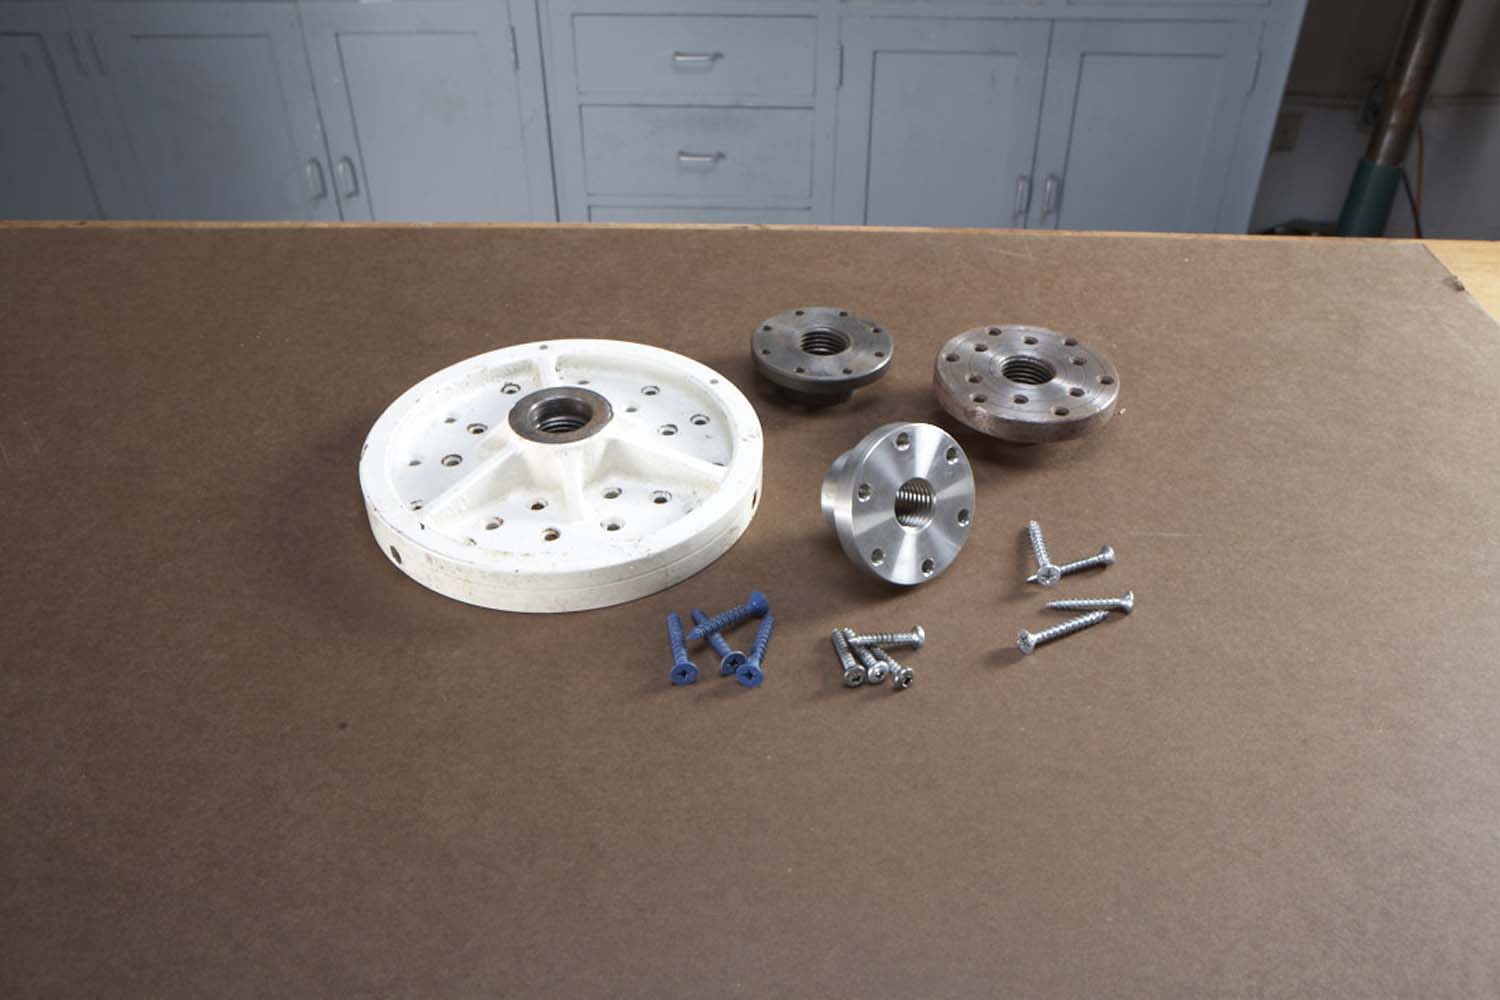
Photo 3. A faceplate with screws is an excellent choice for face grain turning. The size of the plate, its composition, the type of screws and length of their threads combine to offer an enormous range of holding capability.
No other chuck offers as wide a range of holding power as a faceplate with screws (Photo 3). Combined with the plate’s bearing surface, screws provide remarkable chucking strength—even a chuck with a single screw in the center can offer surprising holding power. However, these chucks are only suitable for face-grain turning, when the screws mount in the blank’s face grain (such as face-grain bowls, platters, stool seats and the like). Faceplates with screws should not be used if the screws will mount in the blank’s end grain (including end-grain bowls, boxes, goblets, for example).
Always make sure the faceplate is flat. The mounting point on the wood must also be flat or very slightly concave—never convex or uneven, or with high spots. Here are some other key issues concerning faceplates:
Don’t skimp. Buy a high-quality solid steel or hefty cast iron faceplate. The most practical sizes are 3″ and 4″ dia.—choose one made of one piece steel or even stainless steel with at least four holes. Faceplates 6″ in diameter and larger are usually made of cast iron. Choose one that’s at least 1/2″ thick. In any faceplate, the more holes the better—my favorite 3″ faceplate has 6 holes; sometimes I fill every hole on my 8″ faceplate with long #14 screws!
Use the right screws. The best choices I have found are sheet metal screws with square-drive heads, Tapcon® screws (hex head, 3/16″ dia. and 1/4″ dia.) and SPAX® Philips or square drive construction or multiple-materials screws. Do not use wood screws, drywall screws or deck screws—they’re often brittle and have too little holding power due to shallow threads and smaller diameters.
Use #10 #12 or #14 screws for most situations—always start by drilling pilot holes. Hex-head lag screws may be the best choice if the work is large and heavy and the faceplate is 10″ or larger. Buy a variety of screw lengths: long for roughing (especially when screwing into what will be the opening of a bowl); shorter for finish turning or small, light work—but always err on the long side. Even for small work, every screw must penetrate at least 1/2″ into the wood (full threads; the lead point doesn’t count). Deeper penetration and more screws are always safer paths—especially when working heavy, large diameters or work that’s out of balance.
Eliminate the screw holes. Simply filling or covering them looks amateurish. Instead, learn one or more “reverse chucking” methods. Reverse chucking involves removing the work after completing most of the turning and mounting it in reverse, in order to finish off the base.
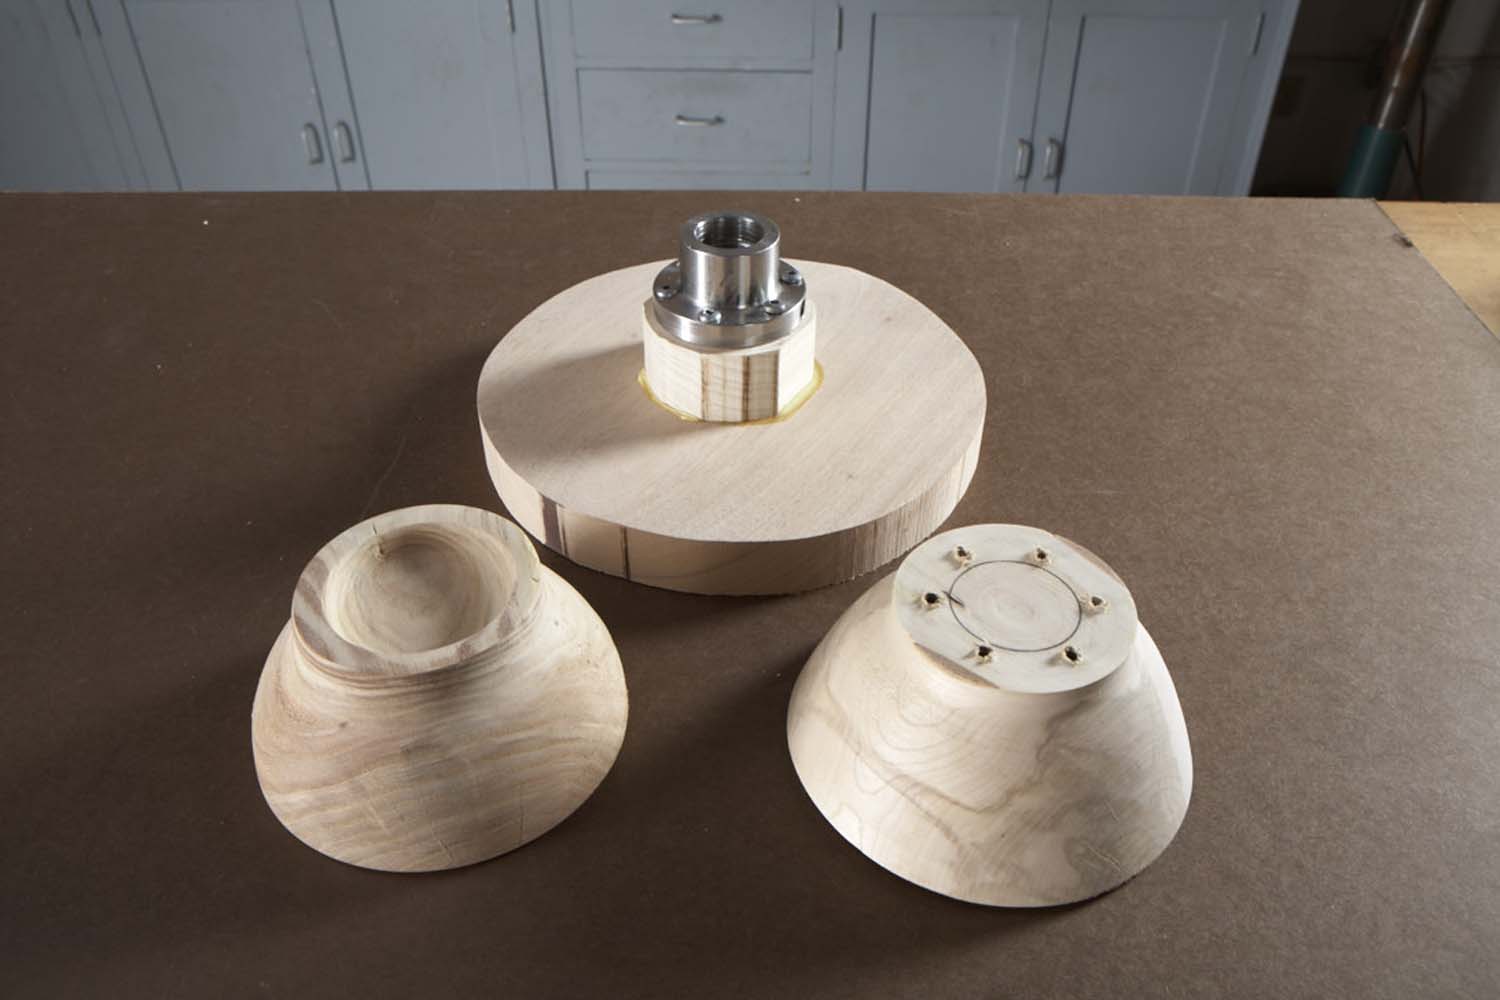
Photo 4. Eliminate screw holes without loosing height by hollowing the area that contained the holes, turning away the holes or gluing a waste block to the back of the blank.
Once the work has been reverse-chucked, the easiest way to remove the holes is to turn down the base. Consider the height you loose as part of the process and of your design. On the other hand, if the blank is just too thin or the wood is so precious that you don’t want to loose any, you have several options to choose from (Photo 4): Create a recess where the holes resided, reduce the diameter of the base inside the “screw orbit” (the ring that describes the circle of screws) or glue on a waste block to house the screws and remove it after the turning is completed.
Scraps of hardwoods such as poplar, soft maple, ash, walnut and cherry are suitable waste-block material. Don’t use weak woods such as pine, cedar and spruce, or plywood, which can separate. Use yellow or white glue to glue on a waste block. Clamp the joint for at least 12 hours and allow at least 24 hours drying time before turning. Do not glue a piece of paper between the waste block and blank. This creates a weak joint that can separate. For wet woods, use a dry-wood waste block and medium-viscosity CA glue. Lightly clamp the joint and allow at least two hours drying time.
Chucks that Compress
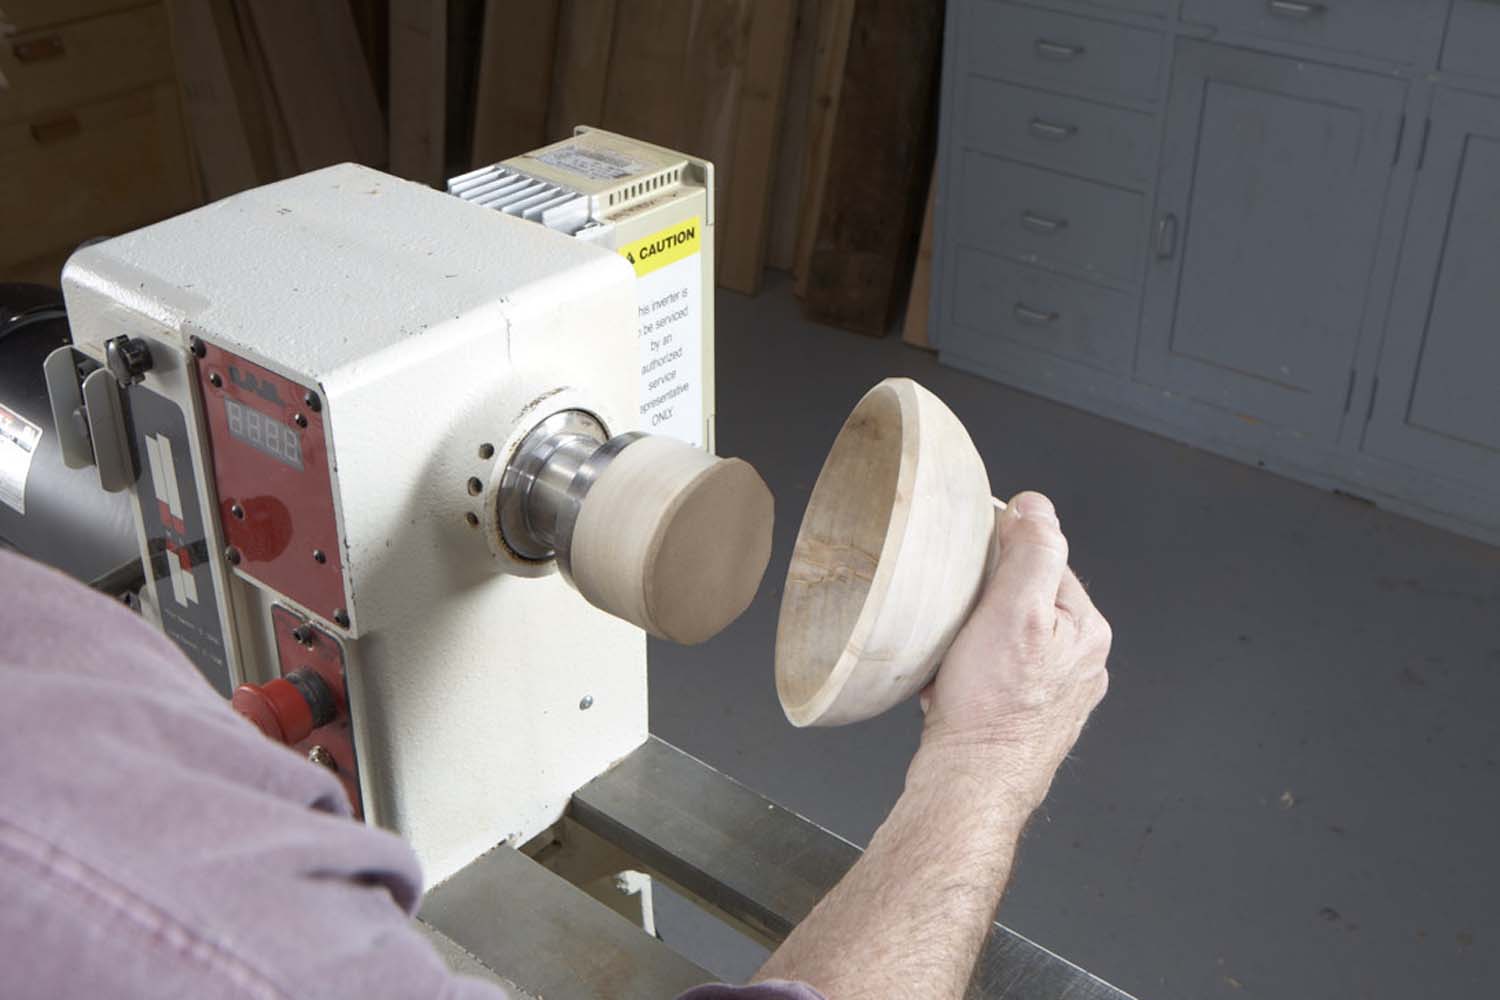
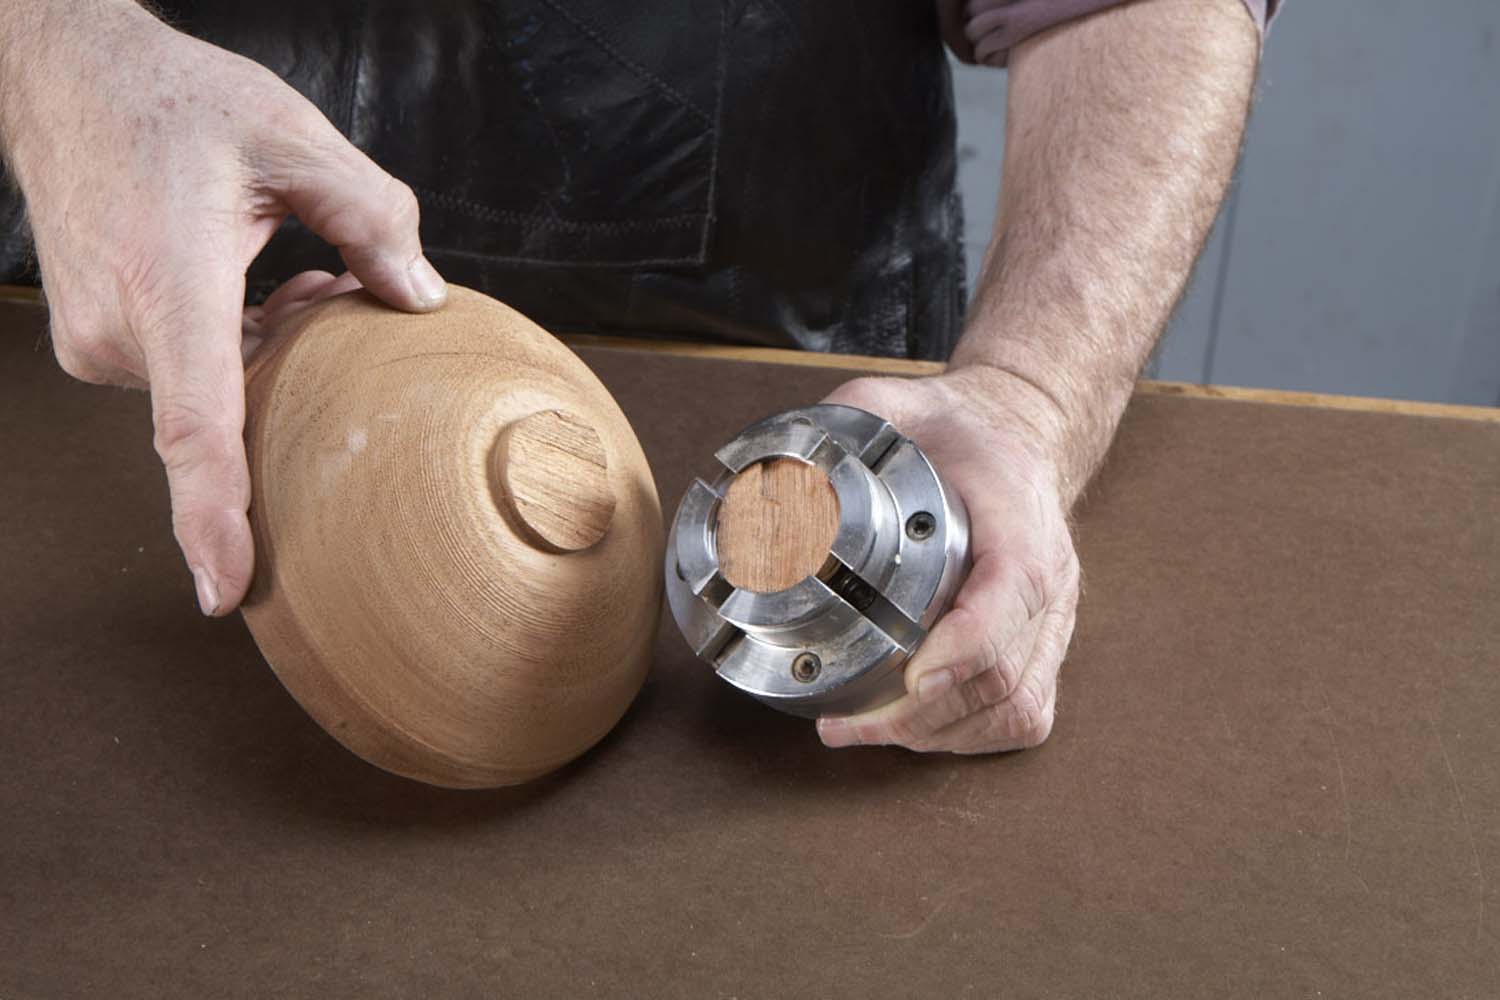
Photo 5. A compression chuck is used in conjunction with the tailstock to remount work to allow finishing its base (called “reverse chucking”). Here, the work will simply be pressed against a block of wood with a padded face.
A block of wood with an anti-slip pad mounted on its face (1/8″ router mat works well) is the heart of a simple reverse chucking set-up (Photo 5). This type of chuck is especially useful for bowls and vessels with natural edges, thin bowls with delicate edges, and for reshaping the mounting surface of a “twice-turned” bowl for remounting into a scroll chuck. (A “twice-turned” bowl is roughed out of a green blank, allowed to dry and then remounted for final turning.)
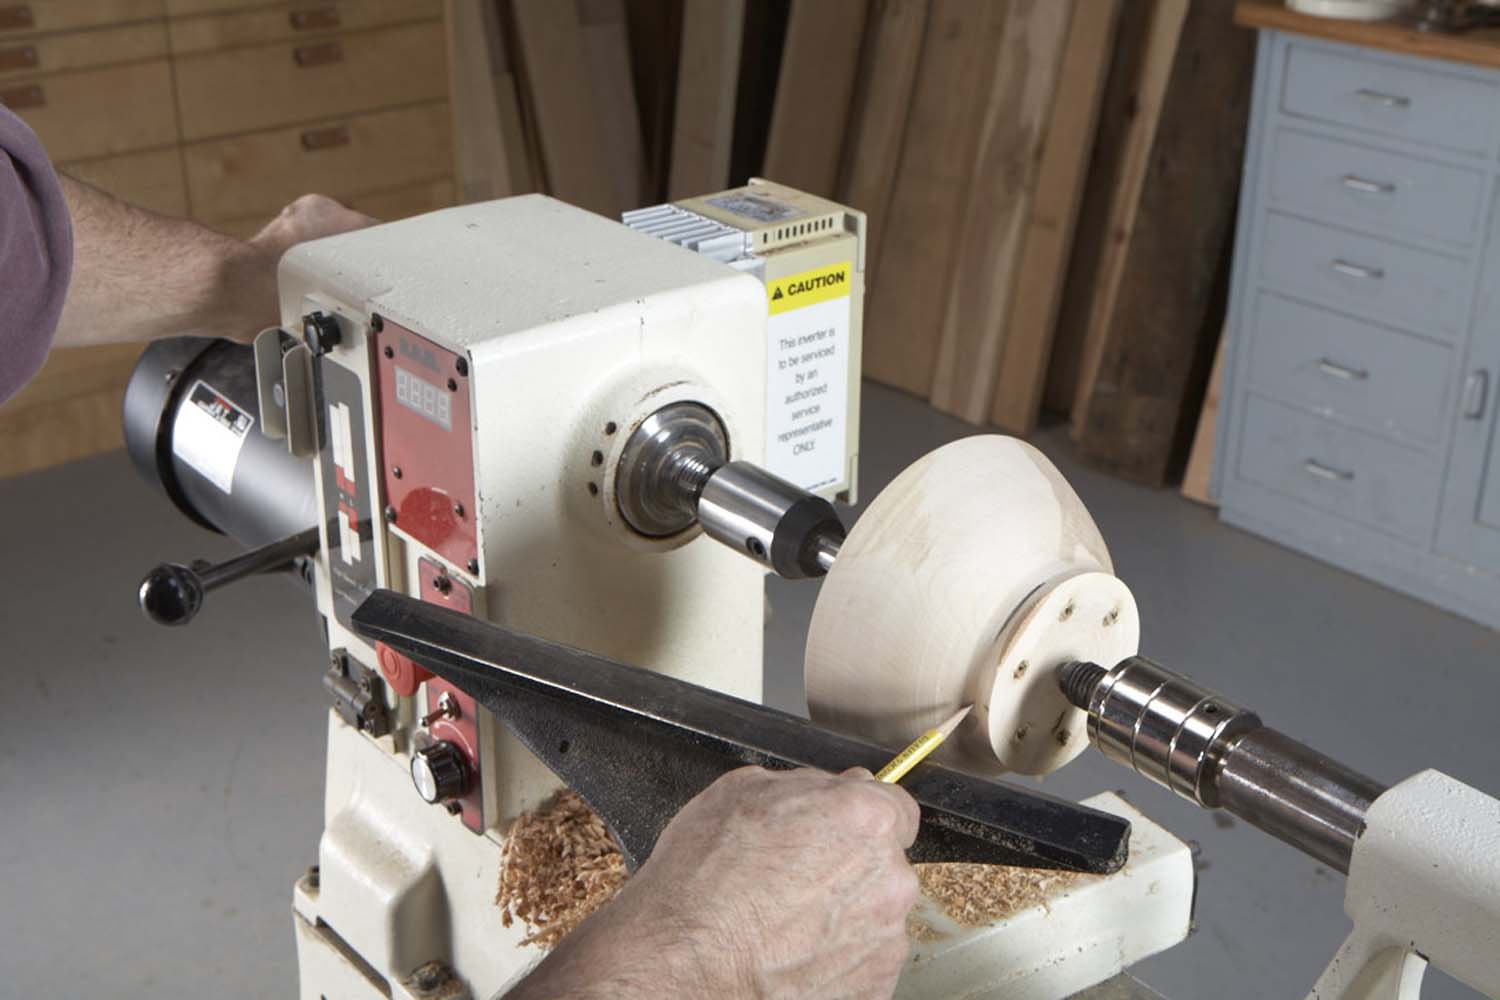
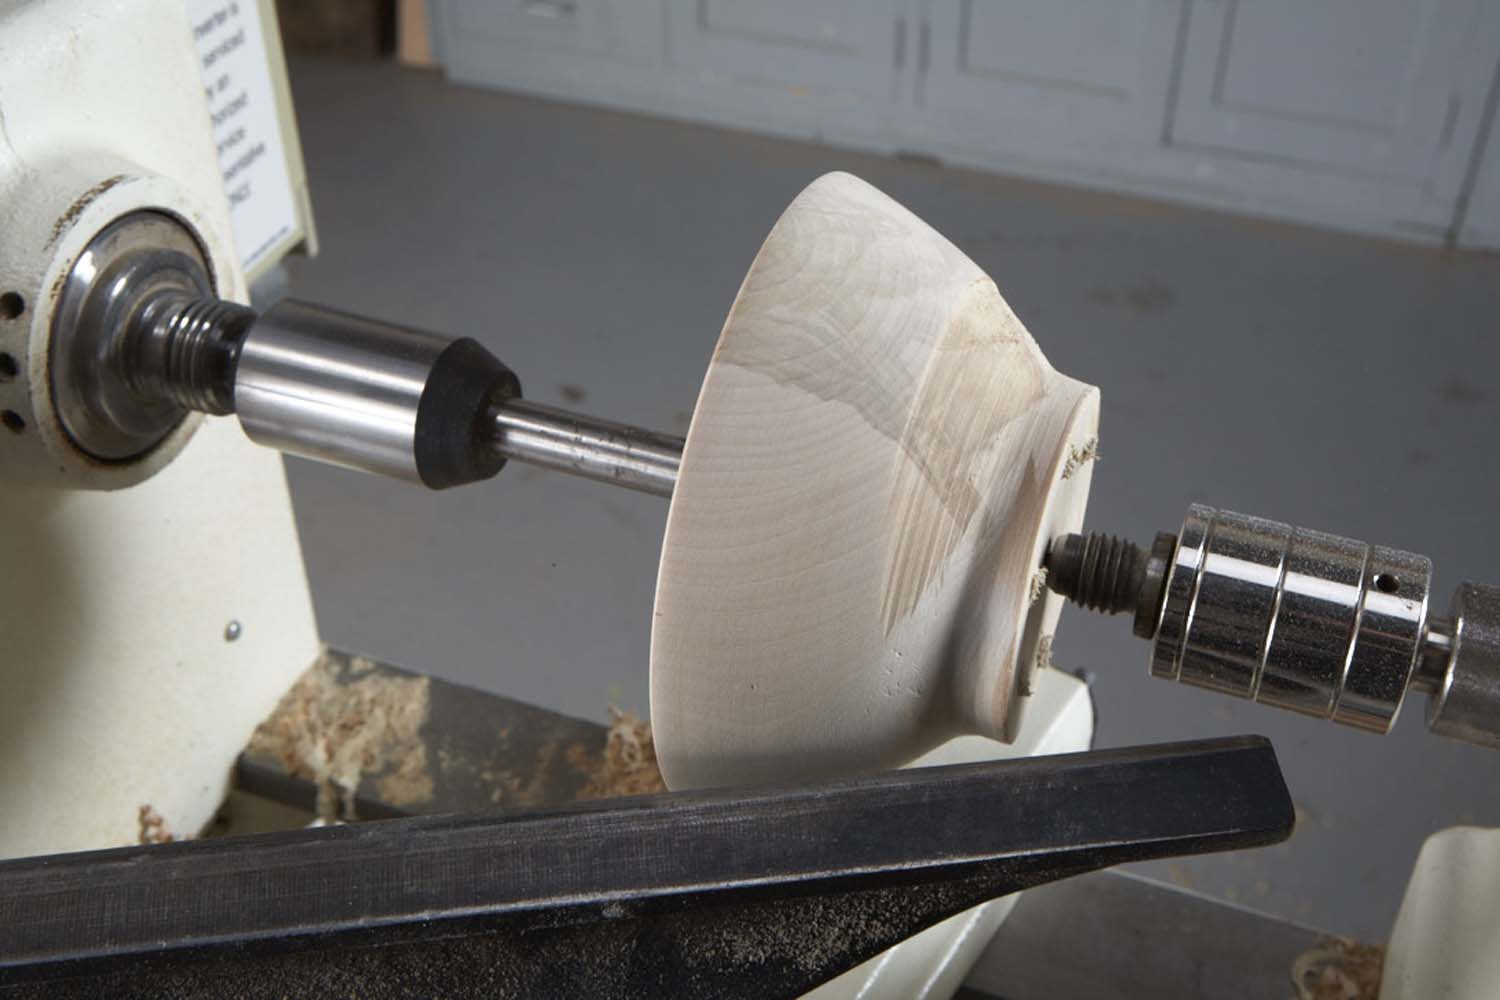
Photo 6. To center work on a compression chuck, mount it with light pressure and turn the lathe by hand to locate the high spot. Slightly loosen the tailstock, push on the mark, tighten and mark again. Repeat until marking creates a full circle.
Mount the block with the anti-slip material on a faceplate or in a scroll chuck. Center a nearly completed bowl or vessel on the block. Then use the tailstock center to firmly press the base of the work against the block, so that compression—and friction—holds the work while its base is shaped. Make sure to accurately center the work (Photo 6). This setup allows working the underside of the base, except near the tailstock center (this area must be worked after the piece comes off the lathe). This setup also allows working the sides, but only about one-quarter of the way up from the bottom.
Chucks that Trap
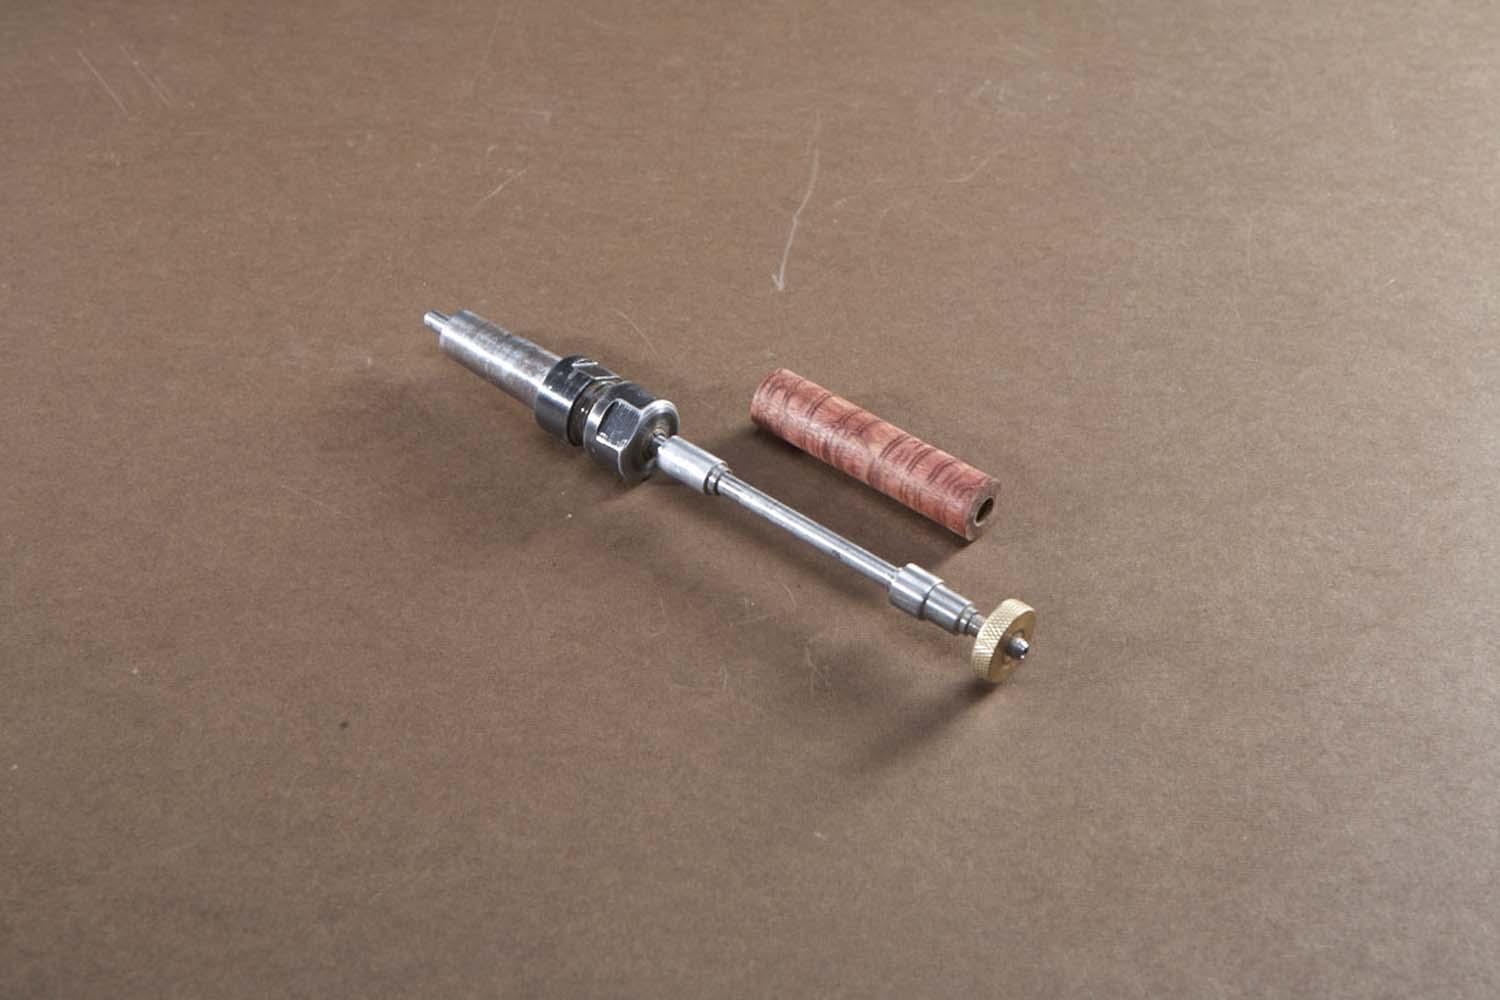
Photo 7. Mandrel chucks trap work with pre-drilled holes on a threaded shaft (between bushings in this case). One end of this pen-turning mandrel mounts in the headstock. The tailstock supports the opposite end.
The most common method for mounting turning blanks with through holes—pen blanks, for example—is to trap them on a mandrel (Photo 7). Pepper mills, game calls, bracelets and toy wheels are frequently mounted this way.
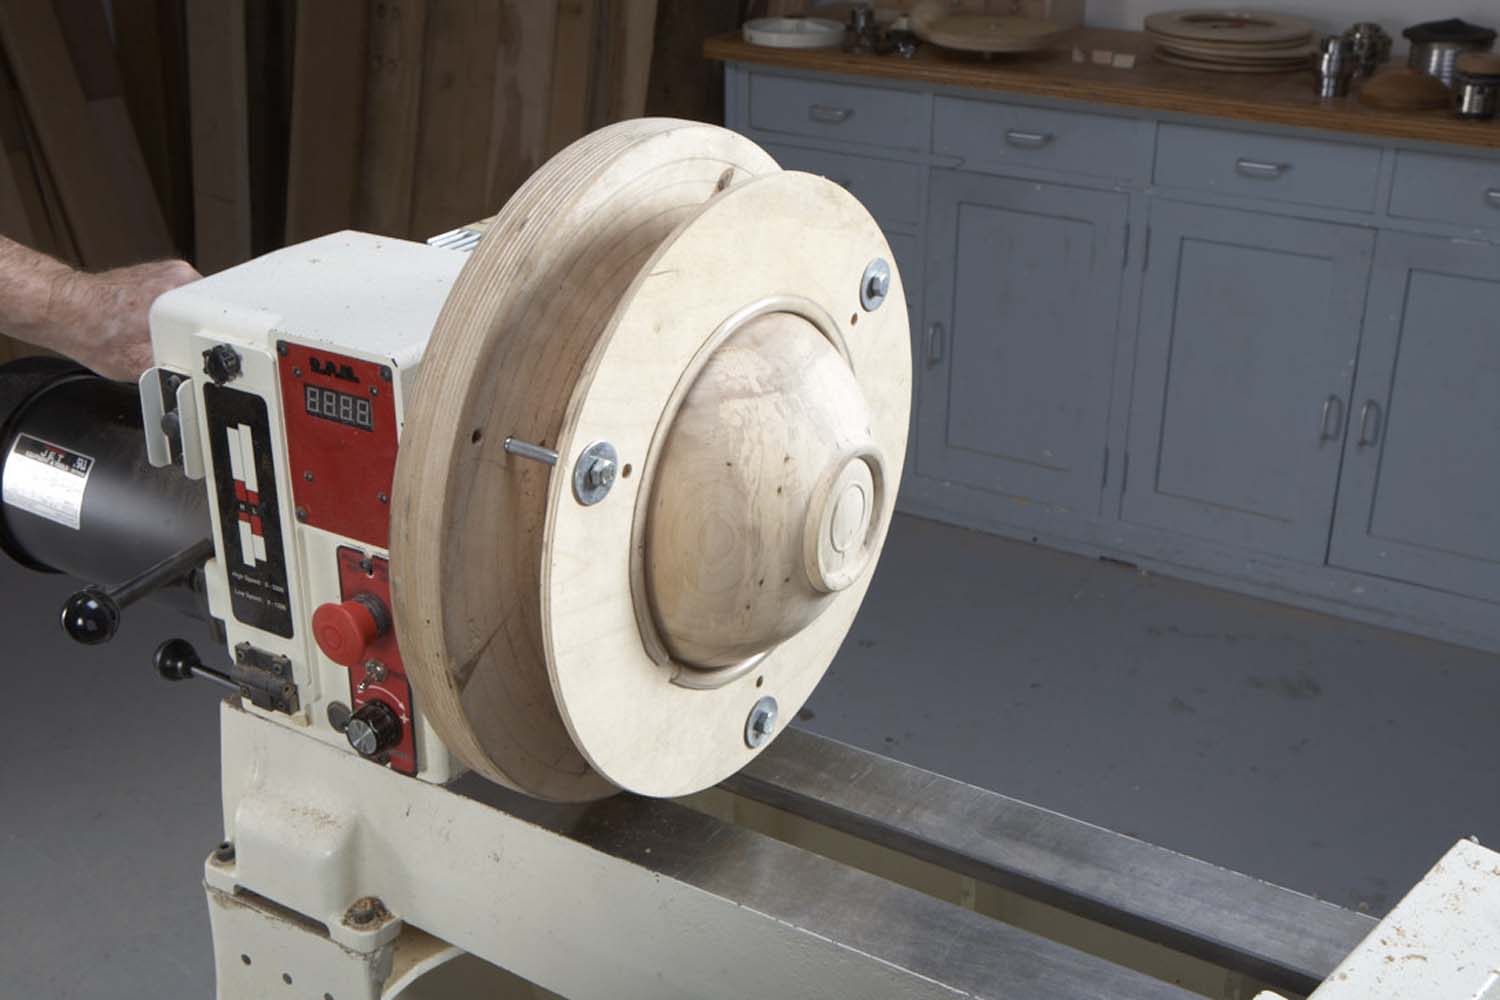
Photo 8. This trapping chuck for reverse chucking provides full access to the bottom of the work and a high level of safety. The system consists of padded rings in a variety of diameters that bolt to a dedicated base and faceplate.
An unusual trapping chuck for reverse chucking leaves little chance for the work to fly off the lathe (Photo 8). An excellent option when full access to the bottom of the work is desired, this system is especially good for full detailing of the base.
Chucks that Pull
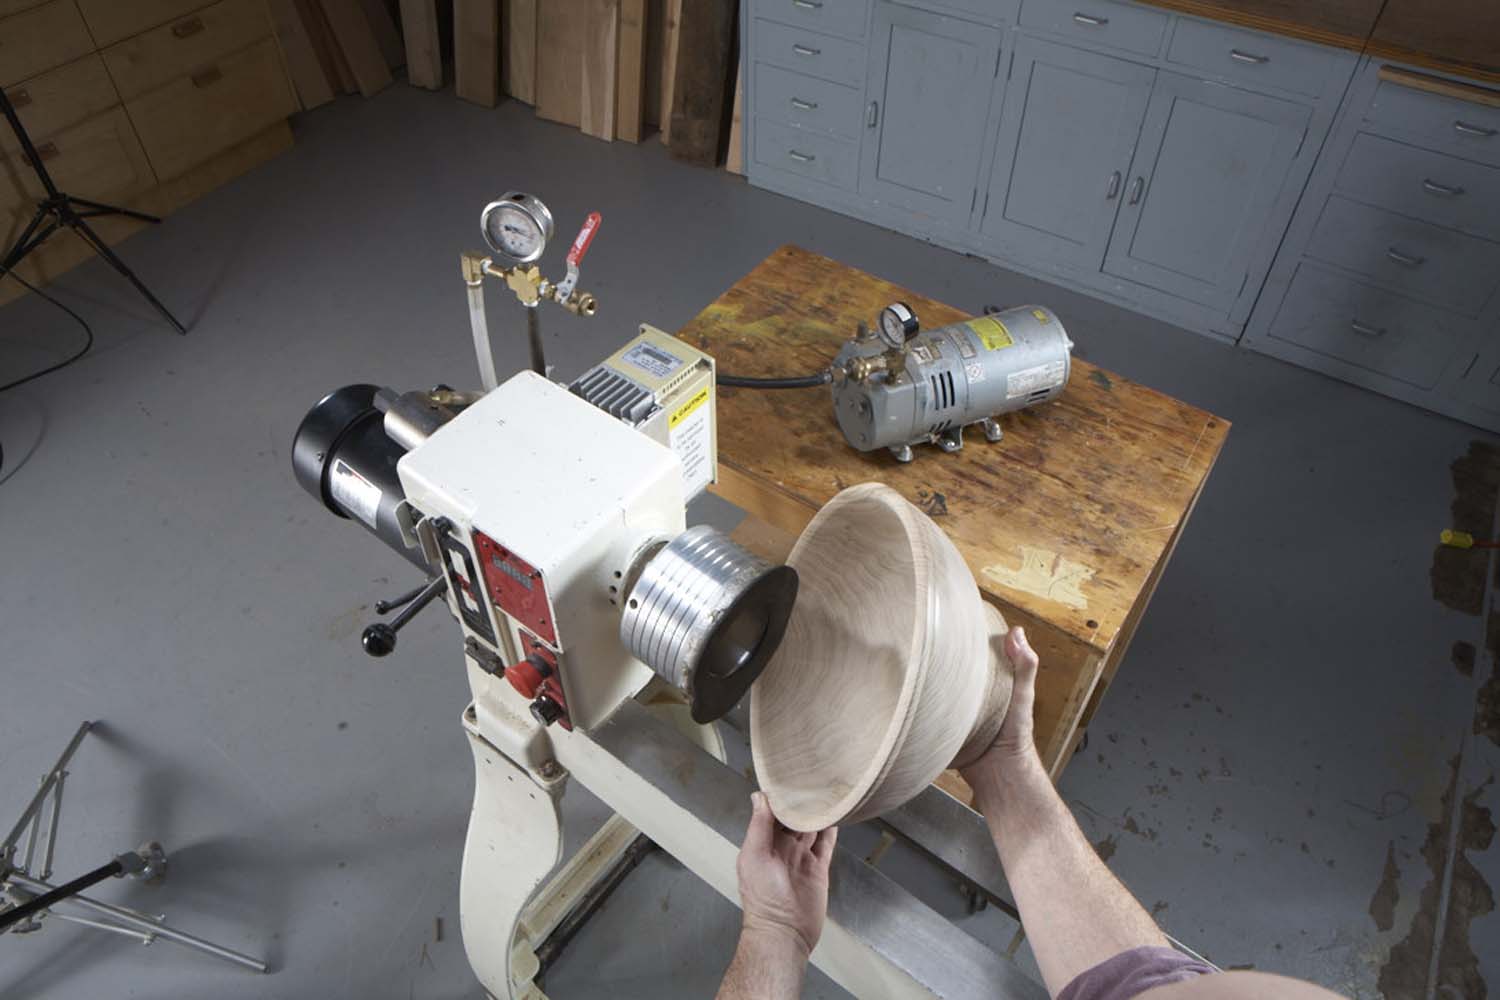
Photo 9. Vacuum chucking is a rapid way to mount a bowl for reverse chucking. This method provides total access to the bottom of the work, but it requires a considerable investment.
Using vacuum pressure to hold work on the lathe is a relatively new option for reverse chucking (Photo 9). This system is great for production work or if full access to the bottom of the piece is desired, but it’s not suitable for pieces that are fragile or very deep, pieces that contain voids and woods with open pores. There are solutions for some of these issues, but choosing other chucking methods is arguably the best one.
Chucks that Jam
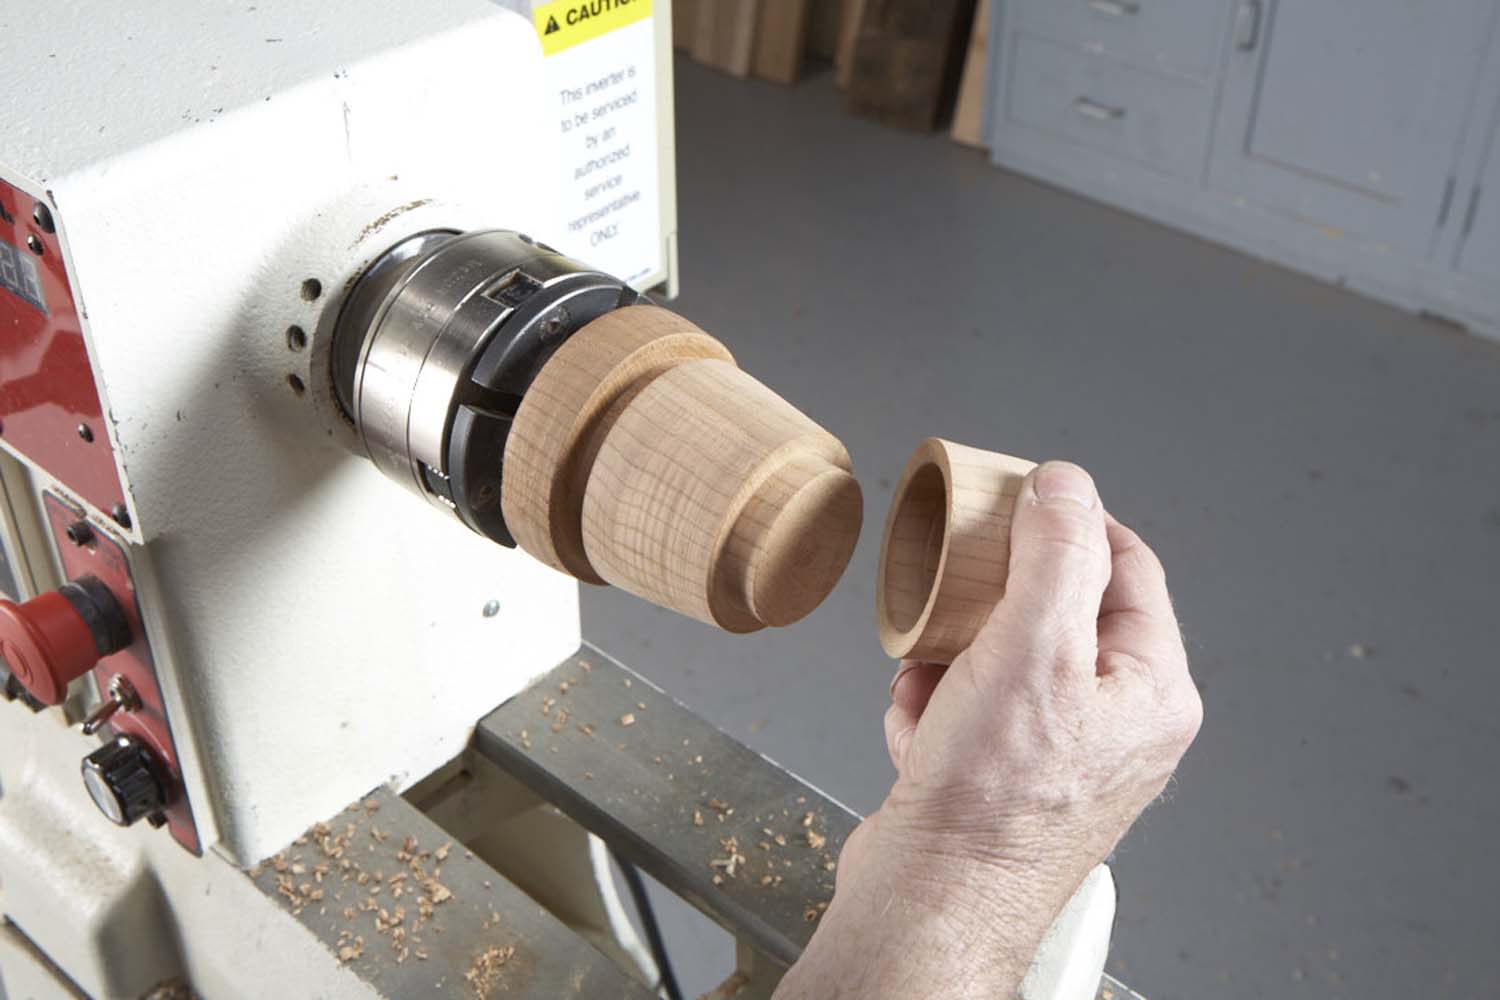
Photo 10. Jam chucking is frequently used in box making. A tenon is turned on the base to snugly fit the hollowed top. Jamming the top onto the tenon allows final shaping of the box’s entire outside profile.
Jam chucks are often turned for one-time use or where metal jaws might cause damage. Basically there are two approaches: Either you jam a hollowed piece over a tenon turned on a waste block (Photo 10) or you jam a tenon into a recess turned into a waste block (Photo 11).
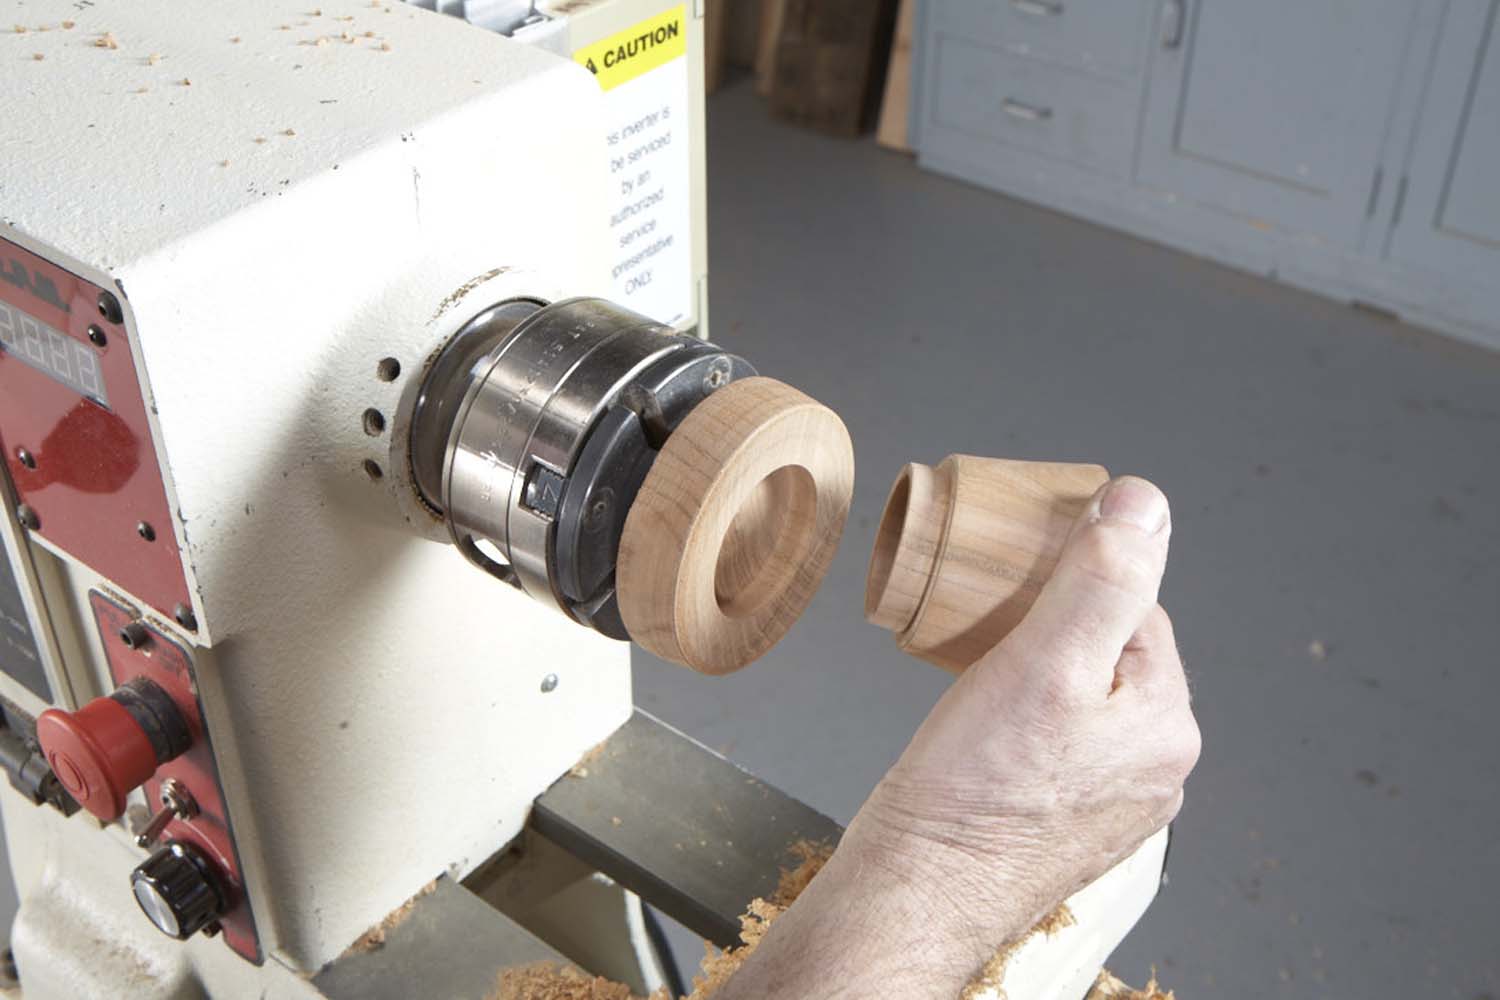
Photo 11. Jam chucking into a recess is another option. Here, the tenon on the box’s base (now shaped and hollowed) snugly fits into a mortise turned in the waste block, so the box’s bottom can be completed.
If you only have a faceplate, you can use a jam chuck in lieu of a scroll chuck for end grain hollowing (to hollow the box base shown in Photo 14, for example). Mount a face-grain block on a faceplate and turn a mortise in it. Then turn a tenon on the end of the base blank to snugly fit this mortise (as shown in Photo 5, but with a mortised face-grain block on a faceplate instead of the scroll chuck). Jam-fit the tenon into the mortise or glue it. A jam-fit can be tightened by adding a layer of tissue paper around the tenon or by wetting the tenon to slightly swell the wood. The tenon’s shoulder provides additional stability by bearing against the block on the faceplate.
Chucks that Stick
Using high-strength double-face tape—not carpet tape or the stuff from the local hardware store—is a great way to mount thin, face-grain, non-oily, dry-wood blanks for turning into small bowls, plates or platters. Note: This method isn’t foolproof, so it’s only for experienced turners: A catch may pull the piece off the lathe.
Cover a clean faceplate (sanded and sashed with alcohol or lacquer thinner) with the tape—don’t allow the seams to overlap. Flatten one face of the blank and then clamp it against the taped faceplate for several hours. (The bond strength increases with clamp time.) For added safety, I bring up the tailstock and keep it in position while I’m turning, until the final cuts at the center. Freeing the completed work from the faceplate takes a slow, continuous pull until the tape starts to release.
Eccentric Chucks
Some chucks can move the work through preordained eccentric patterns. Such chucks have been around for centuries, but new versions can easily change the center of the work or move it through elliptical or wobble patterns.
Sidebar: Lacer’s Laws of Chucking
Make Sure It’s Secure: Grain direction matters with many chucks. In this case, the inherent problem of bearing against face grain work that’s mounted across weak short grain caused a catastrophic fracture.

Leave No Evidence: What chuck was used to turn these bowls? The correct answer: You don’t know. Finished turnings should show no evidence of chucking. The real answer: All three were turned on a faceplate.
Strive for Pinpoint Accuracy: Lack of accuracy in centering the work on the chuck can cause big problems. In this reverse chucking setup, mis-centering changes the bowl’s outside profile, so it no longer matches the inside.
Bio
Alan Lacer is a turner, writer and instructor living near River Falls, WI. To learn more about Alan visit alanlacer.com.
Here are some supplies and tools we find essential in our everyday work around the shop. We may receive a commission from sales referred by our links; however, we have carefully selected these products for their usefulness and quality.


