We may receive a commission when you use our affiliate links. However, this does not impact our recommendations.
Make four variations of Federal inlay with heat and a few simple tools.
While one revolution was winding down, another was gaining force. The Federal period, from about 1780 to 1820, saw both the rise of the nascent United States as well as a uniquely American interpretation of neoclassical design.
This New World take on European design was lighter than the preceding Queen Anne and Chippendale styles, using less imposing elements. It did, however, make extensive use of fine veneers and inlays for depth and richness.
Craftsmen could buy inlays from specialists, but many created their own shop-made inlays. With a few simple tools, you, too can make your own inlays for your Federal (and other) projects and get great results.
Blog: Learn the trick to keeping your inlay clean and clear.
On-Demand eLearning: Discover “Marquetry, Veneer & Inlay for Furniture Makers with Rob Millard.”
Lighter Designs
The American Federal period developed when U.S. cabinetmakers began interpreting the work of British designers such as George Hepplewhite, Thomas Sheraton and the Adams brothers, who exported their ideas from England in the form of design books. Their influences quickly became part of the decorative arts landscape.
Gone were the undulations of block-front and bombé chests sporting expressive brasses on elaborately shaped and carved mahogany.
Narrow tapered or turned legs, the use of negative space in the design and gently curved or flat surfaces form the core of Federal work. And while many of the high-end Federal pieces were carved, it tended to be more subtle than in preceding styles.
Federal furniture depended more on contrasting colors and accents. Neoclassical pictorial elements such as urns, shells and fans were created in veneer, as was the eagle, which had emerged as a symbol of the United States.
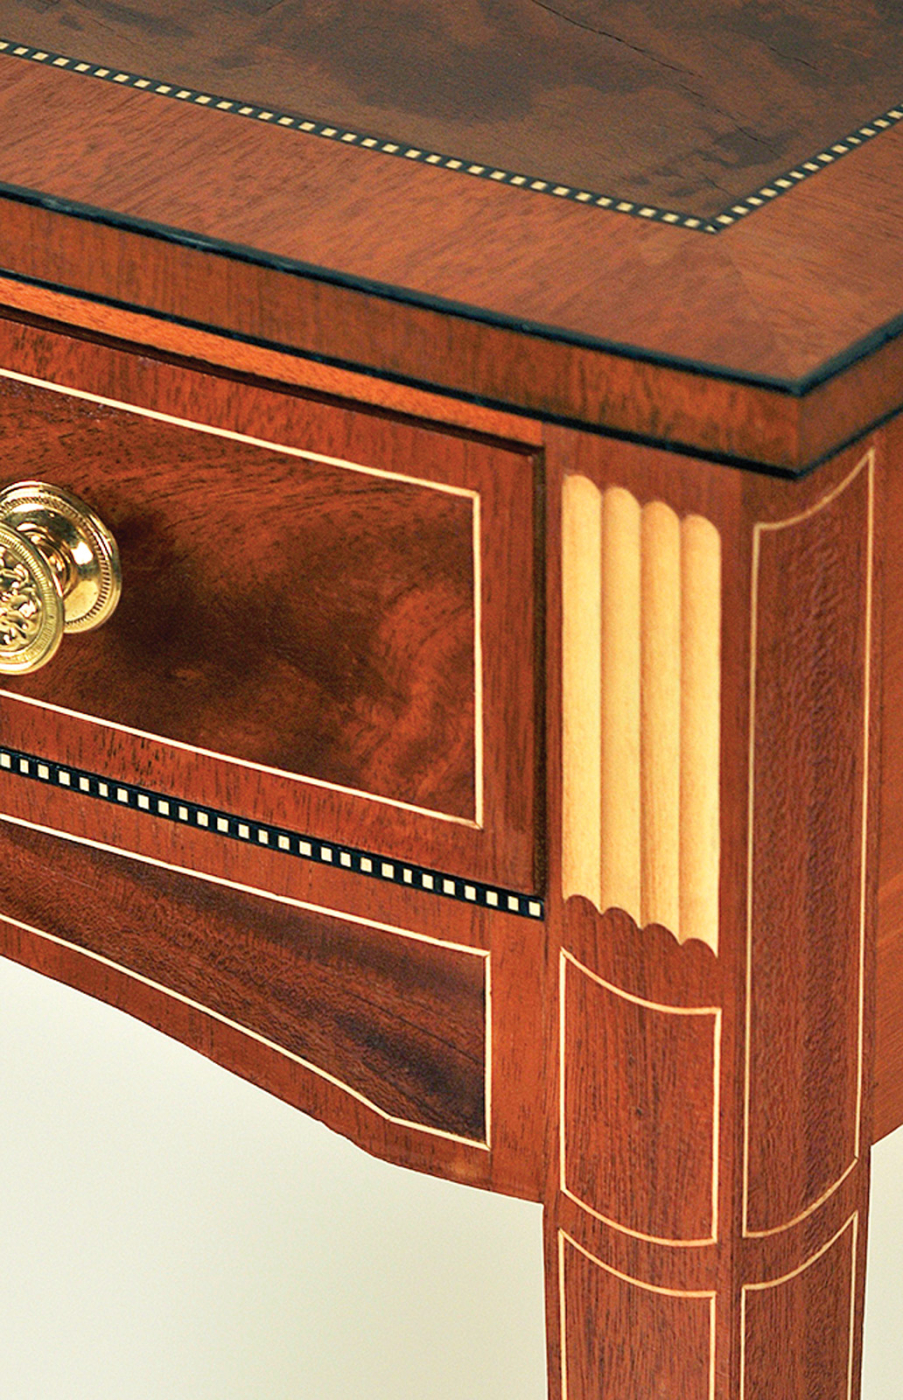
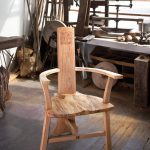
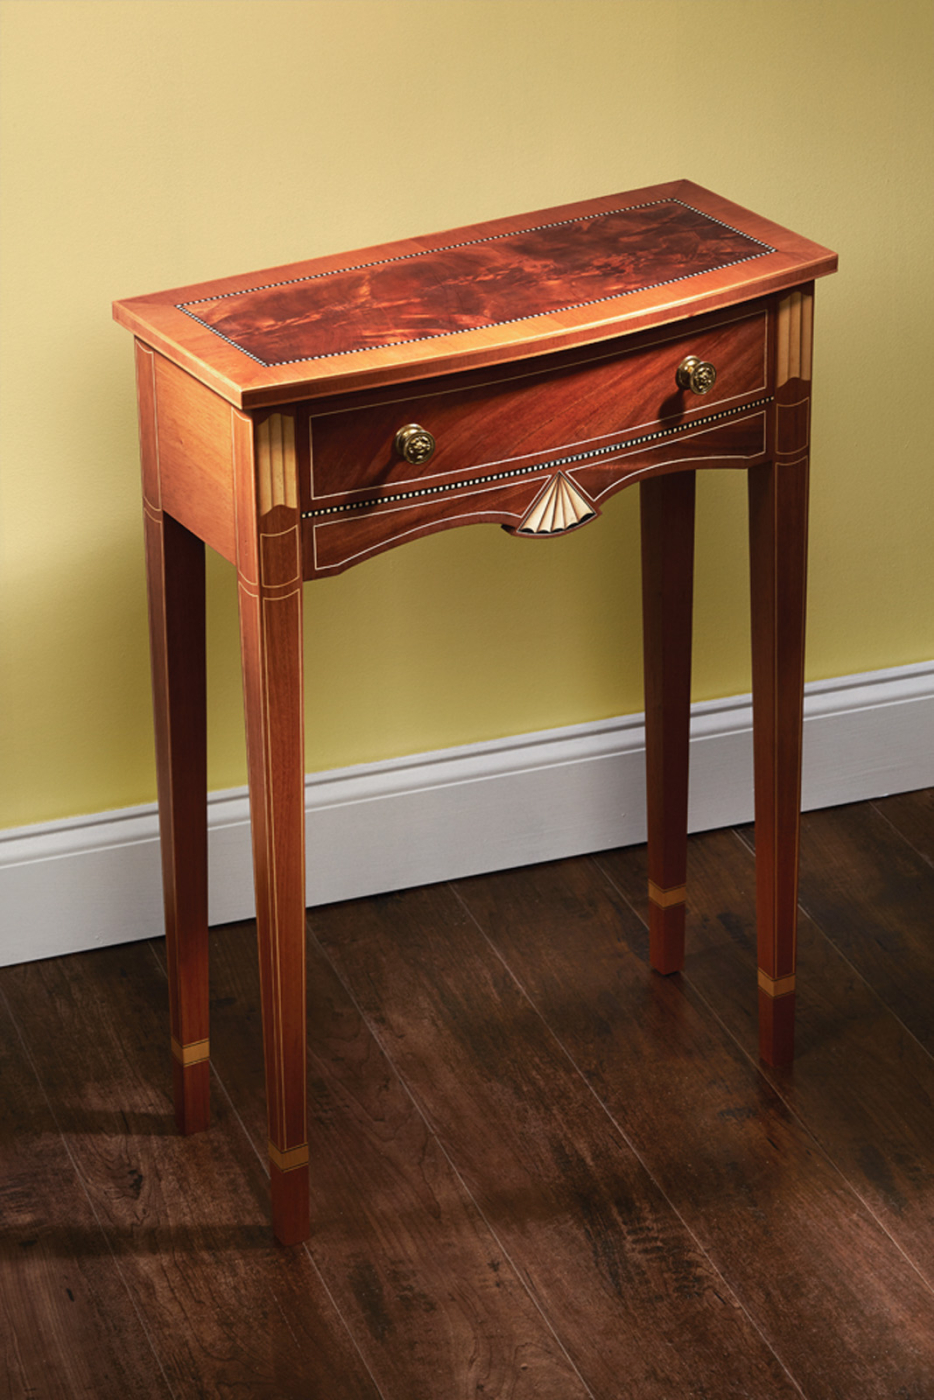
Period touch. Shop-made inlay, such as this bookend design on a table I built, was important in Federal-period furniture; it’s a way to decorate using contrasting colors.
Expert marqueters fashioned complex artistic representations from veneers of different colors. Heated sand was used to gently darken the edges of pieces to create shading that gave designs a three-dimensional appearance.
Much of the elaborate banding and pictorial inlays came from the hands of specialists who created inlays and banding in bulk, inventoried it and sold it from shop to shop.
But cabinetmakers in rural areas didn’t always have access to these specialized craftsmen, or didn’t have the market for such fancy work. They created their own simple shop-made inlays (as did some urban craftsmen.)
Often, these were little more than ovals or rectangles of a contrasting veneer. Others were two-dimensional renderings of simple objects or simple geometric arrangements of shaded veneers. Frankly, many were quite crude.
Known Shop-made Users
Perhaps the best example of a craftsman employing shop-made inlays is John Townsend. Known primarily for his exquisite Queen Anne and Chippendale work, later in his career Townsend also made Federal furniture.
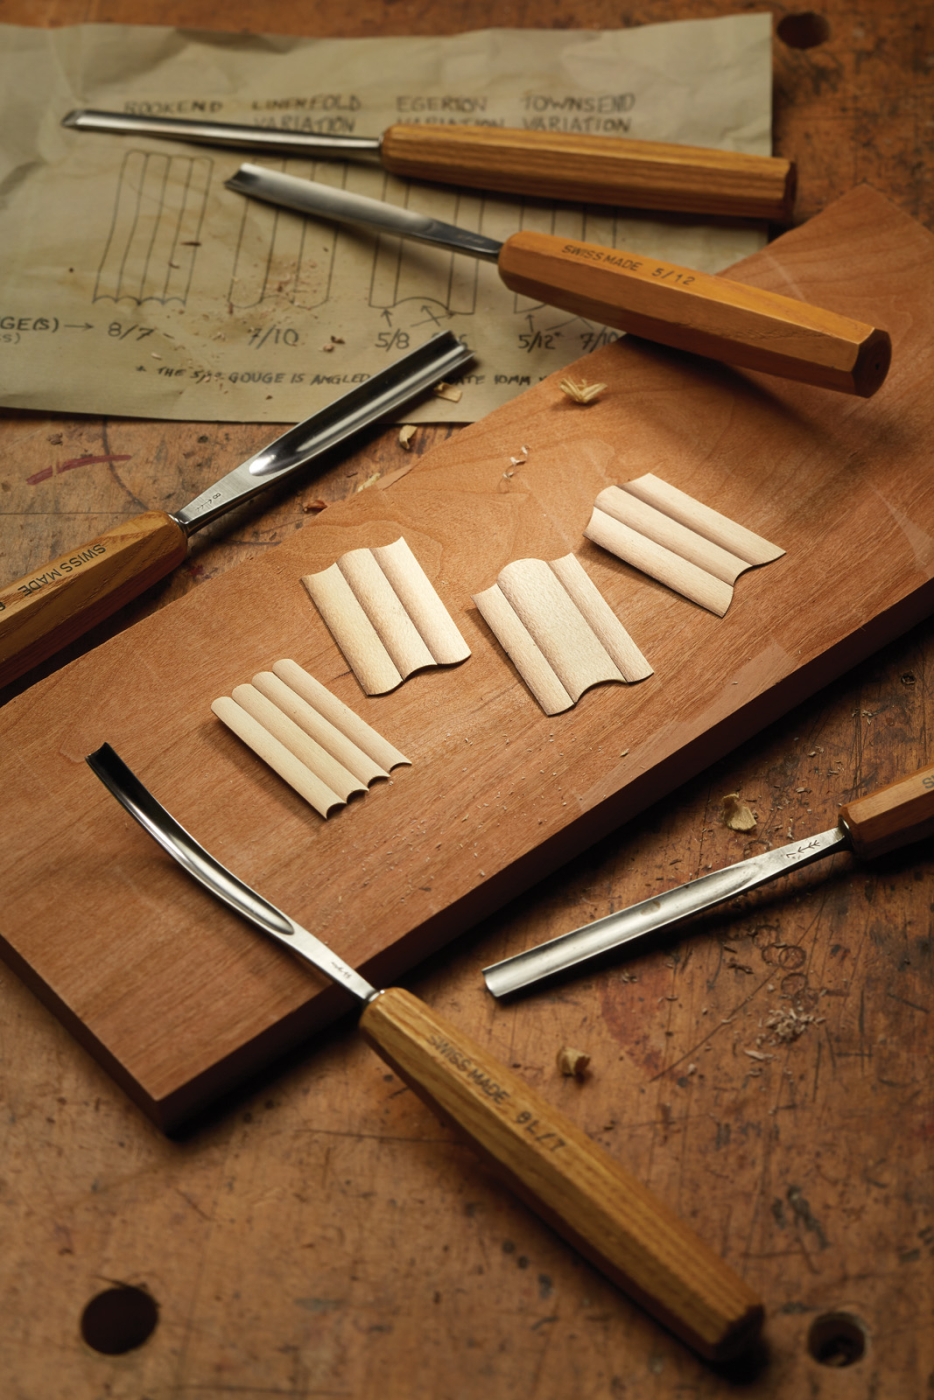
Elaborate banding and pictorial inlay is notably missing from his known Federal work; instead, he used simple stringing and inlays. He was fond of two variations of bookend inlay (three or four matching sections aligned), and what I call the “Townsend variation” (a noticeable change in the sweep of the curves.) New Jersey cabinetmaker Matthew Egerton used another variation with a wider center flanked by two matching narrow pieces. I call a fourth variation a “linenfold” design, in which all three sections are equally wide.
I’ve always been fond of this inlay in all of its forms. The three-dimensional effect is simple yet elegant and no marquetry skills are required to make it. Using tools you probably already have, you can produce project-ready inlays in short order.
Because of the technique used to make these designs, the process to inlay them into your work is simple and precise. We’ll work step-by-step through making the Egerton variation. The same techniques, however, are used to make all of them.
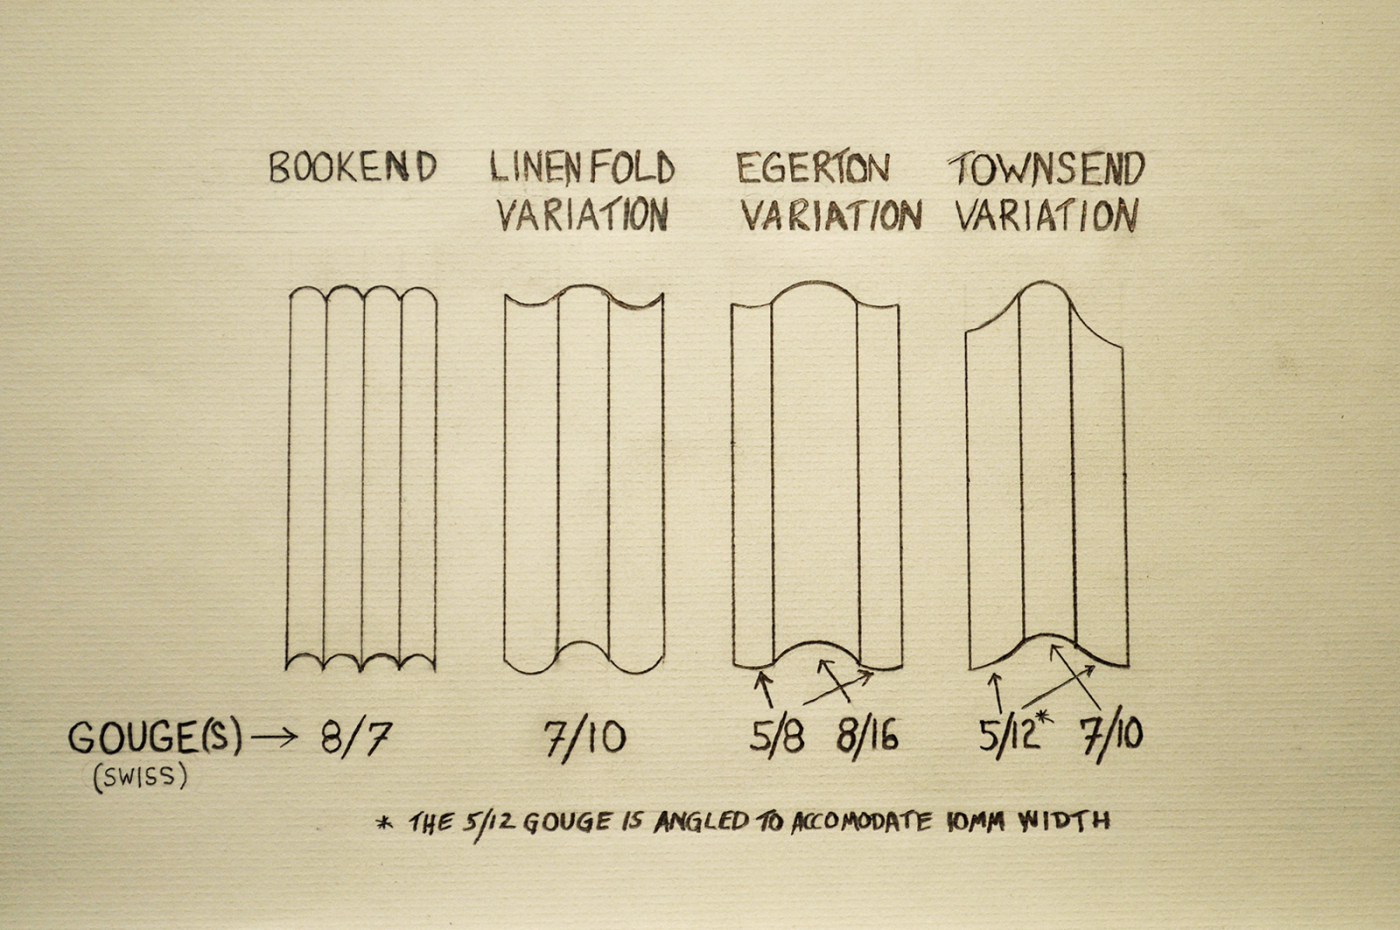
Variations of shop-made inlays
The drawing above shows the variations, plus it notes the gouges I use to develop these inlays for use in small tables, including pembroke, card and bow-front designs.
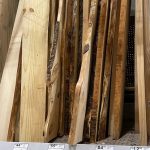
Veneer for Inlay
Choose a light veneer; holly, satinwood and maple are common Federal-period species. Thickness isn’t important. You can buy commercial veneer – usually about 1⁄40” – or slice your own. If you do slice your own, keep it at 1⁄16” or thinner to make it easy to work. Here, I’m using holly sliced to 1⁄32“.
You’re joining three or four pieces of veneer into a panel to create the inlay. (It’s not a lot different than joining a few boards to make a tabletop.) If all your edges are straight, flat and square to the face, you’ll have a successful glue-up.
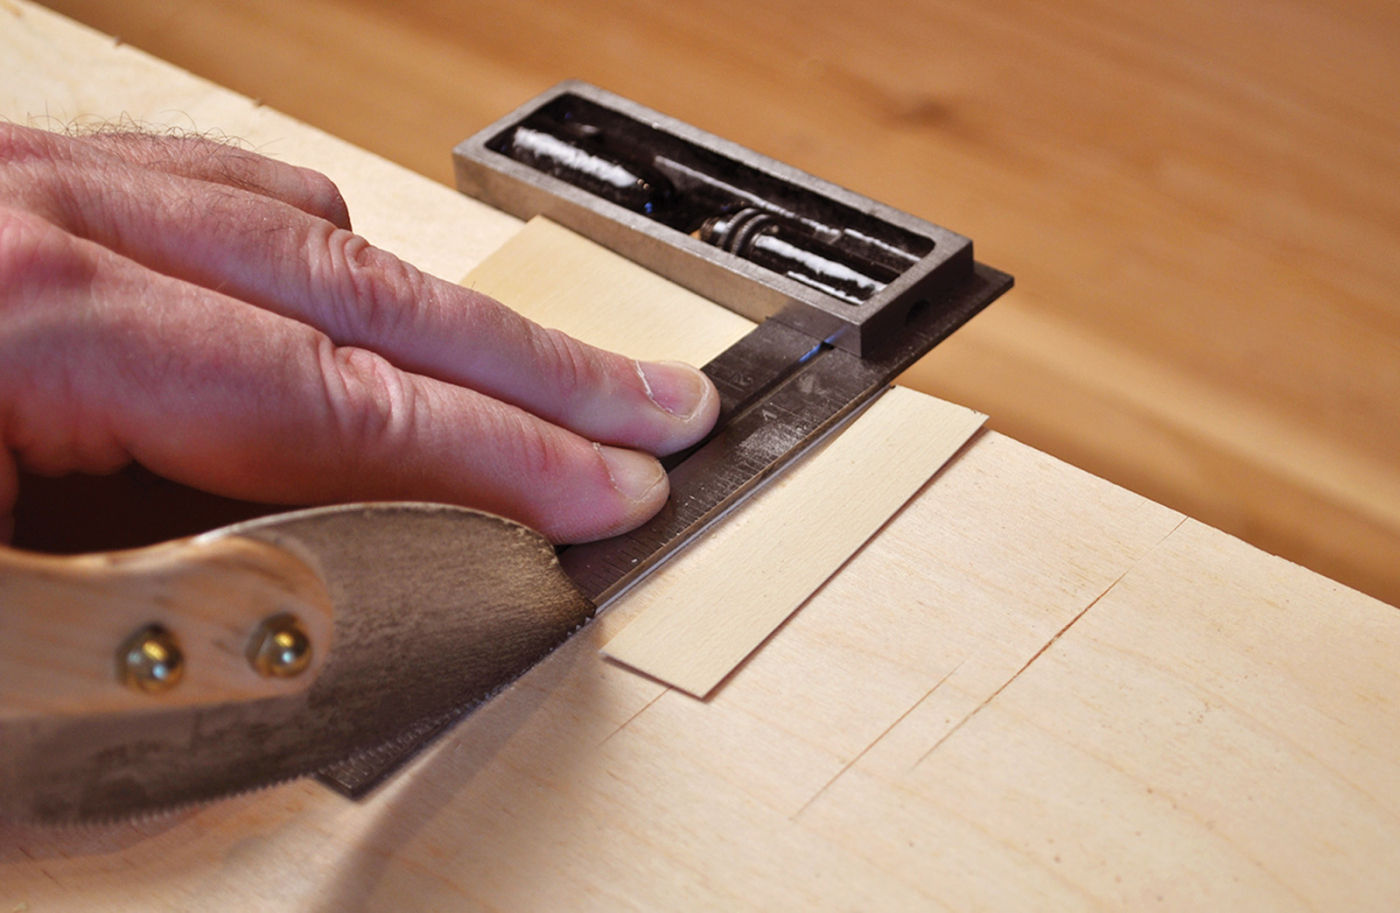
When using short pieces of veneer, you can usually get a good edge to join right off a veneer saw using a straightedge. Keep in mind, however, that one side of the saw blade is beveled. The piece coming off of the beveled side cannot be properly joined without preparation. Shoot that edge with a small plane to get it square to the face. Only the piece coming off the saw’s straight edge is square. Keeping track of those edges is something you get used to after a while, but it can be frustrating if you are new to veneer work.
Squared edges. If you rough-cut your inlay sections using a knife, you’ll need to square the edges prior to assembly.
If you cut the pieces with a knife, you should probably shoot the edges to ensure a good joint.
Tricks for Success
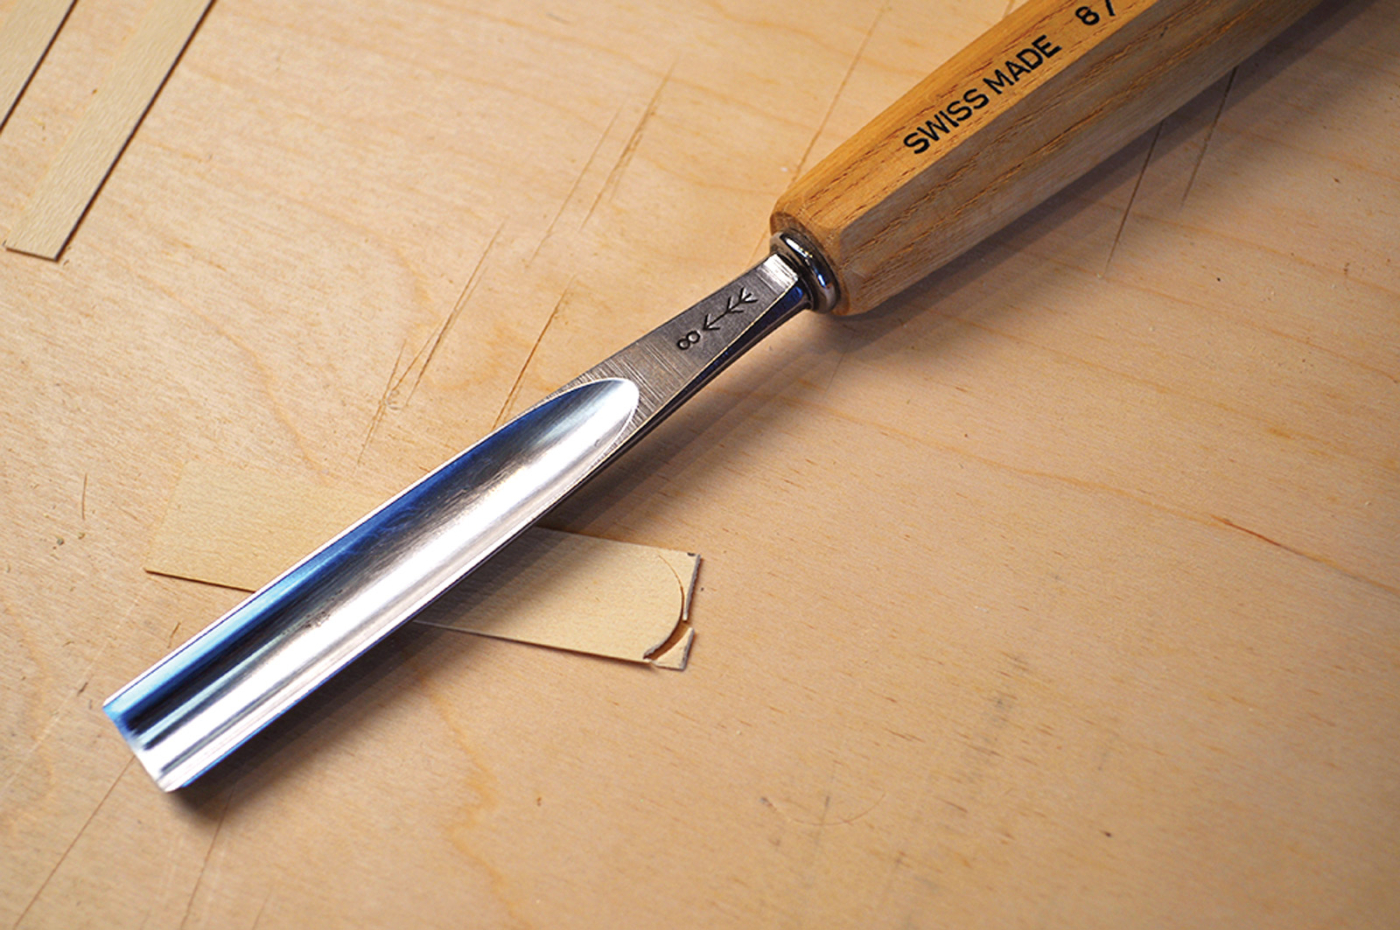
The secret to making these inlay designs and installing them precisely is to use a selection of carving gouges to create the pieces; the same gouge rounds the ends of the inlay and scores the edges of the recess into which the inlay fits. For that to work its best, the finished pieces need to be the same width as the gouge.
Sized by gouge. Section widths are best if determined from the chisels used to make the curved cuts.
Perpendicular. To achieve a crisp edge on the convex curve, keep the unbeveled face of the gouge at 90° to the work.
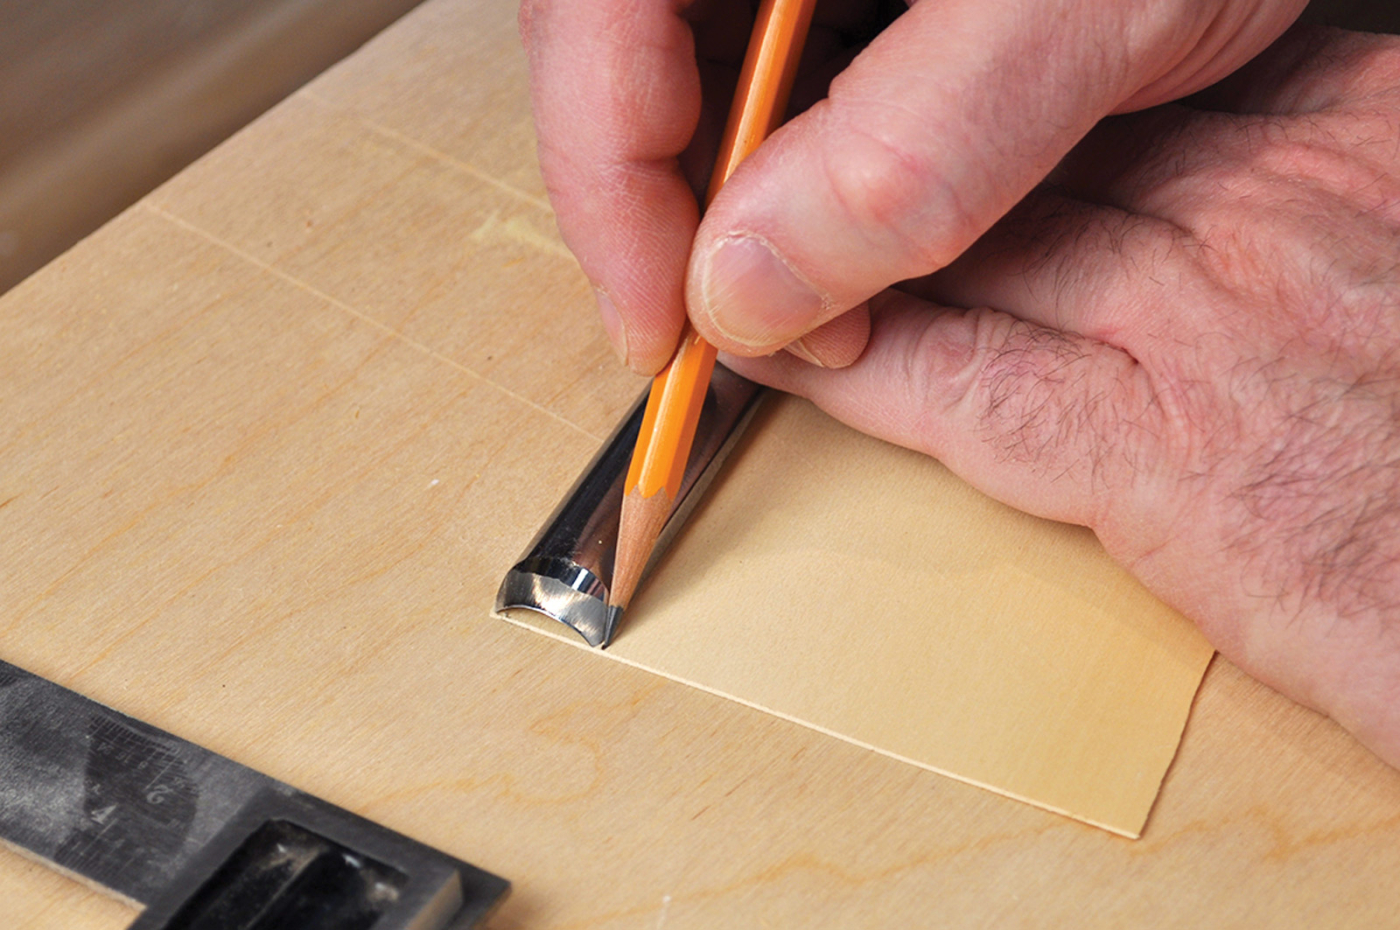
To get a precise width, purposely cut the rough pieces slightly oversized, then center the gouge cut in the oversized piece when punching the convex end. This leaves a little waste on either side. (The concave cut comes later.)
Dead center. Punch the convex shape on only one end of the sections with your gouge centered in the over-wide section; keep the curve aligned as you work.
Trim both edges with a small plane to remove that waste, leaving a piece exactly the width of the gouge. This shooting process also joints the edges of the veneer to provide straight edges perpendicular to the face.
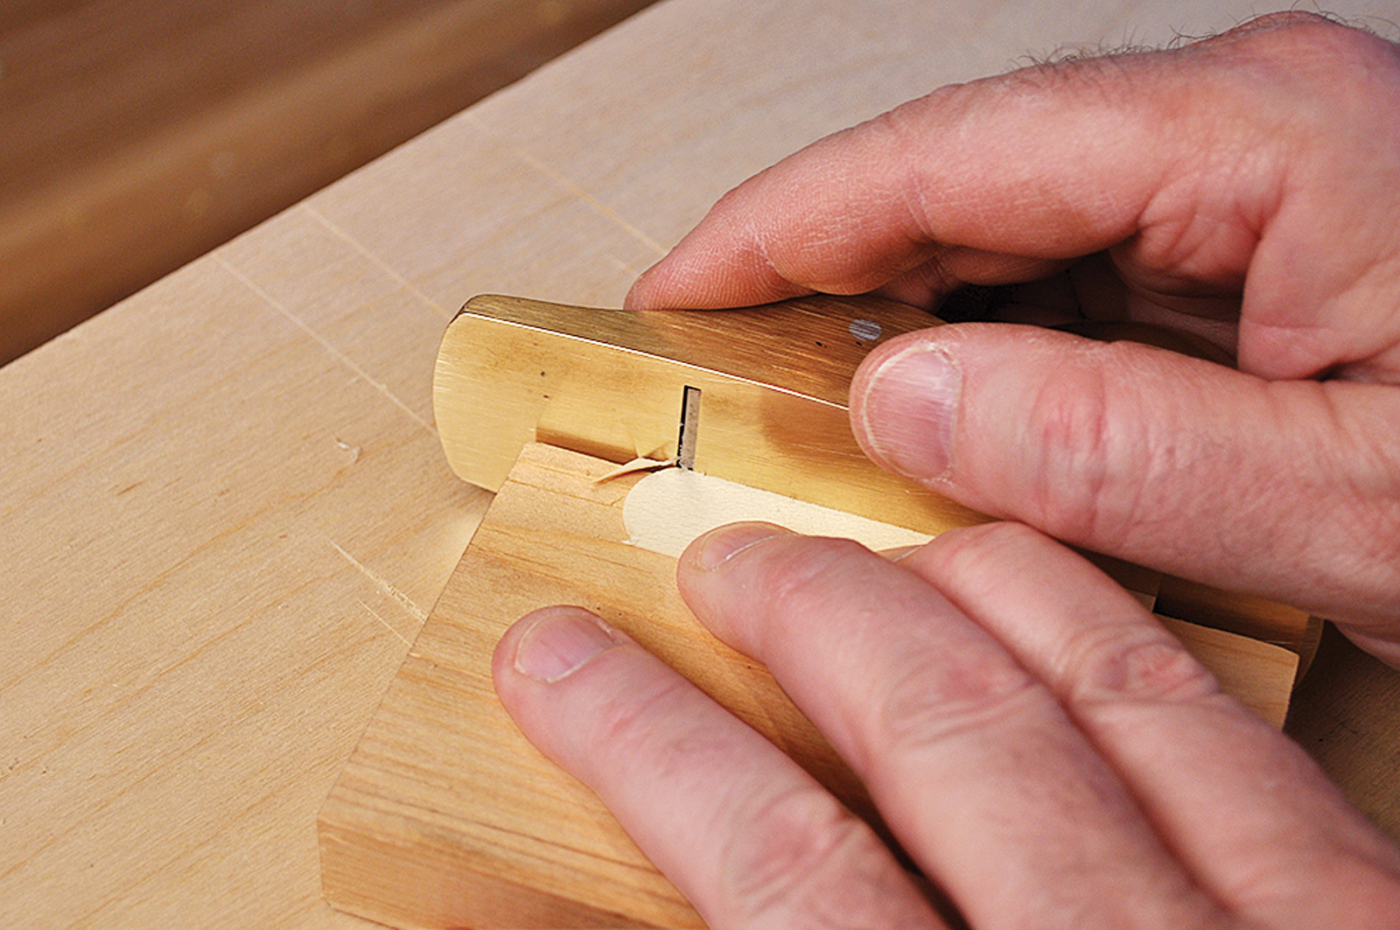
Shoot the edges. A few wisps off both sides of the rounded-end section keeps the curve in position and establishes the width.
When using a gouge to cut the ends of the veneer (and to score the substrate), mind the bevel direction. When the gouge cuts into the material, its bevel side compresses the wood on one side, leaving a cut that is not perpendicular to the face. To get a perpendicular cut on the bevel side, you must tilt the gouge to compensate for the angle of the grind.
Sand Shading
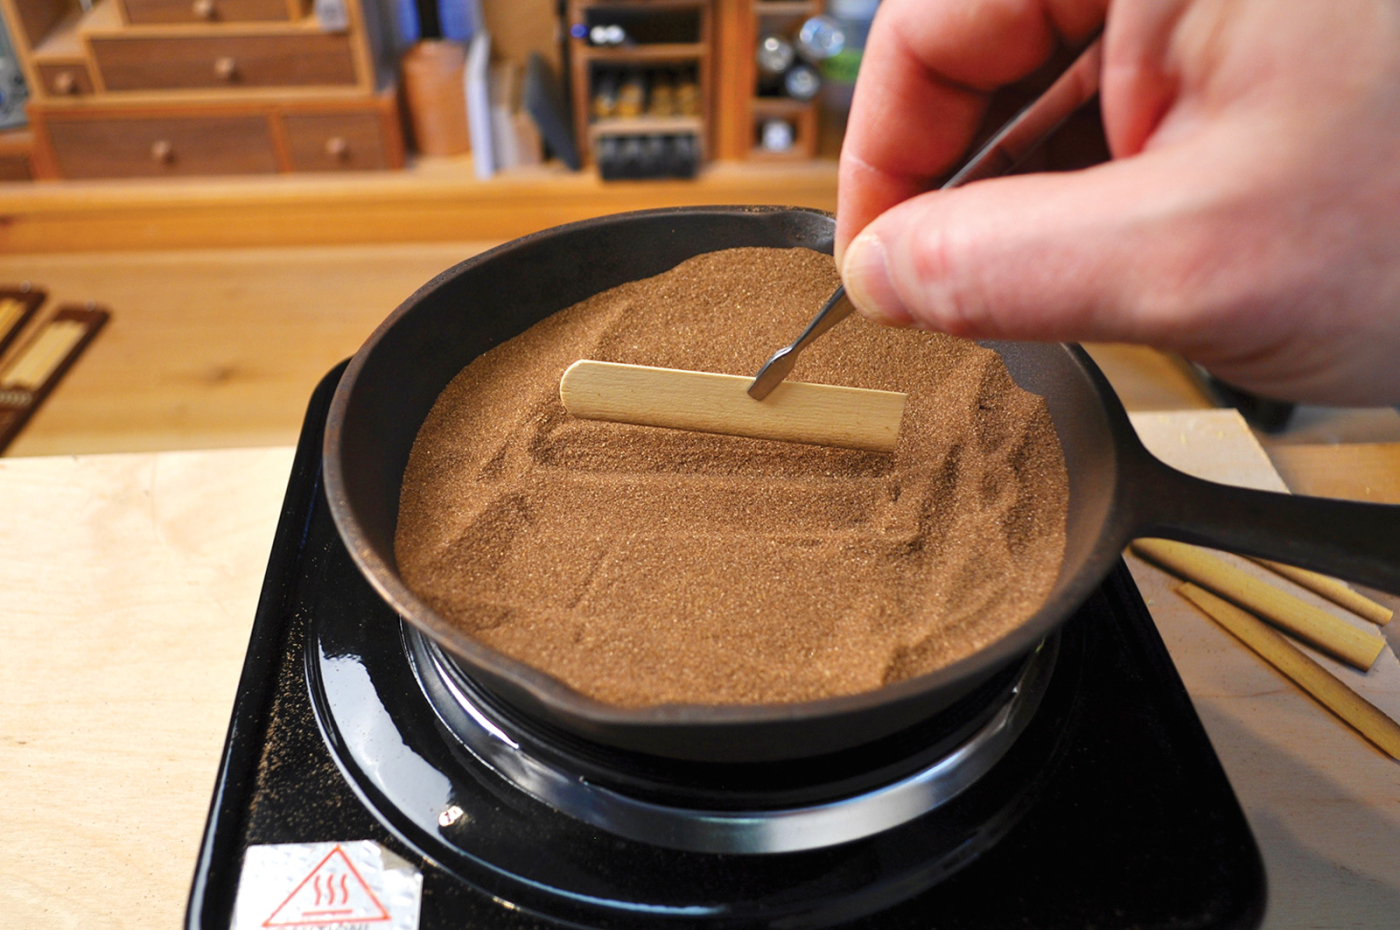
Toasted edges. Shading the edges of inlay pieces in hot sand imparts a three-dimensional appearance.
For sand shading, I use fine sand (available in most craft stores) but any sand works. Heat it in a cast iron pan on an electric hot plate. You can also use a pie tin on a kitchen stove, wood stove or camp stove, but if you’re bitten by the inlay bug and step up to more intricate sand shading, you’ll appreciate the benefits of fine sand and a cast iron pan.
Dip each piece in the hot sand until an edge is sufficiently shaded, then use a gouge to cut the concave end. If you cut the concave ends prior to shading, the fine tips would be damaged by the hot sand. Again, the gouge needs to be angled to produce a cut square to the face of the inlay.
Burnt ends. Cut the concave curves after sand shading; if you cut before shading, the fragile points could be damaged.
Next, arrange the pieces for the most pleasing look. I determine that arrangement by evaluating the shading and color of the each piece. The pieces are then taped in position, and the inlay is ready to be installed.
Special veneer tape is commonly used for this type of work, but in this case, masking tape is fine. We’re not going to hammer or cold press this veneer (in which case the almost-zero thickness of veneer tape is important).
Preparation & Installation
Use the actual inlay to mark off the recess needed in your workpiece. I find it best to locate the inlay, then use tape to hold the pieces firmly where I want them.
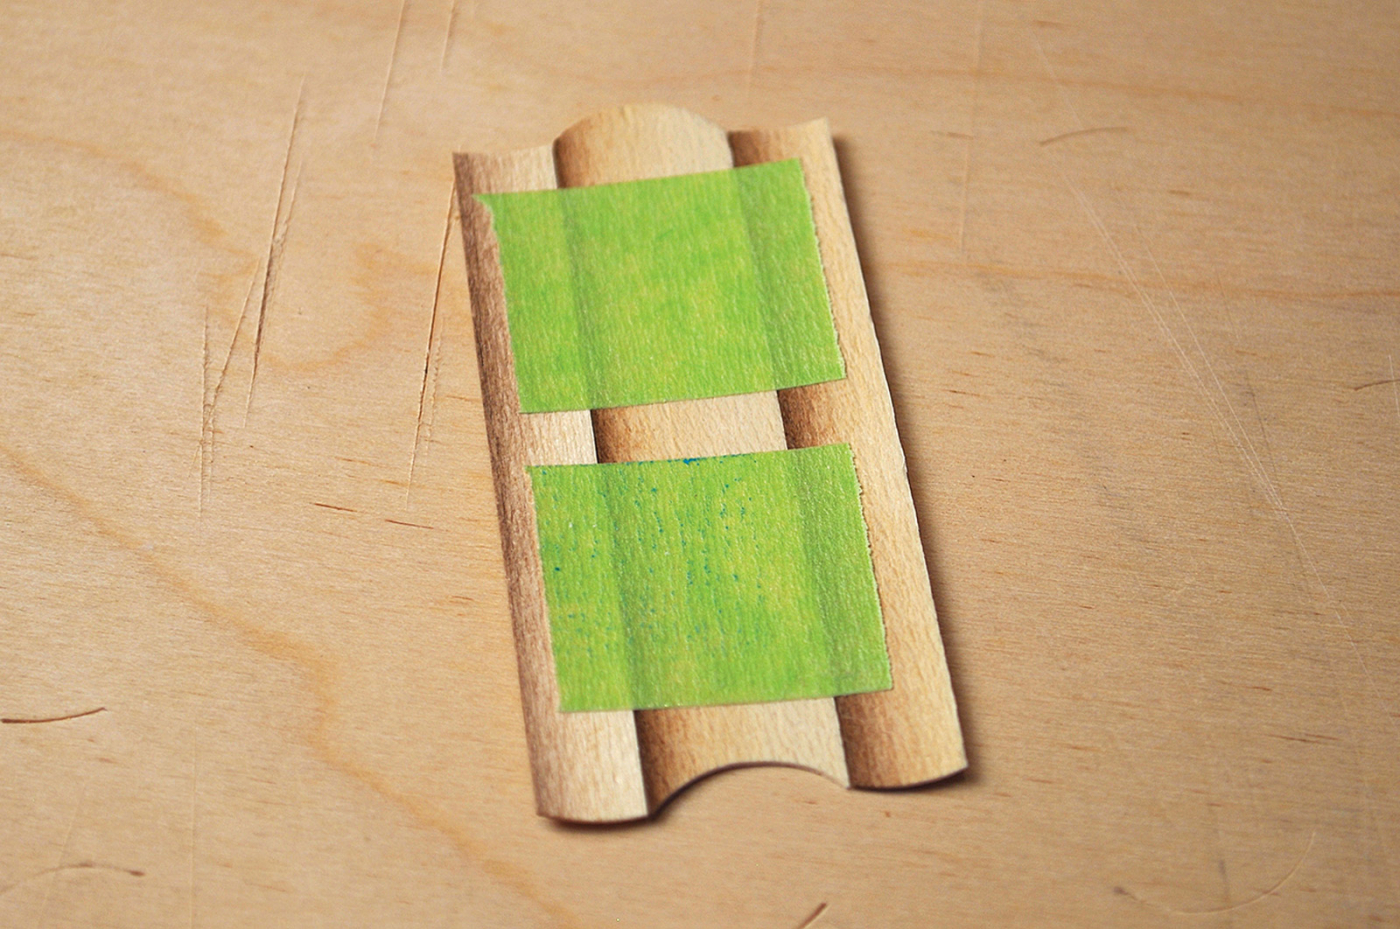
Stick together. Regular masking tape is sufficient to hold the sections tight as the workpiece is set into its recess.
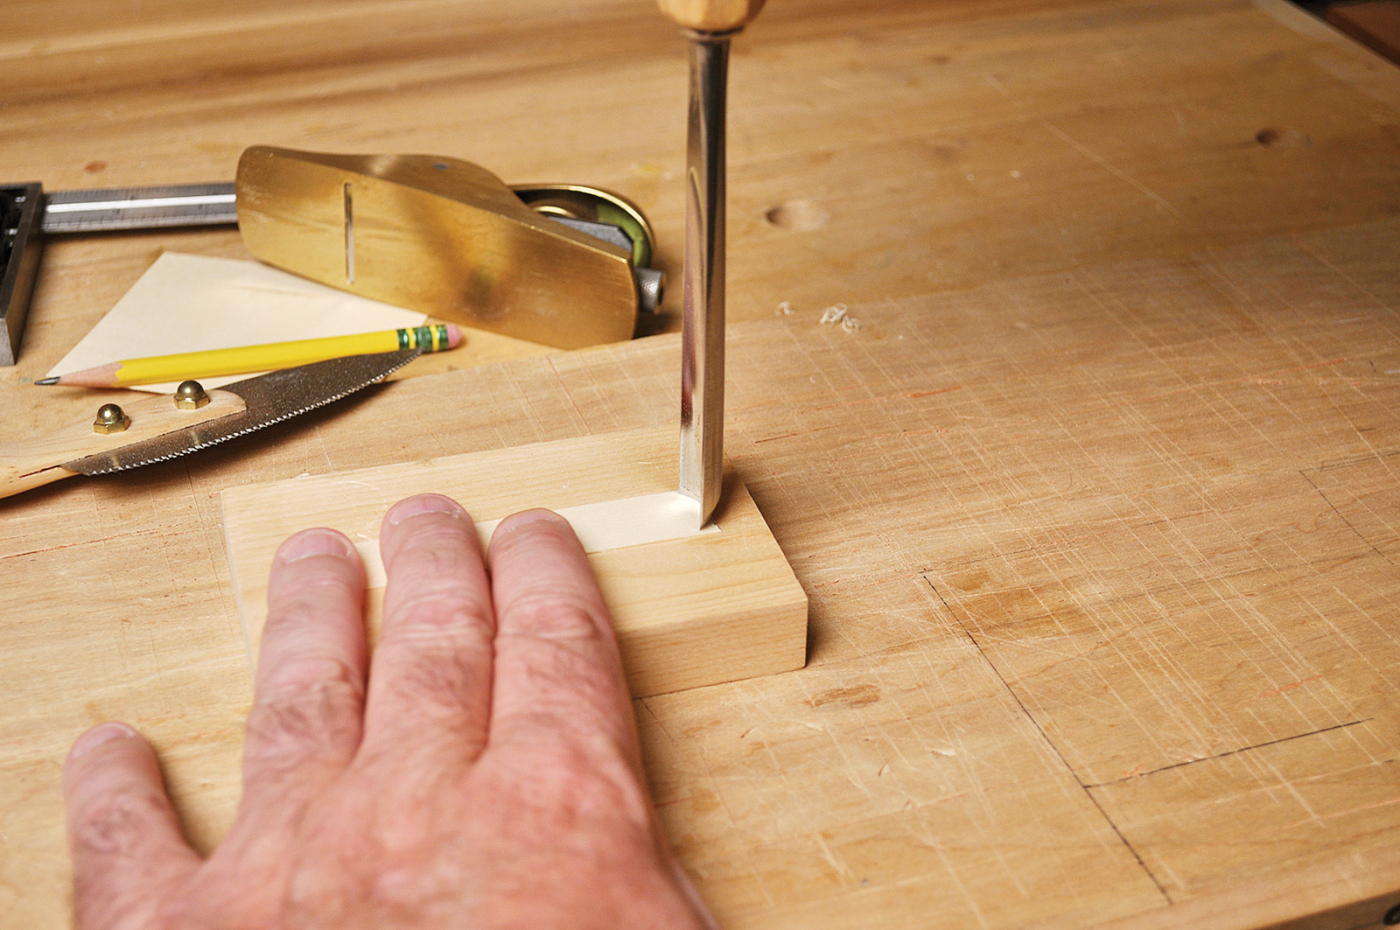
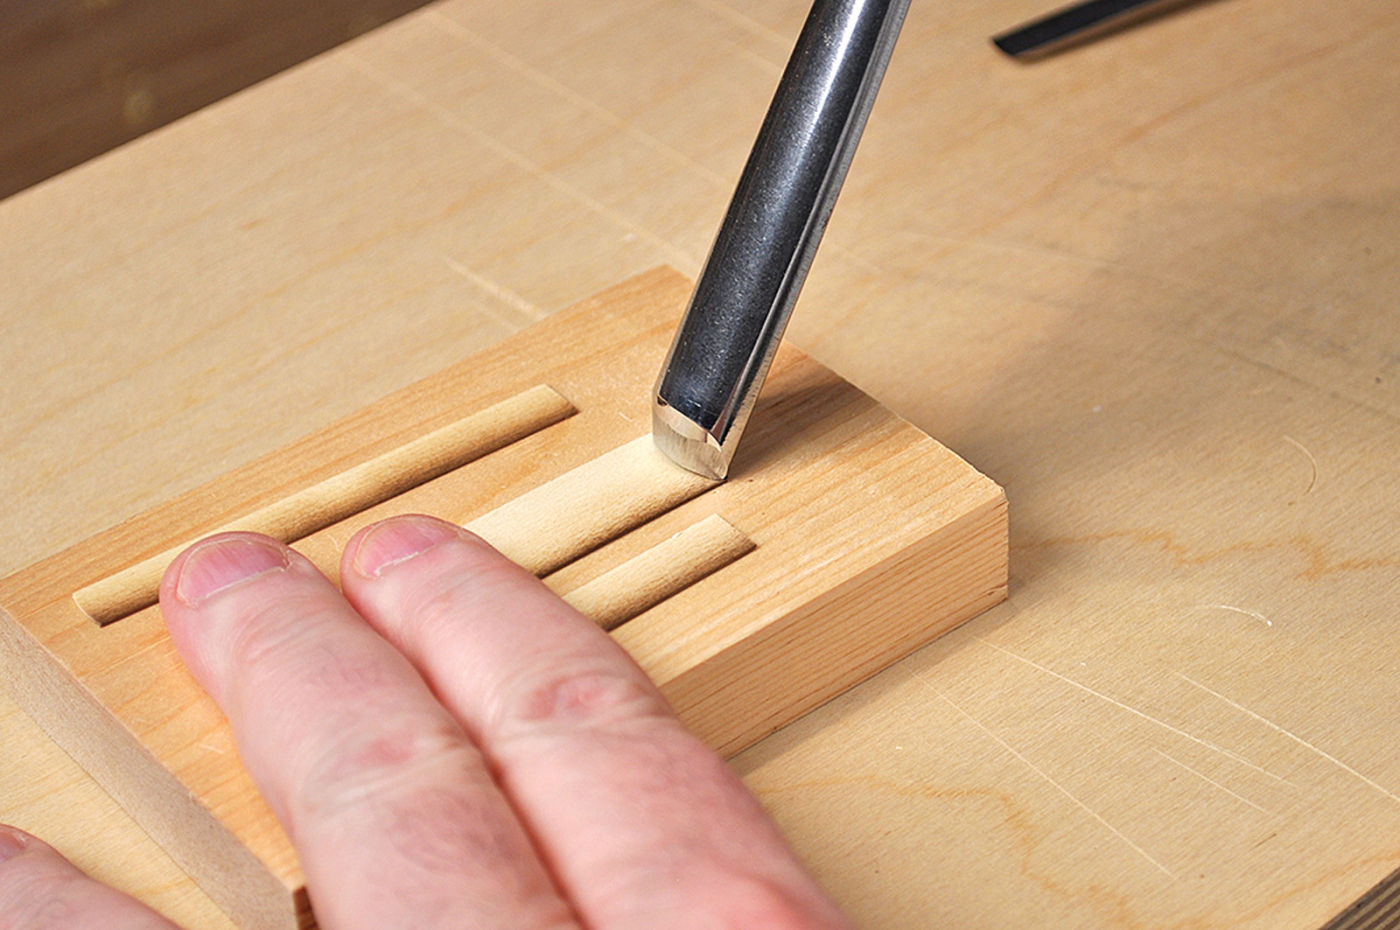
The most important step is to accurately score the substrate. Remember to angle the bevel of the gouge to make the cuts 90° to the surface. Score each rounded end at both the top and bottom of the inlay. Next, I score one straight edge with a scalpel, cutting right through the tape, then re-tape the scored side and cut the other.
Pare the waste around the outside edges using a sharp chisel, then clear the middle with a small router plane.
Set your inlay into the substrate with hide glue. As it is clamped, the glue will move into the inlay, through all the little cracks and gaps.
I clamp my inlay under a caul faced with a cork pad so pressure is evenly distributed. It helps to cover the cork with packing tape, which shuns glue and preserves your cork.
When you remove the caul, there will be glue squeeze-out. No worries. After you scrape everything clean, any residual hide glue in the pores of the wood will be invisible to the finish. (I’ve found that the same is not true of white or yellow glues.)
These are only four variations of book inlay. Of course, any number of additional versions can be created by varying the section width, gouge selection and gouge angle. It’s your choice: You can stick with the period-correct designs or get creative.
Here are some supplies and tools we find essential in our everyday work around the shop. We may receive a commission from sales referred by our links; however, we have carefully selected these products for their usefulness and quality.