We may receive a commission when you use our affiliate links. However, this does not impact our recommendations.
It only looks easy. Successful gluing is a complex process involving many factors and decisions.
Prepare your wood, pick the right glue and prevent problems.
Baseball bats, utensils, turned items and small carved objects are usually made from one piece of wood. But most woodworking projects are made under the premise of “some assembly required.” Face it: Most everything we make with wood involves one or more boards joined together. Without something to tie those boards together there is no gain in structural integrity.
For Basics Week we’re presenting a special offer on our PopWood+ membership, where you can save 25% off your first month or full year when you use the code BASIC23 at checkout.
There are several ways to secure boards together. The first is with a mechanical fastener such as nails, screws or bolts. Mechanical bonds are point-specific and once the fastener is removed the bond is lost. The second way is worked joints, where interlocking or fitted wood pieces join together. Worked joints include dovetails, mortise-and-tenons, dowel joints and housed joints. The third way to join wood is to use some kind of glue. When properly used, most modern glues are stronger than the wood they are used on. A fourth way to join wood is to combine two or more of these methods.
Glue is the most often used means of joining wood and by far the most misunderstood. Cutting a dovetail is a learned skill. Gluing two boards together is much easier. But in the long run it’s the glue between those dovetails that locks them together and it’s the glue that will continue to hold them together throughout time.
If the glue fails you can bet that the joint will fail. However, if the joint fails it might not mean that the glue has failed as well. I believe that understanding how to glue wood together is an inherited trait – we just know how to use it. Nobody ever teaches us how to put the stuff on or explains how it works.
And the two most common factors of gluing two pieces of wood together are almost never considered: the wood and the glue. Before you grab a bottle of glue for your next project ask yourself these simple questions. How should the wood be prepared? What glue is best for this specific task? What is the correct procedure for applying glue, and how can I avoid gluing problems and correct them if they happen?
Prepare the Wood for Gluing
Any wood that is to be glued together should have the same moisture content and be at the same ambient air temperature. Good practice is to place both the wood and glue in the same environment for at least 24 hours before machining and gluing to allow both the wood and glue to acclimate. This will take place automatically if you store everything in the same relatively warm place.
The moisture content of the wood when glued should be the same moisture content that it will have once the glued pieces are put into service. The average moisture content for interior woodworking is around 8 percent, but that can vary a few points depending on where you live. Exterior wood averages between 12-18 percent moisture content. The higher the moisture content, the more challenges there are with curing.
How wood is machined before gluing is especially important. Mating wood surfaces should be smooth, flat, have parallel surfaces and be free from damage to make good contact. Machined wood, such as wood processed on a jointer or planer, has a rough uneven surface when viewed under a microscope. When two pieces of machined wood are brought together the surfaces only touch at certain places and can easily be pulled apart. However there have been times when I’ve handplaned the surface of two pieces of wood and set them on top of each other and had a difficult time separating them (this is called “specific adhesion”).
Imagine the effectiveness of a glue joint if you have a perfectly cut surface of the mating parts. At one time I was told that you should roughen the surfaces of the mating parts, but this can damage the wood cells and add dust fibers to the pores and hinder the wettablilty of the glue. A smooth, knife-cut surface is best for bonding.
Glue manufactures recommend that you glue your wood together when it is freshly cut. A good rule is to try to cut and glue in the same day. The longer the wood has to set before being glued, the more opportunity there is for damage, contamination and moisture changes at the surface. Gluing wood sooner rather than later also minimizes the chance for any distortion in the wood. A clean and dry surface is essential.
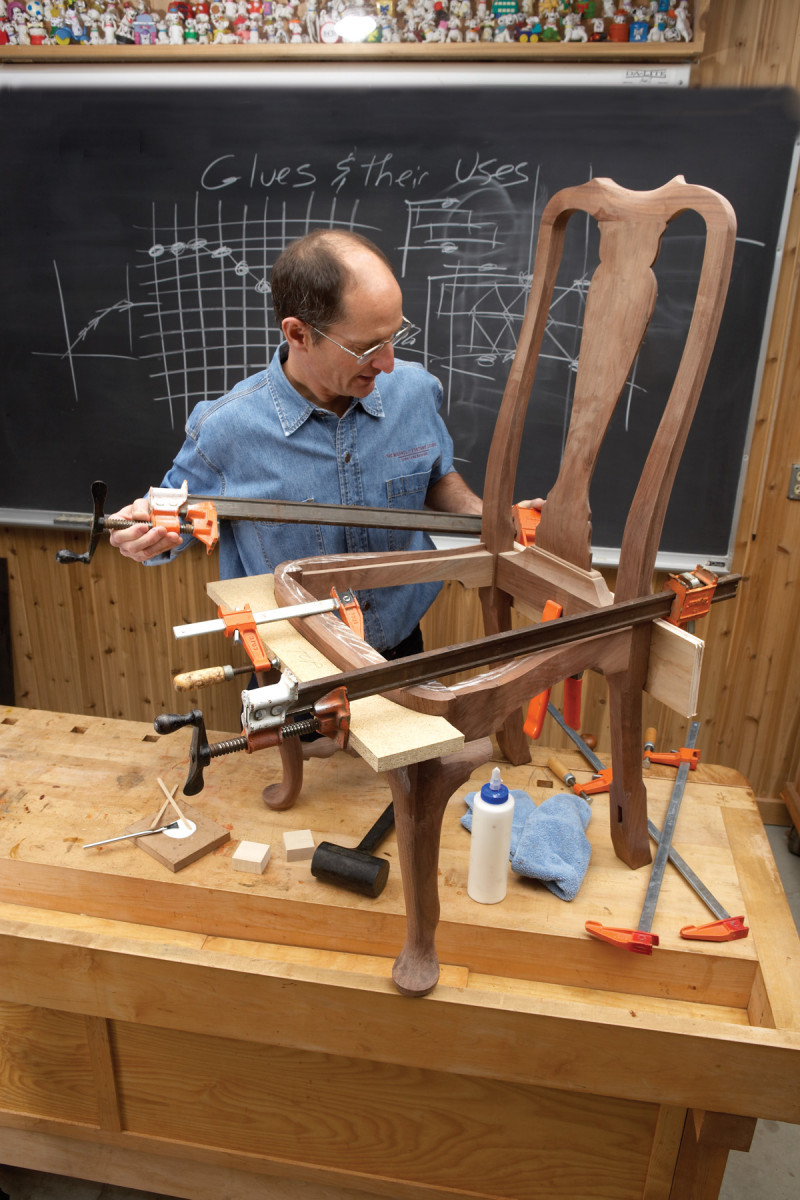
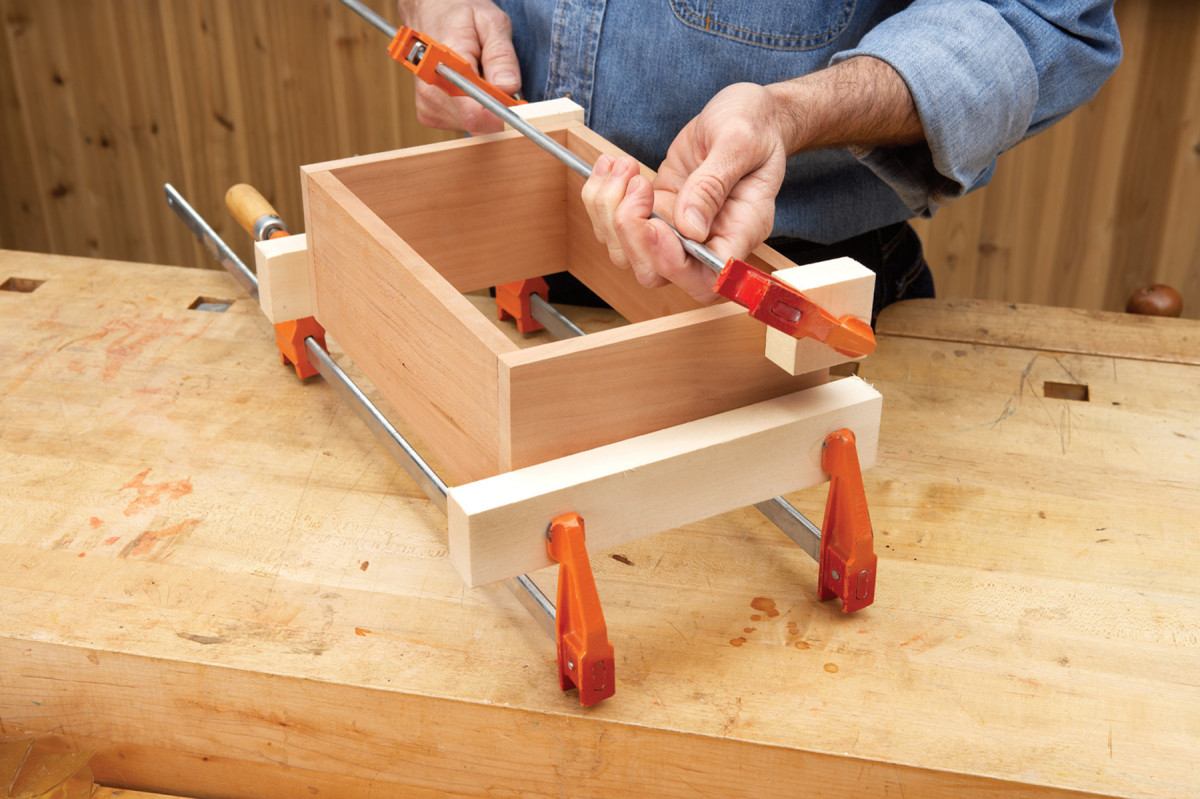
It’s a good idea to make a trial assembly. All joints and parts should fit together without excessive clamp pressure. If you have to force a joint together you will be gluing stresses into the project that may cause the joints to fail. A test run will ensure that your clamps are open and ready and that you have thought through the gluing sequence.
It’s a good idea to use small blocks of wood between the clamp and wood to protect finished and exposed surfaces and disperse the point pressure.
Selecting a Glue
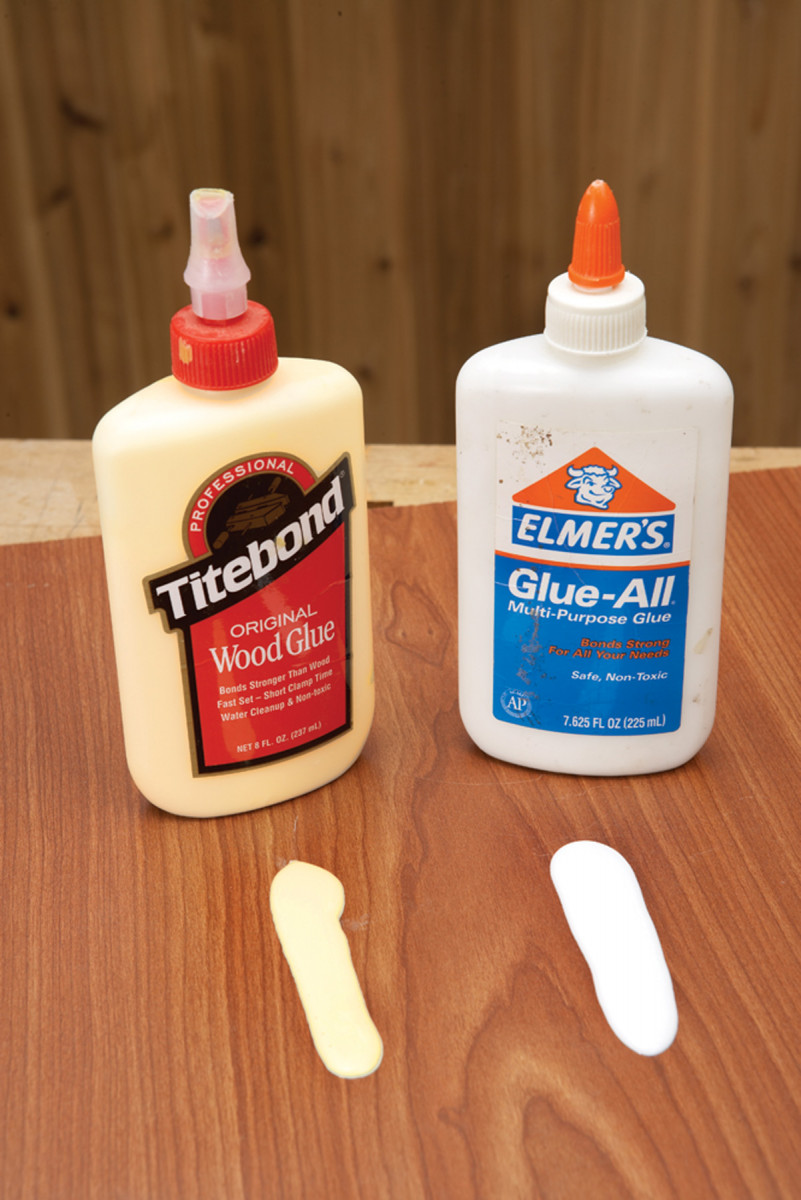
Good old glues. Polyvinyl acetates (White) and aliphatic resins (Yellow) are standard all around woodworking glues.
More than likely you have in your shop a half-empty bottle of yellow glue with no cap on it. I guess the crusty glue around the spout serves a purpose after all. Don’t worry, this qualifies you as a typical woodworker.
However, I have to ask a few questions: Is yellow glue really the best choice when it comes to bending wood or veneering? Would it be the best choice for gluing together green wood for bowl blanks or exotic woods for a cutting board or for outdoor furniture?
Would you use yellow glue for gluing down a laminate countertop or a plastic cover over a fixture? Is yellow glue the best glue for inlay work which might involve wood, stone, shell, metal or leather? Is it the best choice for restoration, conservation or repairing a chair? Or what about the joinery on fine furniture? Would it be the best choice for cabinets that will be subjected to high heat or moist environments?
Don’t get me wrong, yellow glue is a great product, but for many woodworking situations there is a better choice. Choosing the right glue can be a tough decision, especially with so many choices. Work-ability, bond-ability and price are key considerations. The following is an explanation of the seven families of glue used in woodworking.
Hide Glue
Hide glue comes from animals and is one of the oldest known glues. It’s sold by gram strength, a complex test of physical characteristics and rigidity under specific conditions. There are grades of hide glue ranging from 85- to 512-gram strength. Woodworkers typically use hide glue at a gram strength between 164 (longer assembly time) to 251 (fast assembly time).
Flake or pearl hide glue must be mixed with water and heated in a double boiler or glue pot to about 140˚. The goal is to make a liquid of about the viscosity of white or yellow glue. As the water in the glue pot evaporates you need to add in more. In the old days you could tell where the cabinet shops were by smell; hide glues can have a strong odor if not prepared or used properly.
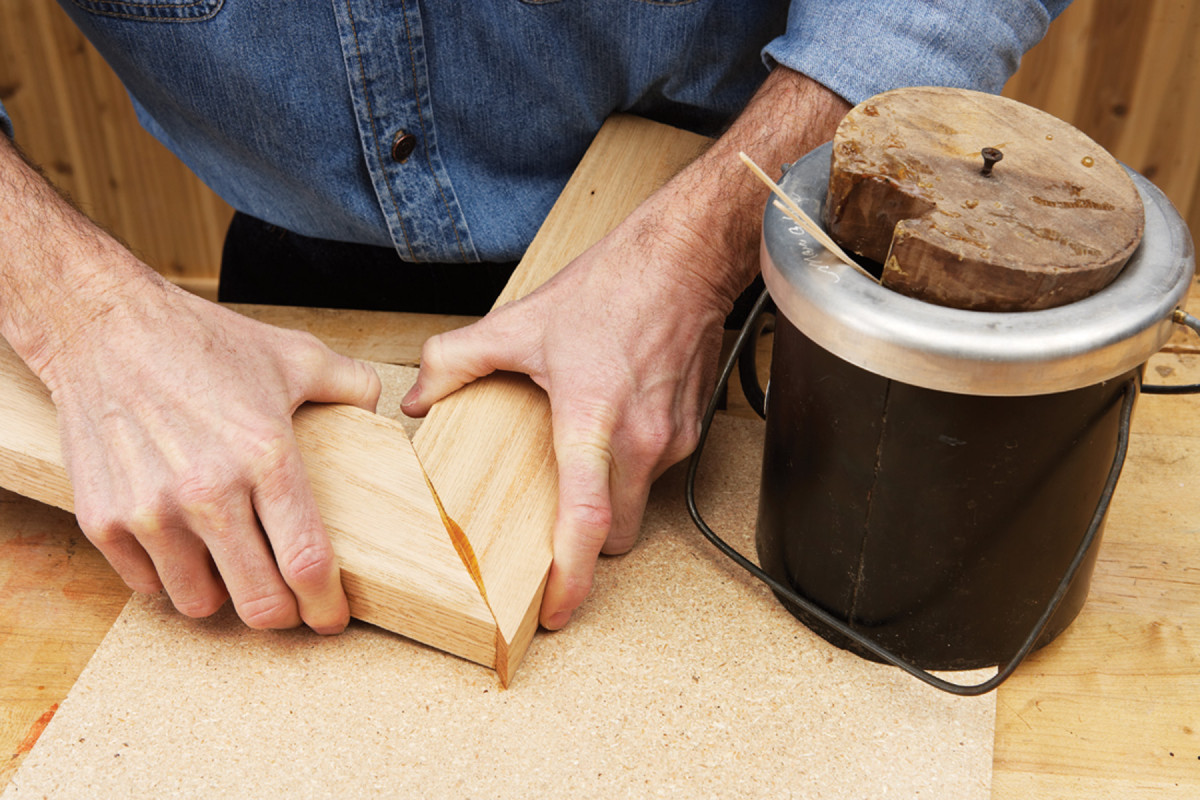
Rub the right way. Hide glue grabs as it cools, making it possible to make complex assemblies without the use of clamps.
Hide glue bonds as it cools to create a strong union that is reversible and resistant to creep in the joint. Because it grabs as it cools, the need for clamps can be eliminated, so complicated angles can easily be glued. It sands well, can take stain, has an indefinite shelf life in dry form, and what you don’t use today can be recycled for future use.
It’s a resilient glue that is great for interior furniture and cabinets but it has no ability to withstand exposure to water. Hide glue is one of the glues of choice for period furniture makers, conservators, musical instrument makers and fine furniture makers. With practice it is a great glue for veneering.
Hide glue is available in traditional form and in a ready-to-use liquid. Liquid hide glue has anti-gelling agents to prevent it from getting hard in the bottle and it cures through moisture loss rather than cooling so it has a longer open time. Liquid hide glues have a shelf life of about a year.
PVA and Aliphatic Resins
White (polyvinyl acetate) and yellow (aliphatic resin) glues are in the thermoplastic family and are made from synthetic compounds. Both are ready to use from the bottle, water-based, have low to no odor and are non-flammable. White and yellow glues are temperature sensitive, have a high degree of strength and are used for interior work.
They’re best suited for well-seasoned wood and have about the same bond strength. They cure in about 24 hours in normal conditions. Neither is water resistant; chemically they have similar characteristics. Both shrink while curing as they lose water. Neither is hard enough for structural bonds. There are cross-linking polyvinyl acetates (PVAs) available that are rated as weatherproof (Type II) or waterproof (Type III).
White glues were introduced in the late 1930s and are one of the handiest glues available. They dry clear (not transparent), have great strength, provide some gap filling properties and cure at room temperature. White glue has a longer working time than yellow glue. It is also a little thinner and has a little less initial tack than yellow glue. Some furniture makers prefer white glue for these reasons. Some downsides are that it is not stainable and it can allow the wood to creep when movement takes place. White glue also tends to clog sandpaper.
Yellow glues hit the scene in the early 1960s. They are white glues with additives (resins) that give them different characteristics. Yellow glues are thicker, tack faster and can be applied in cooler temperatures than white glues. They have a shorter work time and a faster clamp time and offer slightly better resistance to heat, but they are still temperature sensitive. Yellow glues are less likely to allow joints to creep. They sand much better than white glues (but still can clog sandpaper). Yellow glues have a better ability to bond to woods with slightly higher moisture contents.
Some downsides of yellow glues are that they dry with a yellow line that is noticeable in light-colored woods. They also have a shorter working time which can cause some urgency when applying. Yellow glues are great for interior furniture and cabinets, especially in production work.
“Cross-linking” and “Specific Purpose” PVAs are formulated to be water resistant or waterproof, and some can be cured by radio frequency. There are special glues with non-drip formulas, extending agents which allow for a greater working time, gap filling, non-bleeding glues for veneering and even a version that shows under UV light. They even make PVA glues with glitter in them.
Urea Formaldehyde
Urea formaldehydes (also referred to as plastic resins) are water, heat and creep resistant. They are great glues for most indoor furniture and cabinets. They are in the family of thermoset plastics that cure chemically and require mixing to harden. They spread easily and are impervious to most solvents once they cure. Resin glues tend to generate heat as they cure which can cause issues with some inlay materials. They have a long working time which causes the clamp time to be long as well, up to 12 hours.
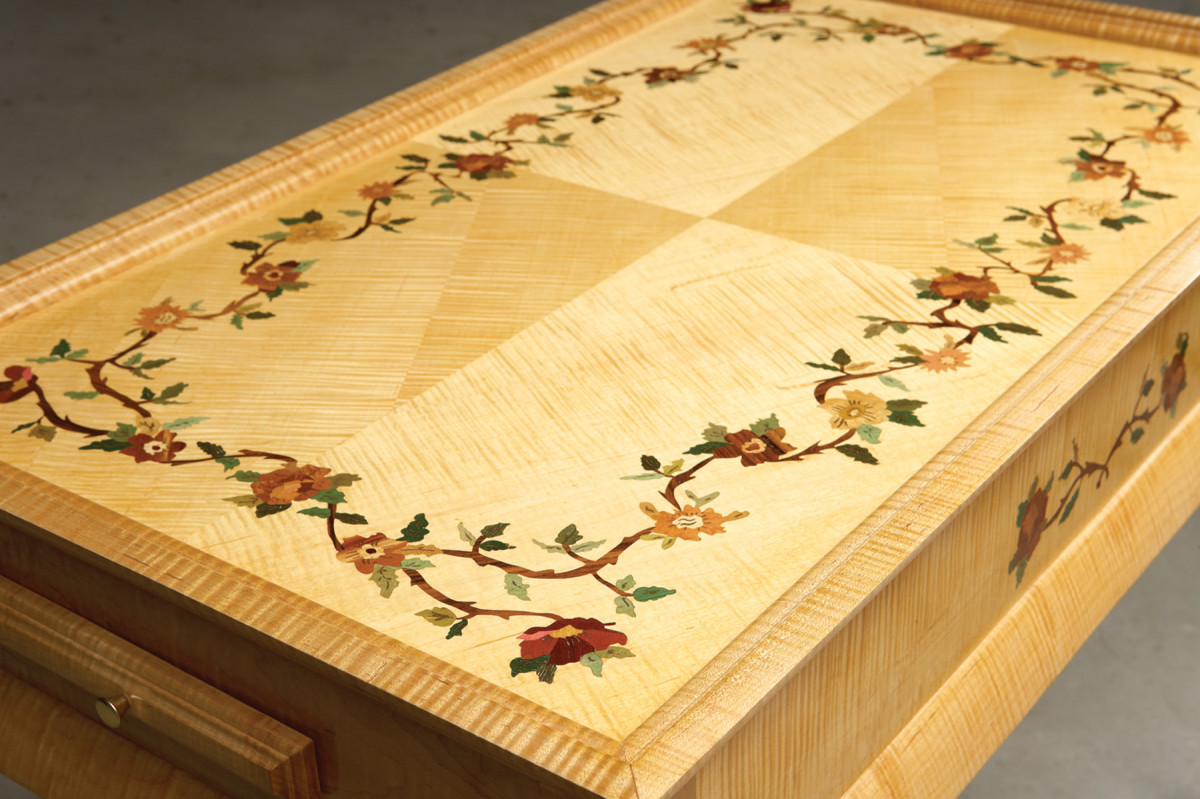
Flat forever. Plastic resins form an ideal bond for complex veneering (as in this table made by Markee Adams) and other tasks where creeping is an issue.
They are temperature sensitive during curing and must be applied at 72˚ Fahrenheit or more. After they cure, temperature is not an issue. They are not the best gap-filling glues and they have a darker color, although some manufactures sell additives that lighten the resin. Resin glues can also be cured through a process called “high frequency gluing,” which takes the normal cure time from 24 hours to just a few minutes.
Urea formaldehyde is one of the best choices for veneering, laminate bending, structural applications, and cabinets and furniture that could be exposed to excessive heat or higher humidity.
Some of the downsides are that they have a short shelf life and can cause health problems. They require carbide cutters when cutting because the cured hardness is brutal on tools (as is cured squeeze-out on hands). Wear safety glasses and a dust mask when working, machining or sanding.
Epoxy
Epoxies are great waterproof glues. They are two-part glues that produce strong bonds on many different materials including some plastics, stone, metals, ceramics, plastic laminates and resinous woods such as teak or rosewood. Epoxy loses about 1 percent of its volume as it hardens so there is basically no shrinkage, which makes it a good gap-filling glue. It dries with a clear or slight yellow color, but non-yellowing and high-clarity epoxies are available. It’s also possible to add dyes to turn it any color you wish.
Epoxies can be rolled, brushed or troweled and they can penetrate wet surfaces well, but they have little or no initial tack, so clamping is important to keep parts from sliding. Clamp pressure should be light with epoxies to prevent total glue squeeze out. Epoxies sand easily and are solvent-resistant but they are not heat- or UV-resistant.
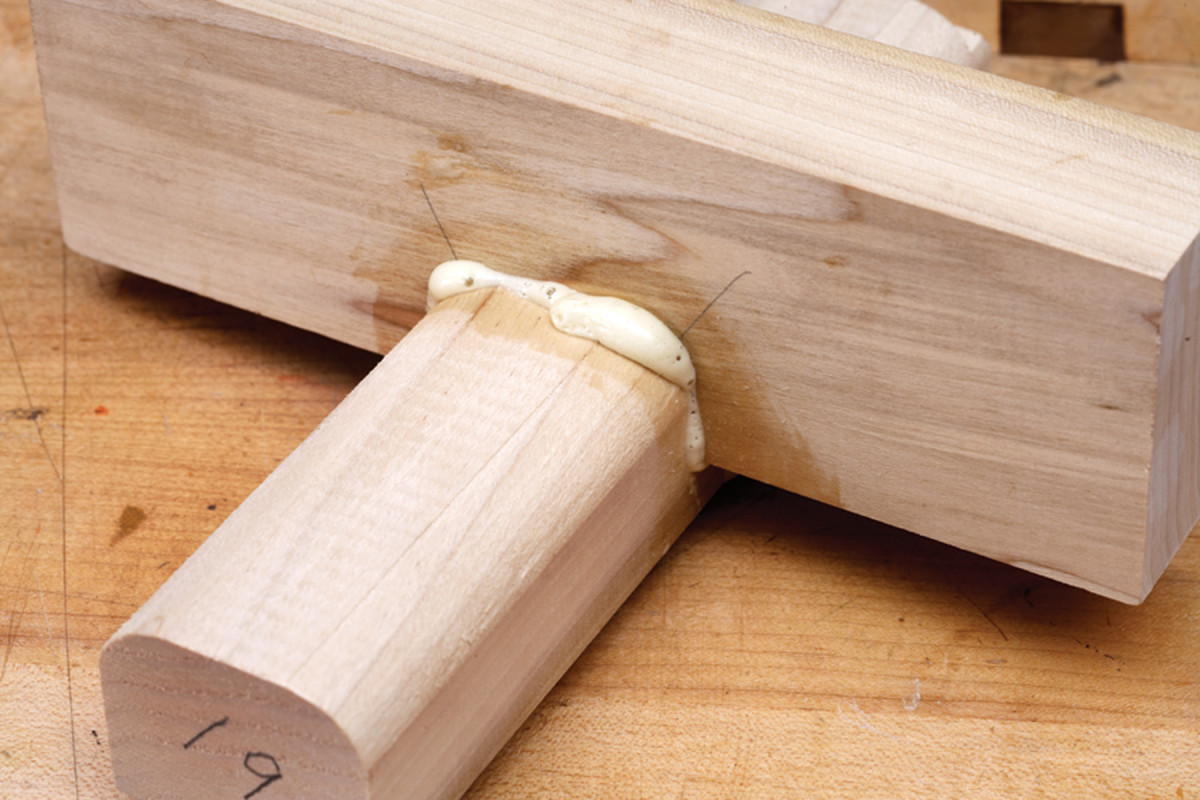
Epoxies are a great choice for outdoor furniture, boatbuilding, working with exotic lumbers, inlaying just about anything and structural applications. They are shock resistant and thus perfect for gluing together items like wooden mallets.
Polyurethane
Polyurethane glues have been around for quite some time but didn’t hit the American woodworking market until the early 1990s. Polyurethane glues have about the same cured strength as yellow glues and stick to just about anything. They foam during the curing process, and the foam that fills gaps is largely air, not solids.
At first they were touted as waterproof but they are only water-resistant. Polyurethanes are heat-resistant and rigid so they are good at resisting creep along joint lines. They are activated by moisture so dry wood should be moistened first and they offer about a 45-minute working time.
Filled with foam. Polyurethane glues foam as they cure. This adds no strength to any gaps and can be a pain to remove.
Because polyurethane glues have a tendency to sit on the surface of the wood instead of being absorbed into it as with water-based glues, they won’t create a staining issue if cleaned off properly. However any polyurethane that remains on the surface will not accept stain. It’s a good glue choice for outdoor furniture. Polyurethane glues are difficult to clean up while they are still liquid but once cured they can be sanded or chiseled off. They work well with exotic woods and do not have a tendency to become brittle with age like most glues. They have a short shelf life and are expensive.
Wear gloves when you apply it and be prepared for some real challenges during cleanup around the joint because of the expanded foam created as the glue cures. Polyurethane glues will bond anything to anything and they excel at gluing woods with higher moisture contents.
Cyanoacrylates or Super Glues
Super glues were developed at Kodak Laboratories in 1942 but were shelved for several years until the 1960s when they were introduced through the TV show “I’ve Got a Secret.” They were submitted to the FDA as a material to hold human tissue together for surgery. Today super glues have found their way into every imaginable application.
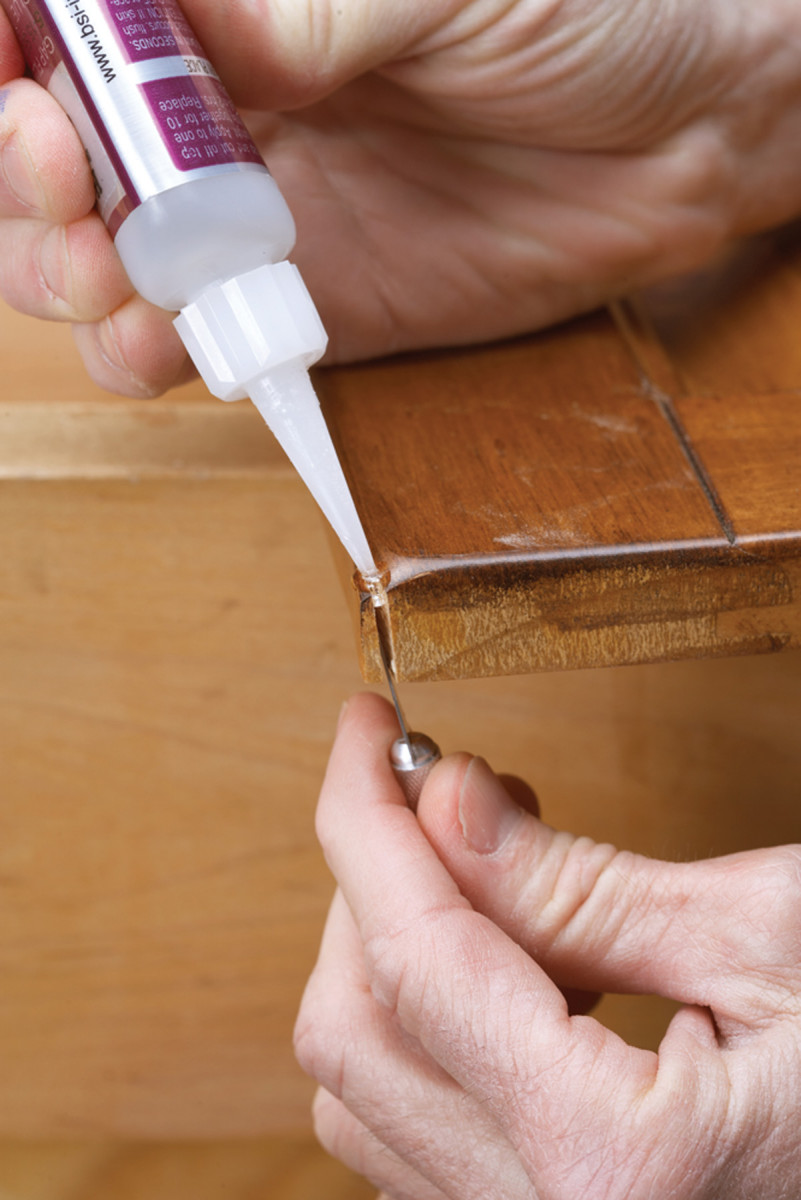
Quick fix. Cyanoacrylates (super glues) don’t have much strength, but are ideal for quick repairs.
Super glues cure to a solid that is similar to a sheet of acrylic. They can be activated by many ways depending on the formulation but the most common way is by reacting with the water in the wood. If you choose to use an activator or accelerator be aware that the bond will be slightly weaker and more brittle. They are expensive, have a short shelf life but set in a matter of seconds. They have great pull strength but not very good shear strength. Super glues come in different viscosities and the thicker formulations have good gap-filling properties. They resist moisture but can’t handle heat. They sand fairly well but don’t take stains.
They are great in woodworking for quick fixes and repairs, and are often used as wood filler with veneers and woodturnings. Be careful using accelerator on woods that are finished. CA glues are not suited for most wooden joinery but are handy for craft items. It is now believed that CA glue bonds get brittle in a very short time period which can cause varying degrees of failure.
Contact Adhesives
Contact adhesives are made from synthetic rubber compounds. They offer an initial tack better than any other glue, and are typically used to bond laminate or veneer to a substrate, or to bond any other impervious surfaces. There are two primary types: solvent-based and water-based but both offer the same characteristics when cured.
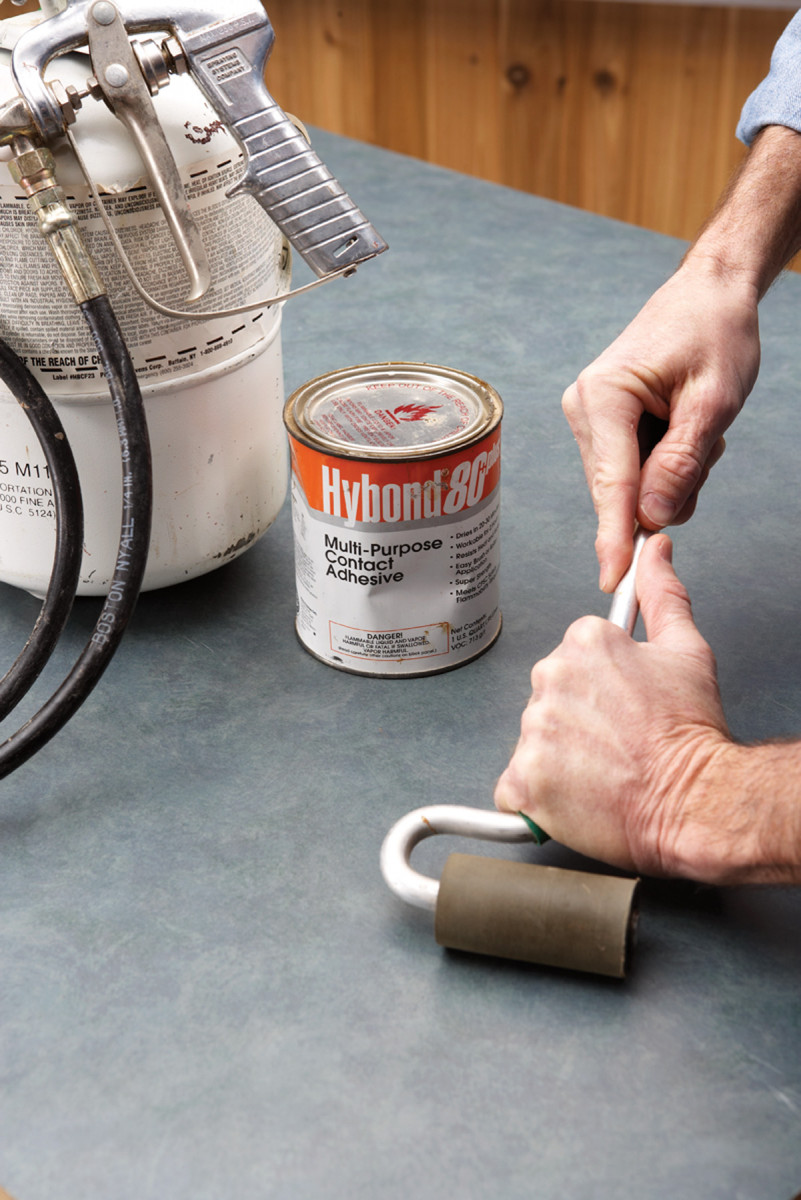
Under pressure. Contact cements grab immediately, but need pressure applied to form a complete bond.
Do not use water-based contact to bond anything to steel or iron. In the long run, contact adhesives have a low resistance to heat, cold and solvents. Contact adhesives are not structural and have no strength. They do not restrict the movement between the parts, so the core or substrate moves independently to whatever is bonded to it.
Contact adhesives are applied to both surfaces by brushing, rolling, spraying or using a trowel. As the solvents evaporate, water can condense on the surface of the rubber. This water must be removed through heat or evaporation before the bond is made. Contrary to most articles that say that pressure is not necessary, it takes 45 pounds of pressure per lineal inch to make a bond. This is typically accomplished by rolling the surface with a “J” roller.
The Gluing Process
When properly used, most modern glues are stronger than the wood. But the method you use can dramatically affect the results. If you are using a specific glue for the first time read the instructions, do some research, ask questions and consider doing a test glue-up. Each step in gluing, from selecting the best glue to the correct ways to apply it, to the final cure is a factor in attaining the full potential from the glue. Do a dry run and consider the effect of air temperature and humidity on the entire process.
Glue doesn’t just go bad from one day to the next. But it loses some of its effectiveness over time – especially if incorrectly handled, stored or misused. For the most part, glues are usable as long as they are spreadable according to the instructions from the manufacturer. A good rule when buying glue is to only purchase what you think you will use within the next year. I write the date on my glue bottle with a marker when I open it. If your glue is unusually thick, has changed color, smells funny or is lumpy it’s probably time to dispose of it.
Pot life is similar to shelf life, but is much more immediate. Pot life applies to glues that get mixed and the proportions of that mix. Once mixed the glue will start to coagulate and set. There is a definite time between being spreadable and becoming hard.
Surface Prep and Spreading
Make sure the wood to be bonded is dry, clean and free from dust and debris. Ideally, wood should be freshly cut with smooth surfaces. The joint should have intimate fiber contact between pieces. I consider the best joint to have slight friction between the mating parts – not so tight that they have to be hammered together and not so loose that they have no fiber contact.
Properly cut surfaces help ensure the glue can be spread and absorbed uniformly over the mating fibers of each piece of wood.
A uniform spread of glue that covers the surface of both mating parts is important. Glue can be applied to one surface (a single spread) or to both surfaces (a double spread) and can be applied with a brush, roller, stick or right from the bottle. Some people use their index finger to spread the glue. Luthiers use their little finger to keep the index finger clean for handling the wood and clamps.
Regardless of the method, the purpose in spreading glue is to distribute an adequate amount with uniform thickness over the entire area to be bonded. When pressure is applied the glue will flow into a uniform thin layer. A thin glue line is the best glue line. The amount of glue on the surfaces to be joined depends on the wood species, moisture or resin content, type of adhesive, temperature and humidity, and whether you use a single or double spread.
Getting the right amount of glue is hard to control. Too much is wasteful, hard to clean up and can add excess water to the joint. Too little can reduce needed working time or result in a starved joint and poor bond.
Open and Closed Assembly Time
Assembly time is the total time between spreading the glue and applying the clamps. Open time is the time between when the glue is applied to the time the two surfaces are placed together. Closed time is the time the pieces remain in contact before pressure is applied.
During open time, glue on the surface of each part is absorbing into the fibers while at the same time evaporating in the surrounding air. This causes the spread to change consistency and become tackier. When the boards are brought together and before the clamps go on (closed time), the glue is still absorbing into the fiber but evaporation stops. Curing of water-based glues involves both absorption and evaporation. Open time to closed time is a critical part of the curing process but is usually never considered.
Clamping boards together after closing the joint serves three main purposes. First it brings the mating boards tightly together forcing out the excess glue; a thin glue line or tight joint results in a stronger and inconspicuous joint. Second, pressure is used to force the glue to penetrate into the wood surface for more effective mechanical interlocking. And third it helps hold the wood together while the glue cures.
Spread the pressure. Blocks between the clamps and the work prevent damage, and increase the area under pressure.
Clamping pressures should be adjusted according to the density of the wood, and at normal room temperature it is important that the glue is still fluid when the pressure is applied. Use a protective pad or caul to help keep the clamp from damaging the wood, and – more important – direct and distribute clamping pressure over a broader area. When pressure is correctly applied, a small bead of glue will squeeze out along the glue line. This should be allowed to dry then scraped away.
Clamp Time
Wood should stay clamped until the joint has gained enough strength to withstand handling stresses that might knock the pieces apart. Under normal conditions, clamp time can be as little as 15 minutes but it can also be as long as 24 hours depending on the temperature of the room, the curing characteristics of the glue, the design and fit of the parts, and the thickness, density and absorptive characteristics of the wood.
Heat can be used to speed up clamp time, such as turning up the heat in your shop, placing an electric blanket over the joint, or hitting the joint with a blow dryer. Don’t place freshly glued wooden items in direct sunlight. Clamp time is almost always listed on the label as a guide to how quickly you can remove your clamps. There’s nothing wrong with leaving the clamps overnight. If you do leave your clamps on for extended periods of time, put wax paper between the clamp and the glue to prevent staining.
Cure time is the time it takes for the glue to reach its final state. Most glues reach total cure within 24 hours, but of course that depends on all the steps. Usually during this process water from the glue is distributed throughout the joint and equalizes with the surrounding wood. It is at this point that the glue will start to fulfill its obligation for strength, durability and performance. Once the glue has cured machining can begin.
Gluing Problems
One way to avoid gluing problems is to do every step in the process perfectly. Well that eliminates just about all of us. Gluing problems are the nightmare of all woodworkers and if you’ve done your share of woodworking, you have likely experienced some kind of glue failure. When a problem occurs, as painful as it is, it is a great opportunity to learn. Start by asking what caused the problem and what can be done to prevent it from happening again. Usually joint failure, specific to glue, is caused because of one or more of the following reasons:
Did you choose the best glue for the application? For example if you are gluing teak with white glue it will probably fail. Make sure the glue you use is fresh, looks and smells right, and spreads normally.
Wood preparation is also important to successful gluing. Is your wood properly conditioned, dry, clean on the surface, well cut and does it mate with the other piece of wood without creating any additional stresses?
Pressure and clamping issues are another reason glue joints fail. The purpose of pressure is to bring the mating faces tightly together forcing out the excess glue. The total amount of pressure varies for different reasons including the density of the wood and the type of assembly. Pressure can be responsible for either a starved glue joint or a thick glue joint – either will fail in time.
Fit of the joint. Face it, if the joint is sloppy or overly tight the glue joint can fail. Remember the ideal joint involves intimate fiber contact between the mating pieces.
Joint design is sometimes the main reason a glue joint fails. A joint under extreme stress can fail regardless of the type of glue. The weakest point of any structure is at the joint. Also keep in mind the direction of the grain in a joint, such as end grain to end grain, long grain to long grain and long grain to end grain. Remember some glues can allow creep to take place in these conditions.
The environment is usually the most punishing problem with glue joint failure. Heat can destroy thermoplastic glue joints. Direct water, intermittent water, and high and low humidity can take their toll as well. UV light is often overlooked and just plain air can oxidize wood in ways that we might not believe.
Here are some supplies and tools we find essential in our everyday work around the shop. We may receive a commission from sales referred by our links; however, we have carefully selected these products for their usefulness and quality.