


We may receive a commission when you use our affiliate links. However, this does not impact our recommendations.
 Make this inexpensive wood look like a million bucks.
Antique pine often has a dark, mellow color. Unfortunately, when woodworkers try to duplicate that color on new pine by using stain, the results are usually disappointing. It’s easy to end up with megablotches and it’s hard to avoid “grain reversal,” a peculiar effect that makes stained pine look unnatural. It doesn’t have to be that way, though. If you follow the process presented here, you can give pine deep, rich-looking color without losing it’s natural appearance.
Pine is hard to stain for a couple of reasons. First, its grain is unevenly dense. Typical wood stains cause grain reversal because they color only the porous earlywood; they can’t penetrate the dense latewood. Second, pine’s surface is usually loaded with randomly occurring figure and super-absorbent pockets that suck up stain and look blotchy.
Our staining process includes four ingredients: water-based wood conditioner, water-soluble wood dye, dewaxed shellac and oil-based glaze (see Sources, below). Our process isn’t fast, because there are several steps. But it isn’t hard, and it’s home-shop friendly. You don’t need any special finishing equipment, just brushes and rags.
In a nutshell, the conditioner partially seals the wood’s surface to control blotching. Dyes penetrate both the earlywood and latewood, so they minimize grain reversal. Shellac and glaze add color in layers, creating depth and richness. This coloring process works on all types of pine, although the end result varies from one species to another.

Staining usually causes blotches and always makes pine’s porous earlywood darker than its dense latewood, just the opposite of unstained pine (inset). This transformation is called “grain reversal.”
Before You Stain
Look Before You Leap
Before you touch your project with a brush or rag, get familiar with the materials and the process by practicing on good-sized pieces of scrap. Experiment on end grain, face grain and veneered stock. Practice until you’re comfortable with the process and know what to expect.
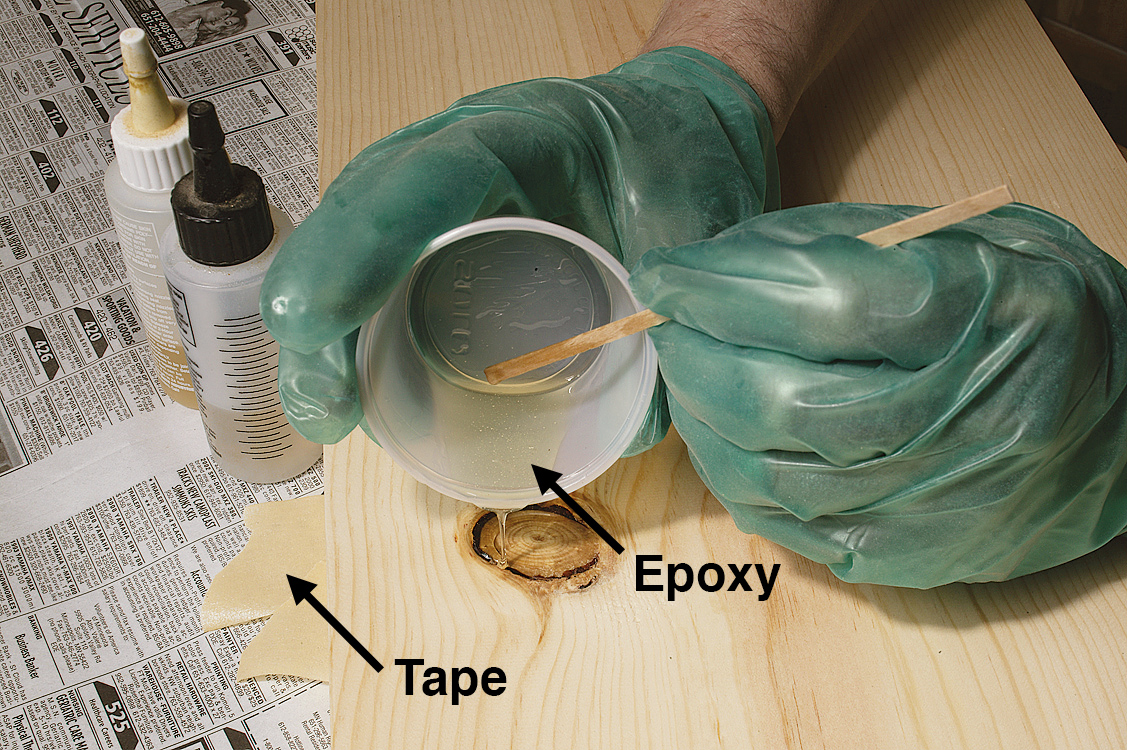
Fill gaps and stabilize loose knots with epoxy. Tape the back of the knot so the epoxy can’t leak out.
Fix Loose Knots
Before you sand, stabilize any loose knots by dribbling epoxy into the gaps. To make cleanup easier, keep it off the surrounding wood surfaces. After the epoxy has set, sand it flush with the surface. Clear epoxy transmits the dark color of the knot. If your epoxy cures milky-white, touch it up later, after you’ve dyed the wood and sealed it with shellac.
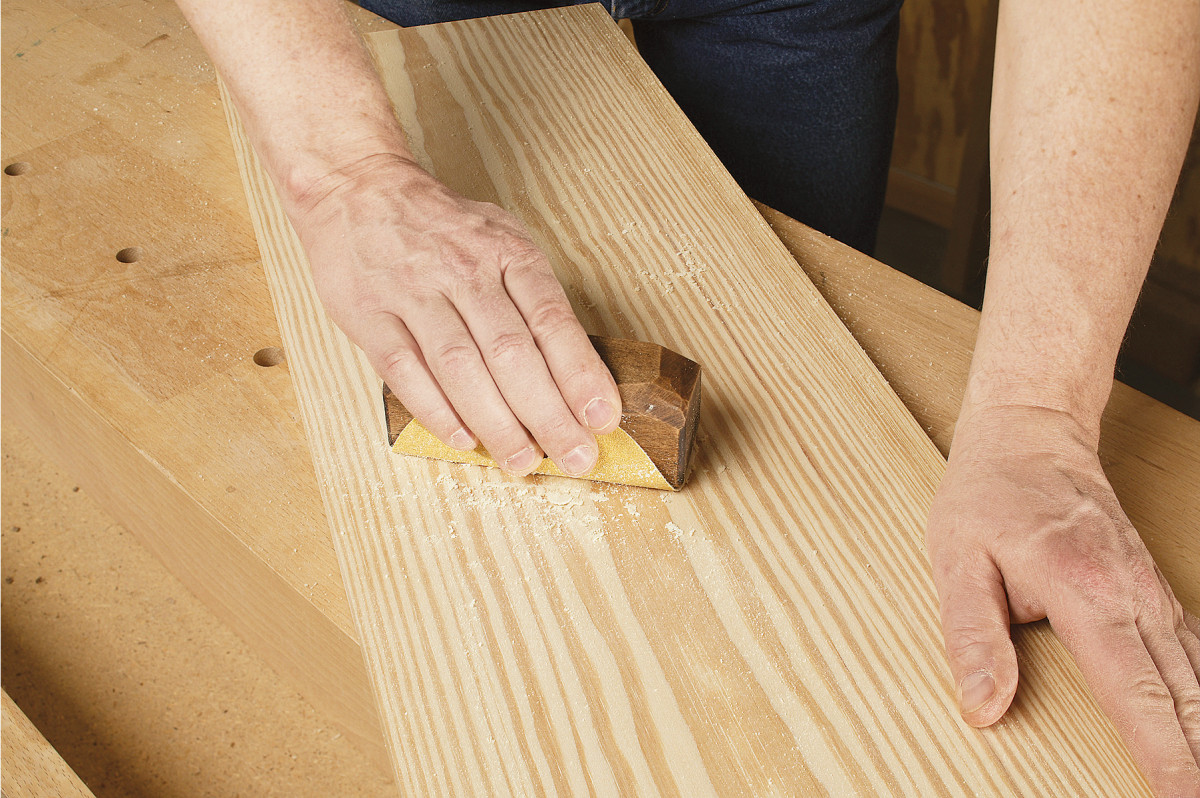
Sand with a block angled across the growth rings. Because of the difference in hardness between the earlywood and latewood, bridging as many rings as possible helps to keep the surface level.
Sand Thoroughly
A good-looking finish always starts with a thorough sanding job, especially with a soft wood like pine. Here are some guidelines:
Sand with a block. Orbital sanders leave swirl marks that make the stained surface look muddy. After power sanding, always sand by hand, using a block, before you go on to the next grit. Sanding with finger pressure alone wears away the soft earlywood, creating an uneven surface.
Change paper often. Pine gums up ordinary sandpaper with pitch-laden dust that quickly renders it useless. Dull paper mashes the wood fibers instead of cutting them, which also creates a muddy appearance when you stain. Serrated sandpaper lasts longer.
Sand up to 220 grit. First, level the surface with 100-grit paper. Then work through the grits to create finer and finer scratch patterns. 220-grit scratches are fine enough to disappear when you stain, as long as they don’t go across the grain.
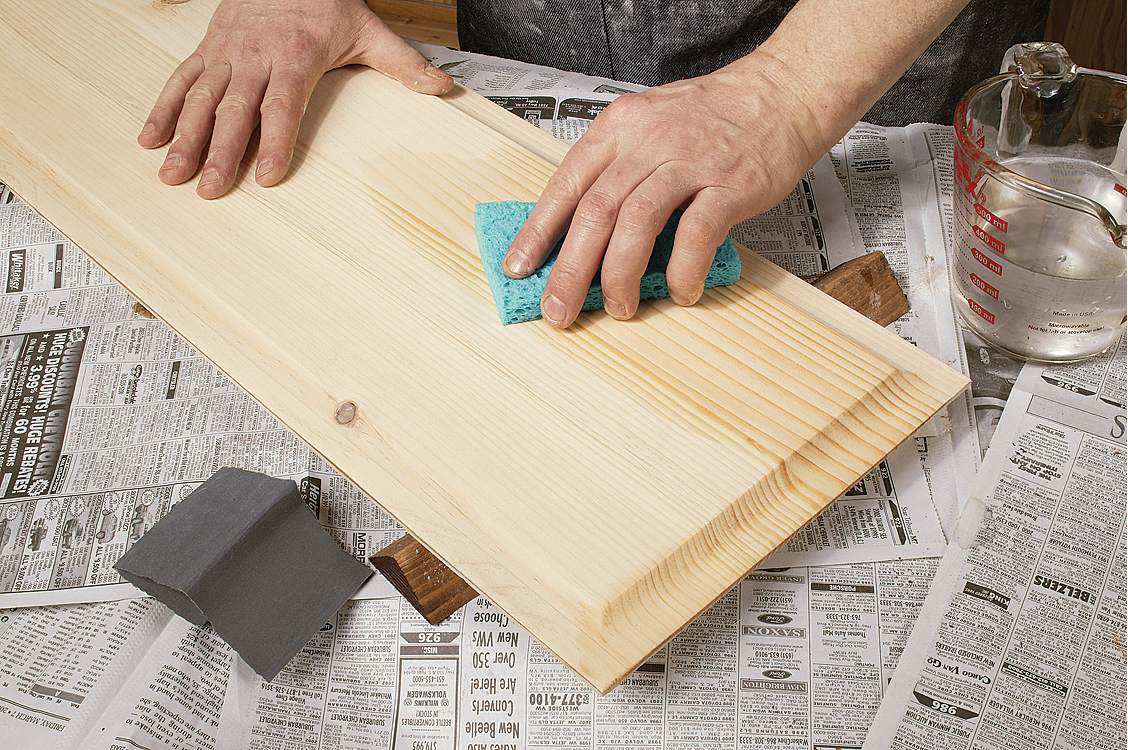
Preemptive grain-raising is a must-do for all water-based finishes. After you’ve finished sanding, dampen the surface, to raise the grain. Then sand it again, with 400-grit sandpaper.
Raise the Grain
Invariably, sanding leaves some fibers bent over. Water-based finishes swell these fibers so they stand up, leaving a rough surface. For smooth results with these finishes, raising the grain prior to finishing is essential.
The Staining Process
Two Coats of Conditioner
Water-based wood conditioner (see Sources, below) makes the water-based dye easy to apply. It limits the dye’s penetration by partially sealing the wood, like a thin coat of finish. Two coats are necessary to control blotching (Step 1).
It’s important to keep the surface wet until you wipe it, and then to wipe thoroughly. Any conditioner that’s allowed to dry on the surface will seal so well the dye won’t penetrate.
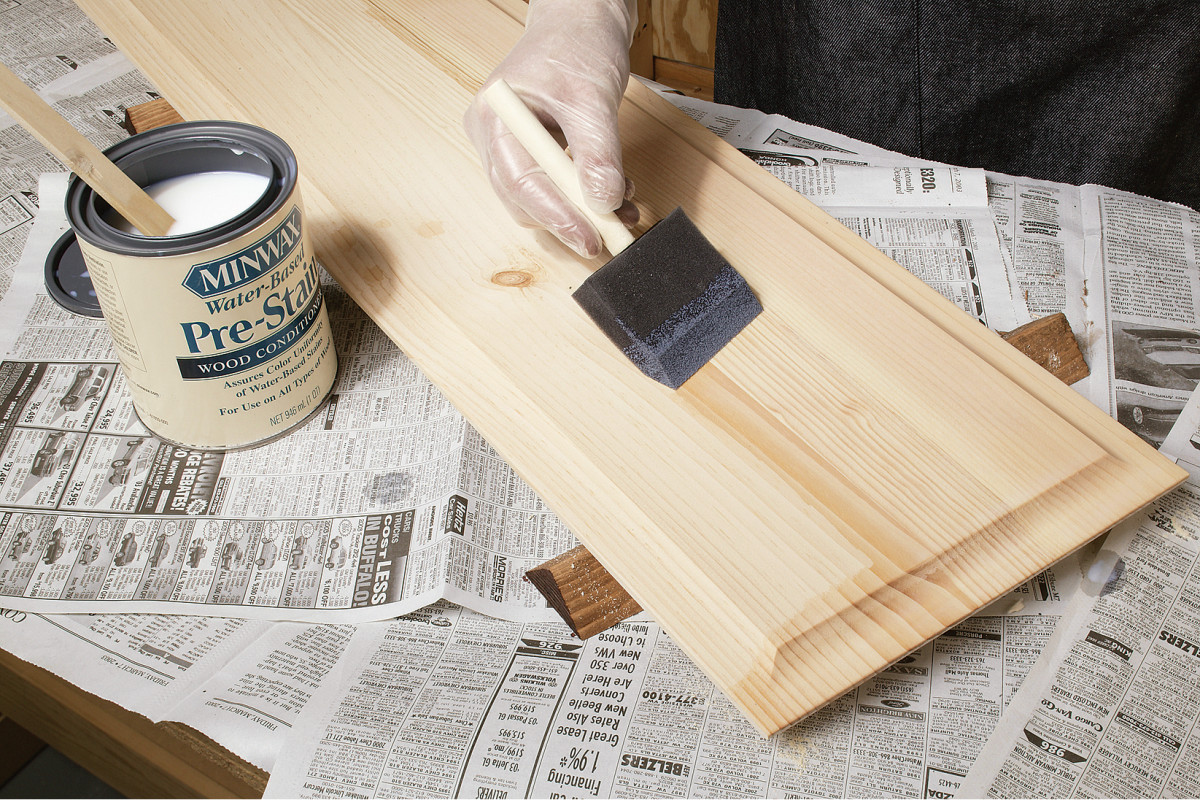 1. Brush on two generous coats of water-based conditioner. With each application, keep the surface wet for three to five minutes, then wipe off the excess. Let the conditioner dry thoroughly, then sand it with 400-grit paper. Go lightly on contours and edges, so you don’t cut through.
Two Coats of Dye
We used Transfast “antique cherry brown” water-soluble dye powder (see Sources, below). Water-soluble dye from other manufacturers will work just as well, although the color will be different. Dissolve the dye at the label-recommended ratio of 1-oz.powder to 2-qts. hot water (Step 2). Be sure to let the solution cool to room temperature before use.
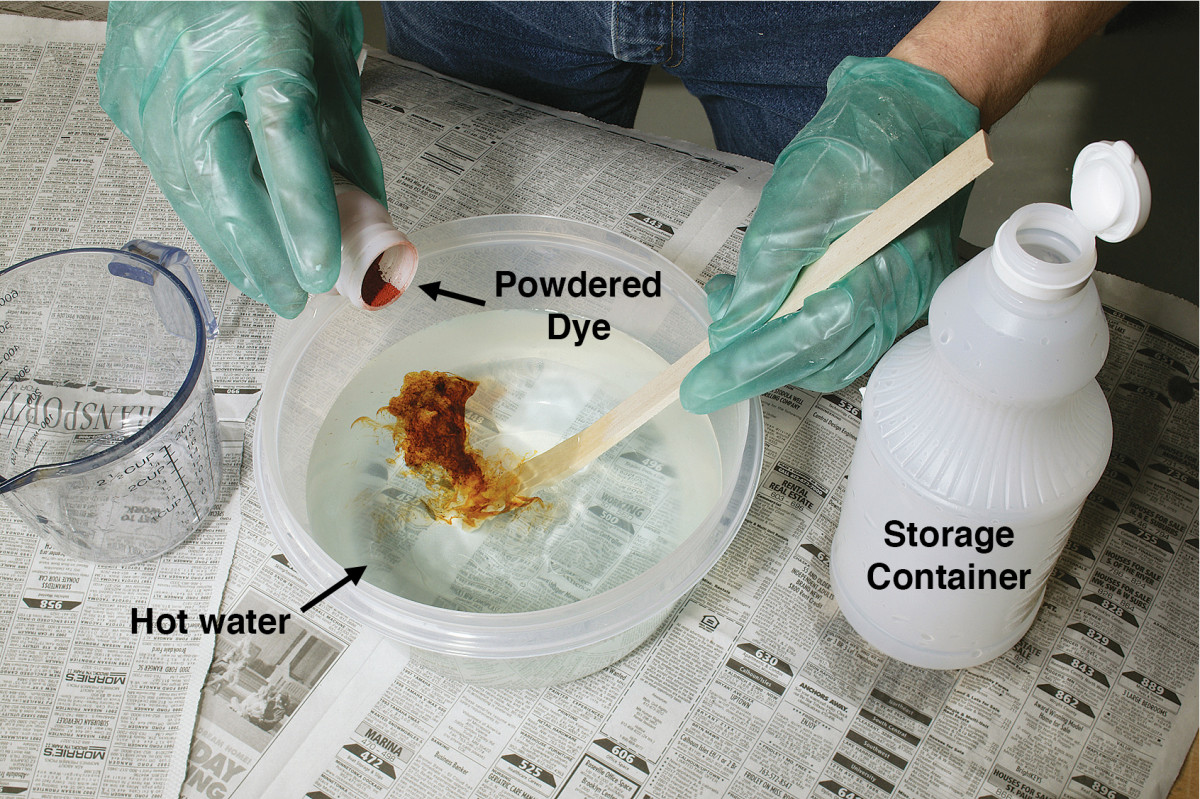 2. Dissolve powdered dye in hot water. When the powder is completely dissolved, transfer it to a lidded container and let it cool.
On the conditioned surface, the dye acts like a liquid oil stain (Step 3). Let it penetrate for a couple minutes before wiping. The second coat of dye imparts a deeper color and a more uniform appearance.
It’s tough to get uniform penetration on end grain. Fortunately, you can minimize any uneven appearance later with the colored glaze.
When you have a large surface to cover, use a spray bottle to apply the dye and a brush to spread it. Simply re-spray previously worked areas to keep the entire surface wet until you’re ready to wipe it dry. Spraying and brushing also works great on vertical surfaces. Start at the bottom and work your way up.
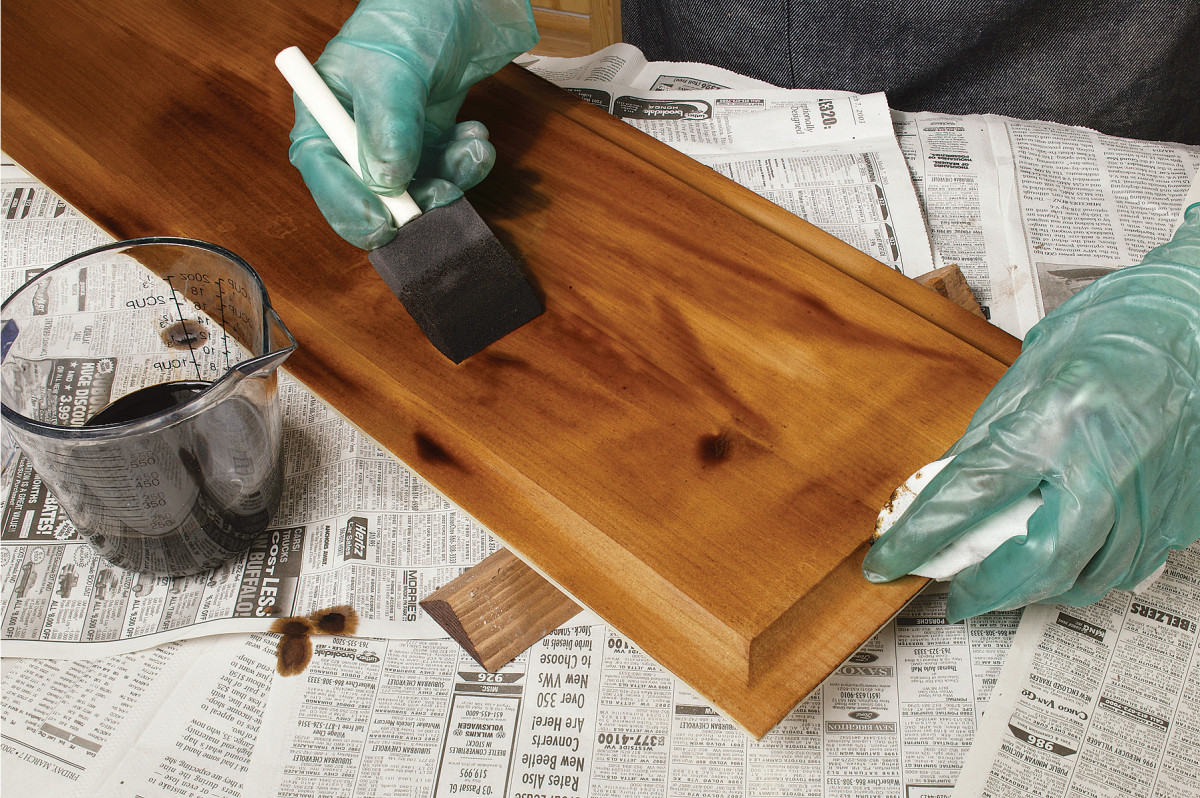 3. Brush on a liberal coat of dye and keep the surface wet. Wipe the end grain occasionally to check its appearance. After the surface is uniformly colored, wipe off the excess dye and let the wood dry. Then repeat the process.
Two Coats of Shellac
Shellac prepares the dyed surface for glazing (Step 4). It also keeps pitch sealed in the wood. Without shellac, pine’s pitch can bleed into oil-based finishes, leaving fissures or shiny spots that remain tacky, especially around knots.
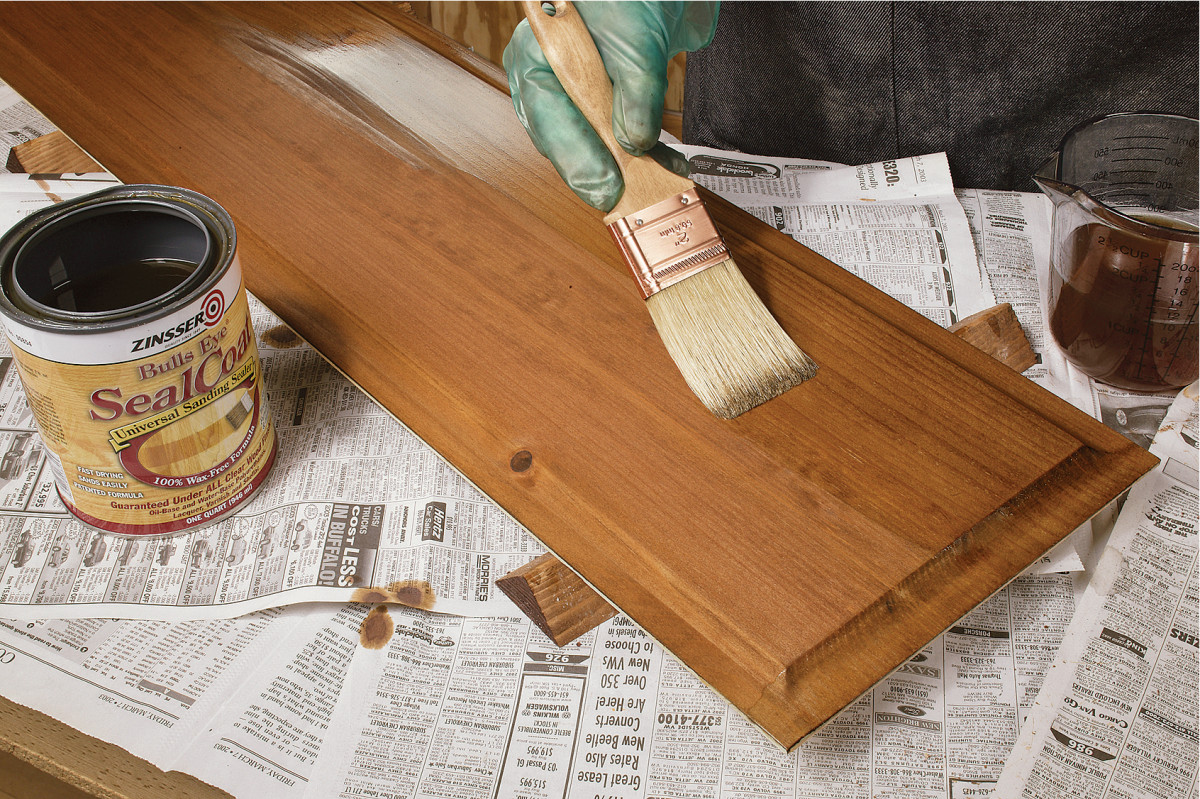 4. Seal the surface with two coats of 2-lb.-cut dewaxed shellac. Sand after each coat with 400-grit paper.
Apply Glaze
Glaze is nothing more than paint formulated for wiping. It’s easy to make your own proquality glaze (Step 5). Artist’s oils contain high quality pigments for pure, clear color. Glaze medium makes the artist’s oil easy to spread and quick to dry (within 24 hours).
Glazing adds a second, separate layer of color that really makes the pine come alive (Step 6).
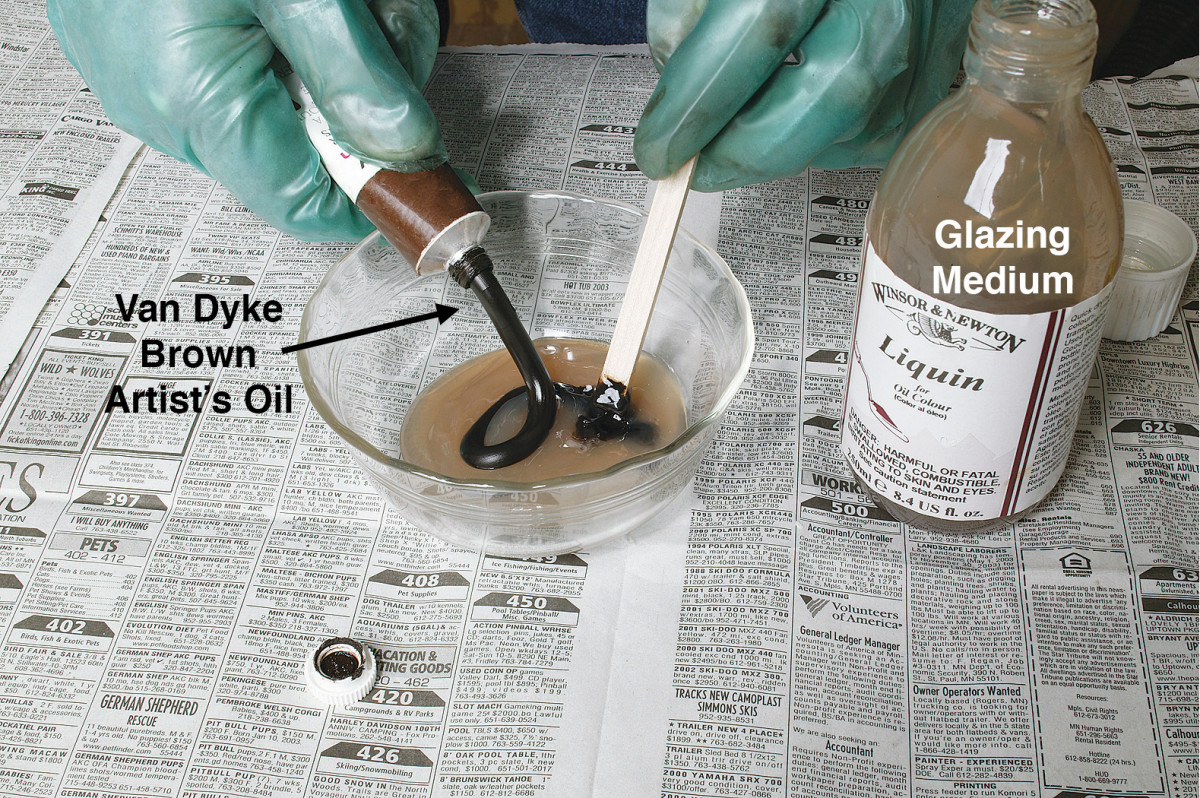 5. Make your own glaze by dissolving artist’s oil into glaze medium (see Sources, below). You don’t have to be scientific about the ratio as long as you use only one color. Don’t go overboard with the amount you mix—a little glaze goes a long way.
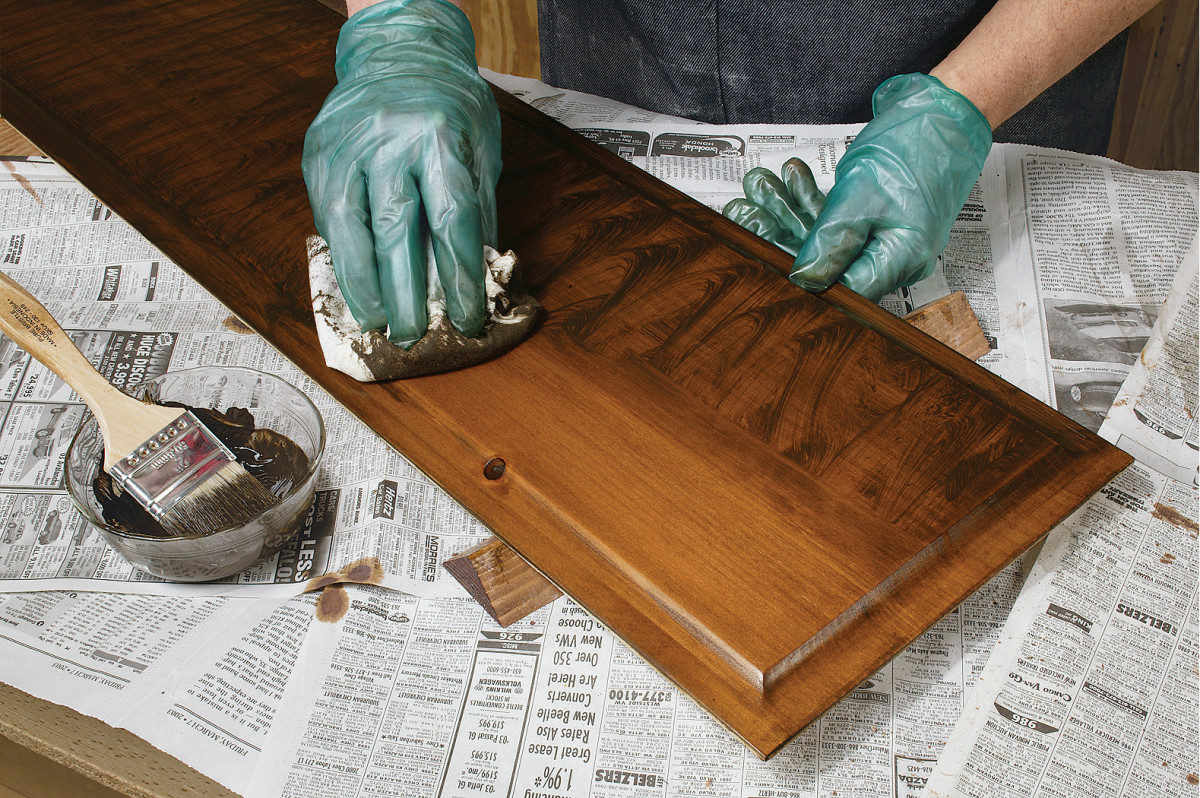
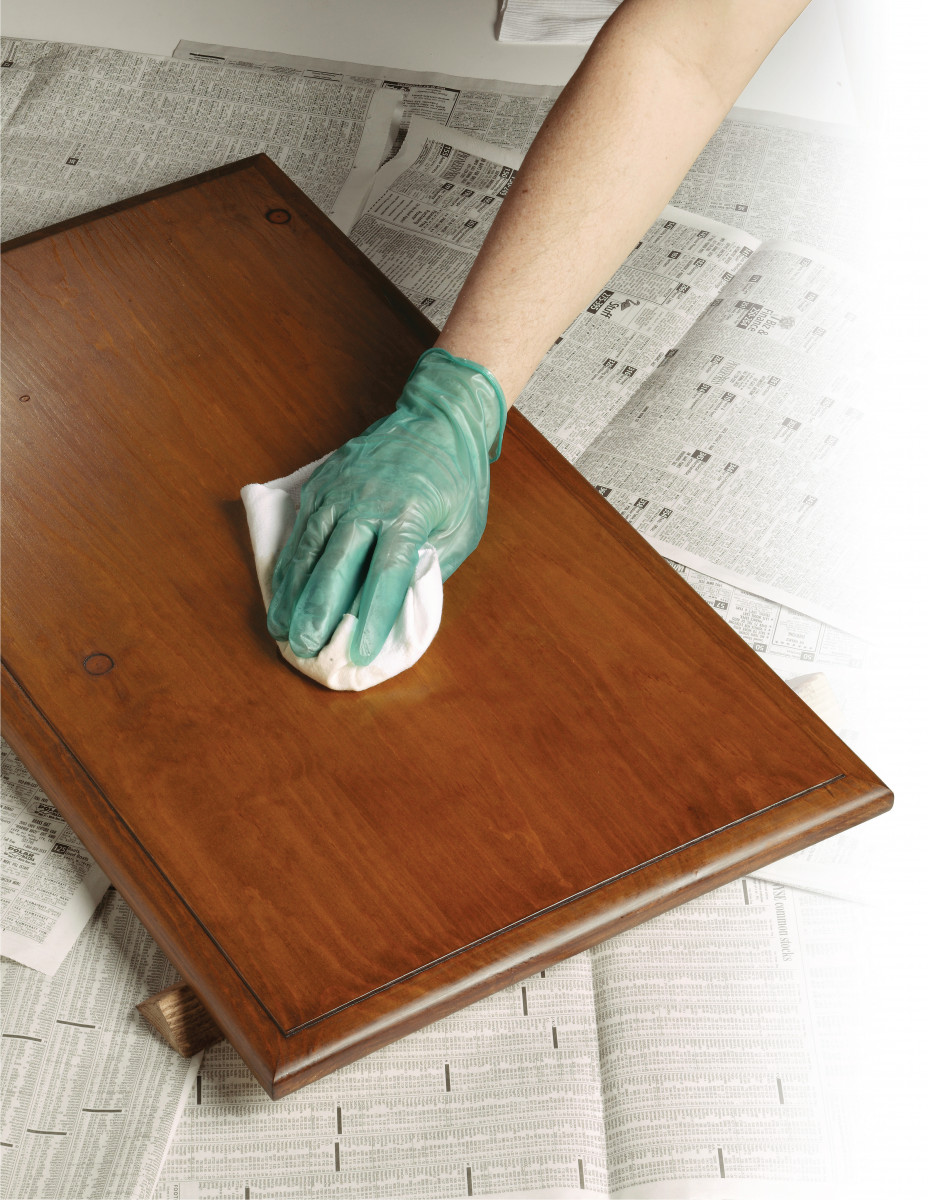
6. Glaze acts as a toner on the sealed surface, resulting in a deep, rich color and a uniform appearance. Just brush it on and wipe it off. Blend uneven areas by varying the amount of glaze you leave on the surface.
Topcoats
You need to protect this layered finish with clear topcoats. Any topcoat will work as long as you wait until the glaze has completely dried. To check, wipe the surface gently with a cotton rag. If it picks up any color, wait another day.
Sources
Note: Product availability and prices are subject to change.
Minwax Waterbased Pre-Stain Wood Conditioner 1-qt.
Tranfast water-soluble dye, HS3266, antique cherry brown.
Zinsser Sealcoat dewaxed shellac (2-lb. cut)
Van Dyke Brown artist’s oil 1.25 oz. tube;
Norton Abrasives Sterrated sandpaper
Here are some supplies and tools we find essential in our everyday work around the shop. We may receive a commission from sales referred by our links; however, we have carefully selected these products for their usefulness and quality.


Fantastic tutorial. All other (amateur) methods are rubbish. I’ll be using this soon, but first, could you clarify what “transmits” means here: “Clear epoxy transmits the dark color of the knot.” Thanks so much.