We may receive a commission when you use our affiliate links. However, this does not impact our recommendations.
A quick guide to the pros and cons of how to make the difficult part of a classic joint.
Many pieces of old handmade furniture owe their long life to mortise and tenon joints. There are many other ways to join wood, such as using dowels, biscuits or pocket screws, but none of them are as strong or durable as well-designed, well-executed mortises and tenons.
Working in the shop, mortises usually come first. That’s because it’s hard to adjust their size once they’re made. Tenons are much easier to fit to mortises, so they usually come second.
You can make mortises by hand, using a chisel, or by machine, using a drill press, plunge router or hollow-chisel mortiser. The goal is pretty simple: Mortises are simply rectangular holes with parallel, plumb sides that are relatively smooth and even. Some mortises have square corners; others have round corners.
Tenons are more complicated. Their cheeks (the surfaces that go into the hole) must be straight, smooth and parallel. But most importantly, they must be the correct distance apart; that is, the tenon must be the right thickness and width to fit the mortise. There’s not much room for error: For the glue to hold, the total gap between a tenon and its mortise shouldn’t exceed the thickness of a sheet of paper—about .003″.
Then there’s the matter of shoulders (the part of the joint that butts up to the area around the mortise). They have to be straight, square and parallel, which also requires a high degree of accuracy.
I’ve made tenons lots of different ways over the years, searching for a magic bullet that would deliver quick, precise results every time. Although I’ve come to favor a few methods, each one I’ve tried has its pros and cons. I’ve concluded that no single method is best—there is no magic bullet. I’ll summarize what I’ve learned, so you can judge for yourself what might be best for your shop, your skills and your projects.
Bonus: Learn 5 Ways to Make a Mortise
Bandsaw
 A bandsaw is pretty good for cutting cheeks, but not very good for cutting shoulders. While it’s possible to freehand cut a tenon on the bandsaw, you’ll get much better results if you use a rip fence and a stop block.
Making a tenon to an exact thickness on a bandsaw is a bit fussy, because many rip fences are hard to adjust in small increments. It’s also hard to shave off a thin slice from a tenon that’s too thick, unless your blade is super-sharp.
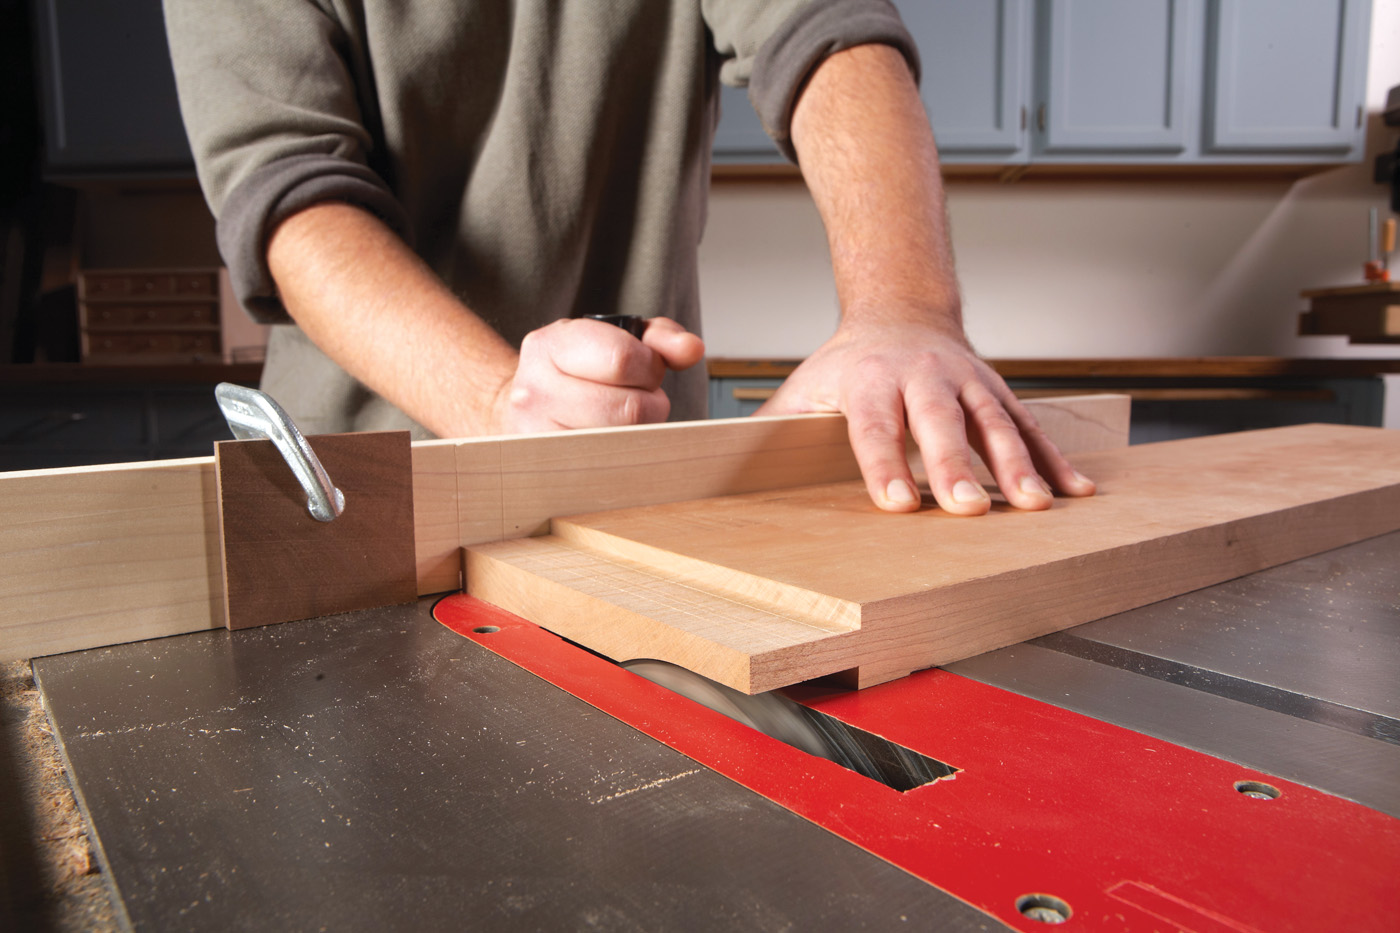
 Your best bet is to cut a tenon a hair fat, then cut its shoulders on the tablesaw. (See above. Note the gap under the stop block, which keeps the offcut from getting trapped.) Use a rabbet plane or a hand router to reduce the tenon’s thickness until it fits correctly.
Bottom Line: Consider using the bandsaw when you only have a few tenons to cut. Setup is fast and easy, but planing each tenon to fit requires a little extra time and a lot of skill.
Tenoning Jig
 This is an excellent method for cutting cheeks—the cuts are straighter and smoother than ones made on a bandsaw. Of course, you’ll have to use a second setup on the tablesaw to cut the joint’s shoulders.
While you can make a tenoning jig yourself (most types straddle the saw’s fence), commercial jigs work quite well. They generally cost $100 or more.
This method is so accurate that little or no fitting should be required. Most jigs have a micro-adjust for dialing in the position and thickness of the tenon. I prefer to use a spacer for determing the tenon’s thickness, rather than adjust the jig. Tenoning jigs also allow you to tilt the work side to side or front to back in order to cut angled tenons; that’s hard to do with most of the other methods listed here.
Tenoning jigs do have two important limitations, however. First, the tenon’s maximum length is about 3-1/2″, the deepest cut you can make on the tablesaw. Second, if the pieces you cut are more than about 3′ long, the setup might get top heavy.
Bottom Line: A tenoning jig is a good choice for production runs—particularly for chairs, where tenons are often angled.
Dado Set
 This is my favorite power-tool method.
It’s accurate and relatively easy to set up. Best of all, it cuts cheeks and shoulders at the same time.
You’ll need a good quality stacked dado set—one that cuts a flat bottom. You’ll also need a modified or upgraded miter gauge that doesn’t have any play in the miter slot. If you don’t have one, you could make a dedicated tenoning sled with two runners.
While it’s tempting to use the saw’s fence as a stop to determine the tenon’s length, this is not a safe practice. The workpiece could catch on the fence and twist. It’s better to clamp a stop block to the miter gauge’s fence.
Since you’re flipping the piece over to dado both sides, its end must be perfectly square for this method to work. Adjusting the thickness of a tenon simply involves raising or lowering the dado set. I usually cut one side of all the tenons first, then fine-tune the dado set’s height before cutting the opposite sides. Another virtue of this method is that your workpiece can be virtually any width or any length; supporting it is not a problem.
There is a potential downside to this method: It ties up your saw.
Bottom Line: This is an excellent method for cutting most tenons, but you must have a good-quality dado set and a tight-fitting miter gauge.
Loose Tenons
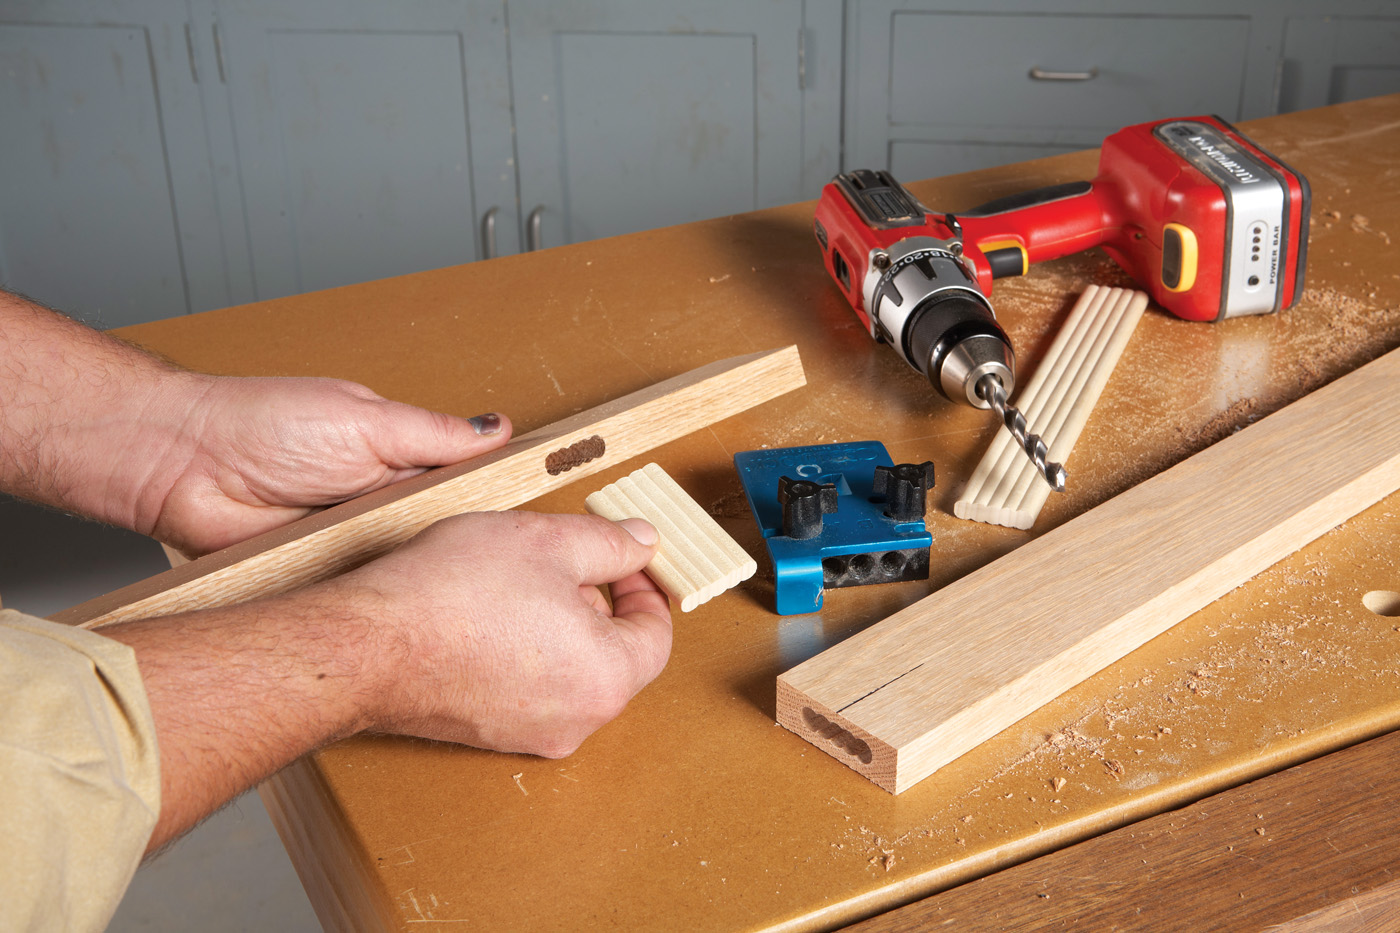
The Beadlock System (older version pictured)
Loose tenons are like rectangular dowels—they fit into mortises cut in both of the mating pieces. You need only saw butt joints on the ends of the rails, which simplifies measuring and eliminates fussing with shoulders—there aren’t any. There are many ways to do make the mortises and their loose tenons; here are three I’ve found useful.
- You rout the mortises with a plunge router and a homemade or commercial jig. You make the tenon stock yourself, shaping the edges with a roundover bit. One limitation: Most jigs sit on the end of a rail; if the rail is over 4′ in length, this can be very awkward.
- You drill the mortises guided by a commercial jig—the Beadlock, from Rockler—and either use the manufacturer’s tenon stock or make your own, using a special router bit. The mortises are essentially a set of overlapping holes, which works surprisingly well. You don’t need any special tooling—just a drill. A basic jig costs about $50.
- You use a portable machine—the Domino, from Festool—that works like a horizontal plunge router. You buy the tenon stock from the manufacturer. These machines come in two sizes, for large or small joints. They work extremely well and cost from $1069 to $1,685.
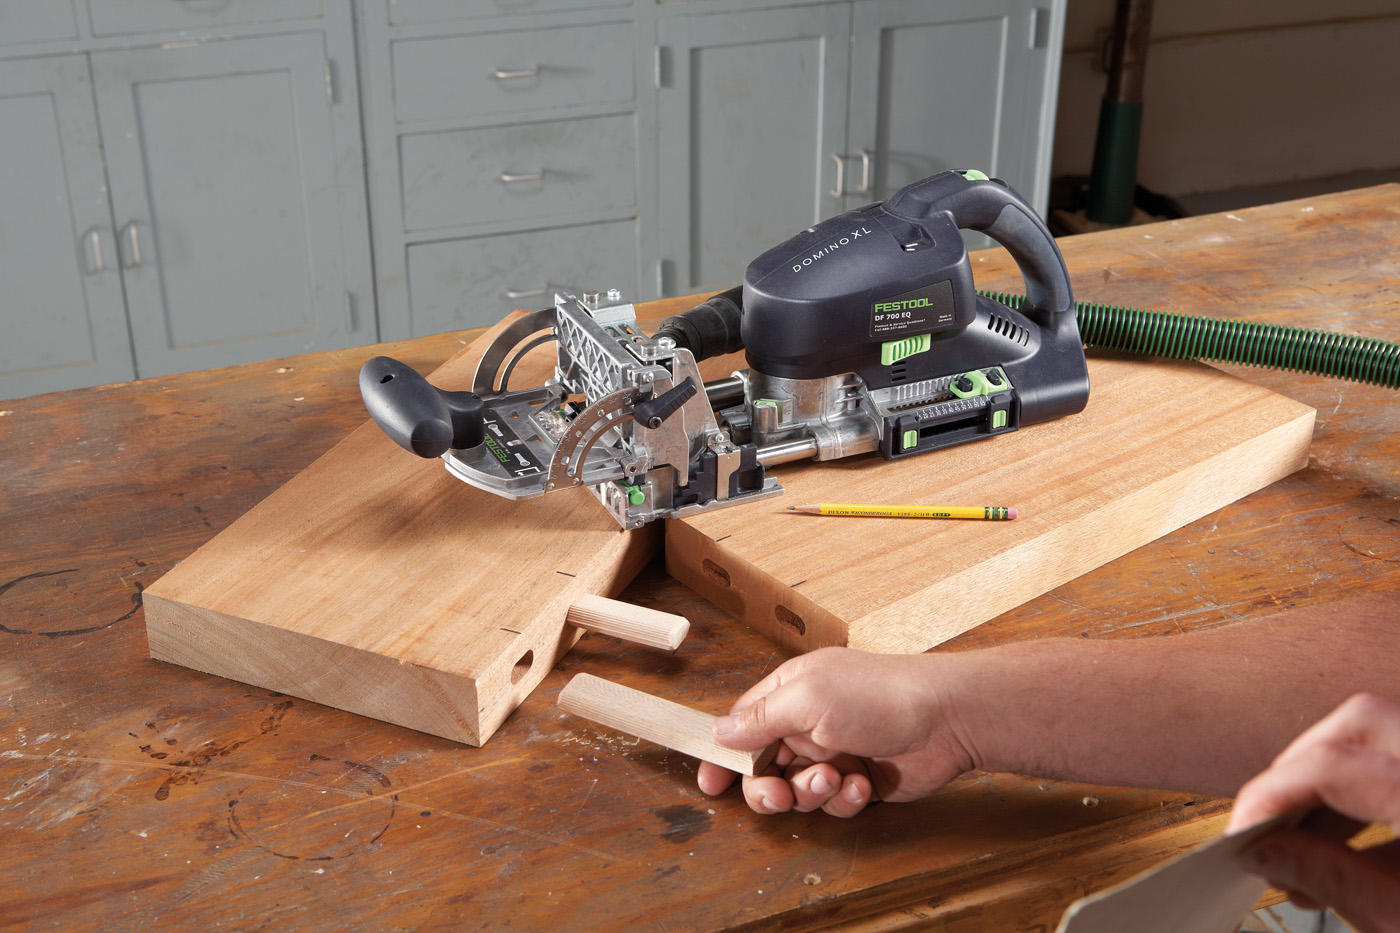
The Domino System
Bottom Line: This method is easier than others because you don’t have to cut shoulders, just butt joints. If you use a commercial system, you don’t have to fit the tenons, either—their accuracy is built in.
Dual Blades
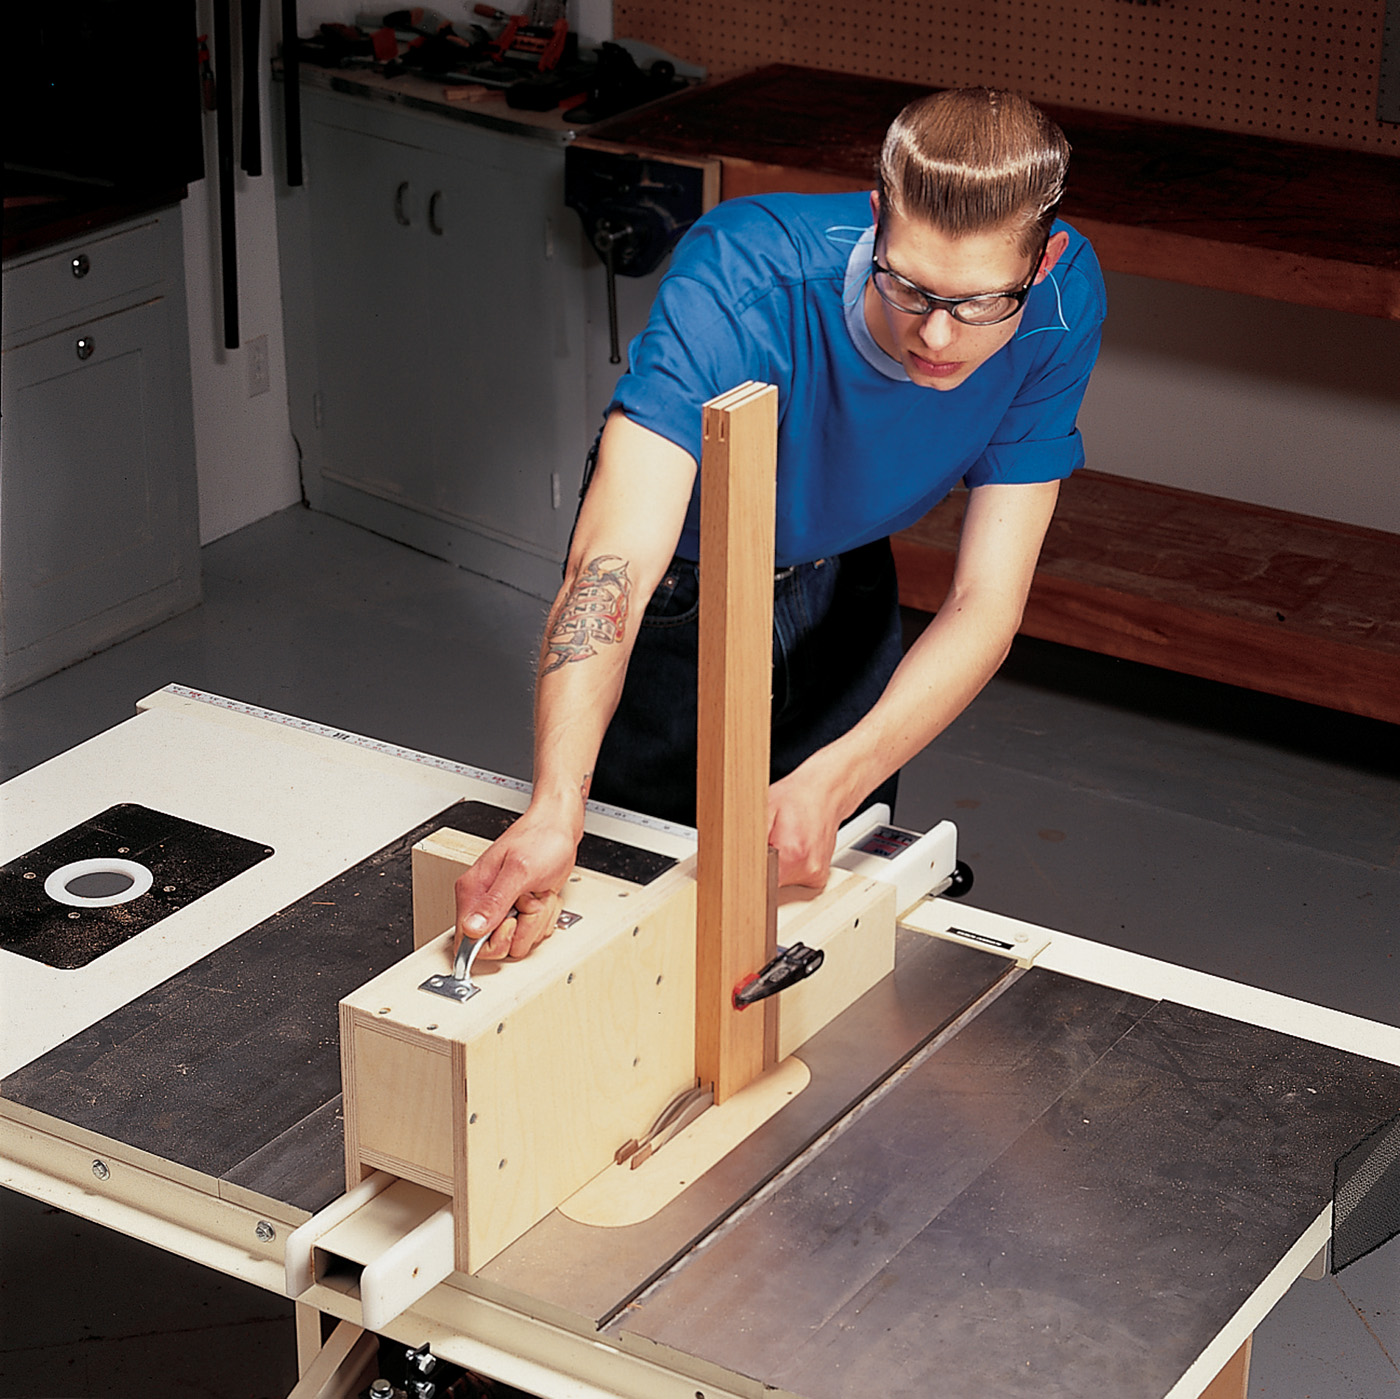
Using two blades equal in diameter, you cut both cheeks at the same time with a tenoning jig. The blades are separated by a spacer sized to fit your mortise, so you don’t have to fit the tenons each time you set up the jig. Of course, you must saw the shoulders in a second setup.
You can use a commercial tenoning jig or make your own, as shown here. Using both outer blades of a dado set works well, but their depth of cut is limited. I strongly recommend using a dedicated zero-clearance insert so the workpiece is supported at all times.
Accurately spacing the blades is the key to this method. Start with a plywood disc that’s as thick as the mortise is wide, and the same diameter as your arbor washer—this gets you close. Then add playing cards or paper shims until you achieve an exact fit. Save the spacers as a set for re-use the next time you cut tenons.
As with using a tenoning jig and a single blade, there is a potential downside to this method: It ties up your saw.
Bottom Line: This is a really slick set-up, particularly when you have a lot of tenons to cut. Shop-made spacers determine the thickness of the tenons, which shouldn’t require fitting.
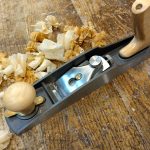
Hand Tools
 This method requires more skill than any other, but with good, sharp tools and practice, you can rival the accuracy of any machined surface. Basically, you saw each tenon oversize, then shave it to fit. The process is slow, but I’ve found it very rewarding.
You’ll need a marking gauge (a wheel-type gauge is OK, but the combination of a mortising gauge and a knife gauge is more convenient), a backsaw or dozuki saw, a number of chisels, and a rabbet plane or—better yet—a router plane.
 Cutting accurate shoulders is the tough part. I scribe them first with a knife gauge, deepen the gauge line by paring into it with a chisel (making a valley for the saw to start in), then saw the rest of the way.
Using a rabbet plane to fit the thickness of the tenons can work OK, but a router plane automatically keeps the cheeks parallel and even. It’s amazingly accurate.
Bottom Line: Hand tools are slow, but can deliver machine-like perfection. There are no limitations to the tenon’s dimensions.
Router Jig
 Some commercial jigs, such as the Leigh Pro Frame Mortise & Tenon Jig (shown above), allow you to cut cheeks and shoulders at the same time. The plunge router basically follows a template, mounted on top of the jig, to produce a tenon that won’t require any fitting—it’s size is pre-determined.
The PantoRouter does essentially the same thing in a horizontal layout, plus has the benefit of being able to cut other types of joinery.
You can also use these jigs to cut mortises of a pre-determined size, so everything automatically matches up. Of course, the range of sizes is limited by the capacity of the jig and the length of the bit. You can also make multiple tenons and some types of angled tenons.
Learning how to use the jig requires reading the manual and closely following its directions. Once you’re set, you’ll get very accurate results. If you don’t use the jig very often, it may take you a while to figure out how it works the next time around. For me, the downside of using any router jig is that it’s a noisy and dusty operation.
The Leigh Pro costs about $1539 and the bare PantoRouter $1395. You supply the router.
Bottom Line: A good commercial jig will make both mortises and tenons—and the tenons will not require fitting.
Router Table
 Similar to using a dado set or router jig, this method cuts both cheeks and shoulders at the same time. There are virtually no limitations on the length and width of the tenon or the size of the workpiece. If you already have a router table and a coping sled, you don’t need any specialized equipment. Add this all up and you can see why using a router table has become one of my favorite methods for making tenons.
Setup does require some trial and error work, however. You have to adjust the height of the bit each time you make tenons in order to get them to fit correctly. I use a large-diameter rabbeting bit to minimize the number of passes necessary.
A coping sled is a must. If you make your own, it should have a hold-down for the workpiece, a backer strip to prevent blow-out and robust handles, for safety. I use a commercially-made sled that also has a miter bar, which runs in the router table’s miter slot. This ensures that the shoulders are straight. (The sled I prefer, shown above, is from Infinity. It costs about $180, with the miter bar.)
Bottom Line: The router table method makes cheeks and shoulders at the same time, so only one setup is necessary.
Here are some supplies and tools we find essential in our everyday work around the shop. We may receive a commission from sales referred by our links; however, we have carefully selected these products for their usefulness and quality.