We may receive a commission when you use our affiliate links. However, this does not impact our recommendations.

The biggest benefit: less sanding.
Big Slice, Big Blade
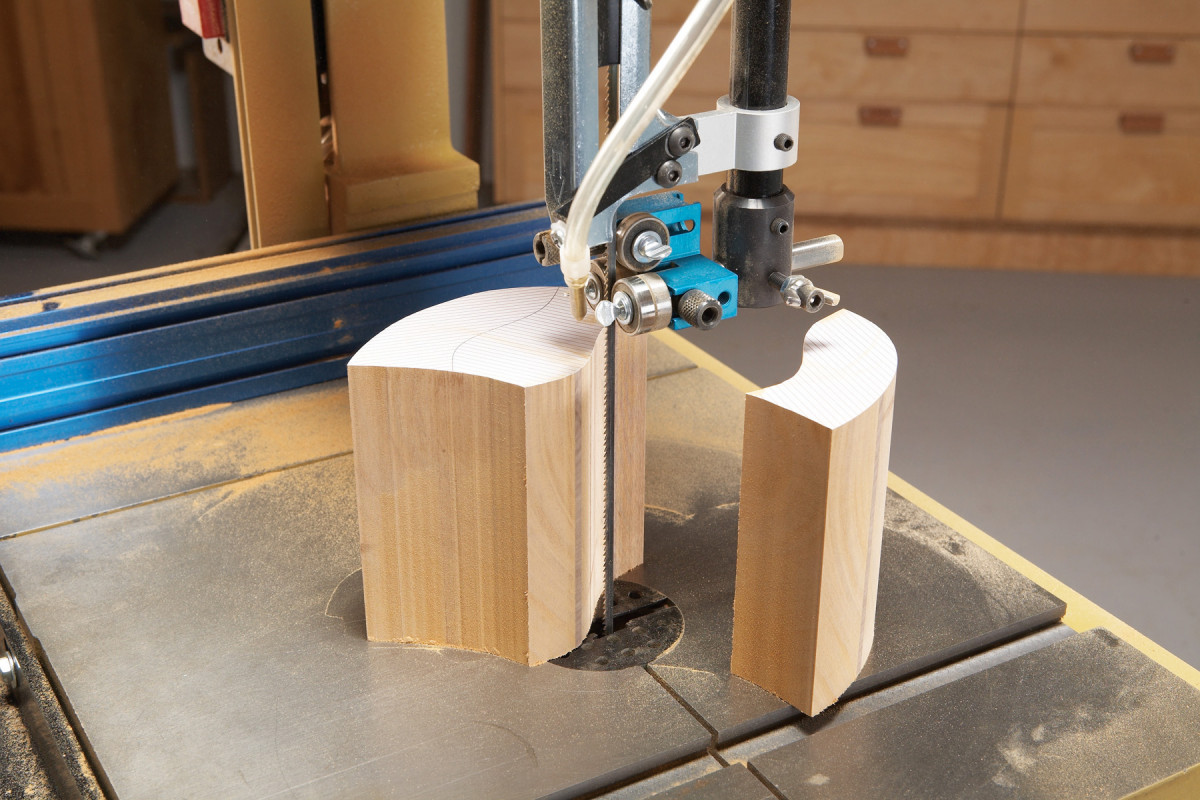
 When you’re cutting the back off a big box, your best bet is to use a 1/2″ 4 TPI (Teeth Per Inch) hook-tooth blade, and guide the cut with a fence. This blade is the widest that most 14″ bandsaws can handle. Its extra width helps prevent the blade from bending backwards and twisting, which can result in a bowed cut. This blade’s extra-deep gullets have plenty of room for carrying away sawdust, which also helps prevent a bowed cut. A fence, of course, assures that the cut will be straight–which is essential when you glue the two pieces back together later on.
The Workhorse Blade
 My favorite blade for cutting curves is a 3/16″ 10 TPI. It cuts a curve as small around as a nickel. Sometimes I use a 1/4″ 4 TPI blade–but it leaves a coarser surface that requires more sanding. One good thing about the 1/4″ blade, though, is that it’s more aggressive. You have to go a bit slower with the 3/16″ blade, but the results are worth it.
Both blades require careful setup, particularly with ball bearing guides. The front edge of the guides should be positioned a hair behind the blade’s gullets, so the blade’s teeth won’t contact the guides. Rounding the back of the blade with a dry oilstone will help the blade negotiate tight curves.
For Tight Curves, An Extra-Small Blade
 When a box calls for curves that are smaller than the radius of a nickel, I take the time to switch to a 1/8″ 14 TPI blade. It can cut curves down to a 1/4″ radius.
A blade this small isn’t easy to set up with conventional guide blocks, unless you’re using phenolic Cool Blocks. Cool Blocks won’t damage the blade’s teeth, so you can set the blade right in the middle of the blocks.
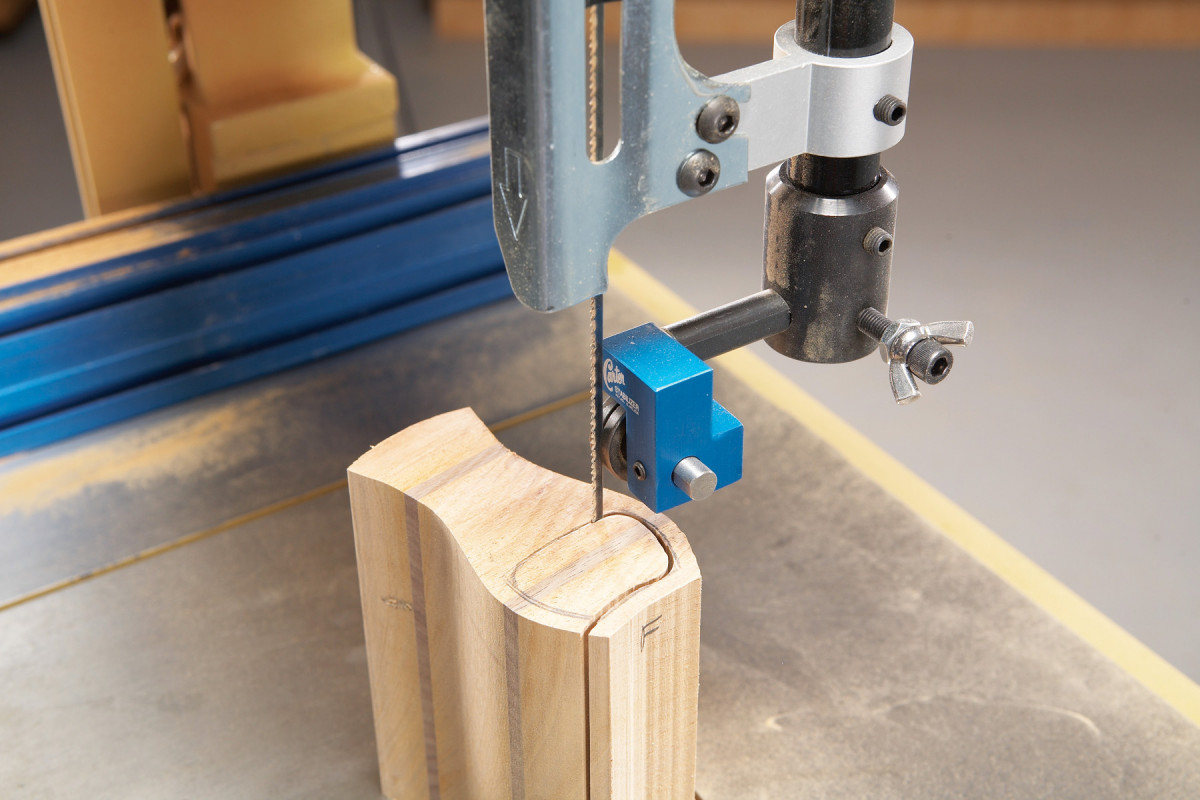
I developed an alternative guide system, called the Carter Stabilizer, for 1/4″ and smaller blades. It temporarily replaces the guides on your saw and is very easy to install. The Stabilizer is essentially a thrust bearing with a groove down the middle. When you set it up, you spring the blade forward a bit, so the blade remains seated in the groove. Just back off the lower bearings, and away you go.
Smooth Joints with Sandpaper
 Before you glue parts together to re-build a box, sand their edges on a full sheet of 80 grit sandpaper. This will make the edges absolutely flat, which helps make the joints invisible.
I put the sandpaper on the cast iron wing of my tablesaw and secure it with Gorilla Tape so the paper doesn’t buckle or shift. I tried masking tape and duct tape, but they don’t hold as well. This stuff does the trick.
Save Elbow Grease
 The fastest way to clean up the bandsawn surfaces of a box is to use a combination belt/disc sander. It doesn’t matter what size it is–a benchtop model works fine.
Use the flat belt for convex curves. For the smoothest results, support your work on the machine’s work table. For concave curves, use the belt’s round nose. Be very careful, though, and use only fine grits and light pressure to maintain control as you sand.
Felt Makes the Difference
 I line the inside of a bandsaw box with adhesive-backed felt. It makes the box’s pieces nest together much better, because the felt’s thickness is just about equal to a blade’s kerf. The wood you lose by sawing is made up for by the felt. Felt also makes drawers glide like butter. Adhesive-backed felt is available at many craft stores, and is easy to cut with a pair of scissors.
Use a Sub-Table
 Sometimes the cuts don’t come out square when making small pieces. I found this out the hard way one day, when a very small drawer turned out tapered from front to back. I discovered that the problem wasn’t my setup or technique.
The problem was the saw’s throat plate. It wasn’t level with the saw’s table, and, being plastic, had some give in it, so the workpiece leaned into the blade.
I solved this problem in a hurry by grabbing a piece of plywood to cover the table. I cut a kerf to the plywood’s center and clamped the plywood to the table. Done deal–this made a perfectly flat work surface.
To protect my fingers, I held the piece in a small handscrew. I cut notches in the handscrew to help hold curved pieces.
Here are some supplies and tools we find essential in our everyday work around the shop. We may receive a commission from sales referred by our links; however, we have carefully selected these products for their usefulness and quality.


