


We may receive a commission when you use our affiliate links. However, this does not impact our recommendations.
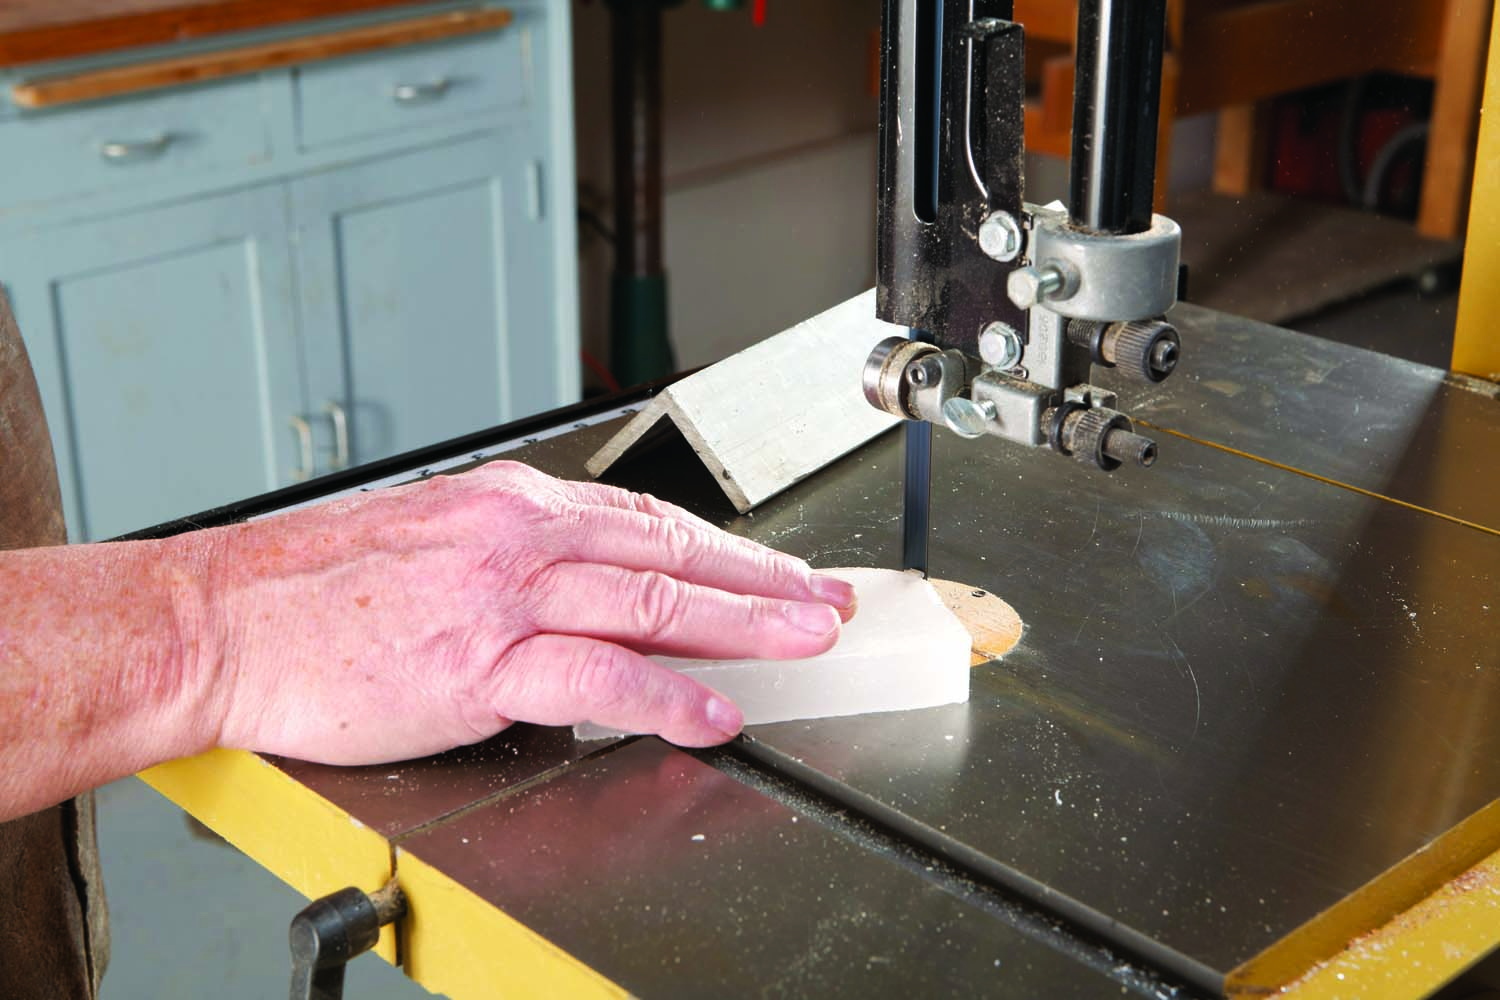
1. Lubricate a Bandsaw Blade
It’s safe and easy to cut brass and aluminum with a bandsaw and a regular woodworking blade. Using a miter gauge, you can make a very straight cut. Be sure to use a 4 TPI blade with hardened teeth. A blade with finer teeth is likely to clog up; an inexpensive, spring-steel blade without hardened teeth will dull quickly.
Before you cut, turn on the saw and hold a piece of paraffin wax against the blade. (Paraffin is sold as canning wax in grocery stores.) Creating a slick surface helps prevent the blade’s gullets from clogging up with metal shavings.
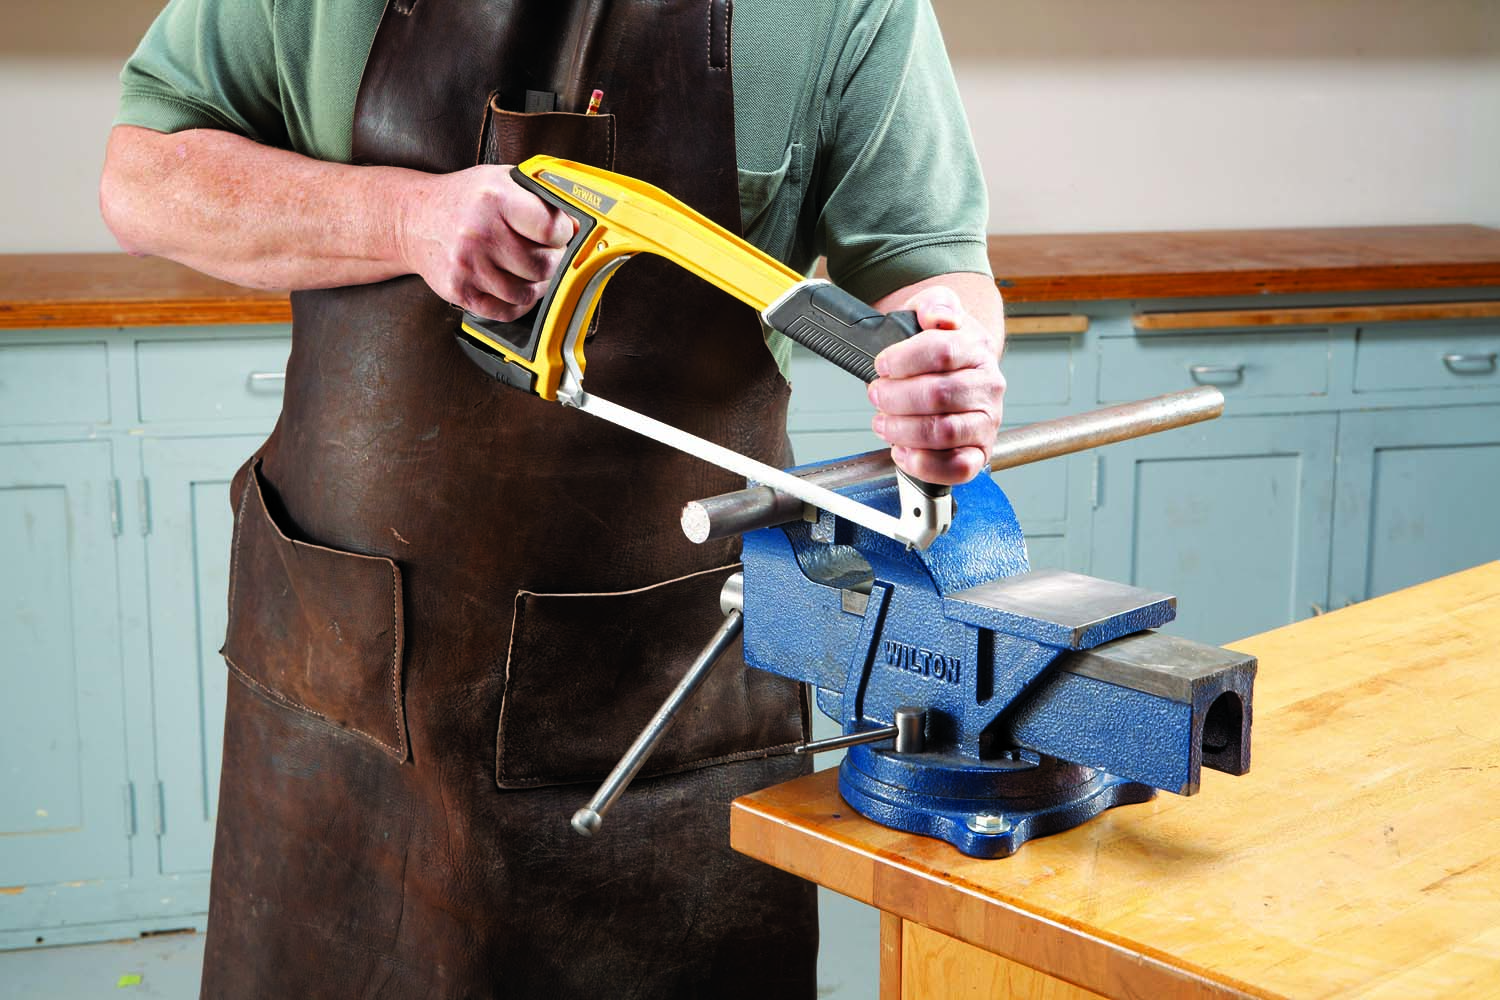
2. Slow, Powerful Strokes Do The Trick
A hacksaw is a very handy tool—if you know how to use it. Hold the saw with two hands and take long, slow strokes. Use plenty of downward pressure on the forward stroke (the direction the teeth are facing). Relieve the pressure on the return stroke—this helps the teeth last longer.
Speaking of teeth, run your fingers over them before you start sawing. If they feel dull, replace the blade. Using a new blade saves lots of time and energy. It’s money well spent.
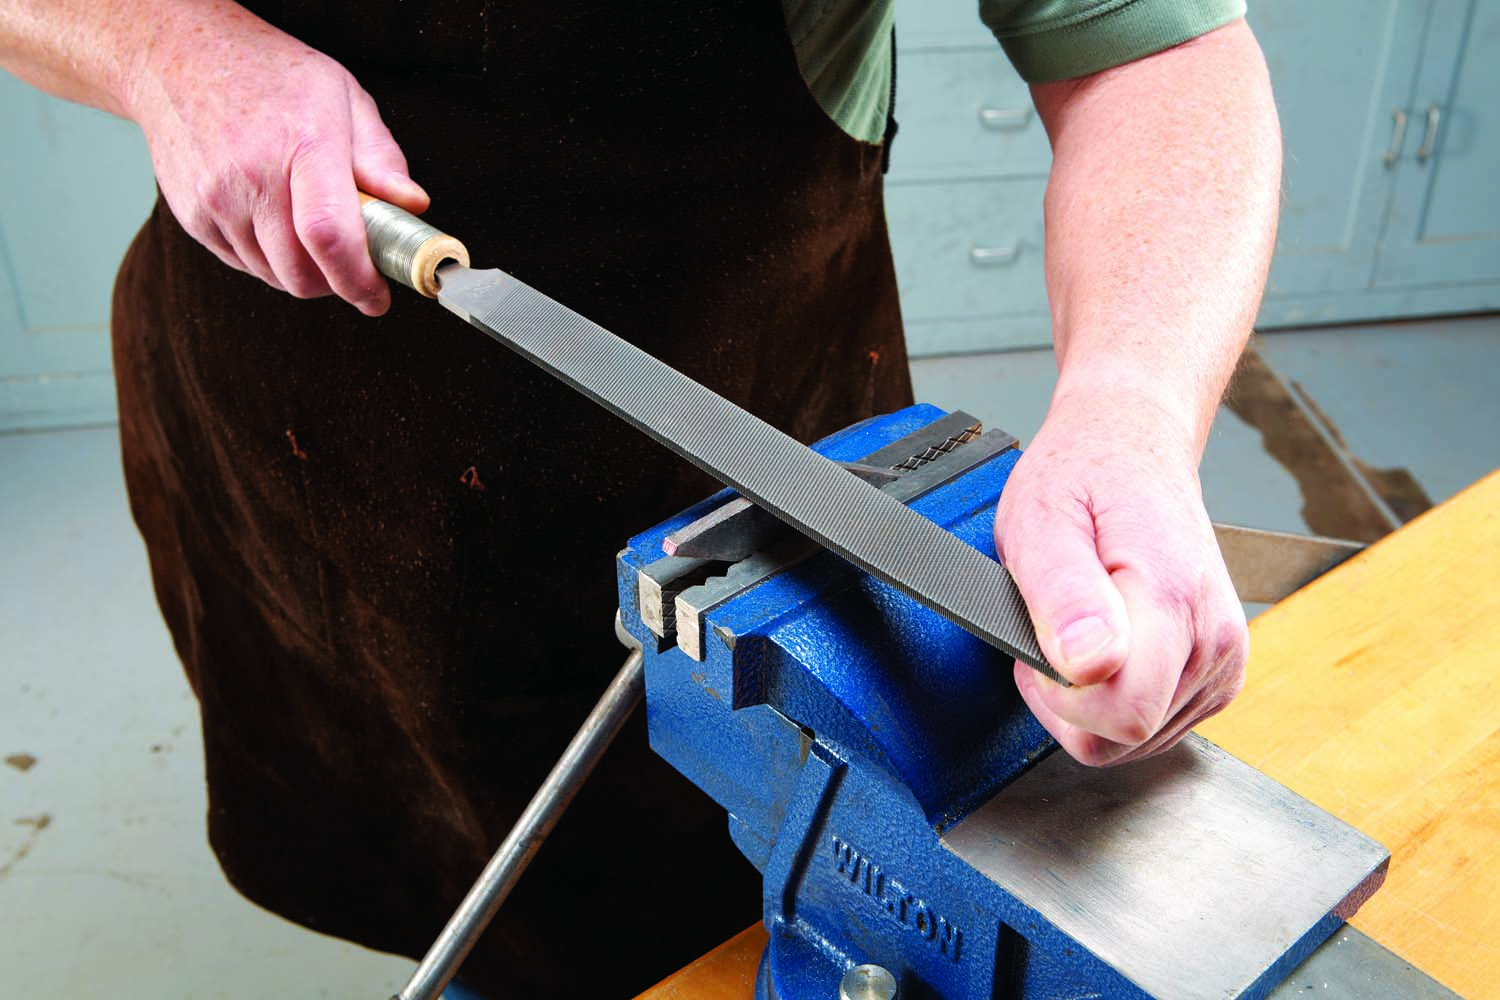
3. Cut Only On The Push Stroke
Good filing takes practice. Apply downward pressure with both hands and put your body weight into the stroke.
Unlike sandpaper, a file only cuts on the forward stroke. When the stroke is finished, lift the file off the workpiece and return it to the starting position. Pulling the file back over the workpiece will prematurely dull the file’s teeth.
If a file is shiny with wear and cuts slowly, replace it. A worn file is about as useful as spent Kleenex.
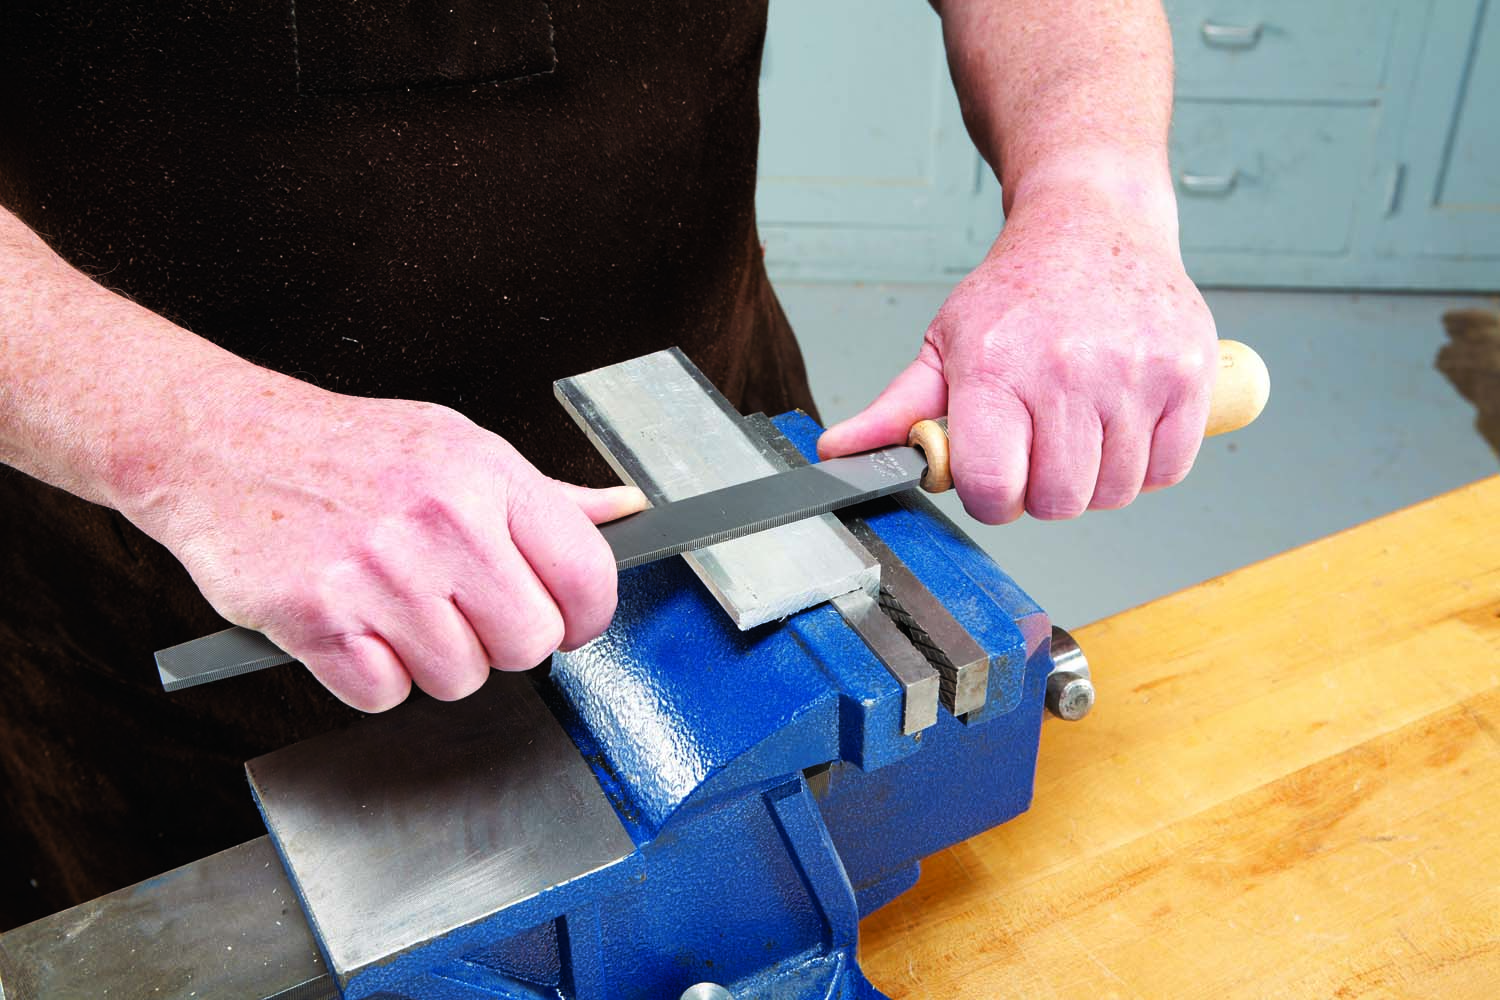
4. Draw Filing Makes the Smoothest Surface
Pushing a file sideways or at an oblique angle makes a smoother surface than pushing it straight ahead. Weird, but true.
This technique is called draw filing. The waste falls off as little metal spirals, rather than chips. Draw file any surface that must be smooth, such as the edge of a scraper.
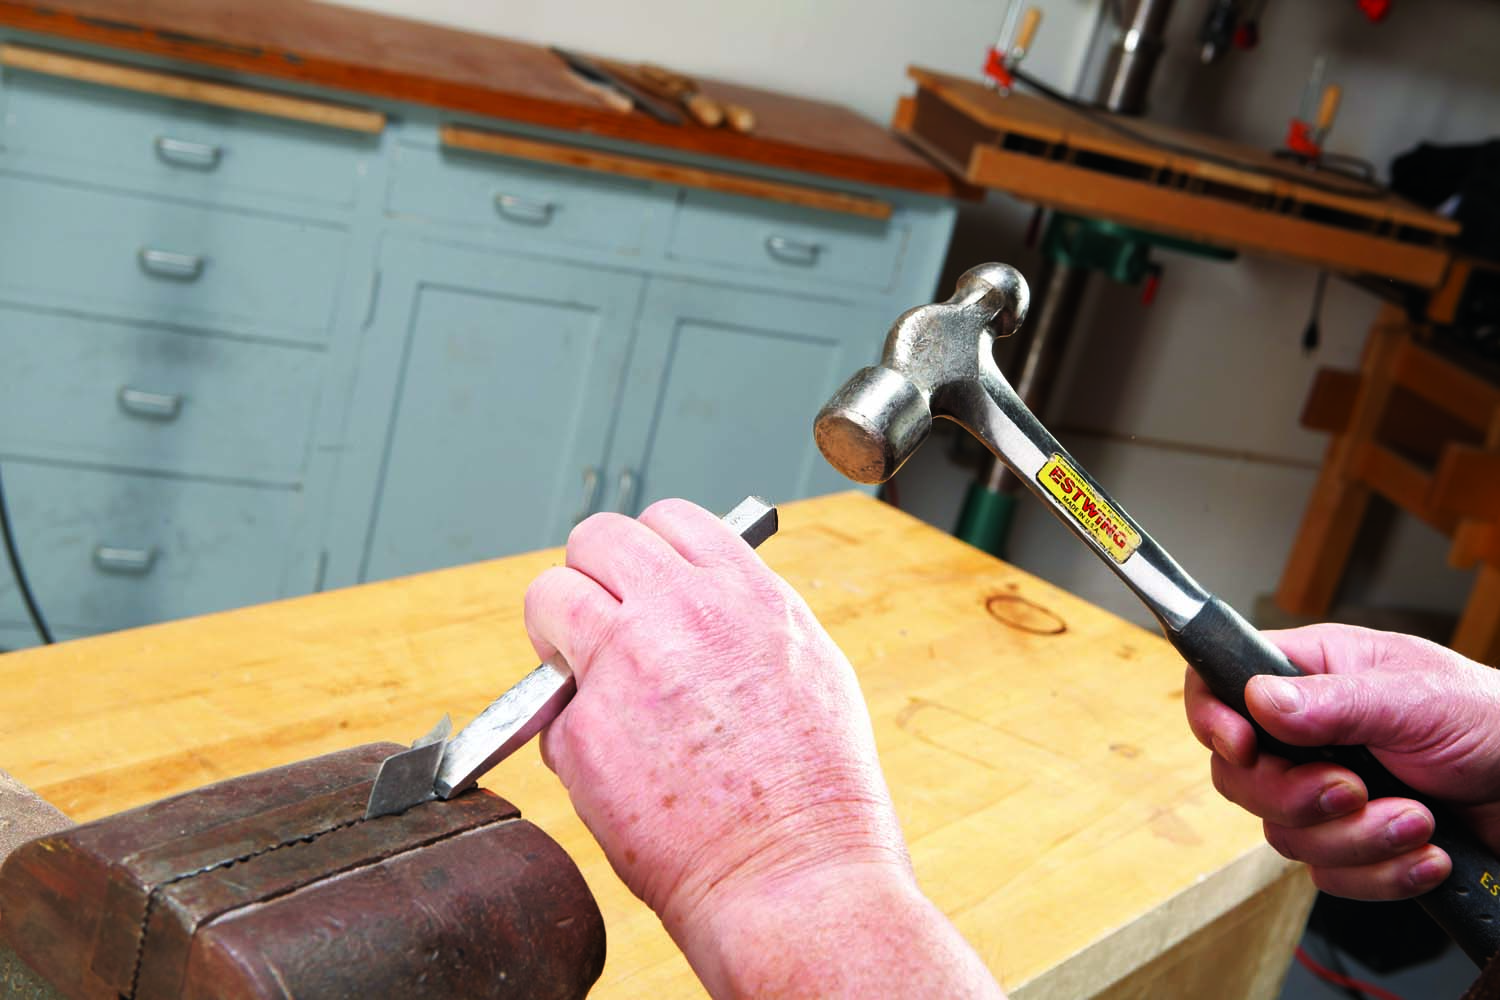
5. Always Use A Ball Peen Hammer
Never use a claw hammer to strike a steel chisel or punch. If you do, there’s a good possibility that a piece of the hammer’s rim may flake off and go flying.
The head of a claw hammer generally has a soft center and a brittle rim; a ball peen hammer is consistent throughout. It’s designed for striking steel.
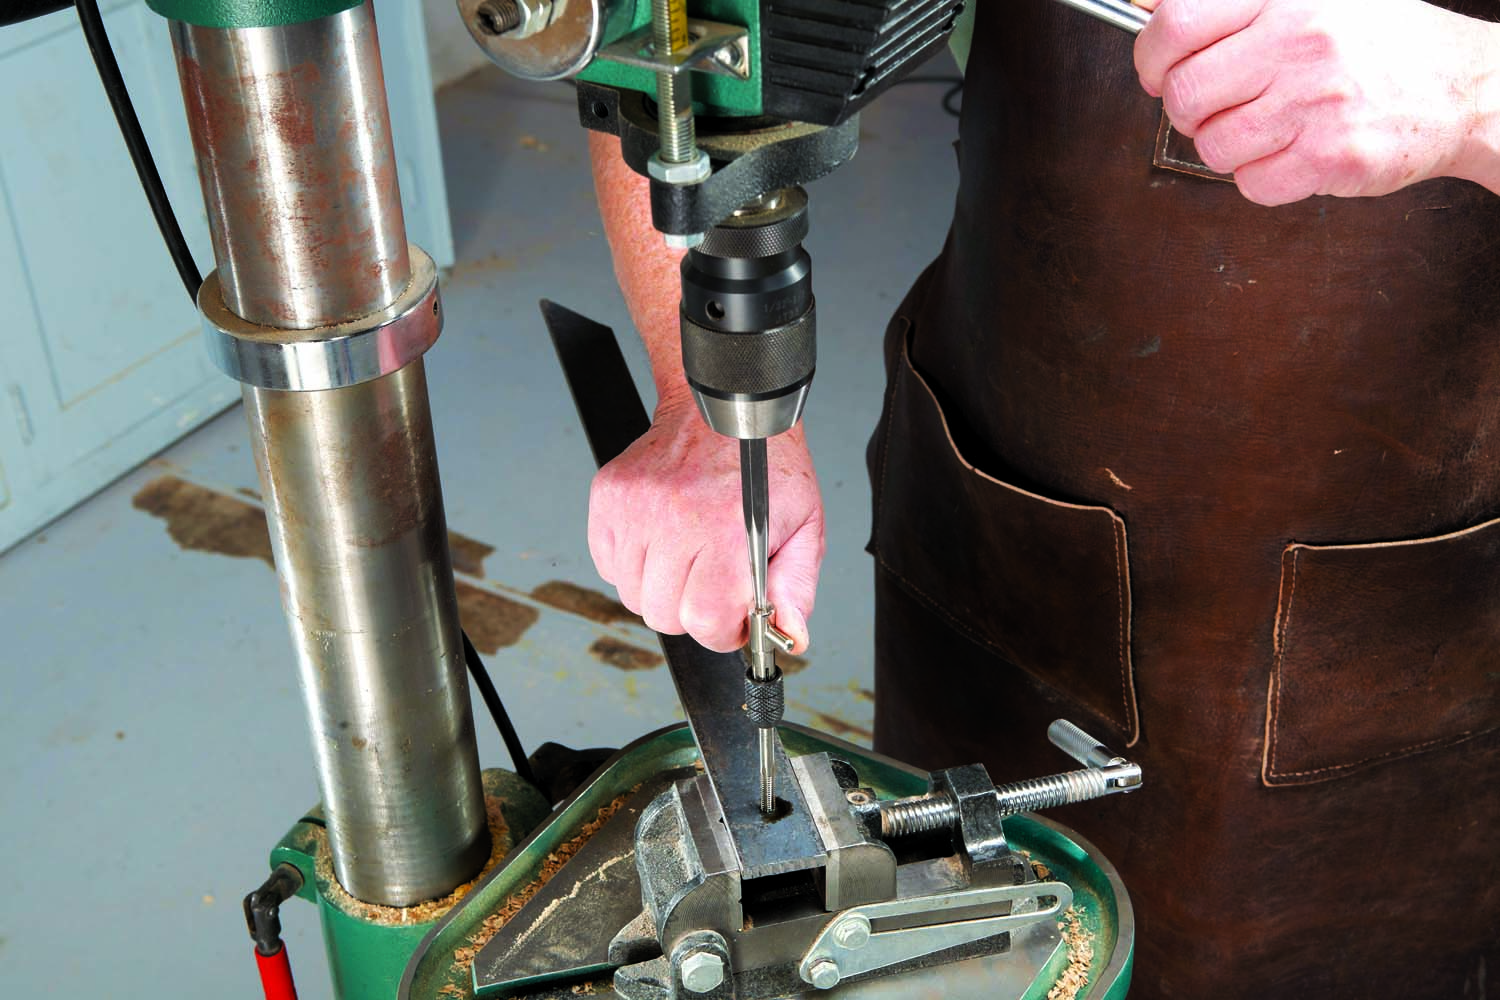
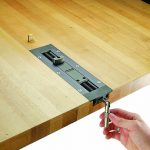
6. Use a Drill Press to Keep a Tap Straight
A tap should be held precisely vertical to the workpiece, with no wobbling. This is very hard to do by hand, but easy to accomplish with a drill press. The drill press doesn’t turn the tap; you do that by hand. While you’re turning, you apply downward pressure with the machine’s feed lever.
Here’s how you set it up. After drilling the hole for the tap, lower the table and tighten a center punch in the machine’s chuck. Be sure that the punch is centered on the hole. Most tap wrenches have a dimple on top of the handle; lower the punch into the dimple to steady the tap and have at it. 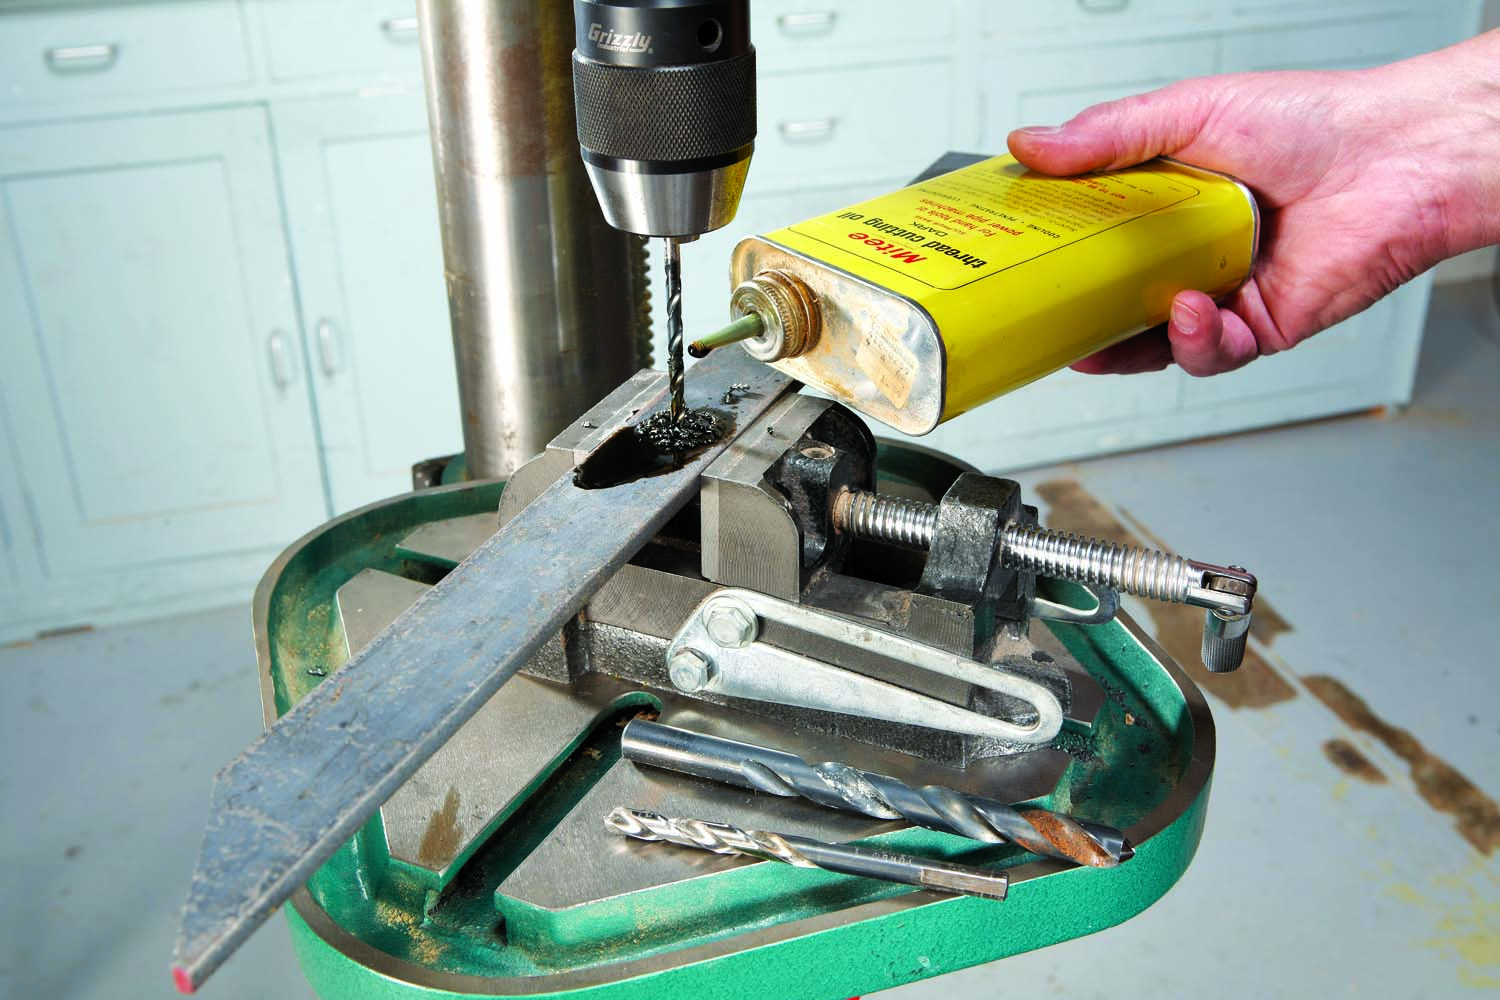
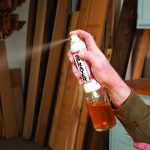
7. Use Plenty of Cutting Oil
When drilling steel, keep the bit lubricated with cutting oil. This makes the job go faster and reduces wear on the bit.
If you’re drilling brass or aluminum, use a thin oil such as kerosene or mineral spirits. You don’t need any oil at all when you’re drilling cast iron—small deposits of graphite in the metal provide sufficient lubrication.
Whatever metal you’re drilling, start out with a relatively small bit. Work your way up through a series of larger diameter bits. In the end, changing bits saves time.

8. Three Snips Make a Set
Aviation snips can be very handy for cutting sheet metal when installing a dust collection system. Easier on the hands than regular tin snips, they have a compound action that increases the tool’s mechanical advantage. Aviation snips come in three styles: left cut, right cut and straight. To be ready for any situation, it’s best to have all three.
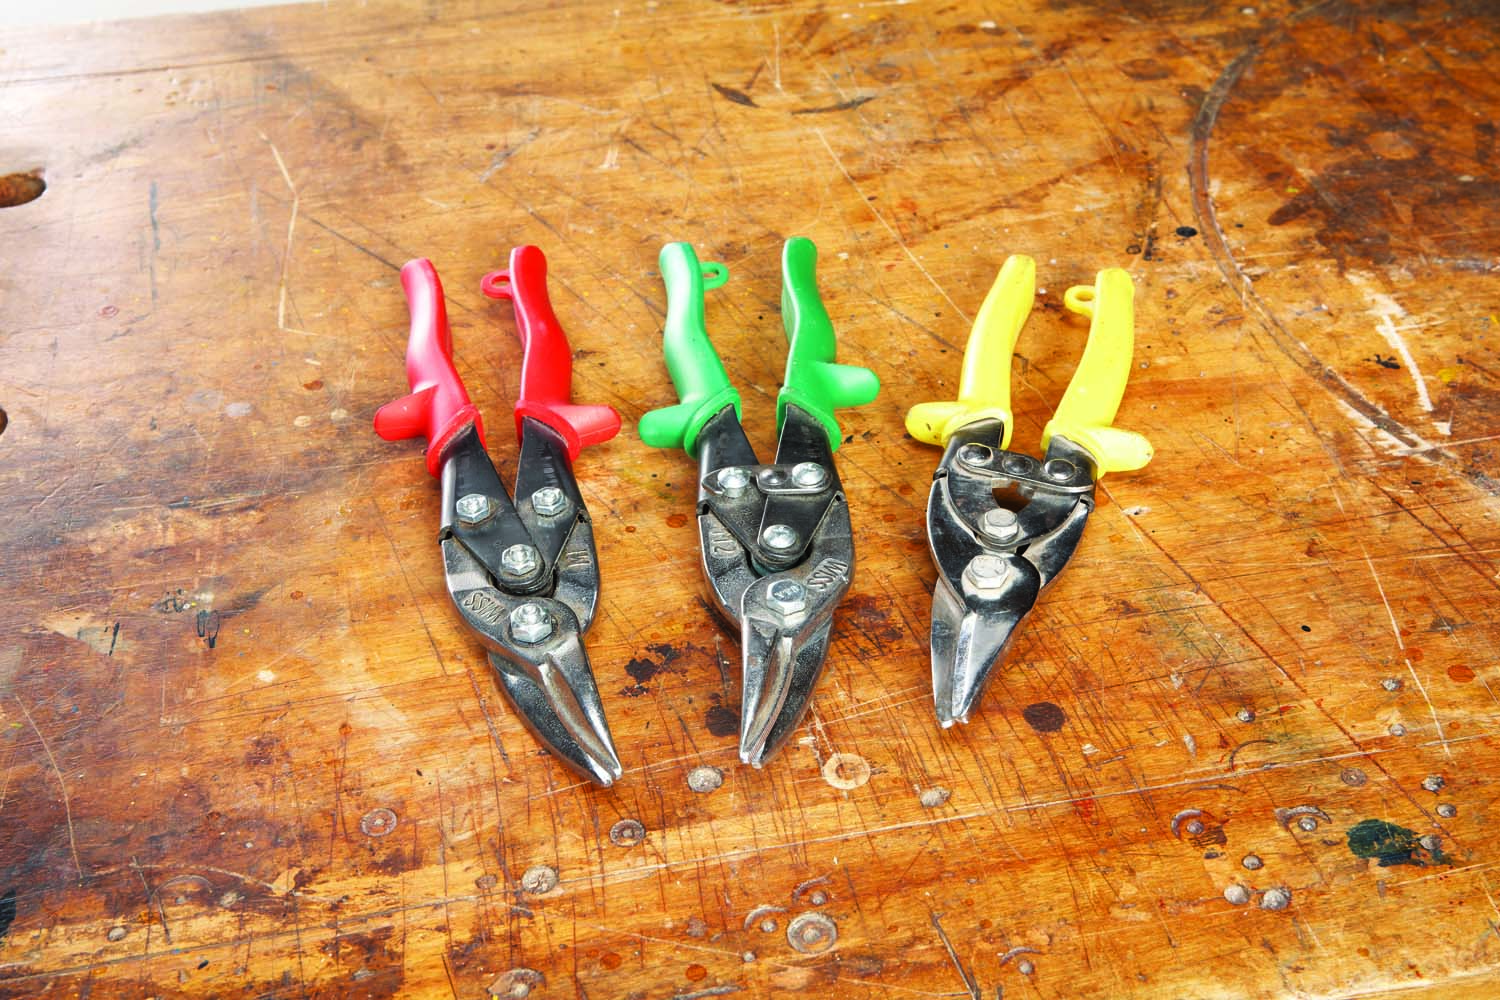 Left cut snips are best for cutting a curve that arcs to the left, as shown above. Right cut snips are for curves that arc to the right. Both of these snips will also cut straight, but straight snips are easier to track along a straight line.
The handles of all three snips are usually color-coded: red for left, green for right and yellow for straight.
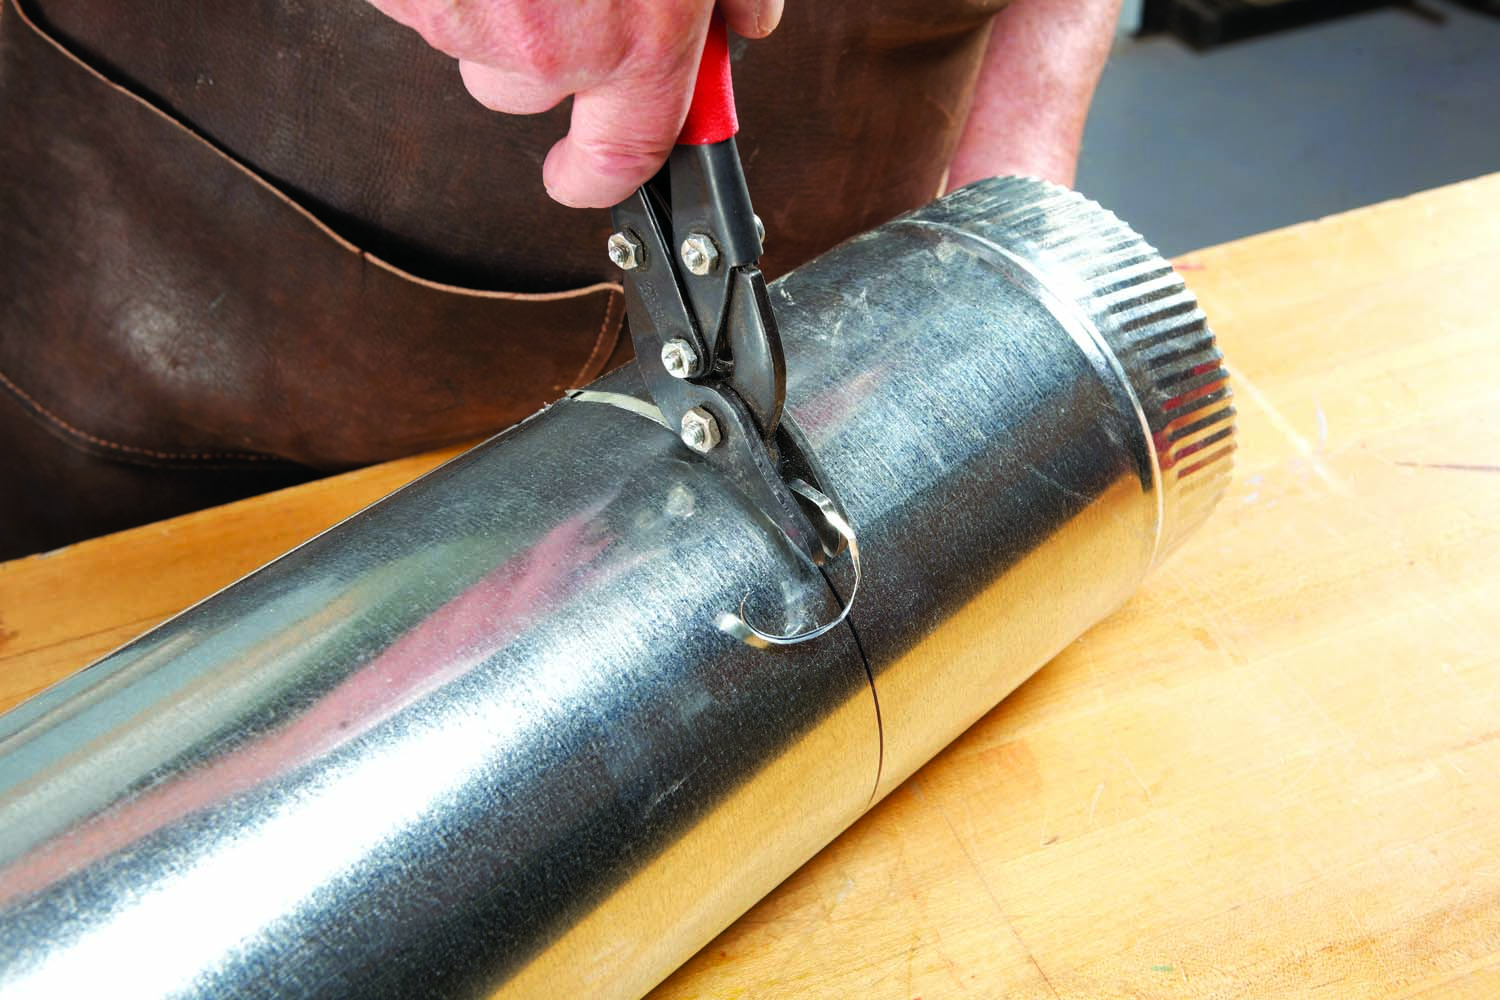
9. Duct Snips Won’t Deform the Metal
Duct snips are the best tool to use for cutting dust collection ductwork. Standard snips will deform the metal on one side of the cut, making it difficult to join the duct to another straight piece or fitting. Duct snips leave both sides of the cut flat and undamaged.
Duct snips work by removing a strip of metal, so they’re actually making two cuts at the same time. They have two stationary blades that are placed above the duct and one 1/8″ wide moveable blade that fits between them. The moveable blade rises up as you squeeze the tool’s handle.
To get started, draw a line around the duct and drill two or three connecting holes on the line. Insert the snip’s lower jaw into the hole and start cutting.
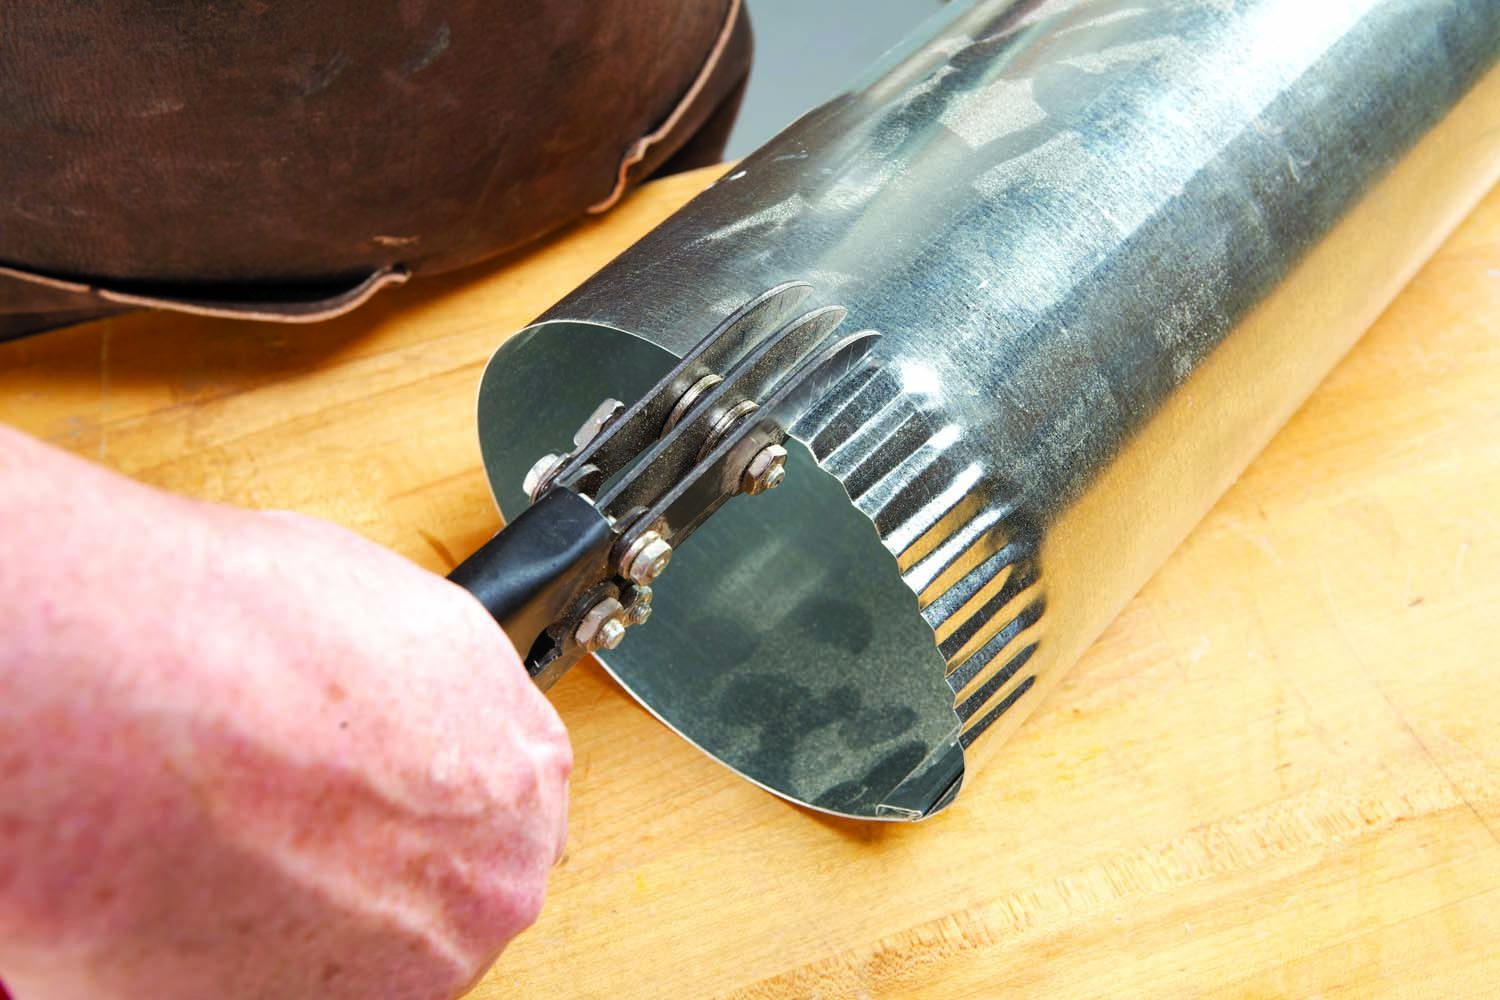
10. Use A Crimping Tool
When you join two pieces of dust collection ductwork, use a crimping tool to make one piece fit inside another. Crimping the ductwork’s end slightly reduces its diameter, so two pieces can easily slide together.
A crimping tool doesn’t cut the metal—it just bends it. It has five interlocking blades, three on one side of the tool and two on the other. When you crimp, place the three blades on the outside of the duct.

11. Make Jaw Protectors
A machinist’s vise is an excellent tool to have in the shop. You can permanently mount it on a bench or bolt it to a piece of plywood that you can clamp to the bench. Mounting the vise on plywood enables you to store it away when you don’t need it.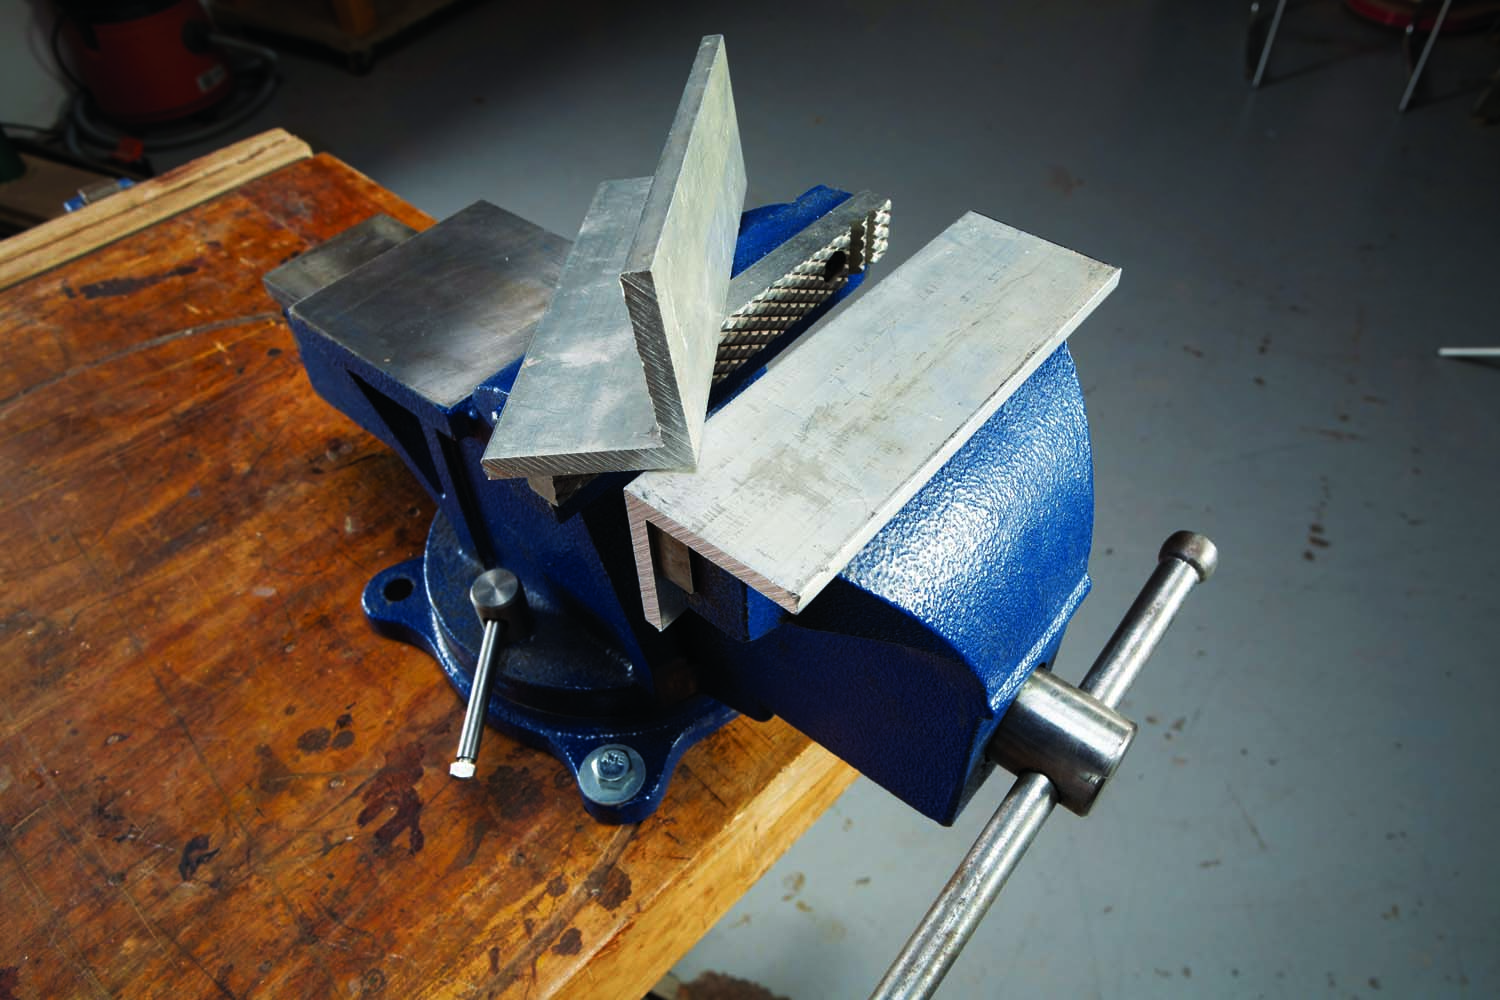
This type of vise has corrugated, non-slip jaws to hold a piece of metal for sawing, filing or bending. When you need to hold something that might be damaged by the jaws, such as the shank of a router bit or a length of threaded rod, use jaw protectors made from aluminum angle or pieces of pine. Pine is easy to crush, which helps hold a round object.
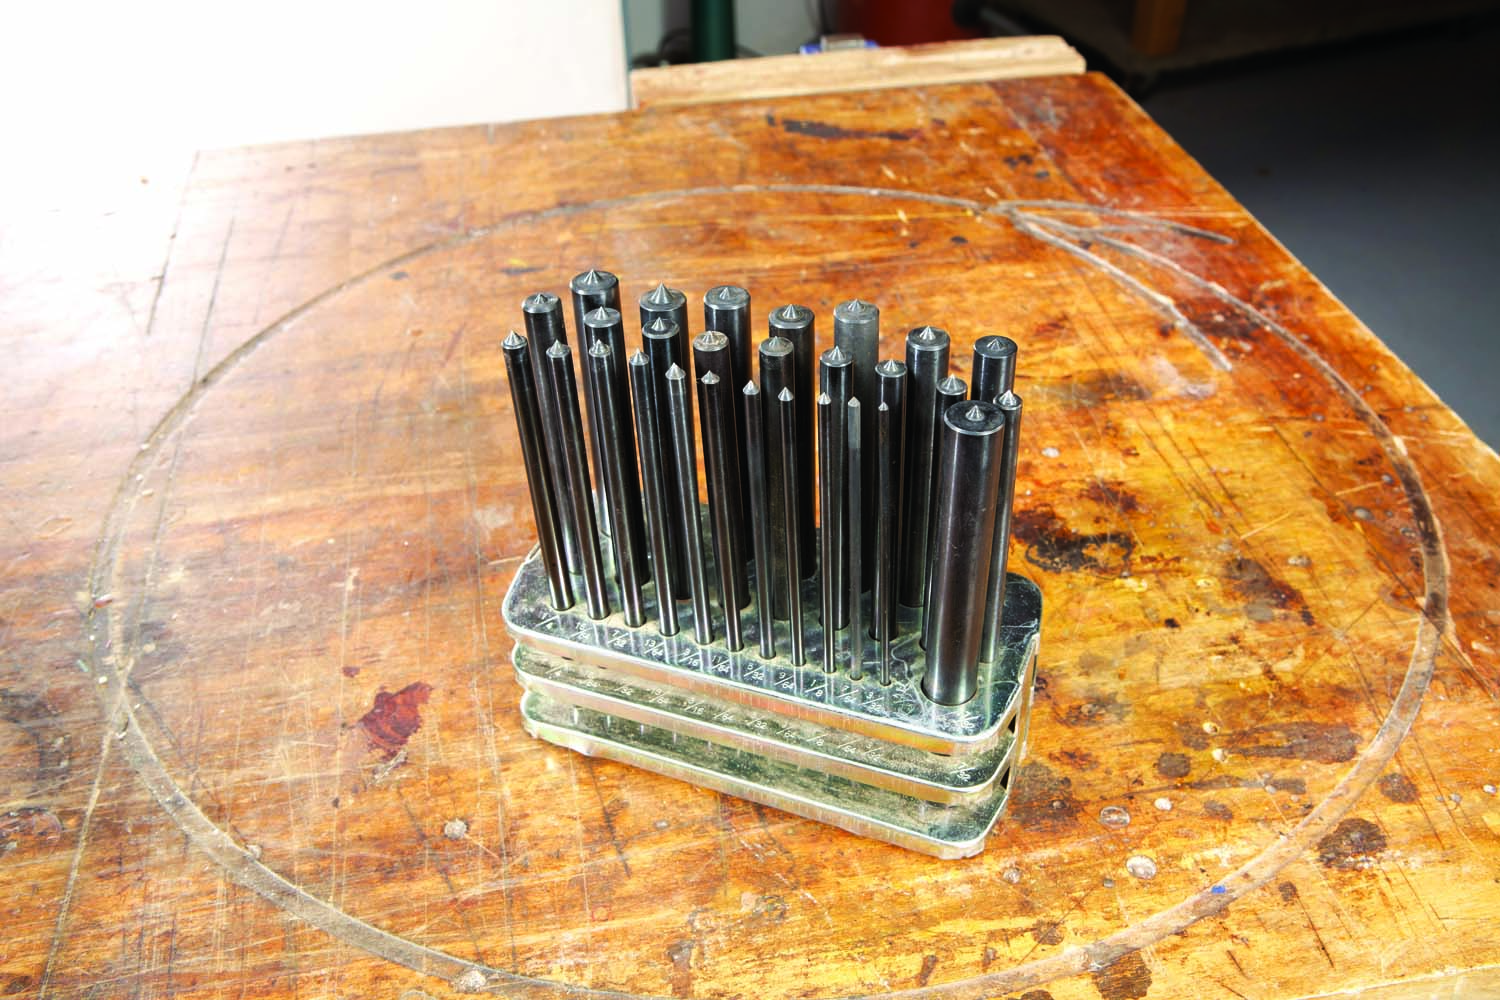
12. Transfer Punches Mark Exact Centers
Let’s say you’ve drilled a hole in one object in order to fasten it to another. How do you locate the exact center of that hole on the second piece? You use a transfer punch—a rod with a sharp point on its end.
Don’t pound on the punch, however—it’s too soft. Just tap it, then use a center punch to enlarge the dimple.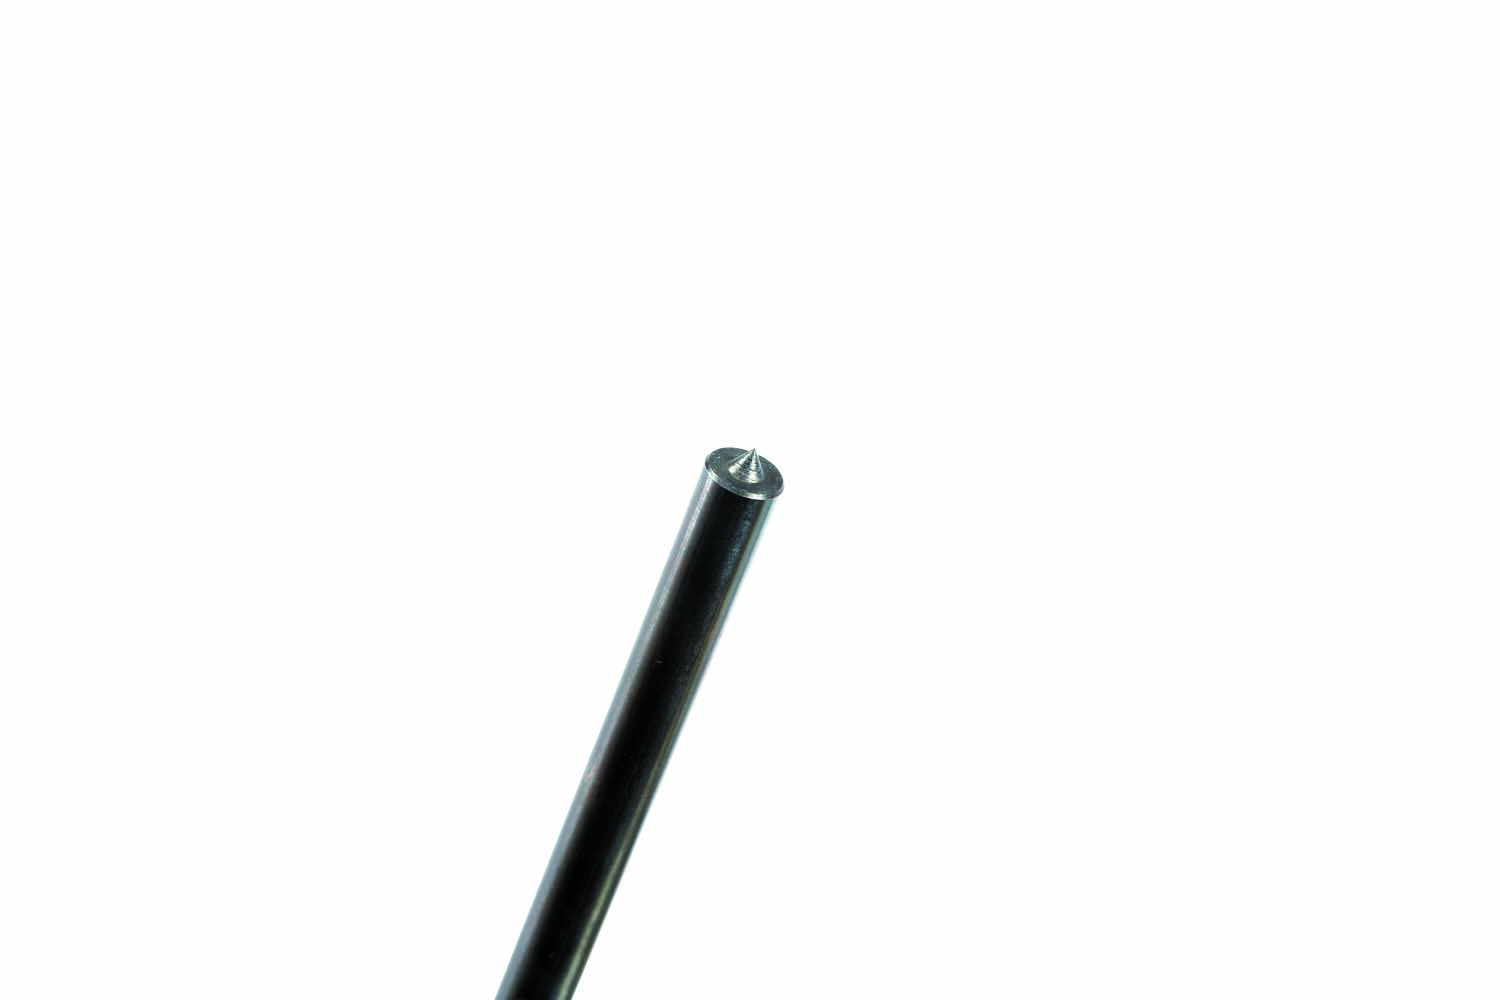
Transfer punches come in a set—one for every size hole you’re likely to drill. You can get fractional, numbered, or letter-sized sets.
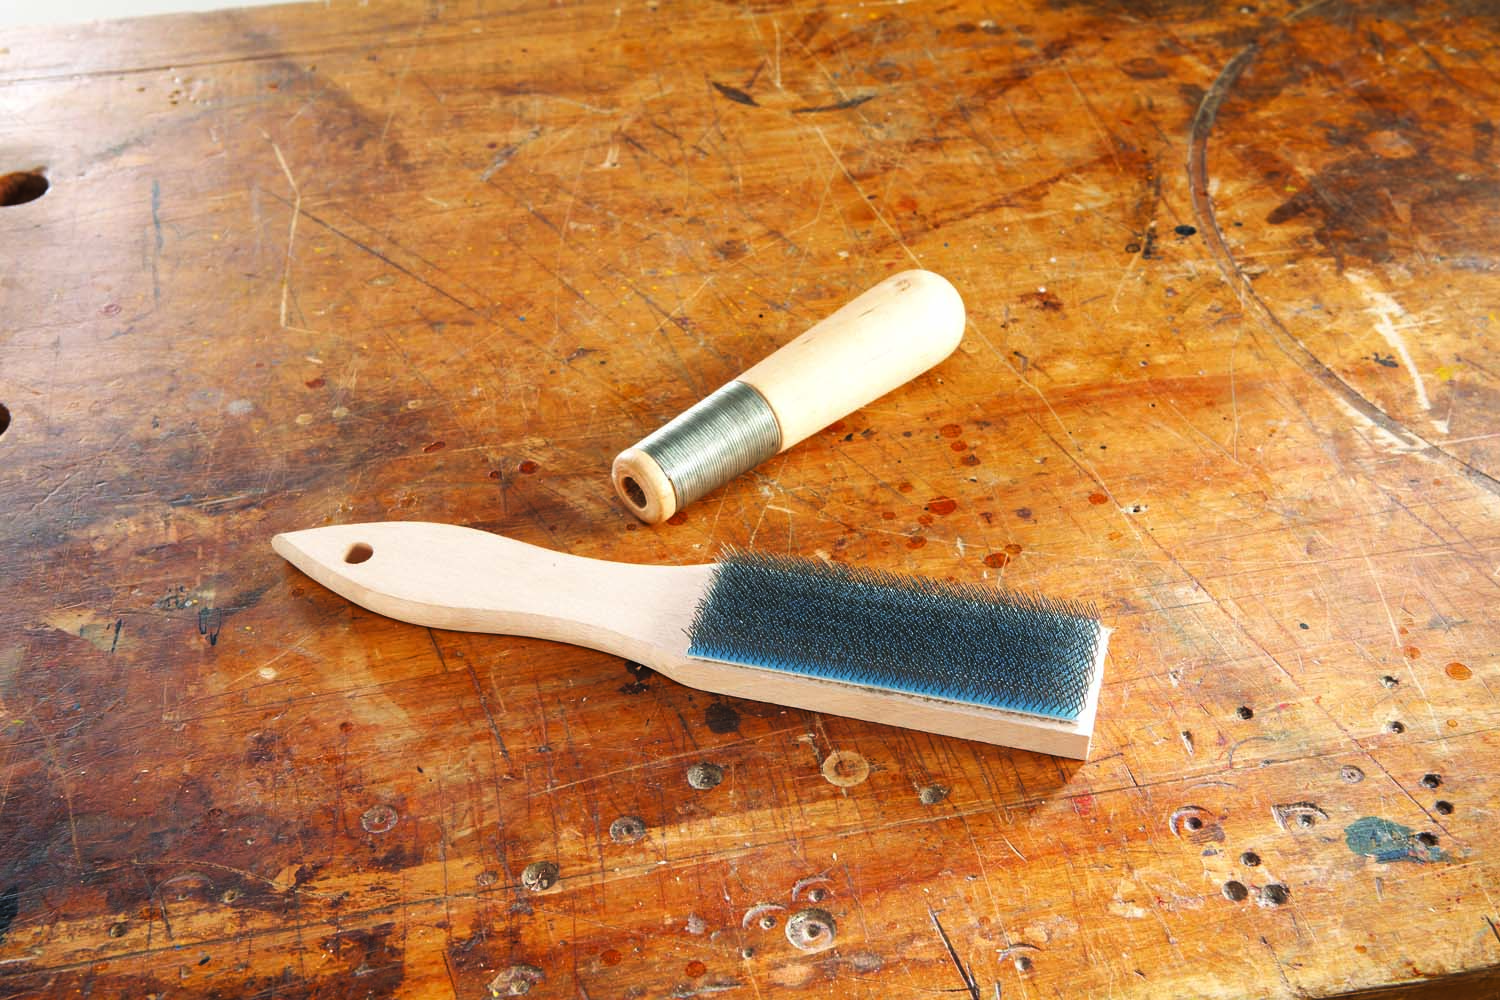
13. Files Require Two Accessories
A set of files is incomplete without two additional items: a file card and a handle. The file card is basically a stiff wire brush. Use it to clean a file’s teeth after every few strokes. You’ll quickly find that a clean file works much more efficiently than one clogged up with metal waste.
A handle has two purposes. First, it enables you to put more downward pressure on the tool. Second, and most importantly, it prevents the file’s tang from piercing your palm if, for some reason, the file hangs up when you’re pushing it.
Most files come without a handle because handles are meant to be reusable. When a file wears out, pull the handle from the file’s tang and slide it onto a new file. Tap the end of the handle on a bench to seat it.
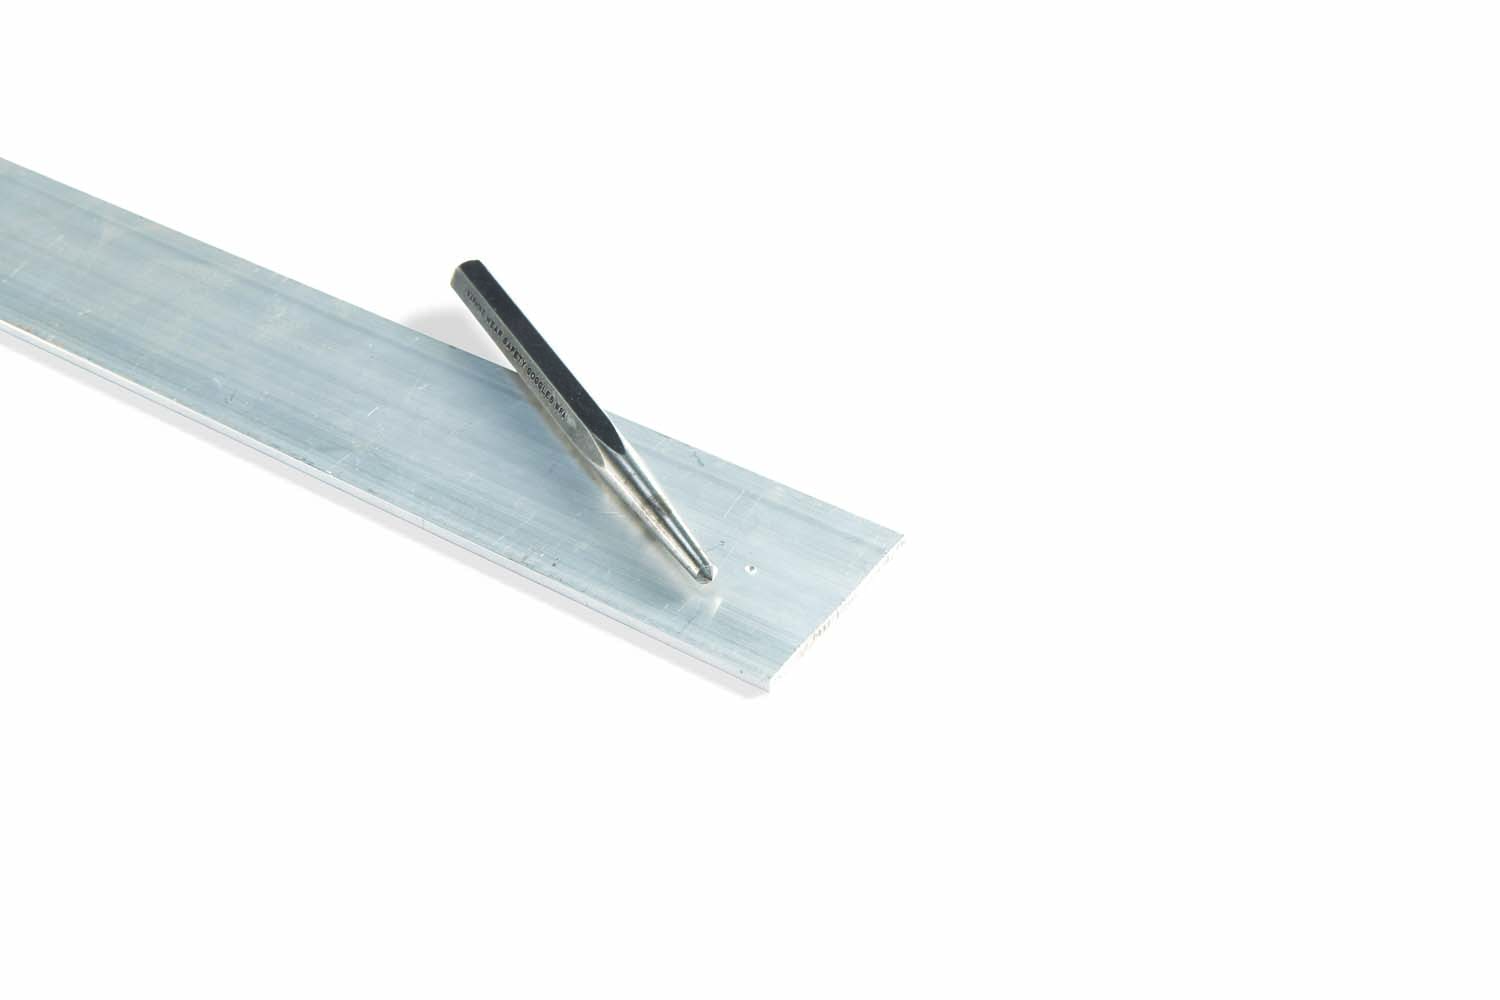
14. Start A Hole With A Center Punch
Whenever you’re drilling a hole in metal, begin by creating a dimple with a center punch. This cavity allows the drill bit to start precisely where you want it to. Without the dimple, the bit will probably skitter across the surface before it begins to bite.
The smaller the diameter of the bit, the more important it is to use a center punch. Chucked in a drill press, a small bit may skitter, flex and drill off center if it’s not properly guided by a dimple. This can result in a hole that’s out of square or a broken bit.
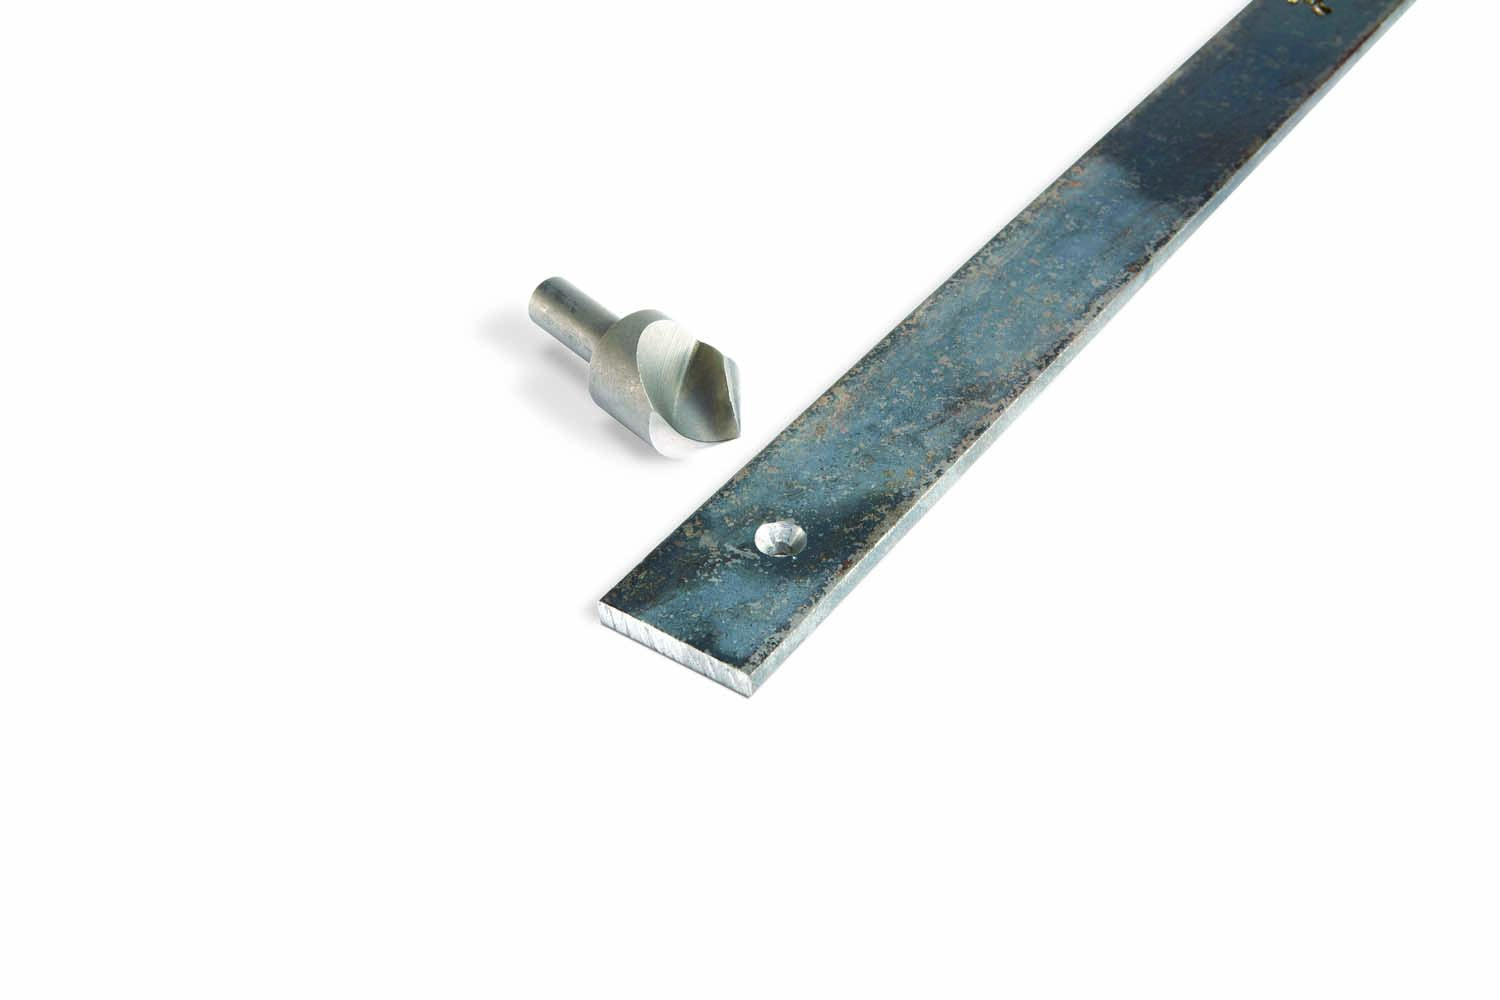
15. Single-Flute Countersinks Are Best
Countersinks come in two different types: multi-fluted and single flute. In my experience, a single-flute countersink usually leaves the smoothest surface. Whichever one you use, set your drill or drill press to a very low speed for the best results.
Countersinks also come in different chamfer angles, to fit different types of screws. Most American screws (UNC and UNF) require an 82° chamfer; metric screws use a 90° chamfer.
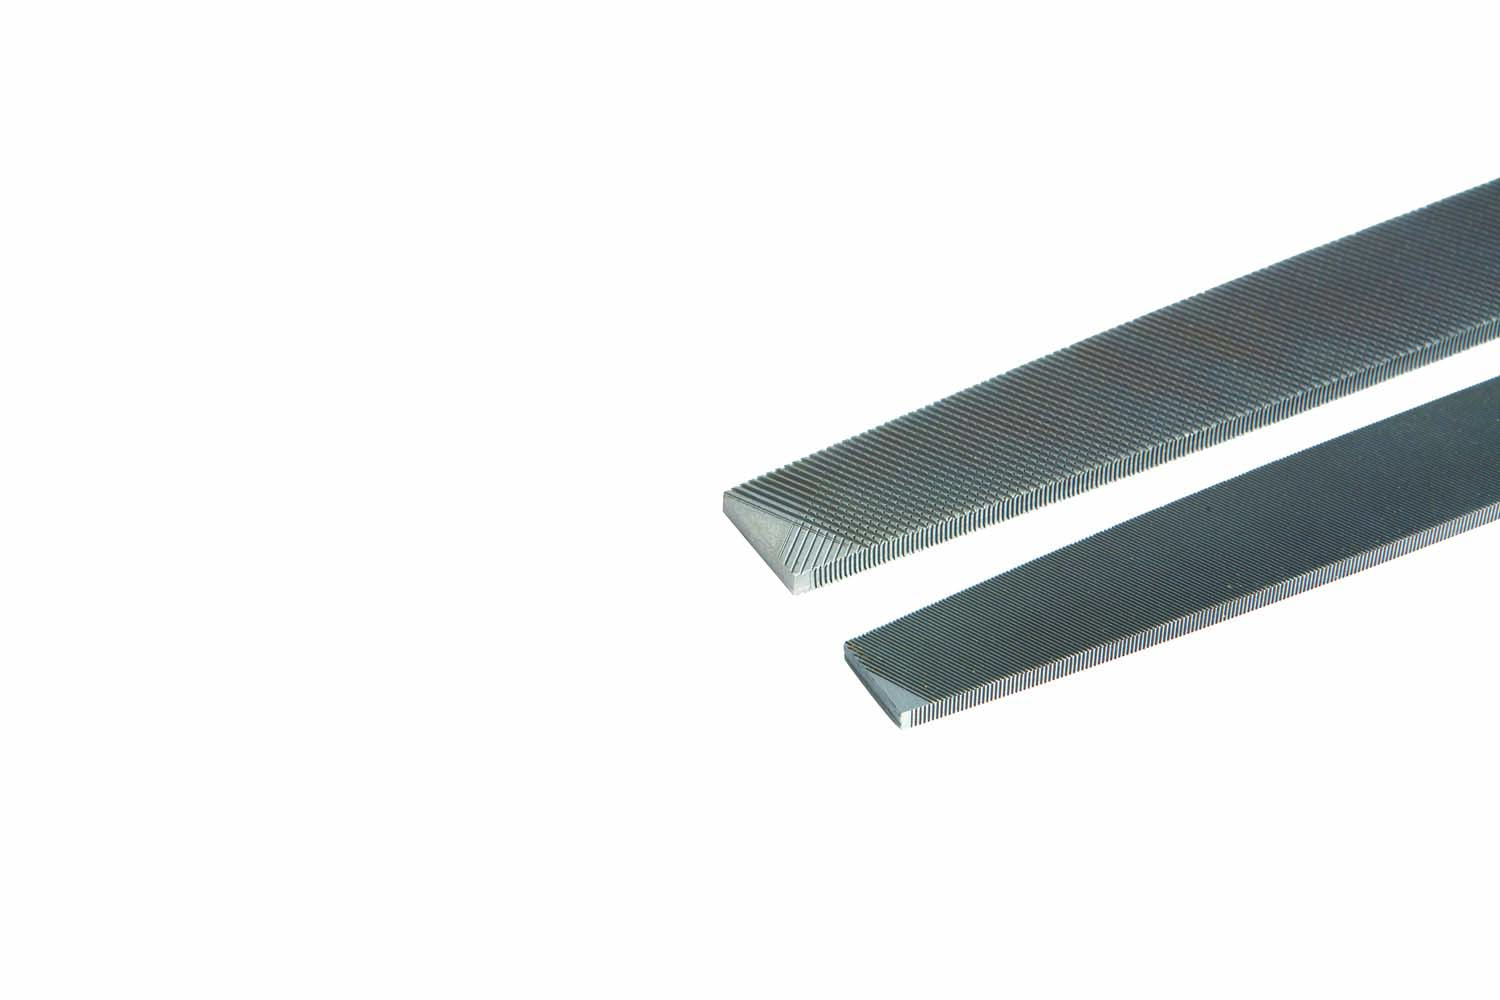
16. Double-Cut Files Are More Aggressive
Metalworking files have either single rows of teeth or two rows of teeth that are crisscrossed. They’re commonly called single-cut and double-cut files, respectively. The easiest way to tell which is which is by looking at the end of the file. It’s a good idea to have at least one of each.
Double-cut files cut relatively fast, but leave a rough surface. Single-cut files cut slower and leave a smoother surface. If you have a lot of metal to remove, start with a double-cut. If the surface must be smooth, finish with a single-cut.
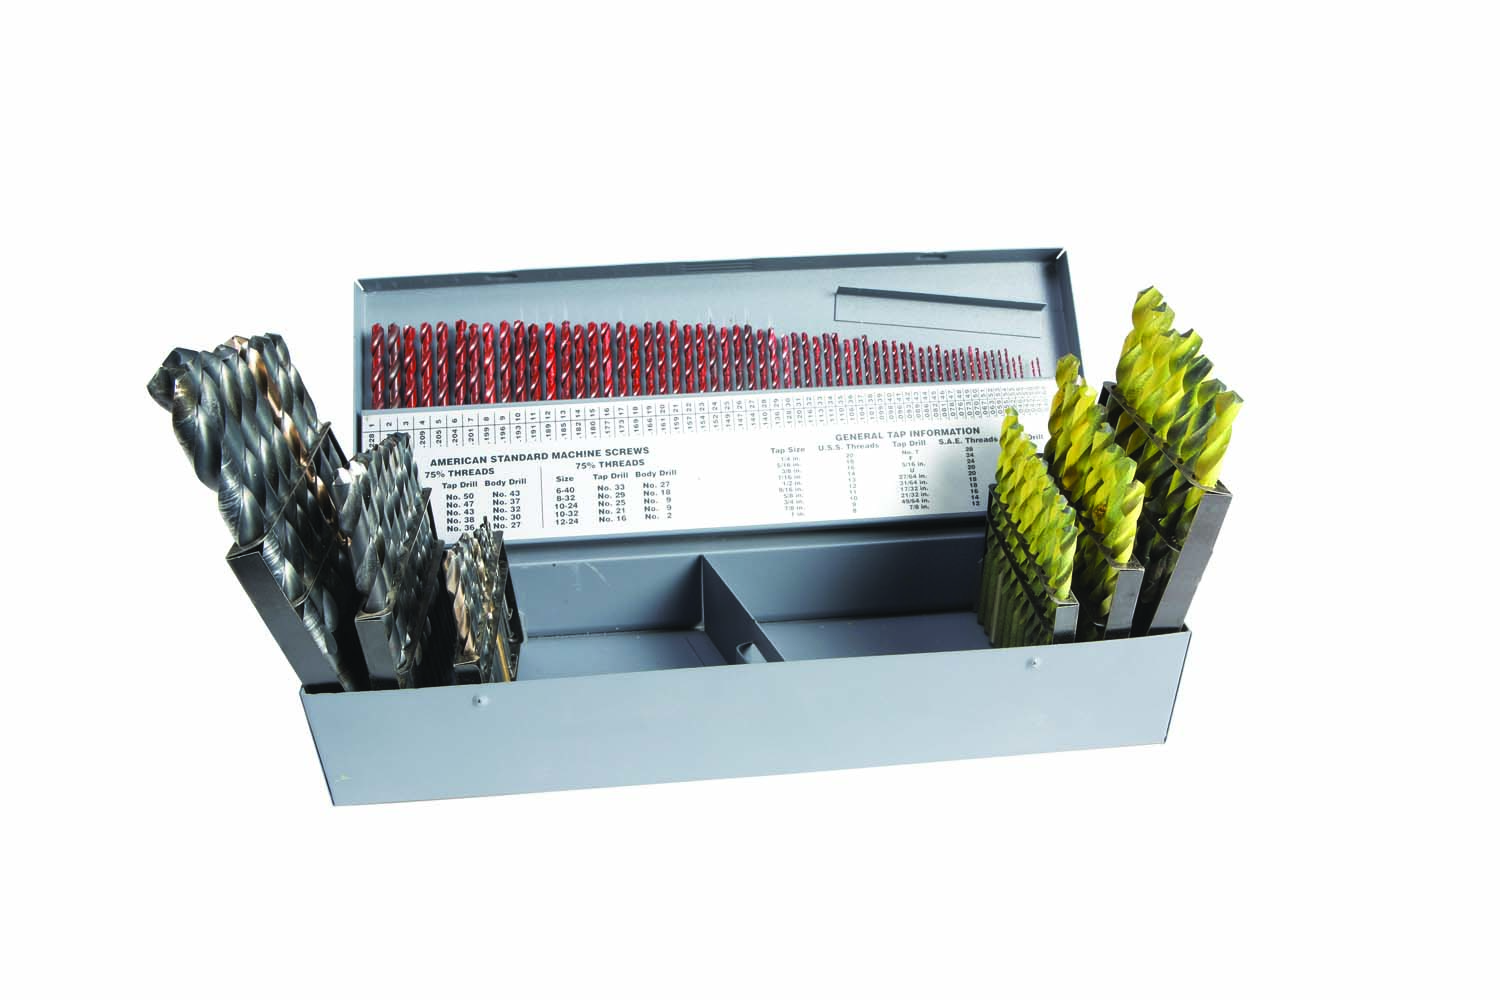
17. Pick From The Right Set
For all you tool junkies, you can honestly say that you need not one, but three sets of drill bits: a fractional set, a numbered set and a lettered set.
The numbered and lettered sets basically fill in the gaps between the fractional bits. They’re particularly useful for tapping holes, where the precise diameter of the hole is extremely important. Most taps specify which number or letter drill to use.
All of these bits are easy to mix up, however. To keep them straight, spray paint the number and letter sizes different colors.
Here are some supplies and tools we find essential in our everyday work around the shop. We may receive a commission from sales referred by our links; however, we have carefully selected these products for their usefulness and quality.


Thanks for the great article. Regarding Section 6, “Use a Drill Press to Keep a Tap Straight”, is there a reason why the tap isn’t put directly into the drill chuck? I’ve done that with good results. Typically, one gets enough leverage inserting the chuck key into the chuck and using that to spin the tap.
While there’s no reason that wouldn’t work, it feels like there’s more that could go wrong, especially if someone misunderstands the directions and tries to spin the tap using the drill motor itself.