We may receive a commission when you use our affiliate links. However, this does not impact our recommendations.
Tighter Corner Joints Ahead
Dadoes and, rabbets are two of the most widely used cabinetmaking joints. Cabinet carcasses, drawer boxes and jewelry boxes all lend themselves to this simple but strong joinery method. I’ve been woodworking, demonstrating and teaching for a long time. Over the years, I have accumulated some great tips for making and using dadoes and rabbets.
Proper Terms
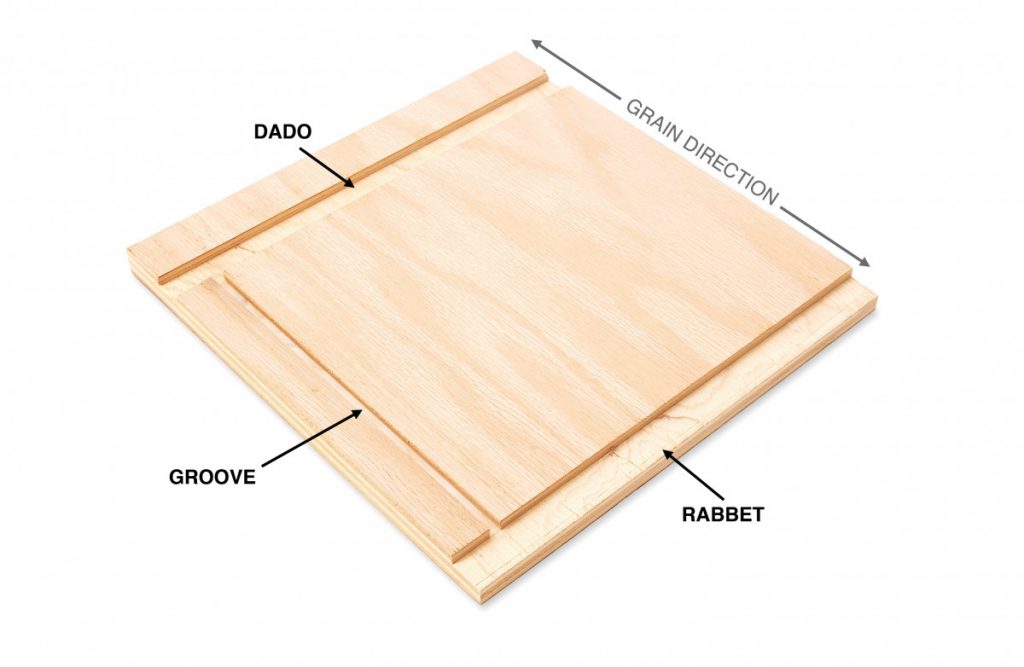
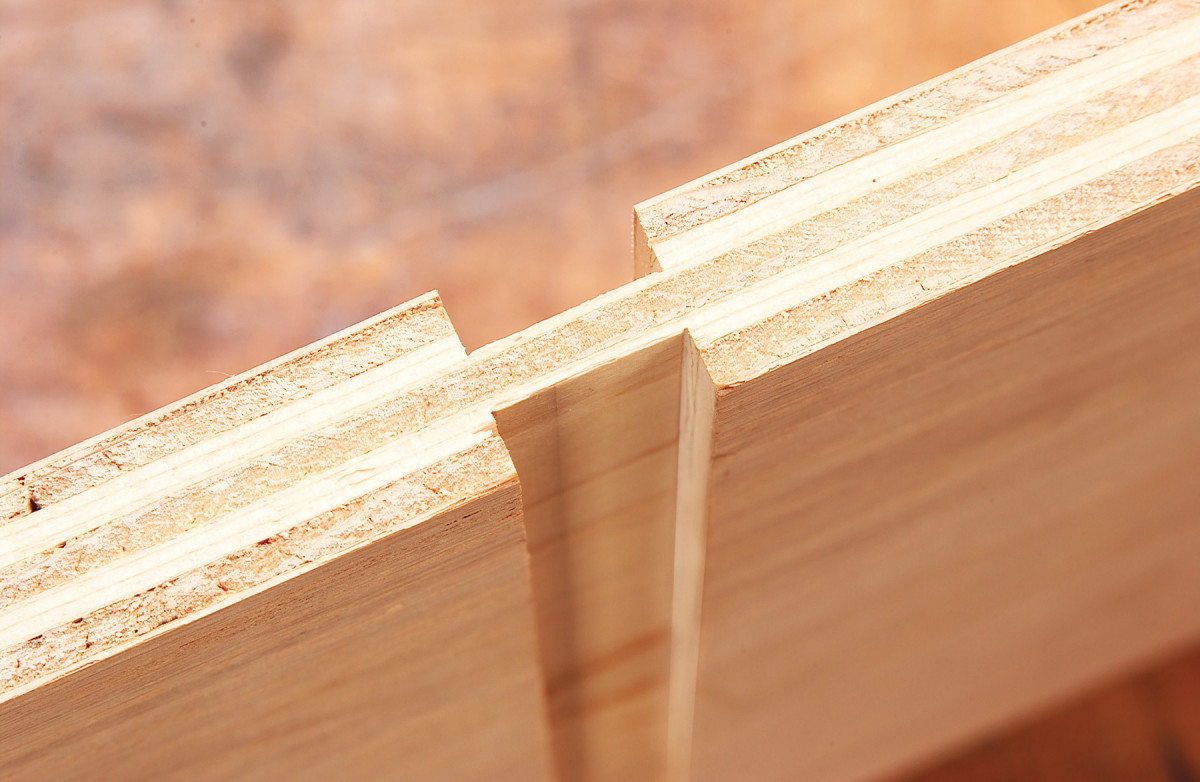
Some people get pretty worked up about using the right word for the right joint. Perhaps they have a point since imprecise use of terms can lead to confusion. So, to be precise, here are the proper definitions: A dado is a U-shaped, square-bottomed channel cut across the grain. A groove looks just like a dado, but runs with the grain. A lot of people call a groove a dado I think that’s OK – but imprecise. A rabbet is an L-shaped channel cut across or with the grain. A rabbet is always cut on the stock’s edge.
Make a Gauge Block
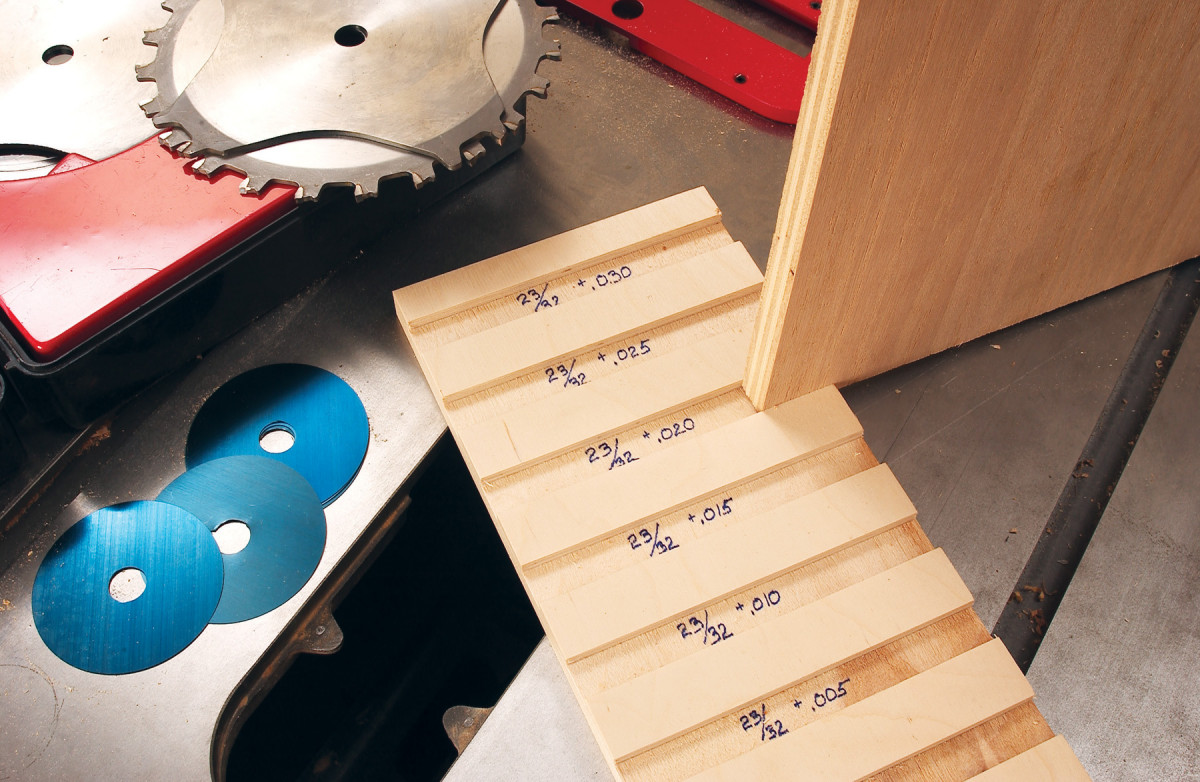 Setting up a stackable dado head can be fussy and time consuming. You’ll significantly reduce the guesswork of matching your plywood to the right size dado by making a dado gauge block. To make the block, cut a 23/32-in. wide dado in a board big enough to allow for six dados and space between. Add a single .005-in. shim to the 23/32-in. set up and plow a second dado next to the 23/32-in. one. Continue adding shims and making dados in .005-in. increments until you get to a 3/4-in. dado. Mark the dadoes as you go. To use, slip your plywood into the test dadoes until you find the perfect fit. Then, read the number of shims needed.
Best Dado Depth
 For years, I made all my dadoes 3/8-in. deep in 3/4-in. plywood. If I made dadoes on opposite sides of a divider, however, I had to change their depth and recalculate shelf lengths just for that joint. I’ve since learned it’s a lot easier and just as strong to set the depth of cut for every dado to 1/4 in.. This makes calculating shelf lengths a whole lot easier, and I never have to make special calculations for a double dado.
Lock the Height
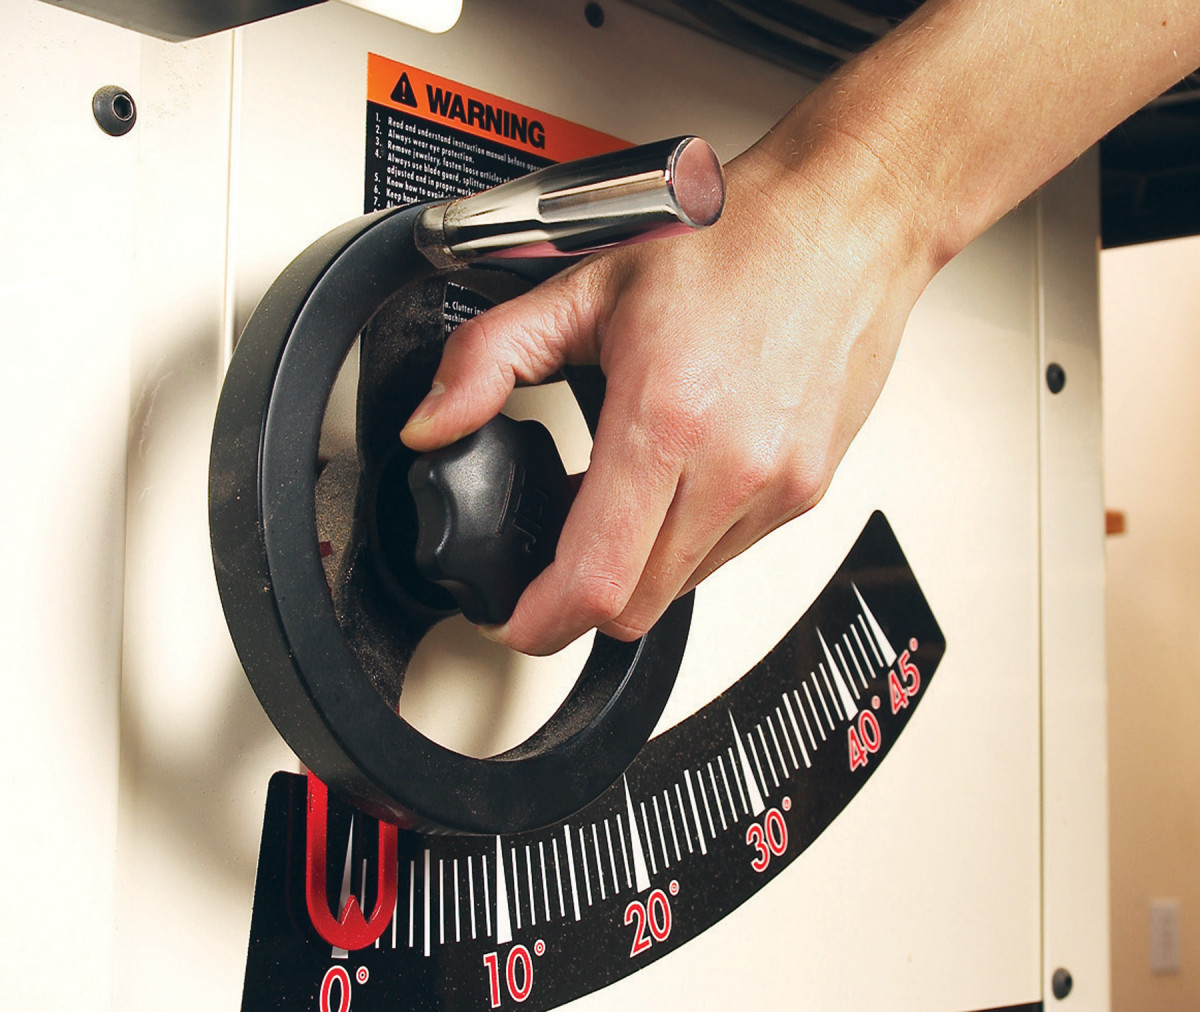 Always lock the blade-height adjustment handwheel before cutting. Vibration can make the handle turn, changing the depth of cut. This change is often hard to observe until assembly time. A big oops, if you just cut dadoes for a kitchen full of cabinets.
Cut Rabbets with a Sacrificial Fence
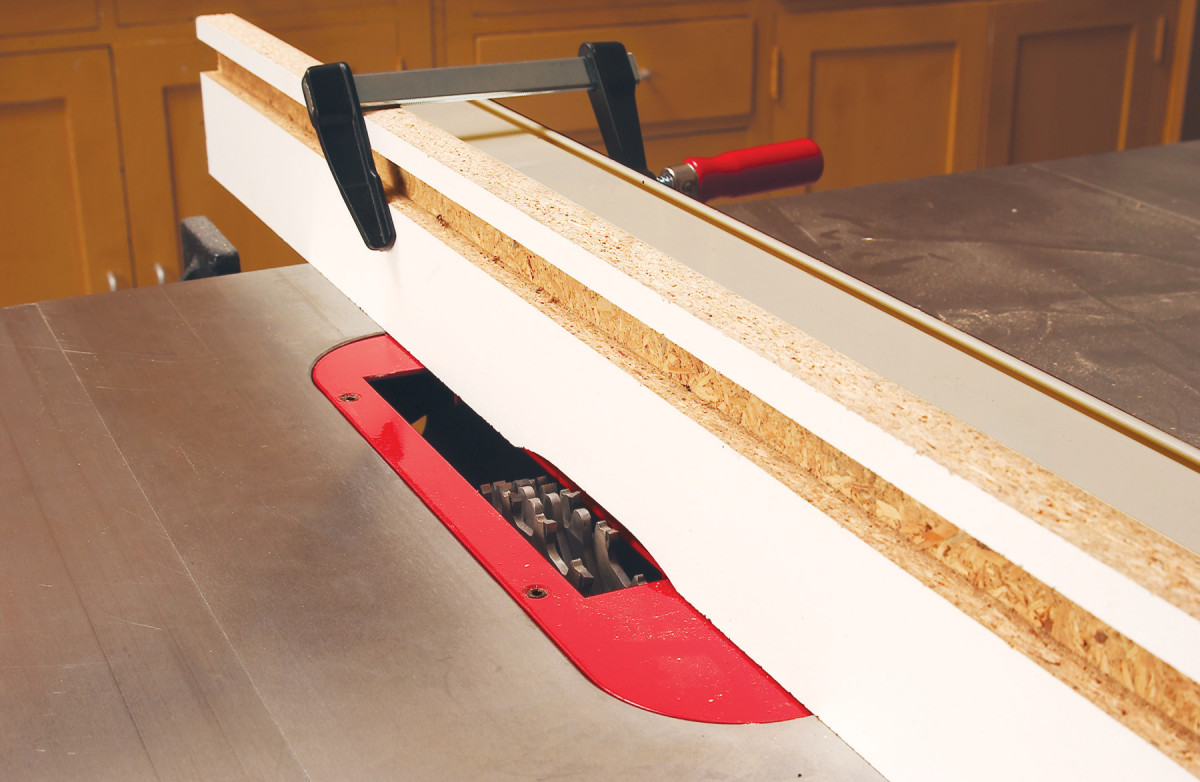 A sacrificial fence protects your tablesaw fence from accidental knicks. I make my fence from melamine because of its slippery surface. I cut a 3/8-in. x 3/4-in. groove to accept a commercial featherboard. I often make a scallop cut in the face of the sacrificial fence that allows me to bury part of the blade.
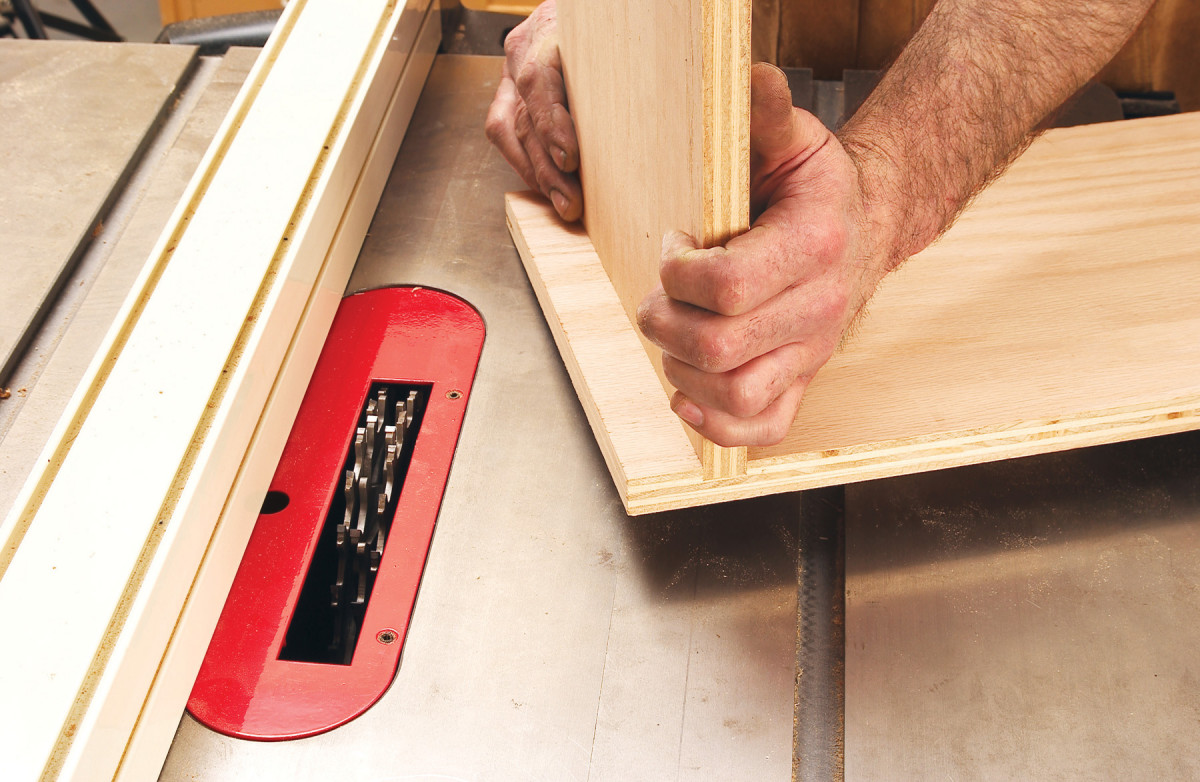
A Featherboard Guarantees Accuracy
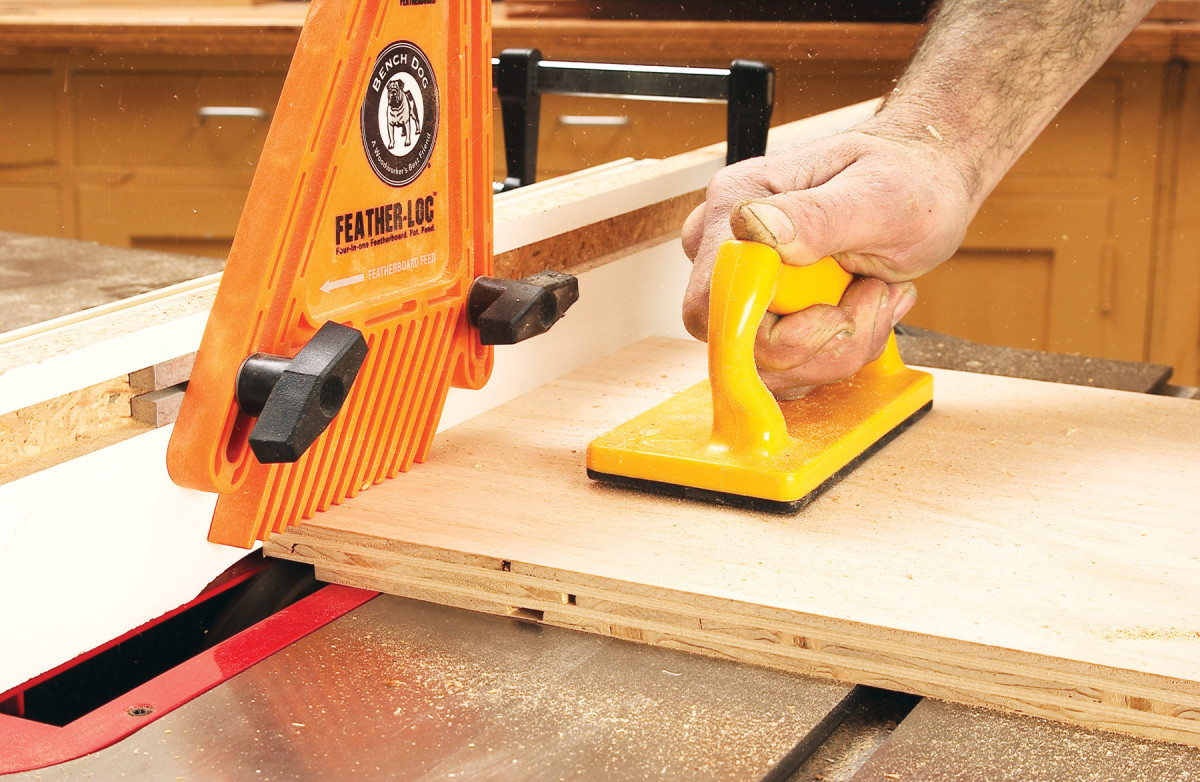 A featherboard provides consistent downward pressure on the material right over the blade. This will compensate for a slight warp in plywood and insure a consistent depth all along your rabbet. I always use a push block to keep something between my hands and the unguarded blade.
What’s the Right Fit?
 A properly fitted joint should go together with hand pressure. At the same time it should be tight enough to lift a modestly sized assembly without falling apart.
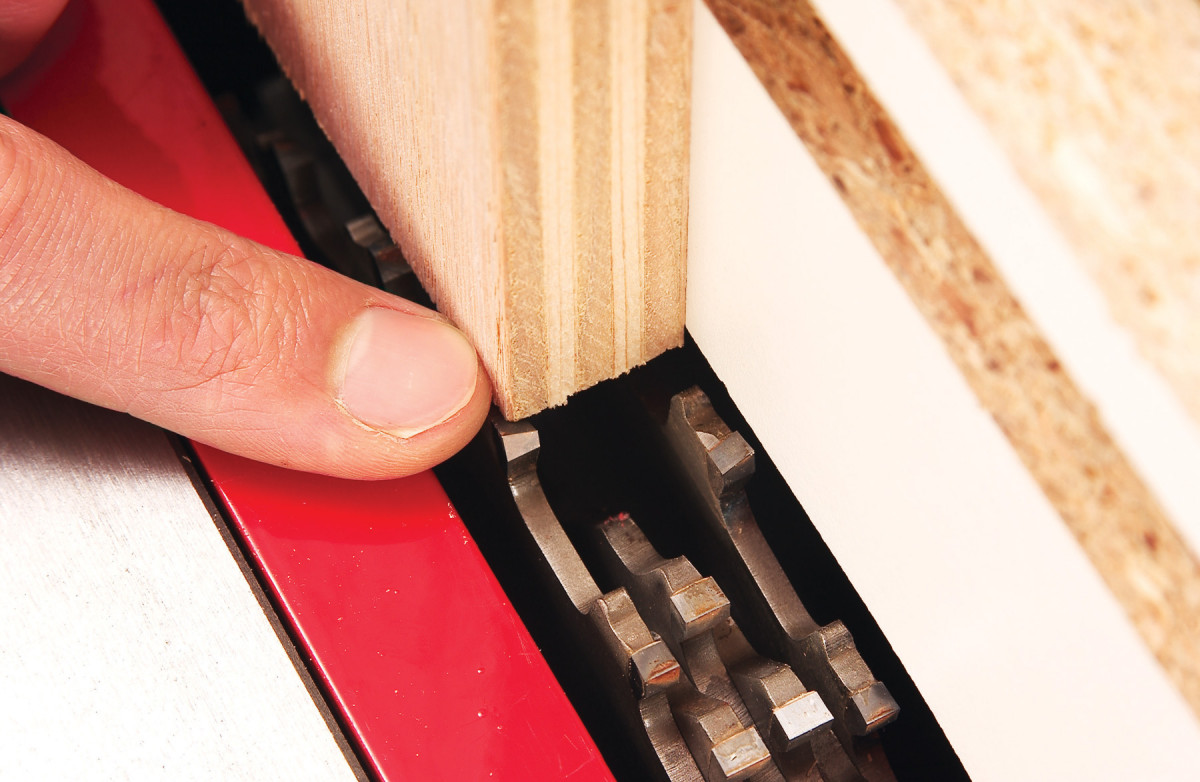
Stagger the Teeth
 Rim blade teeth and chipper teeth are meant to nestle between each other. If they touch you can chip or knock off a tooth when you tighten the arbor nut.
Cut Rabbets Slightly Oversized
 I like to cut the top rabbet in the cabinet sides slightly wider than the top’s thickness. Use the top to set the fence so the dado head projects, just a fingernail thickness past the plywood.
 This puts the top just below the top of the cabinet side after assembly. A quick pass with a flush trim bit makes the side perfectly flush with the top.
Use a Caul ‘n Card
 Guarantee clamp pressure in the middle of the joint as well as the ends by putting a playing card or two between the caul and the cabinet. Tightening the clamps bows the caul and puts clamping pressure on the middle of the joint as well as the ends.
Don’t Over-Glue
 Often we tend to think, ”If a little is good, a lot has got to be better.” During glue-up, this is definitely not the case. A brush makes it easier to gauge the amount of glue your putting down and where you’re putting it. Spread a uniform film that’s just thick enough so you can’t see through it. Keep the glue in the bottom of the dado or rabbet and off the sides. I find this technique prevents excess glue from oozing out of the joint during assembly.
Make Perfect Dadoes with a Router and Jig
 This is a great jig automatically cuts perfectly sized dados.
 Locate the jig so the fixed fence lines up with the bottom of the marked dado. Squeeze a couple plywood offcuts from the shelf stock between the fixed and adjustable fences and tighten. This sets the space between them to perfectly match the material thickness.
 Using a 1/2-in.pattern cutting bit in your router, make one pass with the bearing against the fixed fence and another with the bearing against the adjustable fence. The result is a dado that perfectly matches your material.
Here are some supplies and tools we find essential in our everyday work around the shop. We may receive a commission from sales referred by our links; however, we have carefully selected these products for their usefulness and quality.