


We may receive a commission when you use our affiliate links. However, this does not impact our recommendations.
 They’re so easy and fun to make that you’ll want a dozen!
 They’re so easy and fun to make that you’ll want a dozen!
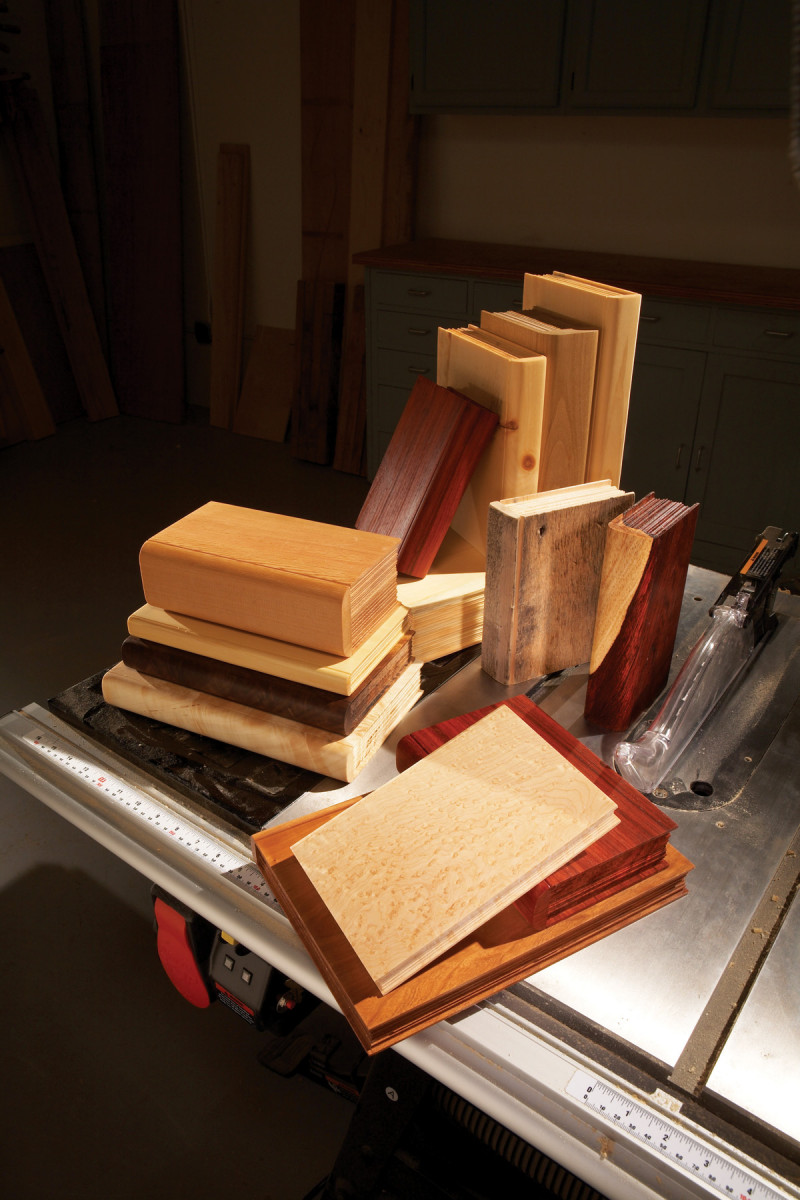
If you can’t stand to throw away good wood, you’ve probably got a stack of short boards that are just waiting to become–who knows what? I’ve turned my stack into a library of wood samples, which can be shelved just like real books.
My wooden books are ideal for showing customers and friends what different kinds of wood look like, and how their figures vary depending on how boards are cut. Having made the books years ago, I also now have a record of how a wood’s natural color changes with time and exposure.
To make a book, start by milling a blank foursquare. If you’re using rough lumber, start with a blank that’s at least 12″ long, for safety when jointing and planing. The blank can be any thickness, but I’ve found that books 1″ thick or more look best. For starters, a milled 2×6 is just right.
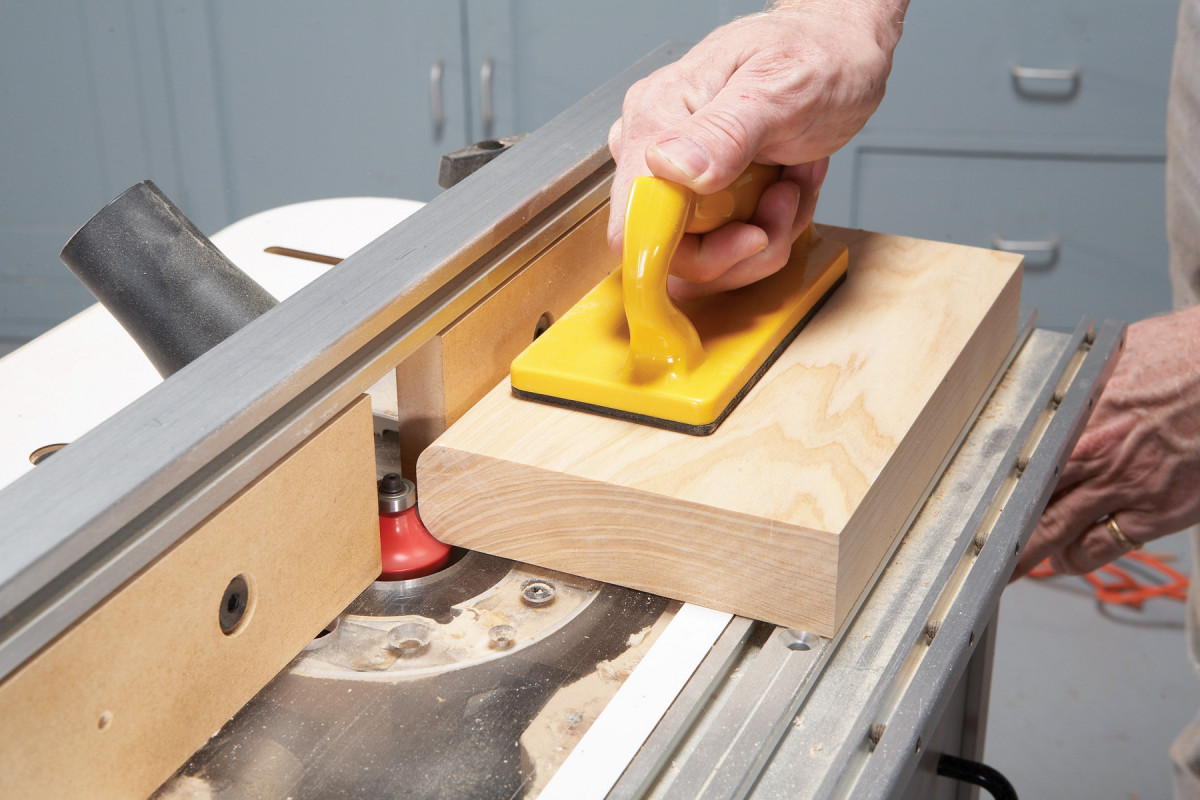
1. Round over one side of a squared-up blank, to duplicate the look of a book’s spine.
Round over both sides of one long side of the blank (Photo 1). For books that are 3/4″ to 1-1/4″ thick, use a 1/4″ radius bit; for books 1-1/2″ to 2″ thick, use a 1/2″ bit; for thicker books, use a 1″ bit.
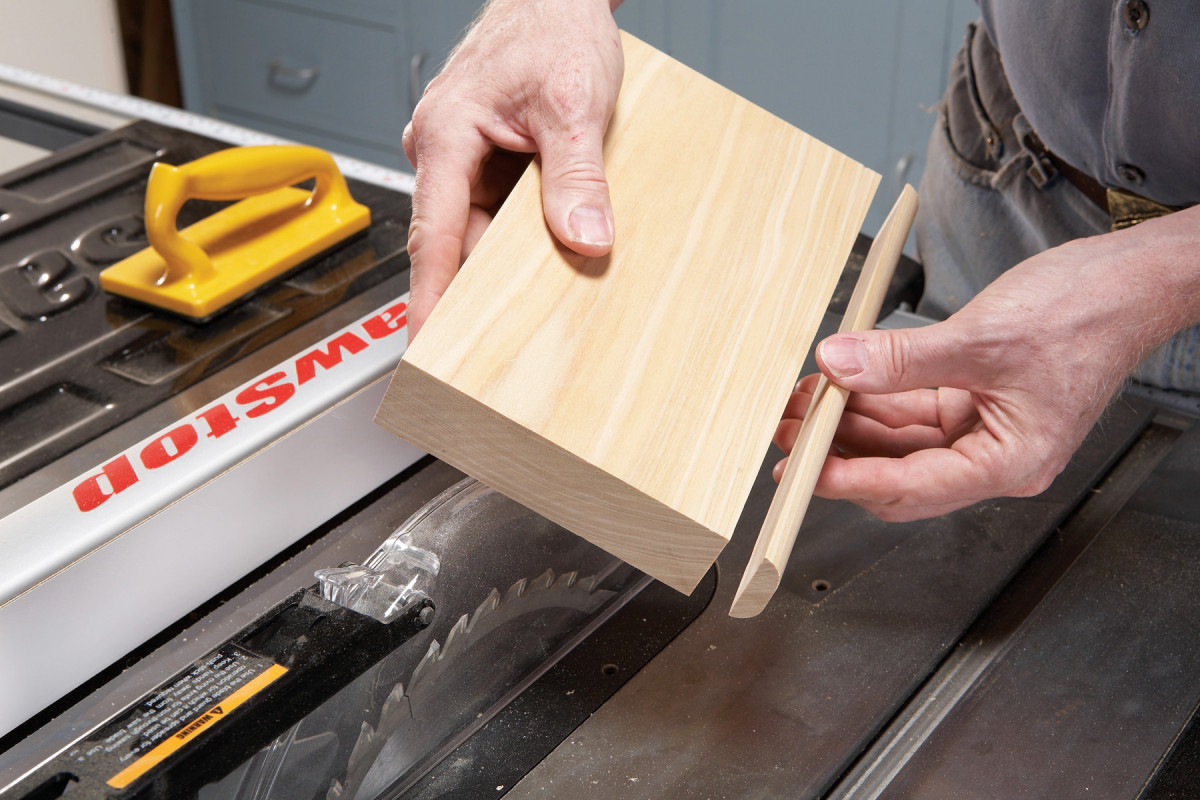
2. Rip the blank to separate the spine from the body of the book.
Rip the spine from the body of the book (Photo 2). Make the cut at the base of the roundover. Mark the two pieces so you can correctly re-assemble them later.
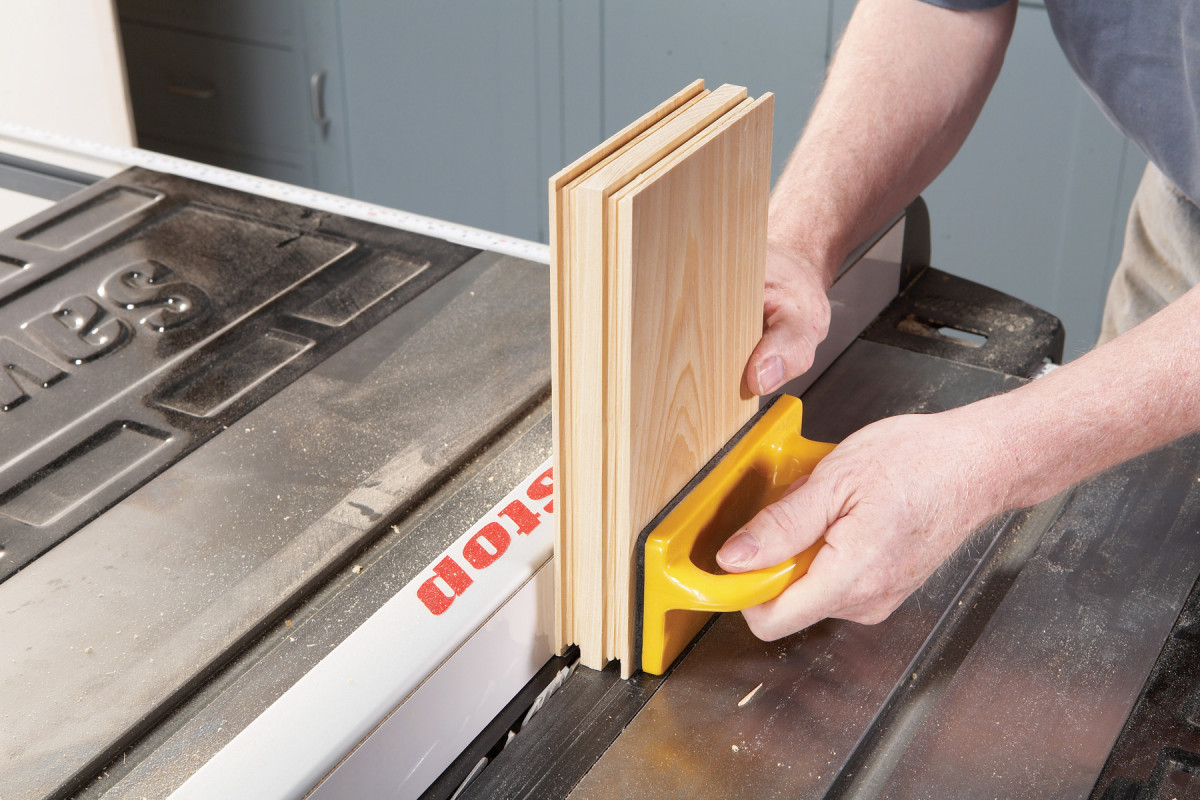
3. Simulate a book’s pages by sawing three sides of the blank. Vary the height and width of the cuts.
Saw the book’s pages (Photo 3). I recommend that you use a zero-clearance fence for maximum support. Begin by sawing from both faces of the blank to make the outer pages. Raise the blade to make a cut about 3/16″ deep and position the fence about 1/8″ from the blade. To minimize tearout, make the first cut with the book upright; lead with the spine side. Then cut the long side, and lastly the remaining short side, without changing the blade or fence.
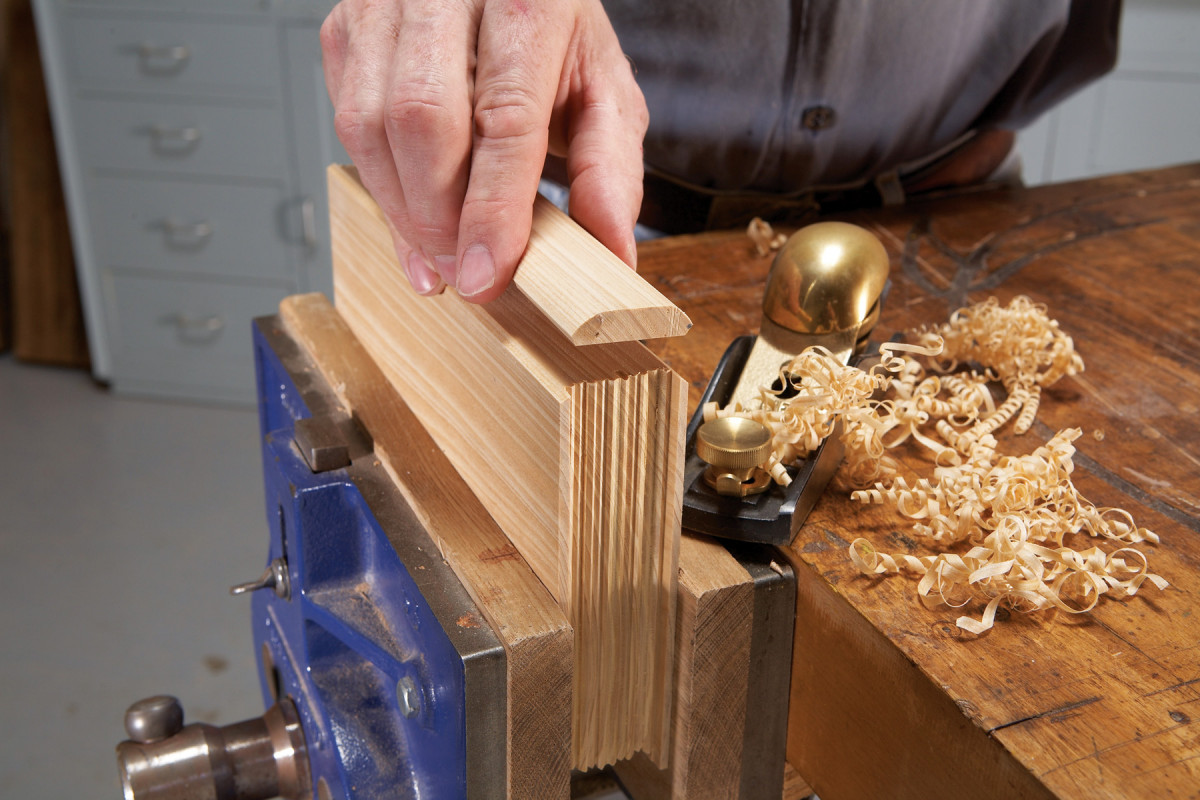
4. Chamfer the edges of the spine and body with a block plane.
Once these three cuts are completed, raise or lower the blade a bit, move the fence 1/64″ less than the blade’s kerf, and repeat the three cuts in the same order. Continue to make a series of similar cuts, changing the blade’s height and the fence’s position by different amounts each time, until all the pages are formed.
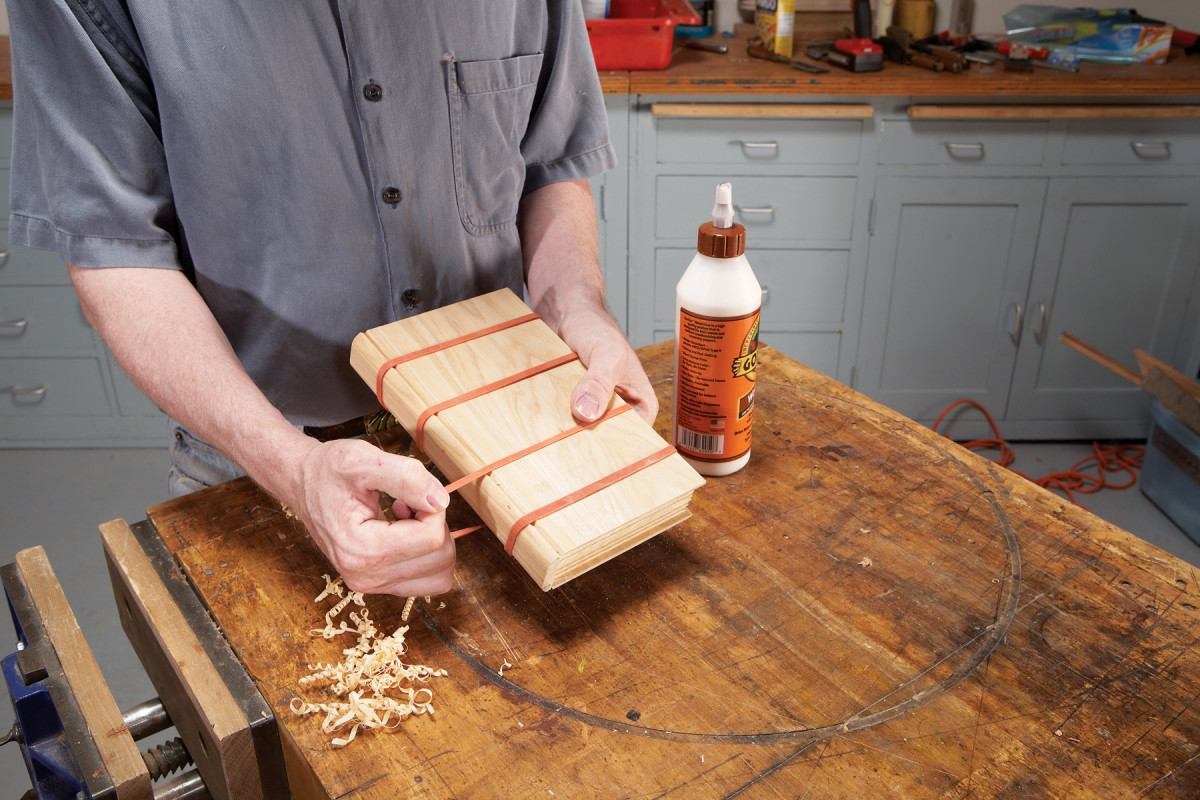
5. Glue the spine back to the body. Use rubber bands as clamps to avoid marring the book.
Make a reveal between the spine and body by chamfering the mating edges of both parts (Photo 4). Spread glue on the joint (use a small amount so there’s no squeeze-out to clean up) and bind the book with rubber bands (Photo 5). Apply a finish–or not–and it’s ready for the shelf.
Here are some supplies and tools we find essential in our everyday work around the shop. We may receive a commission from sales referred by our links; however, we have carefully selected these products for their usefulness and quality.


Didn’t think of it till after I submitted the prior comment but another way to store samples inside your books would be making the spine so it will slide up or rotate away from an opening on the spine side.
Also if you were to use a Laser Engraving machine to reproduce real book covers, they might also be used to put a title and library code on the spine. I know you want the wood to be visible, but then your title could be the wood species, and other data on said sample.
I understand the need to have wood samples, but have to wonder where you find room to put them. I’ve only got nine full sized book shelves and three end tables that hold books and I still have them stacked on evey table and a few stacks in the floor a few feet high.
Did you ever consider joining thin slices of wood sample together to make a book with about 1/8-inch pages for the same use? Then you might also hollow them out with a hinge and store some smaller samples, for your customer, inside.
Also unless I’m mistaken a book binder could rebind books with wood covers made from your scrap pieces. Say like a good book on woodworking you find in a used book store needing a new cover.
Oh, I thought you might be binding real books in wood.