


We may receive a commission when you use our affiliate links. However, this does not impact our recommendations.

Router inlay makes a basic table stand out.
Sometimes a small project with a quick turnaround time is just the thing to get us back in the shop. The proportions of this dinette table are petite, and would be useful in a loft or condo. If space is at a premium, this small table might just fit the bill. The table was designed using stock no longer than 30″, and can easily be assembled in a long weekend.
I chose walnut lumber for its clean grain lines and good workability. If you don’t have enough hardwood to make the base out of walnut, consider paint-grade legs and aprons.
A Leg to Stand On
1. Laminate the leg blanks from strips of walnut if 12/4 material isn’t available in your area. Size the blanks so that they can be finished to 21/2″ square.
The leg blanks start out at 2 5/8” square, and are milled to 2 1/2” square. If 12/4 walnut stock isn’t readily available in your area, just laminate thinner boards together to achieve the required thickness. Mill some stock to 7/8” thick, and rip it into strips 25/8” wide. Arrange the strips for the best grain match possible, and glue three strips together to make a leg blank. Once the glue cures, these rough leg blanks can be jointed and planed to finished dimensions.
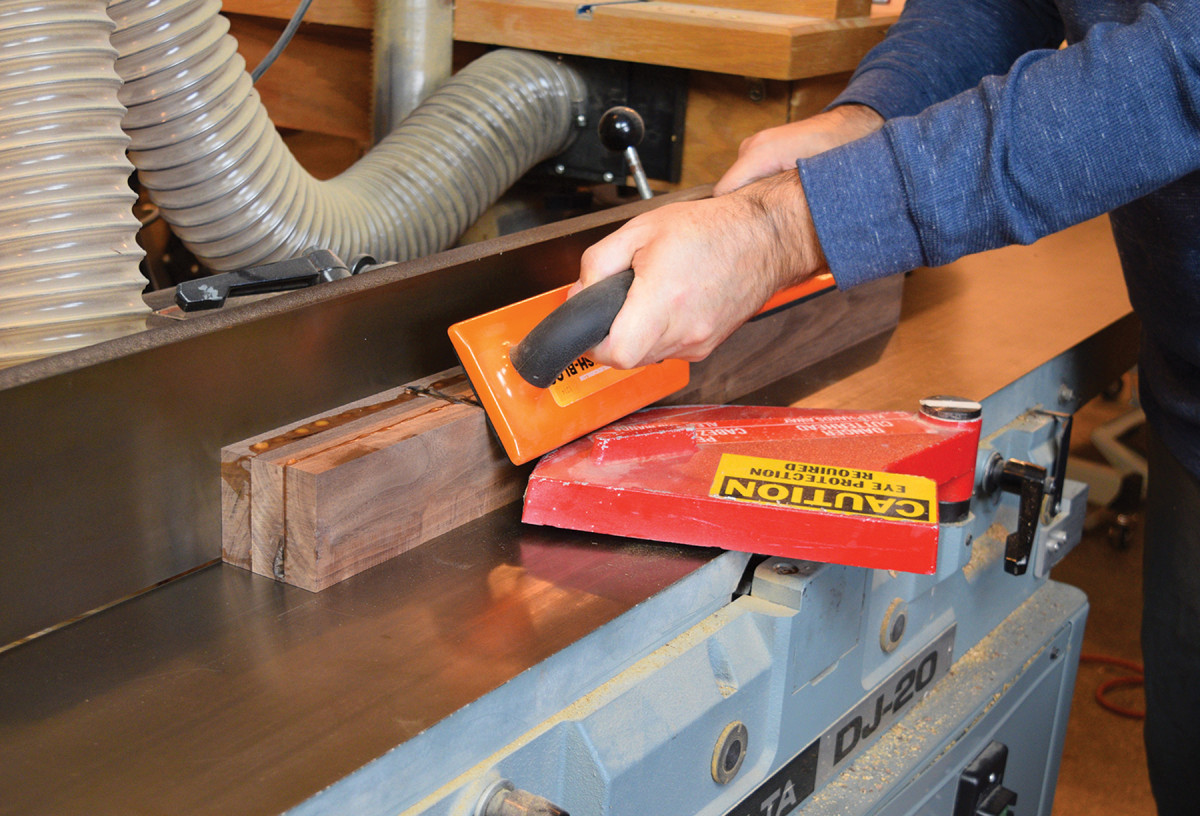
2. Joint the leg blanks square. If you were careful with your clamping, the individual boards start to look like a solid timber.
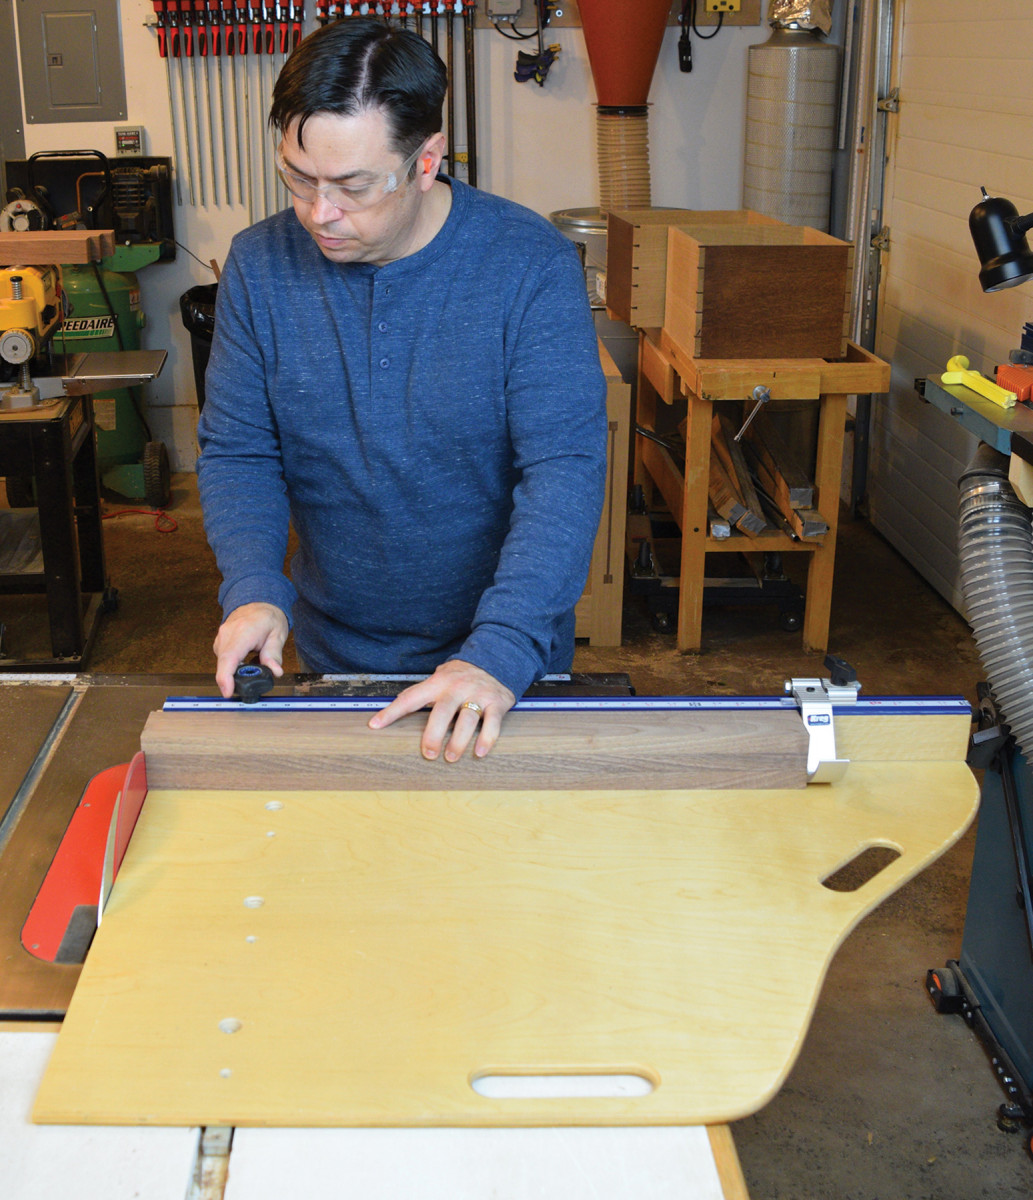
3. A crosscut sled at the tablesaw is the tool of choice to trim the legs. First square one end, then cut the legs to their finished length of 28″.
Now is the time to square one end of the legs and cut them to finished length. Next, we’ll want to take care of all the joinery before introducing any tapers or curves, so choose a method to make your mortises and get to work. I used a hollow chisel mortiser to make the 1/2” wide and 1 1/4” deep mortises. I like to keep the mortises 1/2” away from the top of the legs to preserve structural integrity and make sure the joints will last for years to come. The mortises are all the same size, and conveniently centered on the thickness of the legs.
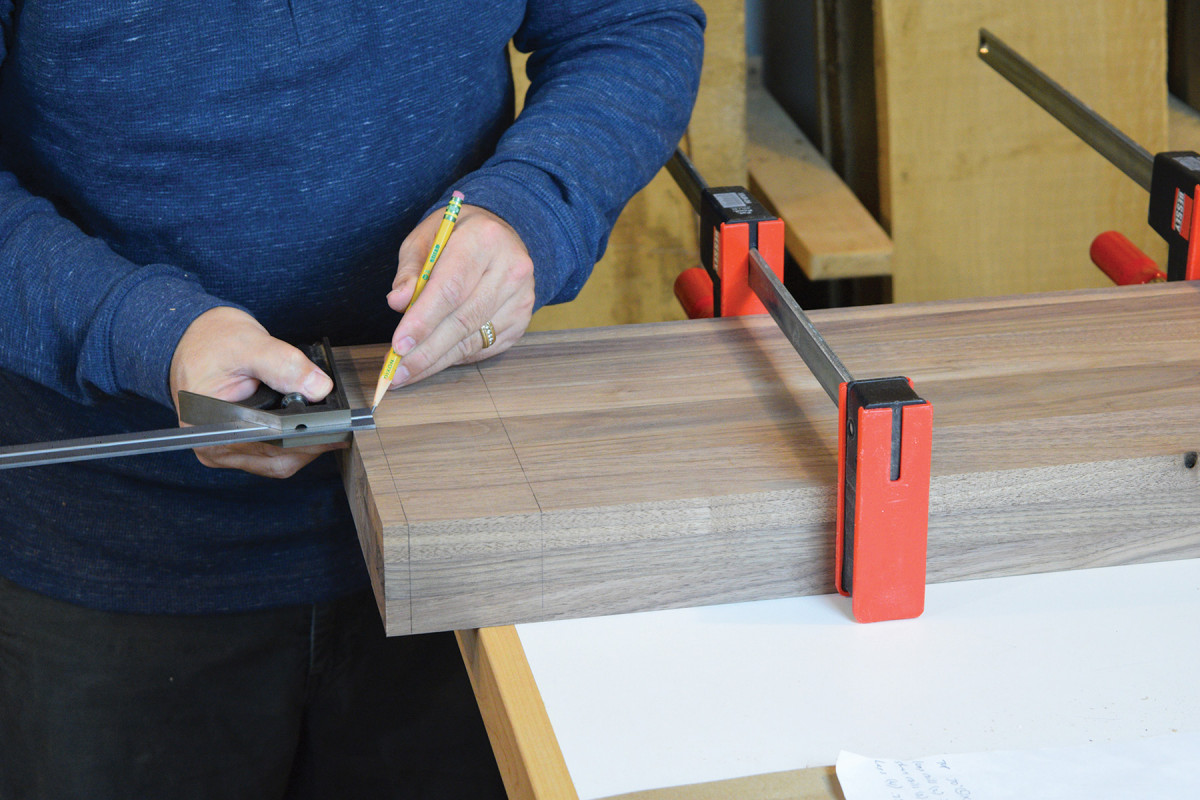
4. Lay out the mortise locations with a combination square. Pay attention to which side of the leg will be most visible in the finished piece; spend a moment inspecting the grain, too.
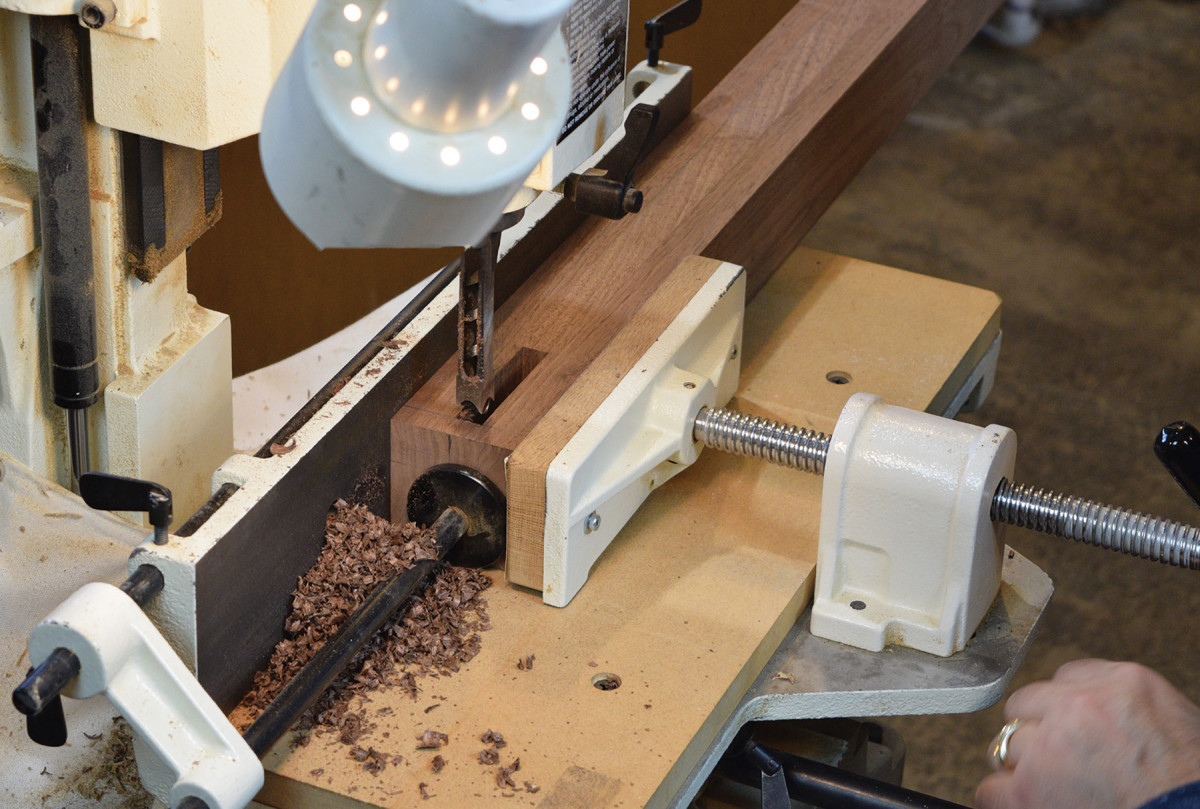
5. Each leg needs 13/4″ x 1/2″ mortises, which are 11/4″ deep. Here a mortiser with end-stop makes quick work of repeated cuts.
Traditional Table Joinery
Take a moment to mill up the remaining parts of the table. You’ll need two long aprons, two short aprons, and enough boards to make the top panel. With the eight mortises complete, try your hand at forming the tenons on the aprons. Using a fine-toothed dado blade and quality miter gauge makes the job easier. Check your tenon shoulders for square as you go, and creep up on a snug fit. Use the mortise itself as your ultimate gauge as you size the tenons. The top shoulder on each tenon is 1/2” tall, while the bottom shoulder is only 1/4“. Since all the tenons are the same size, this work proceeds quickly.
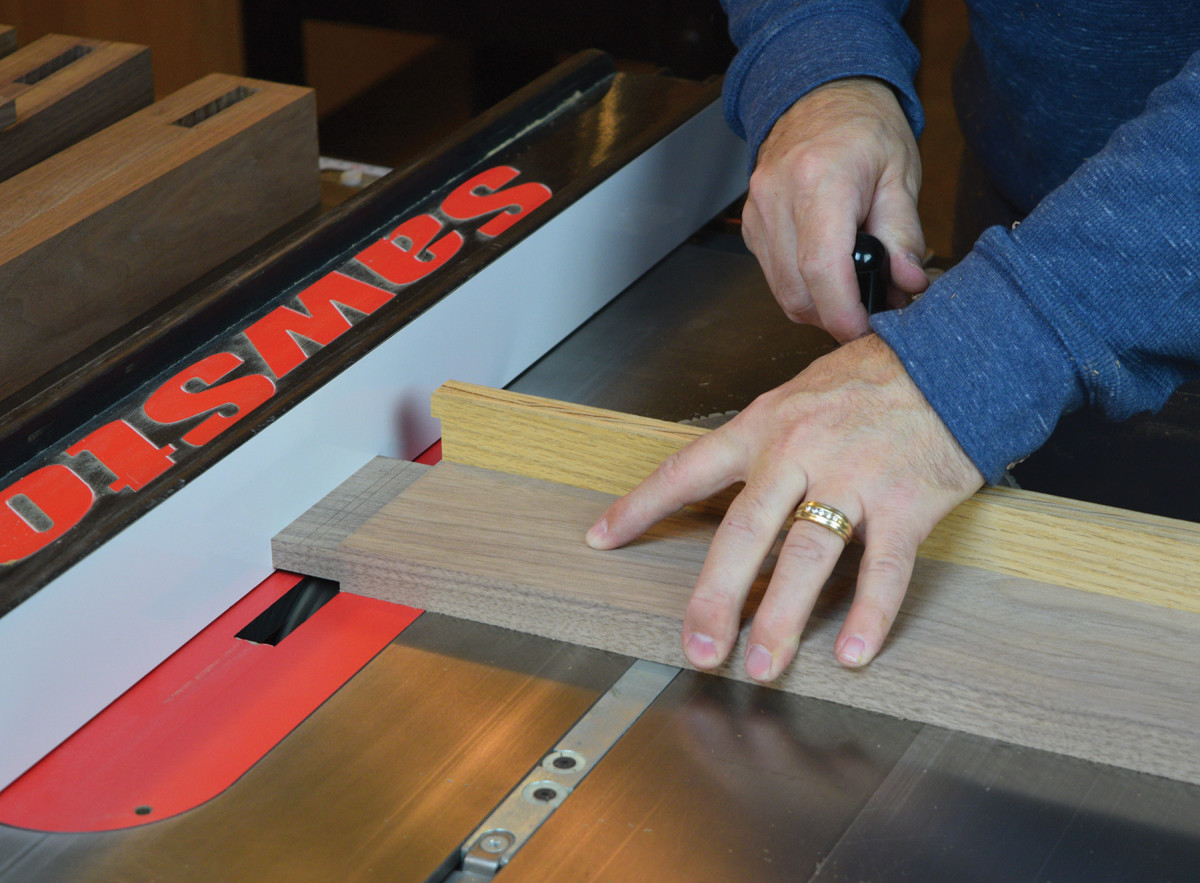
6. Cut the tenon on the table saw with a dado stack. I use a fine tooth stack and a solid miter guage.
With all the joinery complete, we can tackle the more interesting aspects of this project, like shaping the aprons and tapering the legs. The subtle shape on the underside of the aprons lightens the overall look of the table, and adds some grace to an otherwise simple form.
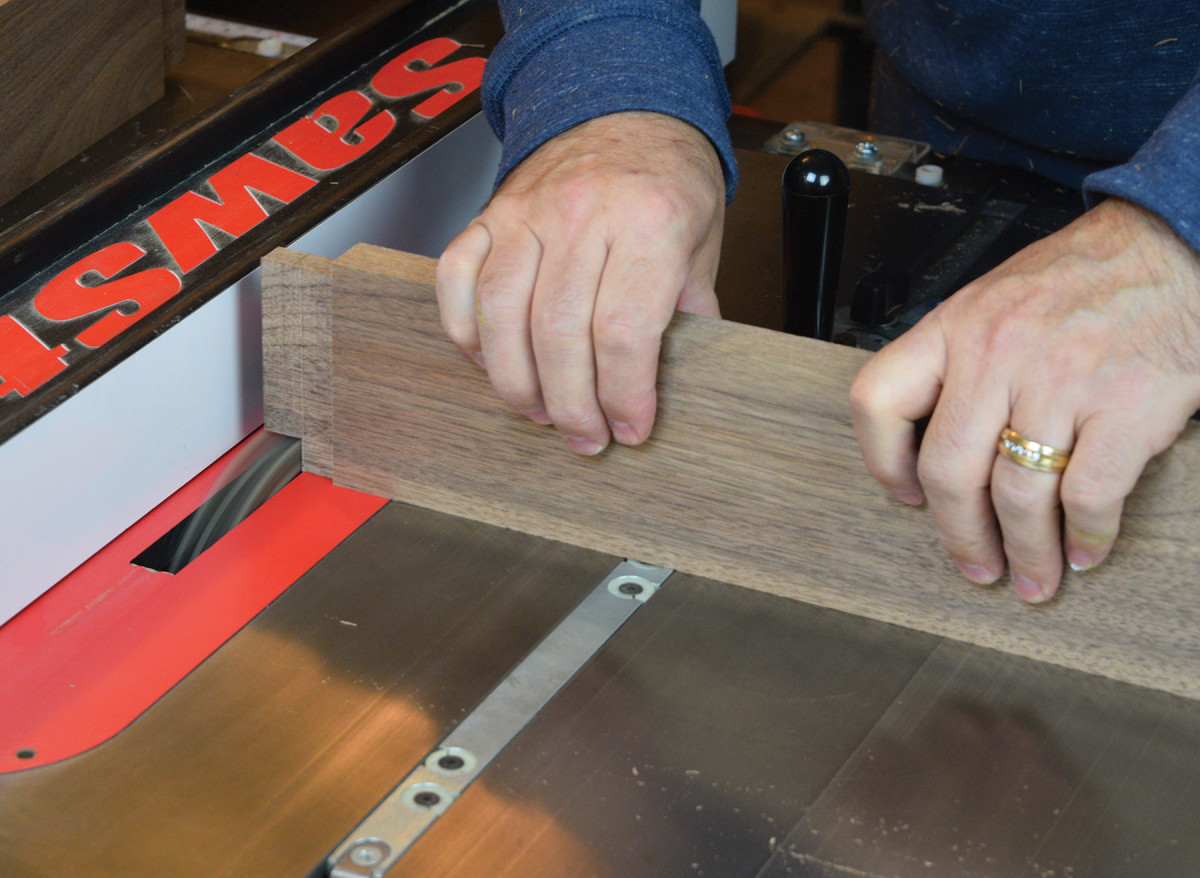
7. The top shoulder is 1/2″ tall and the bottom is 1/4″ tall. All of your tenons are the same size, batch them out.
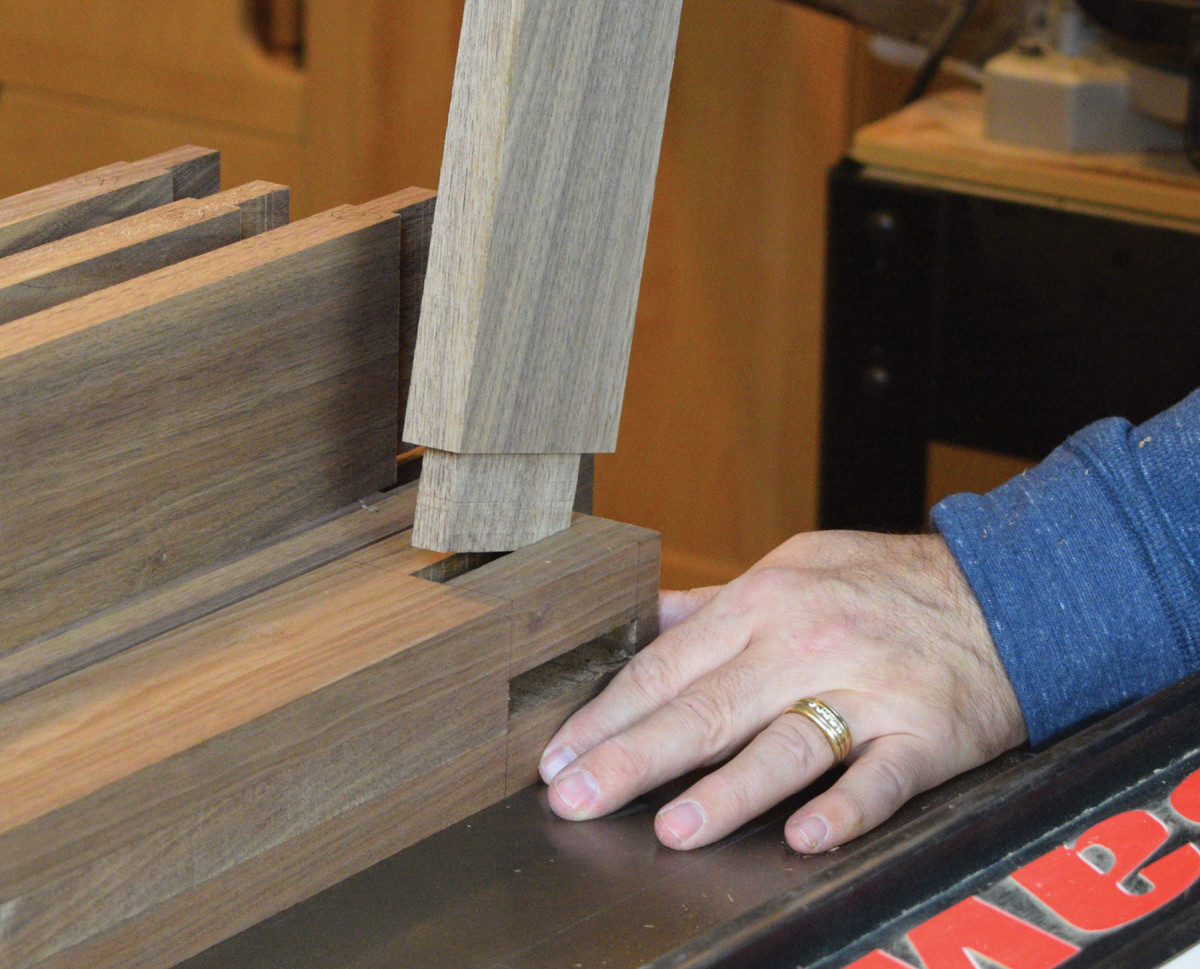
8. Give each tenon a final test fit and now you’re ready to move on to shaping the aprons.
To shape the aprons, I find it easiest to use a jig at the router table. The jig is a simple matter to construct, and only requires a couple scraps of plywood. Start with a 3/4” plywood base, and mark the curved profile before cutting it out at the bandsaw. Sand the curve to your line, and add a 1/2” plywood fence. A small stop registers the shoulder of the aprons in the correct position, and a pair of toggle clamps hold it in place.
9. To shape the curved aprons, start by cutting close to your pencil line at the bandsaw. Next, install the rough-cut apron into a curved routing jig.
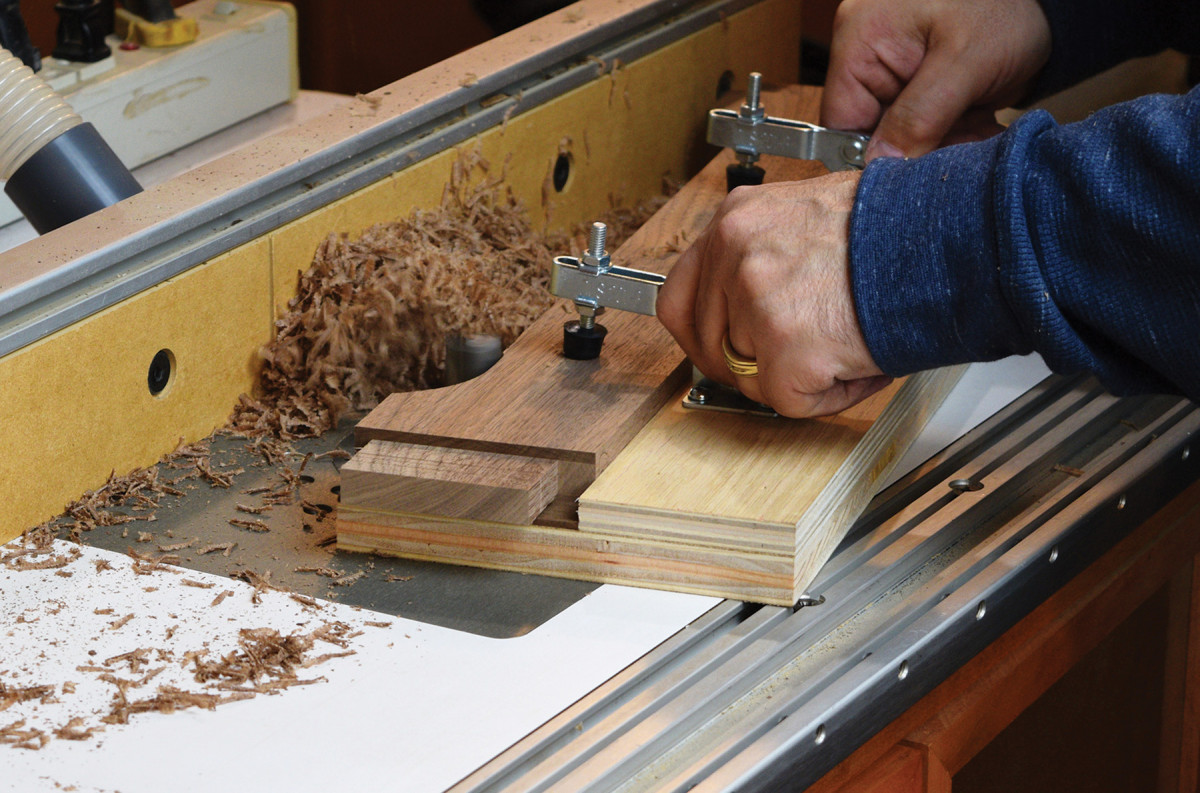
10. Finally, smooth the curve with a bearing-guided bit at the router table.
Taper the Legs
To lighten the look of the 2 1/2” square legs, they’re tapered on two inner edges. I used a commercial tapering jig and a push pad to make the taper cuts at the tablesaw.
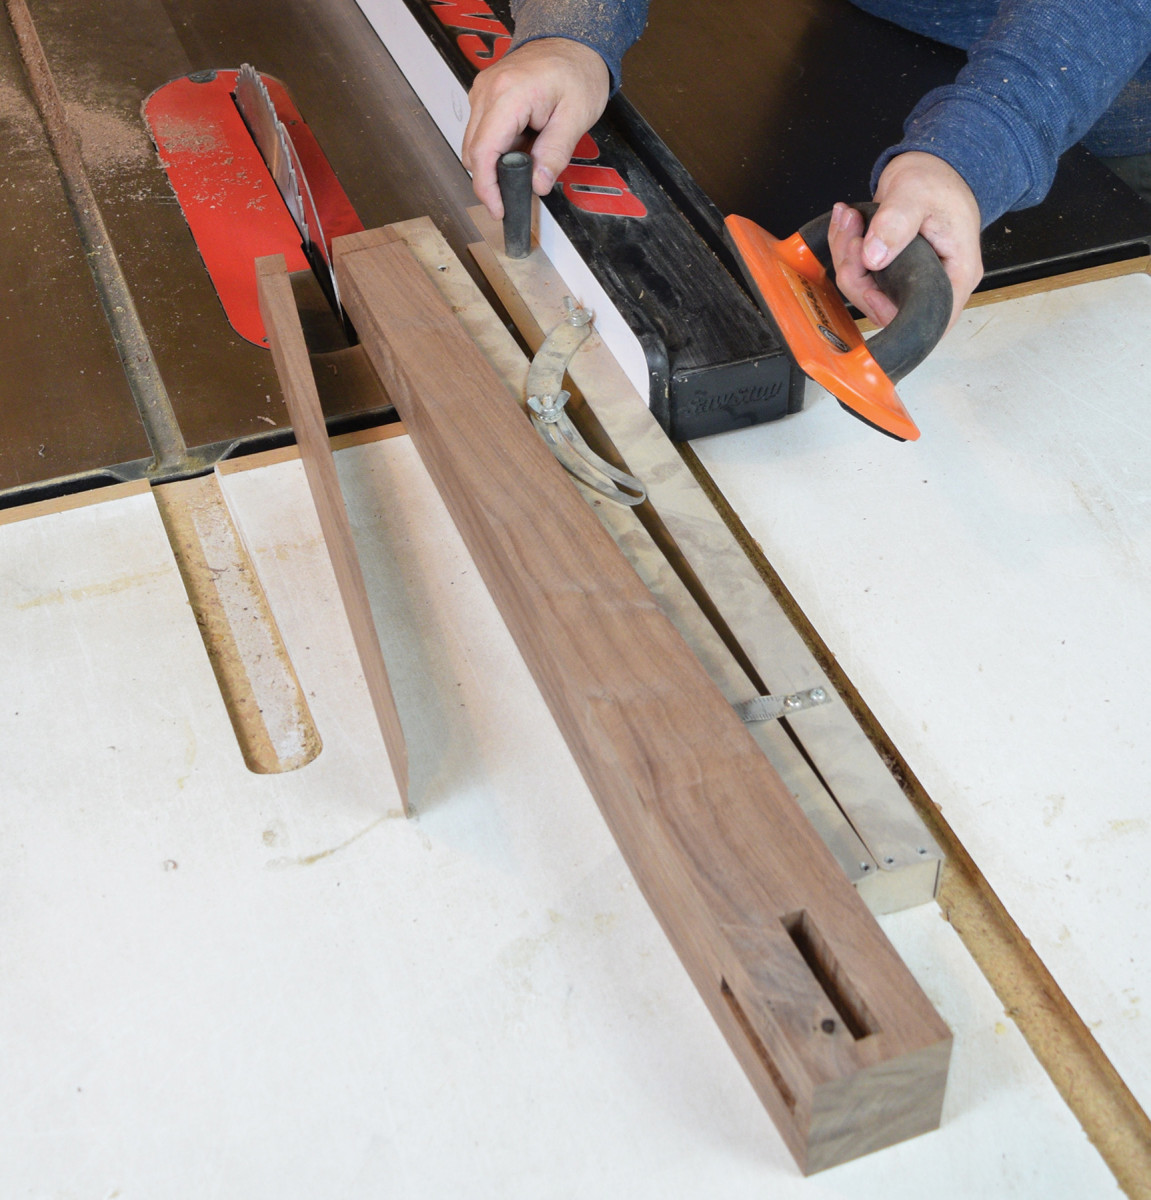
11. Taper the legs with a tapering jig. Keep in mind you’re tapering the inside faces that contain the mortises.
Then any saw marks can be sanded smooth, and the edges of the legs and aprons are softened with a roundover bit at the router table. Just a couple steps remain before you’re all clear to glue up the table frame.

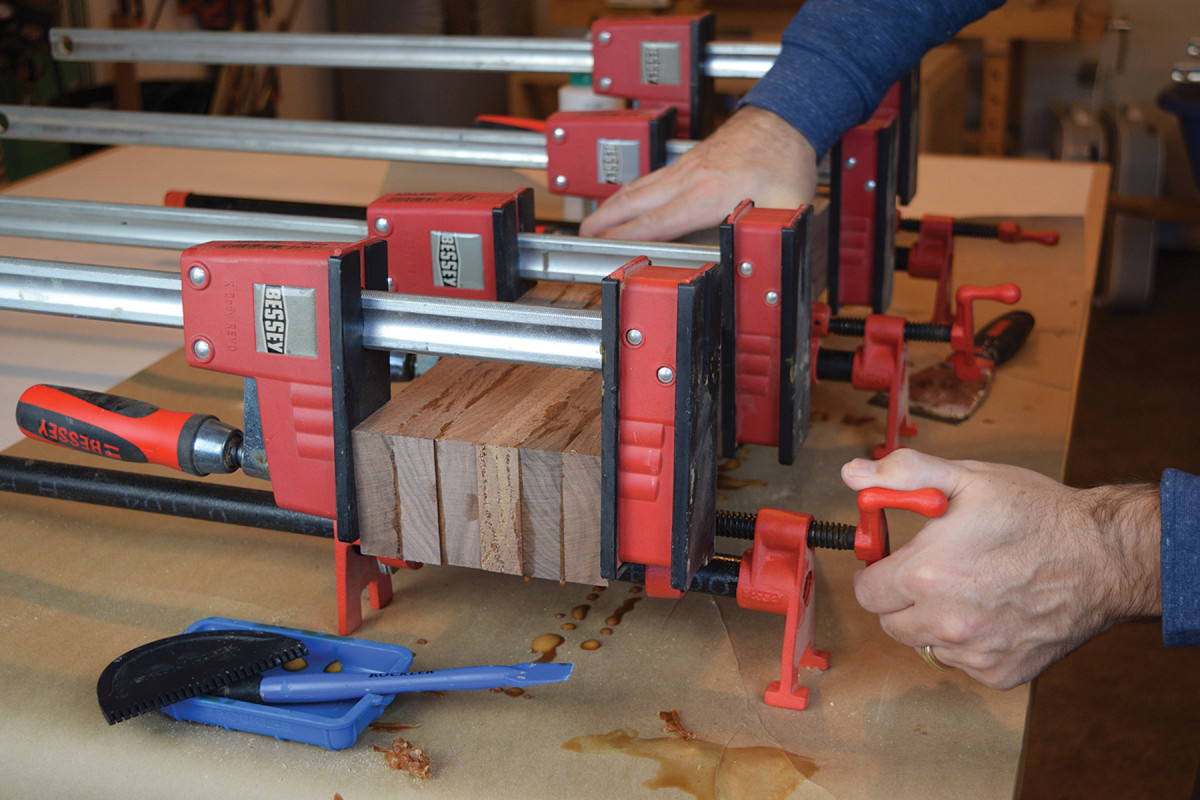
12. Glue up the base. Parallel clamps will draw the structure square. Clean up any squeeze out.
Miter the tenons where they intersect and test fit the aprons with a complete dry assembly. Once you’re convinced the joint fitment is good, proceed with finish sanding. I sanded with a random orbital sander at #120 and #150 grits, and gave the parts a good hand sanding, with the grain, using #150 grit.
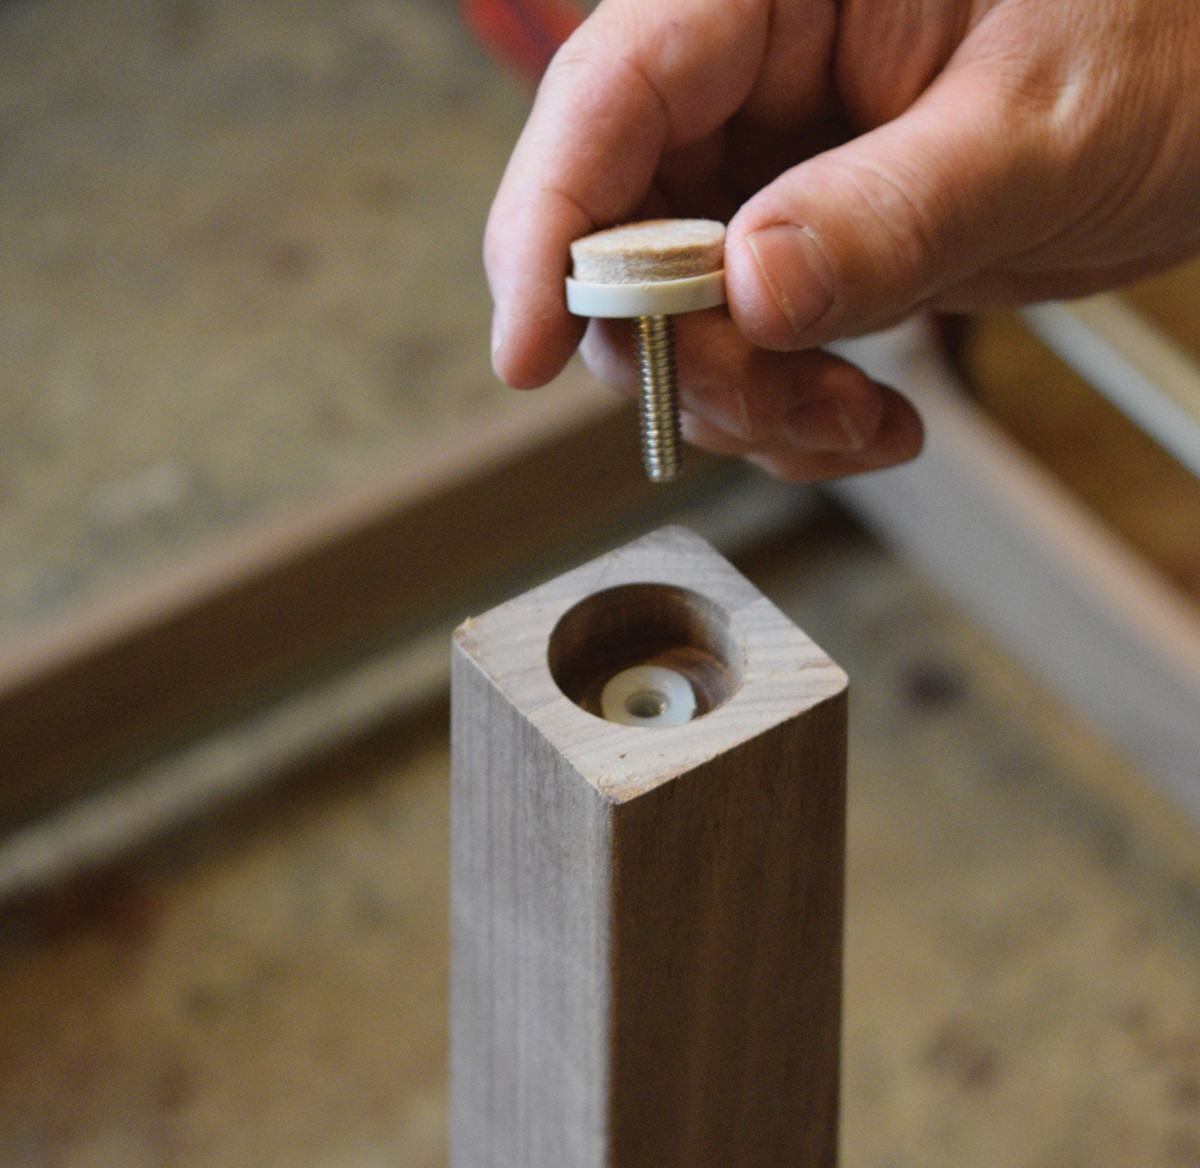
13. For a wobble-free table that maintains its sleek look, try recessed leg levelers. Use a 1 1/8” Forstner bit to drill the large clearance hole. Then drill for the threaded insert (usually 11/32”), but follow the manufacturer’s instructions that come with the leg levelers.
Make the Tabletop
I like to minimize the sanding work required to achieve a smooth, flat tabletop. To that end, I start by gluing two pairs of boards together as an initial assembly. Once the glue has hardened, I scrape the glue and send the planks through the planer.
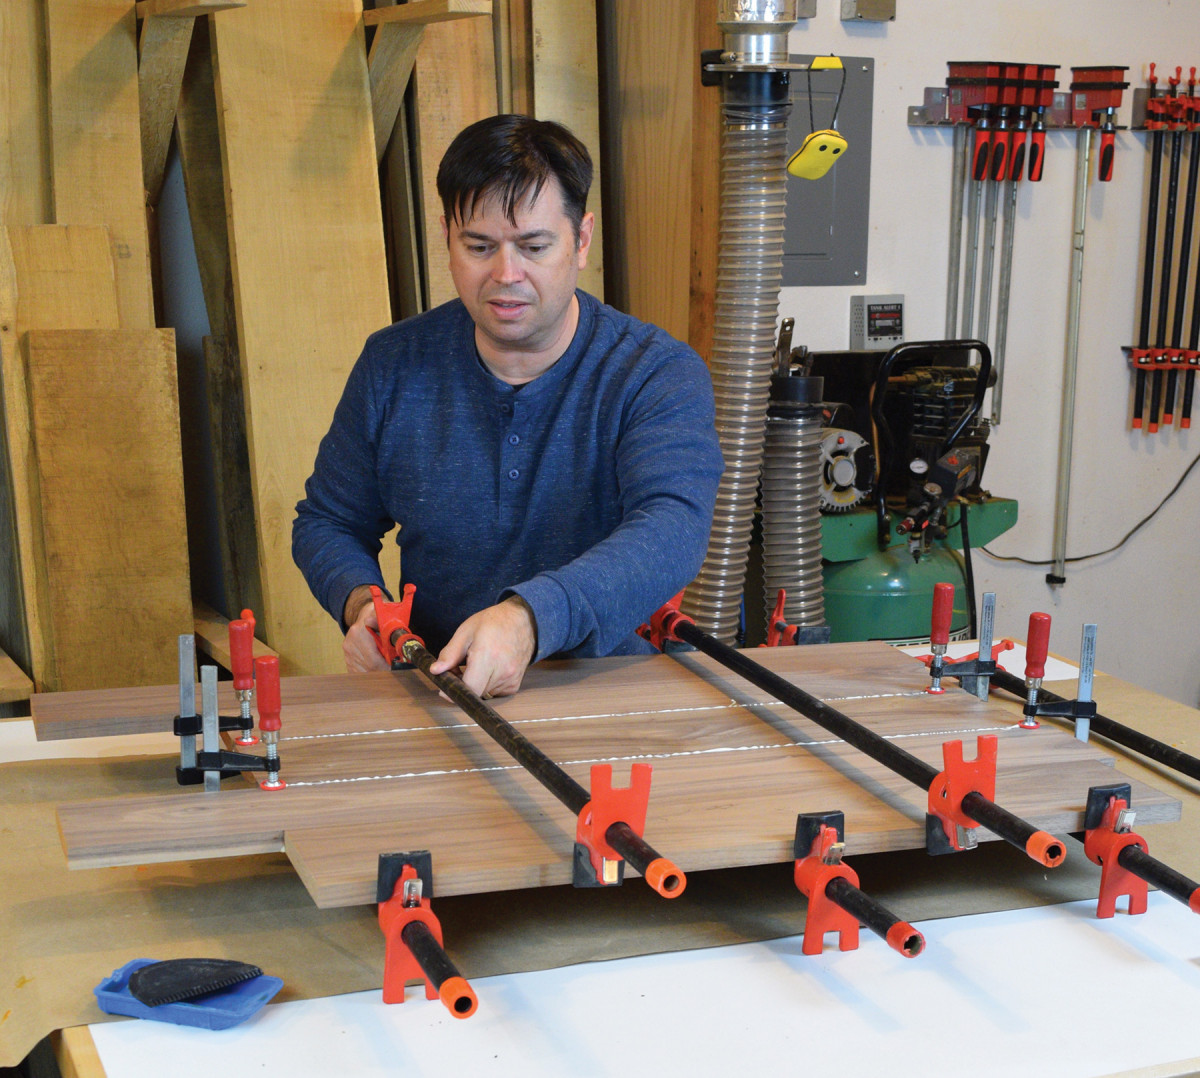
14. Glue two planks together with a central board for the final tabletop assembly. Notice this assembly has only two wet-glue lines.
For the final step of building the tabletop, glue the planks together with another board in the middle. This way there are only two glue lines to sand clean, as opposed to four.
Router Inlays
To give the table a decorative element, I came up with a floral motif inlay. I wanted a simple form for the inlay, so it could be completed with a router and inlay bushing kit.
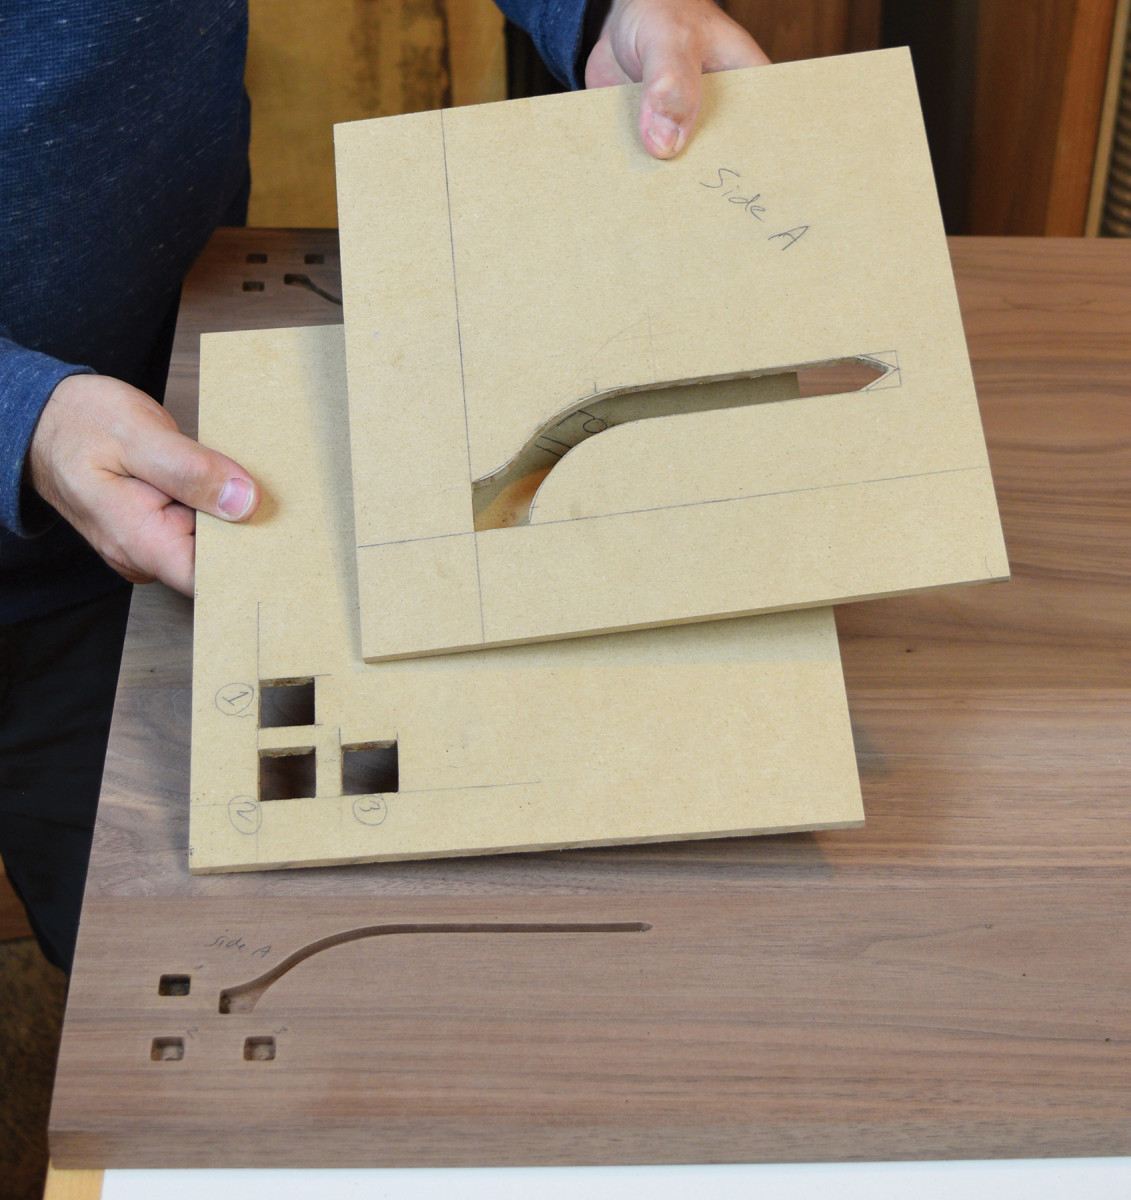
15. Two templates are used to make the inlay that dresses up the corners of the table.
To accomplish this I made two templates from MDF; one handles the three squares while the other handles the curved stem design. The openings in the templates are slightly oversized to account for the spacer on the inlay bushing kit.
To make the inlay templates, draw out the designs on 12″ x 12″ squares of 1/4” MDF. Remove the bulk of the waste with a drill bit or mortiser, and sand or file the openings to size.
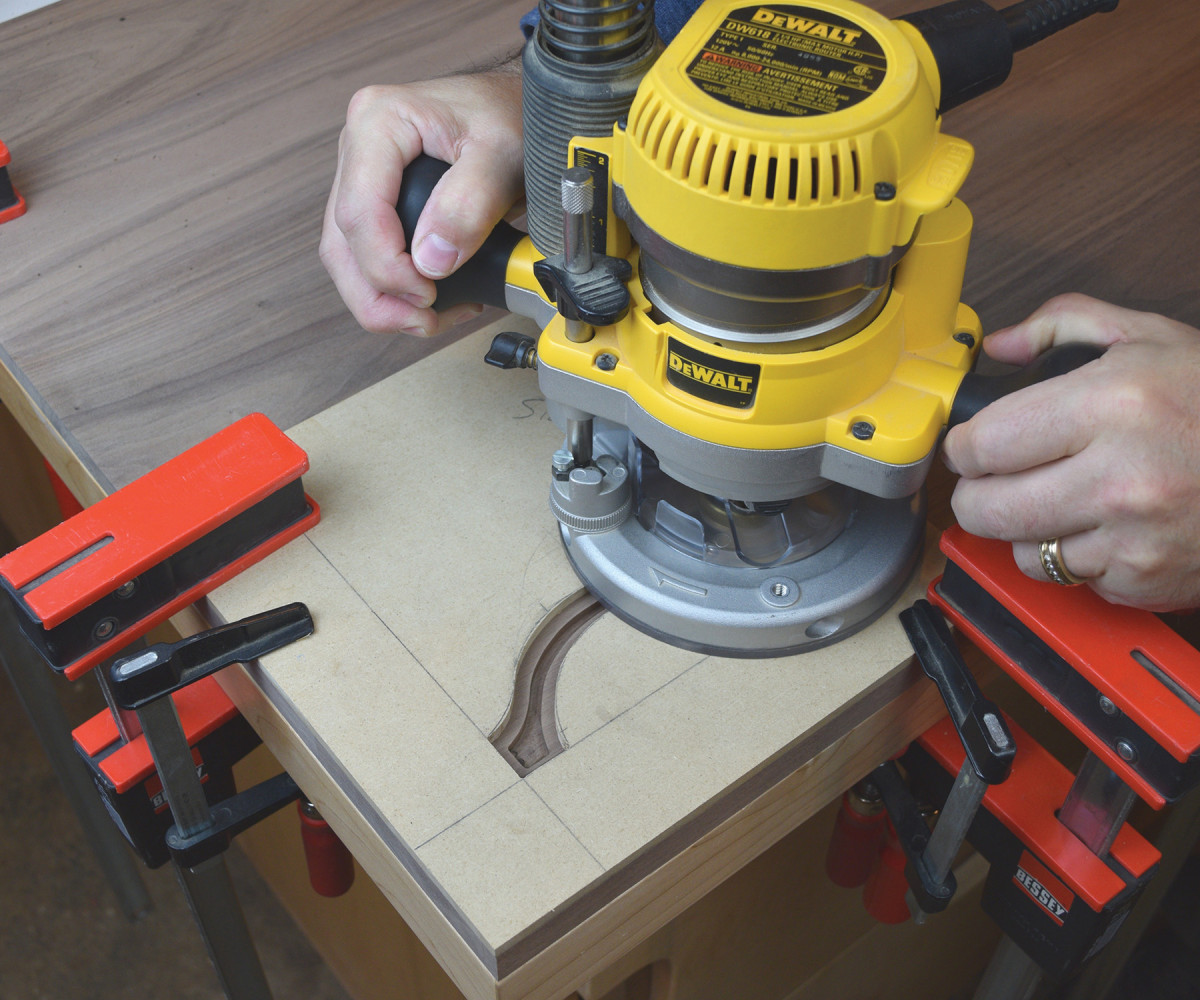
16. Clamp a template to the table, and rout out the recessed shape. Then switch templates and repeat.
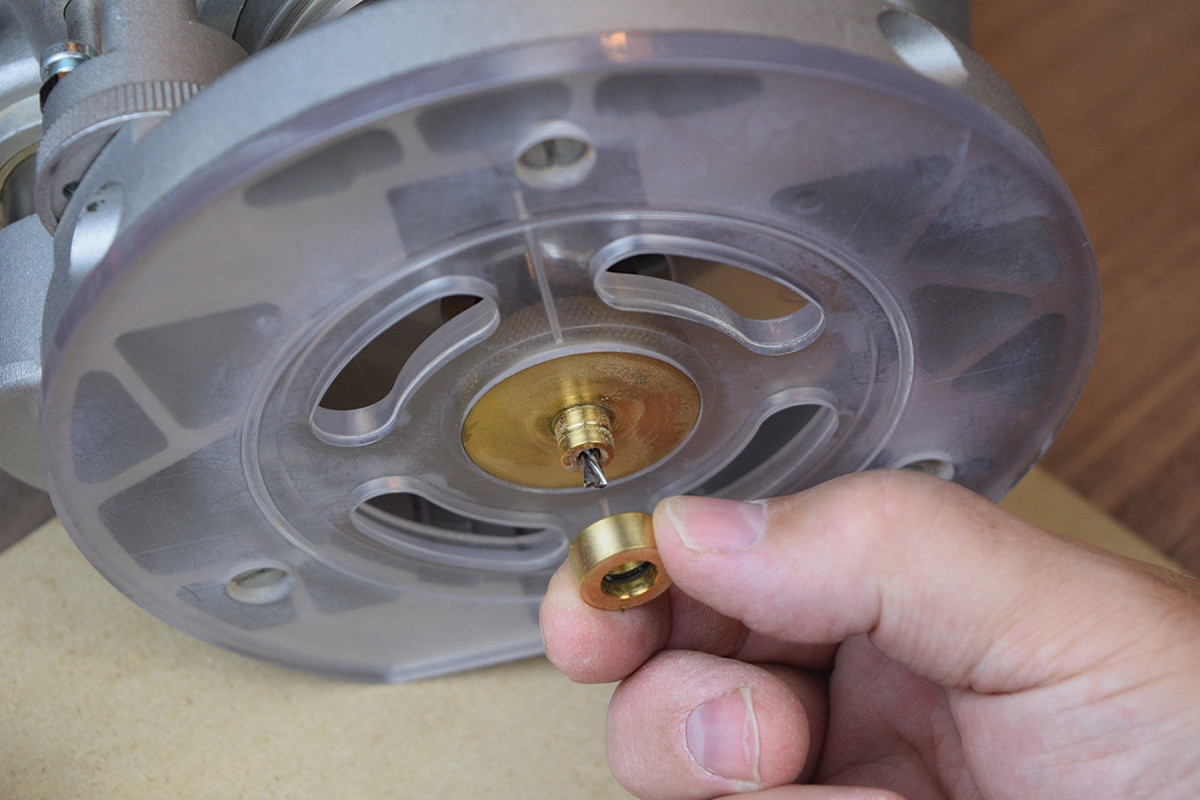
To start the inlay process, carefully center the guide bushing on a plunge router (some inlay bushing kits come with a helpful centering pin). Then install the removable spacer ring onto the guide bushing, and clamp the “three squares” template flush with a corner of the tabletop.
17. Note that this step is done with the spacer ring installed on the router.
Rout the perimeter of the template, and then gradually carve out the center of the recess with your router. Since the design is fairly small, it only takes a couple passes with the router to clean out the recess.

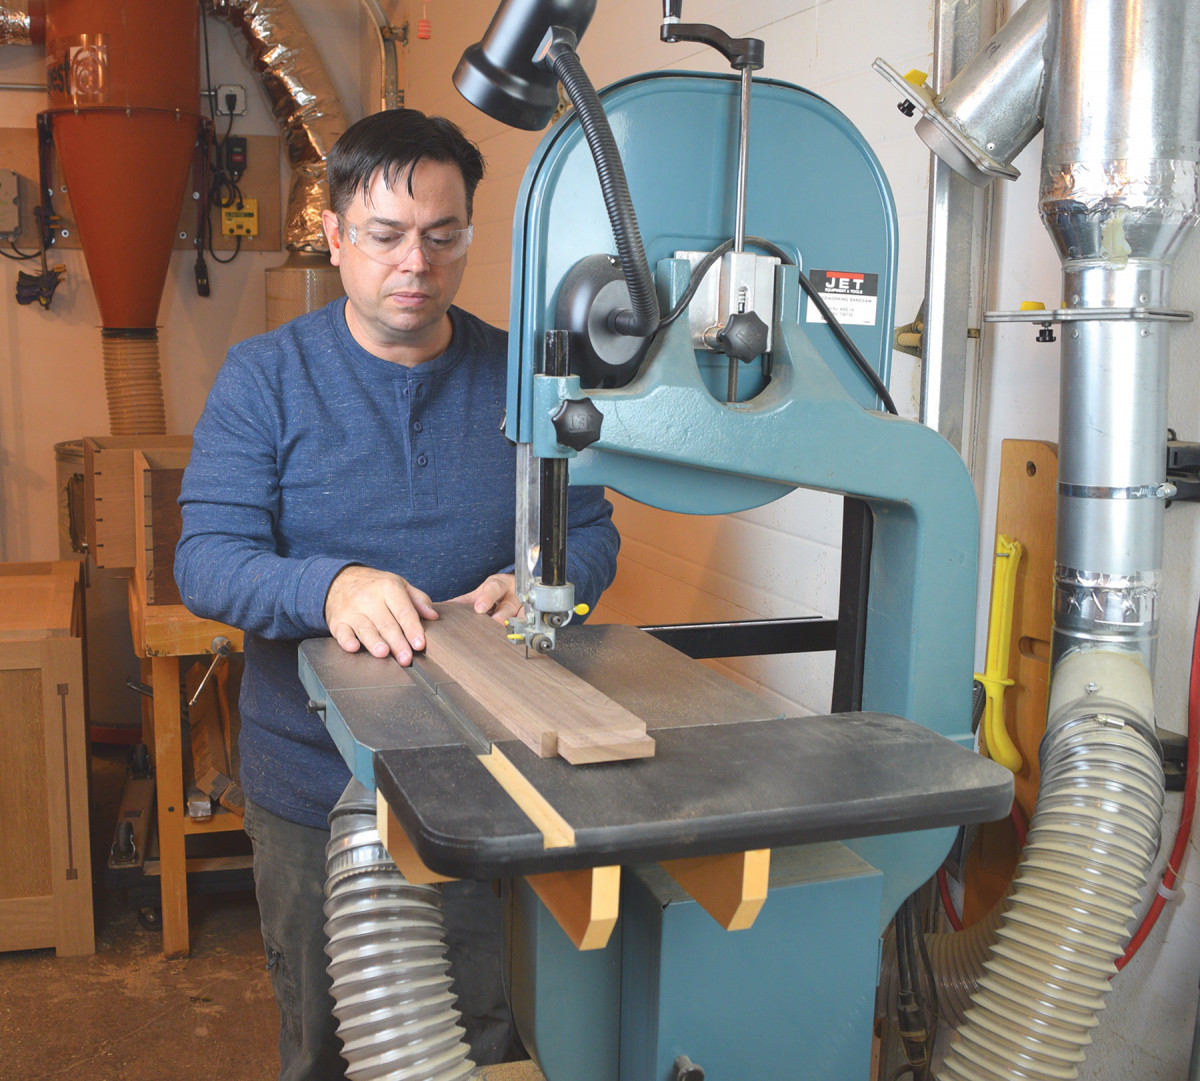
18. Remove the spacer ring from the guide bushing and use the same two templates to make matching maple parts. Once the router work is done, place masking tape over the maple inlay parts, and cut them free by resawing the board at the bandsaw.
Now switch to the “curved stem” template, and rout the shape in a similar fashion. Repeat the process on all four corners, and then remove the spacer ring from the guide bushing to make some maple pieces for the inlay. Use the same templates to cut the maple stock, but only make one clockwise pass, keeping the router bushing tight to the template.
19. Remove the spacer ring from the guide bushing and use the same two templates to make matching maple parts. Once the router work is done, place masking tape over the maple inlay parts, and cut them free by resawing the board at the bandsaw.
Number the squares to match the template, and pay attention to grain orientation. Remember, this is a hand-cut template, so the size of the three squares may vary slightly. By numbering the squares and template, you’ll ensure each part fits like a glove.
Finishing Up
Round the corners of the tabletop if desired, and ease the edges with a roundover bit. I tested some stains on a sample inlay to get an idea of what the finished product would look like.
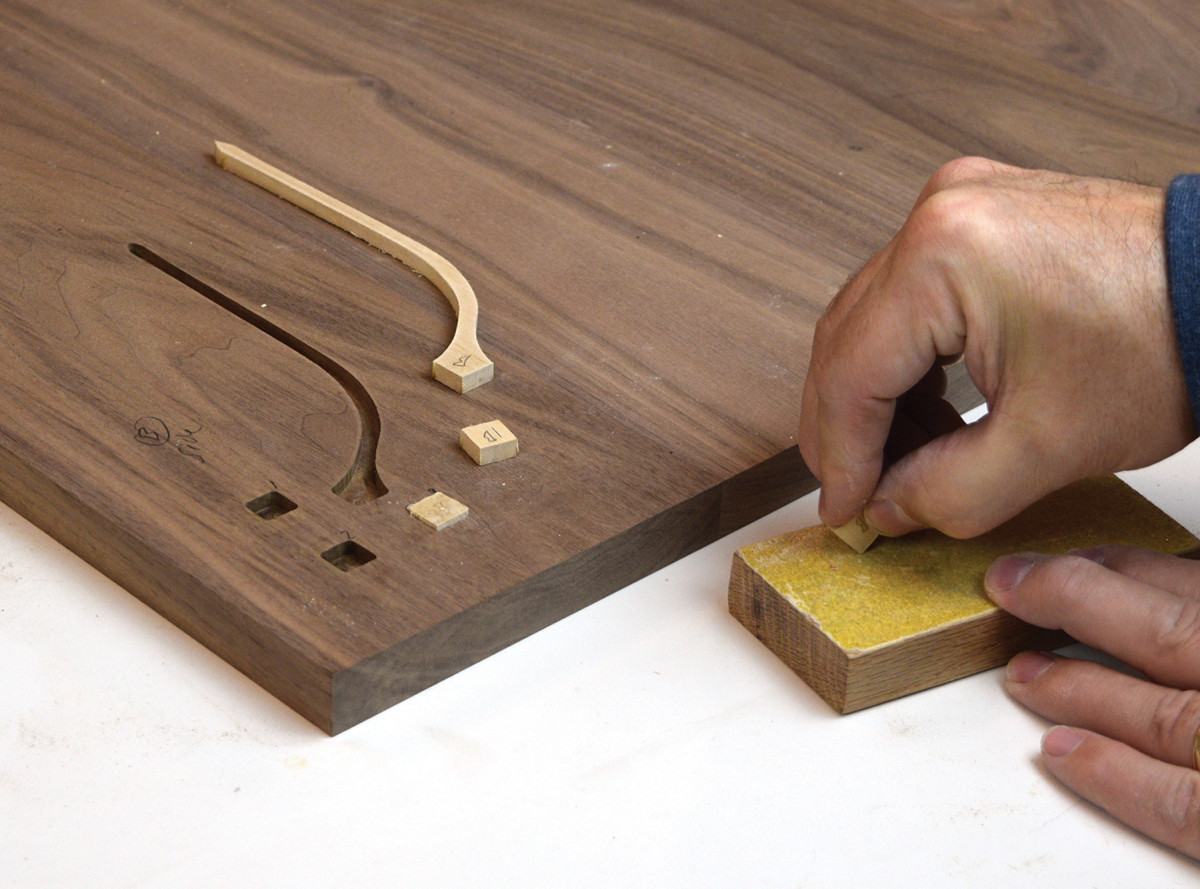
Lift the tape to reveal the newly cut inlay parts. Using a sanding block, round the sharp corners of the maple parts, and begin gluing them in place.
I found an oil-based stain that subtly darkened the walnut, but maintained good contrast with the maple inlay. My topcoat of choice was two coats of pre-catalyzed lacquer in a satin sheen. Once the topcoat cured, I wet-sanded with a #1500-grit soft sanding sponge and some tap water.
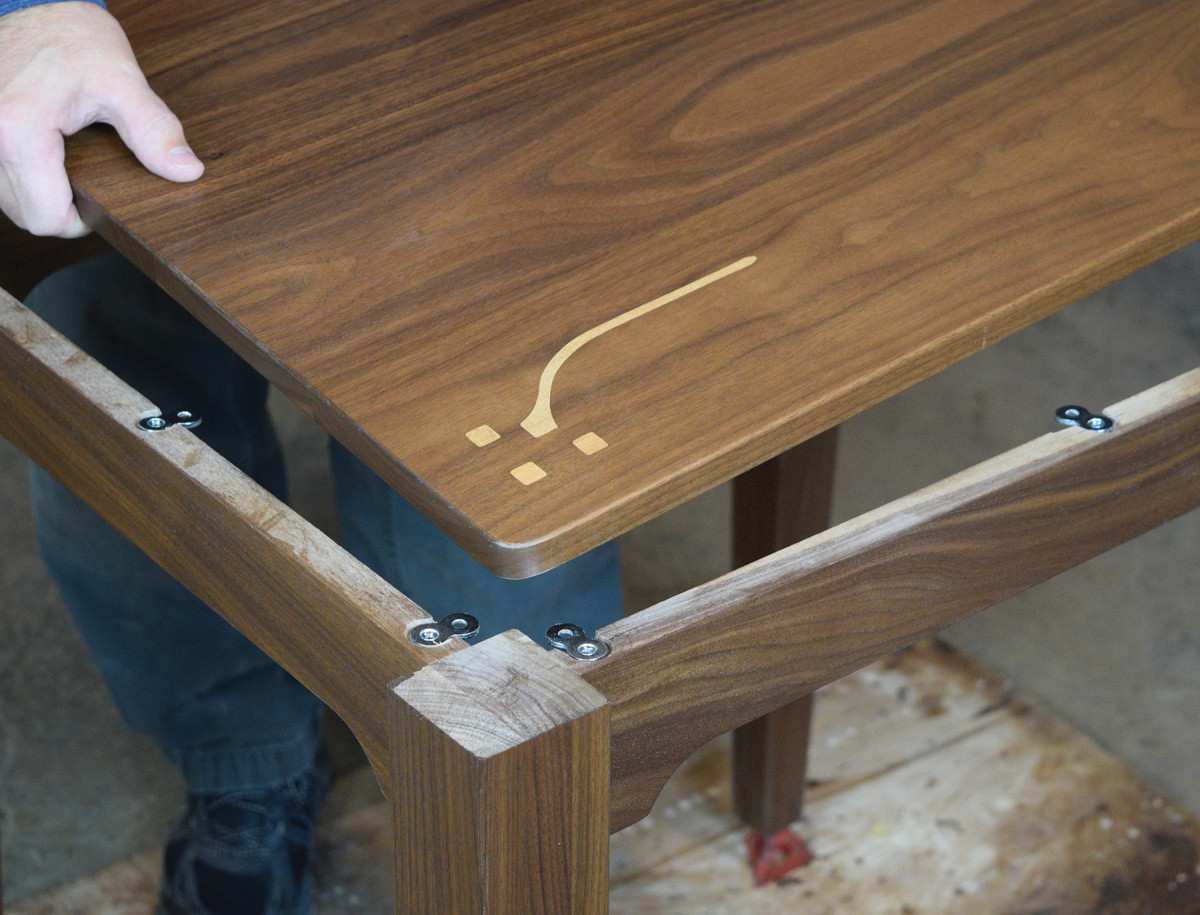
20. Install the solid wood top with figure-8 fasteners to allow seasonal expansion and contraction.
The last detail that remains is attaching the top with figure-8 fasteners. I used 3 fasteners on each apron, for a total of 12. Recess the figure-8 fasteners with a Forstner bit on the inboard side of the aprons for a concealed look. Reinstall the recessed leg levelers, and put your new table on display.

Here are some supplies and tools we find essential in our everyday work around the shop. We may receive a commission from sales referred by our links; however, we have carefully selected these products for their usefulness and quality.


