We may receive a commission when you use our affiliate links. However, this does not impact our recommendations.
Walnut Wall Shelves
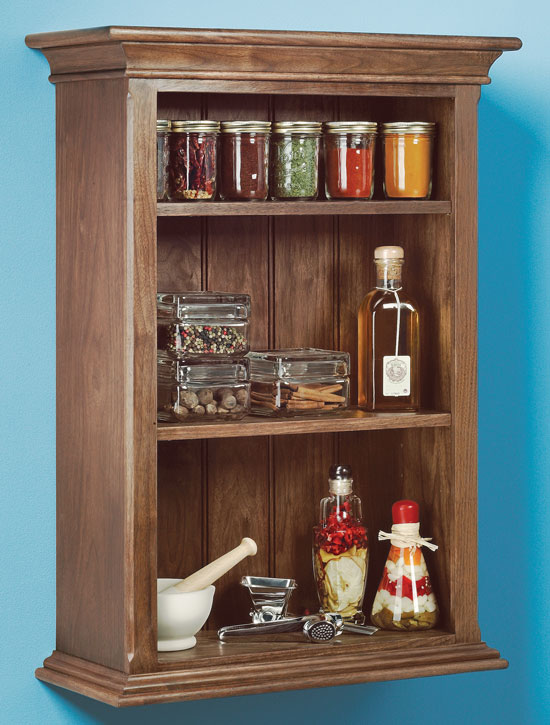
Versatile go-anywhere shelves to hold books, discs, kitchenware, or anything you want!
By Jon Stumbras
|
Never enough shelf space where you want it? This little shelf is a great |
You may also like… |

|
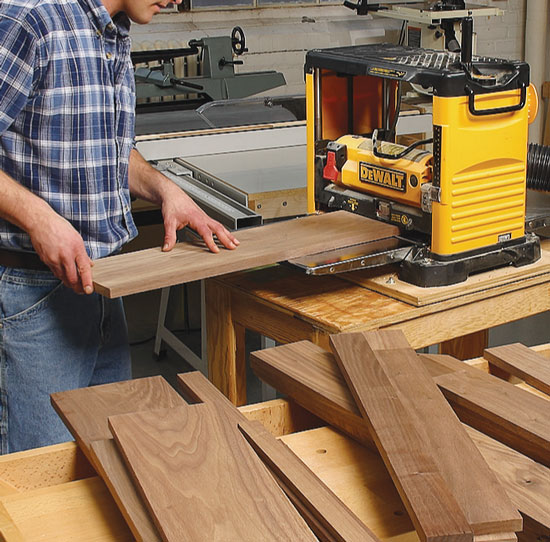
Plane your parts to final thickness after you’ve rough cut them to width and length. It doesn’t take long because there are only about two dozen parts. |
Click any image to view a larger version.
|
|
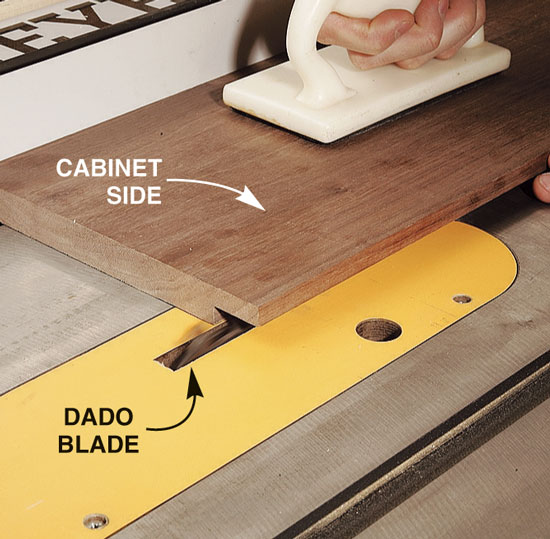
Cut rabbets along the inside edge of the cabinet sides with a dado blade. The cabinet back fits into this rabbet. |
|
|
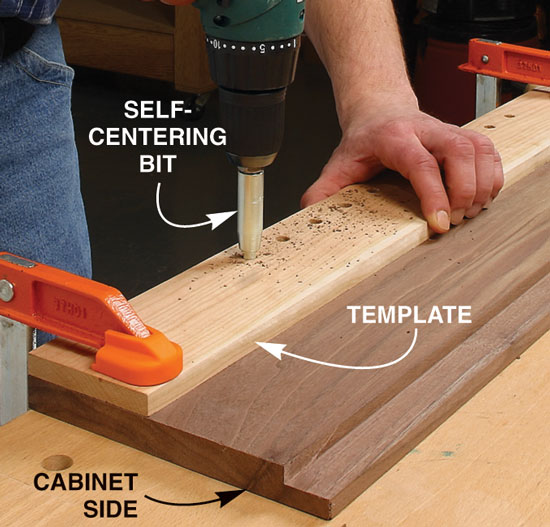
Drill shelf-pin holes before assembling the case, using a template and 5mm self-centering drill bit. The template guarantees evenly spaced holes and the self-centering bit has a built-in stop to keep you from drilling through the side. |
|
|
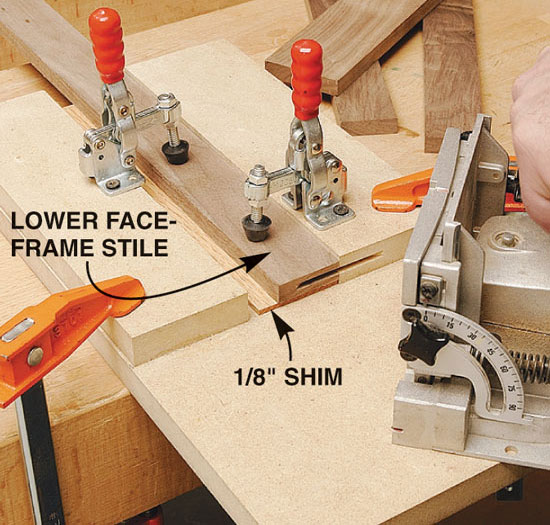
Cut biscuit joints in the face frames. Using this simple jig allows you to safely and quickly cut accurate slots in the thin, narrow parts. The bottom face-frame rail is too narrow to hold a whole biscuit so the slot is offset. The biscuit will protrude but can be trimmed after the gluing and will be hidden by the bullnose cabinet bottom. |
|
|
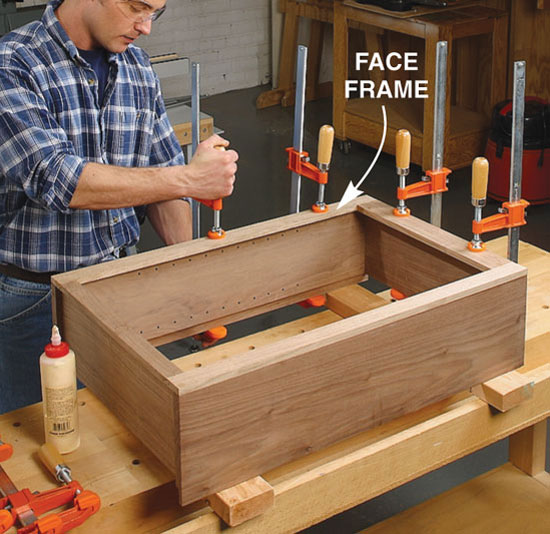
Clamp and glue the face frame to the case. The face frame is 1/16-in. wider than the case to allow some wiggle room during glue up in the event that the case or face frame are a little out of square. |
|
|
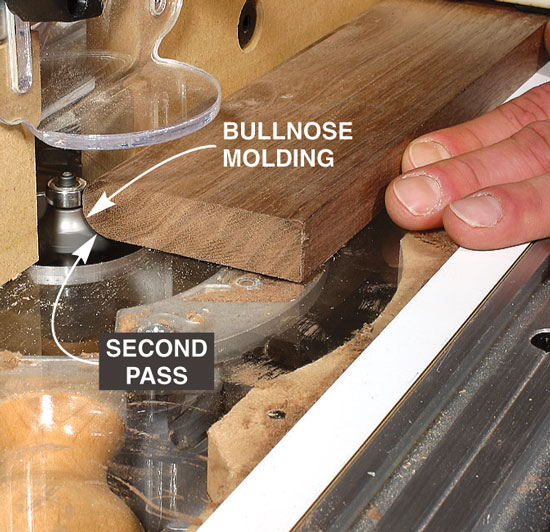
Rout a bullnose profile for the decorative top and bottom moldings with a round-over bit. First rout one side, flip the wood over and rout again. Presto, a bullnose! |
|
|
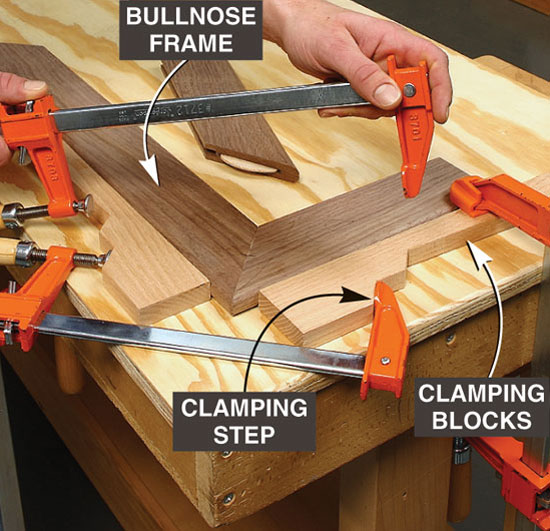
Glue and clamp the bullnose frames one corner at a time. The stepped clamping blocks shown here help pull the miters tight. Make the blocks the same thickness as your parts. First clamp the bullnose frames and clamping blocks to your bench. Then add clamps to the steps on the clamping blocks to pull the joint tight. |
|
|
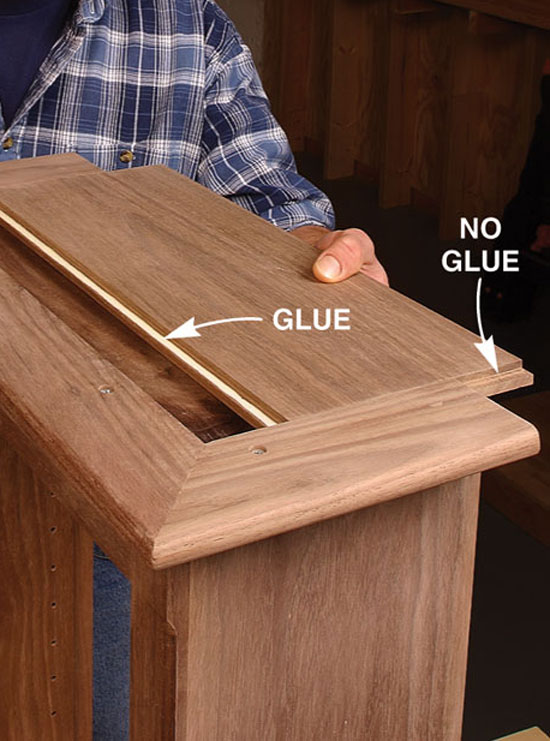
Insert the top panel into the bullnose frame. Glue only the leading edge so the panel can expand and contract with changes in humidity. Wood plugs hide the screws that attach the bullnose frame to the case. |
|
|
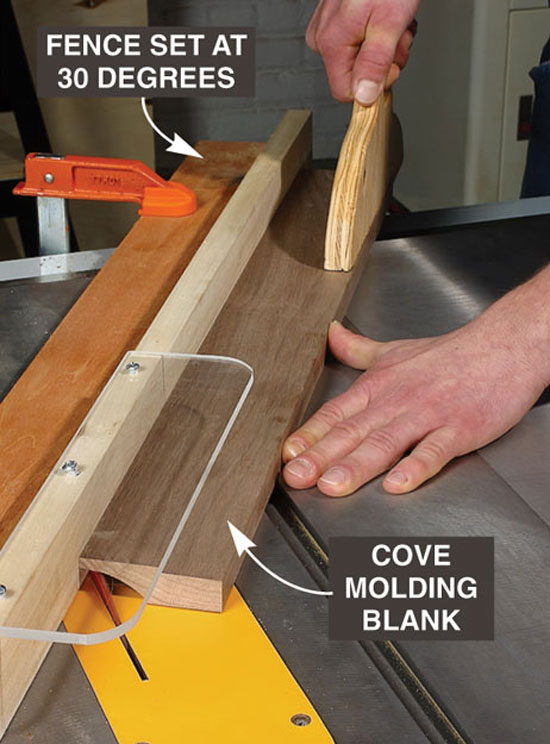
Cut the cove molding with several passes on your tablesaw using an auxiliary fence set at 30 degrees. The auxiliary fence covers half of the blade, producing only the half arc needed for this cove. |
|
|
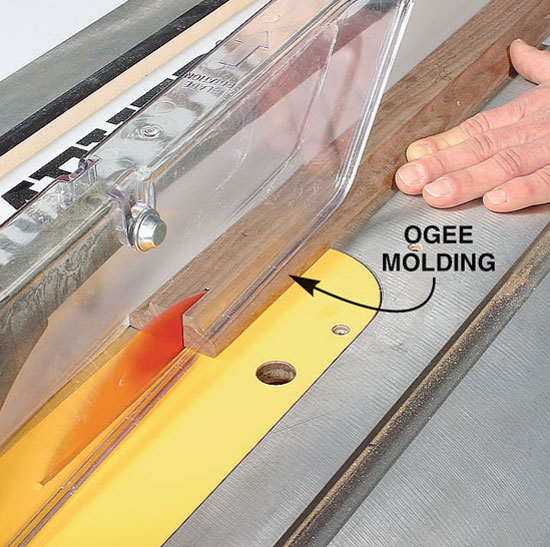
Rip the cove, ogee and beaded moldings to final width on your tablesaw. The cove molding gets ripped once to remove the waste portion while the boards for the ogee and beaded moldings get ripped twice. |
|
|
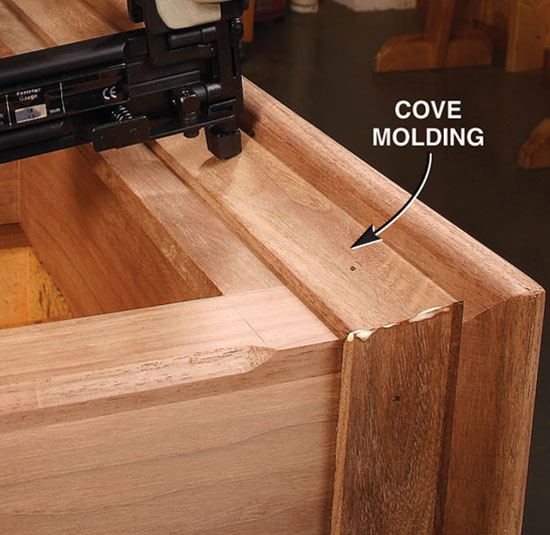
Attach the cove molding with pin nails or small brads. For additional strength, the molding is glued to the case and at the miters. |
|
|
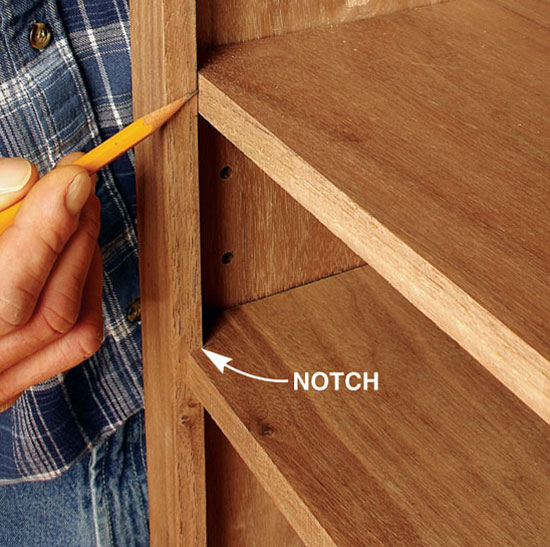
Mark each shelf for a notch before installing the back. Marking right off the cabinet is more accurate than taking a measurement. The notch permits the shelf to slightly overlap the face frame, creating a small, decorative detail. |
|
|
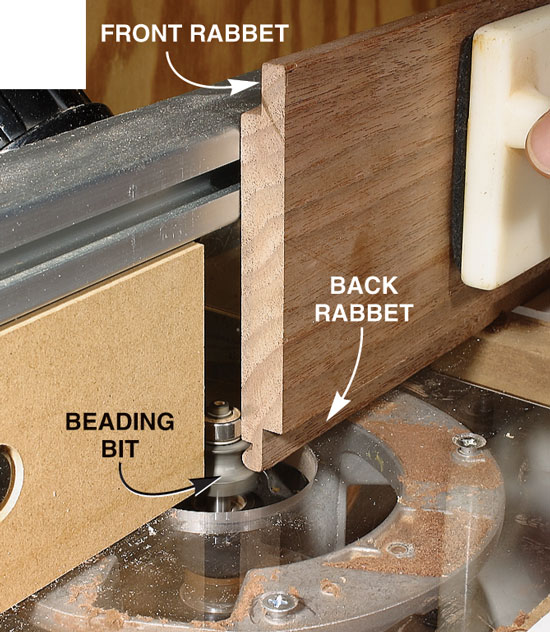
Rout the beaded profile for the back. A specialty beading bit makes quick work of this traditional molding. Opposite rabbets on each piece create the overlapping shiplapped joinery for the back panels. |
|
|
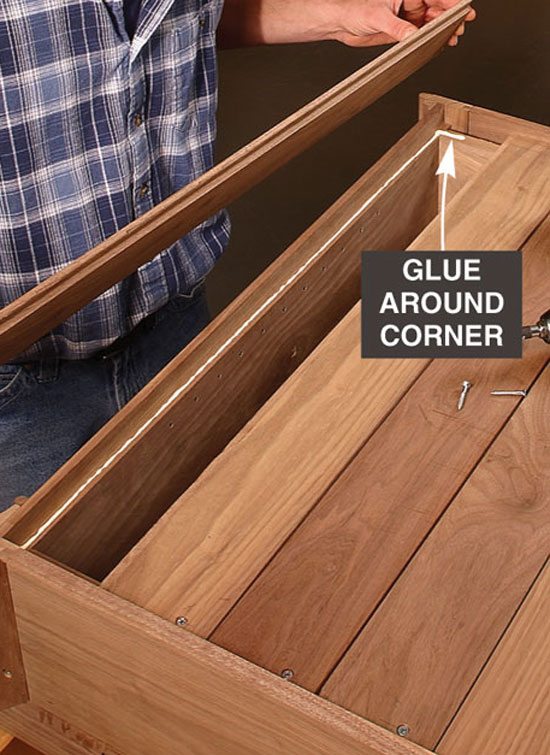
Screw the back panels in place. Gluing the outer two panels along the case sides and 1 in. around the corner adds rigidity to the case. The center three panels, attached with screws, are free to move with seasonal changes in humidity. |
|
|
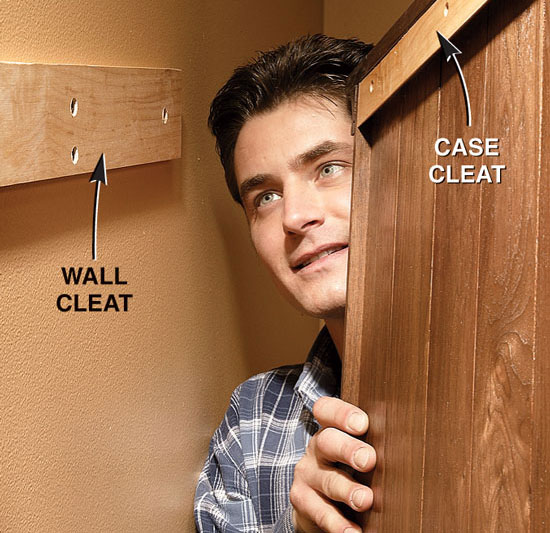
Hang the cabinet on the wall using a two- part beveled cleat. One part is screwed to the case and one part is screwed to the wall. Attach the wall cleat to at least one stud and add a couple of wall anchors for extra strength. The cabinet hangs flush against the wall with both cleats hidden from view. This story originally appeared in American Woodworker May 2003, Issue #100. |
|

Here are some supplies and tools we find essential in our everyday work around the shop. We may receive a commission from sales referred by our links; however, we have carefully selected these products for their usefulness and quality.