We may receive a commission when you use our affiliate links. However, this does not impact our recommendations.

Turning Table Legs
By Alan Lacer
| Turning four table legs that match may sound impossible, but it’s not. With these tried and true tips, and a little practice, you can successfully turn even the largest legs. And these same techniques apply when you’re copying a broken chair spindle or producing a set of balusters.Here’s what we’ll show you:
Before you start turning table legs,
Wood to turnYou’ll need four pieces of 3-1/2 in.
Tools and supplies
Tip: Driving with a dead center
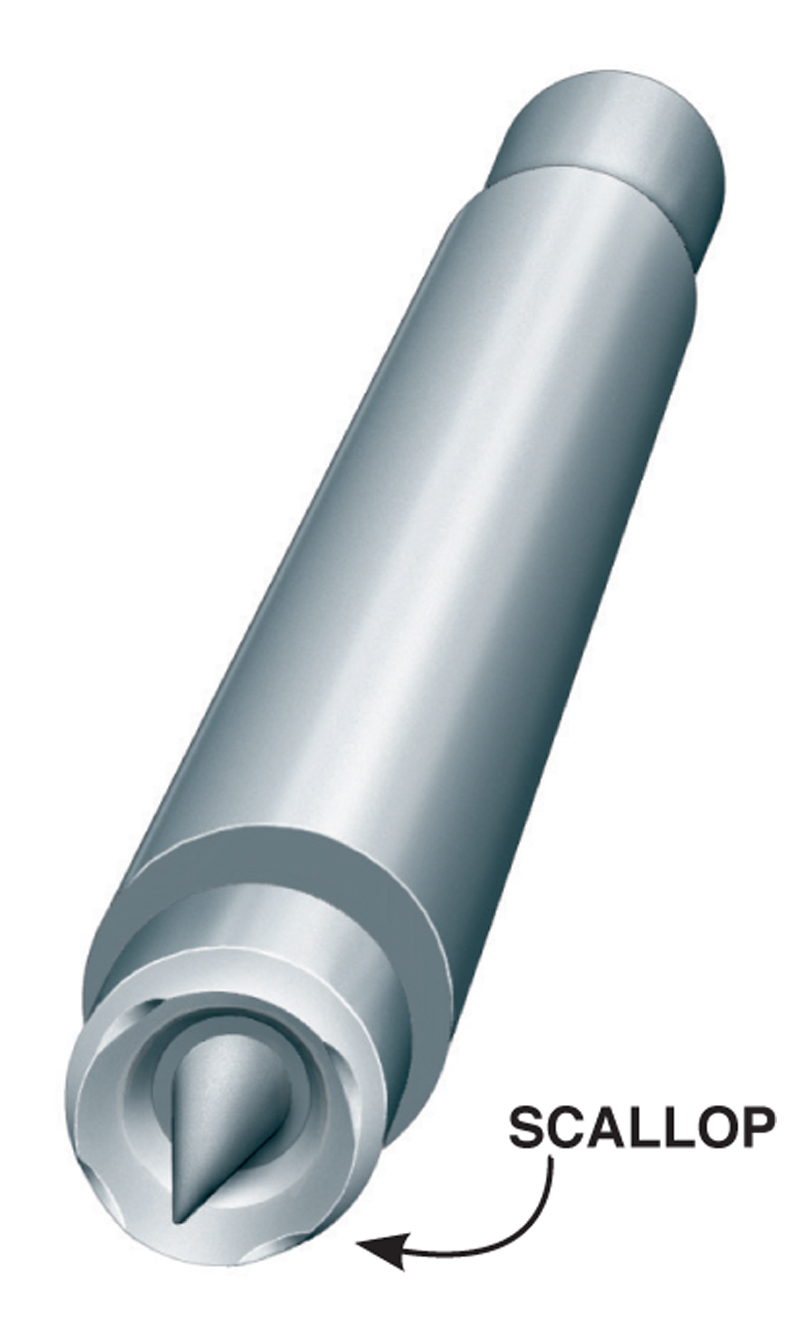
Although normally used in the tailstock, the dead center is a good alternative to a spur center for driving the work at the headstock. By controlling the pressure on the tailstock handwheel, you can determine the amount of slippage in driving the work—a real benefit in case of a catch or if you are intimidated by a large spinning square. You also can remove and accurately remount the leg several times, which is important for viewing the leg vertically during the design process.
To use the dead center for driving, file the shoulder of the dead center to a sharp edge. You can cut several shallow scallops along this edge to increase its grip on the wood. This shaping is easily done with a rotary tool and a small stone or a chainsaw file. Prior to mounting turning stock on the lathe, drive the center into the headstock side of the blank with a deadblow mallet to make an indentation.
Sources(Note: Product availability and costs are subject to change since original publication date.)
This story originally appeared in American Woodworker October 2000, issue #82.
|
Click any image to view a larger version.
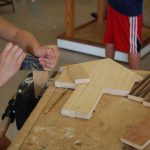
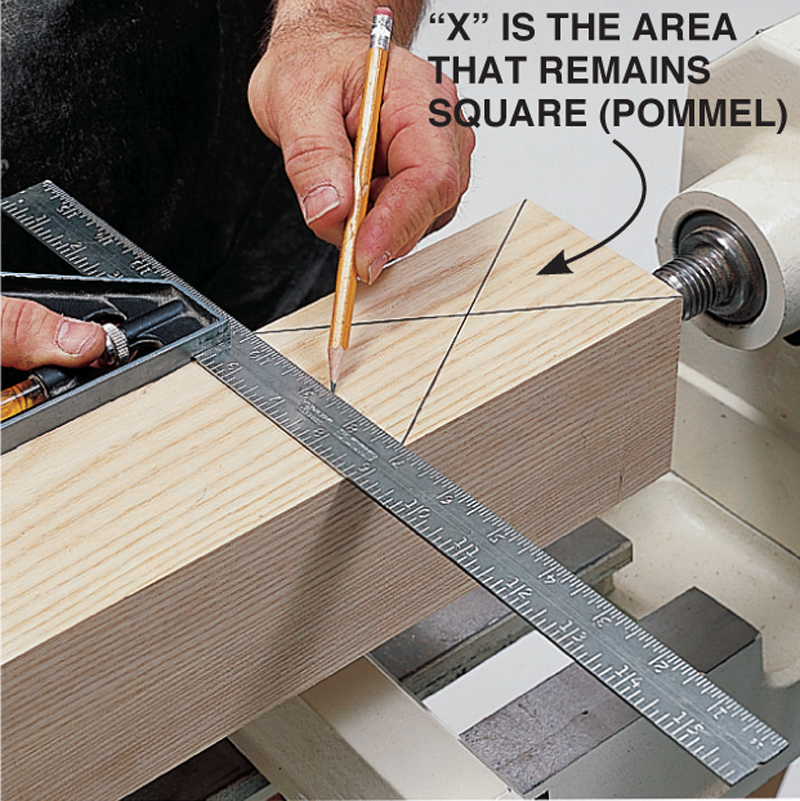
1. Lay out the pommel (area to remain square) with a square and pencil. Only one line is necessary at the shoulder of the pommel because the spinning wood will show the line clearly.
2. Cut 1/8 in. to the right of the layout line with a parting tool. Make sure the edge is keen; the handle is low; take only light cuts; and widen the cut as you go deeper to prevent binding. Cut to the left until you reach the layout line.
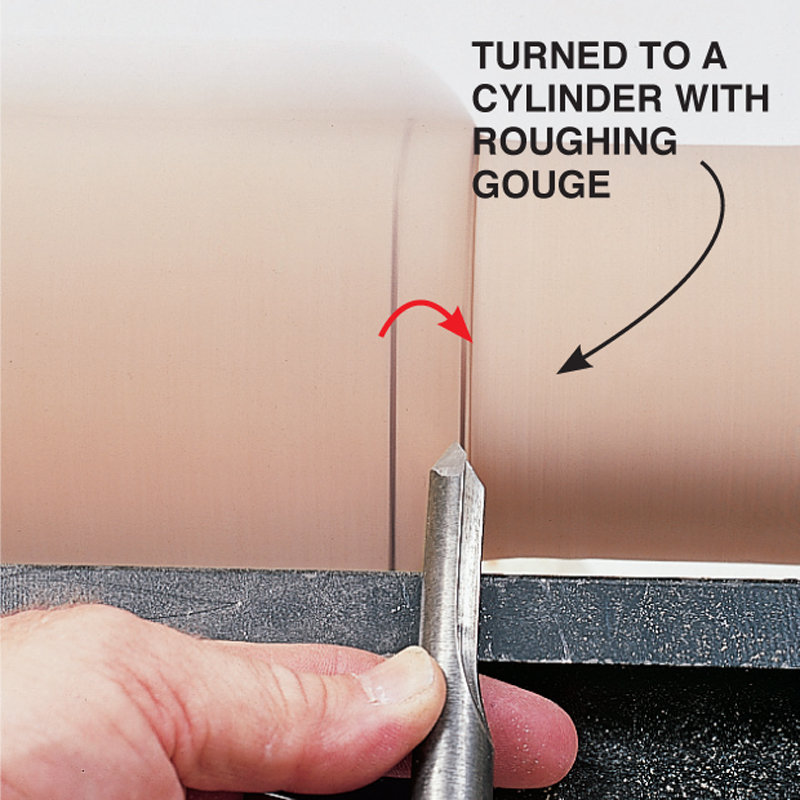
3. Turn the area to the right of the pommel to a cylinder. If you’re making rounded shoulders, turn the corners of the pommel with a
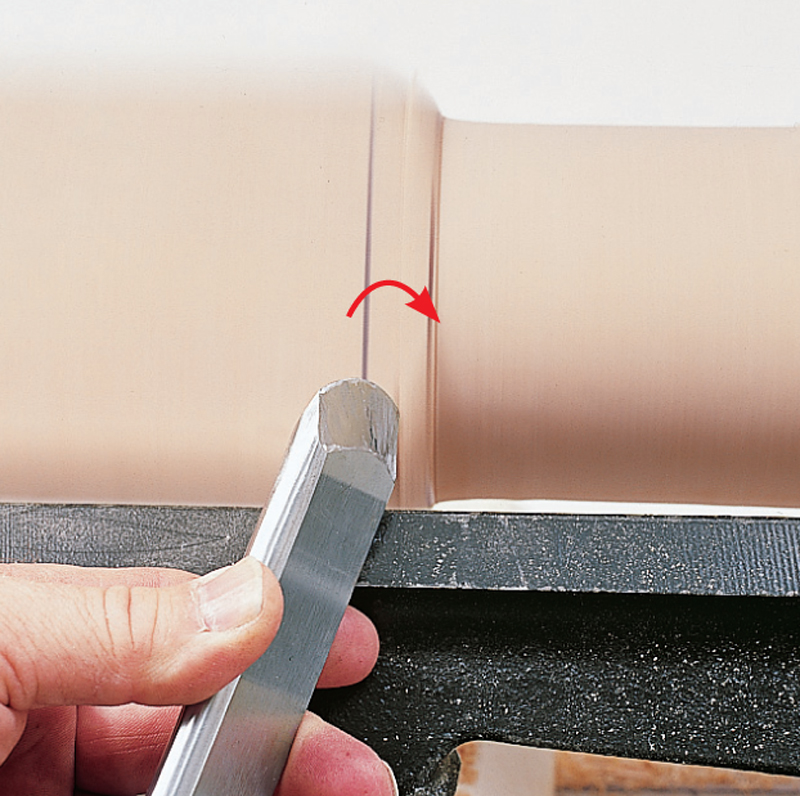
4. You can also use a skew chisel to do both square-shouldered or rounded pommels. The long point (toe) of the skew is down and leading the cut. Skews leave the best surface, but require more skill and practice to use.
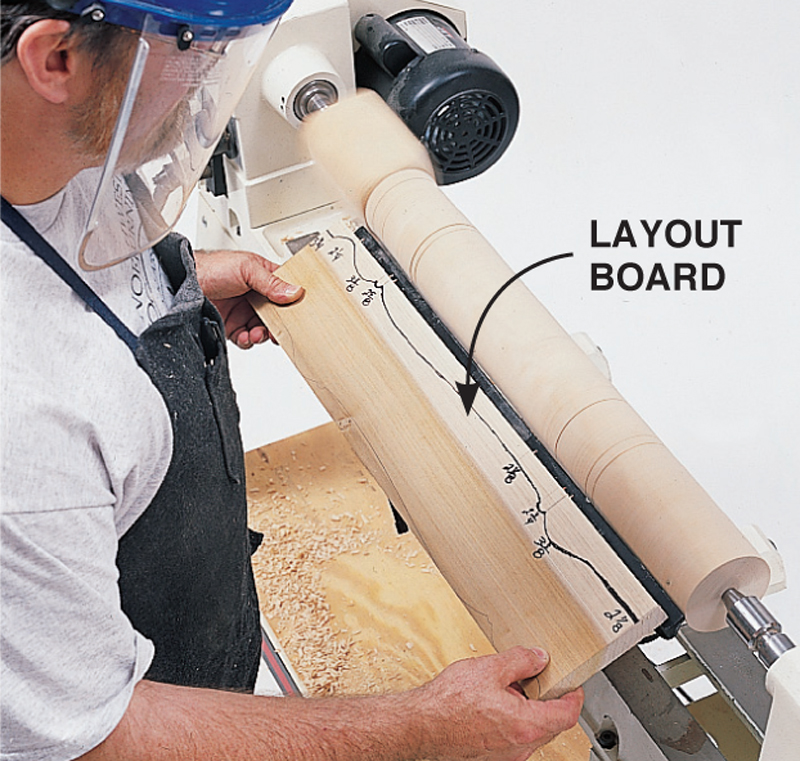
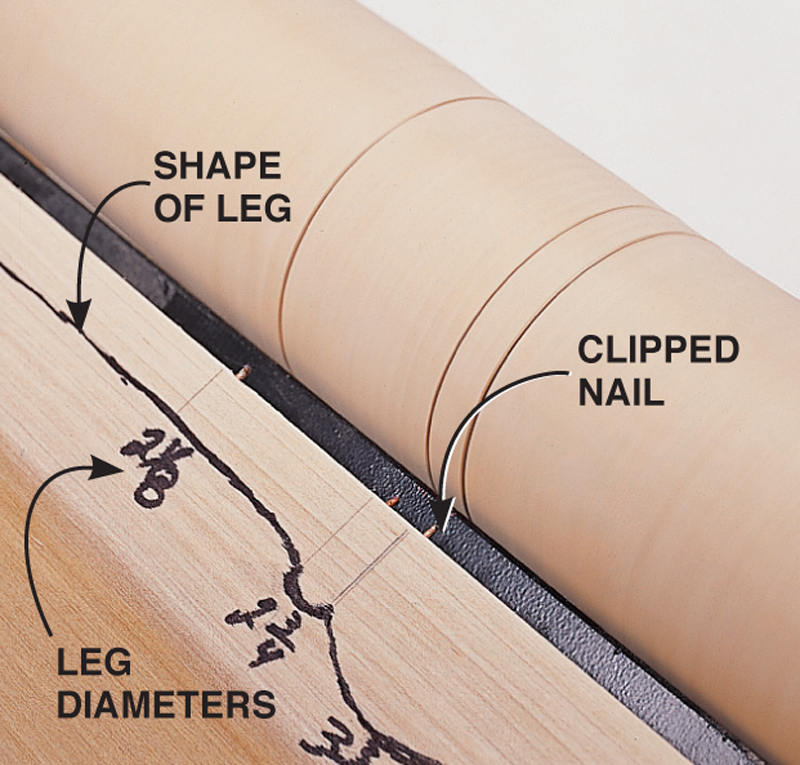
5. Use a layout board with cut pins to accurately lay out the placement of elements below the pommel. Securely place the board on the tool rest and push it into the cylinder below the pommel.
6. The pins are simply brads or finish nails driven into the edge of a 3/4-in.-thick board at the critical points and clipped off about 1/4 in. from the surface. On longer work it’s often easier to manipulate the layout board by making it in two or three sections.
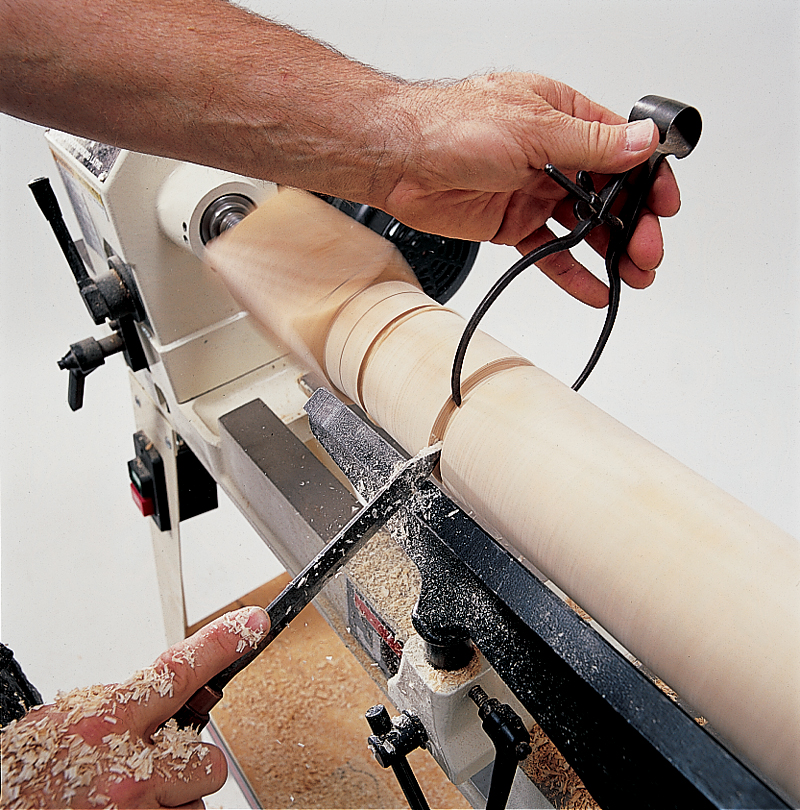
7. Use a calipers and parting tool to size critical diameters. The calipers must have rounded edges and make contact only on the side opposite the cutting tool. There must be no gap between the wood and tool rest. Hold the parting tool handle low, tucked under your forearm.
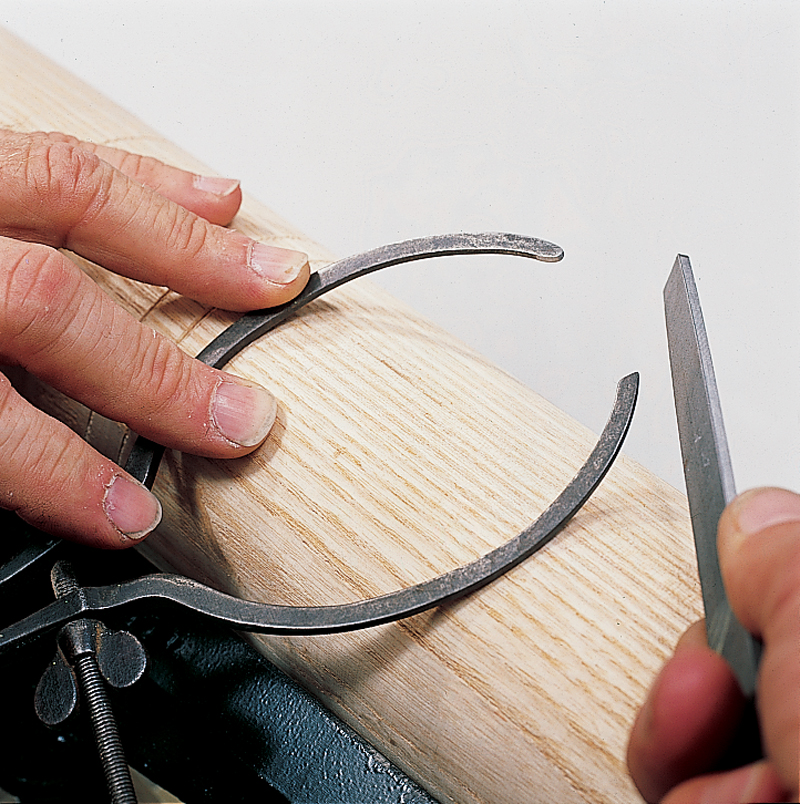
8. Round the ends of the outside calipers with a fine mill file or rotary tool before using on the spinning wood. I finish off the process with 220-grit sandpaper. The goal is to eliminate any sharp edges or corners that might catch on the wood.
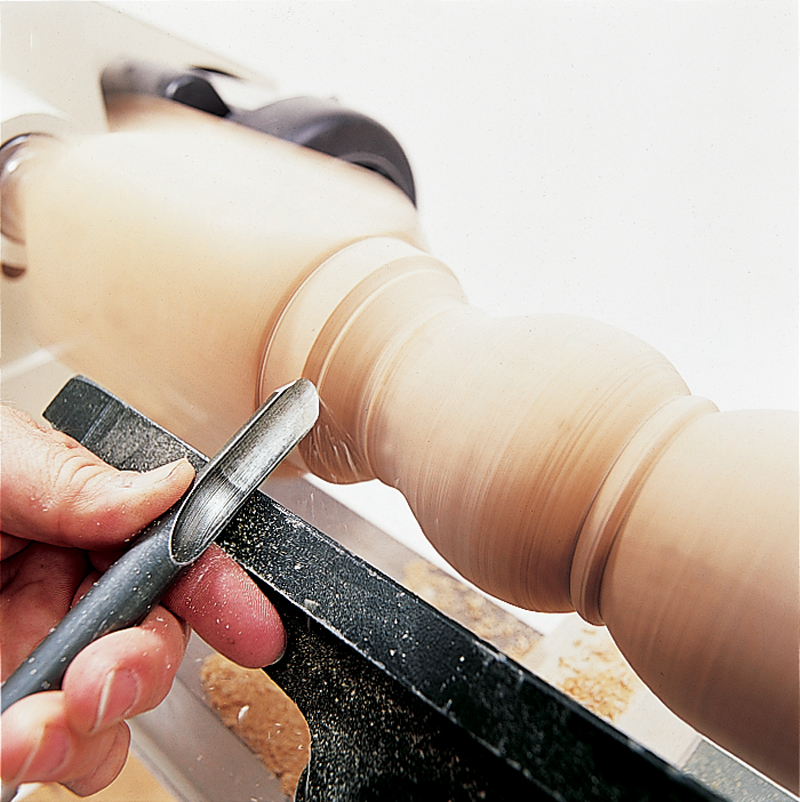
9. Cut details with the detailing gouge. For long, gradual curves, cylinders or straight tapers, use the roughing gouge. After turning the pommel, work from the headstock toward the tailstock until the leg is finished. Control the shape by watching the upper horizon of the piece rather than the tool tip.
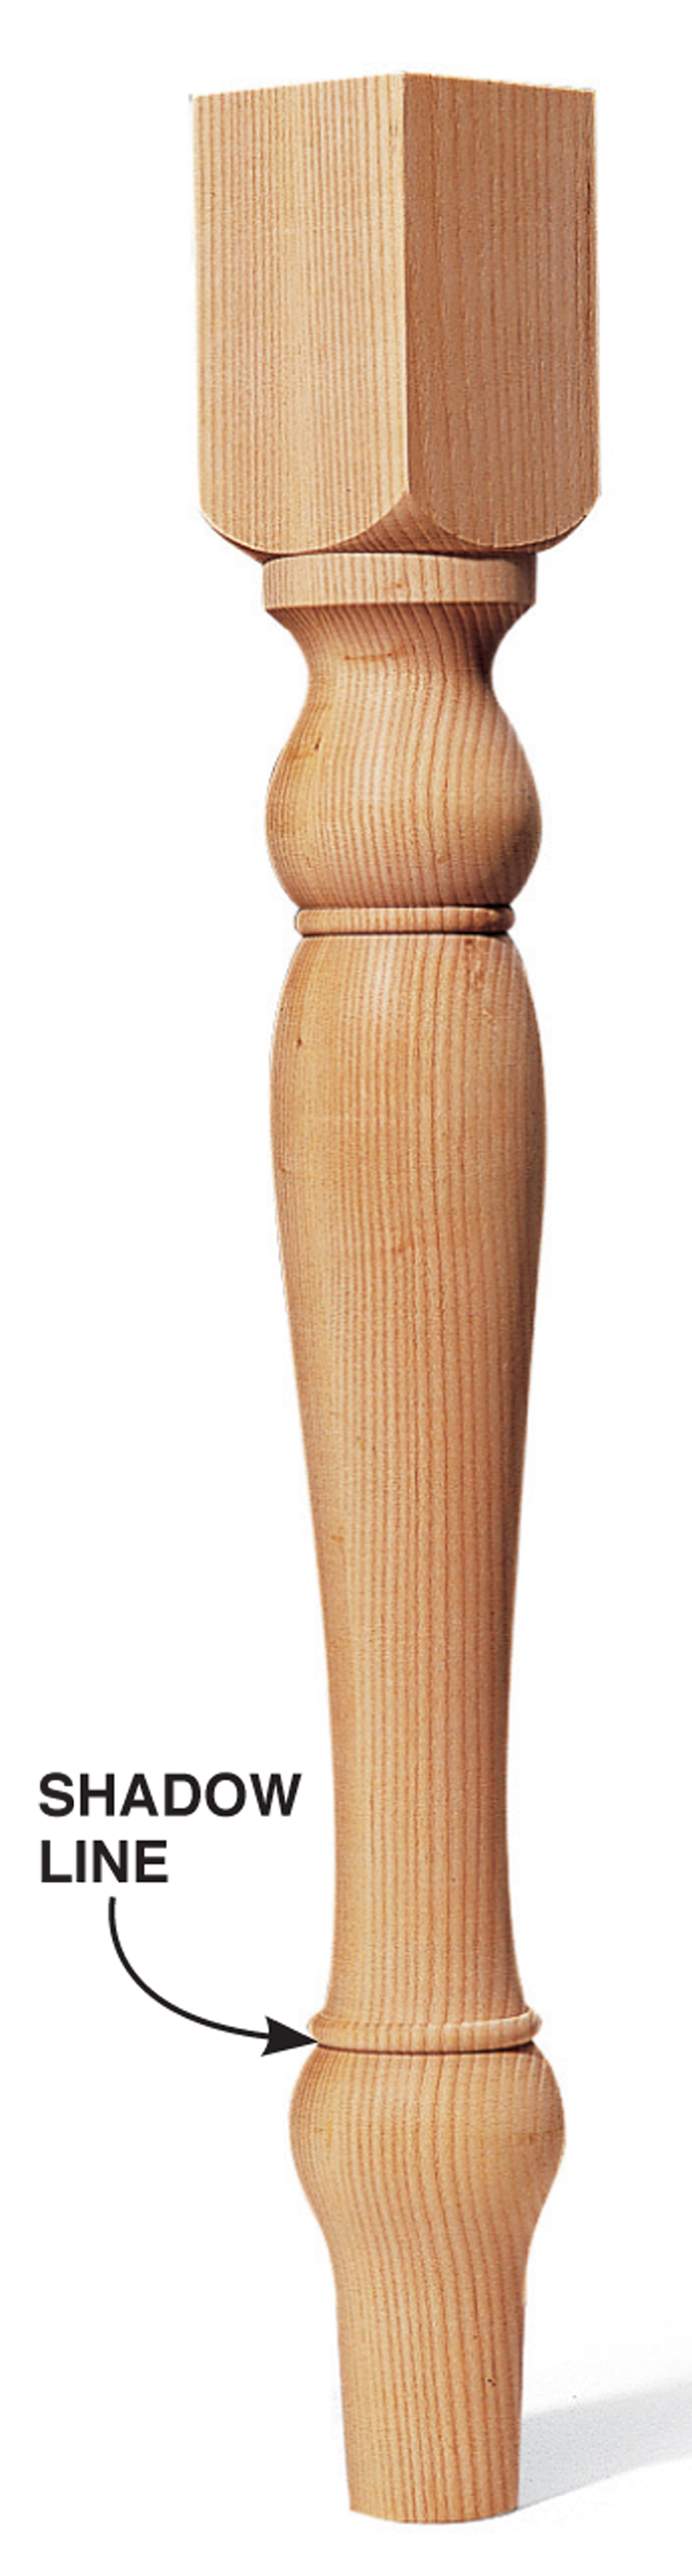
10. Use the skew chisel (long-point down) to add shadow lines, crispness and emphasis to beads, shoulders, fillets and other details. Be sure to check the leg by removing it from the lathe and examining it in a vertical position. Complete the leg with final sanding.
|


Here are some supplies and tools we find essential in our everyday work around the shop. We may receive a commission from sales referred by our links; however, we have carefully selected these products for their usefulness and quality.