


We may receive a commission when you use our affiliate links. However, this does not impact our recommendations.
 Hone Your Skills Making Functional Storage
 Hone Your Skills Making Functional Storage
PROJECT #2102 • Skill Level: Advanced • Time: 1 day • Cost: $50
It’s rare that I afford myself the opportunity to spend time and experiment at the lathe. Much of this could be attributed to the fact that turning (to me) has always had the perception of being a purely hobbyist pursuit that was too arcane and esoteric to be practical. And as a neophyte to the craft, it’s often easy to view fine woodworking and turning as two separate things, but in fact can be classified as either synonymous or as an extension of one another. Personally, I prefer to view them as complementary—a correlational and mutually advantageous discipline.
It’s this sense of interconnectedness combined with a willingness to improve, that continually drive my need to pick up a gouge and dispel my initial impressions of turning. Over time, I have found that committing to small projects (such as the ones featured in this article) become a reminder of the gratifying quality that turning possesses. Another redeeming aspect of turning is the ability to yield successful results without having a great deal of experience. Minimal tools and equipment are required, rendering this an accessible and enjoyable exercise for novice woodworkers and experts alike—so let’s get started.
Scrap Bin Diving
One of the things to relish about this project is that it allows you to finally utilize those pieces of wood you refused to discard ‘insert number of years ago here’. Of course, there is always the option of going out and purchasing something exotic or figured (since it’s on a more economical scale), however, there is something inherently gratifying about using up old scraps of sentimentality.
For this project, I chose some leftover cherry that had interesting figure along with some spalted maple. If you have blanks large enough, great. If not, there is no shame in laminating two pieces together (from the same board) to get the desired thickness. Just make sure to be conscious of matching grain to avoid any conspicuous glue lines.
Blank Preparation
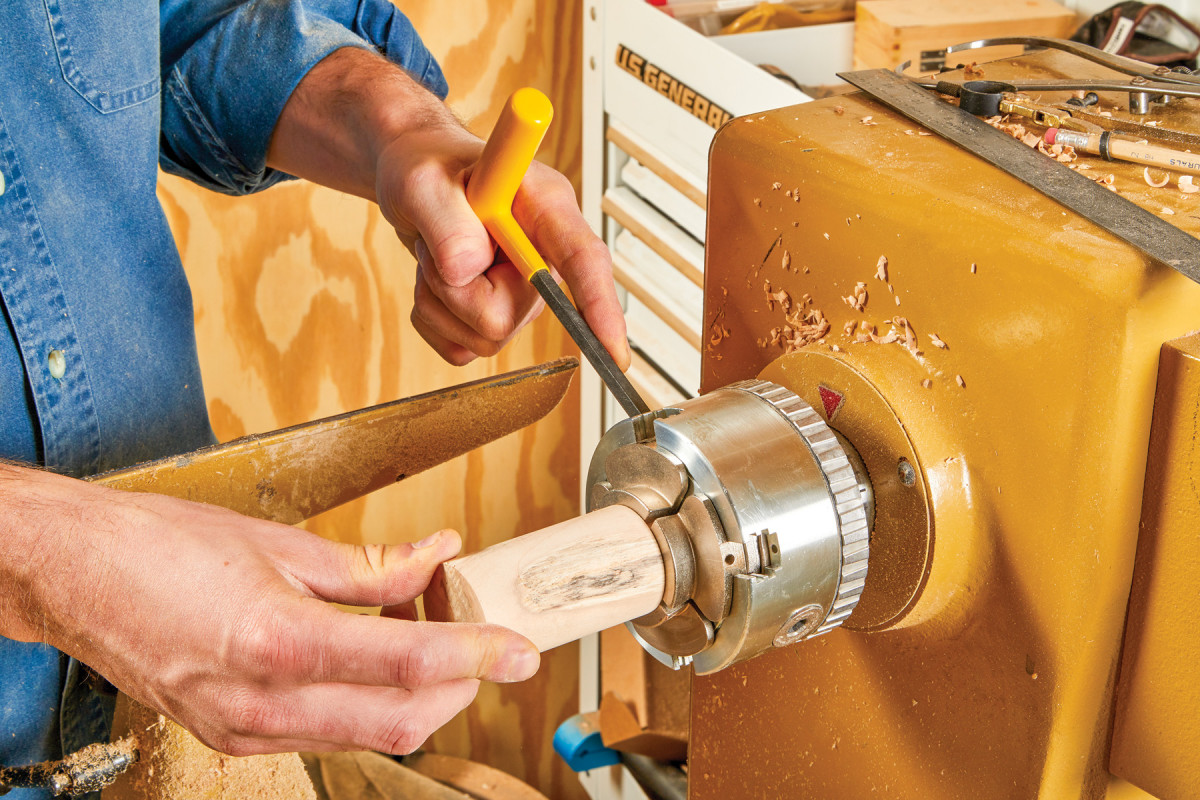
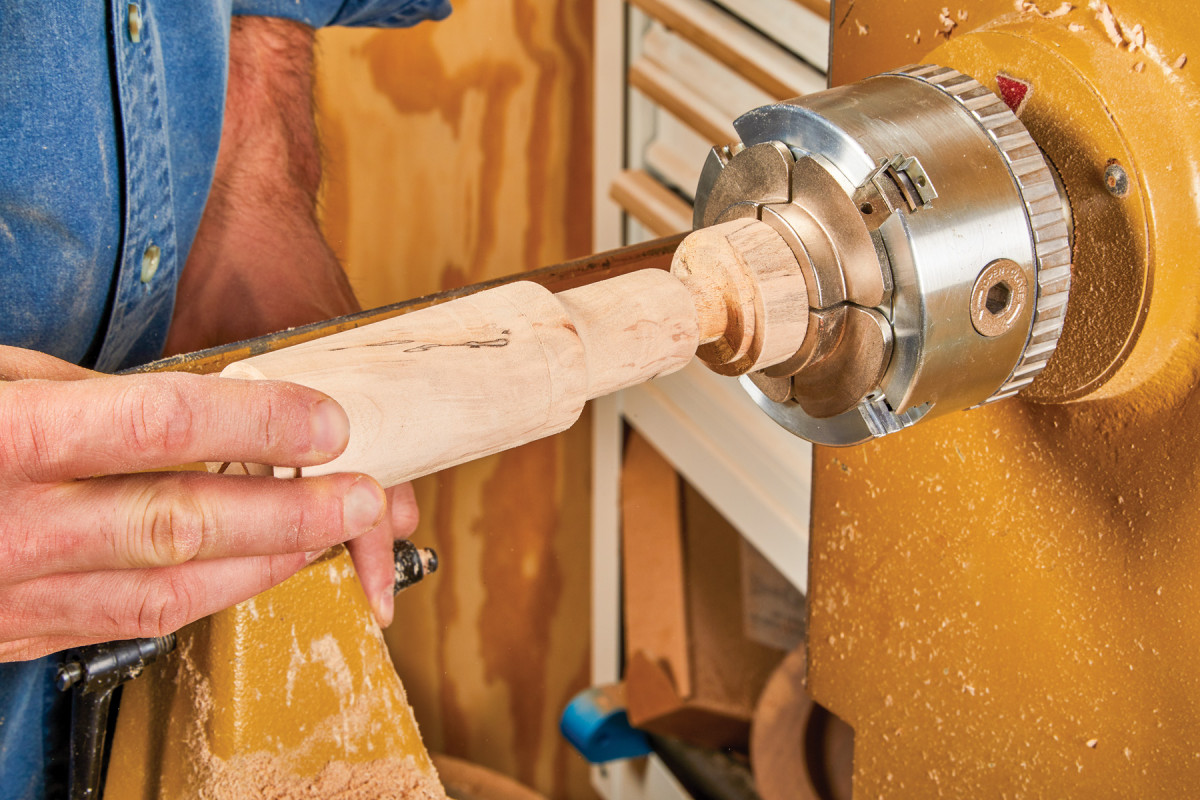
Since the piece(s) will invariably be turned down to a cylinder, there doesn’t seem to be a conceivable reason to further prep your piece, short of chucking it into the lathe. Albeit, squaring up the work piece aids in finding center on each end of the blank. Move over to the band saw and create two intersecting stop cuts on one end of each blank. This will aid in allowing the spur center to seat properly to the blank. Proceed to do this on all four blanks—don’t hesitate to make a couple back-up blanks for insurance.
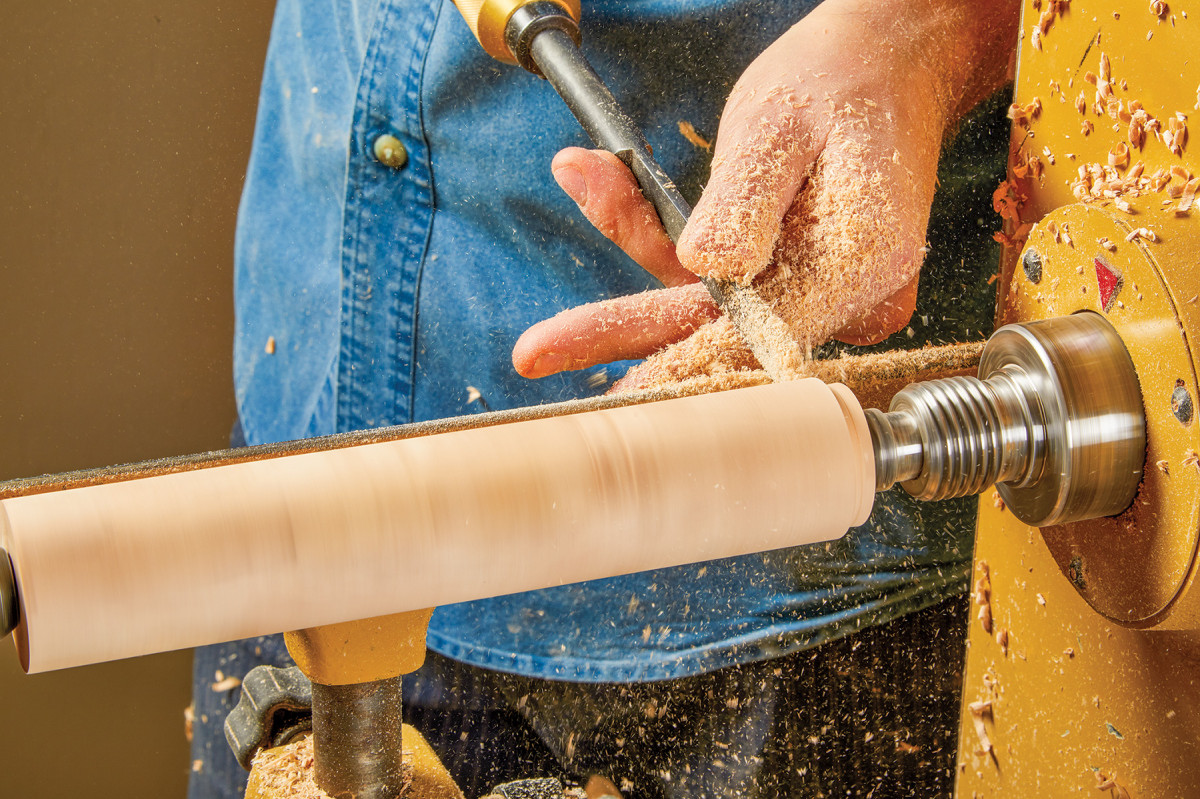
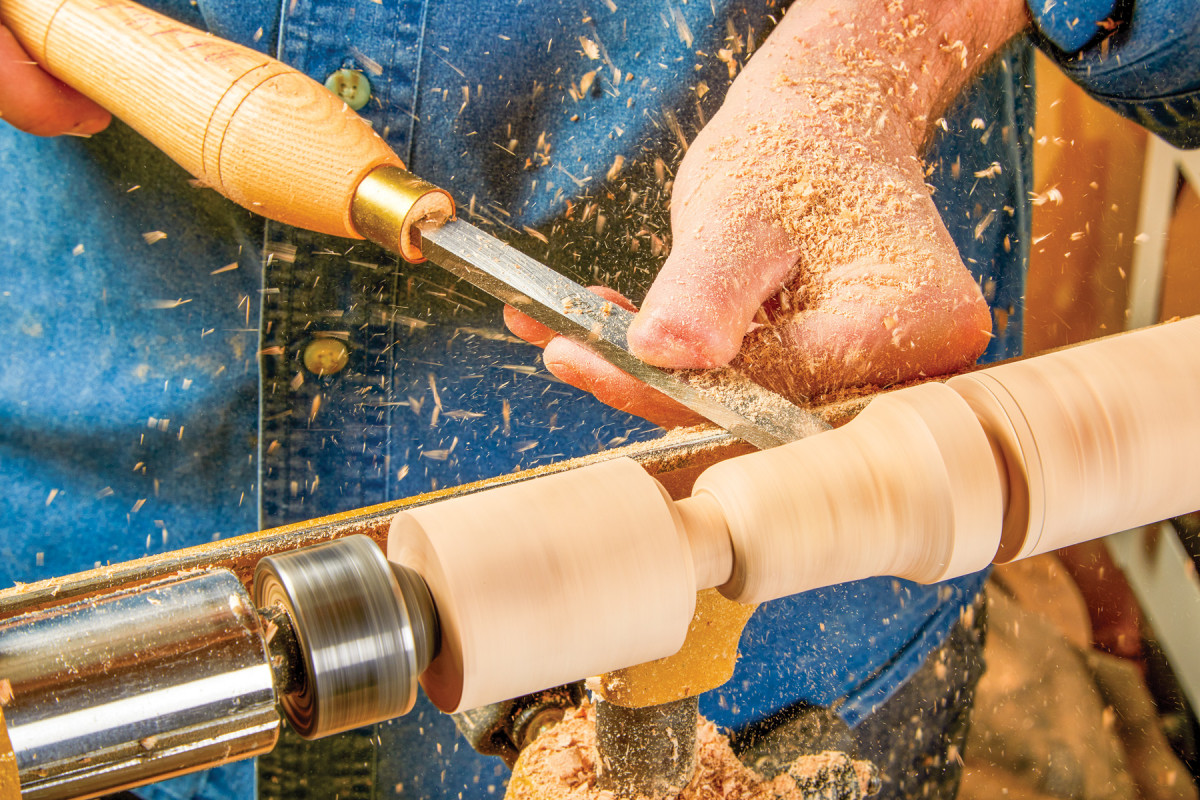
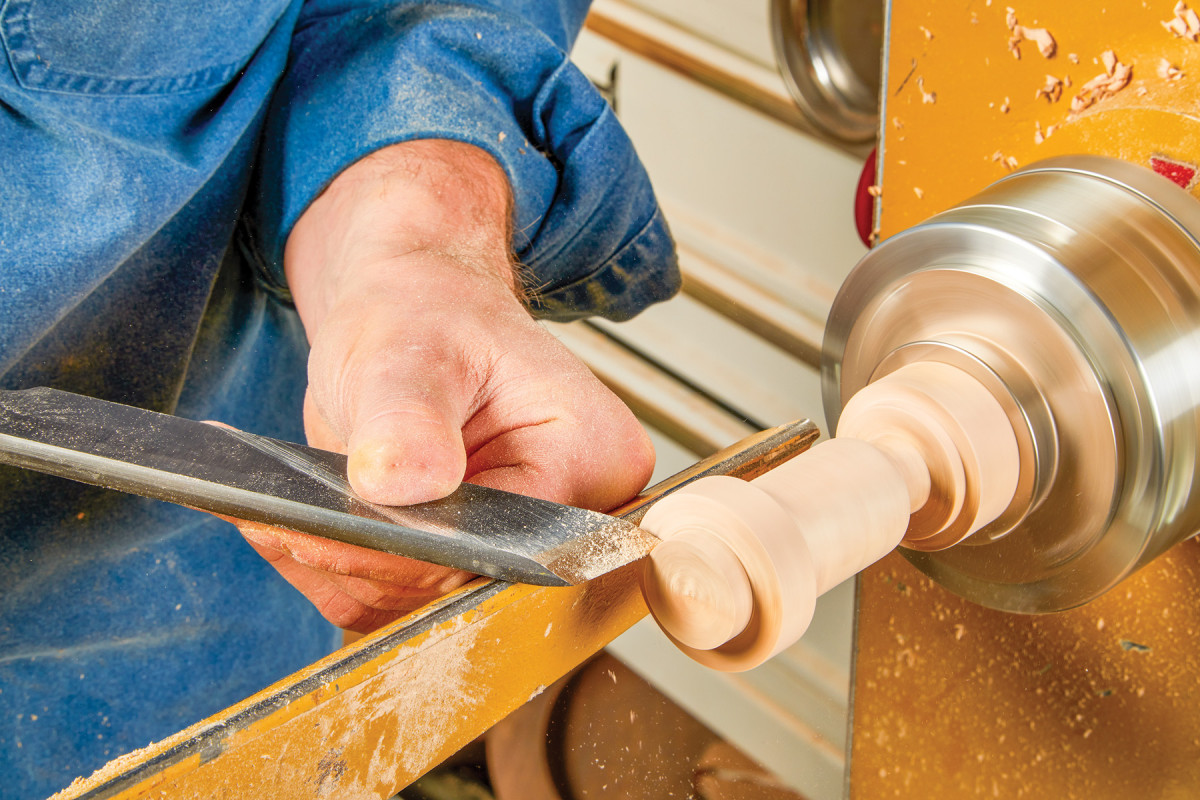
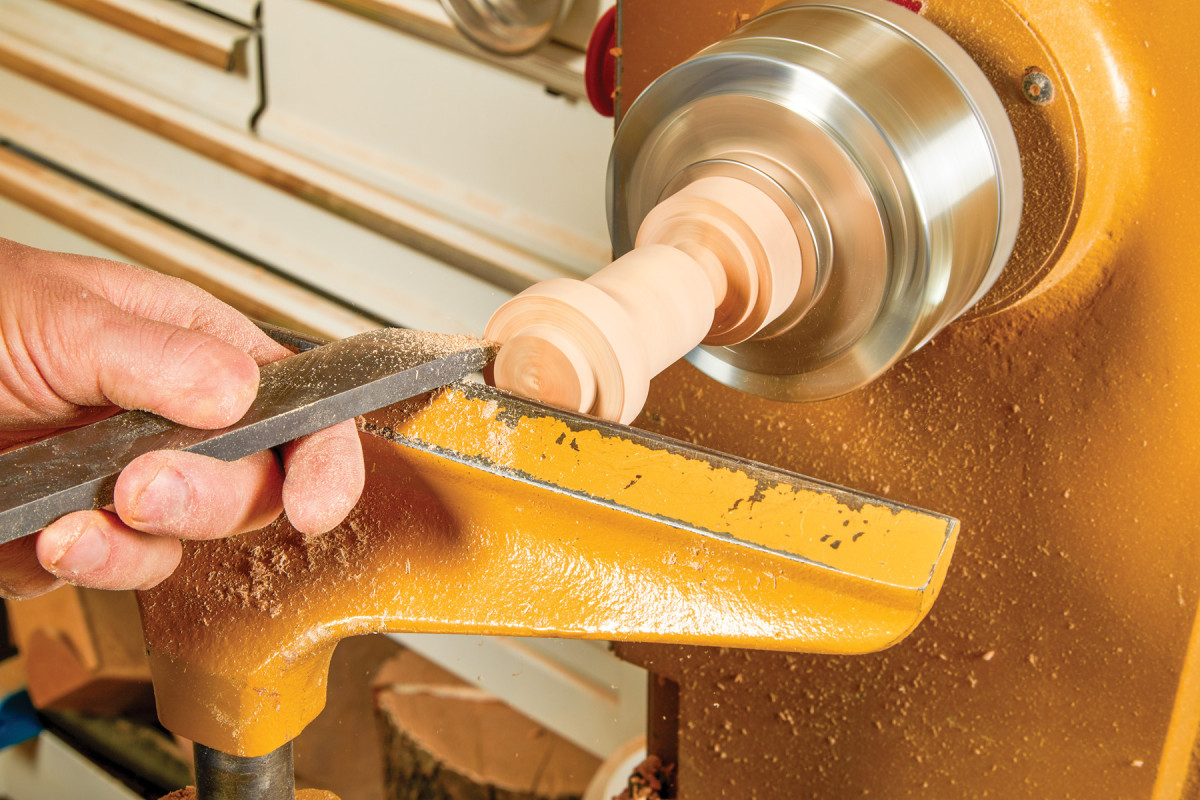
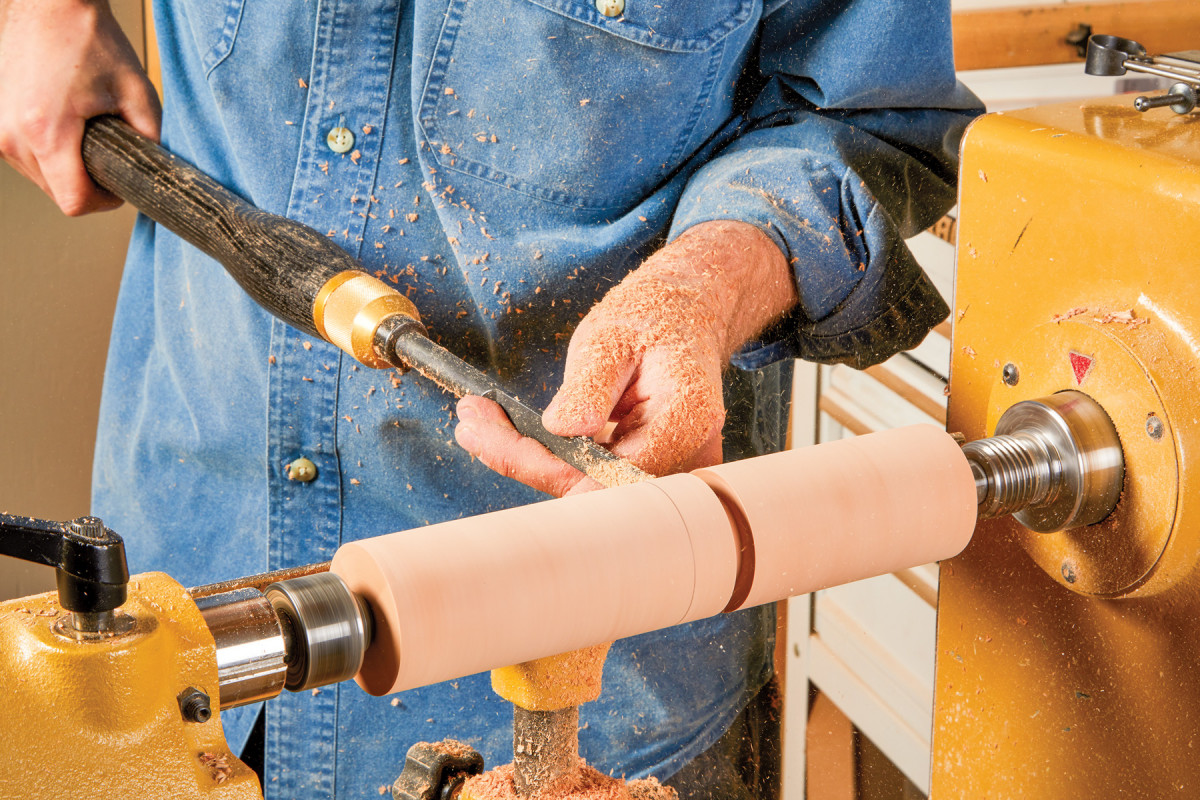
Clean up any hills or valleys left behind from the roughing gouge using a skew.
Need for Speed
Before turning its important to determine the safe minimum as well as maximum RPM in relation to the size of the work piece. Take the diameter and multiply it by 6,000 to 9,000. The first number (6,000) divided by the diameter of the piece will give you the minimum efficient speed. The latter number (9,000) divided by the diameter will provide you with the safe maximum speed. Considering our blanks are under 3“, speeds up 3,500 RPMs are acceptable, however are not requisite—the important thing is to start slow and to establish a level of comfort as well as familiarity with how each individual tool cuts.
Turned Canister: Rounded Lid
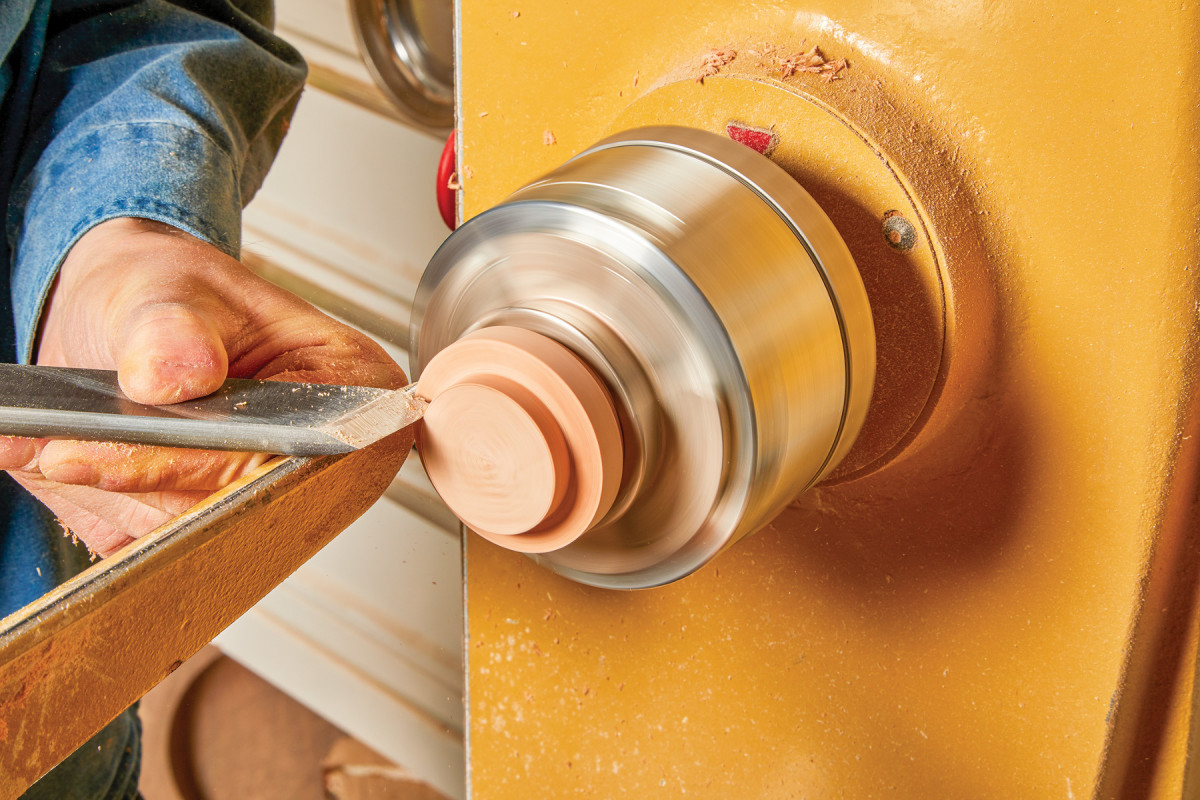
Create a tenon (approximately 3/8″ wide) on the end of the blank using a parting tool.
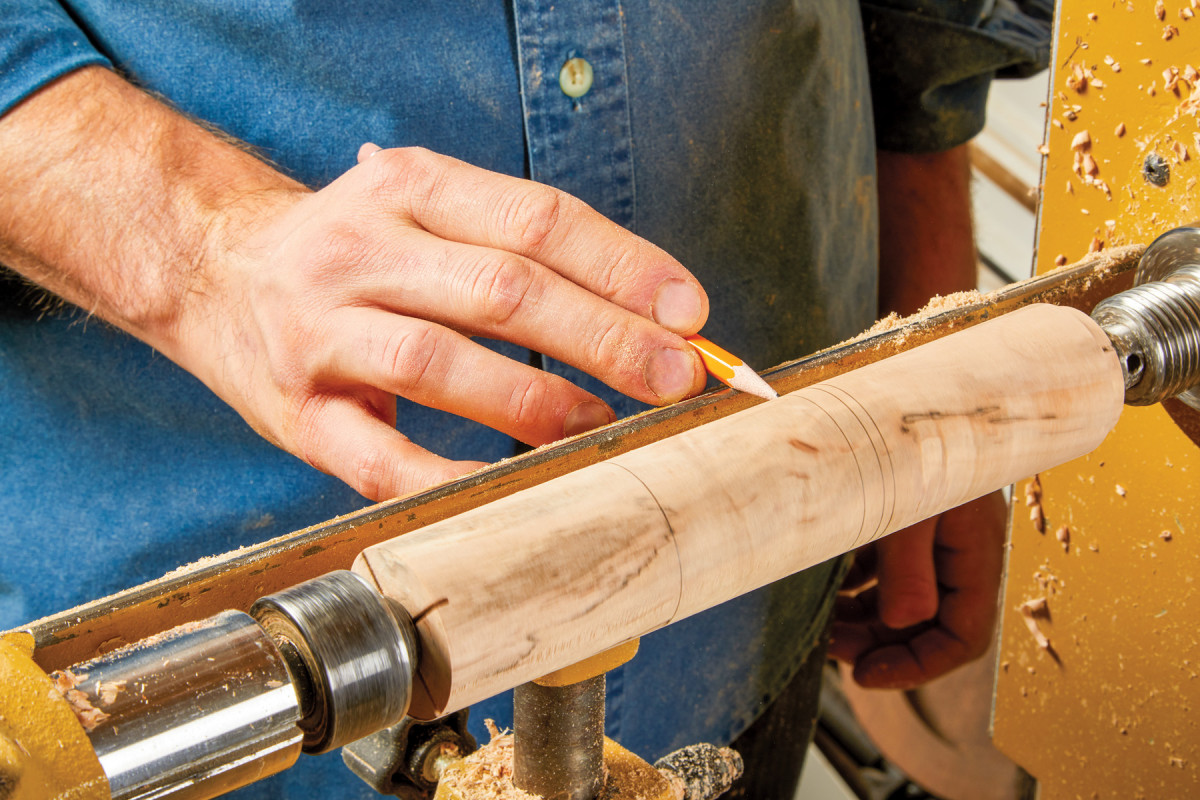
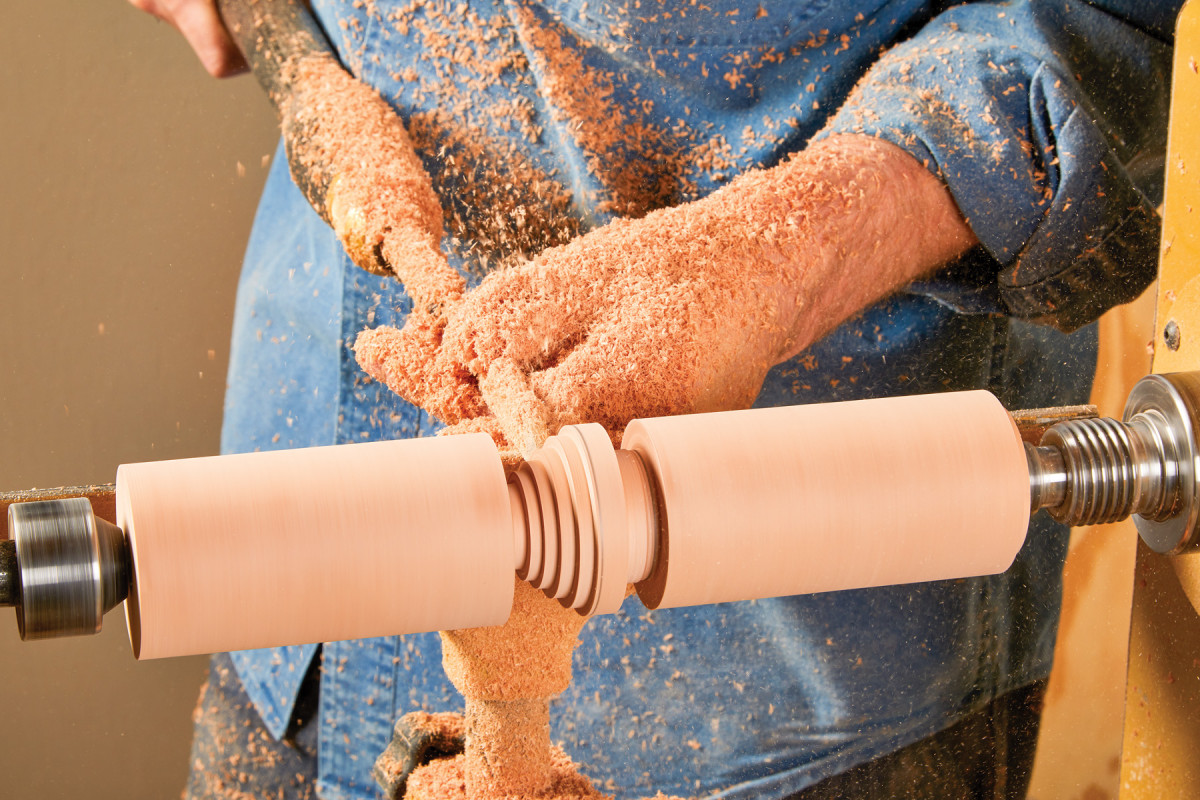
Lay out the individual parts of the canister using a ruler, pencil and the rotation of the lathe.
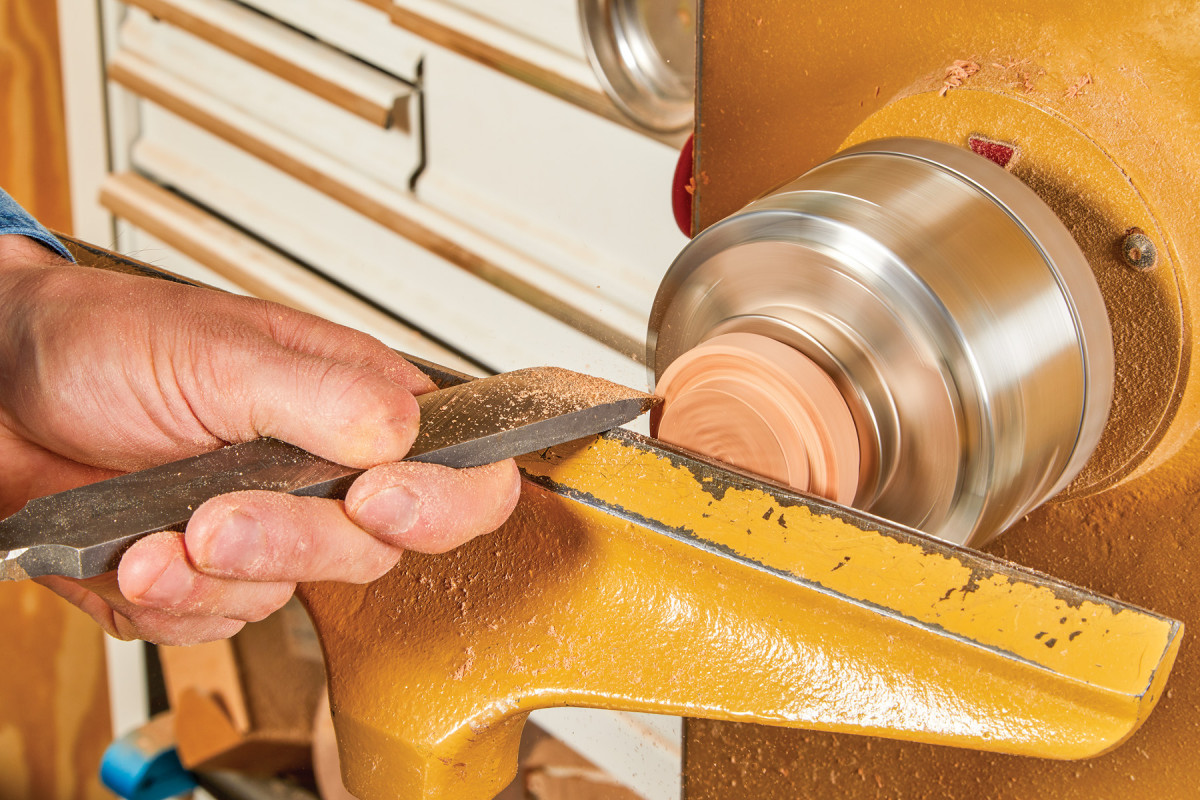
Using the reference lines, as well as a parting tool, create a tenon that will make up the seal between the lid and the base.
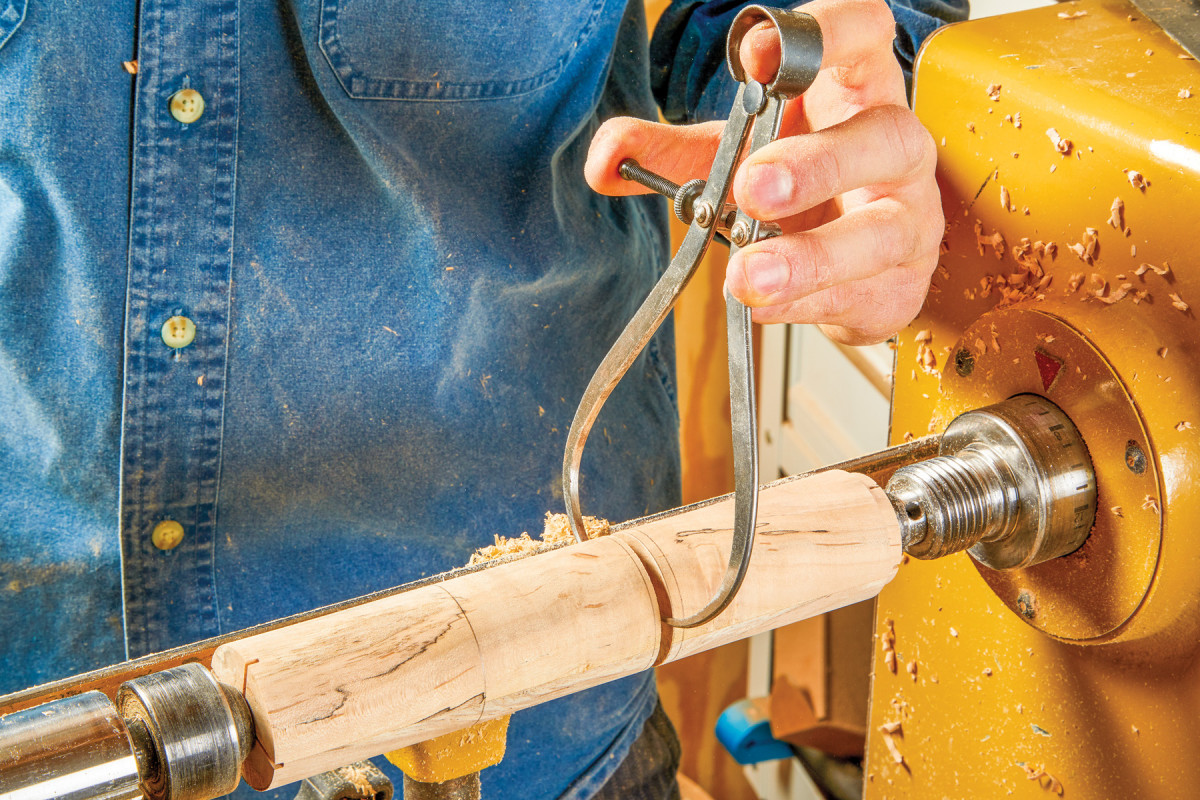
To ensure an accurate fit, check the diameter of the lid tenon often. A slightly proud tenon can be easily rectified, but an undersized one can be tricky.
Once the length of the lid is established, begin to shape the profile using a spindle gouge.
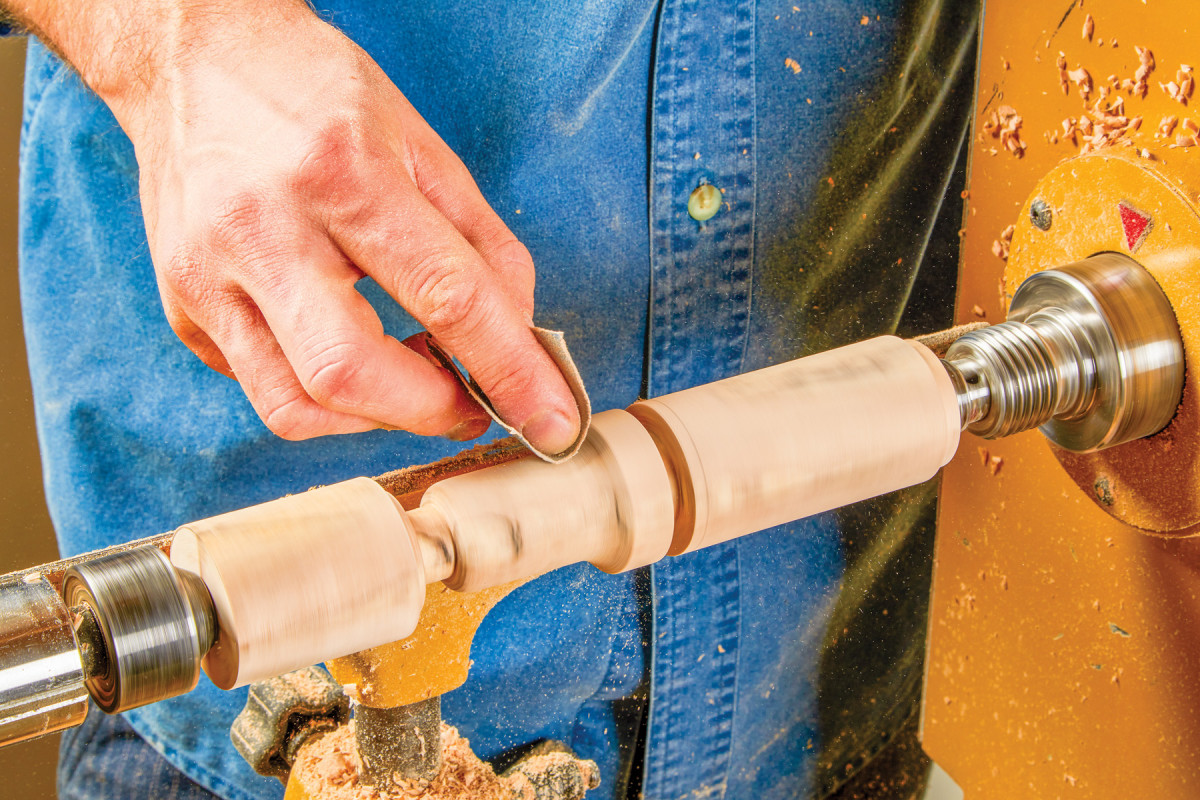
Finally, slow the RPMs down (250-350) and do some light sanding. If feasible, reverse the rotation of the lathe during this process.
Using a parting tool, create another tenon towards the top of the lid. Proceed to sever the lid from the base using a handsaw.
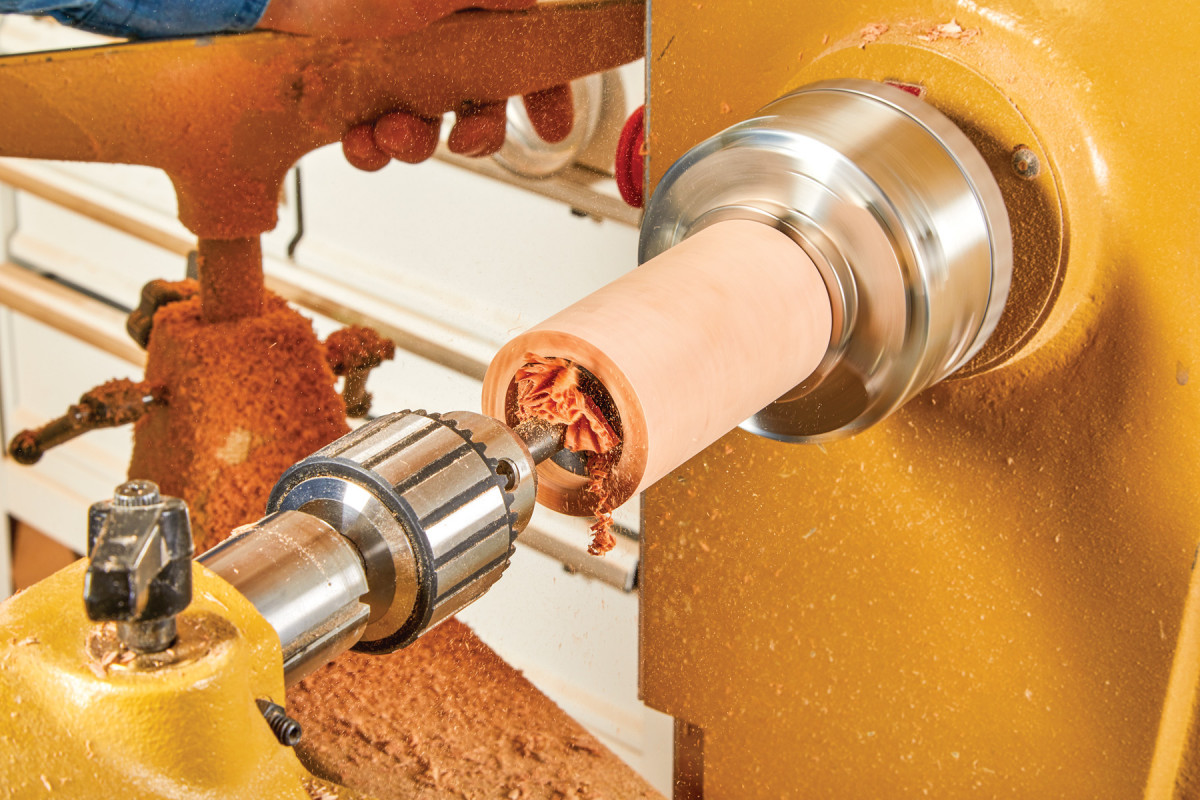
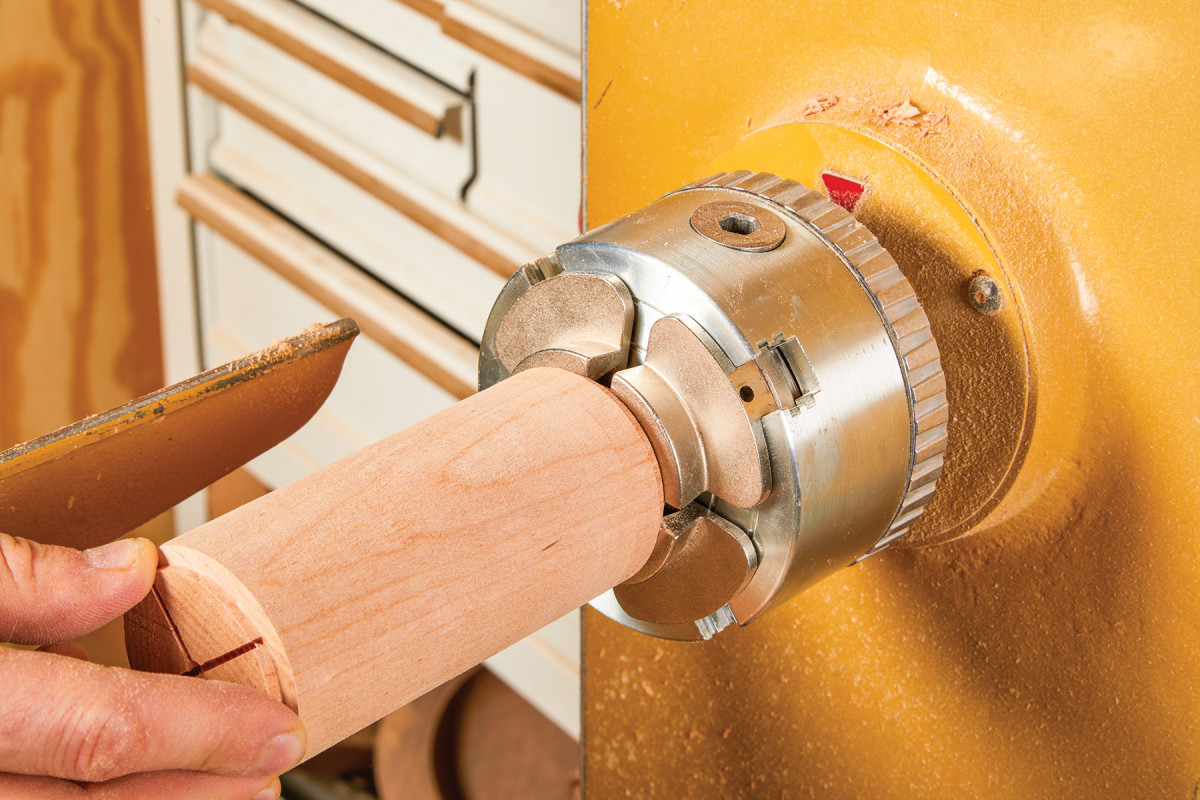
Insert the base of the canister (tenon side first) into the jaws of the scroll chuck.
Feed the Forstner bit into the base with the lathe spinning at about 500 RPM. The bit tends to get hot so, back off when necessary to prevent scorching.
Chuck the lid into the jaws and refine the tenon using a skew.
Rotate the tool rest 90° and proceed to undercut the shoulder of the lid. This small refining measure will ensure a seamless fit.
Lastly, check your work and listen for the “patented burp” when the lid is removed from the base.
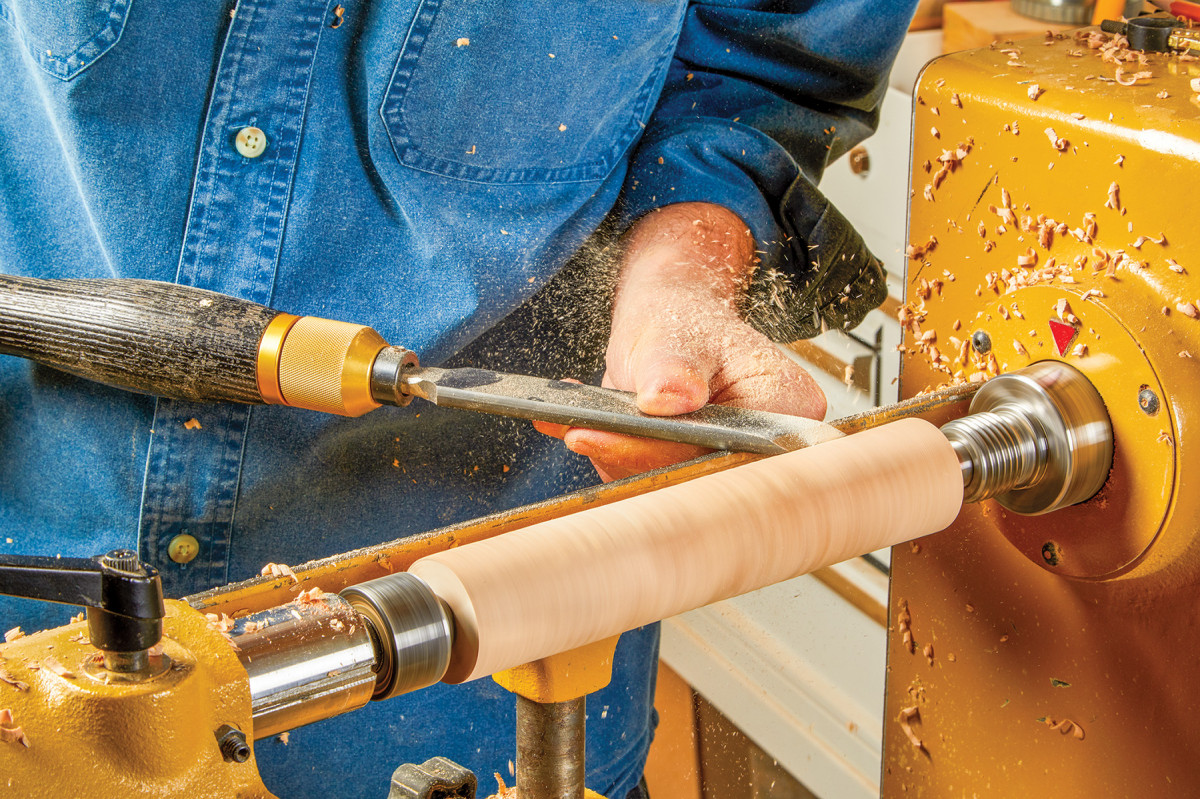
Start with a Cylinder
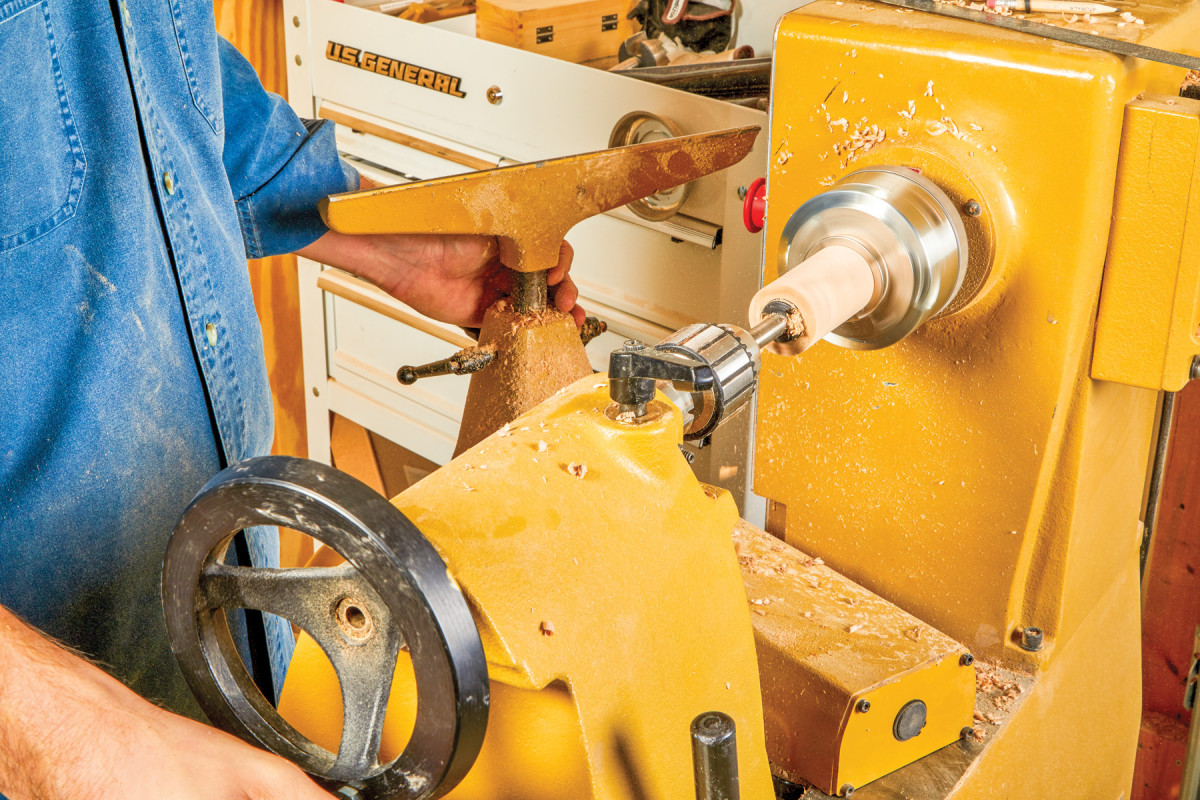
Mount the blank by placing it between the spur center (on the headstock) and the live center (located on the tailstock). Position the tool rest so that the when the roughing gouge is anchored against it, the cutting edge should make contact at about the half-way point on the blank. Ride the bevel against the work piece and start making passes back and forth using the cutting edge to remove the material. Using calipers, check the blank to ensure a consistent diameter throughout. Once this is complete, heighten the tool rest and go back over the blank with a skew and clean up any grooves or valleys left behind by the roughing gouge.
Lay Out the Pieces
Begin by laying out the individual parts of the canister with a pencil and a ruler. With the parting tool in hand, create a tenon about 1/4“– 1/2“ long—This will later be placed into jaws of a chuck. Continue to make another incision on the second layout line. This separation or “part off” will create the 1/4“ tenon for the lid. It’s important to not only get the final diameter as close to 11/2“, it’s as equally important to account for the kerf of the blade once the two pieces are severed.
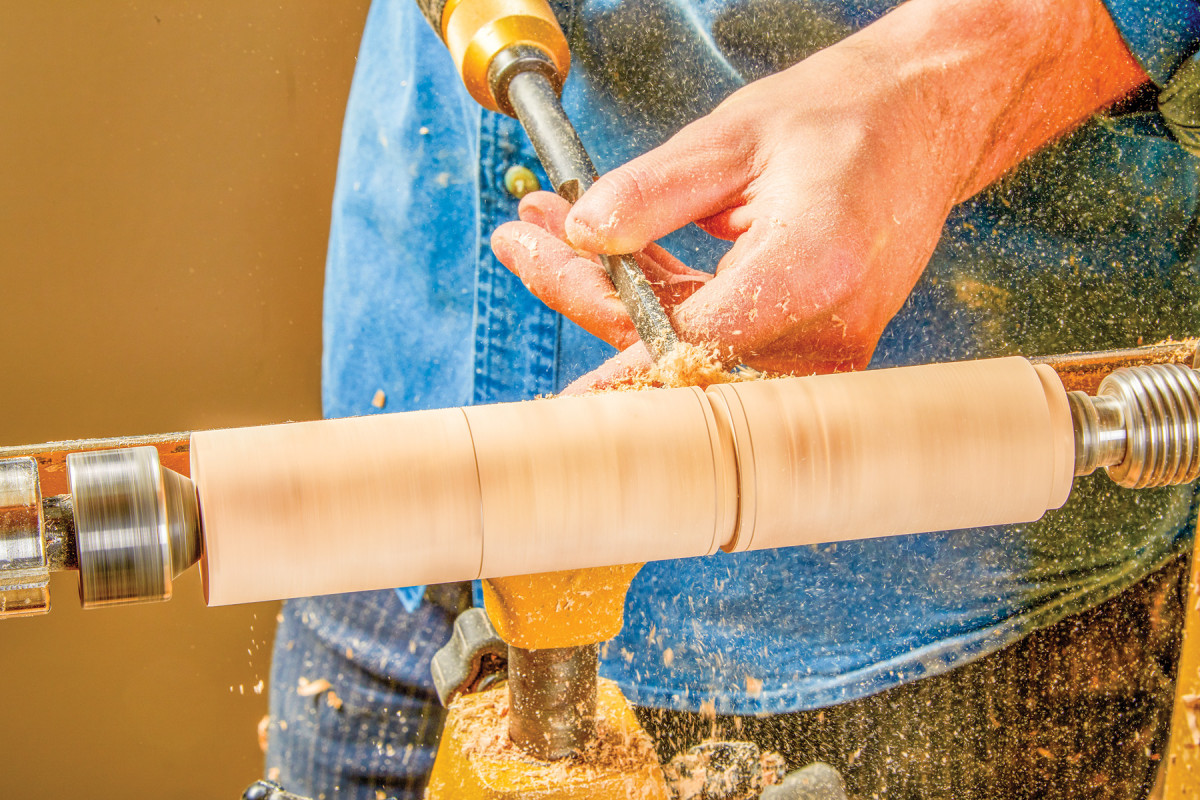
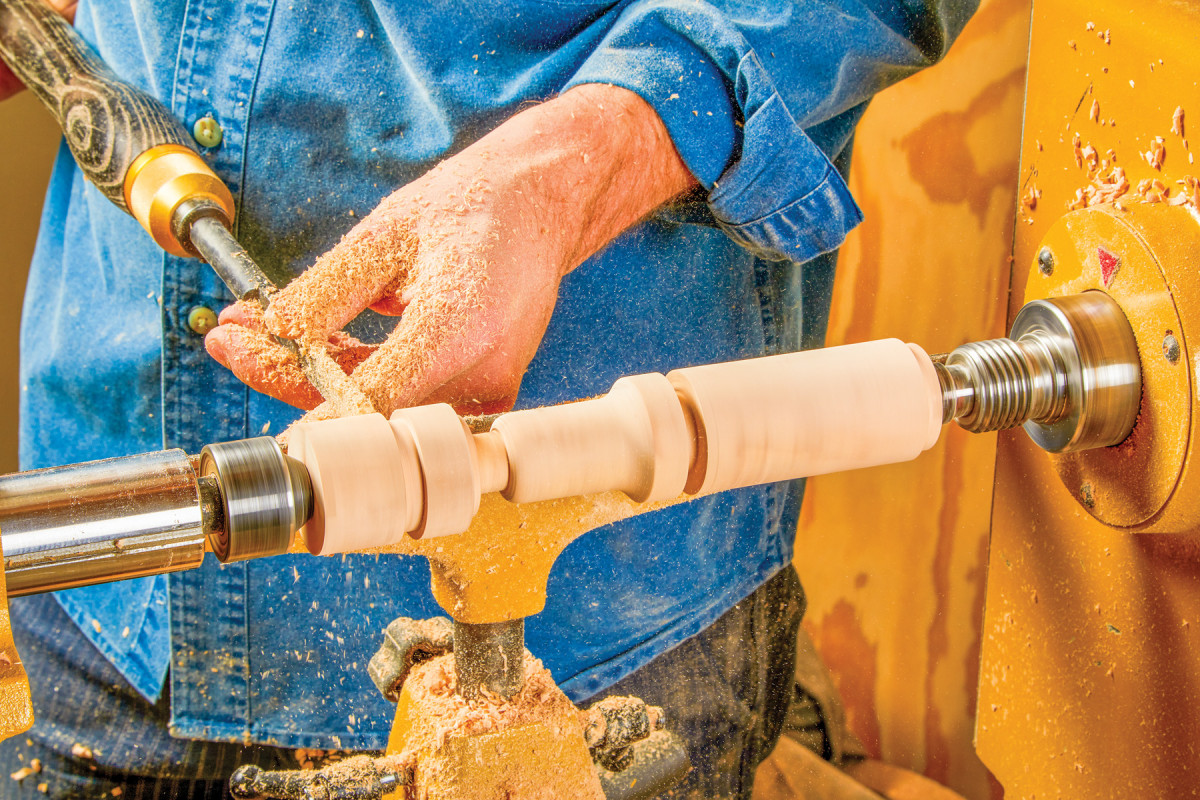
Once the recesses are created, move onto creating the tiered detail on the lid. I used the width of the parting tool as a reference to establish the length of the tiers. Continue this process by creating another “part” to institute the end of the lid. Slow the RPMs down to 250-350 and take this time to do some light sanding. Note, excessive speeds can cause dust to build up between the sandpaper and the wood, which ultimately prevents abrasion—so be conservative with the amount of pressure applied and let the sandpaper work for itself.
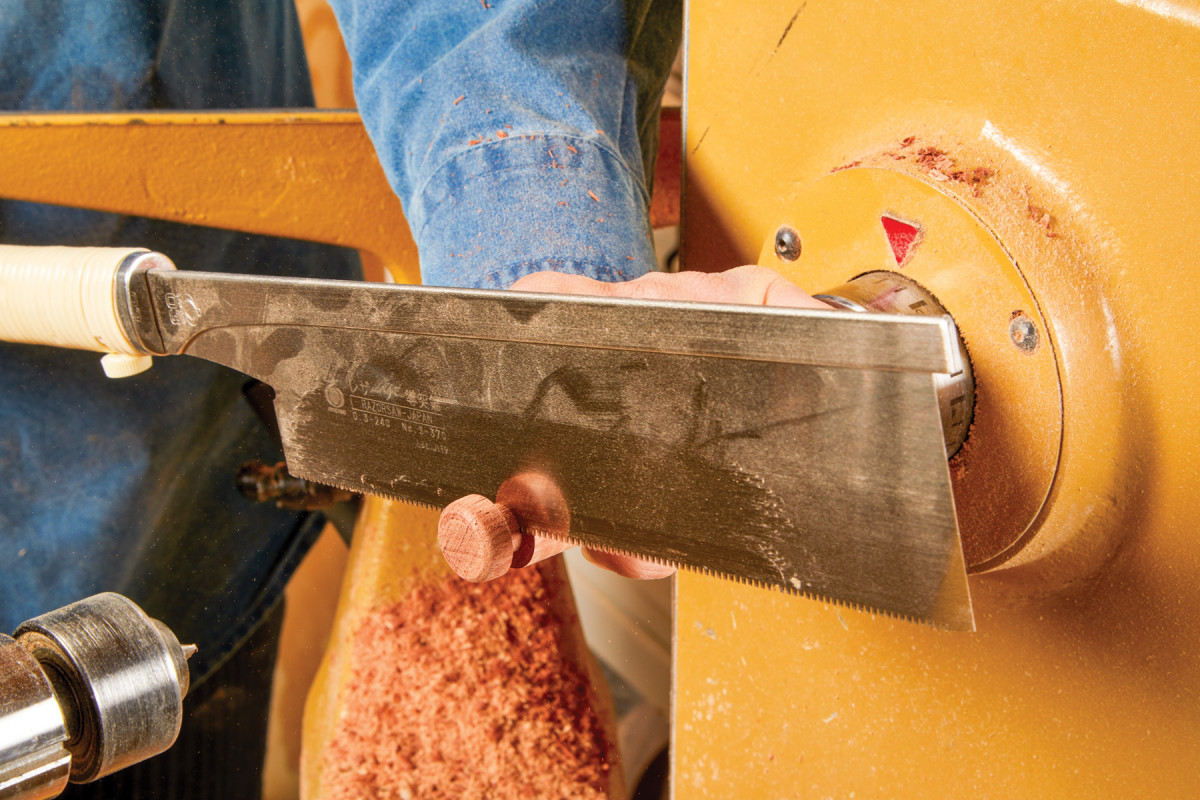
Now that the individual pieces are finished, disengage the lock on the drive center and release a small amount of pressure. Using a handsaw, proceed to sever the lid (at the base of the tenon) from the body of the canister.
Boring the Cavity
Utilizing the tenon, place the base of the canister in the jaws of the chuck on the headstock. Insert the Jacob’s chuck with the 11/2“ Forstner bit into the Morse taper of the tailstock. Proceed to move the tailstock so that the Forstner bit is just a 1/4“ or so from the canister base and lock it in place—keep the spindle lock disengaged as you will be using the handwheel to feed the bit into the rotating blank. Since we are using a traditional Forstner bit, apply the same RPM conversion rate as you would with a drill press (i.e. 400-500 RPM). Continue by feeding the drill bit into the blank (back it off if the bit gets hot) until you have reached the desired depth.
Fitting the Lid
Remove the base and insert the lid (top or tiered side first) into the jaws on the headstock. Using the skew, clean up the tenon to create a precise fit between the base and the lid. To further ensure a seamless transition between parts, proceed to undercut the shoulder on the lid. Just remember, a little goes a long way, (and material cannot be replaced) so skew lightly and check the fit often.
Once this is complete, flip the piece so that the tenon is chucked into the jaws. Swap out the 1 1/2“ Forstner bit with an 1/8“ brad point bit and proceed to drill a 1/2“ deep hole in the top of the lid to accommodate for the knob.
Turned Canister: Tiered Lid
Order does not always matter. Once the parts were laid out, I started by creating the tenon for the lid first.
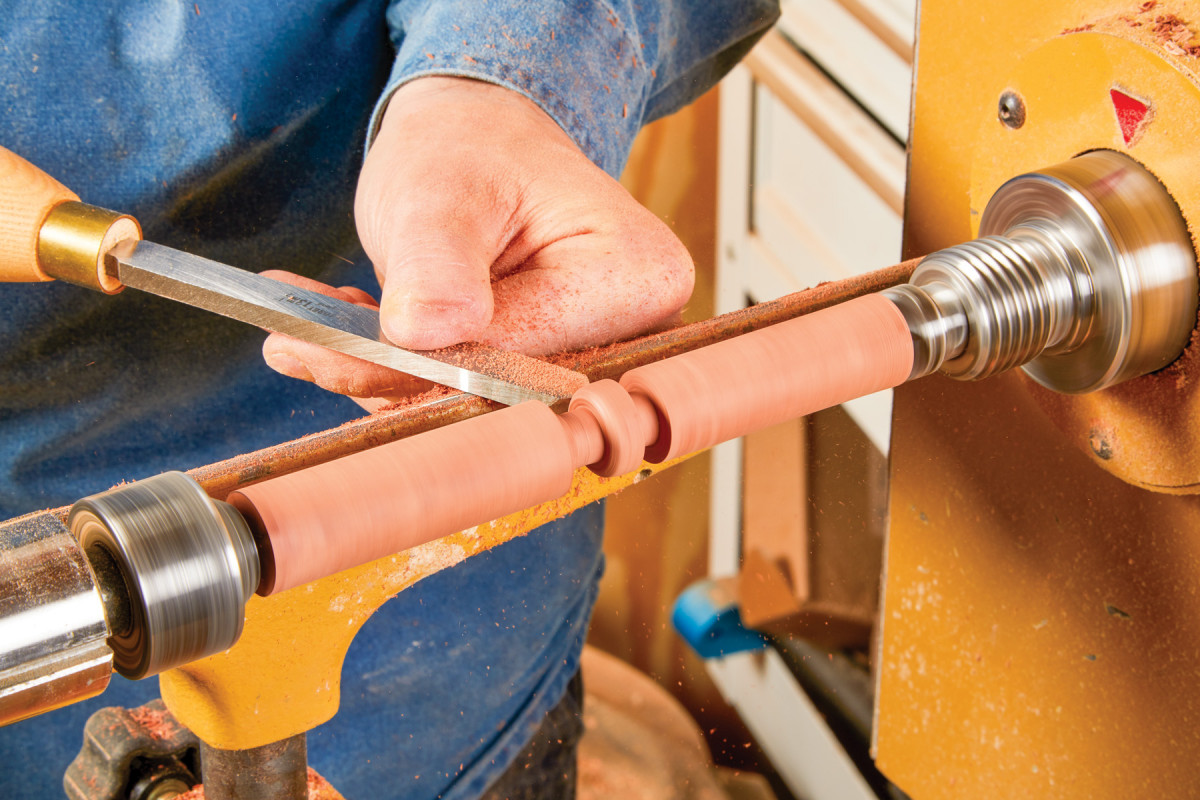
Using the width of the parting tool as a unit of measure, make a series of plunge cuts to create the individual tiers.

Once again, slow the speed of the lathe and work through a progression of sandpaper grits (preferably 120-180).
Bore the cavity into the base. Back the Forstner bit off periodically to aid in removing waste build up.

Chuck the tiered lid into the jaws (tenon side first), replace the Forstner bit with an 1/8″ brad point bit and drill a 1/2″ deep hole for the cap tenon.
Rotate the lid and proceed to clean up the tenon.
As before, flip the tool rest and proceed to undercut the shoulder on the lid. A gap-free connection is a great way to accentuate your newly acquired skill.
Check the fit and revel in the inconspicuous transition between the lid and the base.
Tiny Knob
Given the scale of this detail, the scrap bin may be worth reinspection in terms of unearthing worthy material for the knob. I ended up finding a small chunk of Wenge along with an unaccompanied piece of Bubinga that I thought would pair well with the corresponding canister materials.
Create a cap for your lid
There is no new methodology here in terms of forming the knobs, with the exception of the introduction of a couple new tools. Layout the piece as you did earlier with the canisters. Form a cylinder longer than the final length of the finished knob. Then, create a tenon (using a parting tool) approximately 3/8“ in diameter by 1/4“ long. Towards the top of the knob, “part” an area about 3/4“–1“ long. This extra space will allow for a spindle gouge to be used when applying a round-over profile to the head of the knob. If available, a 1/2“ round-nose scraper can be used in substitution for a spindle gouge to further define as well as refine the profile.
Release the tension from the tailstock and either part-off or release the cap from the blank using a handsaw.
Now it’s time to drill the 1/8“ diameter hole that corresponds with the one bored on the cap. Since jaws on my scroll chuck had a minimum diameter of an 11/4“, I moved over to drill press to create the dowel hole. Locate center with a center head/ruler and use a hand-screw clamp or machinist vise to hold the knob in place while drilling. Proceed by cutting a 3/4“ long piece of 1/8“ aluminum or steel rod to be used as the dowel. Add a spot of epoxy to each hole and press the knob into the cap—Clean up any squeeze out with Acetone.
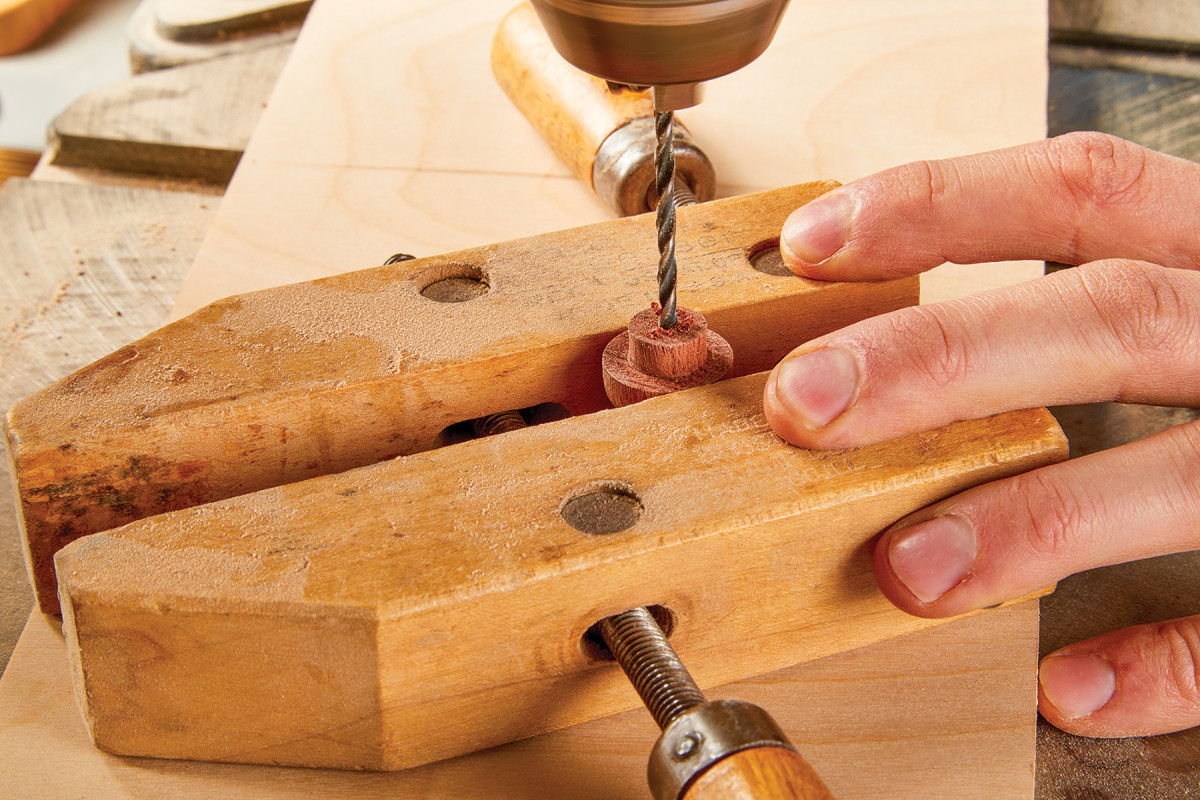
With a minimum diameter capacity of 1 1/4″ on my scroll chuck, I exchanged the lathe for a wooden hand-screw clamp and moved over to the drill press to create the dowel center on the cap.
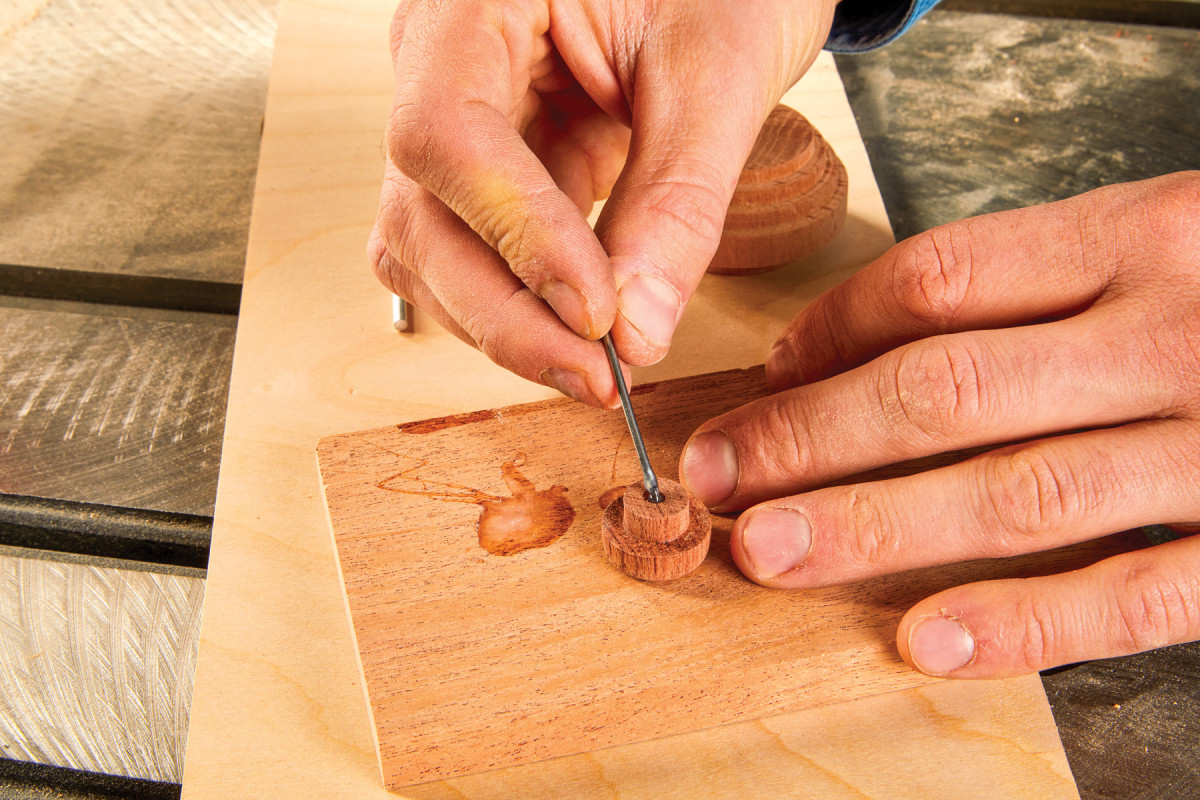
Add a dab of epoxy to the lid as well as the cap.
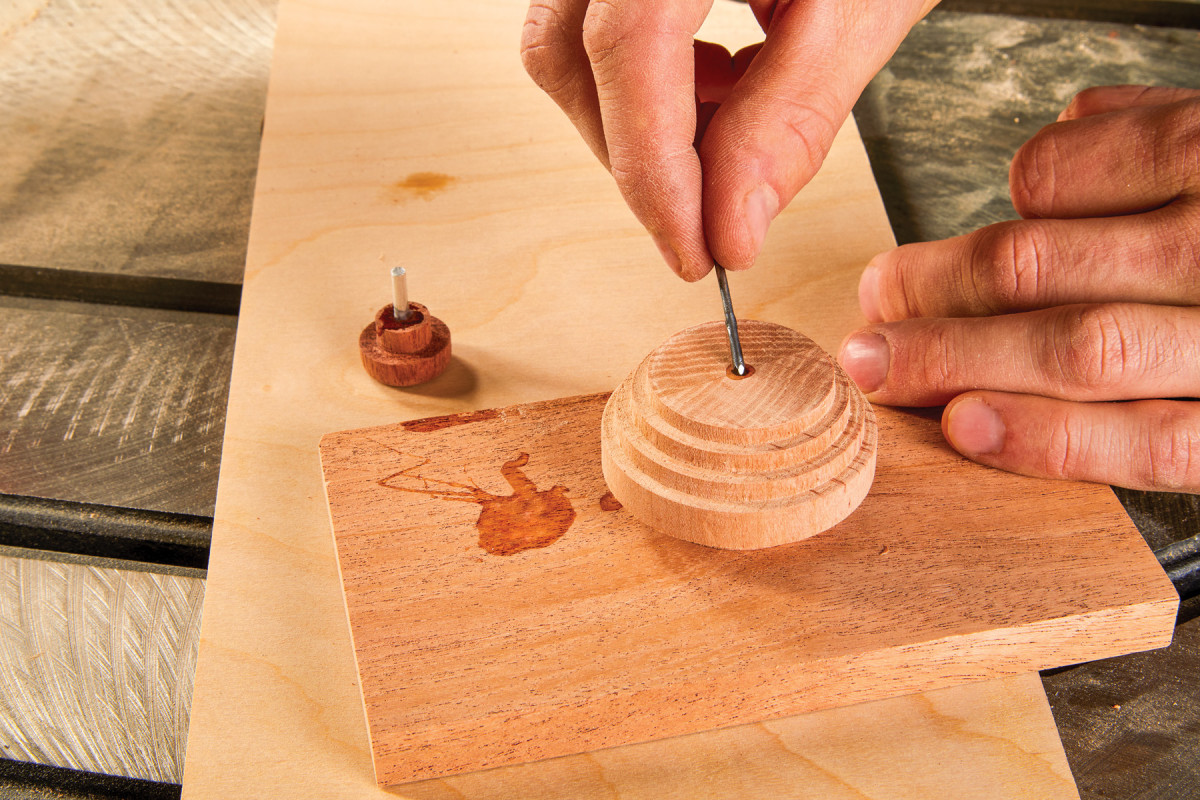
Insert the aluminum dowel and press the cap down onto the lid—use Acetone for any remaining squeeze out.
Finish
You will find that there is a litany of opinions when it comes to the proper way to finish a turned canister or bowl. Since the finishing is not taking place on the lathe (as it commonly is) I went with an oil/cream combo that I had readily available. Apply the oil to the canisters and allow it to soak in overnight. If dry spots occur, reapply as needed. Wipe off any excess oil and begin to apply a liberal coat of beeswax and food grade mineral oil. Once the wax/oil combination has dried (about 15-20 minutes) proceed to buff with a rag.
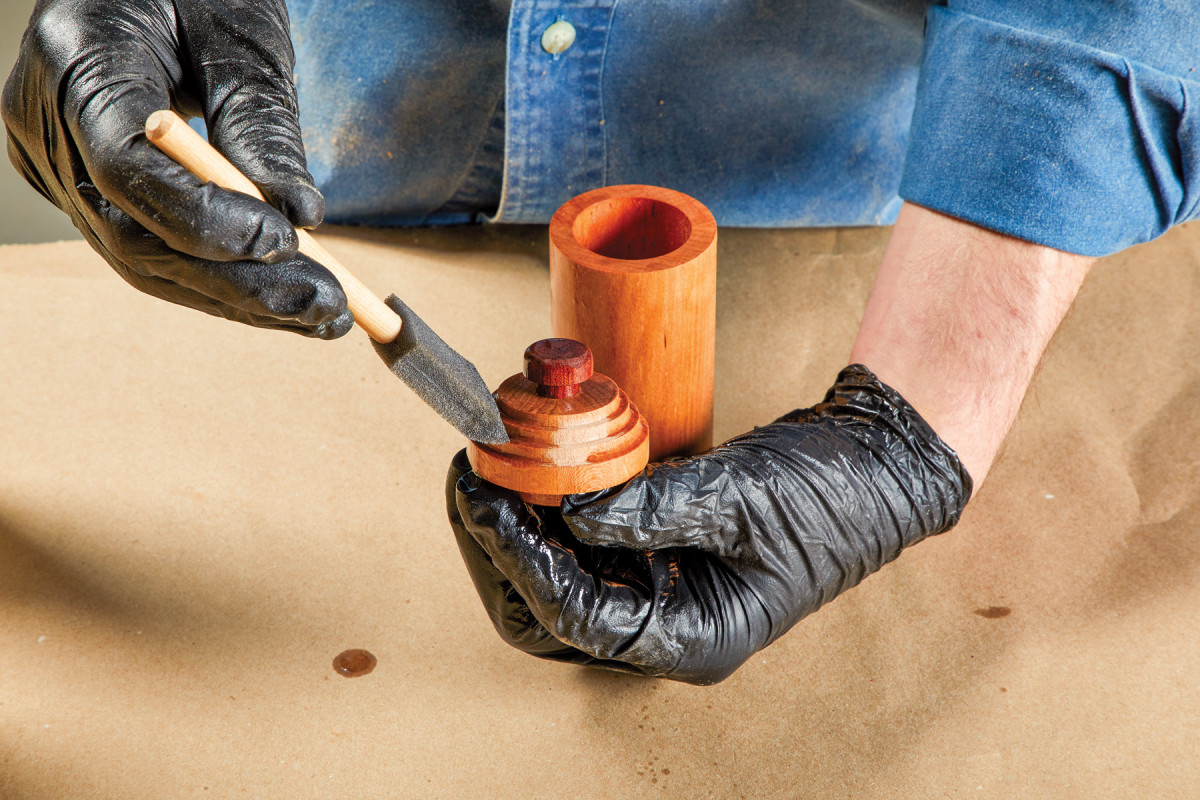
Apply liberal amounts of oil to both the exterior as well as the interior of the canister. I found that the apex of a foam brush helps with getting in nooks and crannies.
With the project complete, and a newly acquired skill, perhaps it’s time to start applying some of the basic techniques explained in this article towards some projects that are more involved.
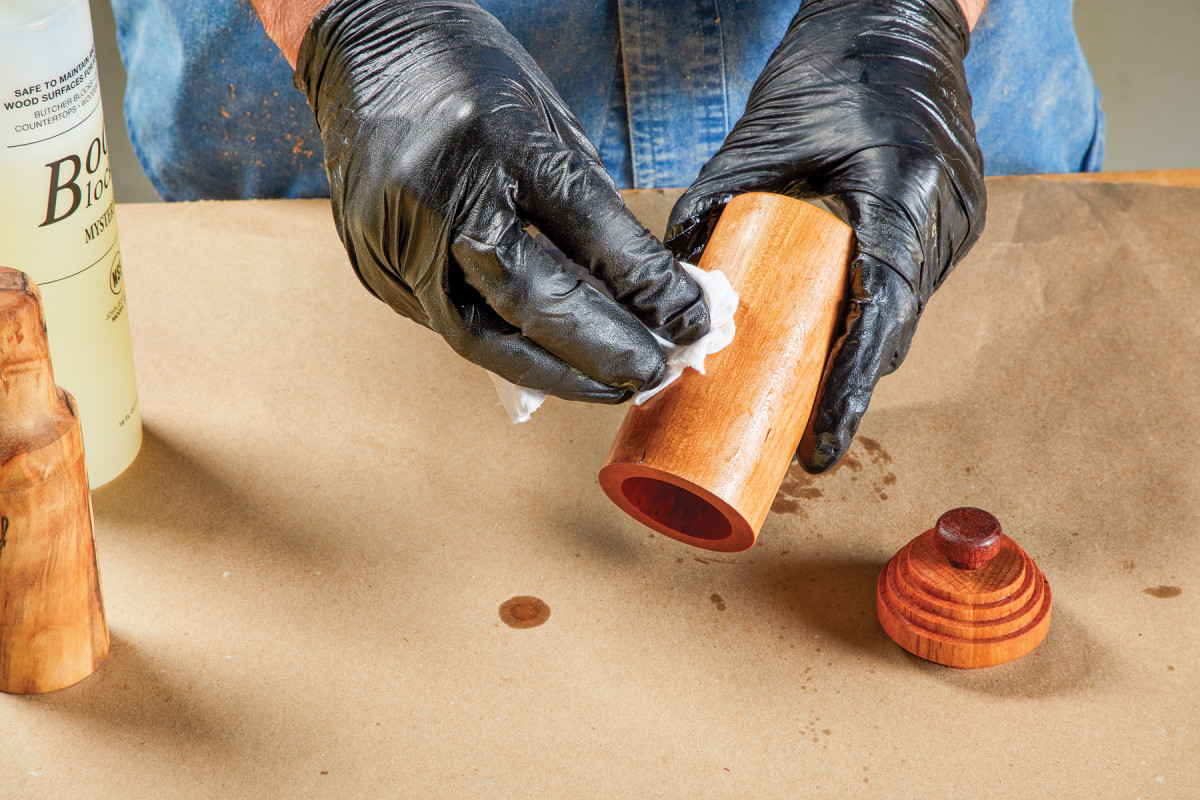
Once dried, wipe back and excess oil that did not absorb. For added protection, apply a coat of paste wax to the exterior of the canister(s)—buff out when dry and voila!
Here are some supplies and tools we find essential in our everyday work around the shop. We may receive a commission from sales referred by our links; however, we have carefully selected these products for their usefulness and quality.


What is the ratio of your beeswax and mineral oil mixture?