We may receive a commission when you use our affiliate links. However, this does not impact our recommendations.
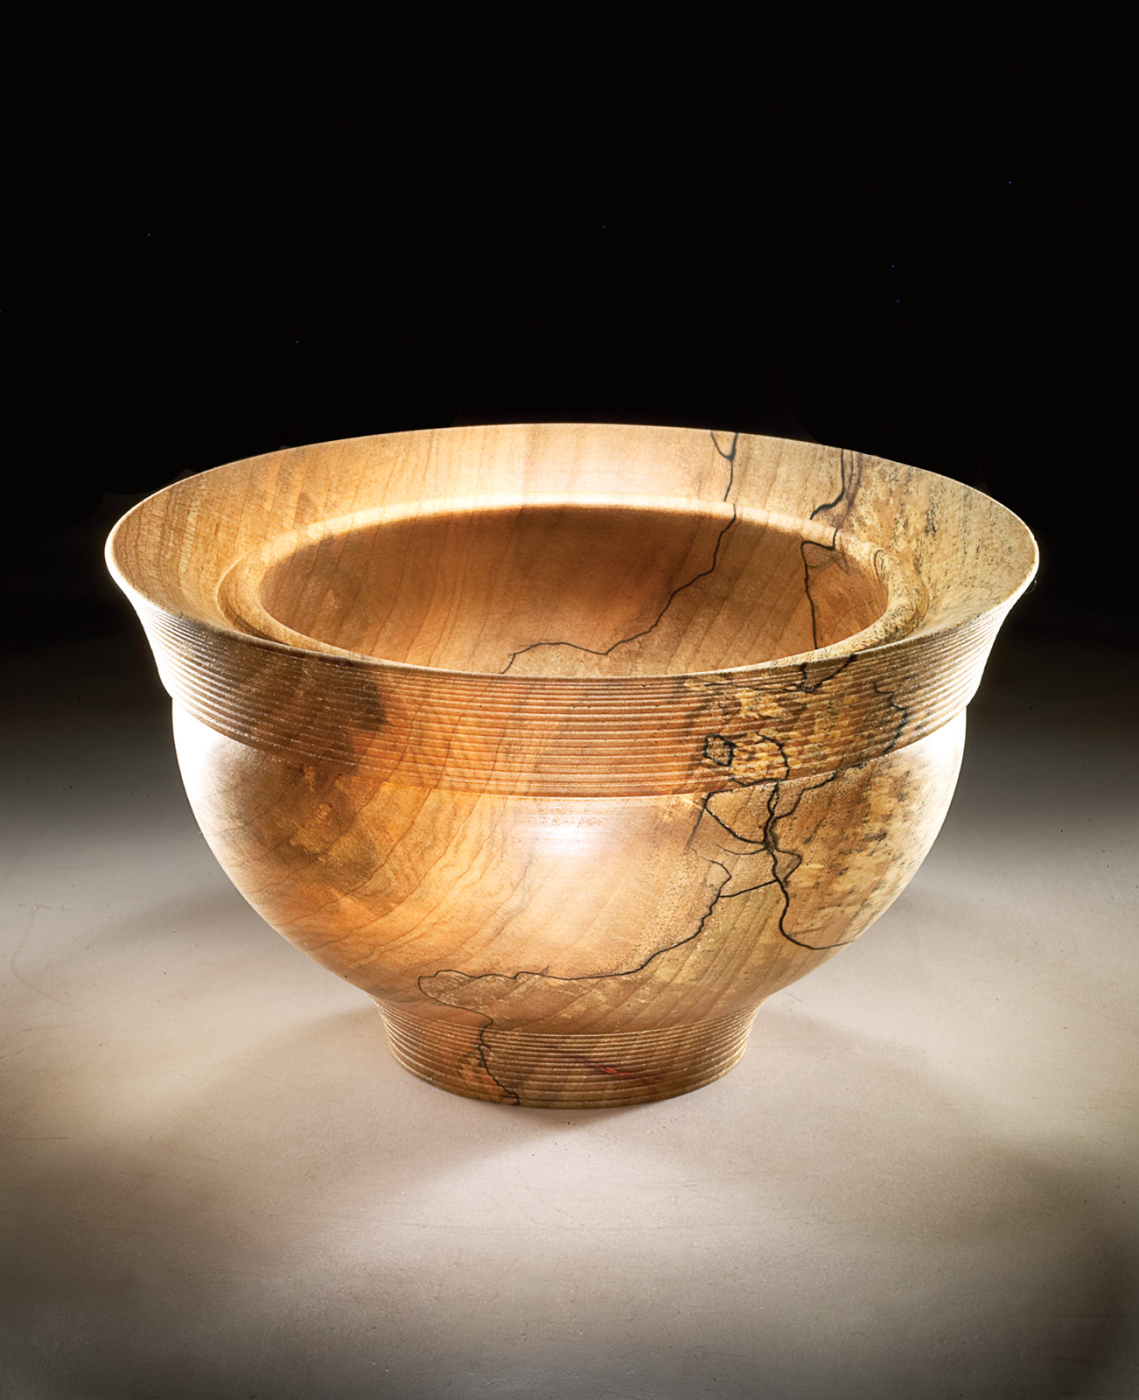
Forget the salad bowl for now. Instead, turn a small bowl such as this one made from spalted maple. Focus on your cuts; there will be plenty of time to turn bigger bowls later.
Taking the time to learn a few basic cuts and moves will help you succeed.
Bowl turning was my first love in woodturning. There is something special about a bowl: The wonderful way the shape shows off different aspects of the wood, the roundness and the ability to contain and present nourishment. I still find it magical to do something that is so different from any other woodworking job (including most turning projects). And I am not alone in this; I have observed that many, if not most, new turners are especially drawn to bowl work.
As with all lathe work, it takes time and practice to develop skill at bowl turning. But the basic process is relatively simple and there are only a few basic cuts. If you focus on learning to make those cuts well, the rest will come.
Wood Selection and Proper Mounting
If you are a beginner, choose your wood carefully, and don’t try to make a huge bowl your first time out. You will progress better (and faster) if you really pay attention to the process and learn to understand the cuts. This is easier if you aren’t struggling with a piece that is too large or with wood that is especially difficult to cut cleanly.
Moderately hard wood that is fairly close-grained and even-textured works best. Most domestic hardwoods make good bowl wood; maple, ash, honey locust, hackberry, beech, persimmon, hornbeam, and hophornbeam are some of my favorites. Almost any nut or fruit wood will work well. Softwoods such as fir, cedar, and pine, and some softer hardwoods, such as willow, will be more difficult to cut well until you have some experience. But sycamore, while relatively soft, actually turns quite well. At the other end of the spectrum, extremely dense, brittle, and hard exotics may be problematic; they will take a very clean cut if you are using the tool correctly, but they will fight back hard if you are not.
The topic of processing green wood is beyond the scope of this month’s column. I will discuss it in future columns, along with the many different possibilities for mounting your workpiece on the lathe. But for purposes of this article, I am assuming the use of a dry piece of wood that will be turned from start to finish in one session. This will mean a piece probably no more than 3″ to 5″ thick and about 8″ to 10″ in diameter.
This bowl, like most, is turned into the side grain. The grain is perpendicular to the axis of the lathe. You may wish to cut the piece into a circle on the band saw if you have one; it will make the initial roughing-out of the bowl easier. Mount the workpiece by screwing a faceplate to the side that will be the top of the bowl; the screw holes will be in the area to be excavated later for the interior.
Bowl Gouge

A bowl gouge is a necessity for bowl turning. It differs from spindle gouges in having a much deeper flute (or groove). When it is ground back on the sides, as here, there are several ways it can be used for a variety of cuts.
Turning the Outside First
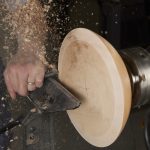
Begin turning the outside of the bowl, working from the foot to the rim (smaller diameter to larger diameter). Cutting in the correct direction helps to produce a clean cut. For this roughing cut, the bowl gouge is more-or-less parallel to the floor, the flute (groove in the tool) is pointed to the left and the tool is moving to the left. The edge to the left of the center of the tool is doing the cutting, but it’s the bevel at the tip of the tool that is riding on the workpiece. The edge itself is horizontal where it is cutting.

Here you can see the roughing cut.
You can remove a considerable amount of wood with this cut, depending on how far back your gouge is ground on the side and how powerful your lathe is. Start out with the lathe going fairly slowly (around 800 to 1,200 rpm, depending on the size of your blank and the sturdiness of your lathe); you can always speed it up later as the bowl becomes round.
 Another cut I often use is a higher-angle cut. The handle is lower than in the first cut, which presents the edge to the wood at a higher angle. The cut is quite smooth. If you have it right, you’ll know it. In fact it can get away from you; correctly done, the tool almost seems to pull itself into the wood. The bevel right behind the cutting edge is rubbing the wood. This cut works best after the workpiece is all the way round; it’s hard to control if the surface is still uneven, as the tool will tend to just bounce along the irregularities.

Here you can see the very high-angle finishing cut.
For a finishing cut, drop the handle even lower. The edge should be almost vertical. It takes a bit of practice to get this right; it’s harder to control the shape you are making, but you can take a very fine shaving. This cut will usually allow you to get a very clean surface even on soft or stringy wood, or across the end grain.
Continue shaping the bowl. Practice the cuts carefully; you have to get all that wood off anyway, so pay attention to what is happening. If it’s not working, make sure the bevel is rubbing and you are cutting in the right direction. Make sure the gouge is sharp.
Footwork and Finishing
I use a fingernail-grind spindle gouge to make the grooves on the rim and foot. The tool is held so the flute is nearly vertical. The edge just to the left of the center is cutting, and it removes a very small amount of wood. This leaves a very clean groove.

The fingernail-grind spindle gouge is perfect for detail work on the outside, foot and rim.
Prepare the foot for the chuck: Cut a recess almost to the finished depth (deeper is more secure on the chuck; err on the side of caution if you are new to this), and with straight or slightly dovetailed sides (a wider opening toward the bowl than at the outside edge). Make sure the opening will fit on the jaws of your chuck. Leave the walls of the foot fairly thick; you are going to expand the jaws inside the recess to hold the workpiece, and if there isn’t enough wood, part of the foot ring may break from the outward pressure and the piece can fly off the lathe.

Cut a recess in the foot for remounting the workpiece on the chuck.
The idea here is to have the entire outside of the bowl completed from the top of the rim to the bottom of the foot. Then if the piece is not perfectly concentric when remounted on the chuck, it won’t matter, because you aren’t going to work on any of that surface again. When you are happy with the shape and surface quality of the bowl, sand it to your satisfaction. I usually go to about #320 or #400 grit; very hard woods such as ebony or rosewood may still show sanding lines, so you may need to use a finer grit on such woods.

Apply finish to the completed exterior.
Apply finish to the completed exterior. I like a bowl with a bit of a sheen, but not a glossy finish. Apply the finish fairly liberally, then turn the lathe on and buff the surface with a clean cotton rag. Editor’s note: Kerf’s Wood Cream is no longer manufactured, but you can make or purchase other wax/mineral oil combos that will perform similarly.
Hollowing the Inside
Remove the bowl from the lathe and faceplate, and remount it on the chuck. Be sure the jaws are expanded very snugly into the recess. The bowl should center itself either on the ends of the jaws or their bases, but if it doesn’t run true, loosen the jaws, tap the piece to center it, and then re-tighten.

Mount the bowl on the chuck. Here the chuck jaws will expand in the cavity to hold the work.
Begin hollowing the bowl. There is one main cut on the inside of the bowl. It is very much like the roughing cut used on the outside. The handle is close to parallel with the floor, and you should be cutting with the right side of the tool as you move it from left to right, and from the rim to the bottom (larger to smaller diameter). A finish cut is made simply by taking a lighter cut, moving the tool more slowly, and possibly speeding up the lathe somewhat, if appropriate. Keep in mind you will have to swing the handle around widely from the right (when you begin cutting the steep side of the bowl) to the left (as you approach the bottom of the interior).


Note the position of the tool as I begin the cut. To keep the bevel rubbing while cutting the side of the bowl, the handle must be held far to the right and must swing around to the left as you cut to the bottom or center of the bowl.
Complete turning the inside of the bowl, sand and apply finish.

Here you can see the nearly completed bowl mounted in the doughnut jig.
I use a doughnut jig (also called a sandwich jig) to finish the foot. It’s cheap, easy to make, holds the bowl securely, and allows full access to the foot. The jig is a disc of plywood attached to a faceplate and turned round, with another disc that has a hole cut in the center. The discs are bolted together to hold the bowl securely between the two discs.

Here I’m finishing the inside of the foot.
Protect the finished rim and exterior of the piece with pieces of carpet foam as shown above. Mount the bowl loosely in the jig, put it on the lathe, turn by hand and tap it as necessary to center it. With a little practice, you’ll be able to do this very quickly. Tighten the wing nuts (which should be on the back of the jig, never the front where they become dangerous protrusions).

This is my completed bowl. Here you also can see another view of the doughnut jig.
Now turn the inside of the foot, sand and apply finish. Liberate your now-completed bowl from the jig. Sign the bottom, if you like. I use an engraver; it’s unobtrusive and it doesn’t spoil the clean appearance of the foot. Your bowl is complete.
Here are some supplies and tools we find essential in our everyday work around the shop. We may receive a commission from sales referred by our links; however, we have carefully selected these products for their usefulness and quality.