We may receive a commission when you use our affiliate links. However, this does not impact our recommendations.
 Create a beautiful showpiece by power carving on the lathe and adding a splash (or a wave) of colour.
 Create a beautiful showpiece by power carving on the lathe and adding a splash (or a wave) of colour.
Project #2309 • Skill Level: Intermediate • Time: 1 Day • Cost: $100
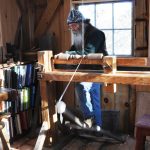
Looking to create a unique, statement? Look no further—this piece is sure to give you that WOW factor! To get started, I used a beautiful maple blank measuring 3“ thick and 10“ in diameter and a screw check for mounting. I like the screw chuck as it’s an easy way to mount a bowl blank—one drilled hole and just screw the blank on. The other advantage is that as you are turning the resistance actually tightens up the blank. Just make sure that the screw hole is longer than the screw, otherwise the screw will strip the wood in the hole if it bottoms out. Secondly, make sure that the blank is tight up against the fence of the screw chuck. If not, you will experience a harmonic from the vibration.
Textured & Coloured Form

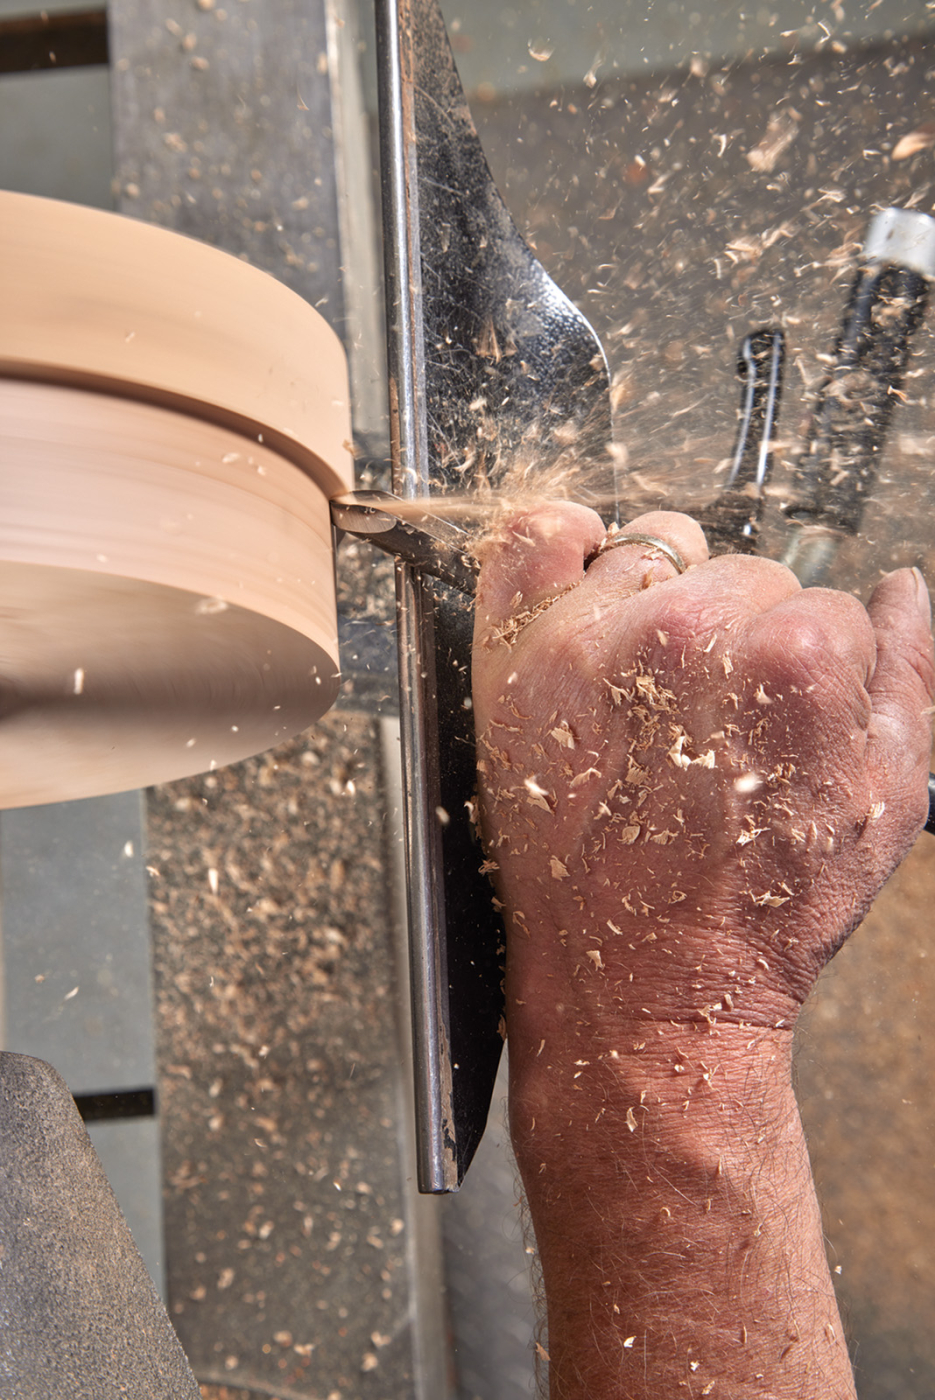
1 Make a push cut along the edge of the vessel to true up the edge of the blank.
Let’s Get Started!
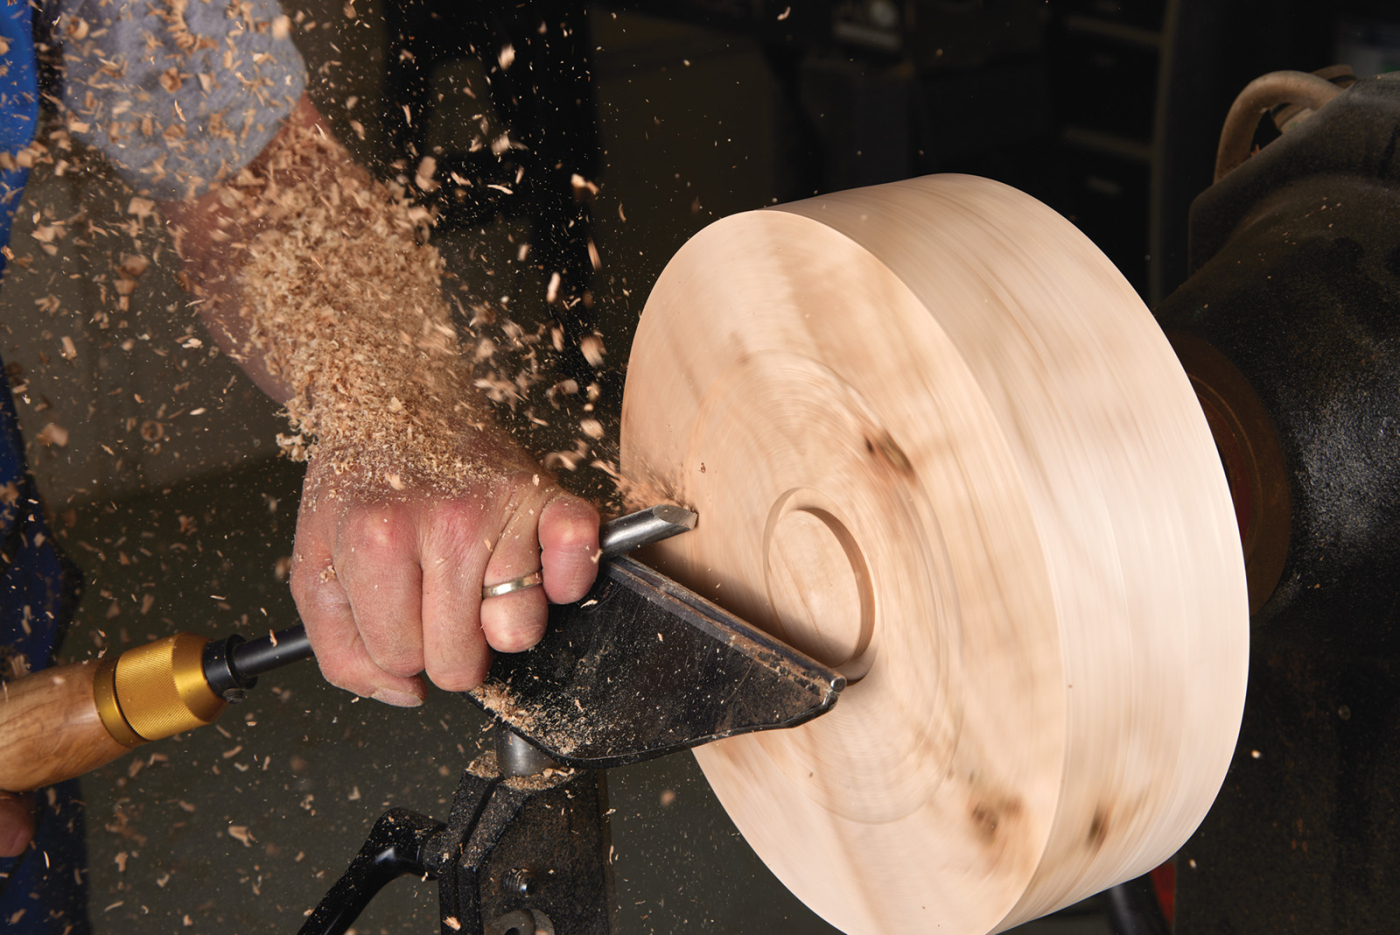
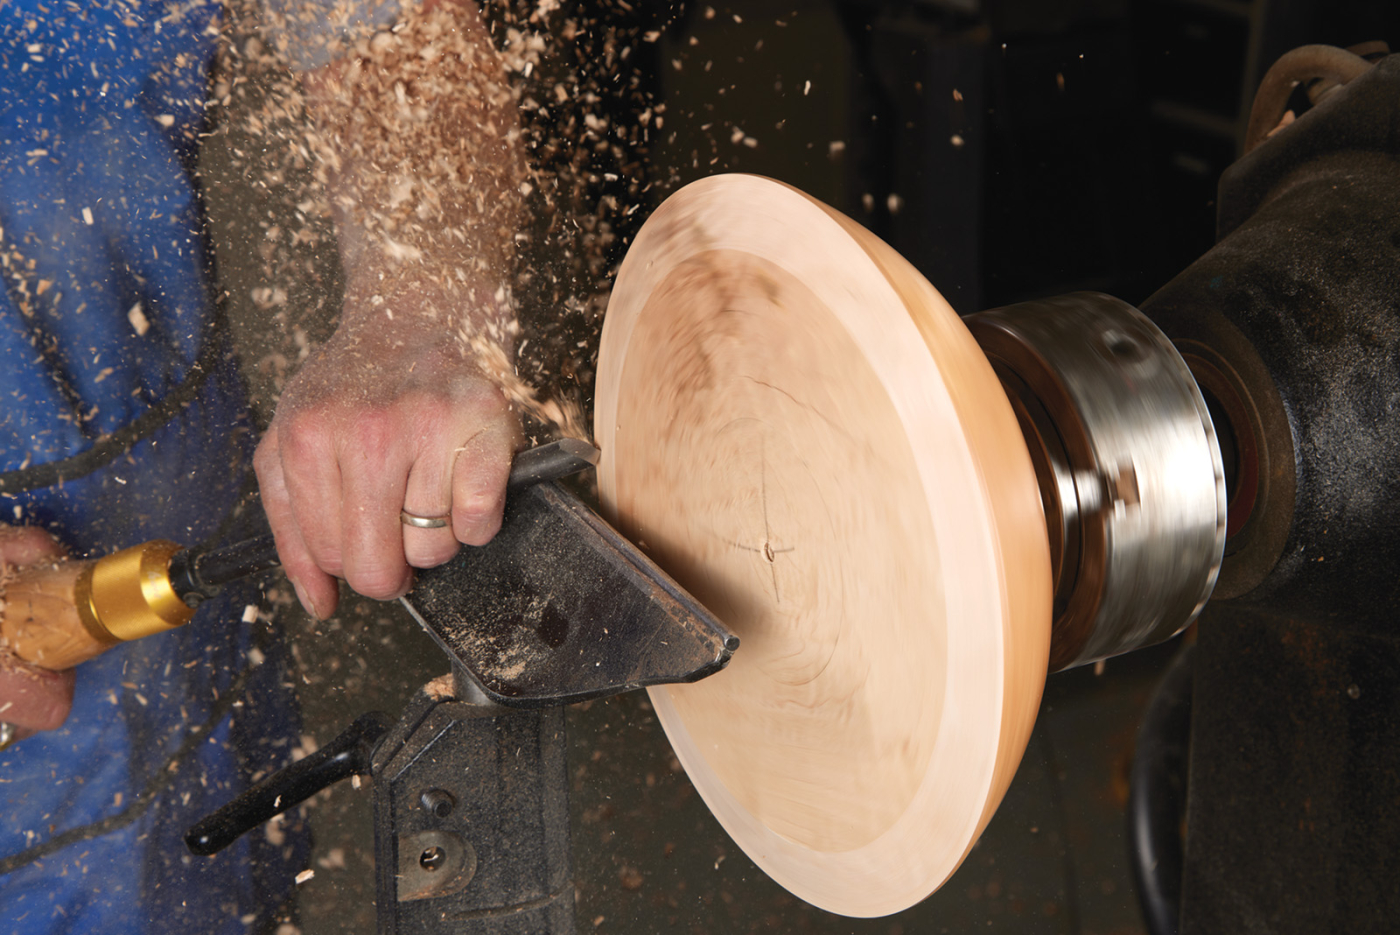
I always true up the edge of the blank first using a push cut with my 1/2“ bowl gouge. If the bevel is positioned in the right place and “floating” behind the cut, the result will be a smooth polished surface. Failing to place the bevel in the right position will result in a rough surface. Also note that you should never use a spindle roughing out gouge for this cut as it is not the right tool to use for this grain direction and can be dangerous! Just remove enough wood to true up the edge otherwise you are making the blank smaller.
2 Draw cuts from the center to the outside will true up the surface of the blank and reveal the grain.
My next step is to true up the face of the blank, again using the 1/2“ bowl gouge but using a draw or pull cut this time. It’s a great, ergonomic cut (after-all, the Japanese use a pull cut for their tools). Again, using a shallower angle of approach will result in a smoother cut.
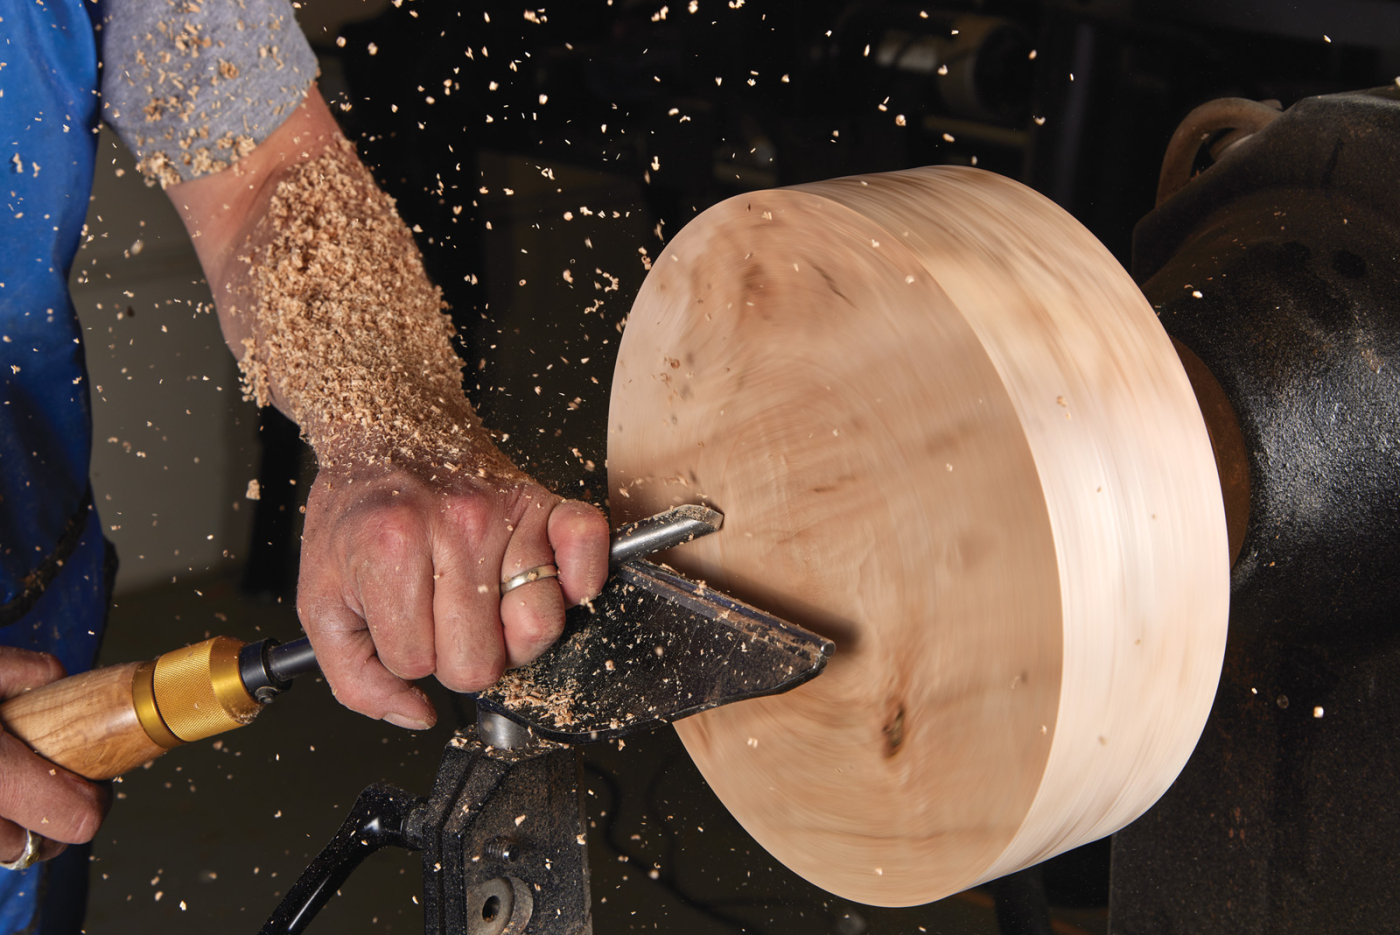
3 Use dividers to mark a tenon sized to match your chuck.
The Back of the Form
It’s at this stage that I mark and cut the tenon. There are several ways of achieving this. I use a pair of dividers and set them to measure the inside diameter of the chuck jaws that I am going to use. In this case, I set it to approximately 2“ and use the Vicmarc VM 120 chuck. Holding the dividers in a trailing fashion and using only the left leg of the dividers, I scribe a line making sure that the line I scribe with the left leg matches up with the right leg. Do not let the right leg touch the surface of the black otherwise the dividers will flick out of your fingers.
After scribing the line with the dividers, I use a 1/8“ parting tool to cut to a depth of about 1/4“ and then another right next to it to widen the cut to a 1/4” (Photo 4). Then using the draw cut, I remove the excess wood, basically leaving a flat surface with a proud tenon. This tells us exactly what we have left to produce a beautiful simple curve.

4
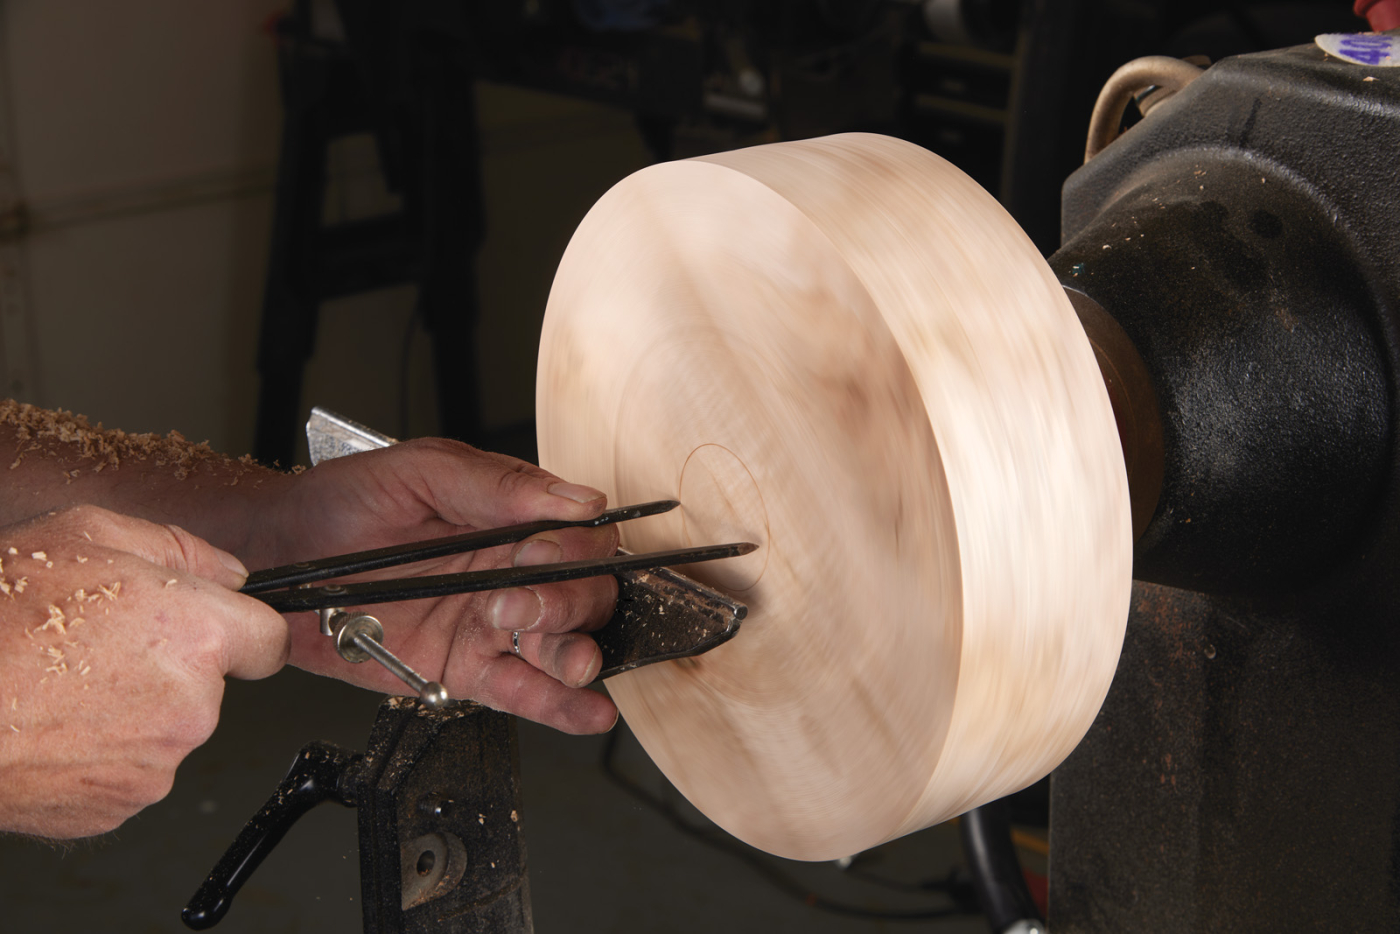
5 With a parting tool, form the tenon and remove the waste with a bowl gouge using pull cuts.
Again, using the 1/2“ bowl gouge and draw cuts, I shape the outside of the form. I prefer the draw cuts as for me it’s generally quicker than the push cut. Also, because of my body and head position, the draw cut lets me look at the profile of the blank as I am cutting it allowing me to make very subtle cuts to refine the curve (Photos 5-6).
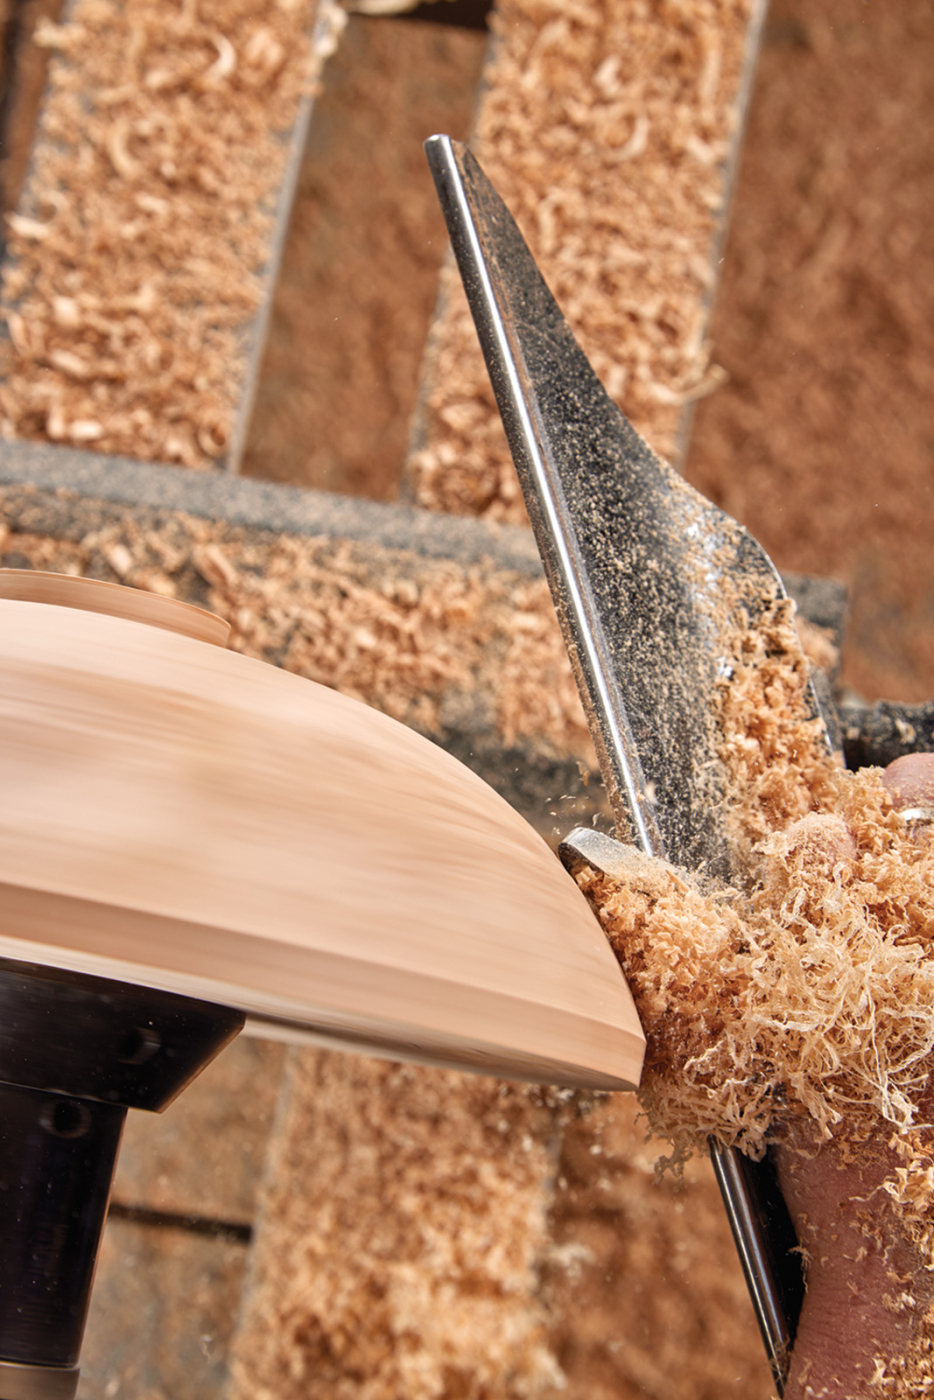
6 A draw cut will allow you to watch the “horizon” and achieve a good shape on your vessel.
Before moving onto the front side, I like to sand and finish the wood. I usually begin sanding with a 180 grit and use the Skilton sanding pad and abrasive discs available from turningwood.com. The reason for this is that using a coarser grit could result in unnecessary scratches and finer grit may not be enough for the initial sand. I can make decisions after using the 180 grit. Any tear-out or disturbed grain should be removed with the first grit, even if you have to go coarser. After that, you sand to the desired finish.
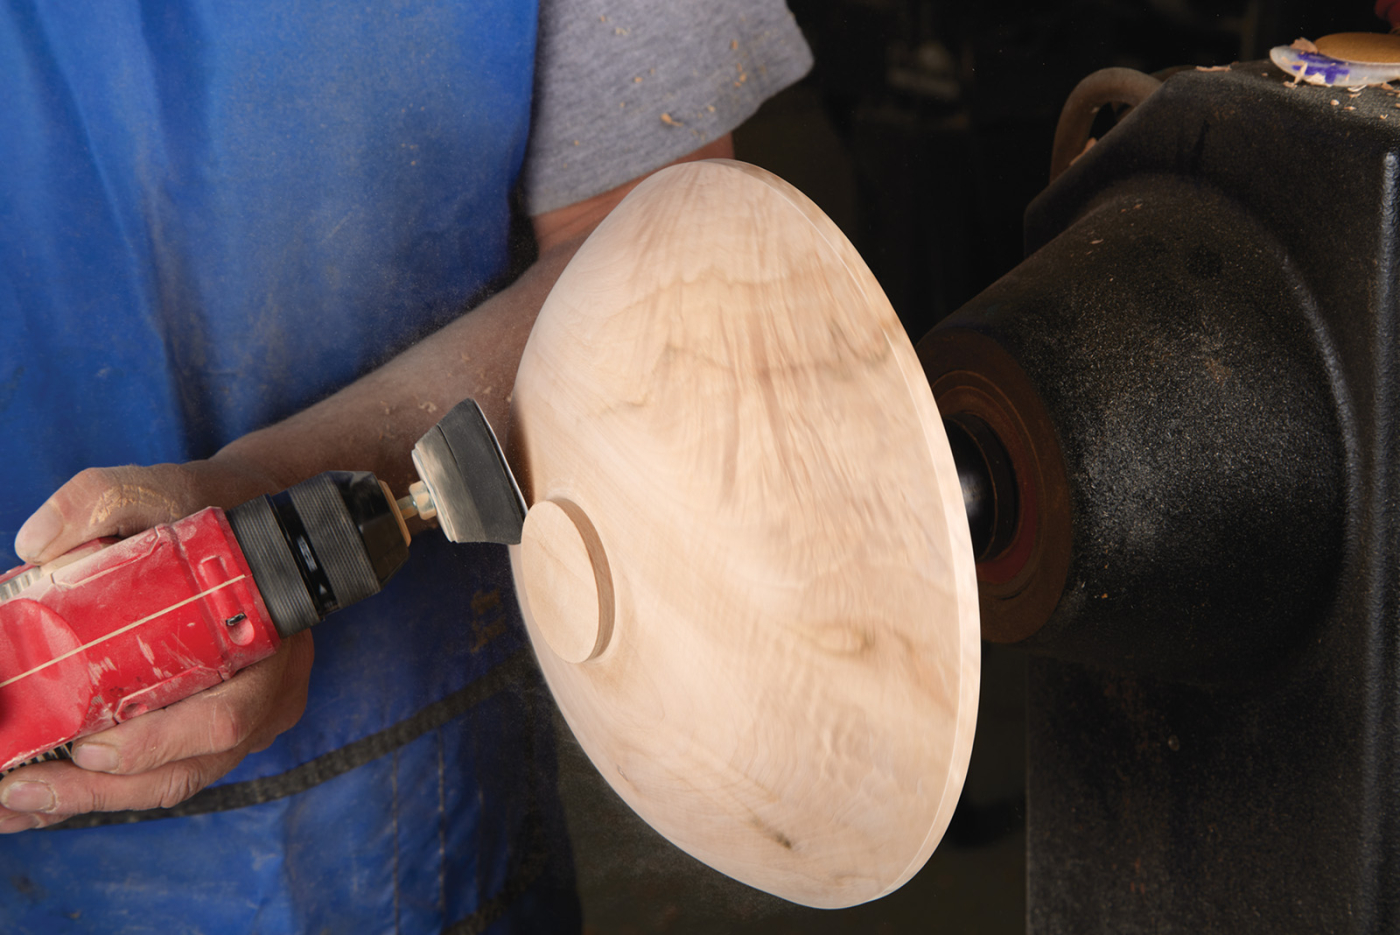
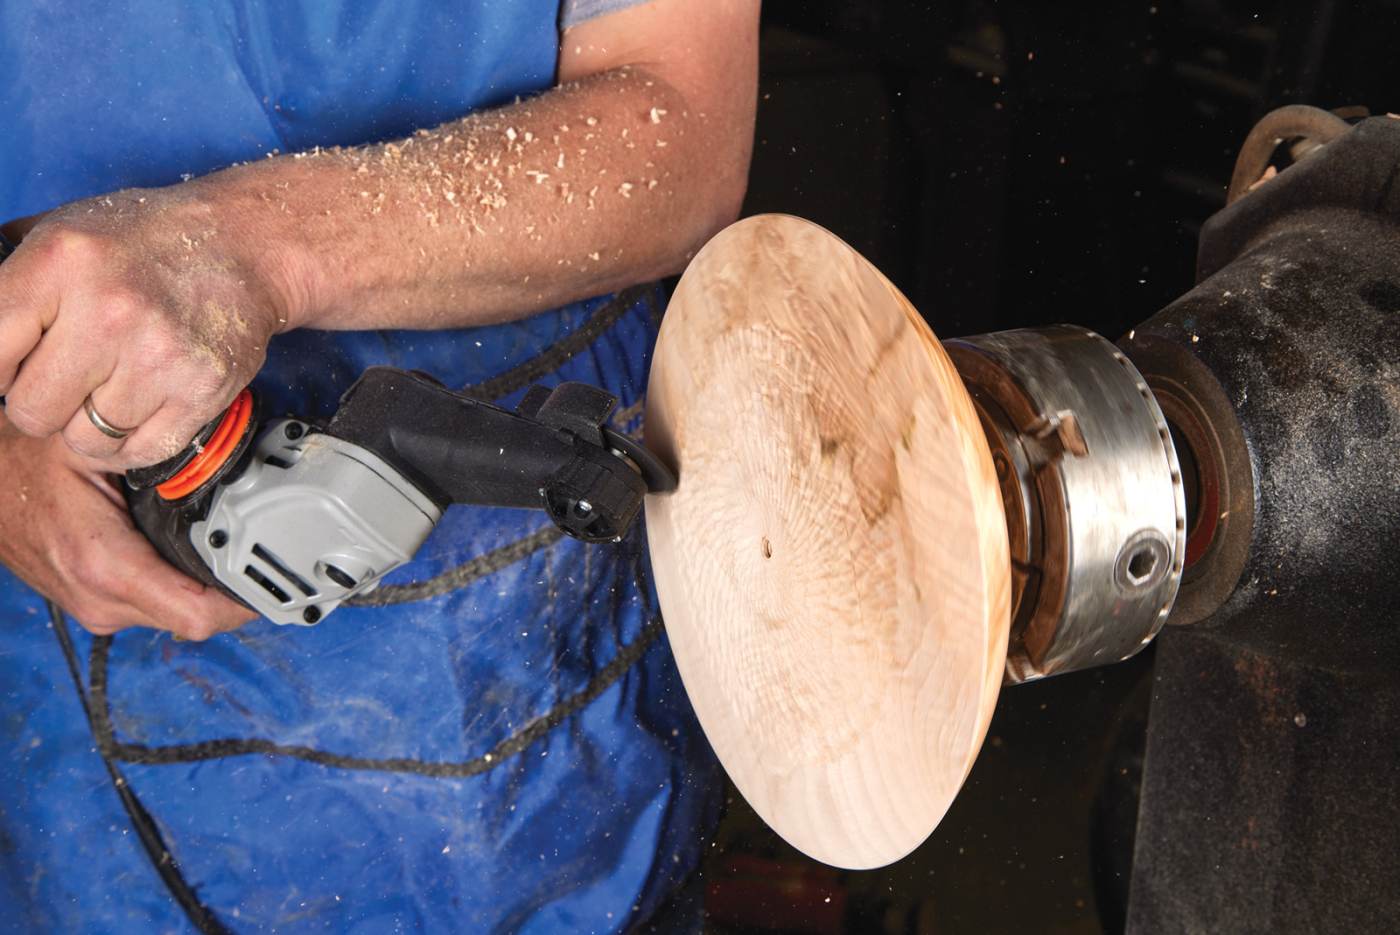
7 Power sand the bottom of the vessel.
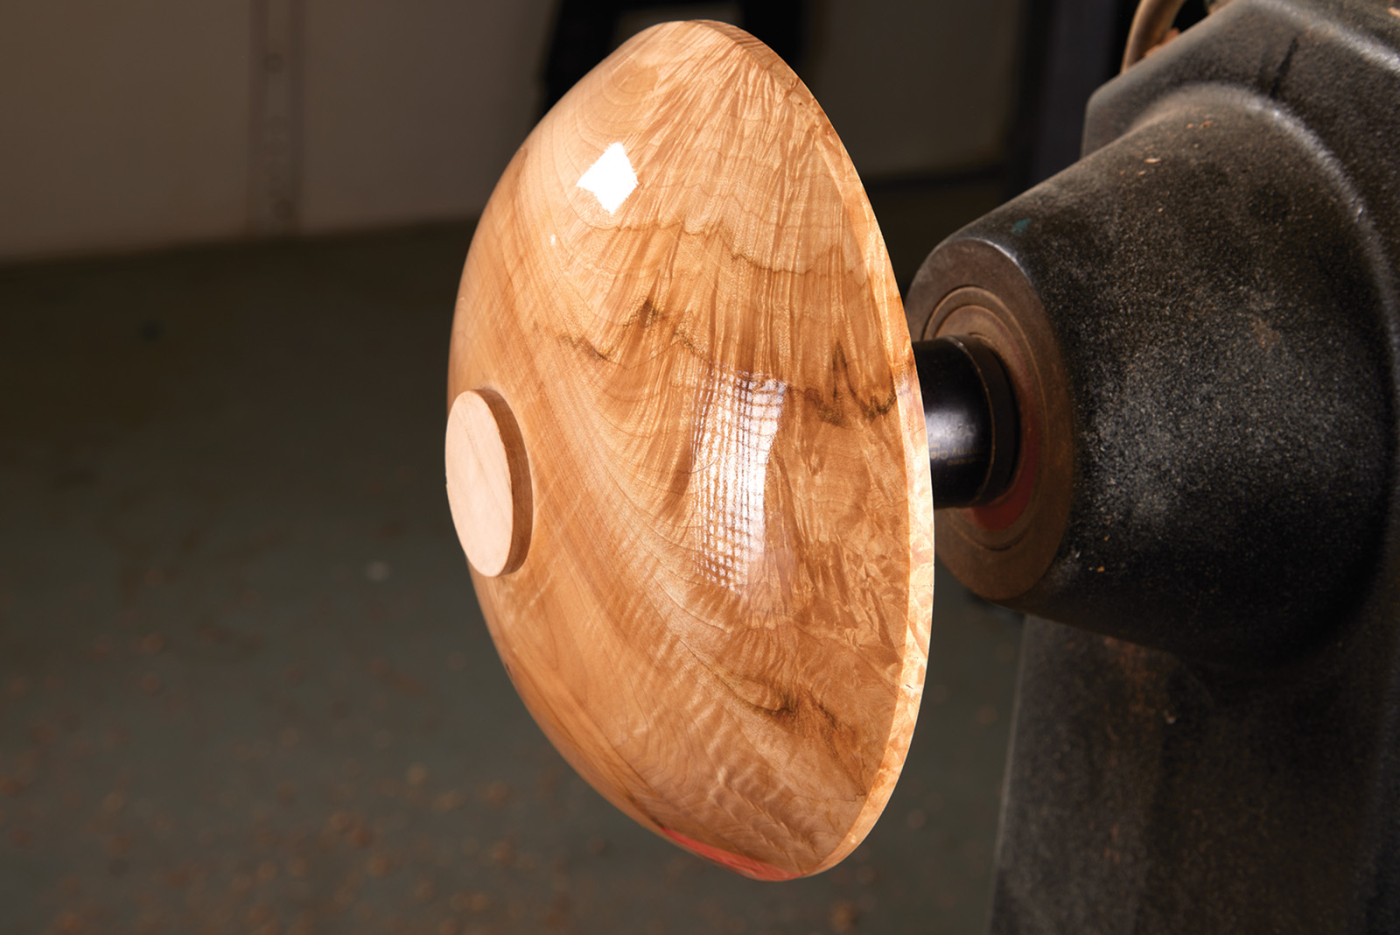
8 Seal it with shellac, then apply a coat of Danish oil.
I find that on most woods 400 to 600 grit for the final sanding is sufficient. One of the many options to finish the piece (and my preferred option) is the Zinsser’s clear coat shellac thinned down 25%. I use this first to seal the wood before I finish with Danish oil. The reason for thinning it down slightly is that it will penetrate further into the wood. When dry, and providing the wood is closed or tight grained, I use #0000 steel wool to cut back the shellac and then apply a thin coat of Danish oil. You will see that the oil will “pop” the grain … beautiful!
9 Start to form the top of the vessel. Here, I’m going for a slightly domed top.
Preparing the Front
After finishing the back of the form, the piece was removed from the screw check and held tightly in the jaws of the chuck. The face is trued up using the draw cut, and I turned a slightly convex curve in the surface. From an aesthetic and ergonomic point of view, the form benefits from a curve on the top rather than a flat. The curved surface does not need to be sanded as the surface from the Arbortec cutter will remove a small amount of wood and cut clean. I use the Arbortec three times during the colouring process.
10 With the blank spinning, texture the top with a circular cutter.
Initial Texture
Before getting started with the Arbortec, there are a few things you’ll want to keep in mind:
- Cutting angle: The Arbortec has two really sharp carbide cutters which have a slightly round edge. When using it to texture, I present the cutting head at an angle of about 45° to the wood. I found when I tried cutting with the cutters in a horizontal position it was more difficult to control the depth of cut and it was quite aggressive!
- Many factors alter the pattern:
Factors include the lathe’s speed, how quickly the passes are made, and the pressure of the Arbortec. - Start in the middle: When making a pass over the surface, I start in the middle of the blank. A couple of reasons for this are that I can feel how the Arbortec is going to cut before I make the pass and the middle will be removed later anyway to apply the gold leaf.
- Always practice first: My advice would be to try a few light practice passes before you shape the top and attempt to texture the finished curve of the form.
- Be vigilant at outer edge: Make sure not to drag the cutter around the edge of the form, otherwise the cutters will badly damage the wood and possibly the finished bottom.
With these things in mind, make the first pass. If you’re happy, it is time to apply the colours.
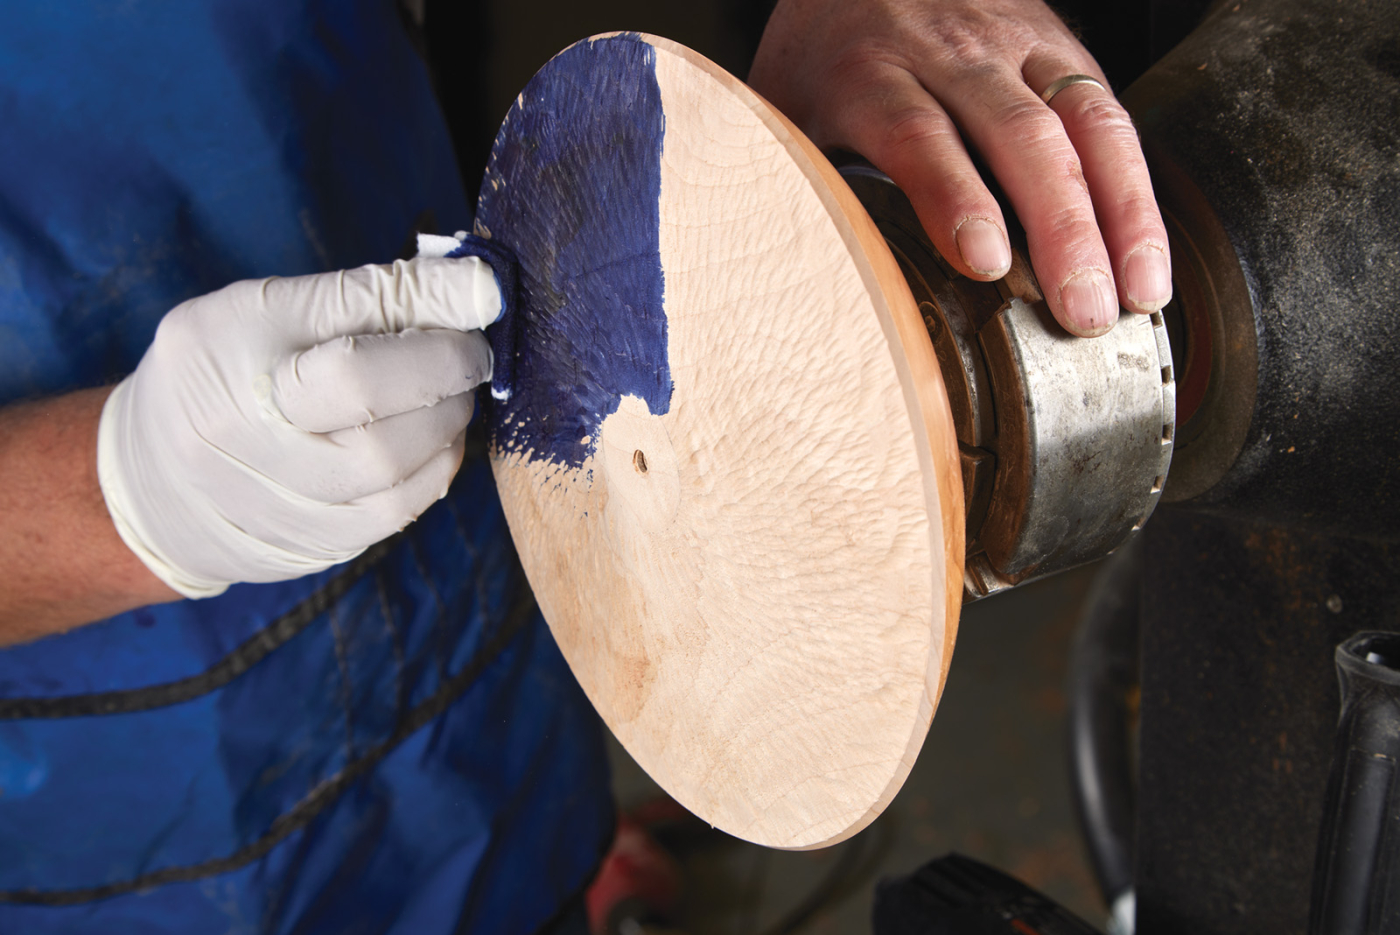
11 Starting with the darkest colour first, apply a layer of dye over the entire textured top.
Applying the Colours
I use Chestnut Spirit coloured stains. I find those stains to be bright, vibrant, and fade resistant, which for an aesthetic piece like this is very important. I only use 4 colours and chose them specifically. They are (variations of) primary colours and mix together to form other colours. For example, red and blue produce purple, yellow and blue produce green, etc. When the piece is finished, you will see so many different hues.
Colour #1: Royal Blue
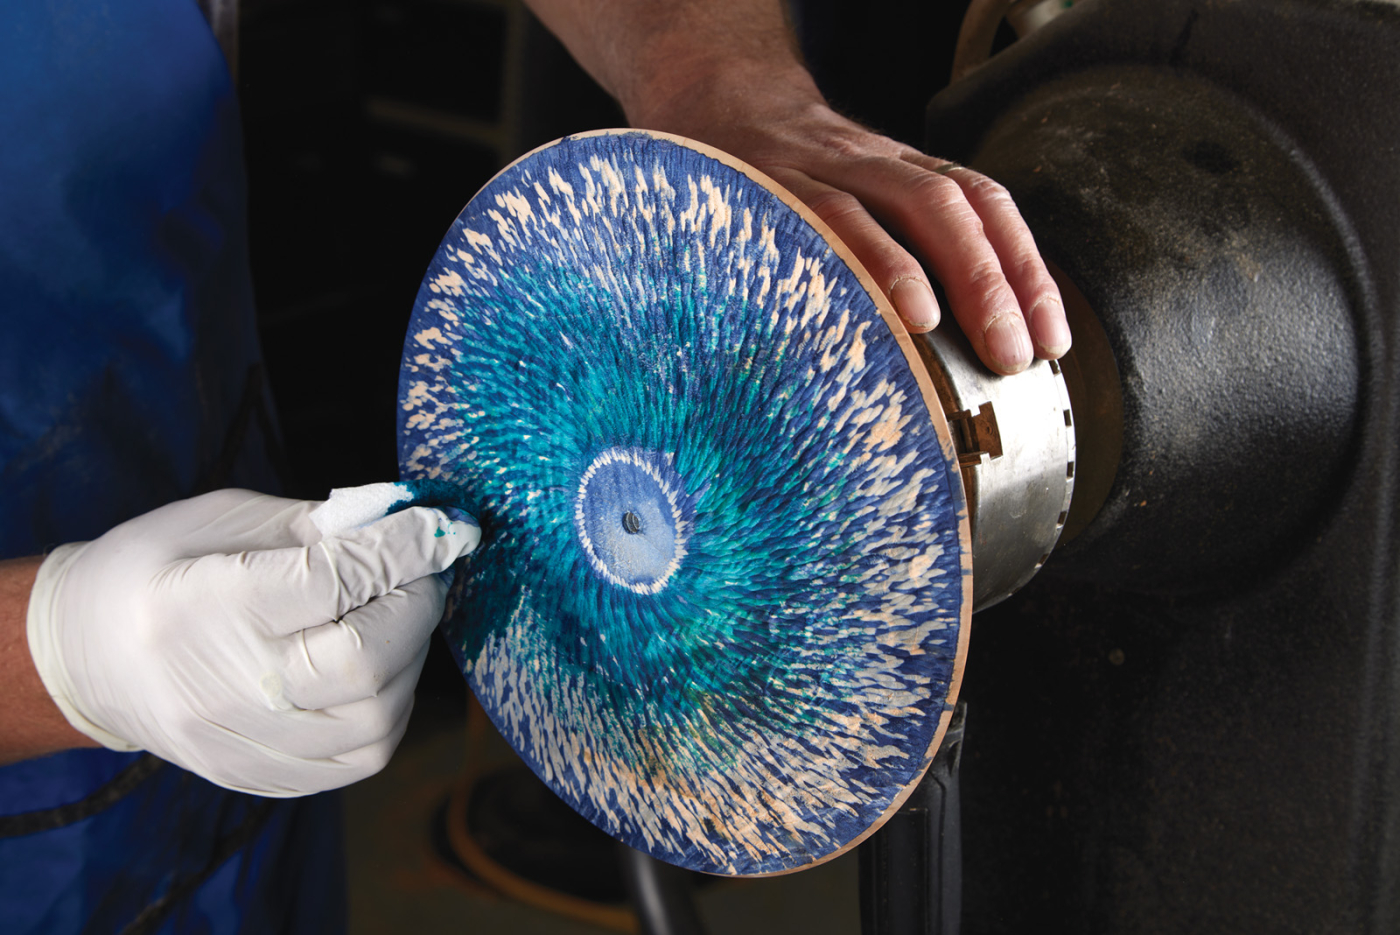
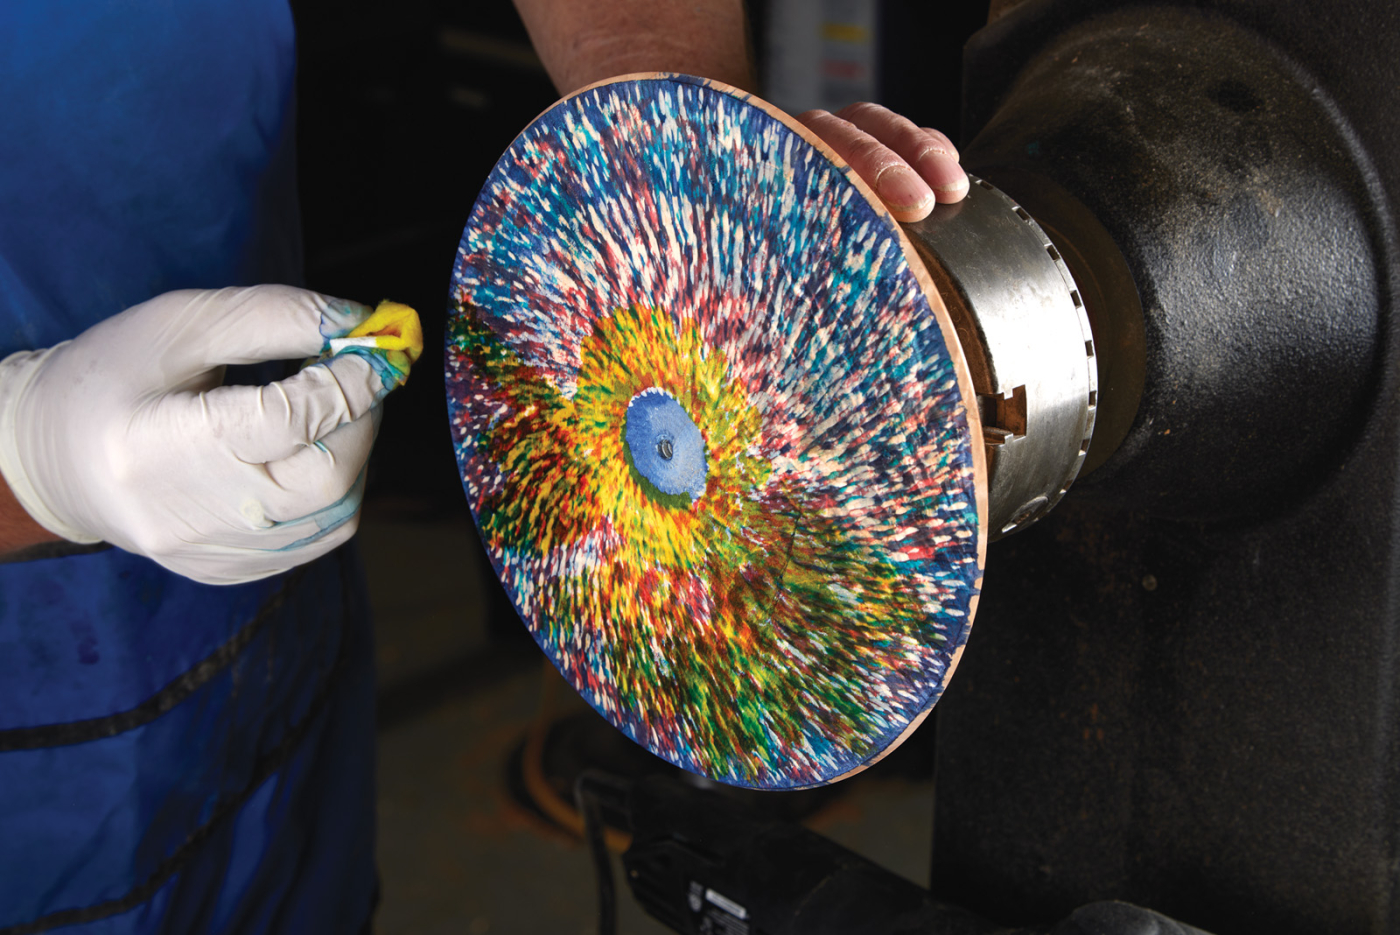
I apply the first colour stain, royal blue, with a piece of paper towel and sometimes a Q-tip for detail. The paper towel is soft enough to allow the die to get into the texture. You could consider using a piece of sponge as well. I use a “stippling” technique of small dabs and cover the whole surface. As the stain is alcohol based it dries very quickly.
12 Once again, texture the top of the blank.
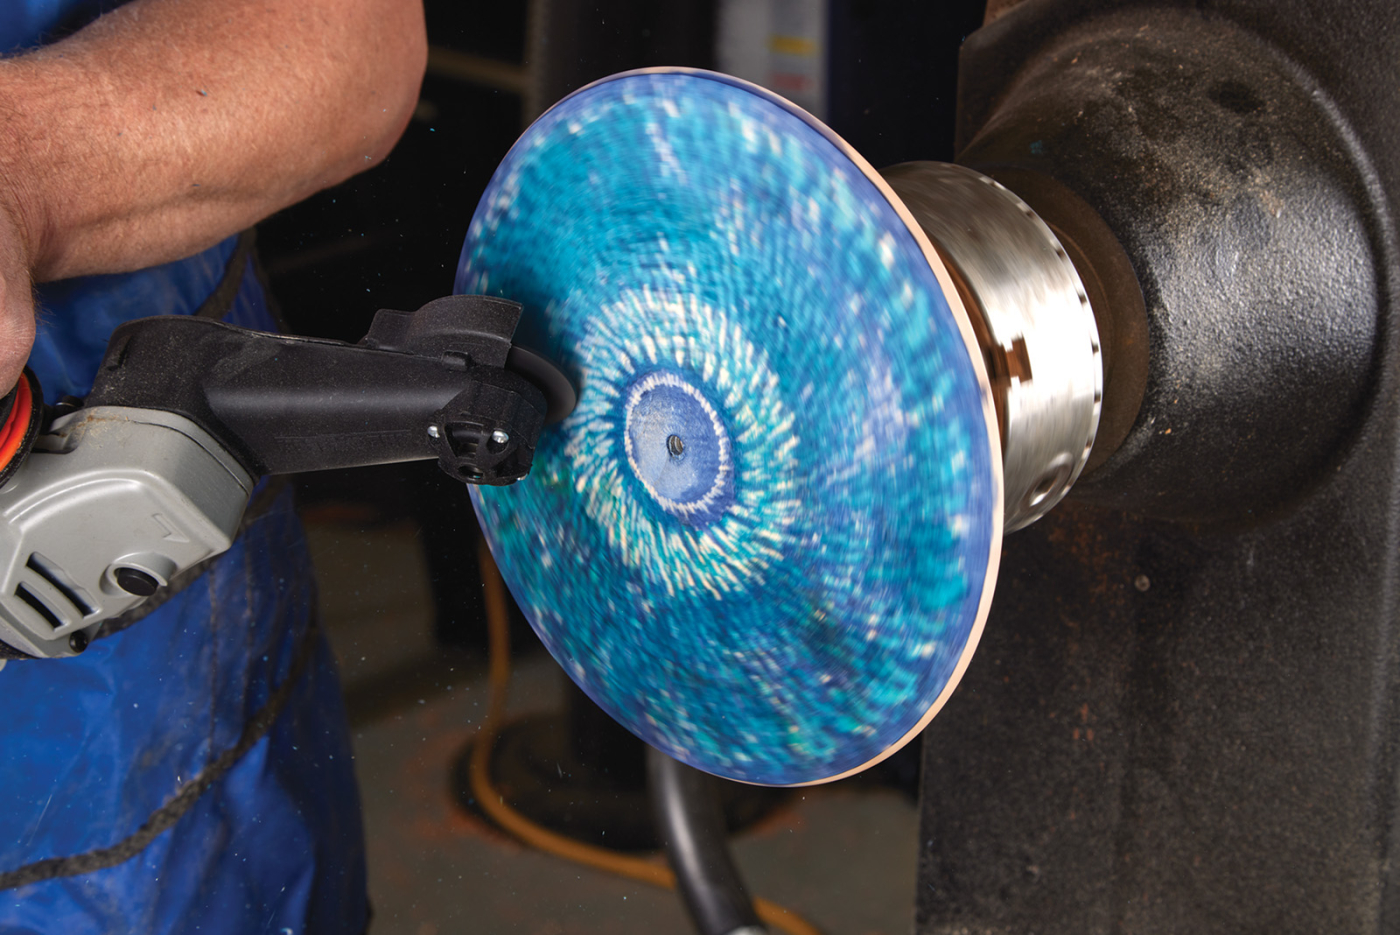
Switch back to the Arbortech for another round of texture. It’s difficult to describe in words how much wood to remove on the second pass as I tend to make aesthetic decisions. However, I would say that I leave about 50% of the royal blue colour.
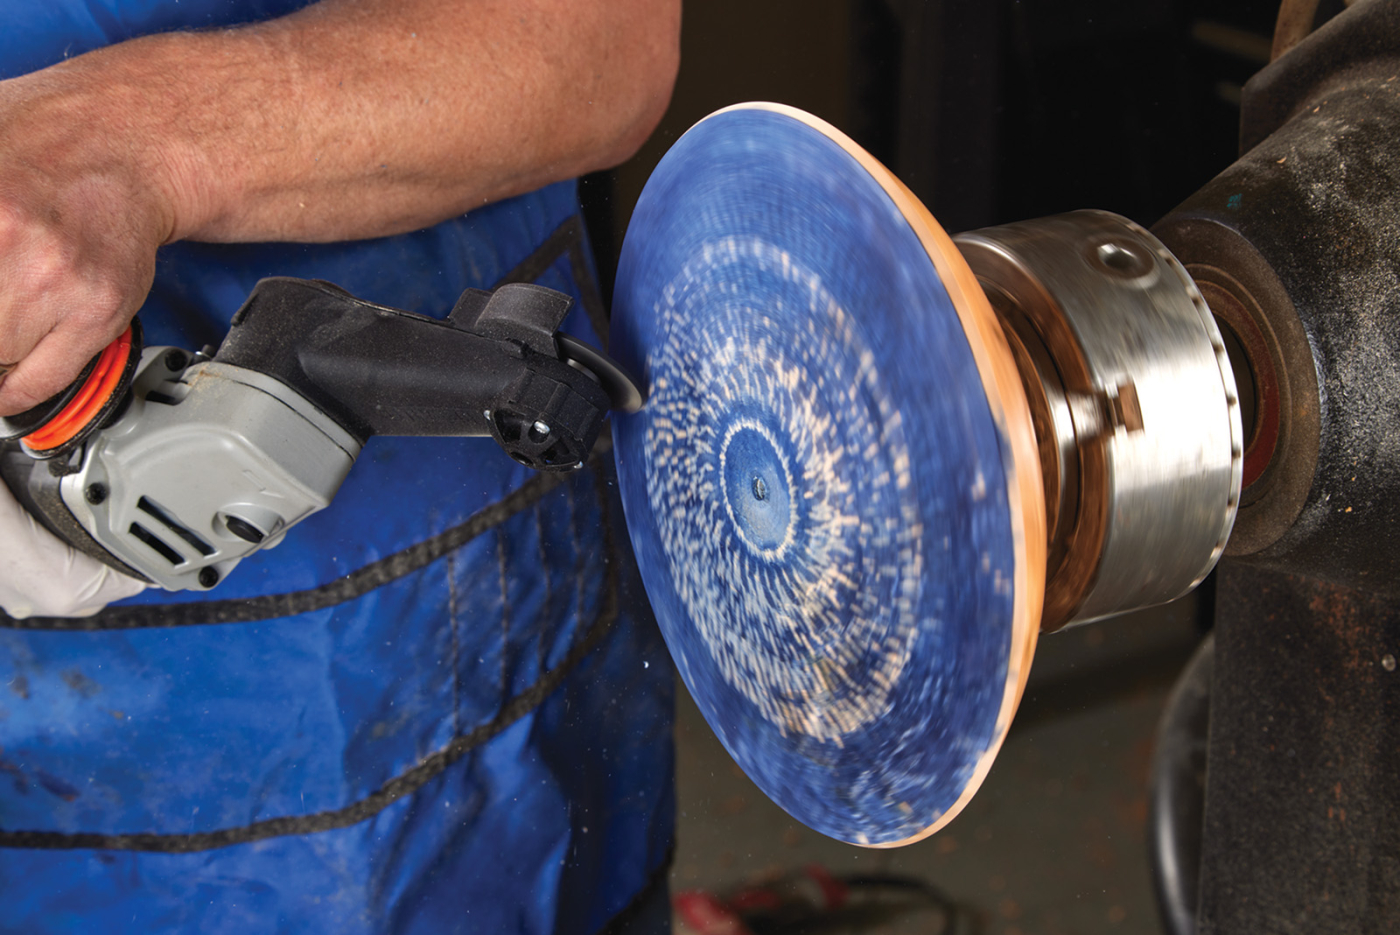
13 Apply a new layer of dye, this time a lighter shade of blue.
Colour #2: Teal Blue
I then use the same stippling technique to apply the teal blue colour to only the newly textured surface or the white natural wood spots.
14 This time, texture the blank slightly less.
Now another pass with the Arbortech—this time I remove a little less wood and leave approximately 60% of the royal blue and teal blue colours.

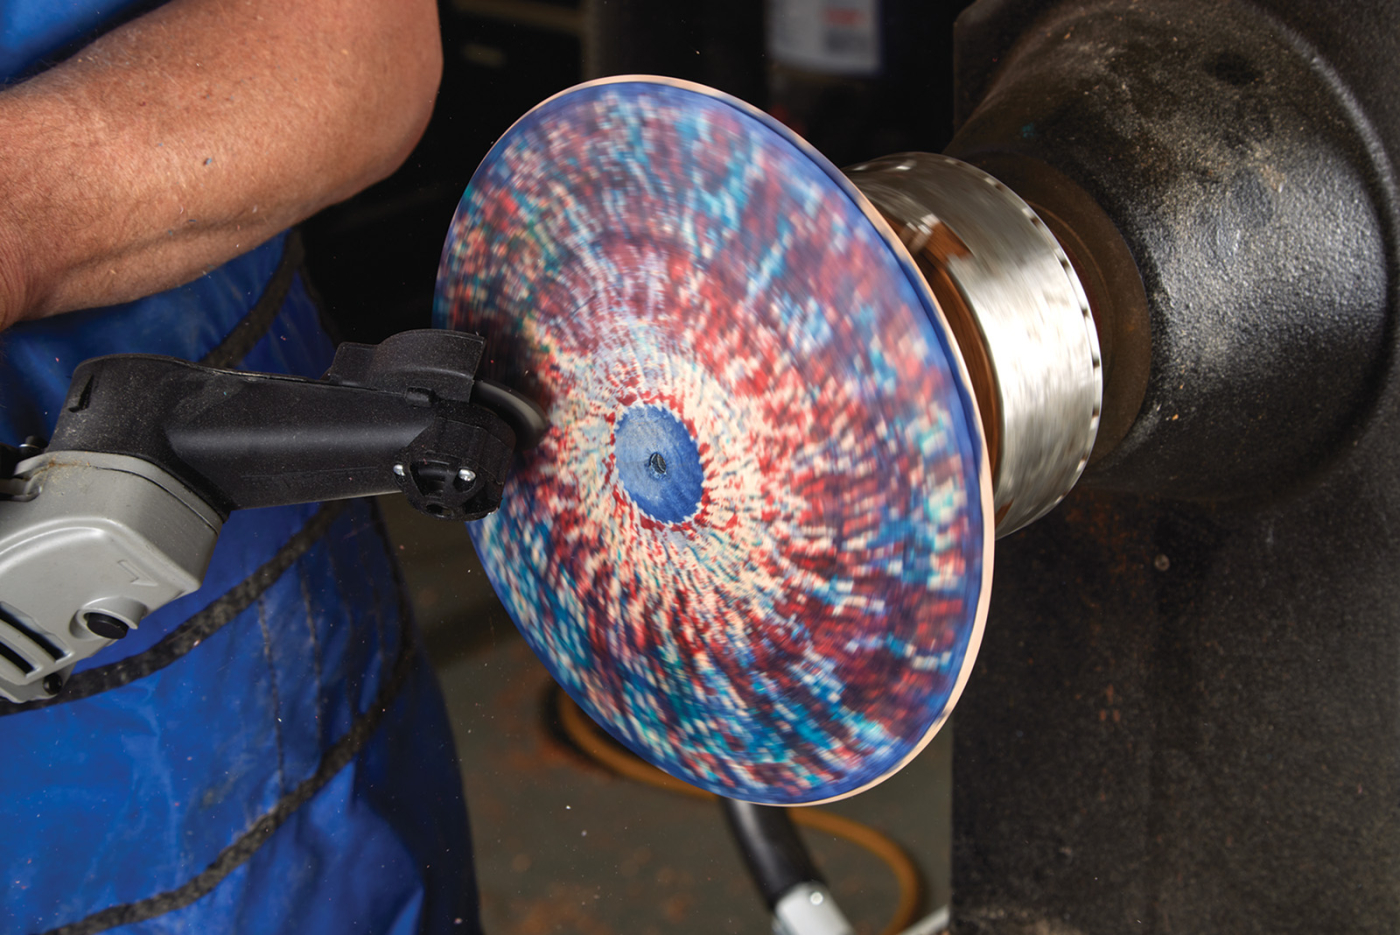
15 Working into different colours, apply a layer of red. Now, start to apply the colour in selective areas, trying to appear random.
Colour #3: Red
Using the previous stippling technique once again, I now apply the red in the newly textured lighter areas. Don’t worry if you leave the odd white bare wood spot as this will be dealt with later.
16 Make a light skim pass with the Arbortech.
The final pass with the Arbortec is another light pass with the goal to keep maybe 70% of the colours with a little more from the center and working outwards.
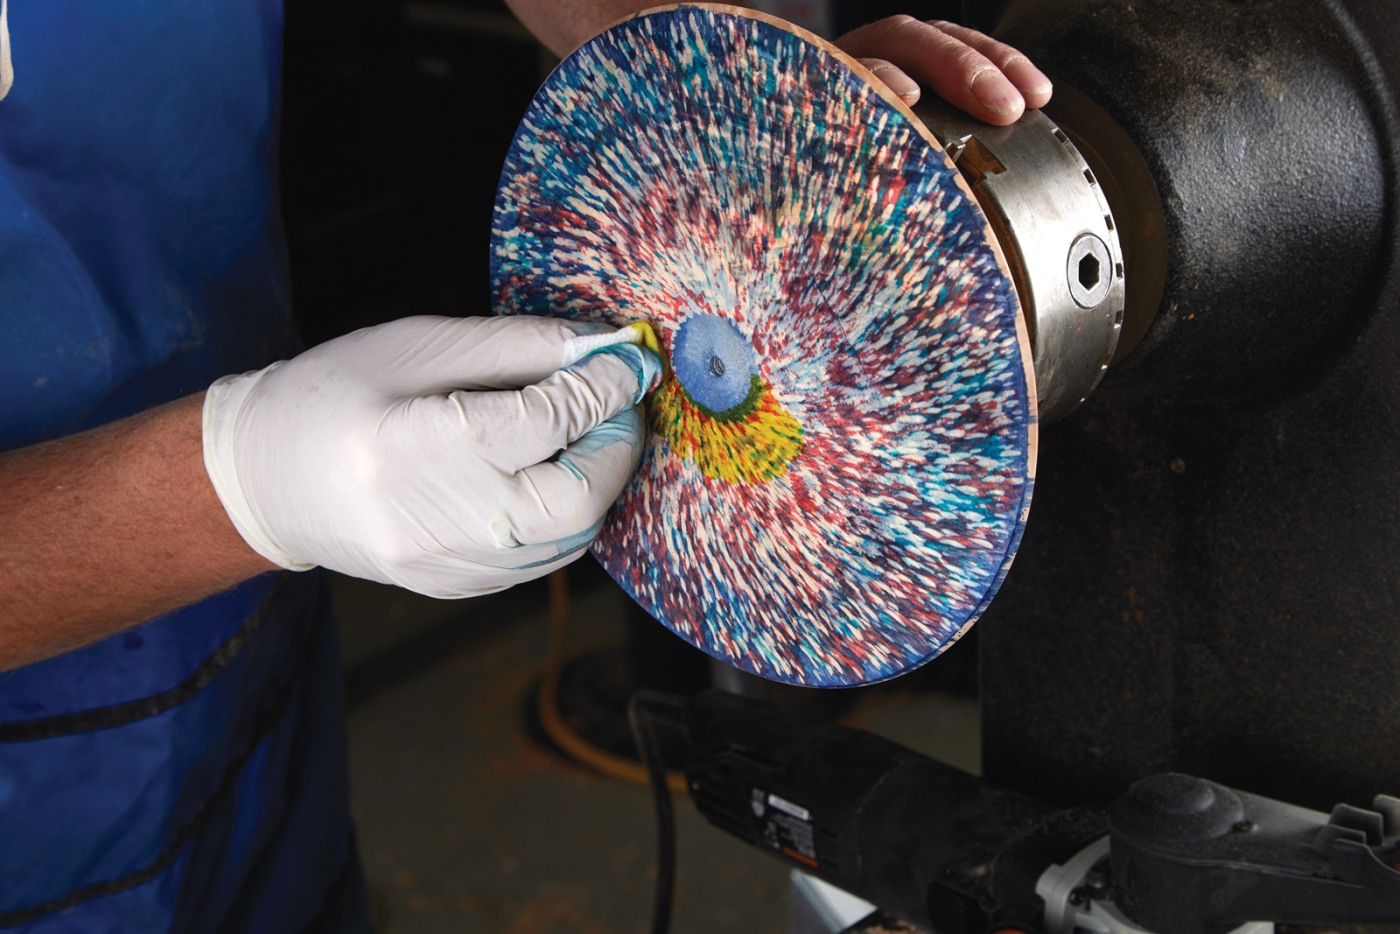
17 The final coat is with yellow.
Colour #4: Yellow
The final color stain is yellow. Again, using the same stippling technique, cover any of the newly cut textured surface. You will start to see purple, green, orange, and other hues begin to appear as the four colours mixed together.
18 It will start to blend together.
Blend all 4 colors
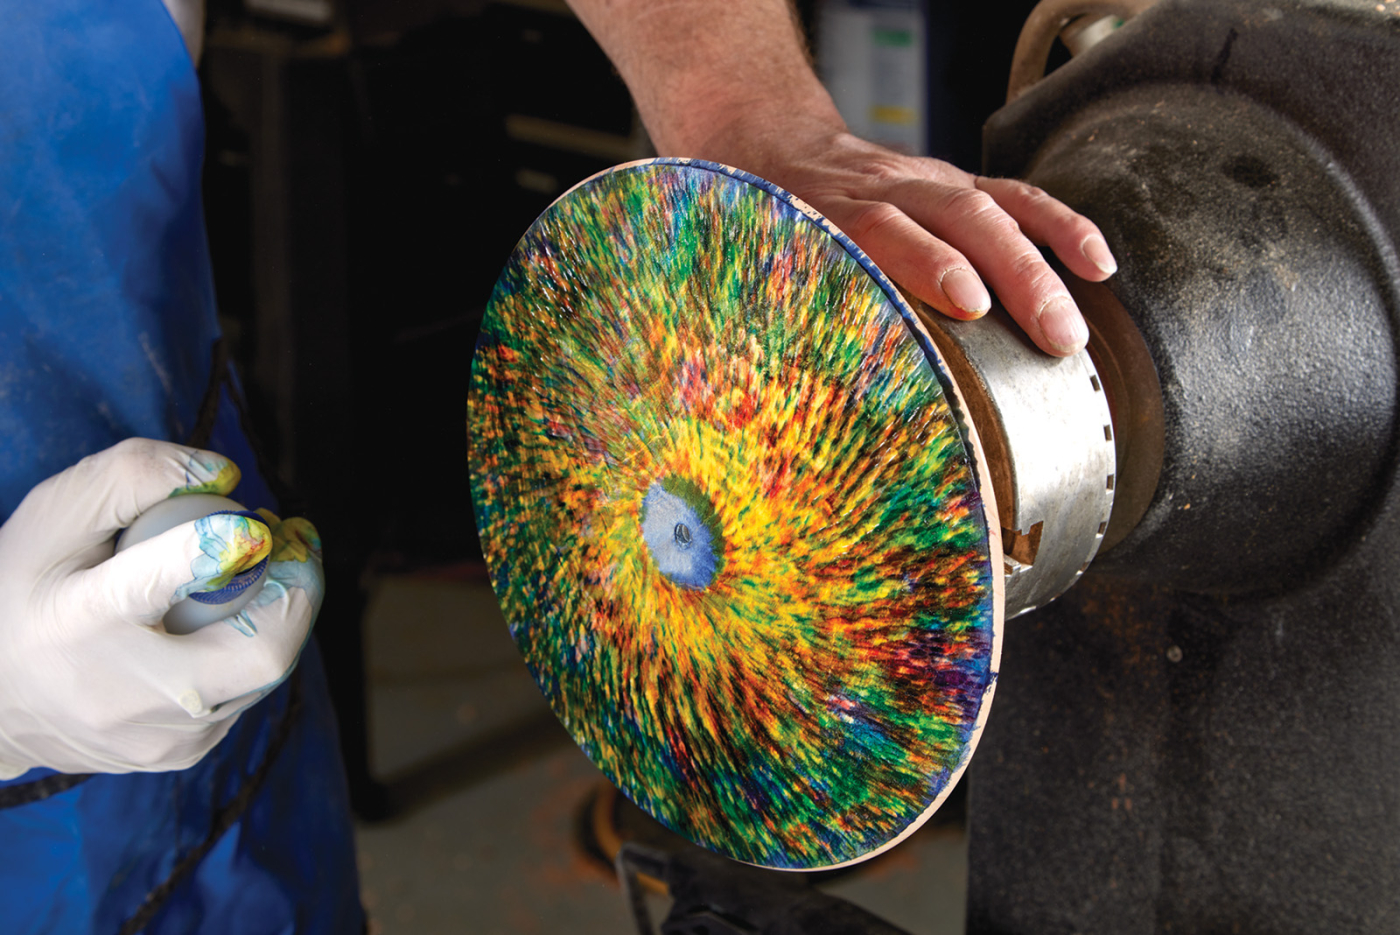
The final technique I employ is to lightly mist the surface with denatured alcohol in order to get all the colours to blend in nicely and cover up any tiny area of the texture that did not cover with stain. When misting the surface, be sure to keep the piece moving as you want to avoid a “curtain” of alcohol flowing across the surface dragging the colours together and when dry, forming a “tideline”.
19 Spray a coat of gloss spray lacquer over the coloured surface.
The Final Touches
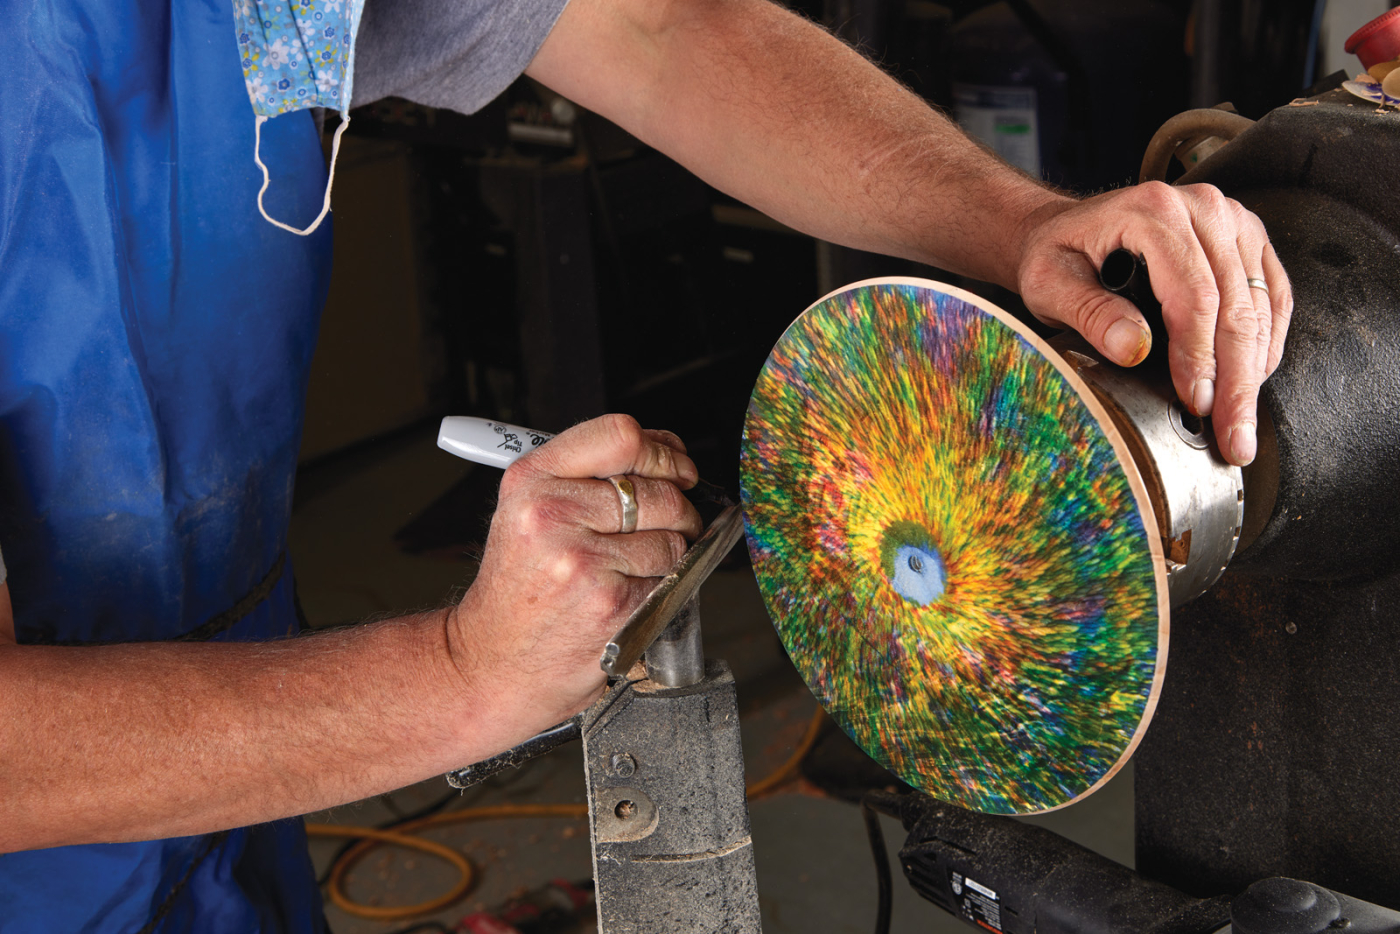
You may notice that the edge of the piece has some stain on it—don’t worry! There are two great ways to clean up the edge. One way is to take a small cut with the bowl gouge and sand it. Another great fix is to use a black marker to cover the edge. This achieves two things: the black line frames the colours from an aesthetic point of view and masks the stain. I hold my hand and marker steady on the tool rest and move the piece with the other hand. This is far more accurate than freehand! I choose to use both methods.

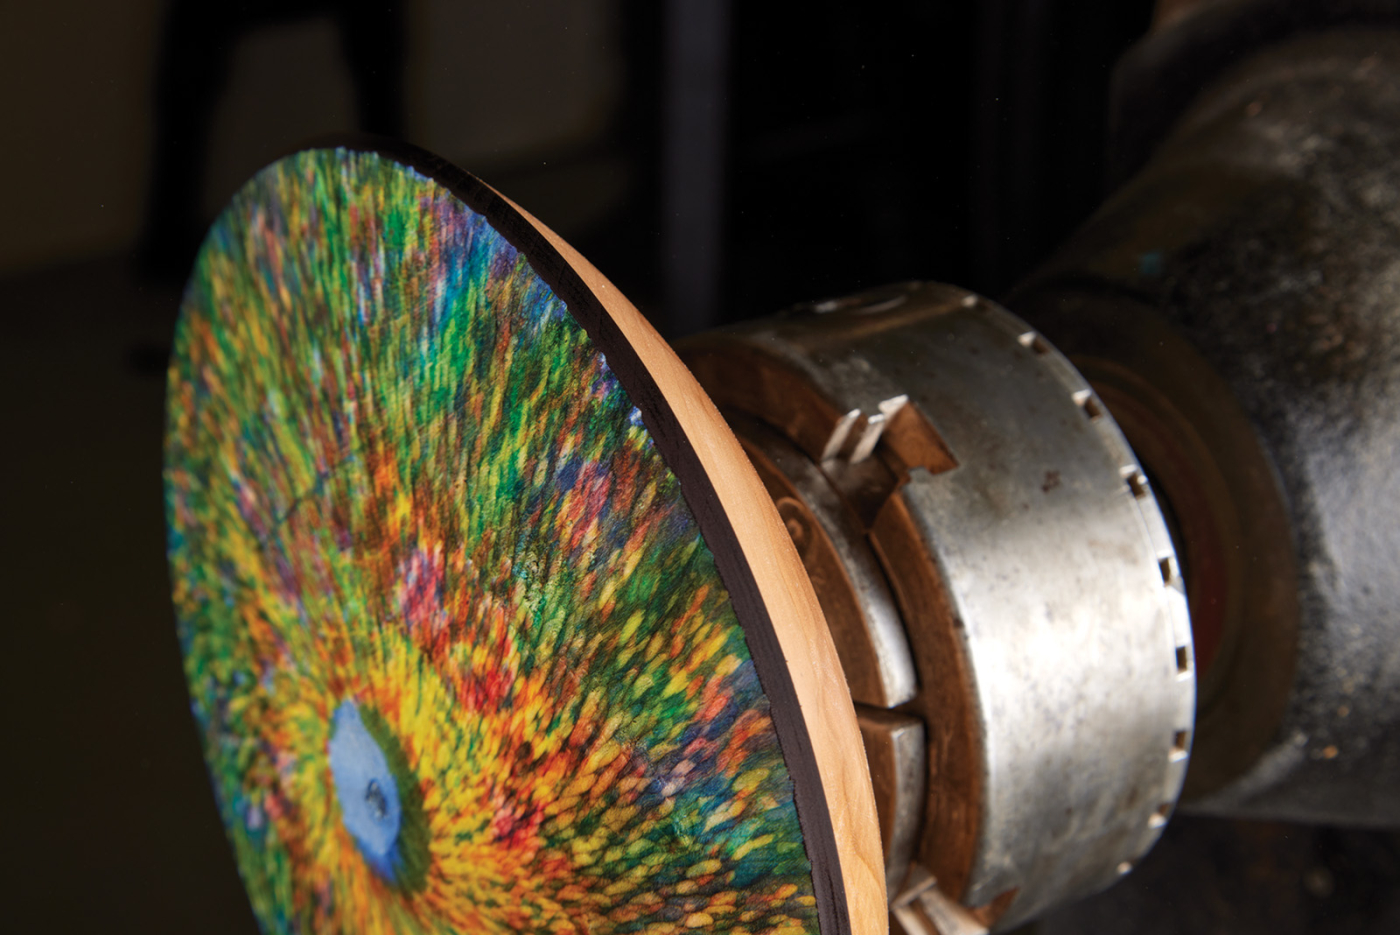
20 Slightly bevel the edge of the top.
21 Colour the bevel black
22
Now we have to attend to the hole left from the screw chuck in the center. Using a small bowl gouge, hollow out a hemisphere about the size of a quarter in the center. You could also use a round nose scraper if this is easier. Make sure the hollow is deep enough to remove the screw hole. The hemisphere is then sanded to 400 grit and sealed using the same thinned down shellac as earlier. This is an important step to do as if you don’t, the adhesive size will soak into the wood and be ineffective. Once the shellac is dry, use #0000 steel wool to smooth out the surface before applying the leaf.
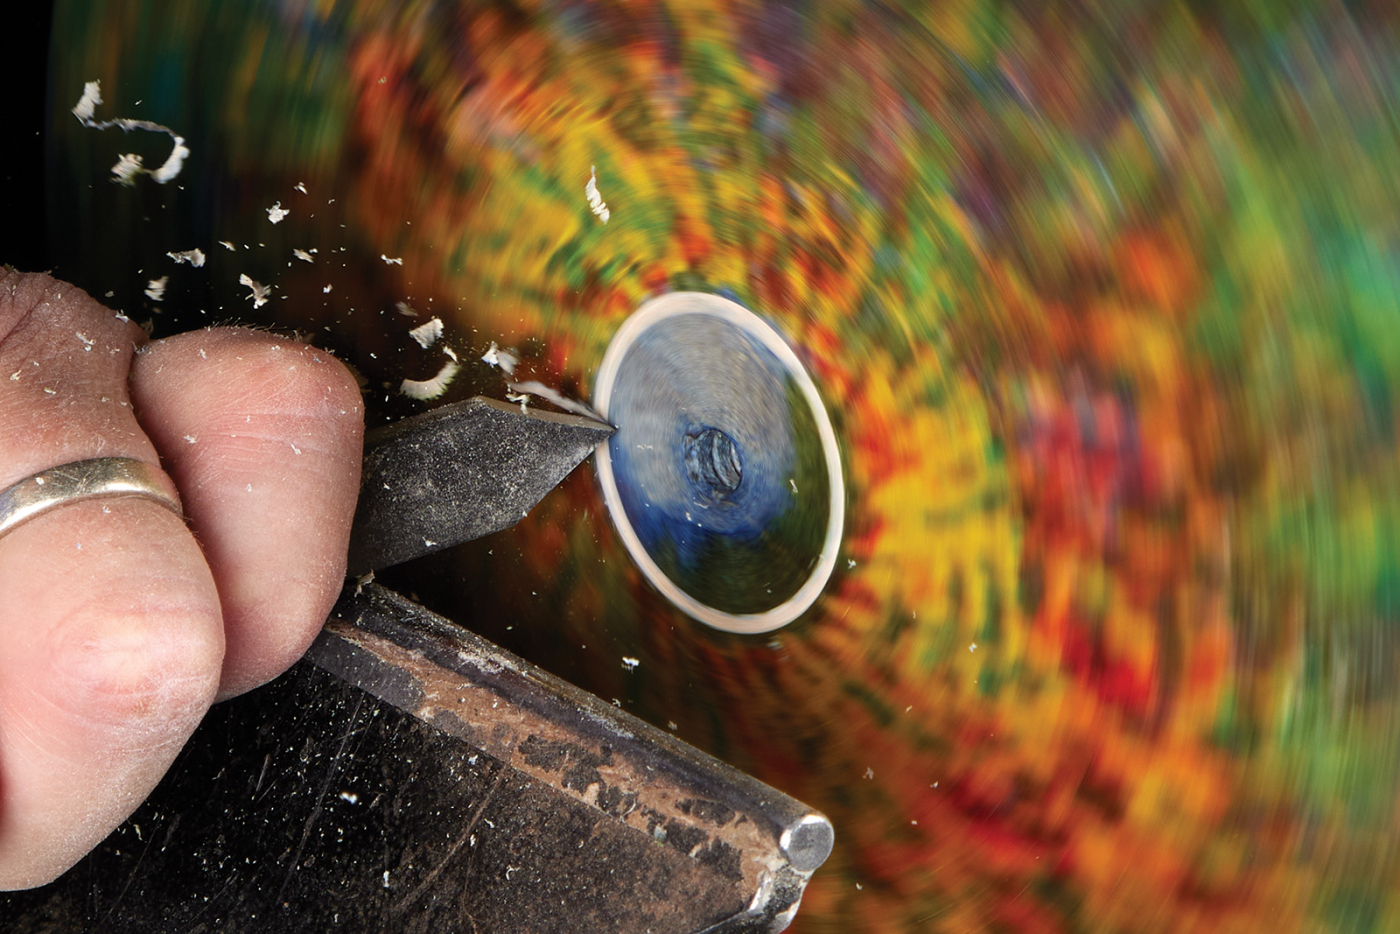
23 Use a parting tool to form a clean entry for the center.
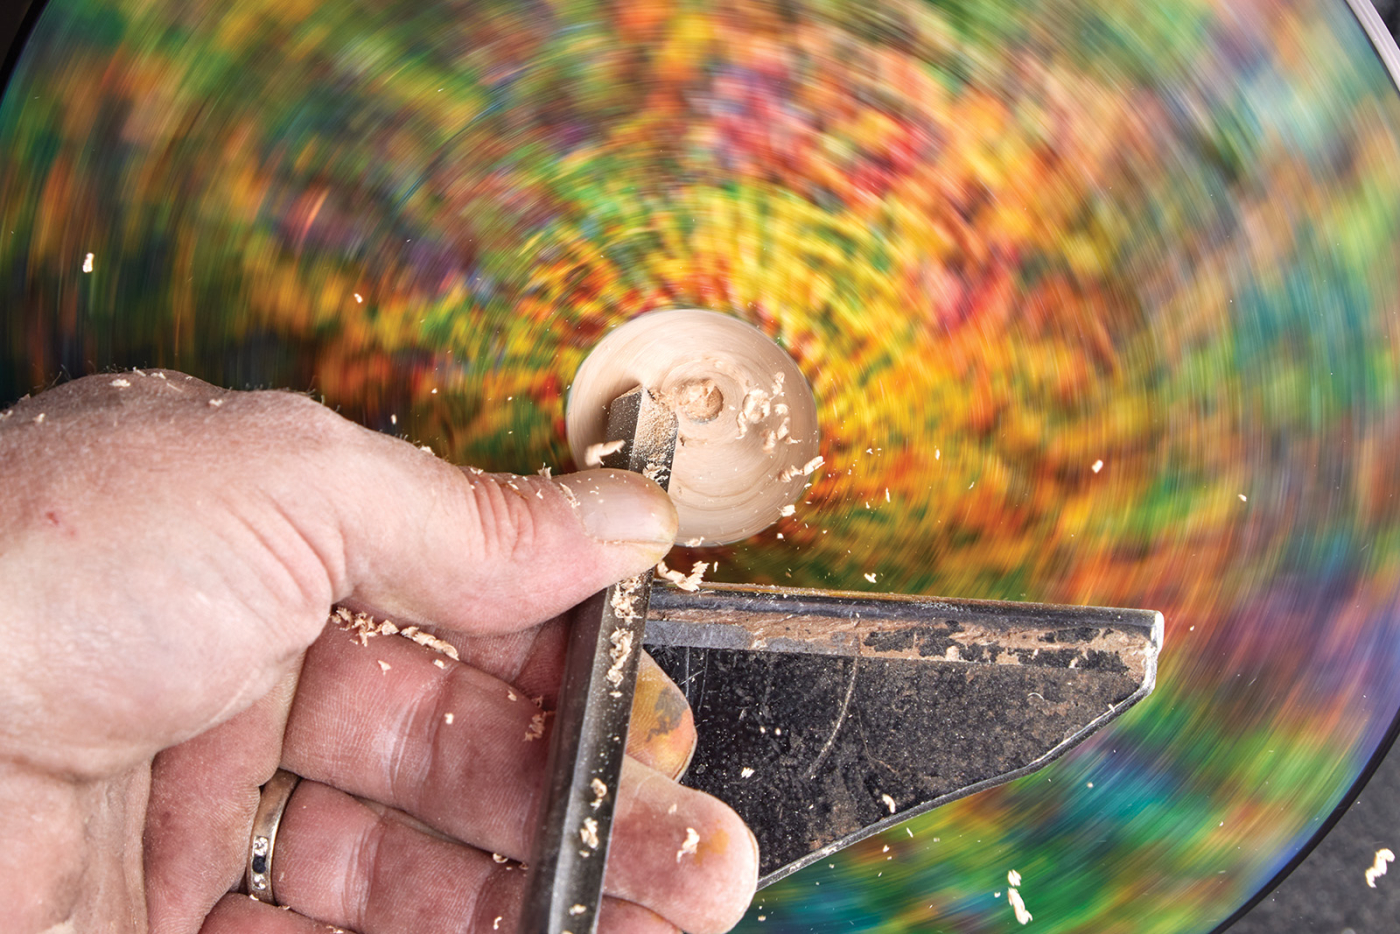
24 A bowl gouge will slightly hollow it
I use the Mona Lisa brand of size/adhesive and apply it with a soft brush. A course brush can leave ridges in the glue which will show up through the leaf. The adhesive goes on as a milky colour and turns clear when it is ready to apply the leaf. This only takes a few minutes.
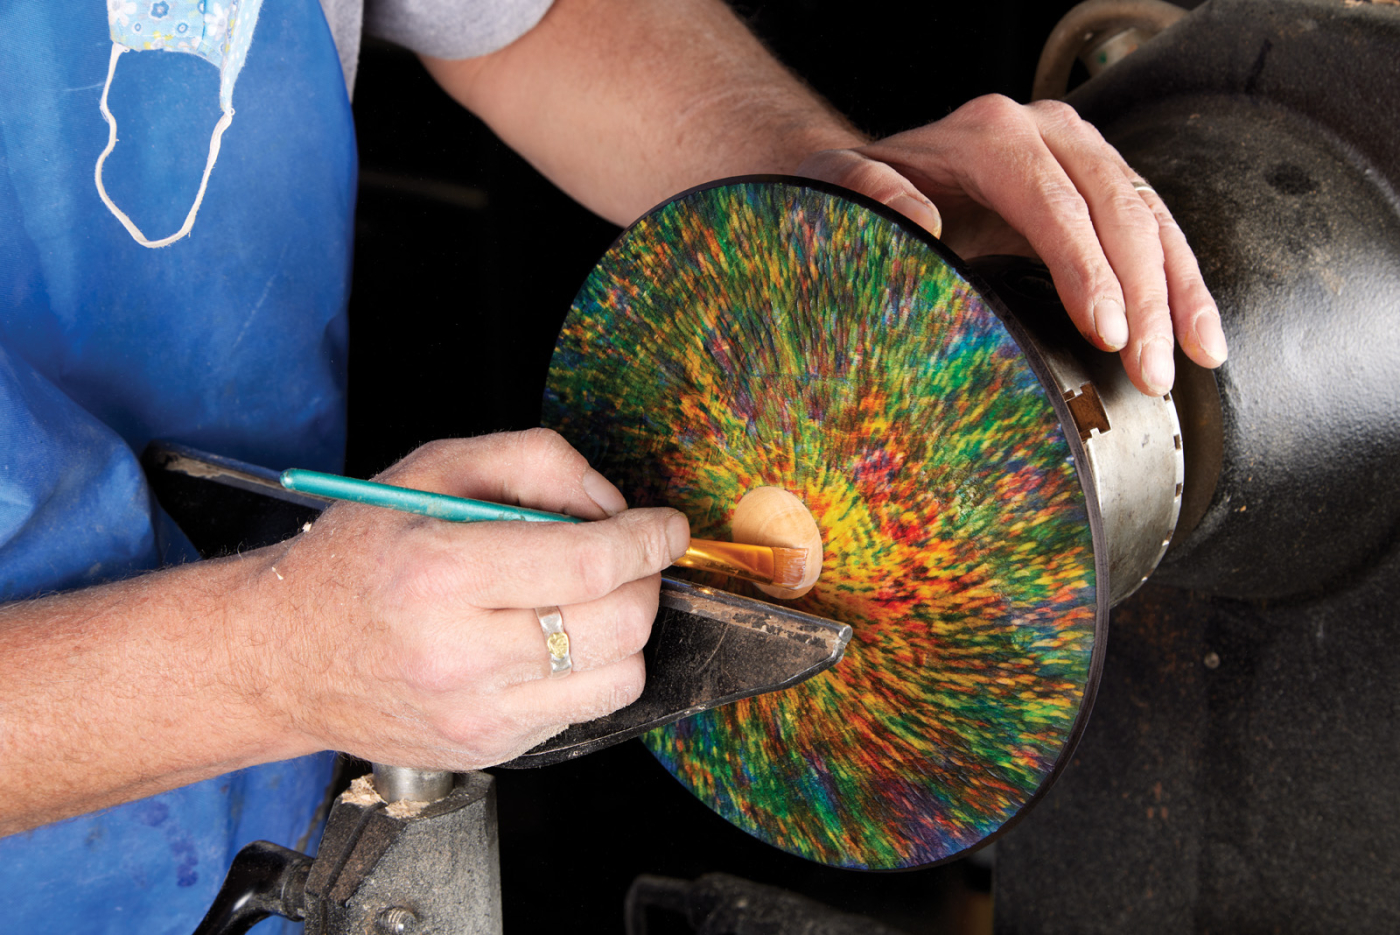
25 Paint on a water-based leaf size.
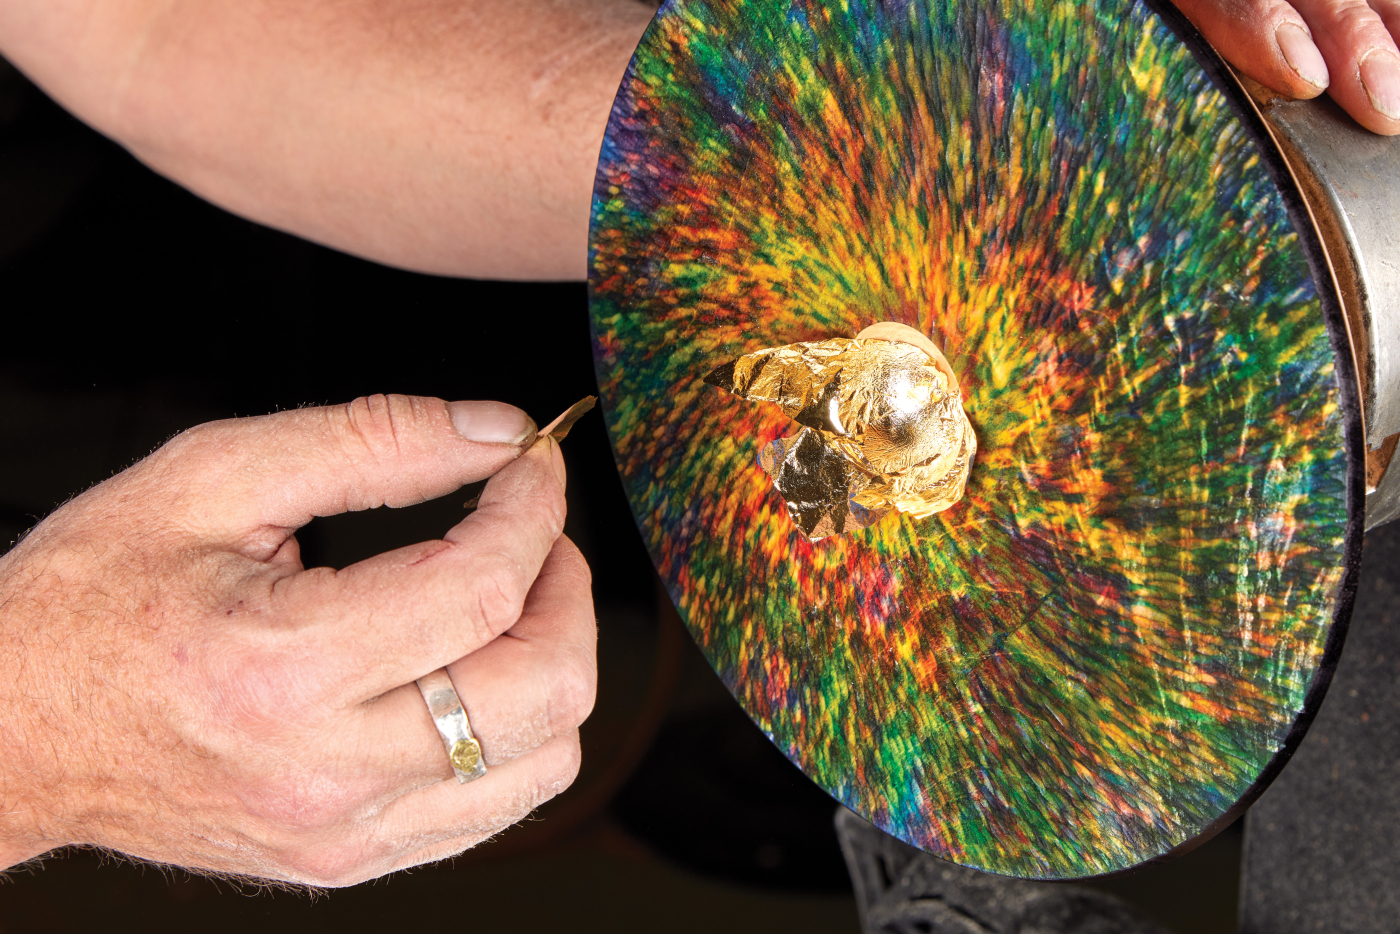
26 Press the leaf into the hollow and use a tissue to press it down.
The Mona Lisa brand is also the brand I use for the gold leaf. It’s not real gold leaf although it appears very similar to the real thing. The reason that I like it (apart from cost) is that it is a lot thicker than real gold leaf and handle much easier. I believe that the exact metal they use is a mixture of tin and copper that they colour through a heat treatment process. To apply the leaf, I tear off small pieces and carefully apply them to the glued/sized area. Make sure that you do not overlap the pieces of the leaf as it will not stick to itself unlike real gold. When the entire area is covered, get a clean semi-soft brush and gently brush away the excess overlapping leaf. To smooth the surface of the metal leaf, I use a soft tissue and gently wipe the surface again. Note that I do not seal the leaf with anything as you tend to lose the bright sheen when you do.

27 A soft bristle brush is used to brush away the leaf.
As I mentioned earlier, I feel the black line on the outside rim frames the texture and colour. To balance the piece and to clean up any excess leaf, I turn a small chamber about 1/16“ at an angle of about 45° on the edge of the hollow and again use a black marker. I then use a gold marker to sharpen any of the edge of the gold leaf that might have lifted away. This now frames the coloured texture and the gold-coloured leaf.
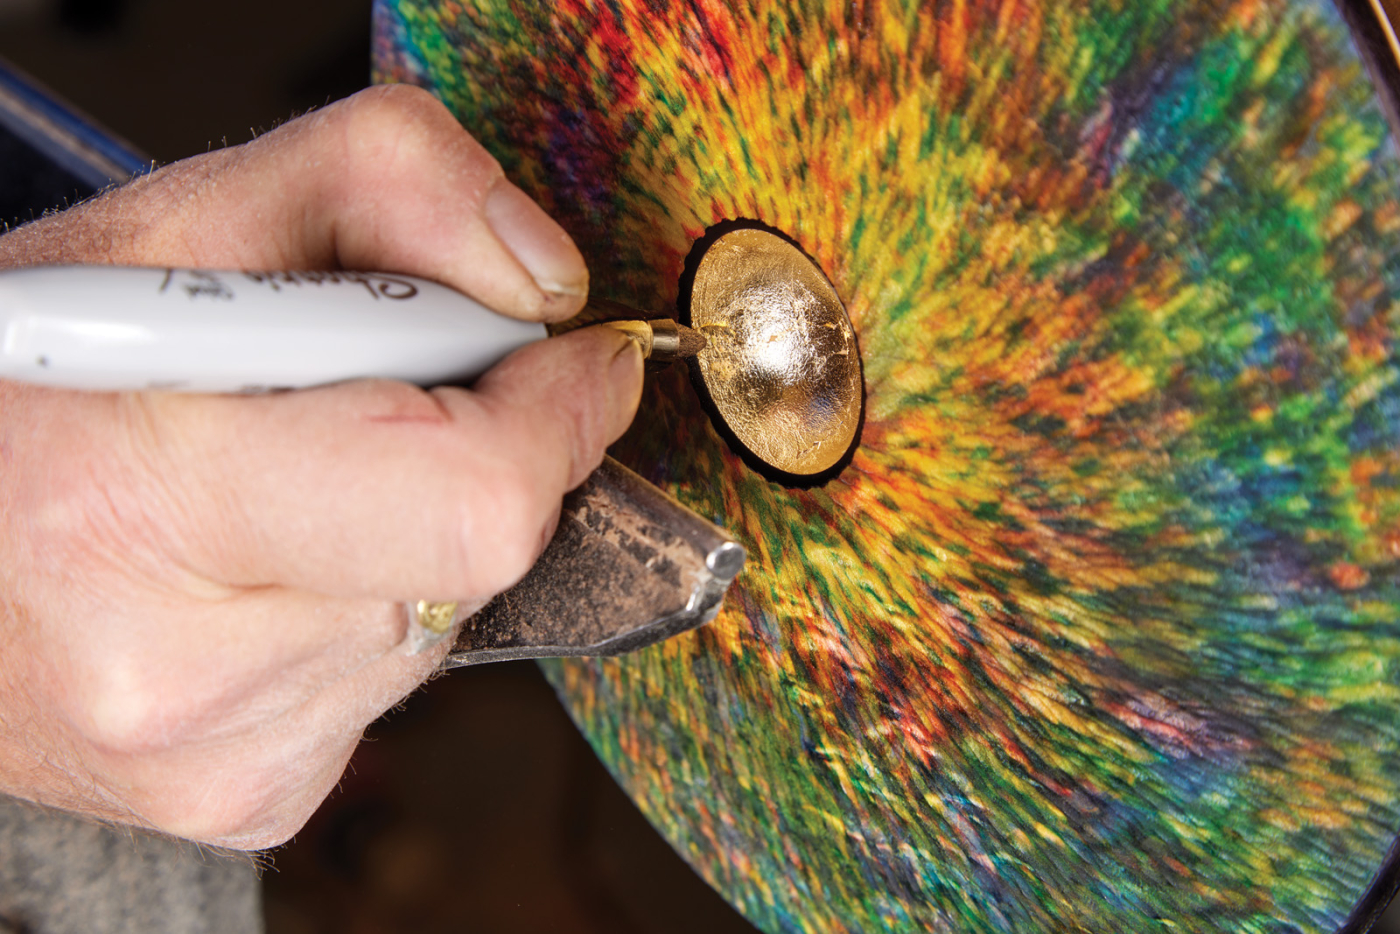
28 As with the top, bevel and color the transition to the center.
Remember that not every piece of woodworking or wood turning needs to be practical. Sometimes, a piece can simply be a decoration and have no real practical use, other than to make you smile when you look at it. This piece is a relatively easy piece to turn and the curve is very simple and easy on the eye and hand. The textured, coloured embellishment really sets it off from an aesthetic point of view. I hope you enjoy having a go at this piece!
Here are some supplies and tools we find essential in our everyday work around the shop. We may receive a commission from sales referred by our links; however, we have carefully selected these products for their usefulness and quality.