We may receive a commission when you use our affiliate links. However, this does not impact our recommendations.
Learn how to beat the chatter.
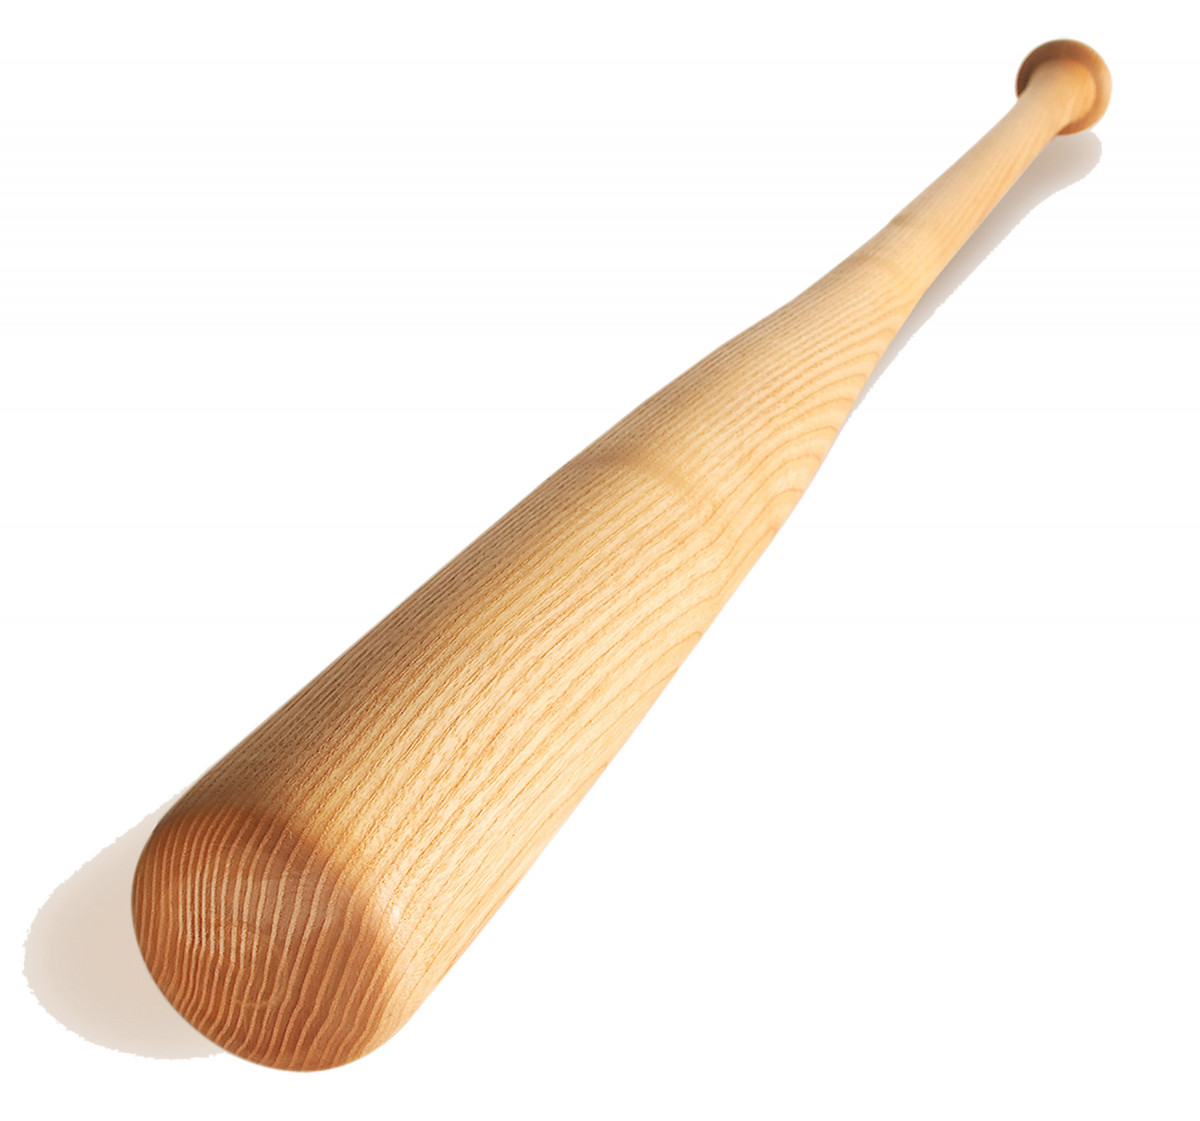
Almost every common wood has been used for bats at one time or another. However, a few species dominate the history of the sport. Traditionally northern ash has been the wood of choice, but currently—at least in the pros—it is a neck-and-neck race with hard maple. A few bats are still made of hickory and beech. For this project, I suggest buying a blank of ash or maple that has been graded for bats. The reason is not only superior performance, but also safety. A bat made from a graded bat blank is less likely to break in use.
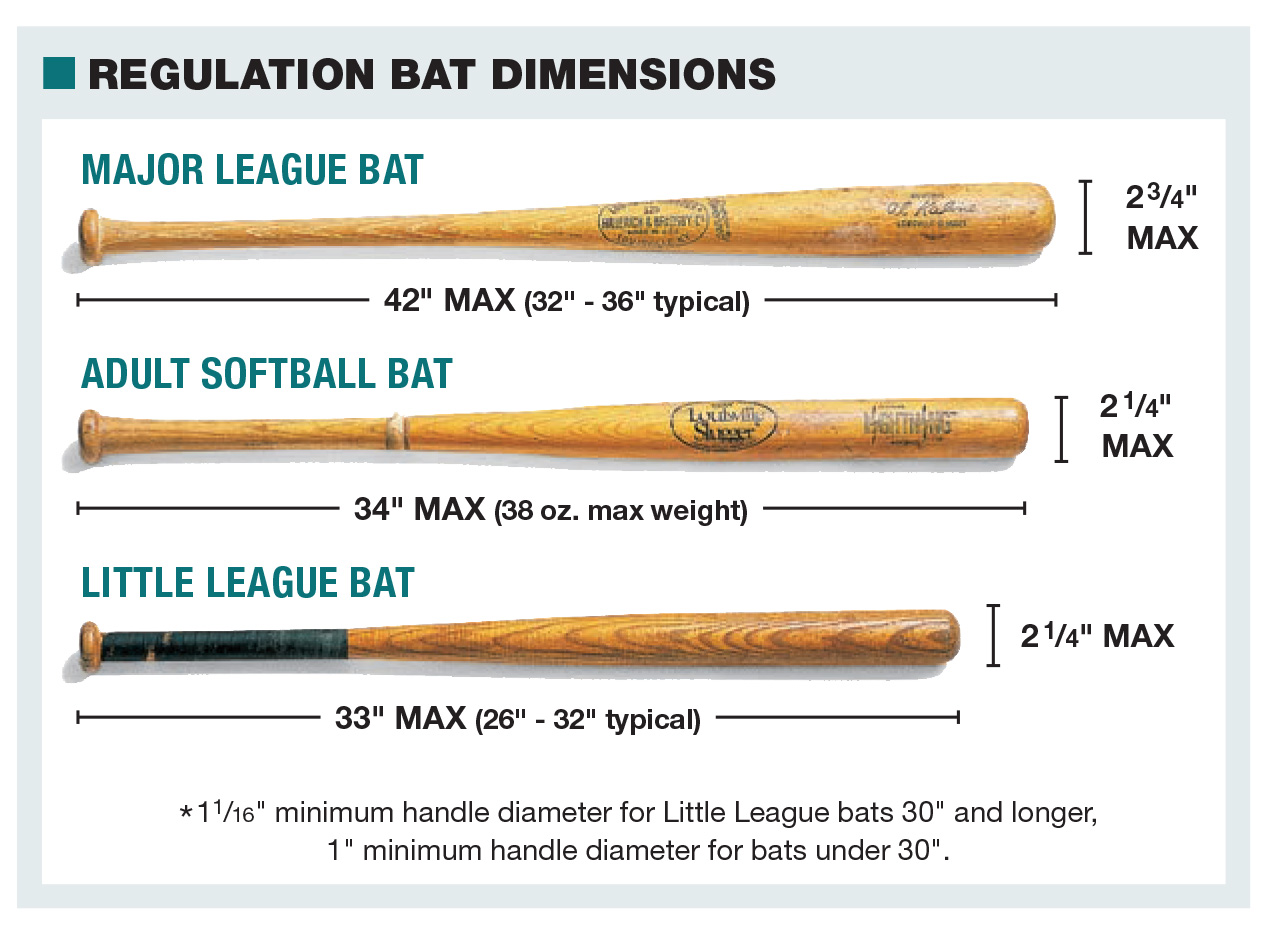
These numbers are only guidelines. Because of the ever-changing and sometimes localized nature of bat regulations, it’s best to check with your local league officials for specific bat dimension limits.
Bat blanks are graded differently from regular furniture grade lumber. First, only straight-grained wood from slow-growing trees of moderate size make the grade. The blank must have tight, evenly spaced growth rings and be free of flaws like knots. The best blanks are often split from the log rather than sawn in order to follow the grain perfectly. Extra care is taken in the drying of bat blanks to create an even distribution of moisture throughout the entire thickness.
Tools and Supplies
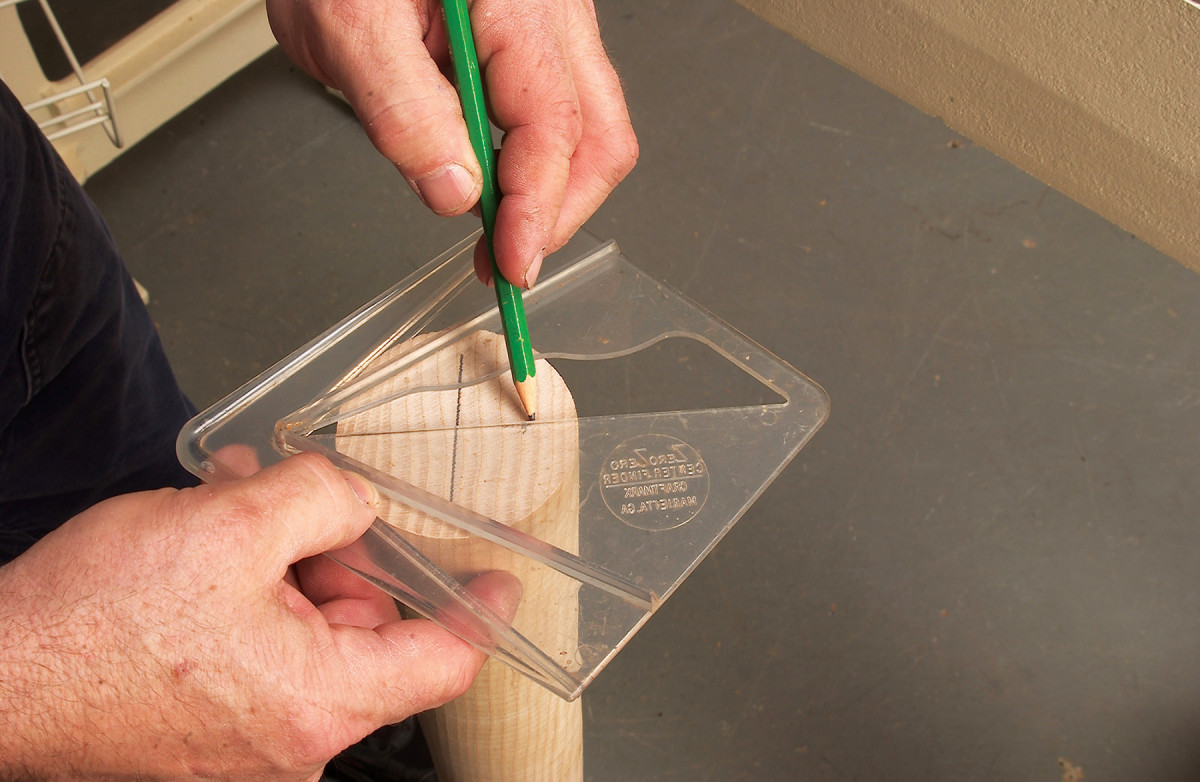
1. If you’re starting with a purchased round blank, mark the center on both ends with a plastic center finder. On a square blank use a ruler across the diagonals to find the centers.
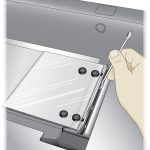
To make a full-size baseball bat you will need a lathe that can handle lengths up to 36“ between centers. For Little League bats, a lathe with shorter capacity will work just fine. It is best to have a live center at the tailstock end, and drive with either a spur or cup drive. If you are duplicating a bat, you will need to fabricate a simple V-block system to hold the master bat (the one being duplicated) directly behind your blank.
2. True the cylinder’s entire length with a spindle-roughing gouge. This step is necessary because the blank may be warped or center marks are not perfect. Take light cuts. You do not want to remove too much stock.
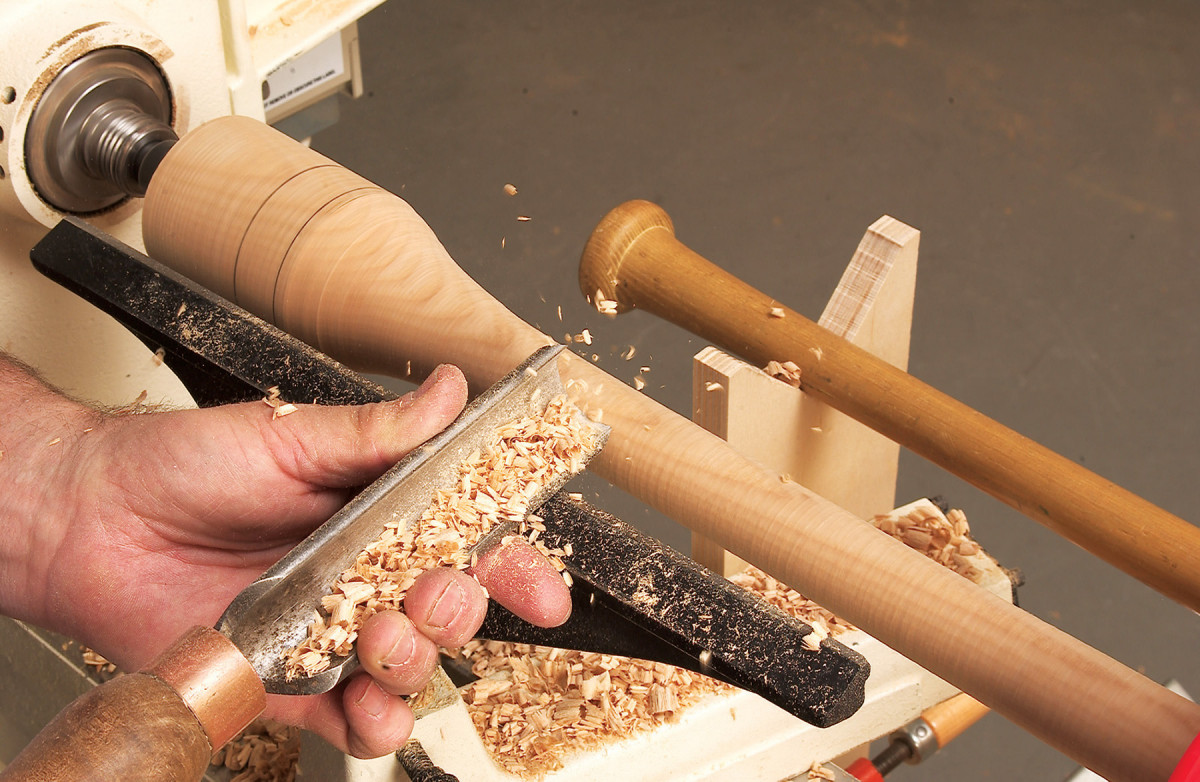
The bat can be turned with three tools: a spindle-roughing gouge (11/4“ to 13/4“), a parting tool (1/4“ wide) and a spindle/detail gouge (3/8“ or 1/2“). If you are comfortable using a skew, a large one (1“ to 11/2“) can be added as an option for smoothing the shape and rounding the end of the barrel.
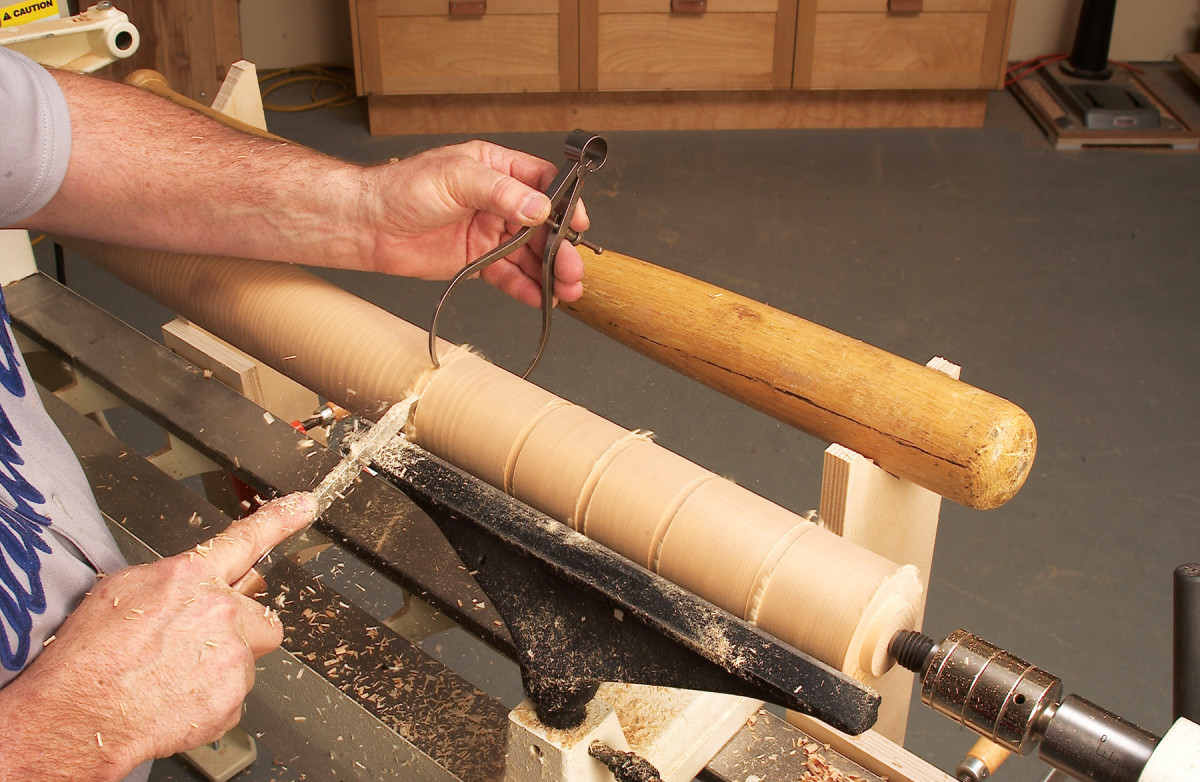
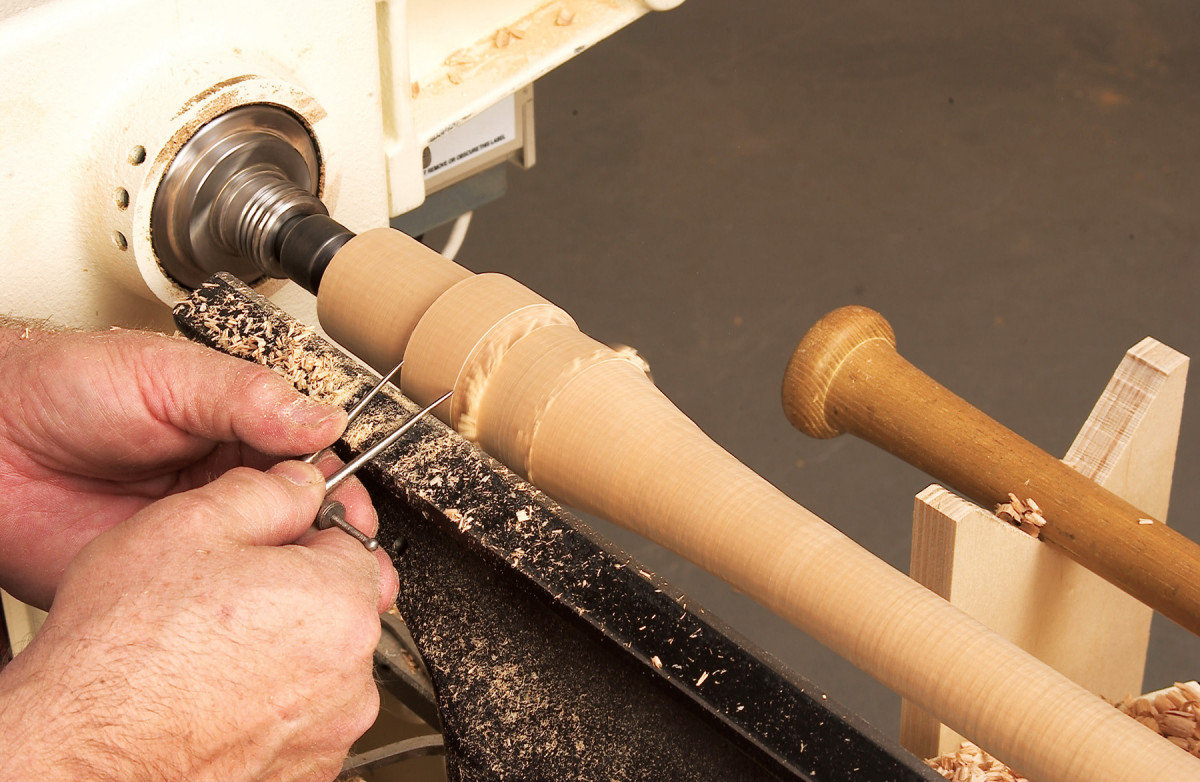
3. Size the bat with calipers and a parting tool. Transfer diameters from a drawing or an existing bat (called a master) onto the blank. Lightly push the calipers into the work as you reduce the diameter with the parting tool until the calipers just slip over the cut.
Complete your supplies with a pair of locking outside calipers. Make sure the caliper’s points are fully rounded smooth. Sharp points can catch when used to size your bat. Round the points with a file and smooth with sandpaper. A pair of dividers is helpful—although optional—for sizing the knob’s width. A plastic center finder is helpful in locating centers on round bat blanks.
Prepare the Blank
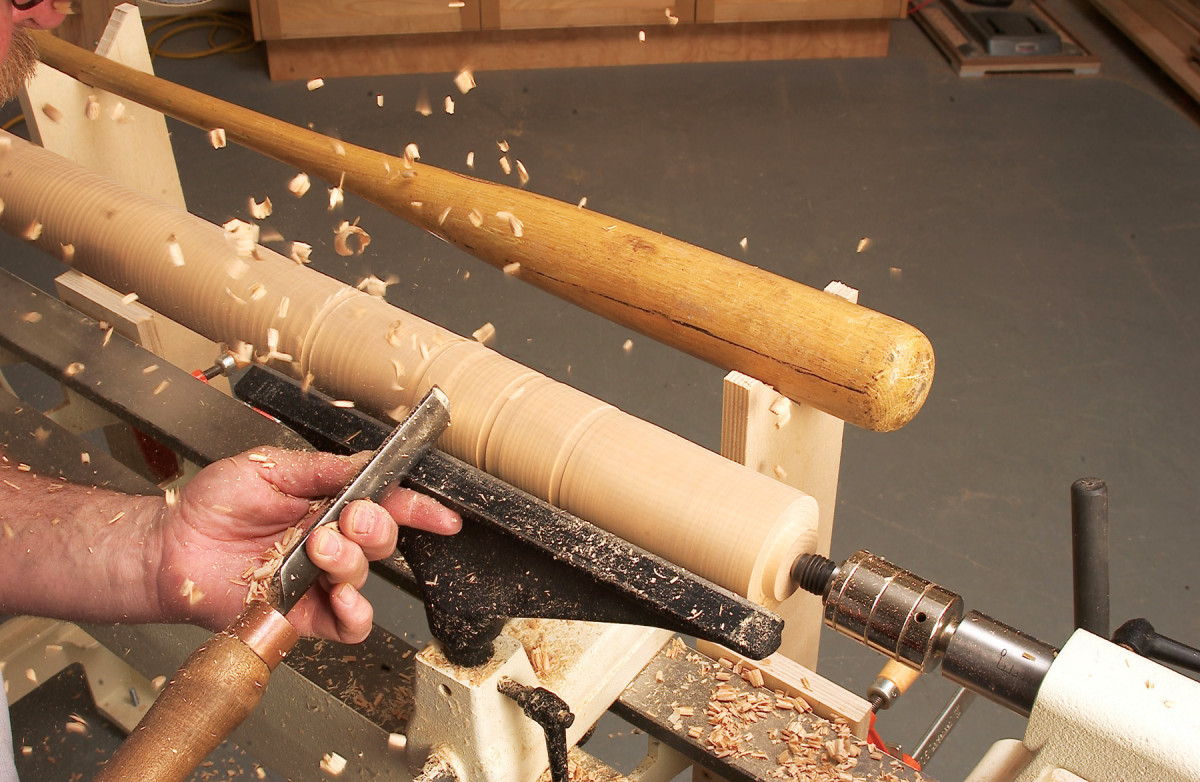
4. Use a spindle-roughing gouge to “connect the dots”. The goal is to join and blend the different guide diameters to create a smooth cylinder that tapers towards the handle.
Determine the type of the bat you intend to turn: Major League, softball or Little League. This can be based on an old favorite you’d like to duplicate or from scratch using a drawing based on regulations dimension (see diagram). The blank should be 1 to 2 inches longer than the finished bat to allow for waste at both ends.
Mark the centers on the blank and mount it on the lathe. I place the barrel end of the bat at the tailstock. Then I true the cylinder to the axis of the lathe.
Shape the Barrel
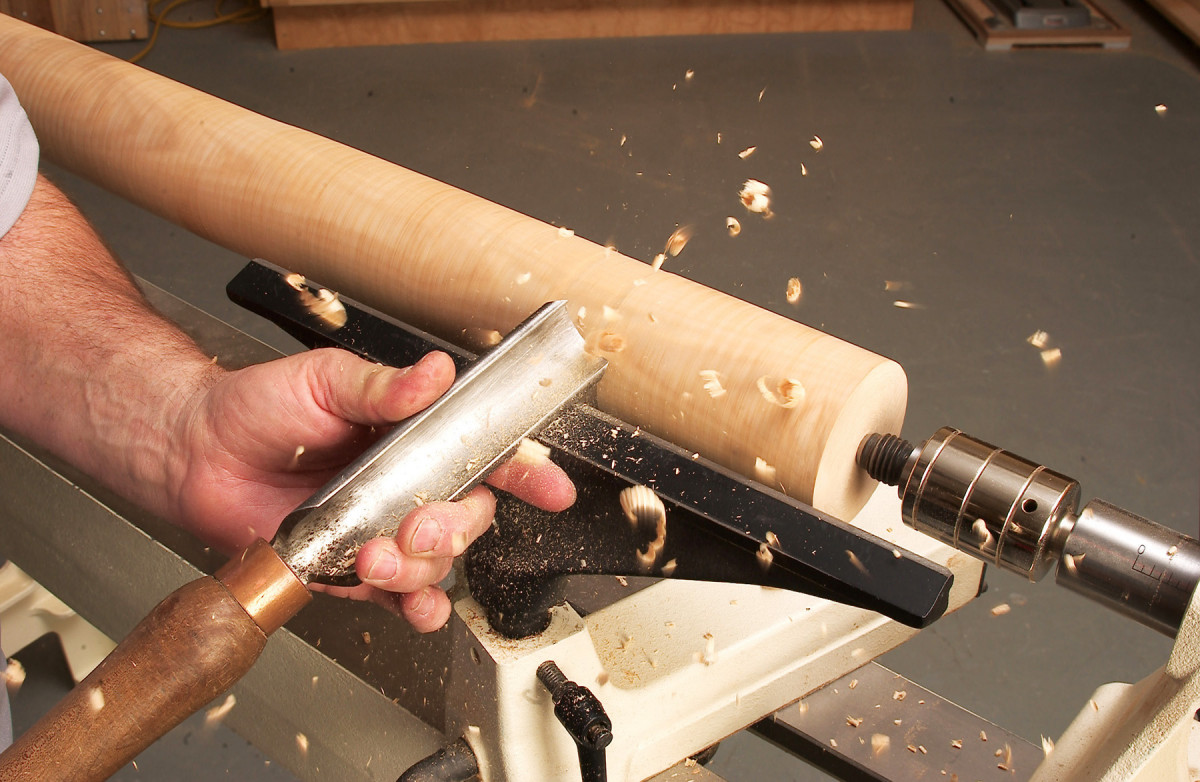
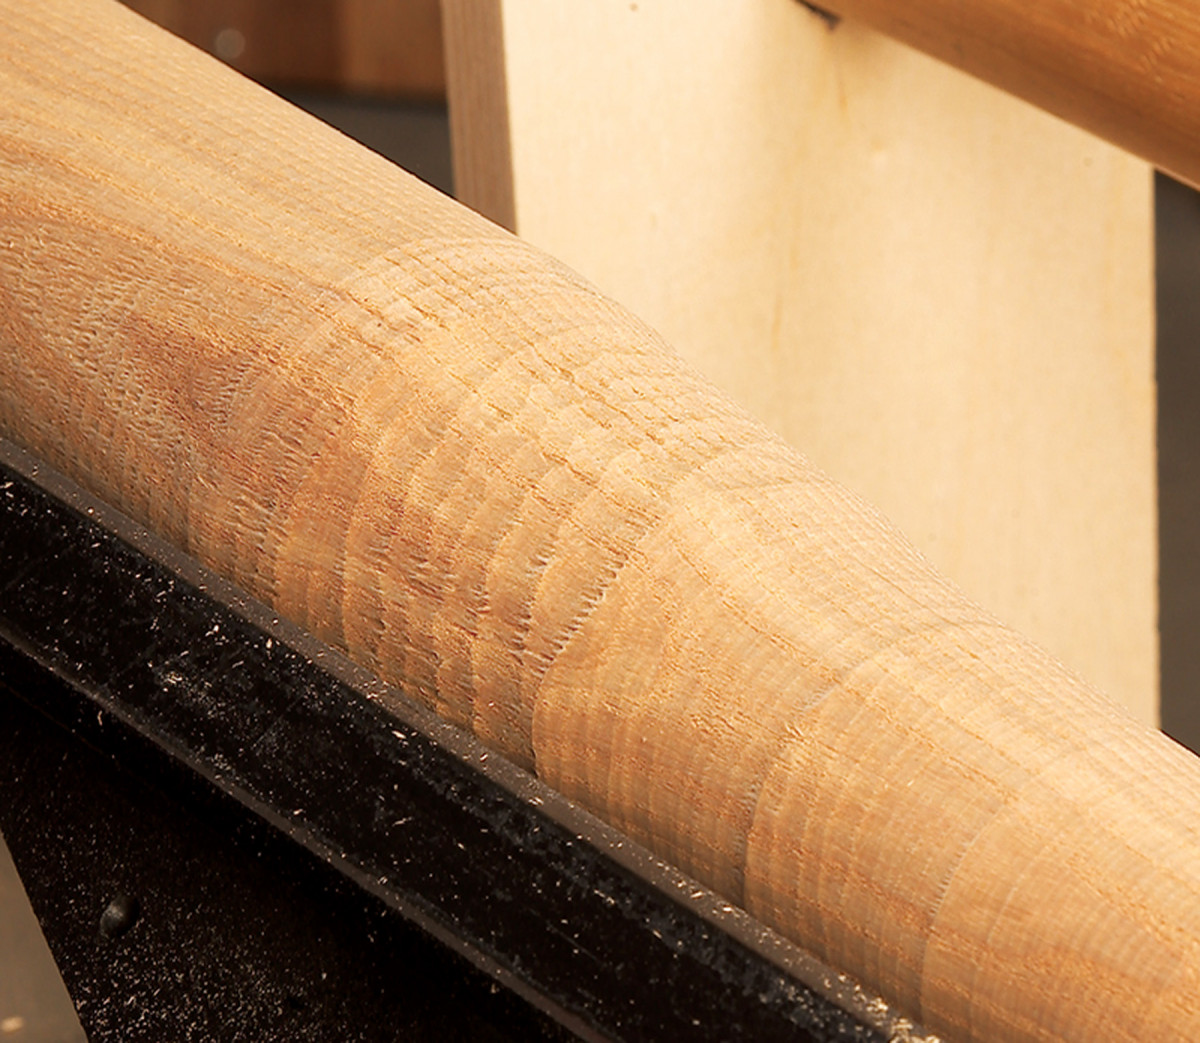
5. Take light cuts and create level transitions as you approach the final shape of the barrel. Work from the large diameter to the small to minimize tearout.
Shape the widest part of the bat, called the barrel, first. You want to preserve the thick diameter on the blank as long as possible to avoid chatter from vibration. Start by making guide diameters on the first third of the blank with calipers and a parting tool. Set the calipers about 1/8“ wider than the desired diameter to allow for final shaping and sanding. If you’re duplicating a bat, place the master directly behind the mounted blank.
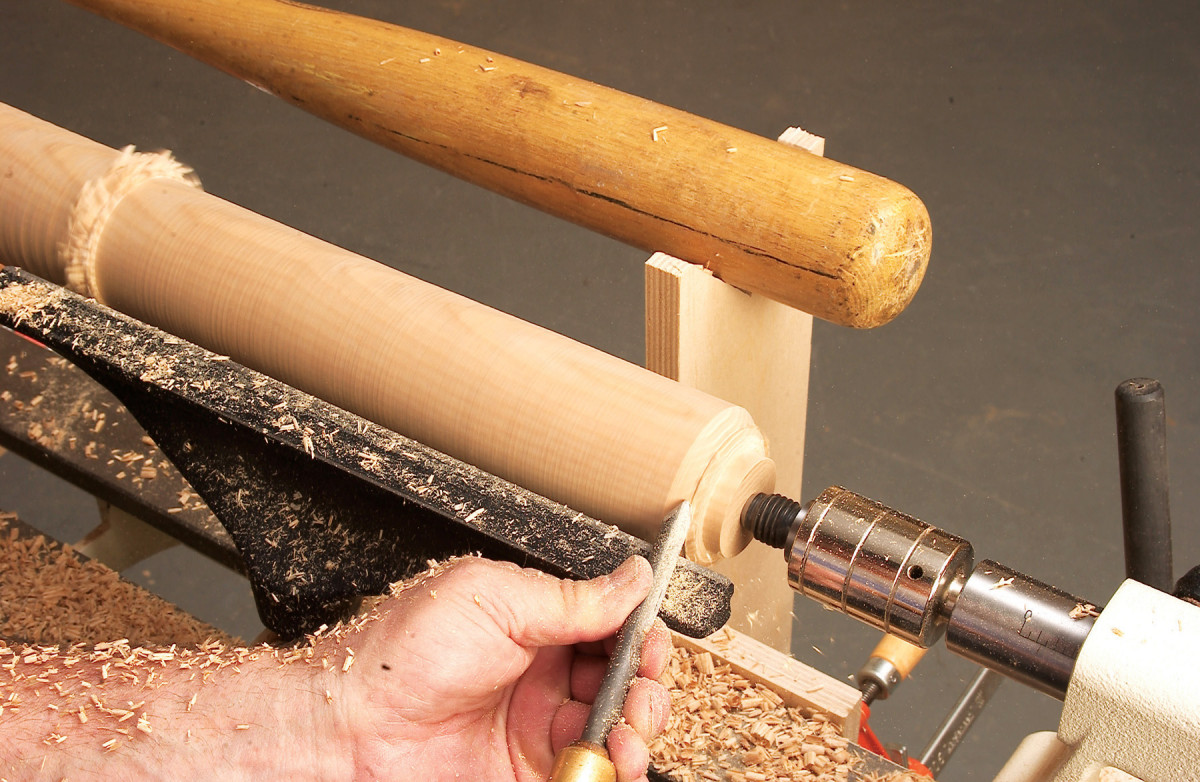
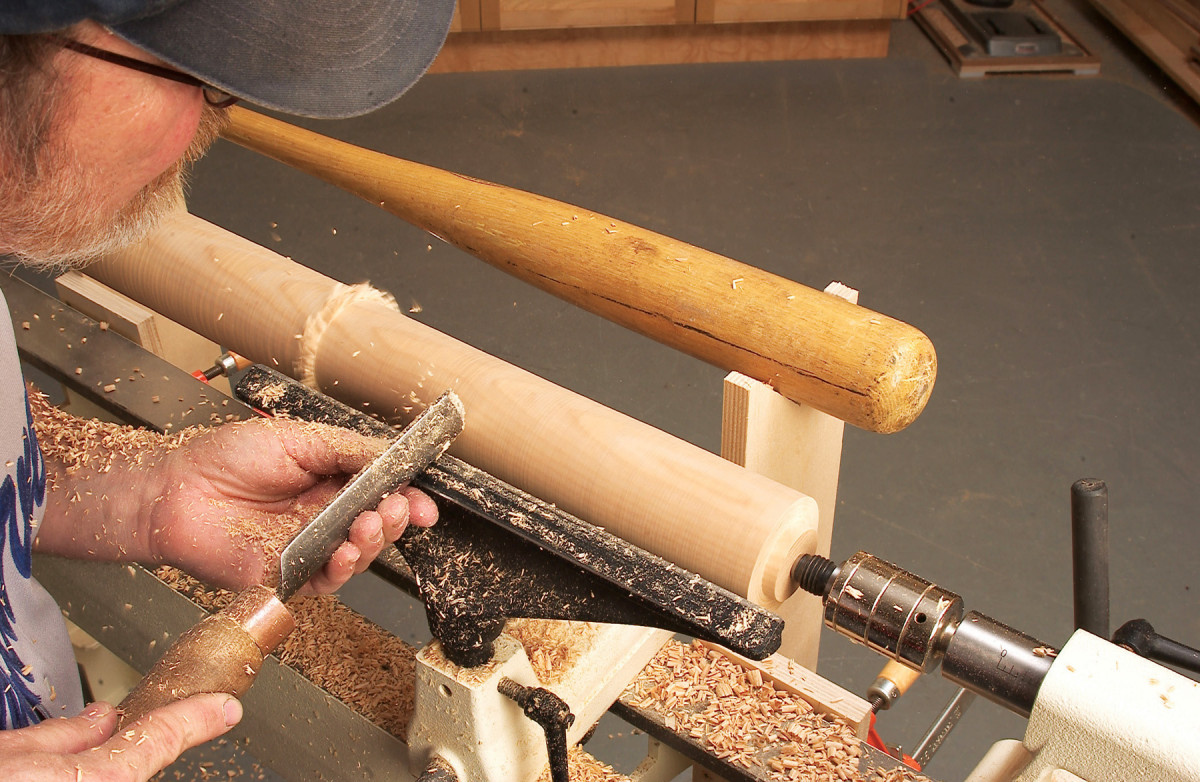
6. Roll over the end of the barrel with a detail/spindle gouge. Shoot for a smooth, gradual curve like the master has. Leave about a 1/2″ by 2″ diameter waste area near your live center for now.
Next is a process of connecting the guide diameters with the spindle-roughing gouge. Shoot for smooth transitions between the guide diameters. Go ahead and roll over the end of the barrel at this time.
Shape the Handle
7. Spiraling or chatter is a big challenge for the bat maker. Spiraling results from the wood flexing, or the tool bouncing or a combination of both. As the bat gets thinner, the problem becomes more pronounced.
Mark and shape the middle third of the bat in the same way you shaped the barrel. When you reach the last third of the bat, remove some of the waste material towards the knob end first to give you some working room. Spindle work is best done from larger to smaller diameters because it produces the least amount of tearout. As you reduce the diameter of the bat, you will experience chatter. This usually shows up as spiral marks on the surface of the wood.
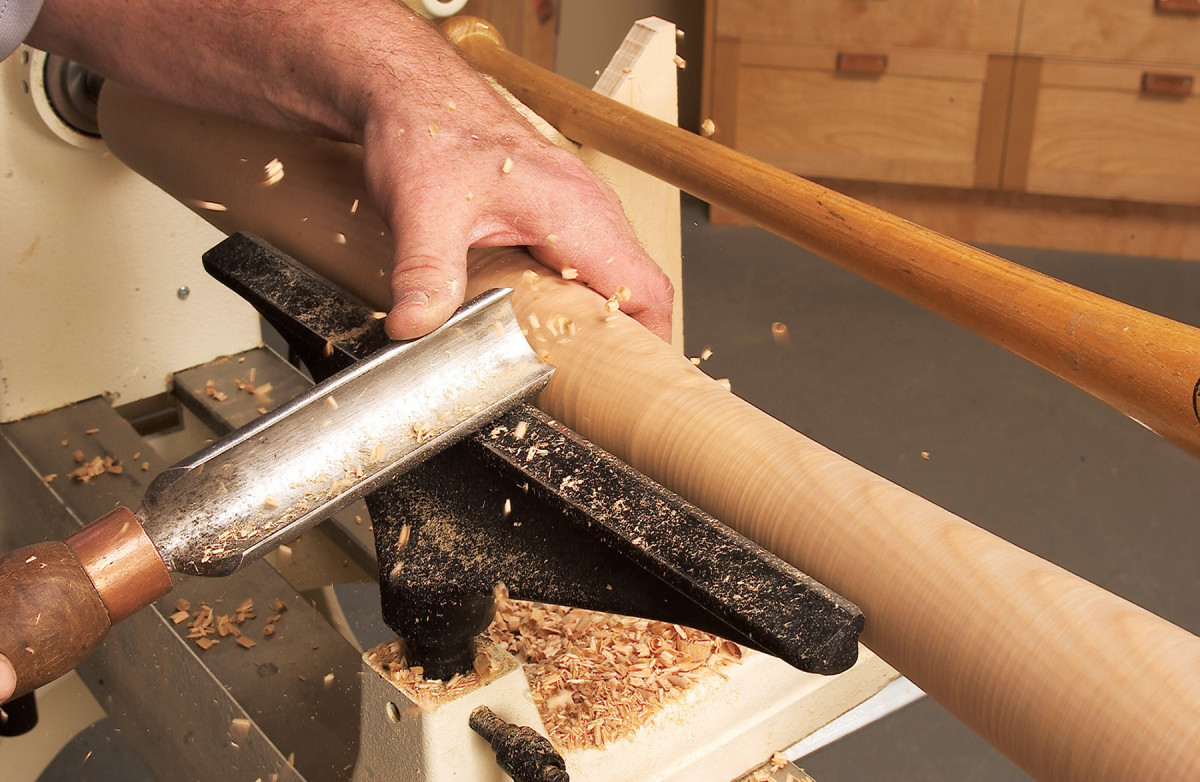
8. Support the work with your hand to reduce spiraling. This is a safe and common practice. Make sure there is little gap between the tool rest and the wood. Keep your hand pressure on the back of the blank.
To reduce chatter, use a sharp tool and keep it firmly planted on the tool rest. Take light cuts. Avoid pushing hard or you’re bound to get chatter from the flexing blank. Even with all these tactics, you will need added support as the handle narrows. The traditional method is to support the narrow area with your hand. Another option is to employ a steady rest. I use a steady rest when I get to about the middle of the blank.
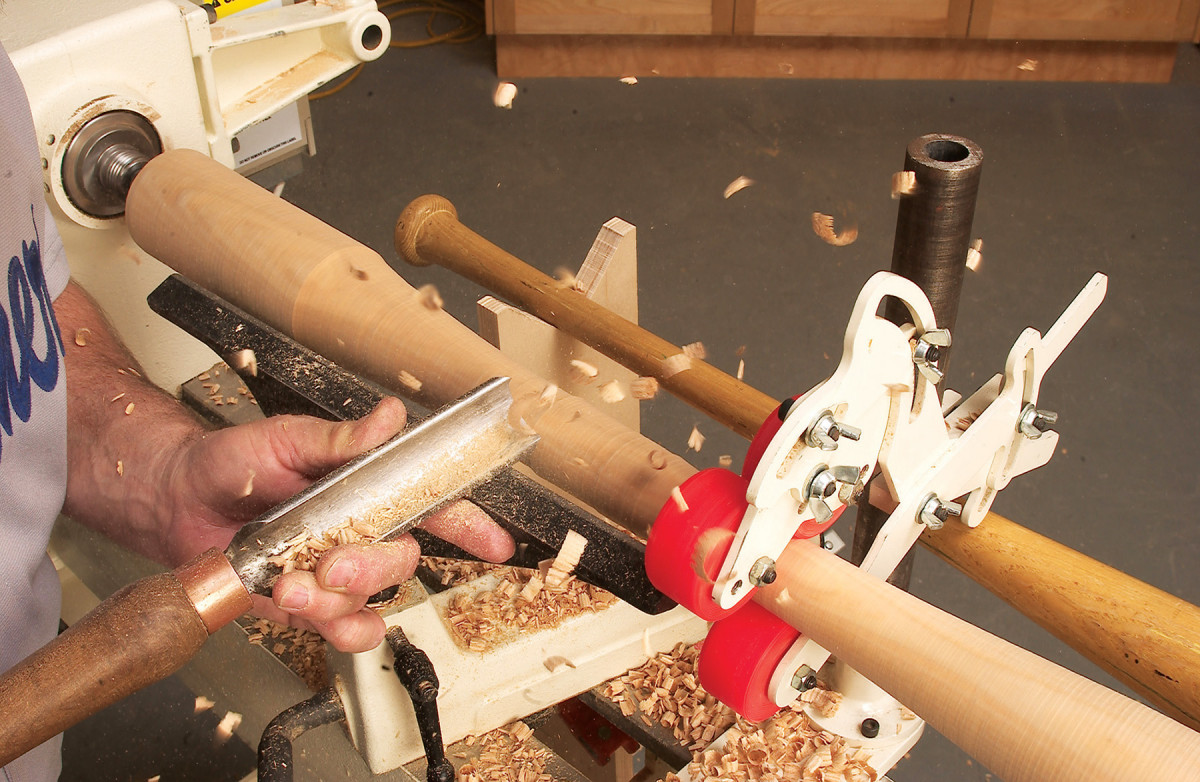
9. A steady rest is an alternative to the hand-support method. It virtually eliminates chatter and spiraling because the work is supported on three sides at once. A steady rest requires a smooth area for the wheels to run upon.
Continue the process of cutting and connecting the guide diameters working from the large diameters on either end towards the narrowest point on the handle.
Shape the Knob
10. Work the area to the right of the knob. Cut from the large diameter towards the small diameter (also known as cutting downhill). This produces the smoothest cut with the least tearout.
As you approach the end of the bat, go ahead and lay out the knob area. Establish the knob’s width and diameter. Then reduce the diameter on the knob’s right side, blending into the handle. Leave a 1/2” to 1″ length of waste material past the end of the knob. After the handle area is completed, finish off the knob by rolling away the corners with the spindle/detail gouge.
Finishing Touches
11. Establish the width of the knob with a pair of dividers. Keep the wood on either side of the knob as fat as possible until the handle area is almost complete. This helps reduce spiraling from a flexing blank.
Sand the entire piece, working through the different grits up to 180. Turn the waste material on both ends down to slightly larger than your lathe centers. Remove the bat, cut the waste off with a handsaw (such as a small Japanese saw), and finish sanding the ends of your bat by hand or a disc on the lathe.
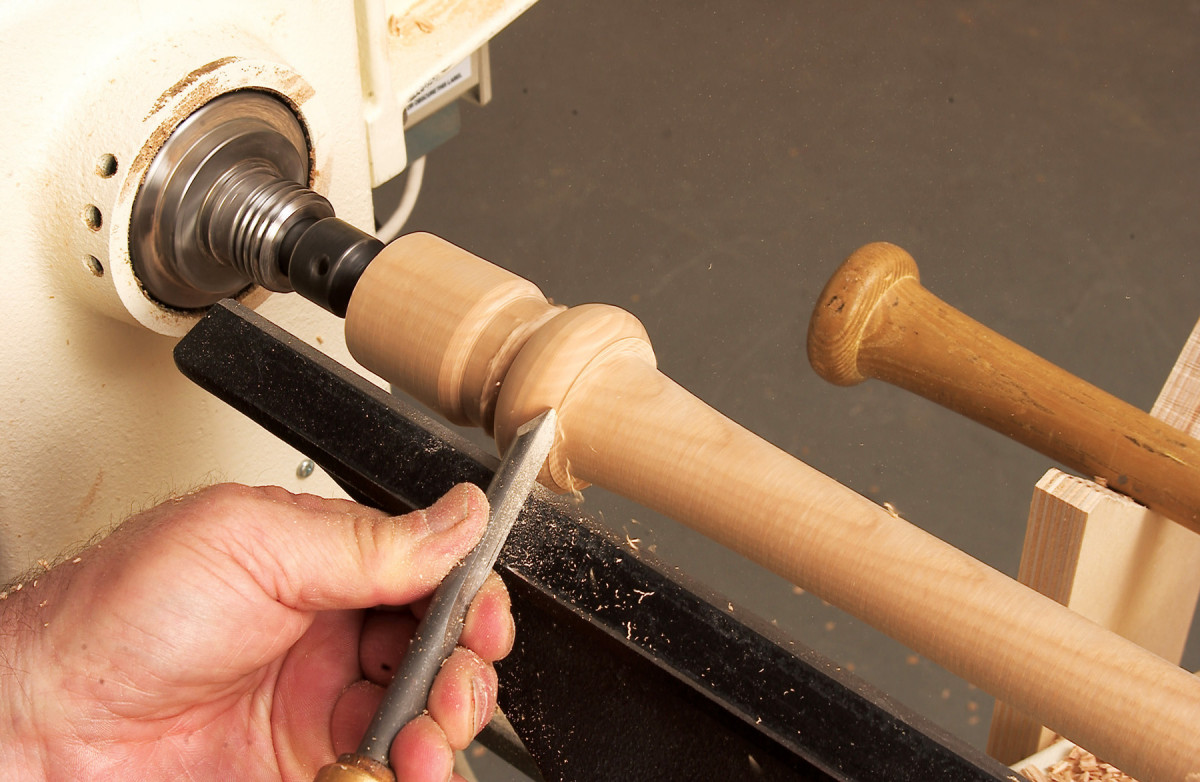
12. Roll the knob using the spindle/detail gouge. Start at the widest portion of the knob and ride the bevel of the gouge down to the handle or waste block. The open or U-shaped portion of the gouge faces the direction of the cut.
Most bats have brands to indicate how the bat should be held. Always swing the bat with the label up to reduce the chances of breakage. The goal is to hit the ball on the radial grain, or what some woodworkers call the edge grain—rather than the tangential or face grain. So, put your brand on the grain that looks like chevrons rather than the edges of plywood. Use a woodburning tool to put whatever name or symbol you wish to use as your brand.
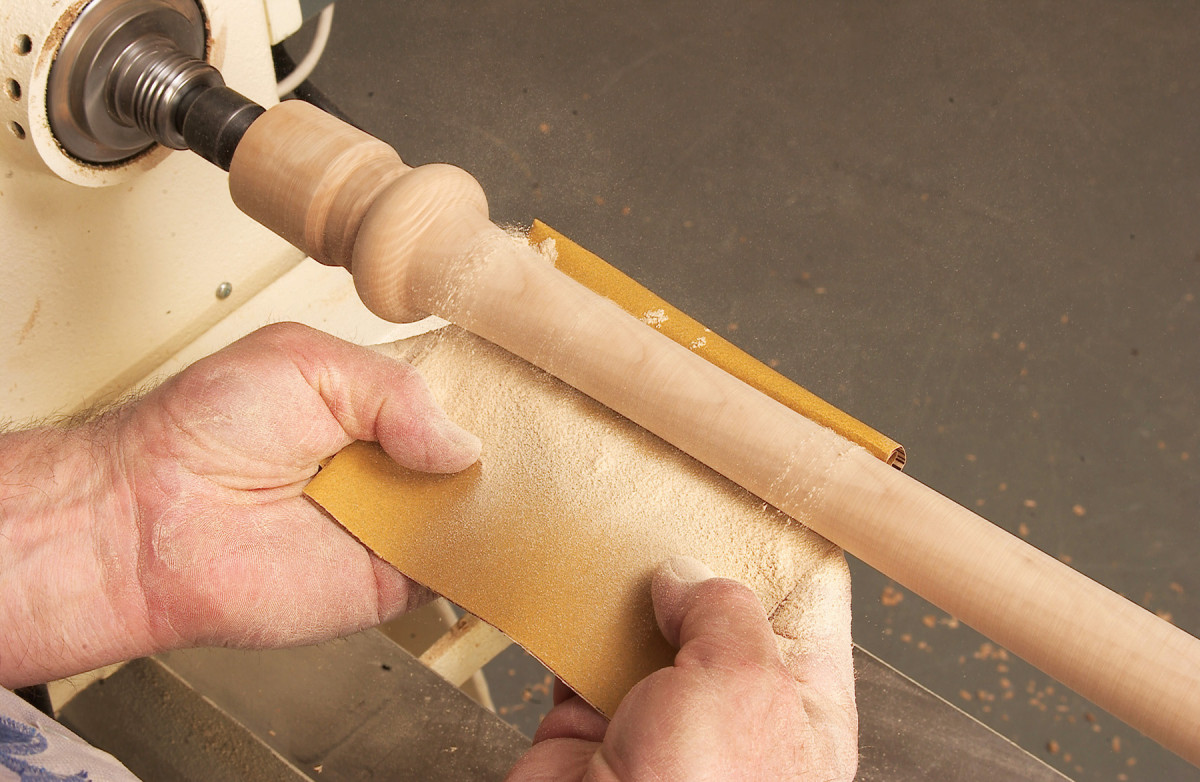
13. Sand your bat with the tool rest, steady rest, and master bat removed. Start with 100 grit followed by 120, 150 and 180 grit paper.
I recommend finishing your bat. A finish gives the bat a nicer look as it brings out the grain. Plus, it offers some protection from moisture. All types of finishes have been used for bats, including shellac, lacquer, varnish (water-based or oilbased). For this bat I am using a wipe-on poly; three coats is sufficient. Some players prefer the handle area to be free of finish—for better gripping and applying pine tar. Now, it’s time to hit the field!
Here are some supplies and tools we find essential in our everyday work around the shop. We may receive a commission from sales referred by our links; however, we have carefully selected these products for their usefulness and quality.