We may receive a commission when you use our affiliate links. However, this does not impact our recommendations.

They’re the next best thing to a giant assembly table. Maybe better!
The next time you need a sturdy, level work surface, I’ve got the perfect solution for you: sawhorses and a pair of torsion beams. Torsion beams are incredibly strong and will always be dead straight; they’re easy to make and inexpensive.
But best of all for a crowded shop, torsion beams don’t take up a lot of room. They’re easy to store in a corner or on a rack. You can make torsion beams in various lengths and just pull out the size you need, when you need it.
What Is A Torsion Beam?
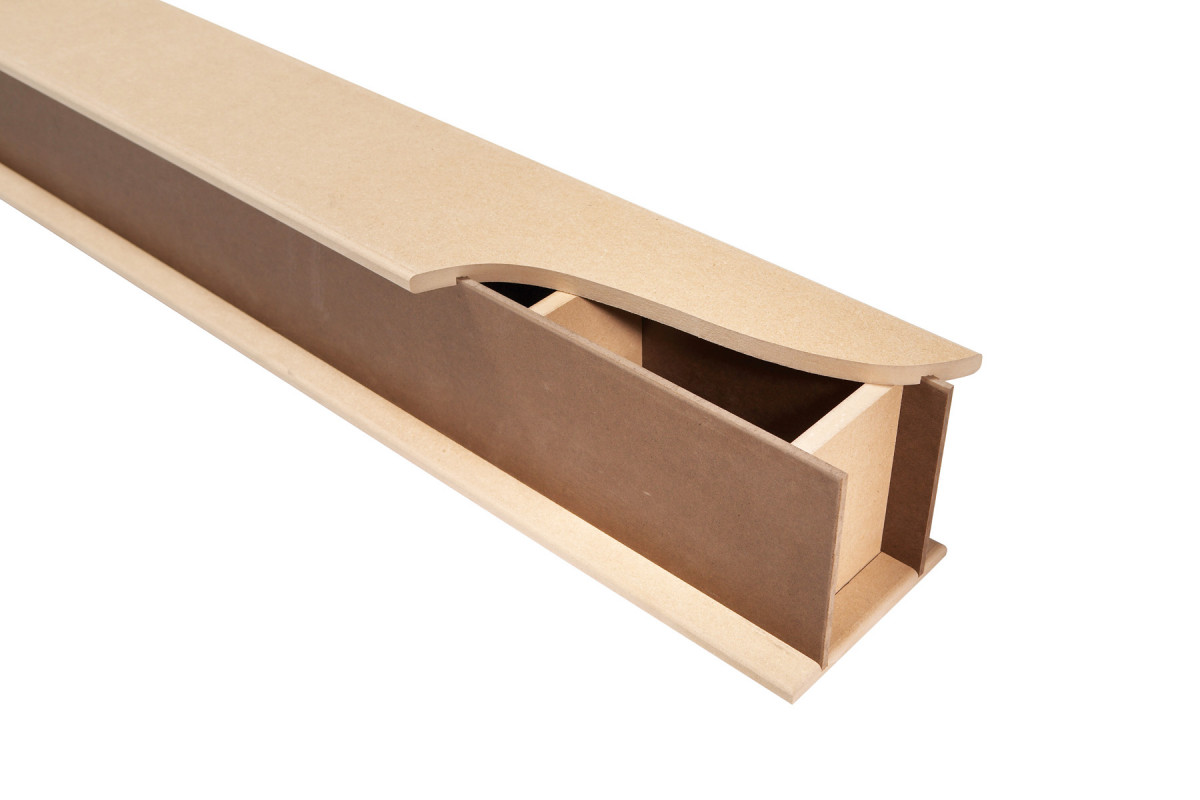
 A torsion beam is simply a narrow torsion box–a structure that’s designed to resist bending and twisting, yet be light in weight. It’s based on the same engineering principles as a skyscraper’s I-beams or the rails of a train track. A torsion beam is composed of three sections: a top and bottom, two sides, and a series of web pieces inside.
This torsion beam is made from 1/2″ MDF and 1/4″ tempered hardboard. Both of these materials are fairly flexible, but when glued together, the beam is almost as stiff as if it were completely solid. This beam is 6″ square and weighs 3.3 lbs. per lineal ft. A 6′ beam, for example, weighs only 20 lbs.
What Are Torsion Beams Used For?
 If you had a large, perfectly flat, rock-solid assembly table in your shop, you probably wouldn’t need torsion beams. Got one? Well, most folks with small shops don’t, either.
Placed on top of a pair of sawhorses, torsion beams are basically a knock-down, modular assembly table. Torsion beams are ideal for a small shop because you can store them in a corner or hang them on a wall and set them up whenever needed. It’s best to have a few pairs in different sizes, from 4′ to 8′ long, so you don’t have to take up any more space than your project needs.
To make a terrific worktable, place a piece of plywood or a hollow-core door on top of the beams.
Materials
Make the beams from 1/2″ MDF and 1/4″ tempered hardboard. Both materials are quite flexible–and that’s actually an advantage. Unlike plywood, which can be warped, these materials will stay flat and straight as you build the beams.
A simple requirement is the key to success: you must be able to saw a straight line. To accurately cut large sheetstock, you should have an outfeed roller or table behind your tablesaw. It also helps to have a similar support in front of your saw.
The beams are 6″ square and can be made any length you wish. They’re best made in matching pairs, so you should cut enough parts to make two at a time. I’ve found that pairs of 4′, 6′ and 8′ beams fit all my needs. To build this set of three pairs, you’ll need two sheets of MDF and two sheets of hardboard. But even one pair, of any length, is handy to have around the shop.
Cutting List For two 4′ torsion beams
 Mill the parts
Begin by cutting the top and bottom pieces to length and width. Cut the side pieces to final size, too.

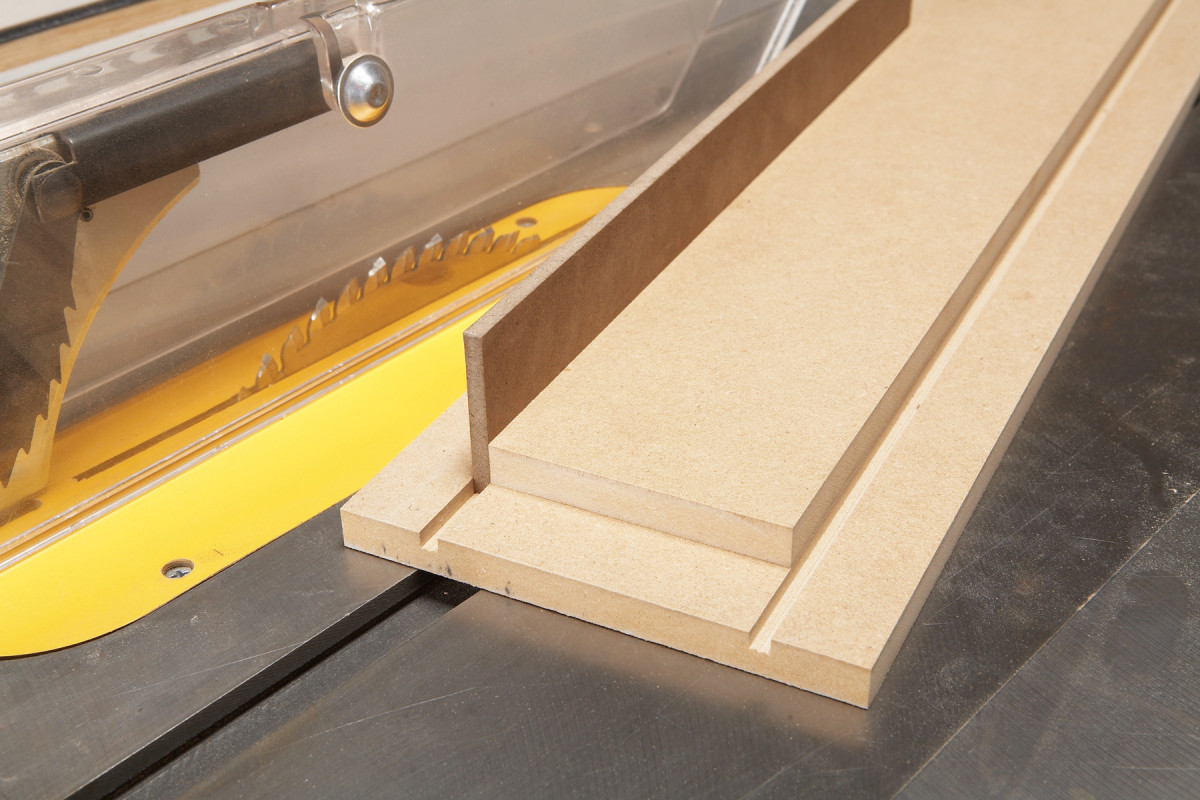
1. Cut shallow grooves in the top and bottom pieces of the beams. The sides should fit loosely in the grooves. Make two sets of parts, to build a pair of beams.
Cut 3/16″ deep grooves to receive the sides (Photo 1). Make them about 3/16″ wide, using a standard blade. (The hardboard is only nominally 1/4″ thick; its actual thickness is usually closer to 3/16″.) Make the first pass on each piece with the fence set 1″ from the blade. Then, move the fence approximately 1/16″ and cut a second set of grooves. Make a few trial cuts in scrap stock to get the correct fence setting–it’s a fussy fit. When you’re done, the sides should drop into the grooves with little or no resistance. Use featherboards to ensure that the grooves are parallel and have a consistent depth.

2. Rip a blank for the web pieces. Make it exactly the same width as the distance between the grooves.
Next, cut the web pieces to width and length. Their exact dimensions are determined by the width and depth of the grooves. First, rip one or more blanks to width (Photo 2), then cut the web pieces to length (Photo 3).

3. Temporarily assemble the top, bottom and sides. Crosscut the web pieces so they exactly fit between the top and bottom.
To make the beams comfortable to handle, rout a 1/8″ roundover on all edges of the top and bottom pieces. Check that all the sides fit into the grooves (there may be some variation in the hardboard’s thickness). If one edge is too thick, sand it with 80 grit paper until the piece slides in the groove. Break all the edges of the sides with 80 grit sandpaper so they will be easier to fit into the grooves when you glue the beams together.
Assembly

4. Disassemble the beam and mark lines across the bottom to locate the web pieces.
Mark the locations of the web pieces on the bottom piece (Photo 4). Space the outer web pieces 1″ in from the ends. Space the remaining web pieces about 8″ to 10″ apart.

5. Assemble one beam, without glue, and turn it on its side. This creates a level surface for gluing up the other beam.
Create a level surface for gluing the beams. The easiest way to do this is to use one of the beams itself as a gluing platform (Photo 5). This is an important step. If you were to glue the beams on a bowed or twisted surface, they wouldn’t come out straight.

6. Place the second bottom piece on the clamped-up beam. Run a thick bead of glue down both grooves.
Place the bottom on the platform and run a generous bead of glue down both grooves (Photo 6). Next, drop the sides into the grooves.

7. Place the sides in the grooves. Apply glue to all four sides of each web piece and stand them in position.
Run a thin bead of glue around all four sides of each web piece, and stand them on their lines (Photo 7).

8. Apply glue to the top piece and drop it in place. The next day, use this beam as a support for gluing up the other beam.
Run beads of glue down the grooves in the top piece and put it in position, starting at one end (Photo 8). As you lower the top, the sides will automatically align with the grooves. Make sure the top is seated along its full length by sighting down it or placing a straightedge on it.
Clamp every 8″ or so, or simply place weights (bricks or cinder blocks) on top of the beam.
Cutting List For two 4′ torsion beams
|
Part |
Qty. |
Th x W x L |
|
Top and bottom |
4 |
1/2″ x 6″ x 48″ |
|
Side |
4 |
1/4″ x 5-3/8″ x 48″ |
|
Web |
14 |
1/2″ x 3-1/2″ x 5″ |
Here are some supplies and tools we find essential in our everyday work around the shop. We may receive a commission from sales referred by our links; however, we have carefully selected these products for their usefulness and quality.


