We may receive a commission when you use our affiliate links. However, this does not impact our recommendations.
Oil it, spray it, shellac it, or glaze it. This is how to make cherry look great.
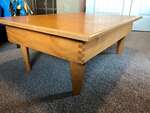
Cherry is gorgeous wood, but as you’ve probably discovered, it can be nasty to finish. Cherry boards come in all different colors, its sapwood and heartwood don’t match, it can look really blotchy and it darkens as it ages.
Take advantage of my 30+ years of experience with cherry. Here’s everything I’ve learned about choosing lumber, getting rich color and a uniform appearance.
Color varies from board to board
To make finishing easier, choose boards that look the same. Some suppliers sell boards from the same tree together, to ensure a good match. Usually, though, you’ll be on your own.
If you plan to use solid cherry along with cherry plywood, stand the solid stock against the veneer in good, natural light, so you can compare the colors. Wetting the surfaces with mineral spirits is another way to get a true indication of color.
If you can’t find enough boards of the same color for your entire project, group similar ones together for the various parts. Everyone will see that single off-colored board in the top, but no one will notice if one side of a cabinet is a slightly different color than the other.
Cherry darkens over time
Cherry’s color deepens from a pale pinkish-tan to a deep red-brown as a result of its exposure to air and light. The color change is so rapid at first that within hours, a partially covered board can develop a shadow line that can be hard to sand out. It’s important to keep freshly planed boards either completely covered or completely exposed.
After the first couple of weeks, darkening becomes more gradual. Most finishes will slow cherry’s color change, especially ones with UV blockers (check the label), but they don’t stop it. At first, linseed and tung oil finishes give cherry a deeper, richer appearance than film-forming finishes like shellac, lacquer and polyurethane. But after a year or so, they’ll all look pretty much the same.
If you want to give cherry a dark color right away, don’t use oil stain. It colors cherry’s pores and makes it look unnatural. Sealing the surface and then applying coats of colored glaze is the way to go.
Sapwood and heartwood
The difference between cherry’s white sapwood and rosy-tan heartwood becomes more distinct over time. The heartwood darkens, but the sapwood doesn’t. The best way to deal with sapwood is to cut it off, but it can be finished to blend with the heartwood.
Thirsty spots and curly figure
Most cherry boards contain extra absorbent spots and pockets of curly figure that are more distracting than spectacular. With both “problems,” finishing results in a mottled appearance. To some, this is part of cherry’s inherent beauty; to others, it just looks blotchy. Before you choose a finish, check your boards for mottling by wiping them with mineral spirits.
Choosing a finish
There are two types of finishes for sealing and protecting wood: Those that dry to a hard film and those that don’t.
Film-forming finishes can be applied by wiping, brushing or spraying. Each layer you apply builds the thickness of the film. Finishes made from drying oils soak into the wood’s pores, but don’t harden enough to form a surface film.
They have to be wiped, because you can’t leave any on the surface. On cherry, drying oil finishes emphasize a mottled appearance. Film-forming finishes, like shellac, lacquer and polyurethane, minimize it. Polyurethane disguises mottling and curly figure the best, but it gives cherry less depth than shellac or lacquer.
Wipe-On Drying Oil Finish
Tung oil and boiled linseed oil soak into the wood, lodging in even the tiniest pores. This makes cherry’s super-absorbent spots and curly figure stand out. The deep-amber color of these oils amplifies the effect. If you like mottled cherry, use a drying oil finish.
Wipe-ons are the most worry-free finishes to apply. They’re dust-free and you don’t have to contend with drips, sags, or brush marks. Wiping can be tedious work, though, and you’ll have to safely dispose of oil-soaked rags.
Brush, pour or rub the oil on the wood, according the manufacturer’s directions. These finishes are usually rather thick, but heating them makes them less syrupy and easier to apply. Wipe all excess oil from the surface. After the first coat is completely dry, smooth the surface with very fine sandpaper or steel wool and apply a second coat. Once the wood has a uniform sheen, additional coats aren’t necessary.
Most wipe-on finishes are blends of oil and varnish, so they’re actually film-forming finishes (see Sources, below). These blends also contain solvents to make them easy to apply and driers to make them dry quickly. Wear gloves, a respirator and maintain adequate ventilation.
Pure drying-oil finishes contain only tung oil or linseed oil (see Sources). They have no added driers or solvents, so they’re safer to use, but they dry very slowly.
Safety Tip: As boiled linseed oil dries it can generate enough heat to cause a pile of oil-soaked rags to catch fire spontaneously. Spread the rags out to dry, allowing plenty of air circulation around each one (I take them outside!). It’s okay to throw the stiff, dried rags in the trash.
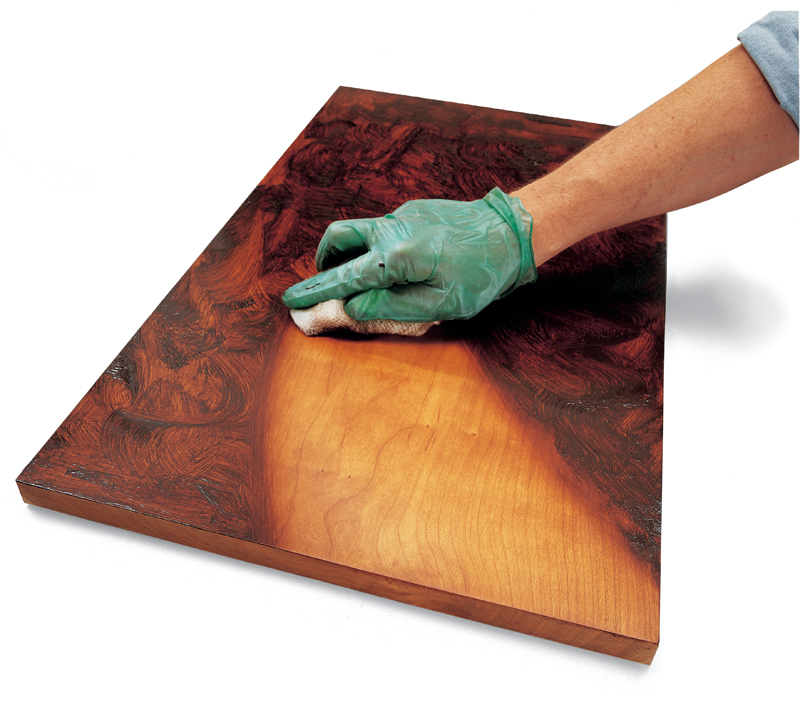
Wipe-On Drying Oil Finish

Oil finish gives cherry a rich tone, because of its amber color, but the results are unpredictable. Cherry often absorbs oil unevenly, and parts that absorb a lot of oil look darker. The result is a mottled appearance. You’ll either see this as part of cherry’s appealing character or as unattractive blotches.
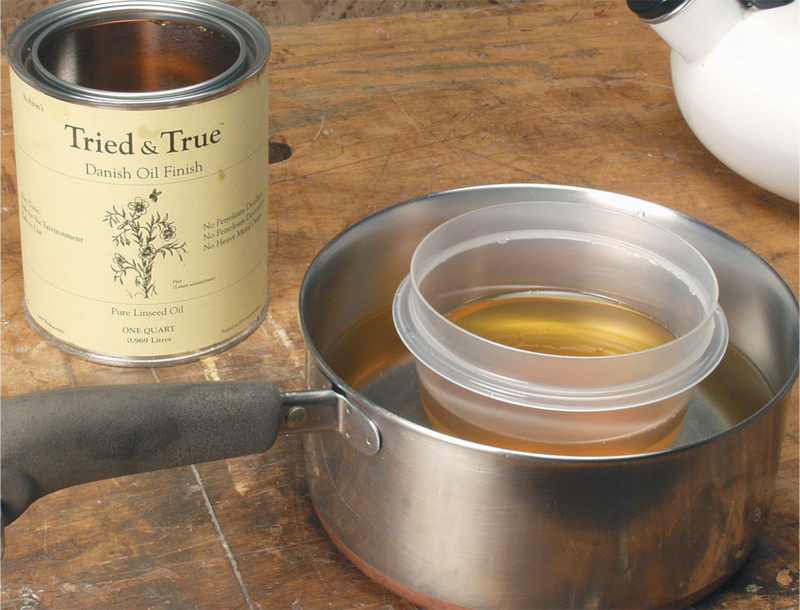
Warm oil finish in a bath of hot tap water to make it easier to apply. Keep the oil warm by occasionally changing the water. Note: Never heat finishes on your stove.
Sprayed-On Film Finish
Finishes that harden into a film minimize cherry’s mottled appearance because they have much less color than drying oils, and they don’t soak in as much. The first coat of a film-forming finish seals the wood, so successive coats lay on top of each other. Each new coat thickens the finish film.
Spraying these finishes from an aerosol can is fast and convenient. It’s great for getting into corners and covering intricate shapes. Spraying also eliminates brush stokes, and no brushes or rags makes cleanup simple. But, you do have to deal with overspray and nasty fumes.
You can find shellac, lacquer and polyurethane in aerosol cans (see Sources). I think shellac and lacquer look the best on cherry. Oil-based polyurethane dries the slowest, but it’s the most durable. You can get a good-looking, durable finish by following an initial sealcoat of shellac with topcoats of polyurethane. Don’t use waterborne poly. It leaves cherry looking pale and parched.
The secret with aerosol spray is to go easy. Sanding off drips and sags from one heavy coat takes a lot more time than spraying and sanding two light coats. Wear a respirator and maintain adequate ventilation any time you spray an aerosol finish. Here are some guidelines for aerosol spraying:
1. Keep the nozzle perpendicular to the surface and spray from a consistent distance, between 8″ and 10″ away.
2. Move the can at a steady rate. Start spraying before you reach the surface and don’t stop until you’re past it.
3. Move your project around (you may even want to turn it upside down) to get the best spraying angle. You can spray up and down as well as side to side.
4. Spray tough-to-reach areas first and areas that are most visible last.
5. Sand between coats with 280 grit or finer paper.
6. Use a new can for the final coat. Then you won’t have to worry about a nozzle that spits because it’s dirty or running out of finish.
Tip: An aerosol tip that sprays in a wide fan pattern is less likely to leave sags and runs. Just look at the nozzle. If it’s round, it sprays a cone pattern; if it’s rectangular, it sprays a fan. You can adjust fan-type nozzles to spray horizontally or vertically. Cans with fan-spray nozzles cost may more, but they’re worth every penny.
Sprayed-On Film Finish

Film-forming finish keeps cherry from looking blotchy, but doesn’t significantly enhance its tone. The cherry becomes richer looking on its own, as it ages under the finish. Within a year, it reaches a pretty coppery color.
Shellac and Glaze
The versatile shellac and glaze process is my favorite finish for cherry. It allows you to add color wherever it’s needed, in a spot, or over the entire piece. It also helps to blend mismatched cherry boards or plywood and solid cherry. It disguises light-colored sapwood and hides mottling and unwanted curly figure. You can use it to make new cherry look older, because each coat of glaze deepens the color.
The technique is simple. First, apply a thin coat of shellac (Step 1). Sand it lightly, apply the colored glaze (thinned burnt umber artists’ oil color—more on this later) and wipe it off. That’s it. Because the shellac has sealed the wood, the color goes on evenly, without making the surface look muddy. Once you’re satisfied with the color, topcoat with polyurethane.
If you have serious color mismatches to deal with, two-stage coloring may work best. Put a coat of golden-brown-colored dye on the unfinished cherry, before the shellac (see Sources). It tempers the color differences so they’re easier to blend with glaze.
I like to brush shellac, but you can spray it, too. Sand each coat with 280-grit sandpaper (shellac takes about an hour to dry). Sand evenly and carefully, because glaze will accentuate any scratches and leave a dark line wherever you cut through the shellac.
Glaze is nothing more than thinned paint. I make glazes using artists’ oil colors (Step 2). Artists’ oils (see Sources) contain very finely ground pigments, so they don’t look muddy, and you can match just about any wood by mixing colors. Liquid glazing medium (see Sources) makes the oil color spread evenly and dry faster.
Once you apply the glaze, you have plenty of time to work with it before it dries (Steps 3 and 4). It’s also reversible (Step 5). Once the glaze is dry (overnight, in good conditions), you can deepen the color with a second coat, add additional glaze selectively to camouflage bad spots or highlight details, or finish with polyurethane. As with other finishes, cherry will continue to darken underneath the glaze, although you’ll hardly notice it.
Shellac and Glaze

Shellac and glaze adds rich color and minimizes blotching. Shellac seals the wood so the glaze, which is thinned oil paint, adds color evenly. You can wipe the glaze hard, or feather it, leaving more in some spots than others. Glaze is great for disguising light sapwood.
The Process
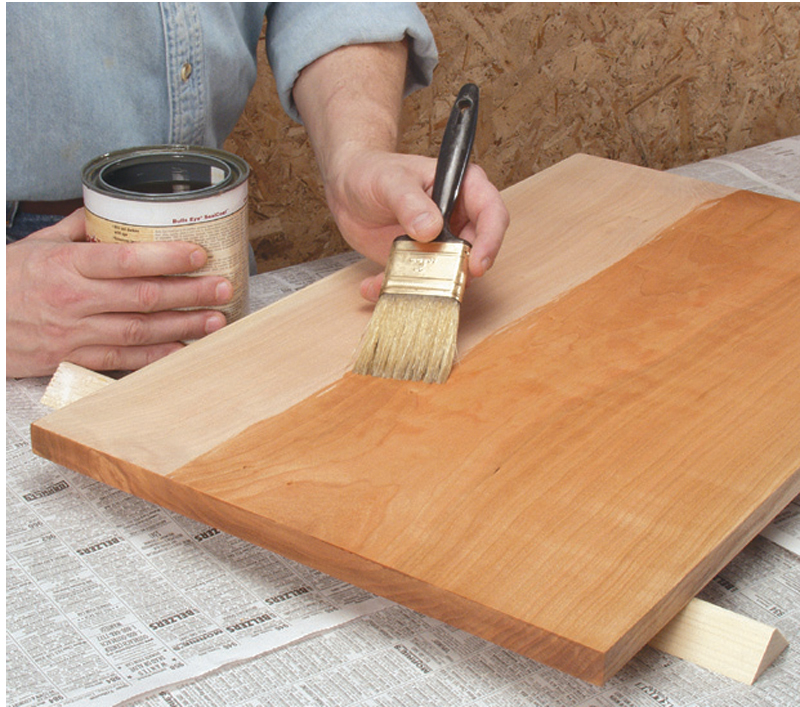
1. Seal the surface with dewaxed shellac
(see Sources, below). On cherry, a single
thin coat (2 lb. cut) allows some glaze to
lodge in the pores. This looks odd to me,
because cherry’s pores aren’t naturally
dark. Two thin coats, sanded between,
keeps color out of the pores.
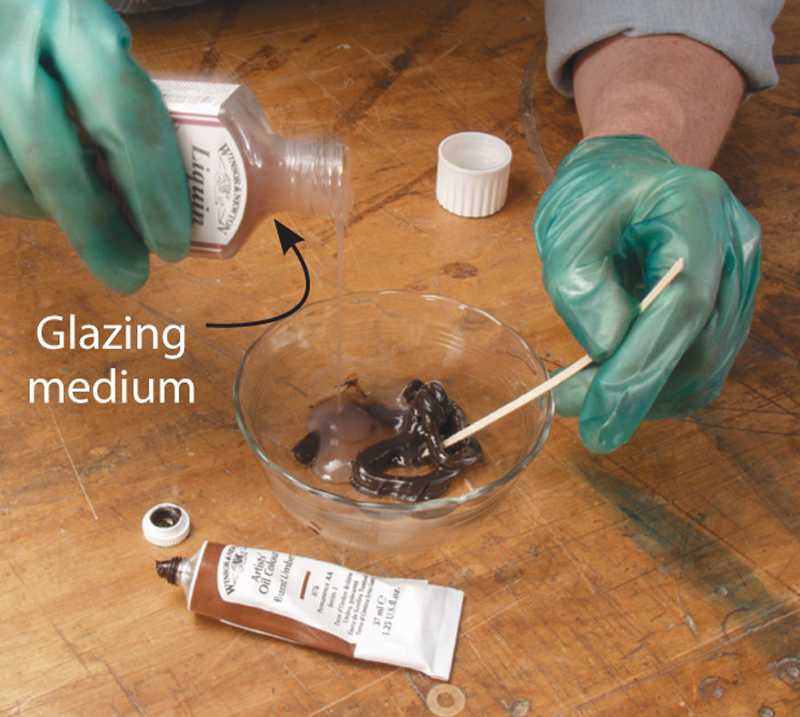
2. Make your own glaze by mixing burnt
umber artists’ oil color and liquid glazing
medium into a medium-bodied paste.
You can get both at art supply or craft
stores. Don’t go overboard—a little glaze
goes a long way.

3. Cover the sealed surface with glaze. It
doesn’t matter how you apply it or if you
miss a few spots. Wiping evens things
out.

4. Use two rags for wiping, one that’s fairly
loaded with glaze and another that’s
fairly clean. Between the two you can
feather the glaze however you want.

5. Mineral spirits remove glaze. If your
glaze doesn’t look right, you can take it
off (before it dries) and try again.
Sources
(Note: Source information may have changed since the original publication date.)
Drying Oil Finishes:
Woodcraft, woodcraft.com, 800-225-1153, Tried & True Varnish Oil, #126857, $30 per qt.; Pure Tung Oil, #07S31, $20 per qt.; Tried & True Danish Oil (pure polymerized linseed oil), #126859, $14 per qt.
Aerosol Spray Finishes:
Hardware stores and home centers, $6 to $10 per 12-oz. can.
Sealcoat Universal Sealer:
Rustoleum, rustoleum.com, 800-323-3584, Zinsser SealCoat Universal Sanding
Sealer, $13 per qt.
Artists’ Oil Colors:
Winsor & Newton, winsornewton.com, 800-445-4278, Artist Oil Burnt Umber, $11 per 37-ml tube; Artist Oil Raw
Sienna, $11 per 37-ml tube.
Liquin Liquid Medium:
Winsor & Newton, winsornewton.com, 800-445-4278, Liquin Original, $9 per 75-ml bottle.
Water-Based Dye:
Homestead Finishing Products, homesteadfinishingproducts.com, 216-631-5309, TransTint Dye Golden-Brown, #6002, $16.50 per 2-oz. bottle.
This story originally appeared in American Woodworker April 2002, Issue #93.
Here are some supplies and tools we find essential in our everyday work around the shop. We may receive a commission from sales referred by our links; however, we have carefully selected these products for their usefulness and quality.