We may receive a commission when you use our affiliate links. However, this does not impact our recommendations.
 Practice Traditional Building Joinery on a Smaller Scale
Project #2104 • Skill Level: Advanced • Time: 2 Weeks • Cost: $300
During my 14 years living in Europe, I marveled repeatedly at how these beautiful timber framed structures had withstood the test of time—I remember one awe-inspiring timber framed house near Wiesbaden, Germany, with a placard on it that indicated it had been built approximately 500 years ago. Unlike modern structures built with manufactured materials, this one actually grew stronger with age. It incorporated the fantastical attributes of trees—nothing less than one of the world’s most awe-inspiring materials in terms of engineering potential and beauty—which, under the direction of master craftsmen, ensured the building’s natural settling caused the joints to grow stronger as gravity worked upon the structure over time. If there is a more profound example of form following function in craftsmanship it doesn’t come immediately to my mind. I knew I had to build one eventually.
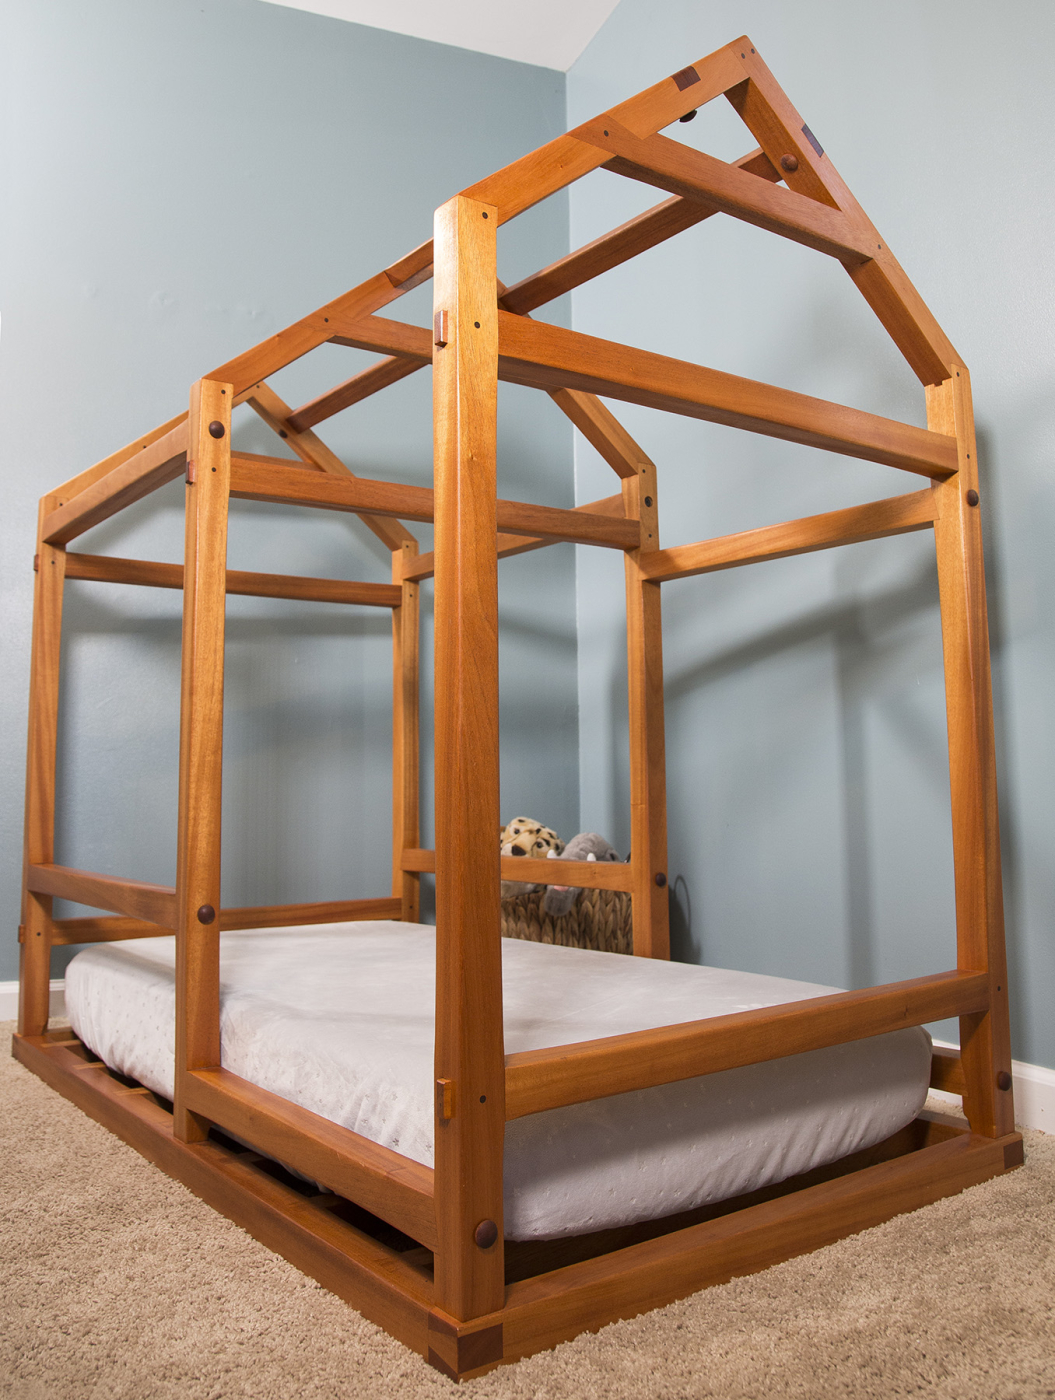
Our son was growing out of his infant bed, so my wife asked me to make a bigger one. “Just make it simple,” she said, naively. Thus far the time hasn’t been right to timber frame our dream house, but it occurred to me that this might be an opportunity to build a tiny house as my first real foray into the art of timber framing. Any mistakes I made on this first attempt would therefore be restricted to a much more manageable (and correctable) scale.
My main source of reference was Building the Timber Frame House by Tedd Benson. Over the years I’d pored over the pages of this book but had never put any of the author’s techniques into actual practice. I did a lot of planning and double-checking of dimensions, as this particular point was continuously stressed in the book. As the process unfolded it became clear why this was so vital.
One of the main challenges I had to overcome was the fact that the dimensions I chose for the bed require that it be knock-down, so it would fit through a standard doorway. But at the same time, I wanted to keep this as traditional as possible— I didn’t want a bunch of metal hardware diluting the effectiveness and beauty of mechanical joints. The construction of an actual house using timber frame methods doesn’t have this particular challenge, since to my knowledge there is no giant doorway through which a full-size house must fit.
I found a way to incorporate knock-down hardware into the joints that would need to be disassembled when moving, such as the shouldered mortise & tenons, as well as in the collar ties. The hardware allows for breaking down the bed when needed, without diminishing the strength of the joints.
The structure of the bed isn’t very complicated. It’s the joinery that’s the real fun, so we’ll focus on that.
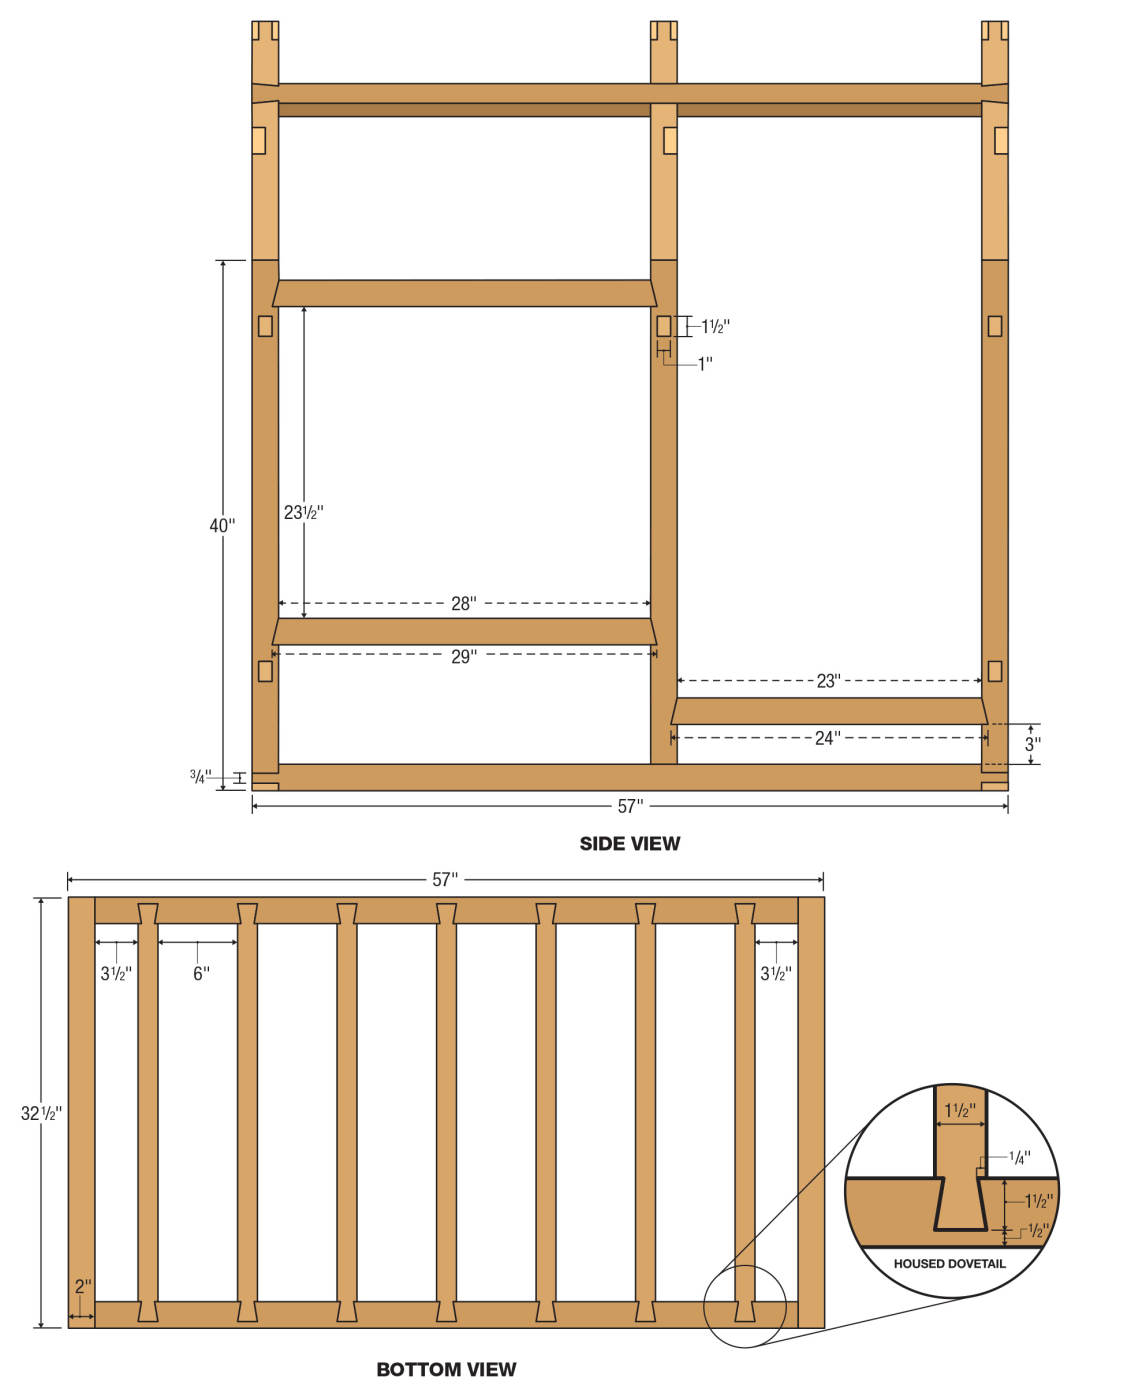
Layout and Cut List
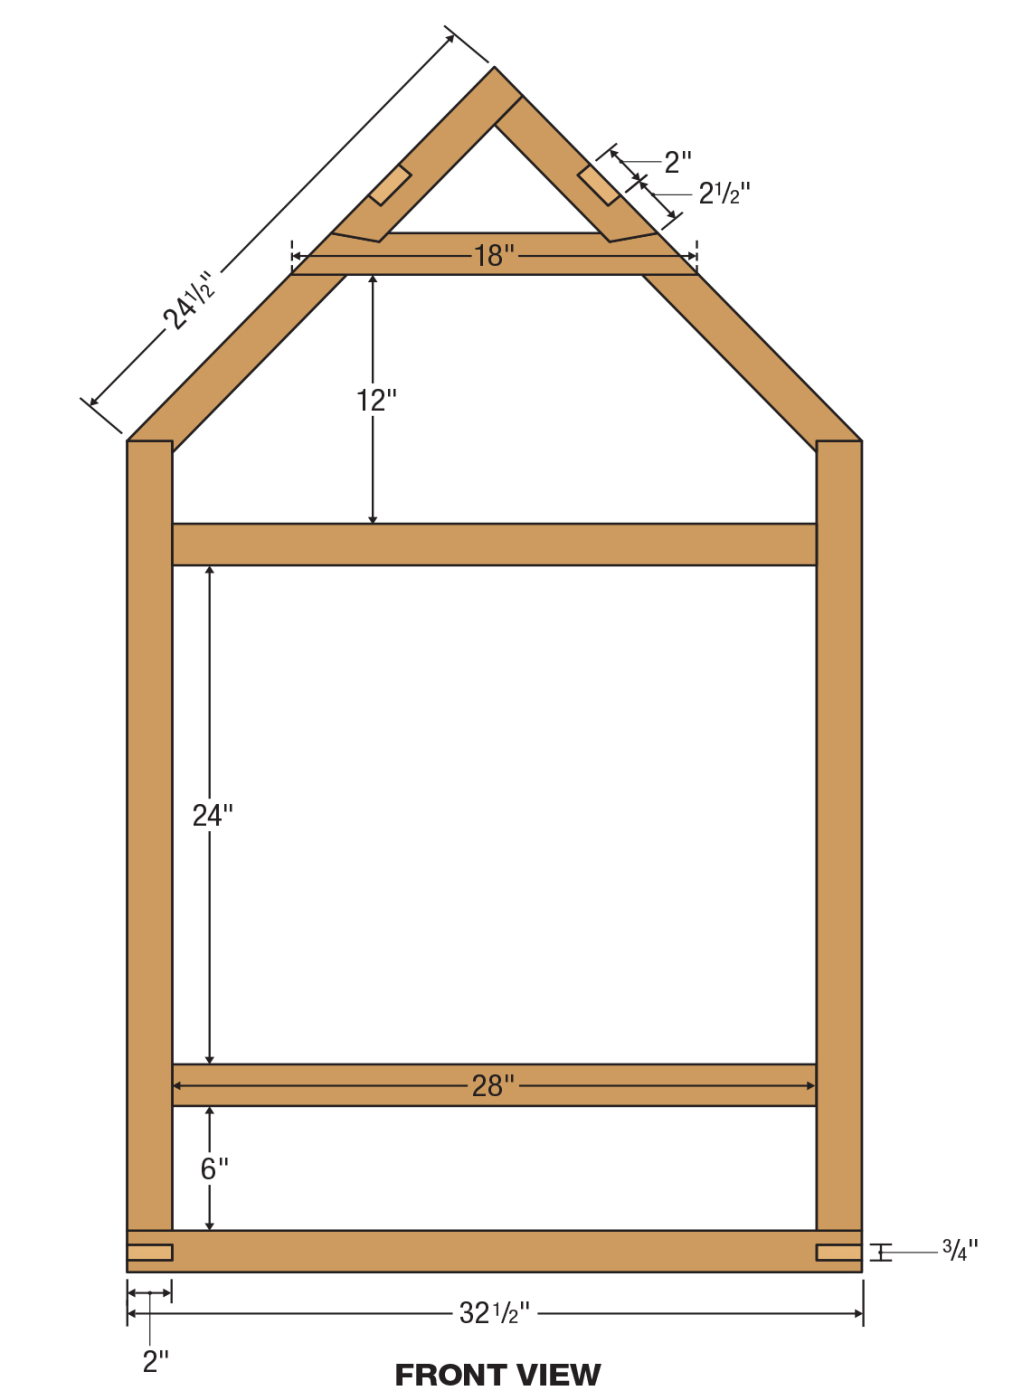
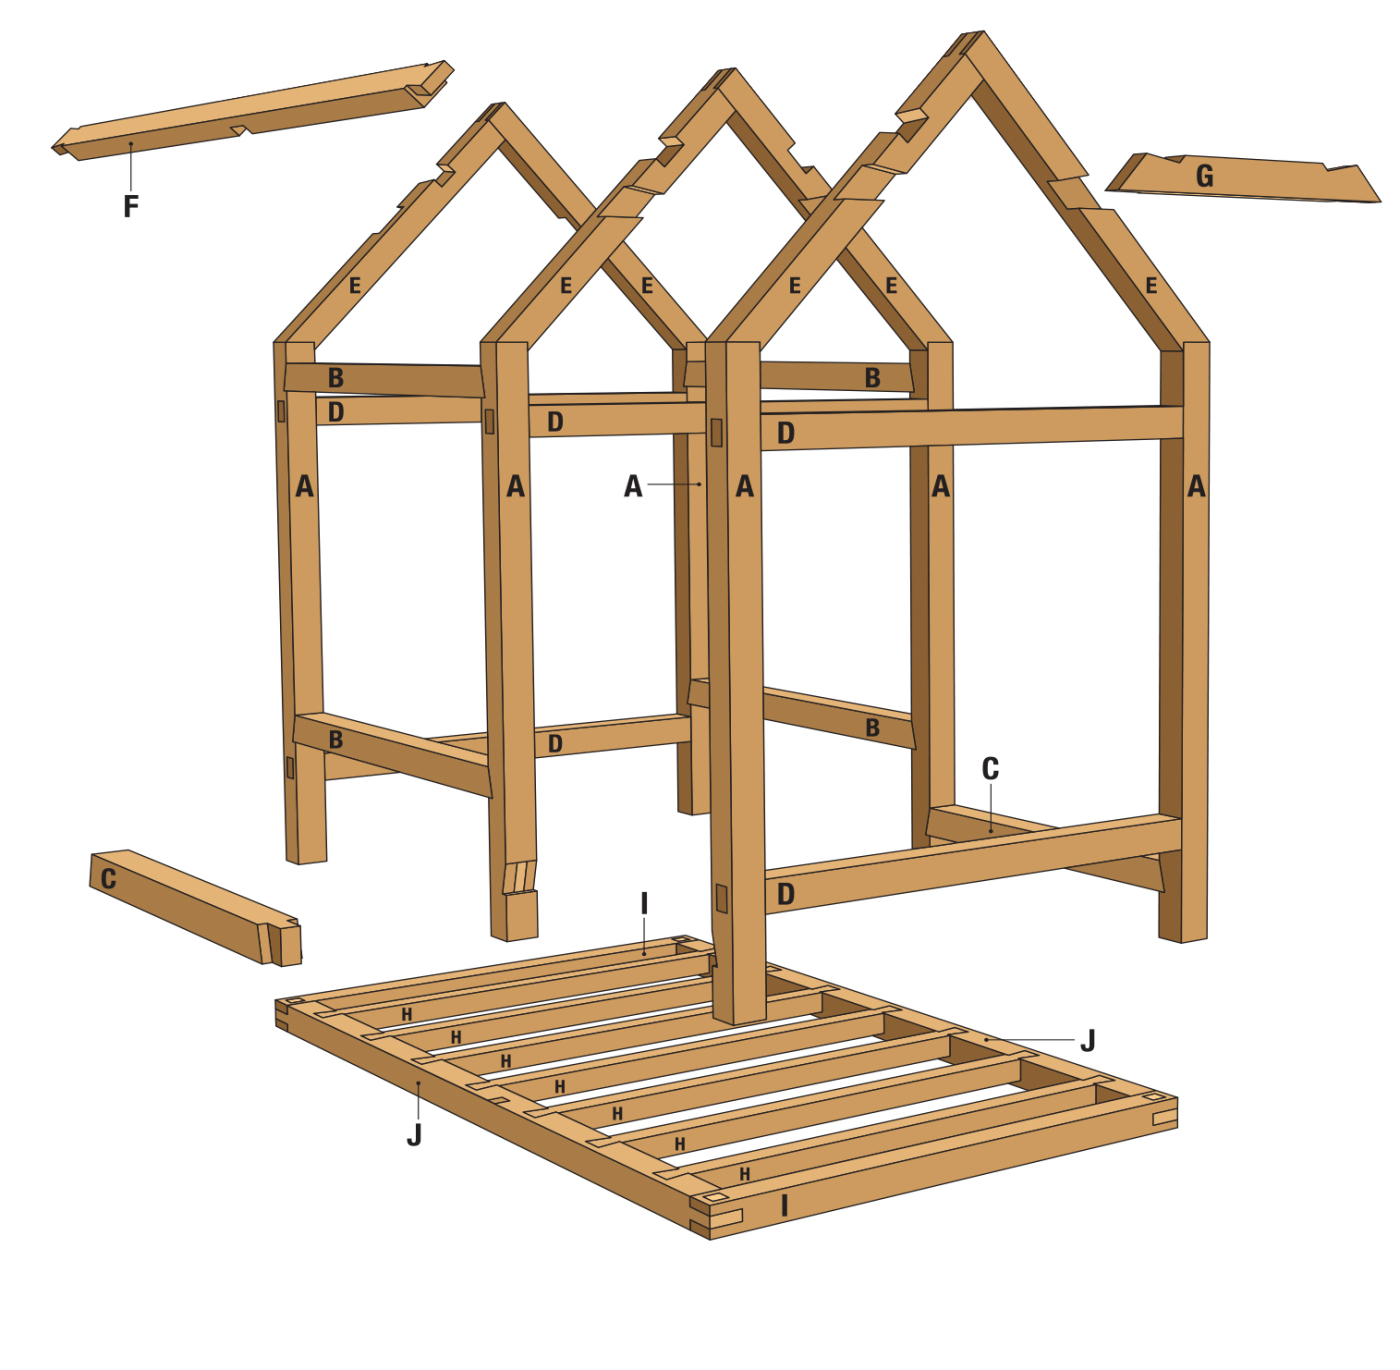
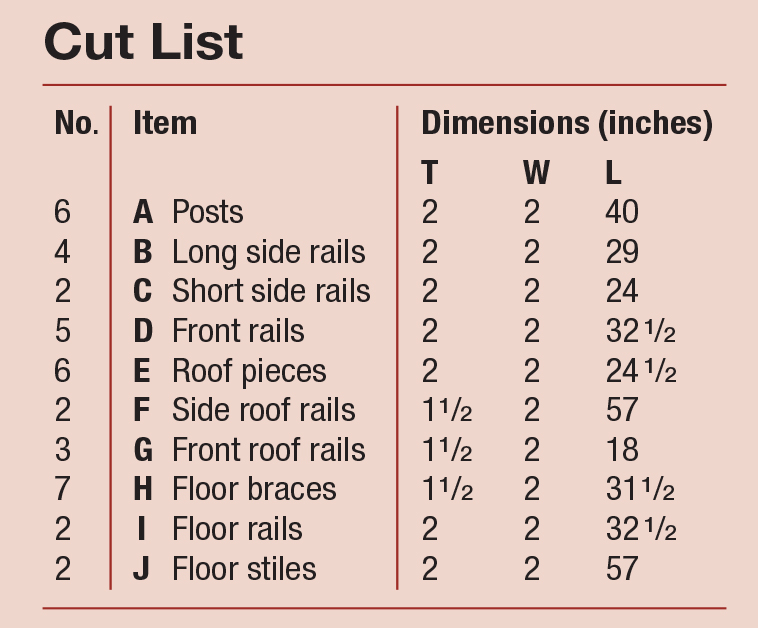
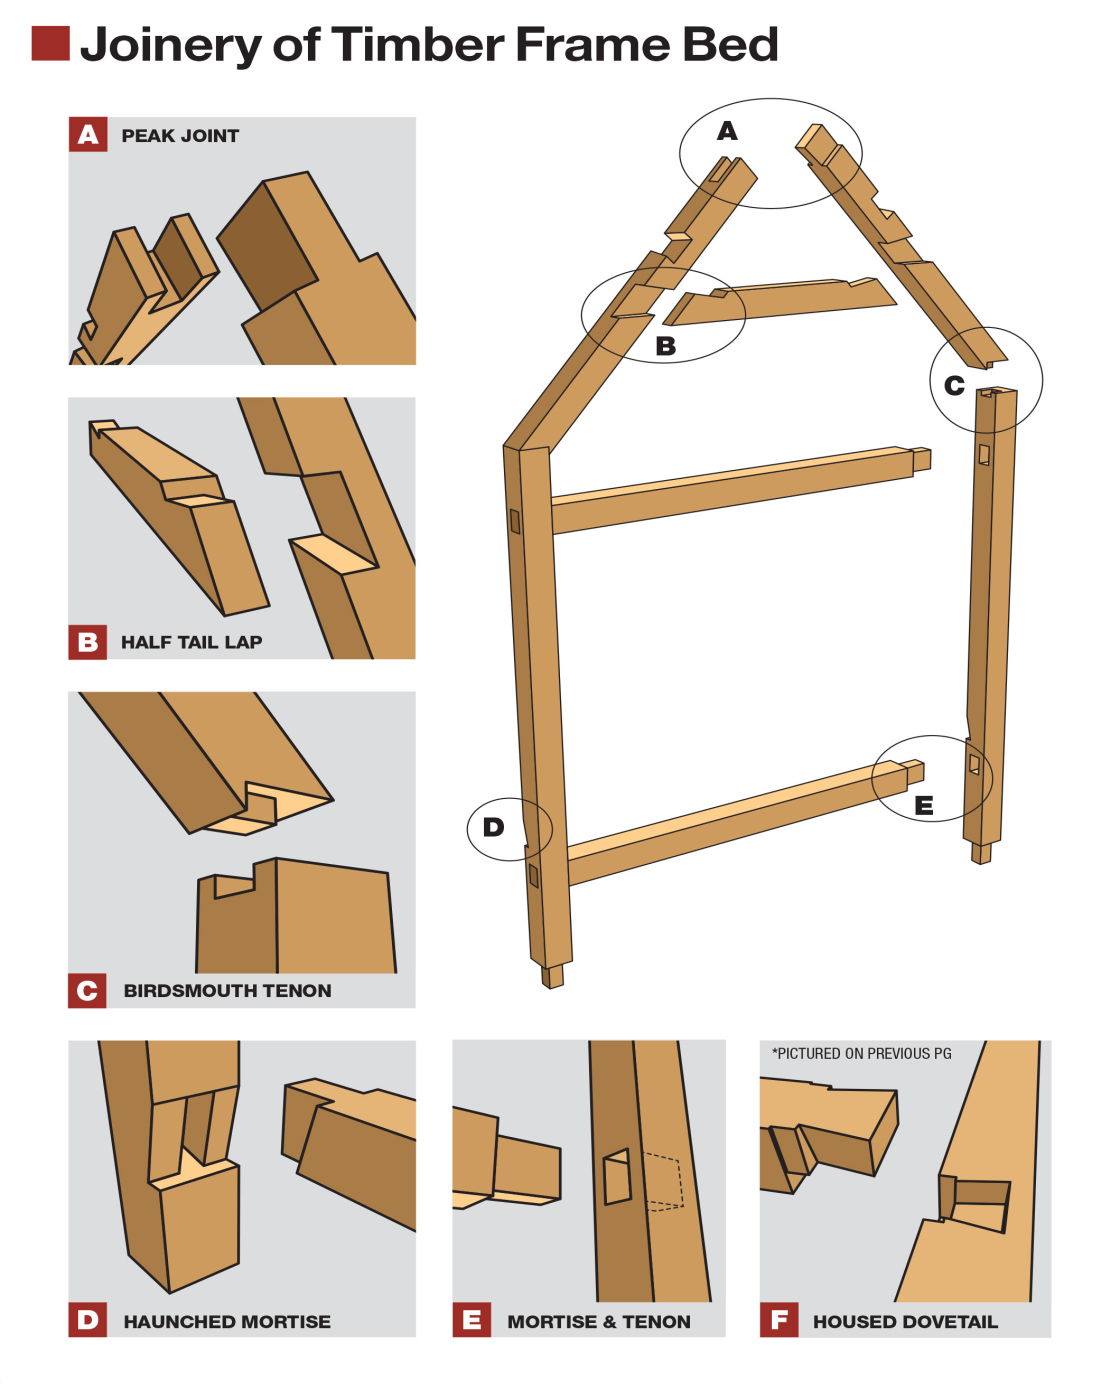
Bird’s Mouth with Tenon at Post
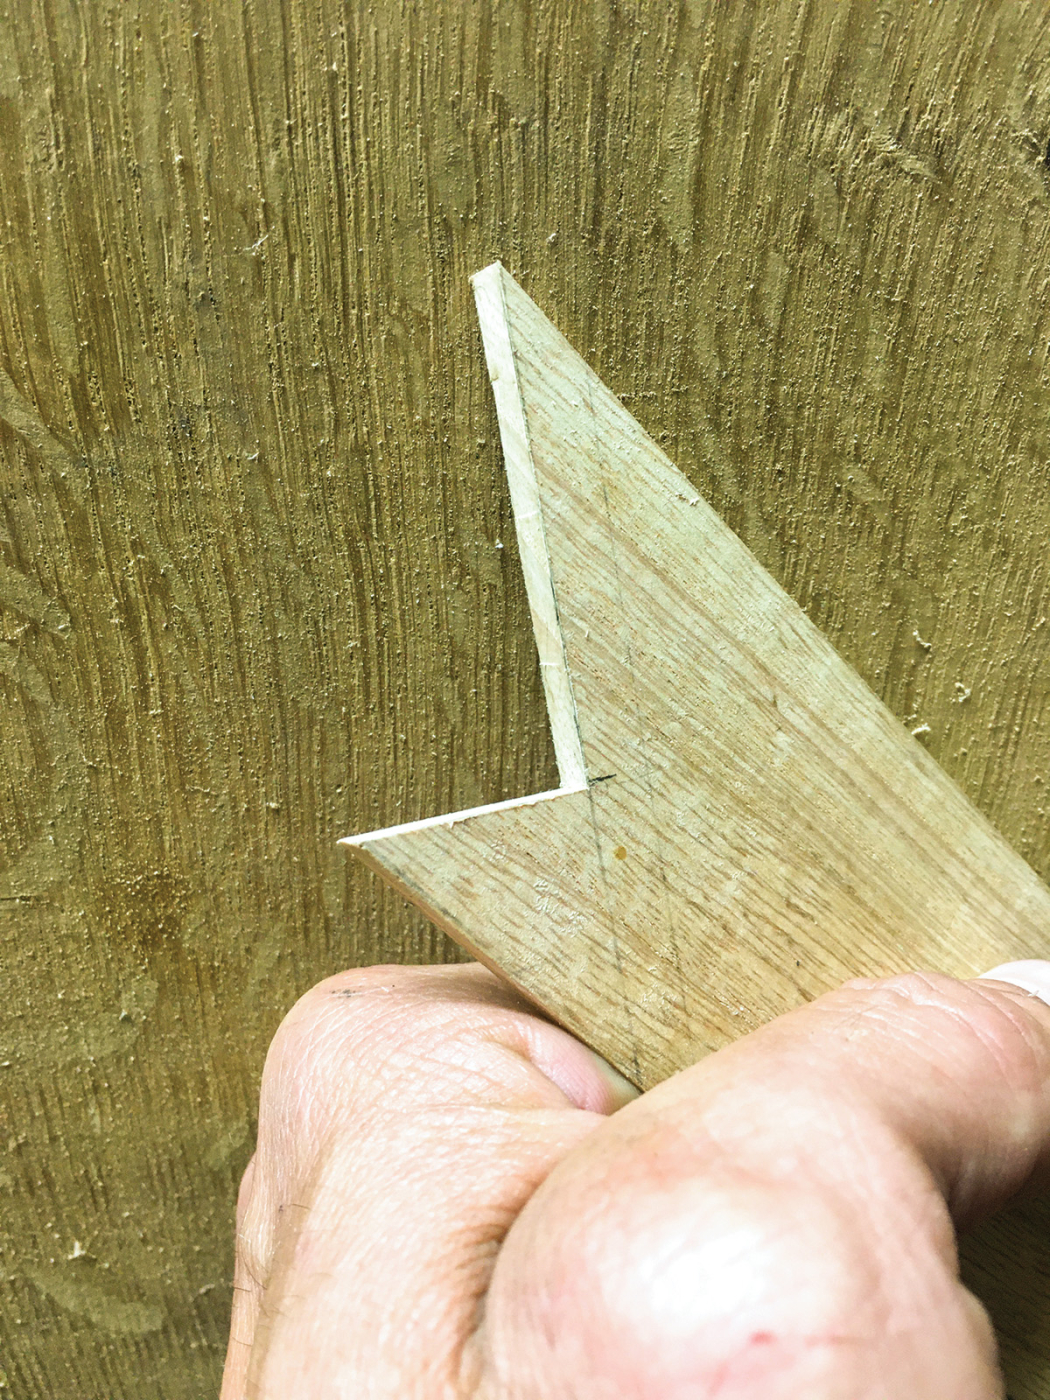
1. A template for the bird’s mouth. Once I dialed in the exact angles, this template helped me mark out and cut the joint on the six rafters.
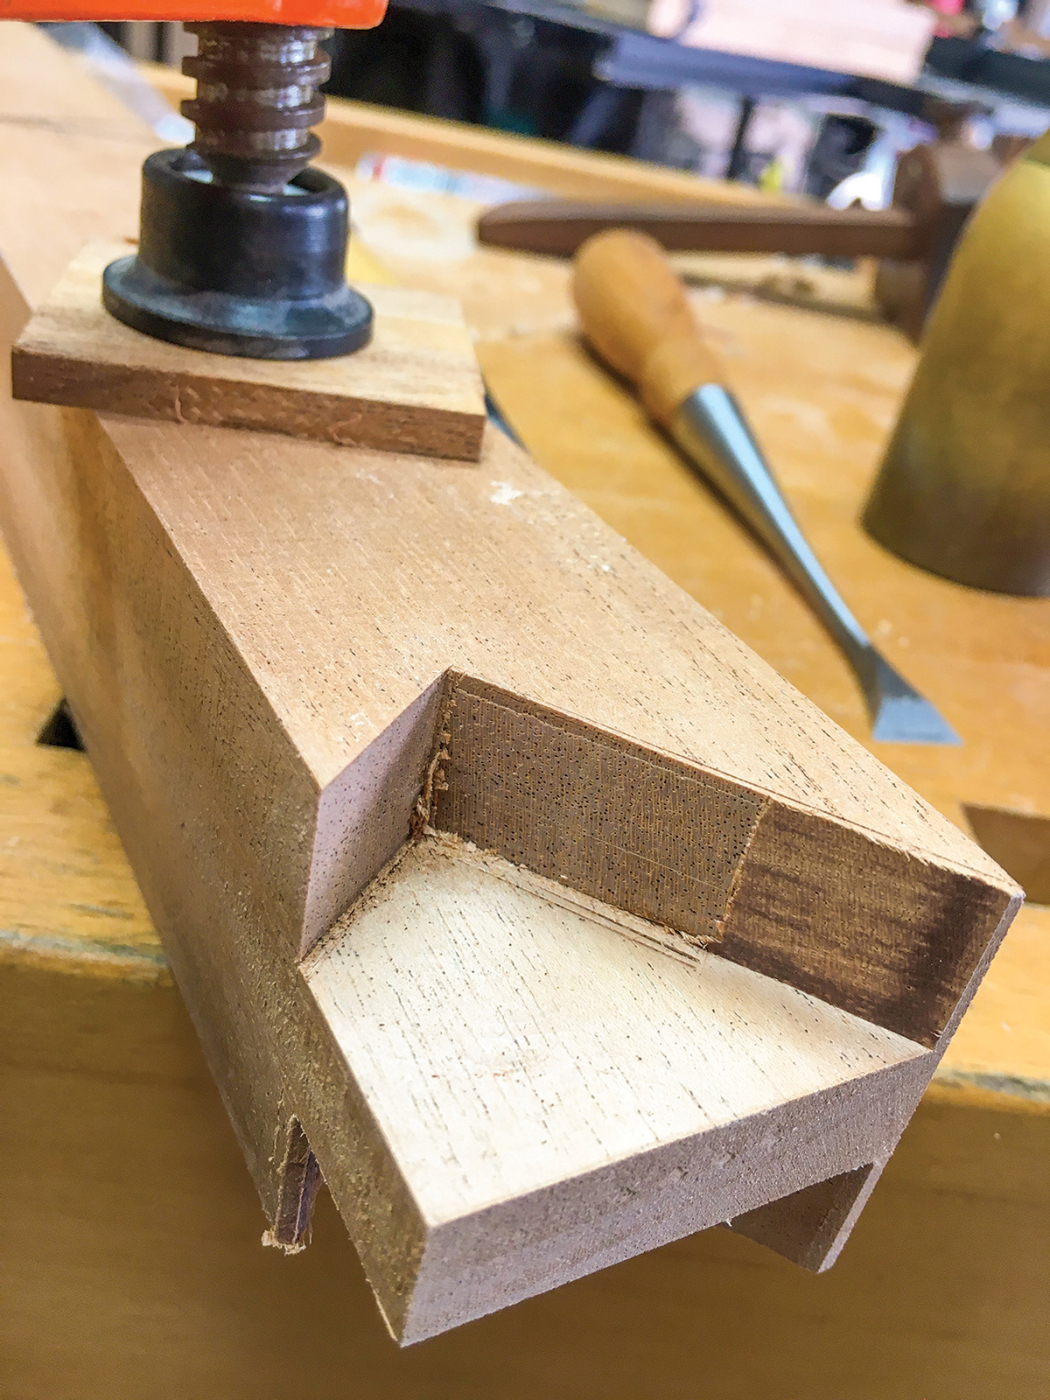
2. I left about a third of the thickness of the rafter for the tenon. The tenon is laid out separately after the bird’s mouth is cut.
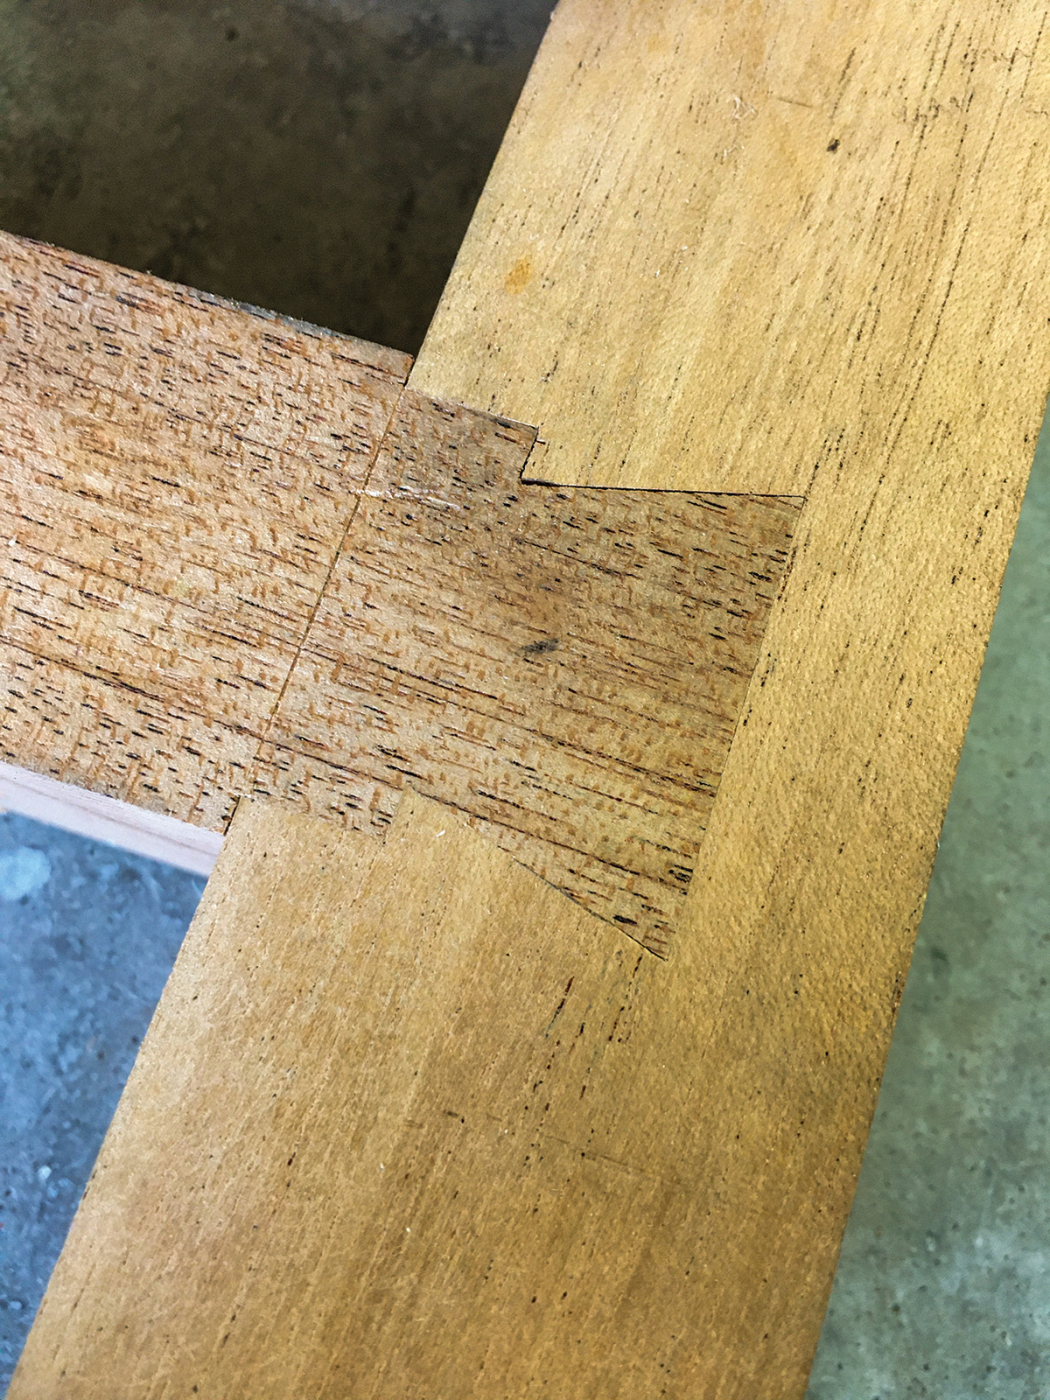
For me, getting the angles in the bird’s mouth and in the top of the rafters correct was probably the biggest challenge of this project. This joint connects the roof with the rest of the frame, so it’s a good one to start with. After constructing the first of the six examples of this joint I realized with a bit of horror that, due to my slight misunderstanding of one of the Benson book’s illustrations, I had missed a small but important detail in the joint’s anatomy during layout. There’s no decrease in the functional strength of the joint, but as a result of my criminal malfeasance there is now an eternal visual reminder, which I chose not to correct (see image 5).
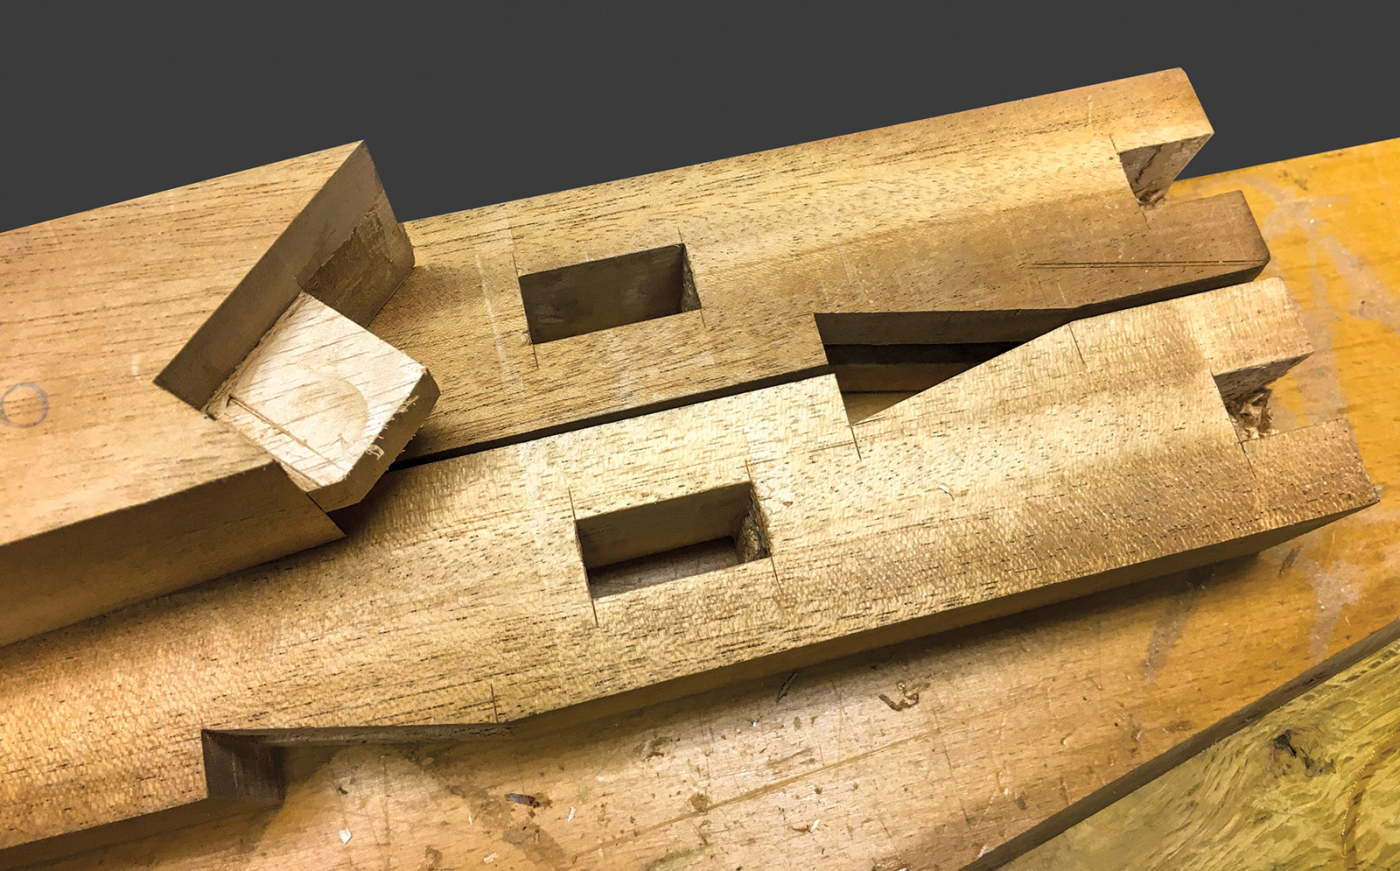
3. The completed bird’s mouth and tenon. You can see some of the joinery I pre-cut on the post
I did revise my layout technique for the subsequent examples. Although I don’t intend to ever disassemble these particular joints for moving, I chose not to use glue here. Instead, these tenons are draw-bored with a walnut peg to keep the joints tight, while the brilliant anatomy of the joint itself easily deals with the worst shocks and stressors an energetic boy
can conjure.
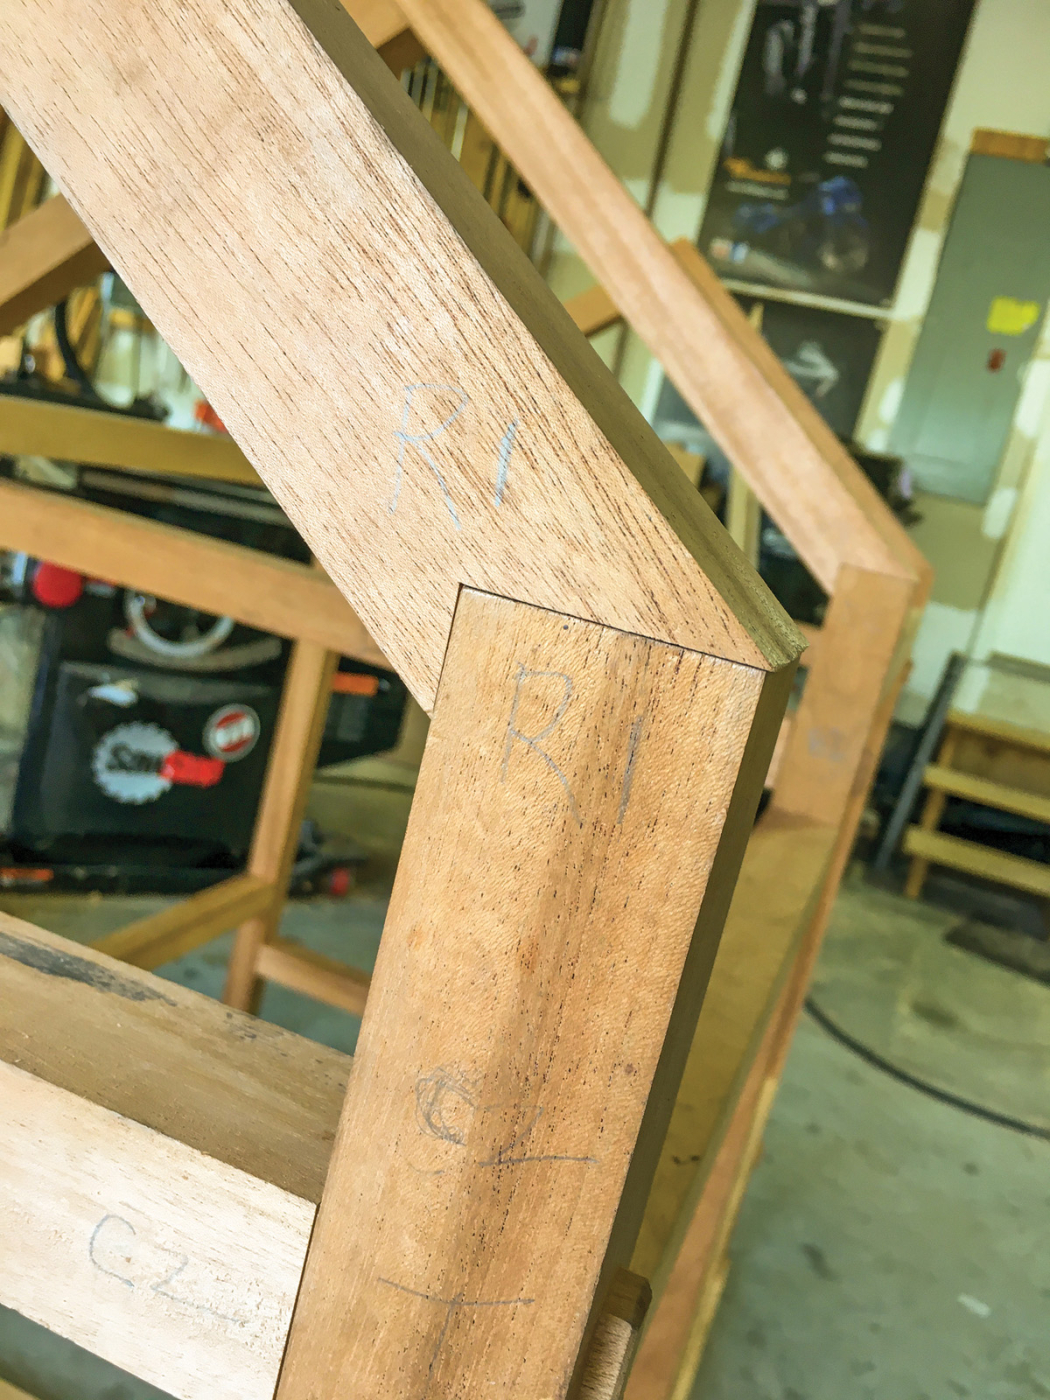
4. The first assembled bird’s mouth and tenon on post. The tenon is completely hidden.
The rather complicated layout of timber framed structures is greatly simplified through the construction and use of templates for each type of joint, which ensures accuracy and easy repeatability. With furniture we fit certain parts with other parts to ensure accuracy (such as with drawers, various joint such as dovetails and mortise/tenons, etc.), but with a large structure this particular technique is impractical or impossible, because of the sheer scale of the timbers.
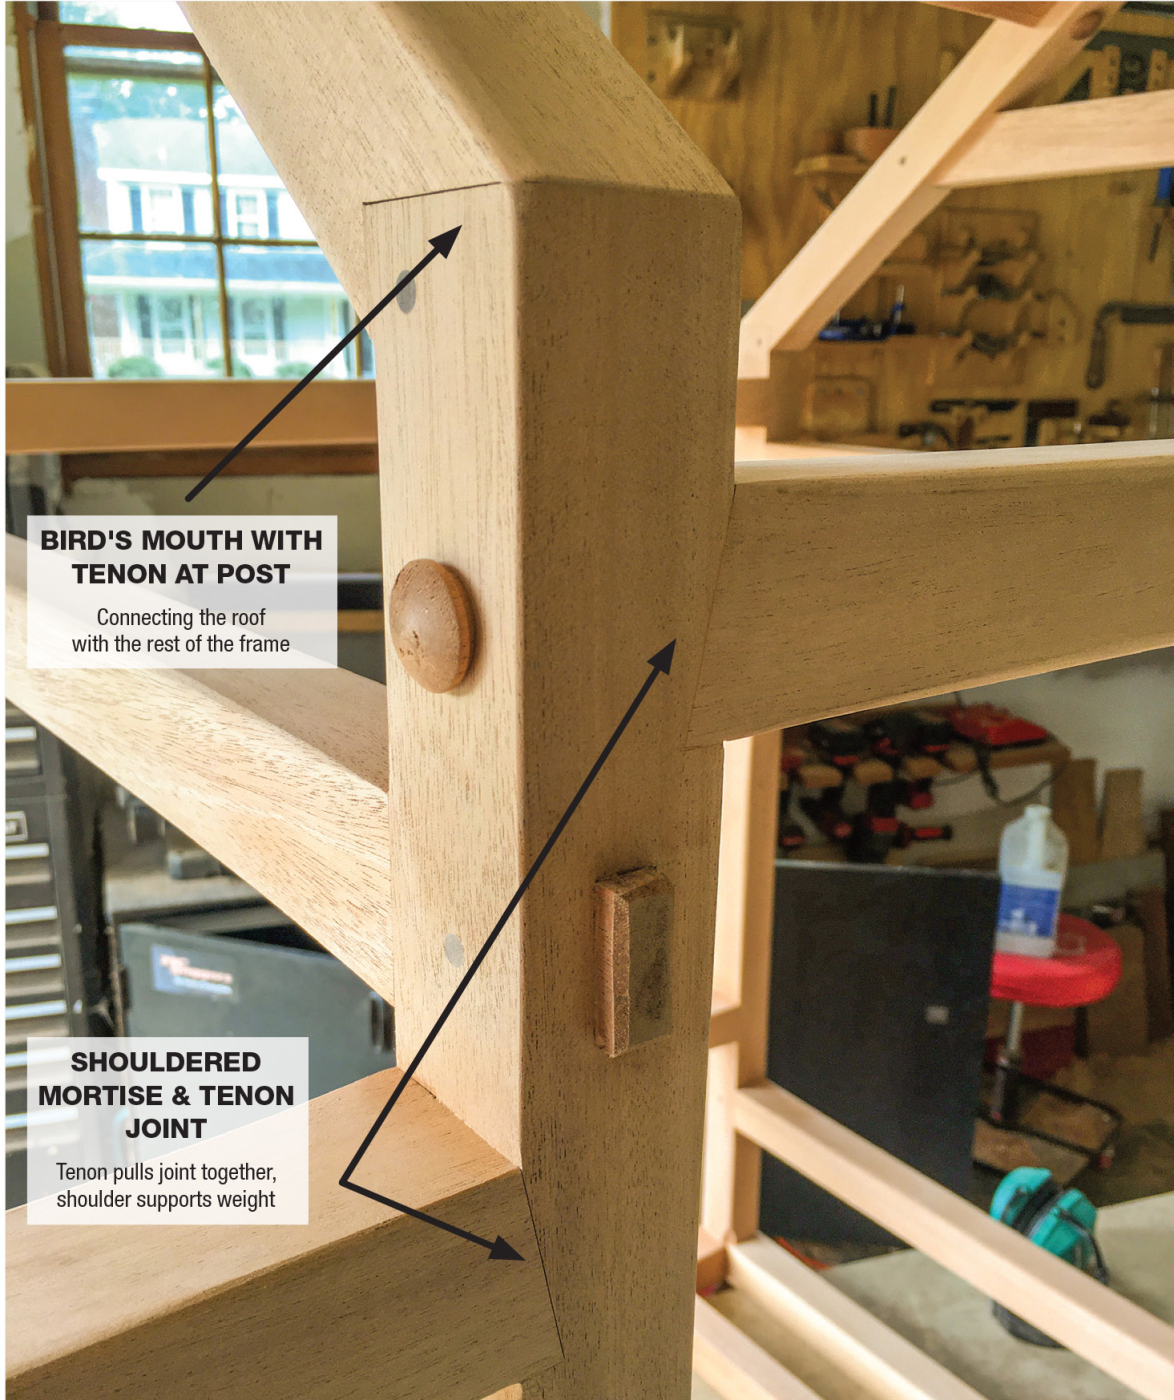
5. I drawbored the bird’s mouth joints with a walnut peg, going through the walls of the mortise and the tenon.
For me part of the point of this project was to build according to the timber frame method—using templates for the joinery. But I also wanted the joints to be as clean and well-fitted as possible, as with fine furniture, so I struggled a bit to come up with a method of satisfying both requirements. I chose to fit some joints as I would with normal furniture, but to use templates whenever possible, as I did with this particular joint.
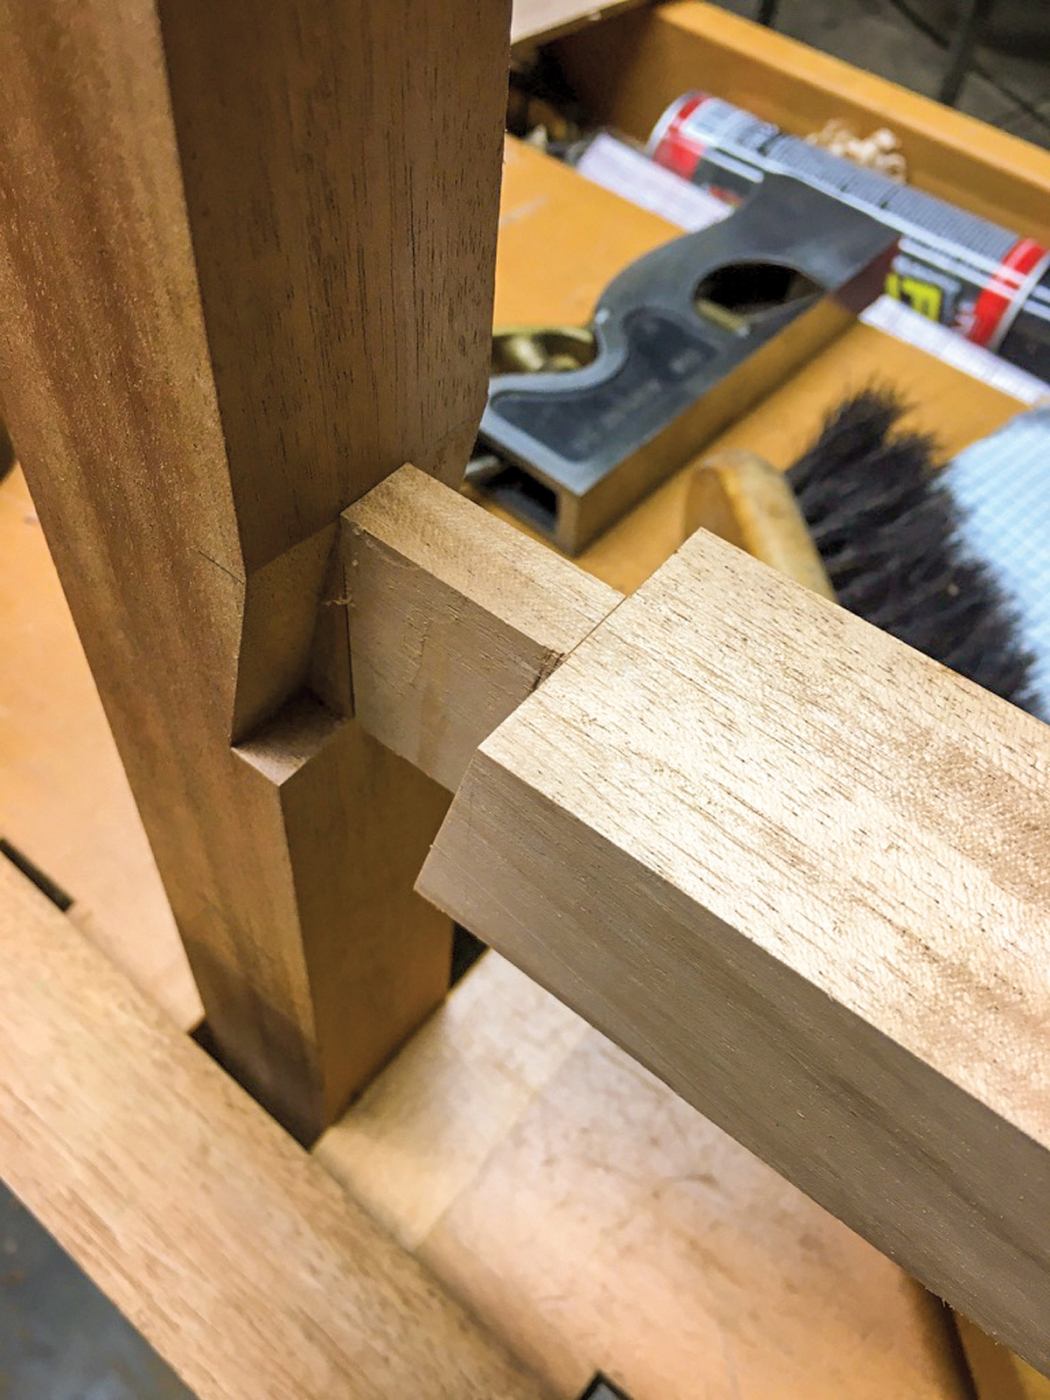
6. The shouldered mortise and tenon can support a lot of weight (though it’s not strictly necessary here).
Shouldered Mortise & Tenon Joint
I have no doubt simple mortise and tenon joints would have been plenty strong for this application, but since the goal here was to use traditional timber frame joints, I chose shouldered tenons. In a house these beams are very large and heavy and must be able to bear some serious weight from the roof, and possibly also another level or more from above. The shoulder is the load-bearing portion of the joint, and the draw-bore tenon pulls the joint together.
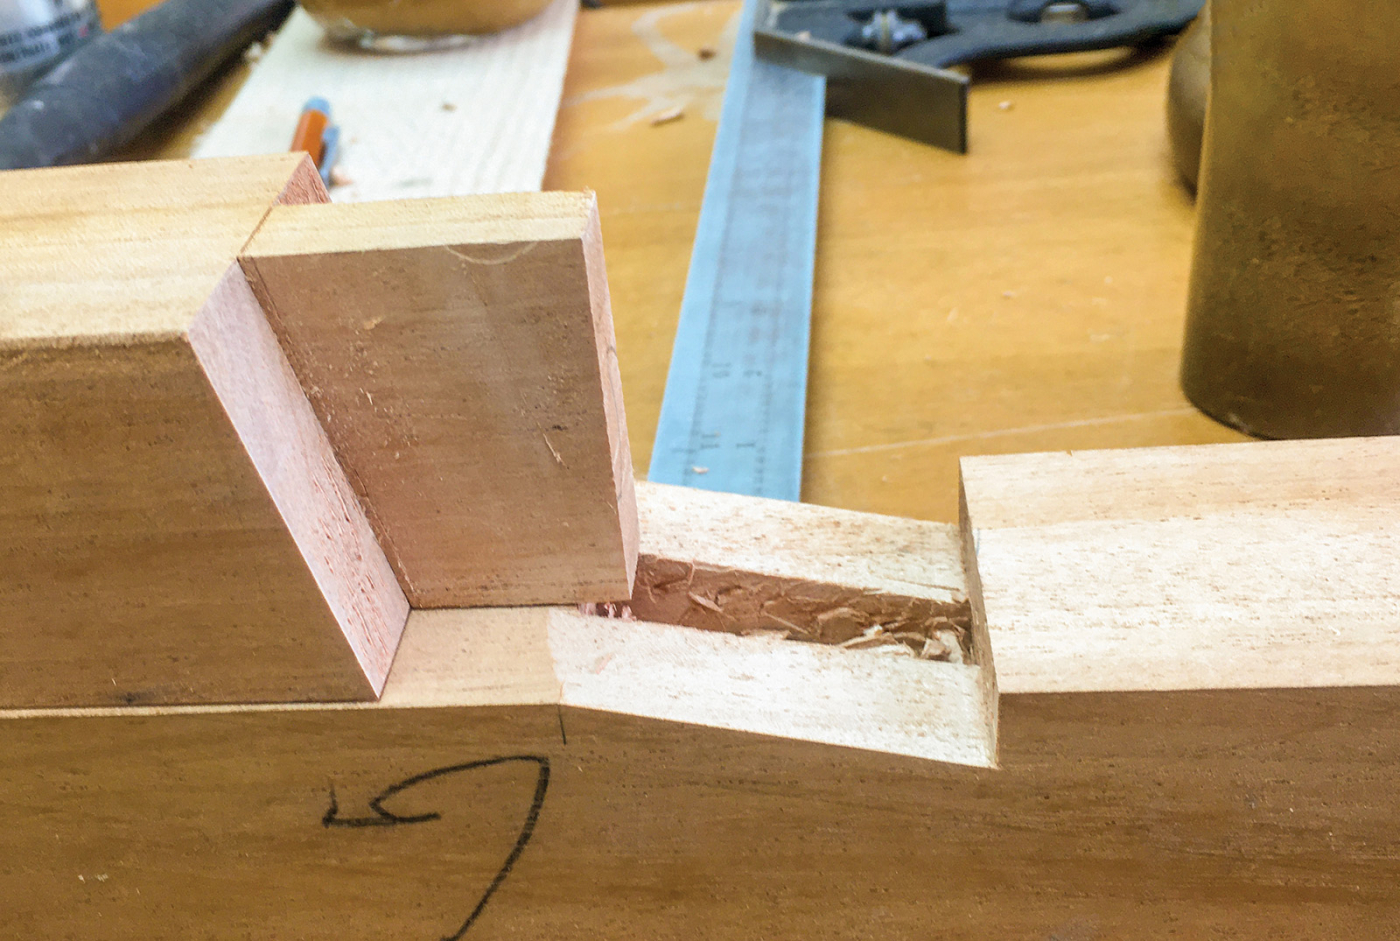
7. I cut the angled shoulder and mortise first, then cut the tenon to fit
I determined this was one of the joints that I would need to be able to take apart for moving, so instead of glue I needed to use knockdown cabinet hardware that would merely keep the joints drawn together during use, but wouldn’t diminish the effectiveness of their load-bearing properties, no matter how many times the bed is disassembled.
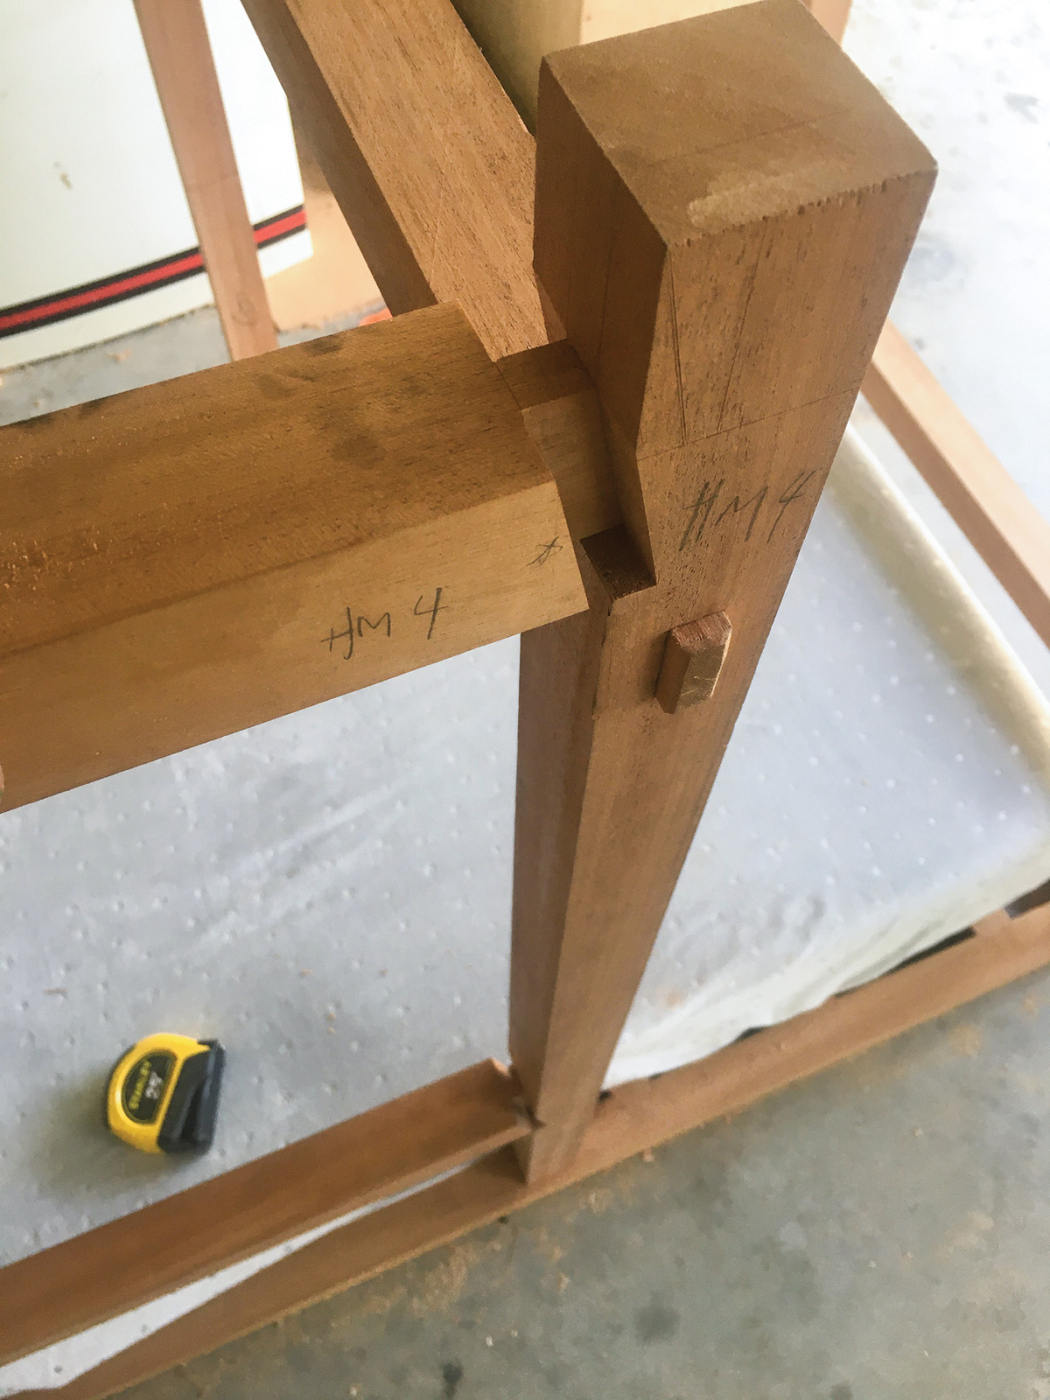
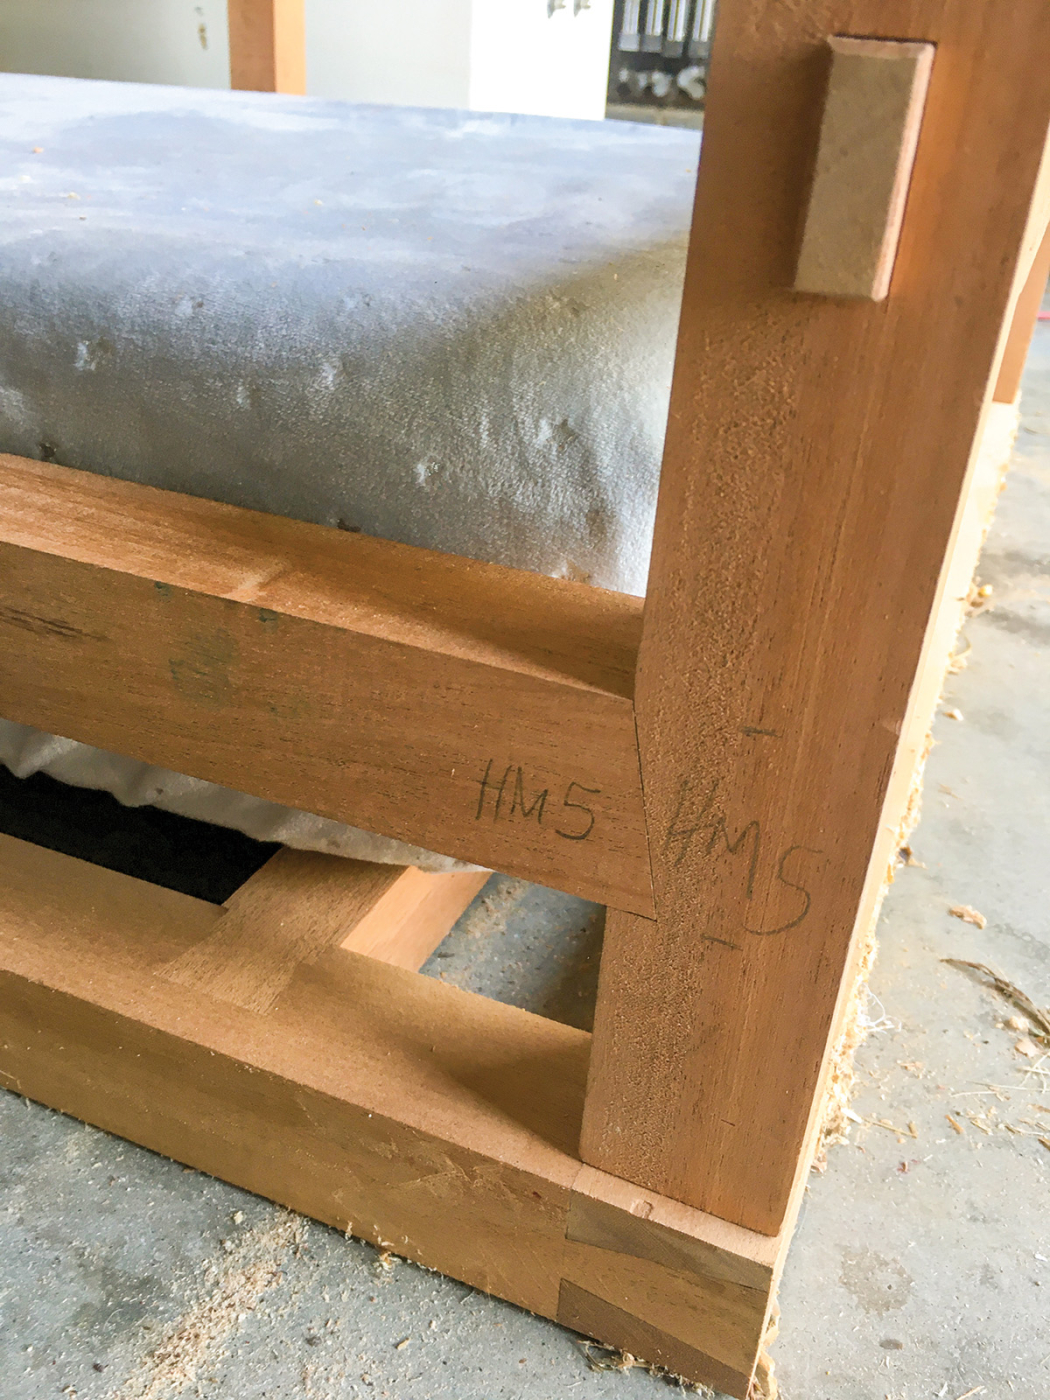
8-9. Fitting one joint was fairly easy. But making sure all of them fit and the frame was square took more planning. These joints will be disassembled, so they’ll be bolted through the end.
15 years ago I made a corner cabinet for some friends of mine as a surprise gift, and after two weeks or so of careful work I loaded it into my truck and drove it to their house to deliver it to them. They were very pleased and surprised, but I think the bulk of the surprise was my own upon discovering it would not fit through their front door. One might imagine the lifelong effect this has had on my woodworking since then. Since that terrible moment there has not been a project I have done where this disaster has not been at the forefront of my mind during the planning stage.
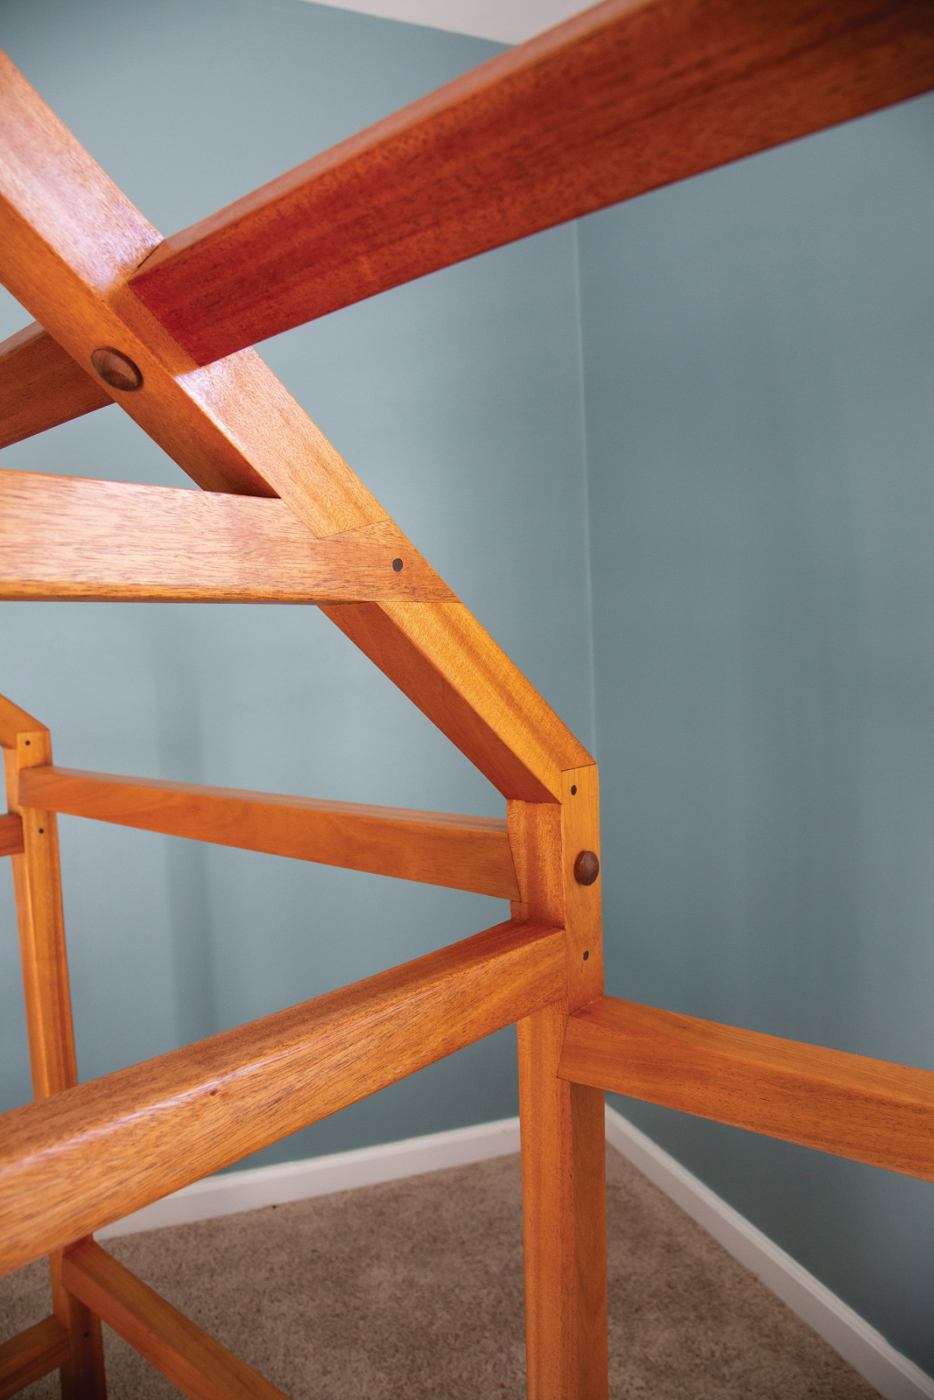
11. The purlin is joined with a simple half-lap joint to the middle bent.
Half-lap Dovetail at Purlin
This long beam (and its mate on the other side of the house) ties all three of the a-frame structures (called “bents”) together. I wanted the dovetail joints to be tight and strong, so that they perform their mechanical functions well, but I also needed to be able to repeatedly disassemble the bed without weakening the joint. I accomplished this through the use of threaded brass inserts and Allen-style bolts.
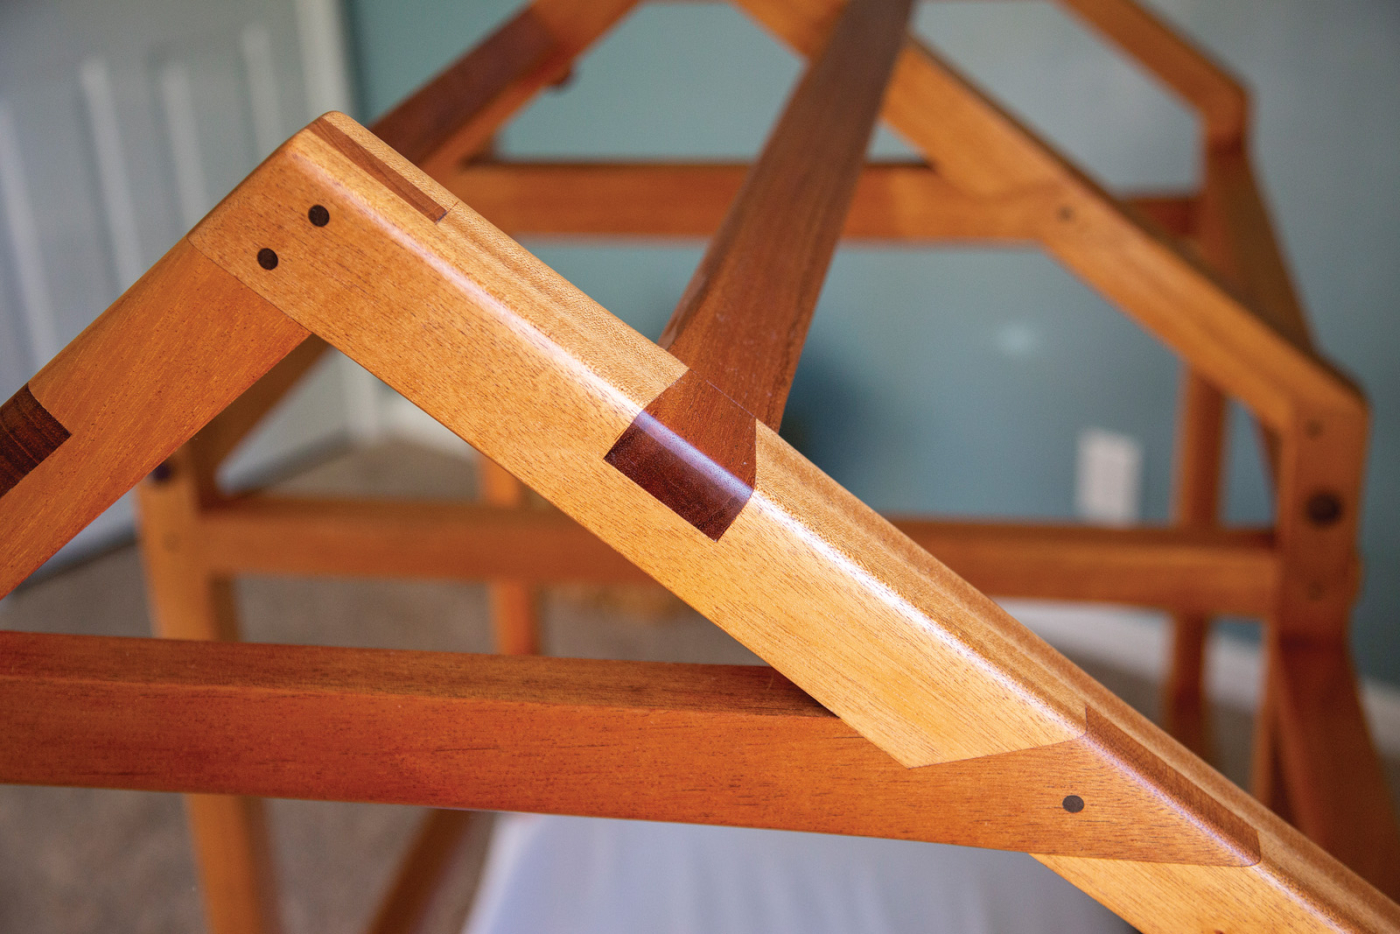
12. The two end bents connect to the purlin with half-lap dovetails, which stop the bents from pulling outward
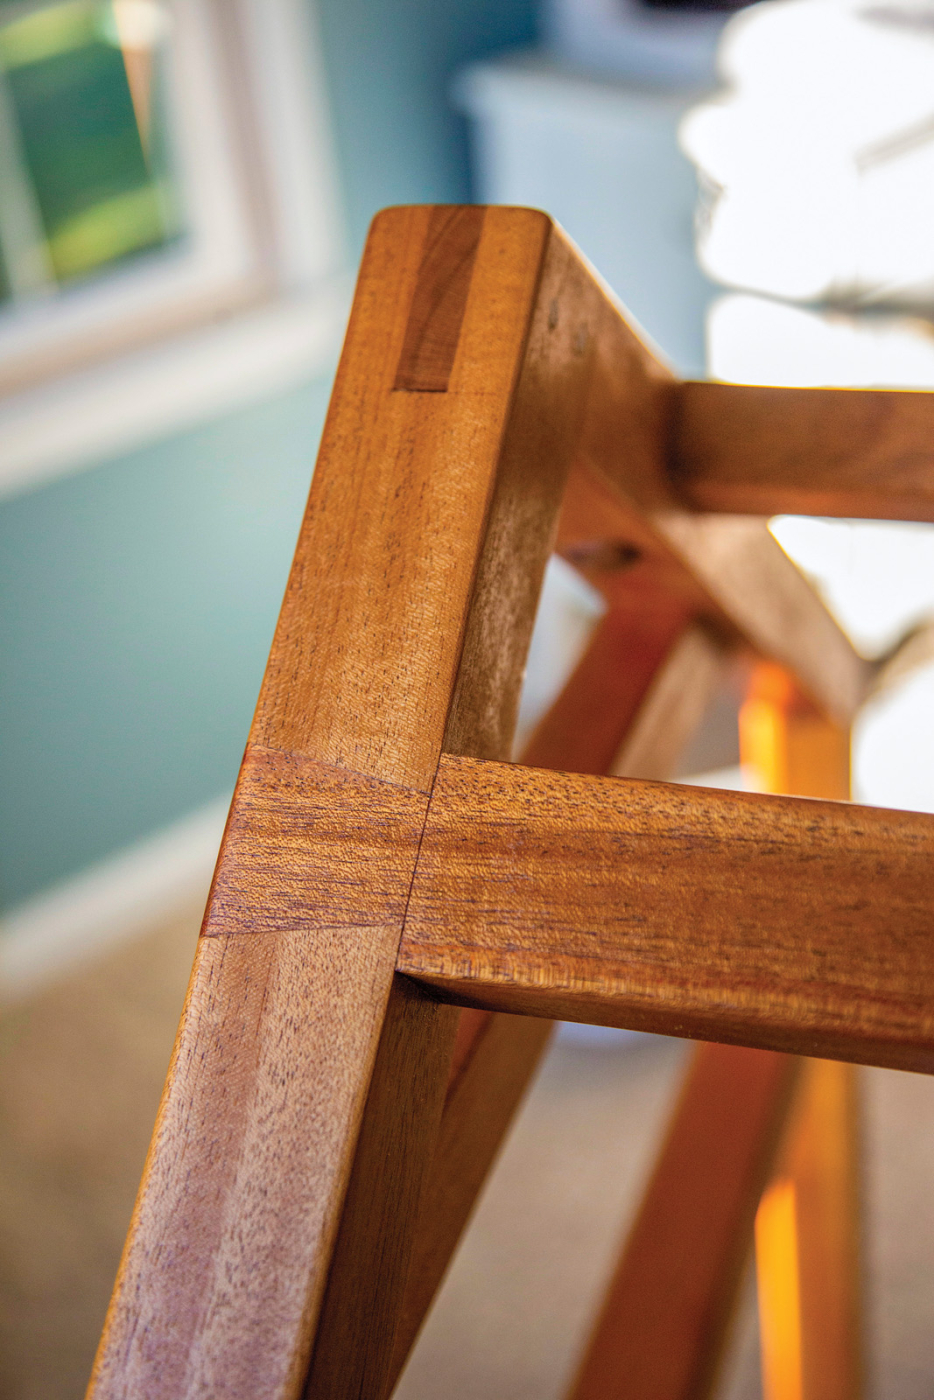
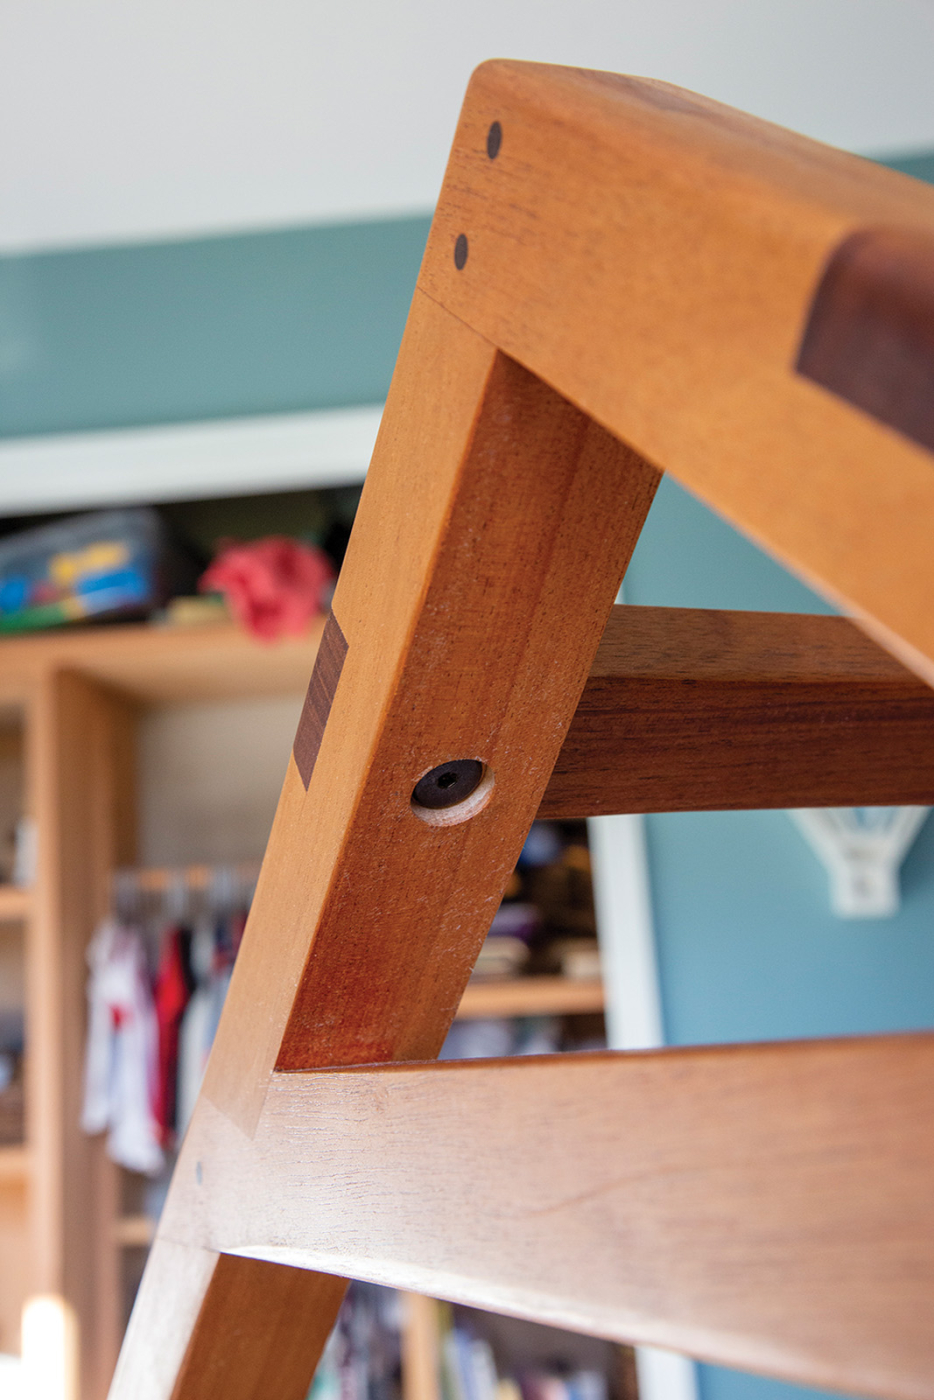
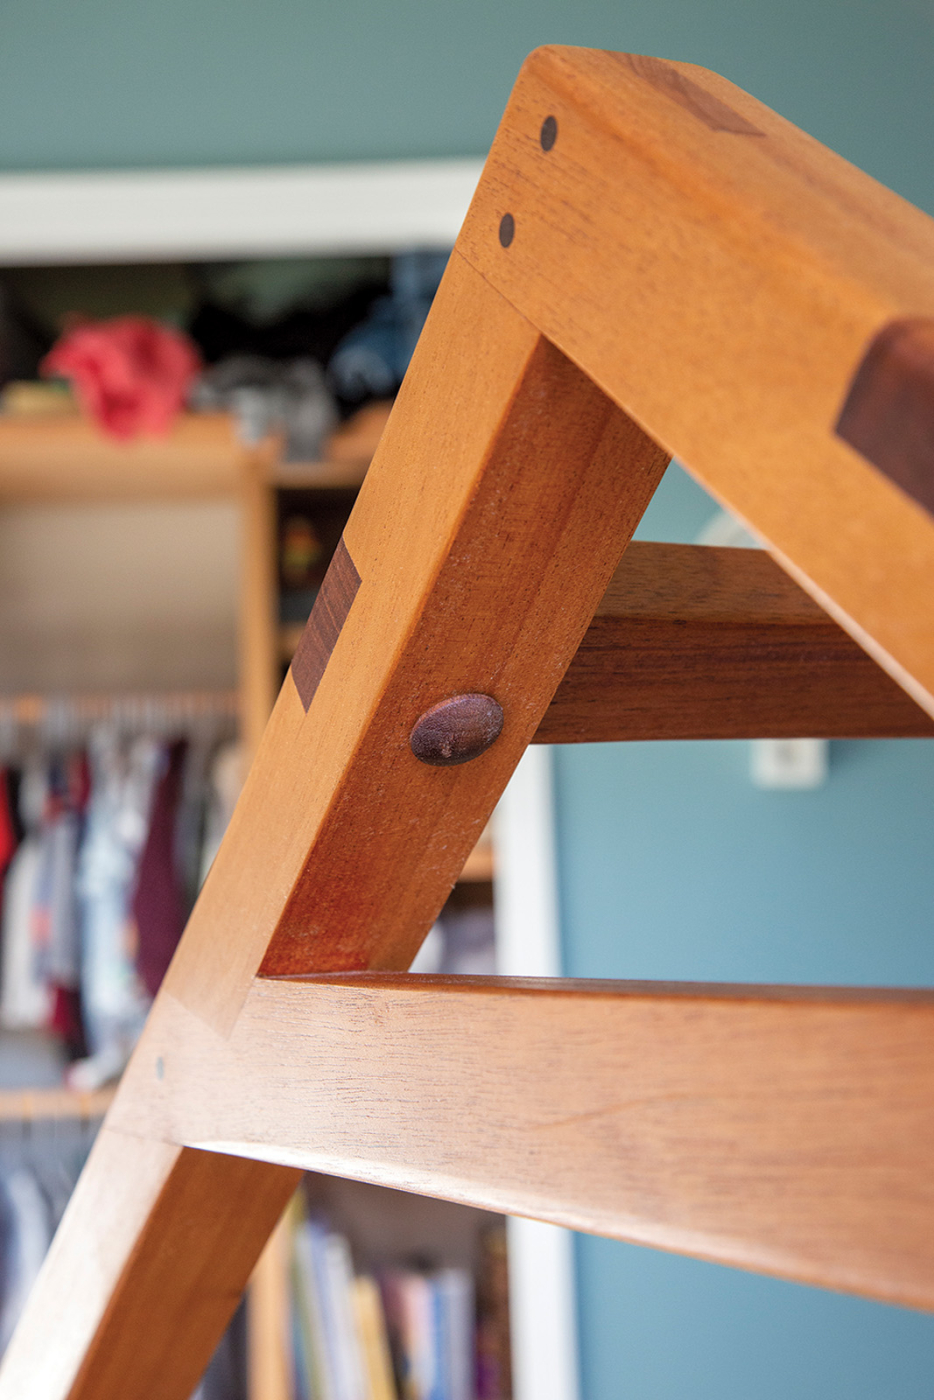
13-15. The purlins will need to be removed to get the bents through the door, so they’re held in place with a single bolt on each end, covered by a walnut plug.
If the fitting of this bed through doorways weren’t a concern I would have glued this joint, but since doorways exist, and generally occupy their time daring you to disrespect them, I didn’t have that option. So instead of glue I installed a threaded brass insert into each purlin, which receives an Allen-head bolt from each rafter below, allowing repeated assembly and disassembly without weakening the joint.
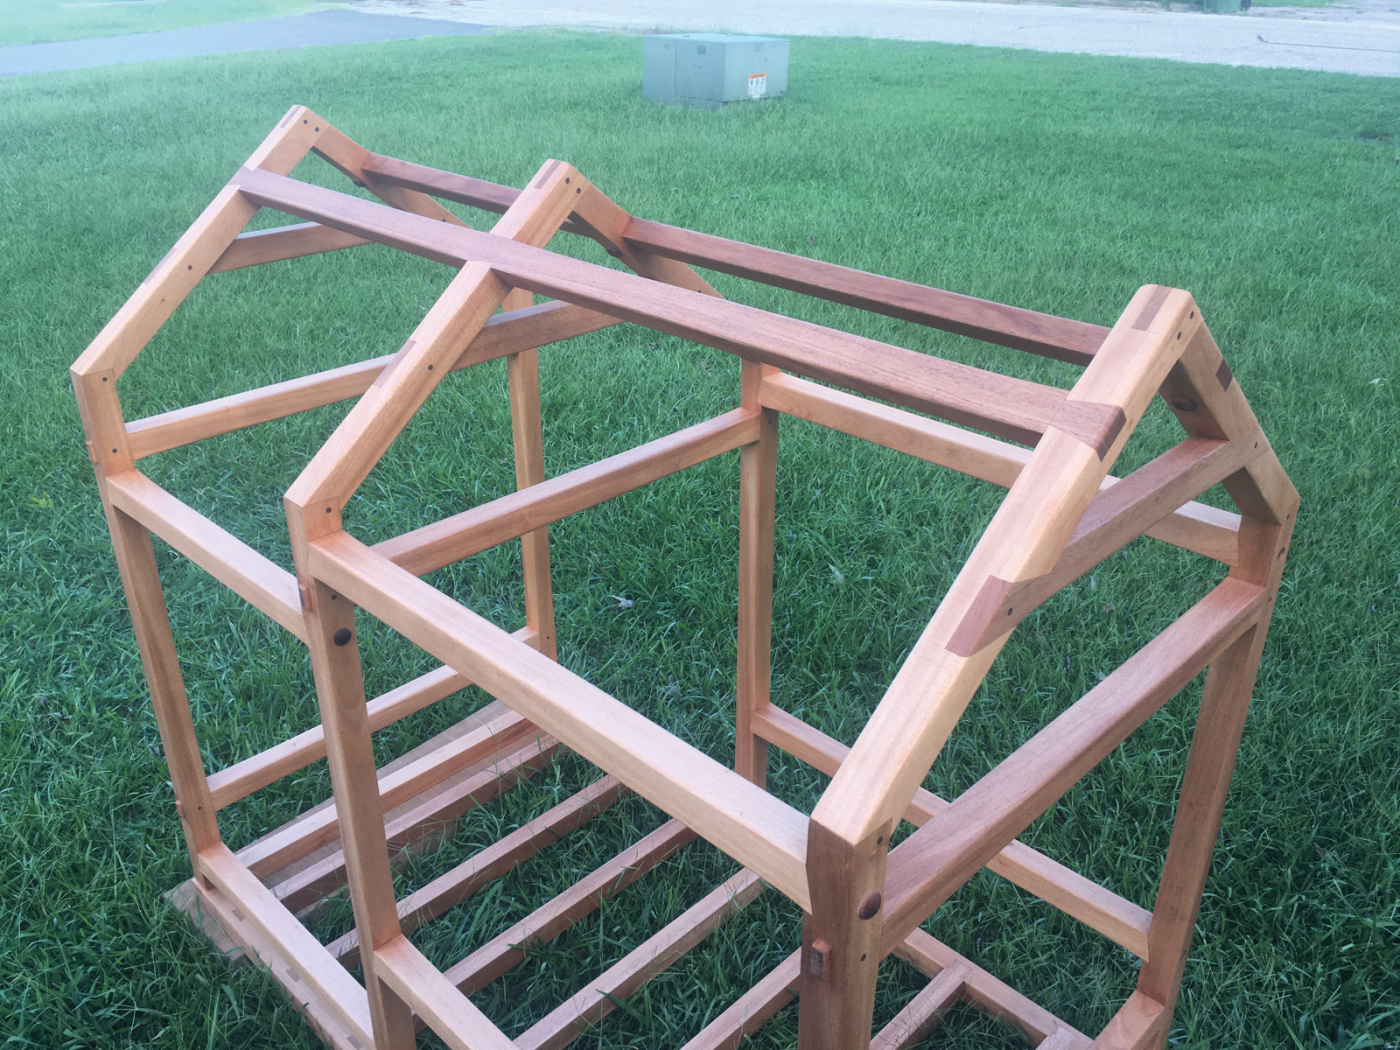
16. The collar ties prevent the rafters from sagging and spreading.
Collar Tie Half-Dovetail Joint
This joint ties the two rafters together, helping to resist the rafters sagging or spreading. With a piece of furniture of this size there might not be much call for a collar tie, but when considering the amount of force an actual roof must withstand, especially when laden with snow, etc., it becomes apparent what a vital purpose this serves. In this case, my son eventually hanging from the rafters like a monkey is a stand-in for the weight of snow on a roof. As is the case with dovetails, the complementary geometry of the male and female portions of this joint means that the more force that acts against the joint, the stronger the joint becomes.
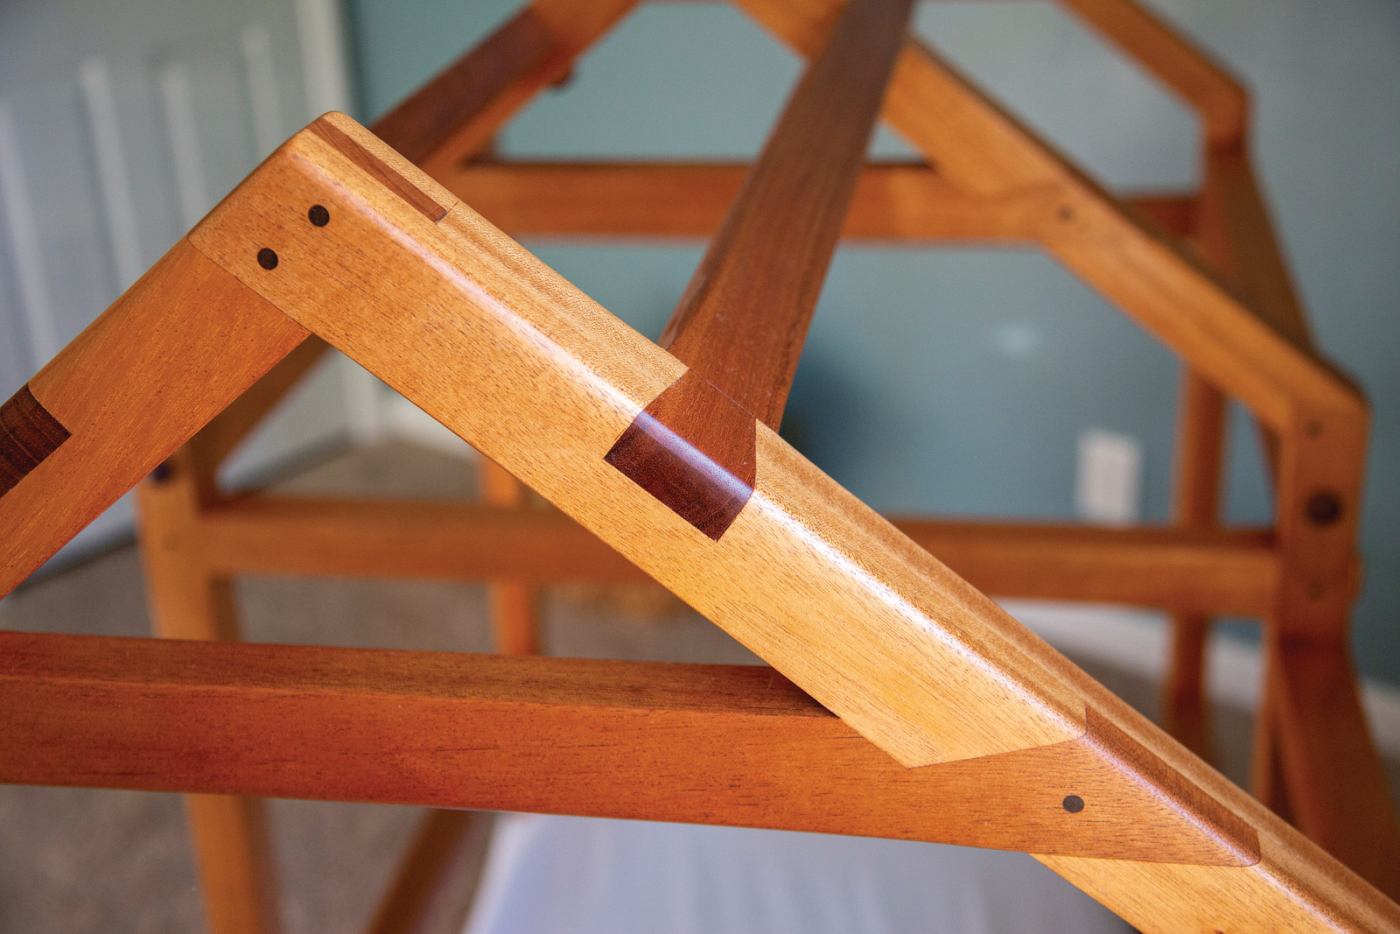
17. The joint combines a half dovetail and a lap joint, pinned with walnut.
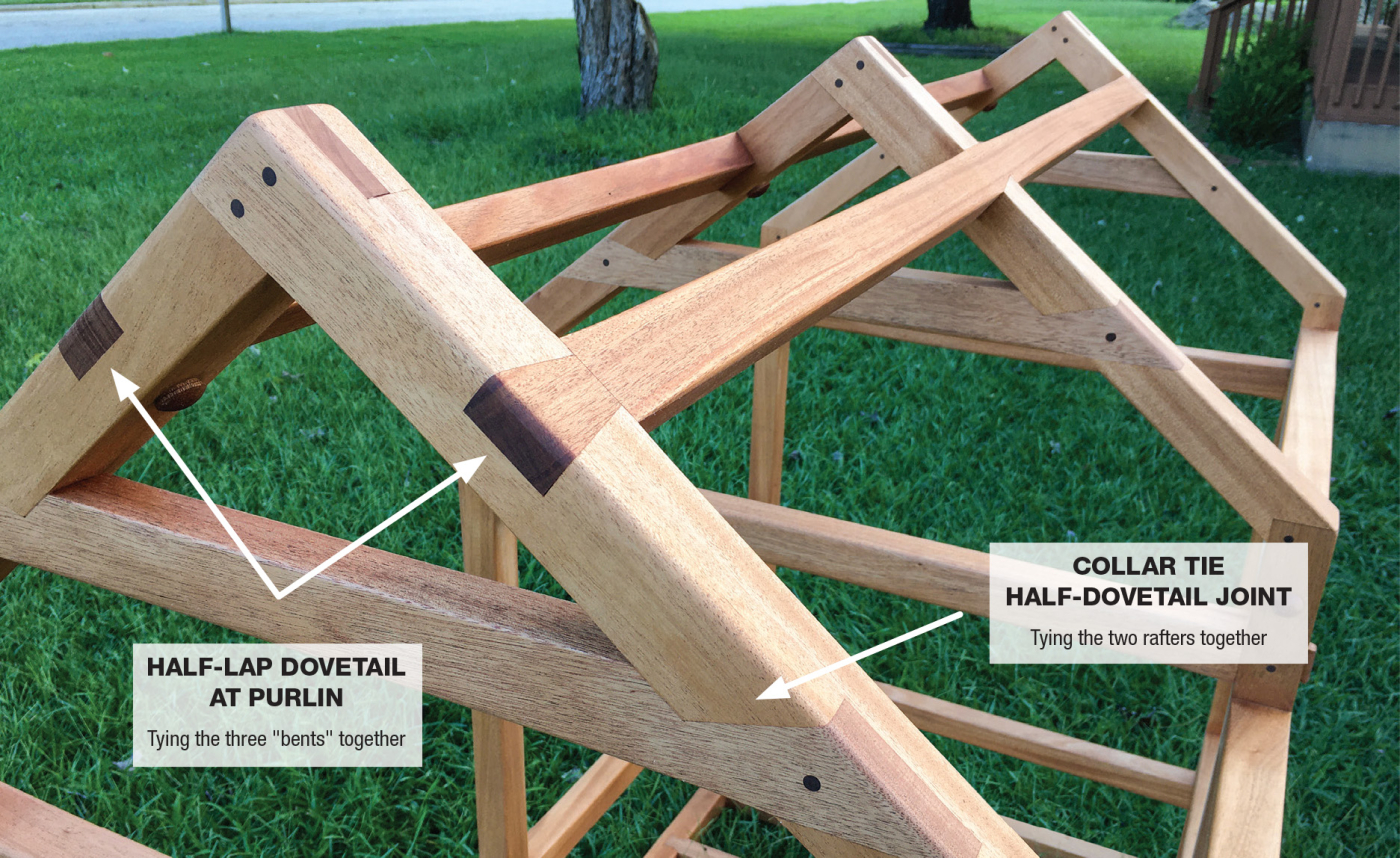
18. The collar ties and purlins work together to create a very strong roof frame.
Housed Dovetail Joint
I used housed dovetail joints for the load-bearing floor (mattress) joists, I cut these joints with a combination of power tools to hog out the waste, and hand tools for refinement. This joint is often used in floors in traditional timber framing because the dovetail portion of the joint resists lateral movement, but the hidden load-bearing portion can support absurd amounts of weight.
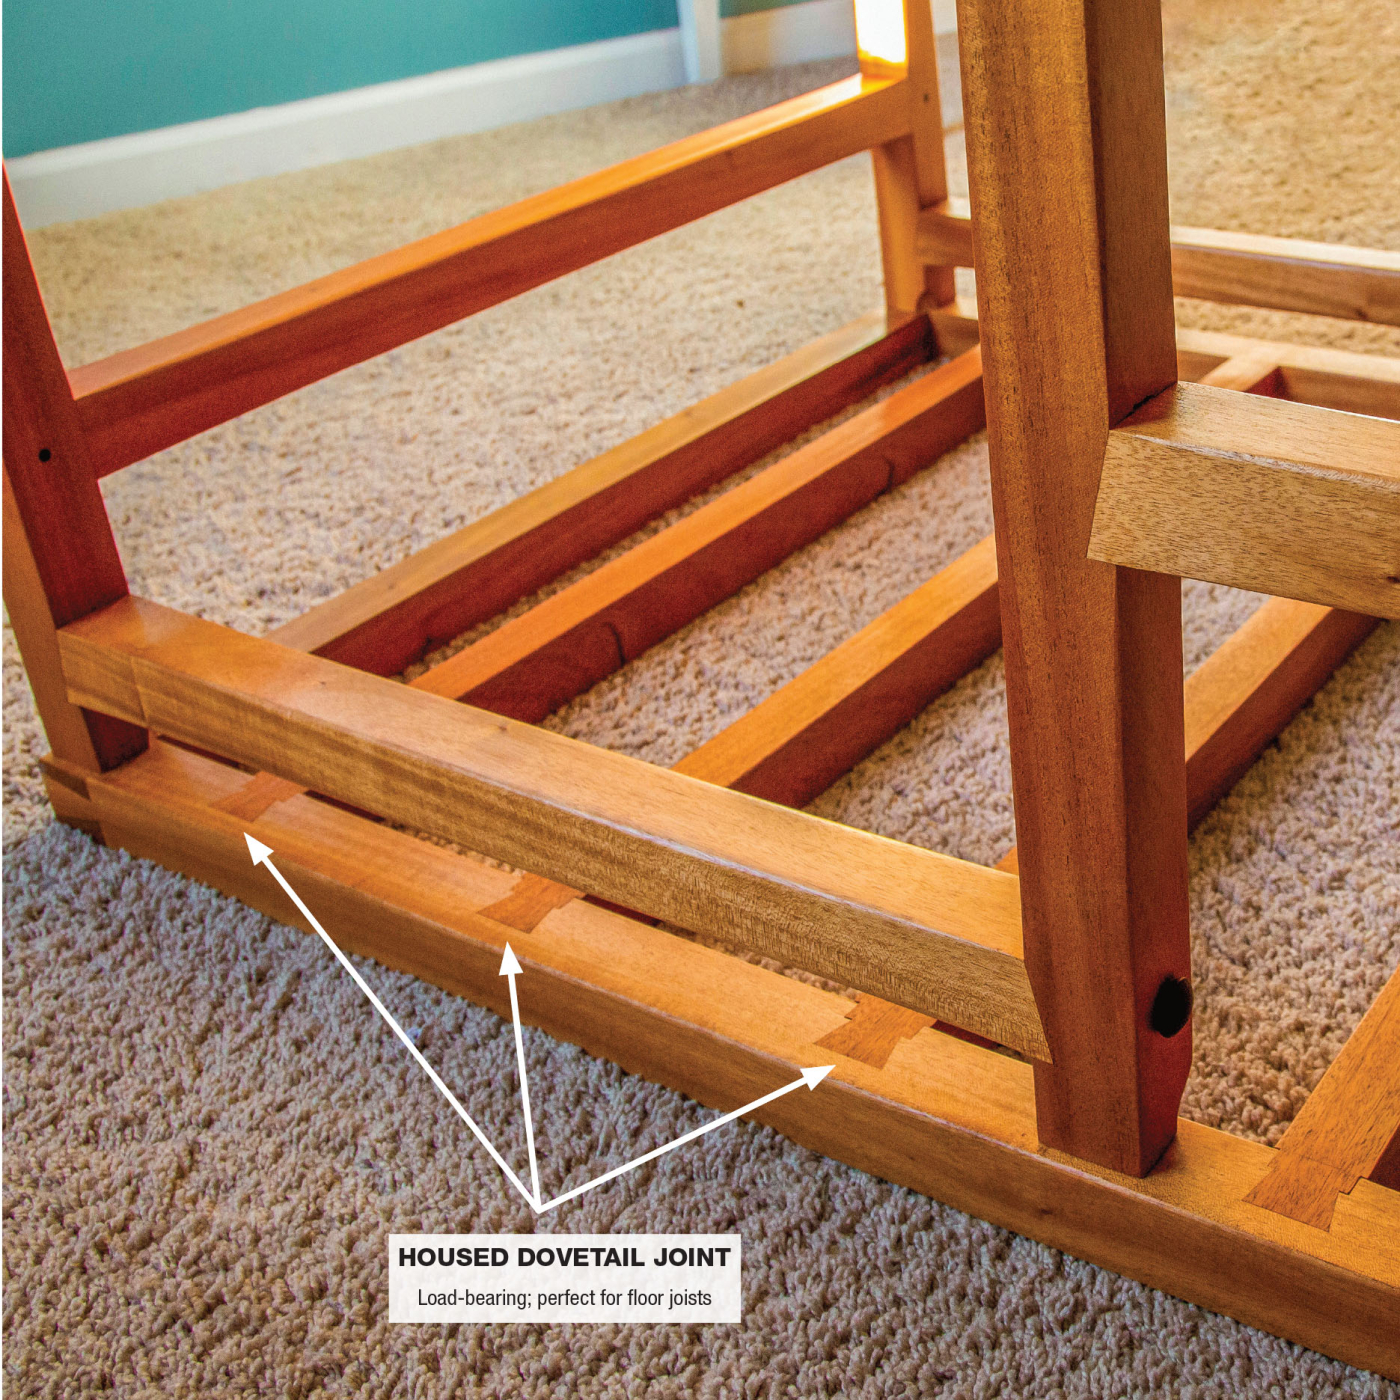
19. The mattress platform is designed to mimic traditional floor framing. To connect the joists to the frame, I used housed dovetail joints. The dovetail portion of the joint keeps the frame from spreading, while the hidden load-bearing portion of the joint supports all the weight.
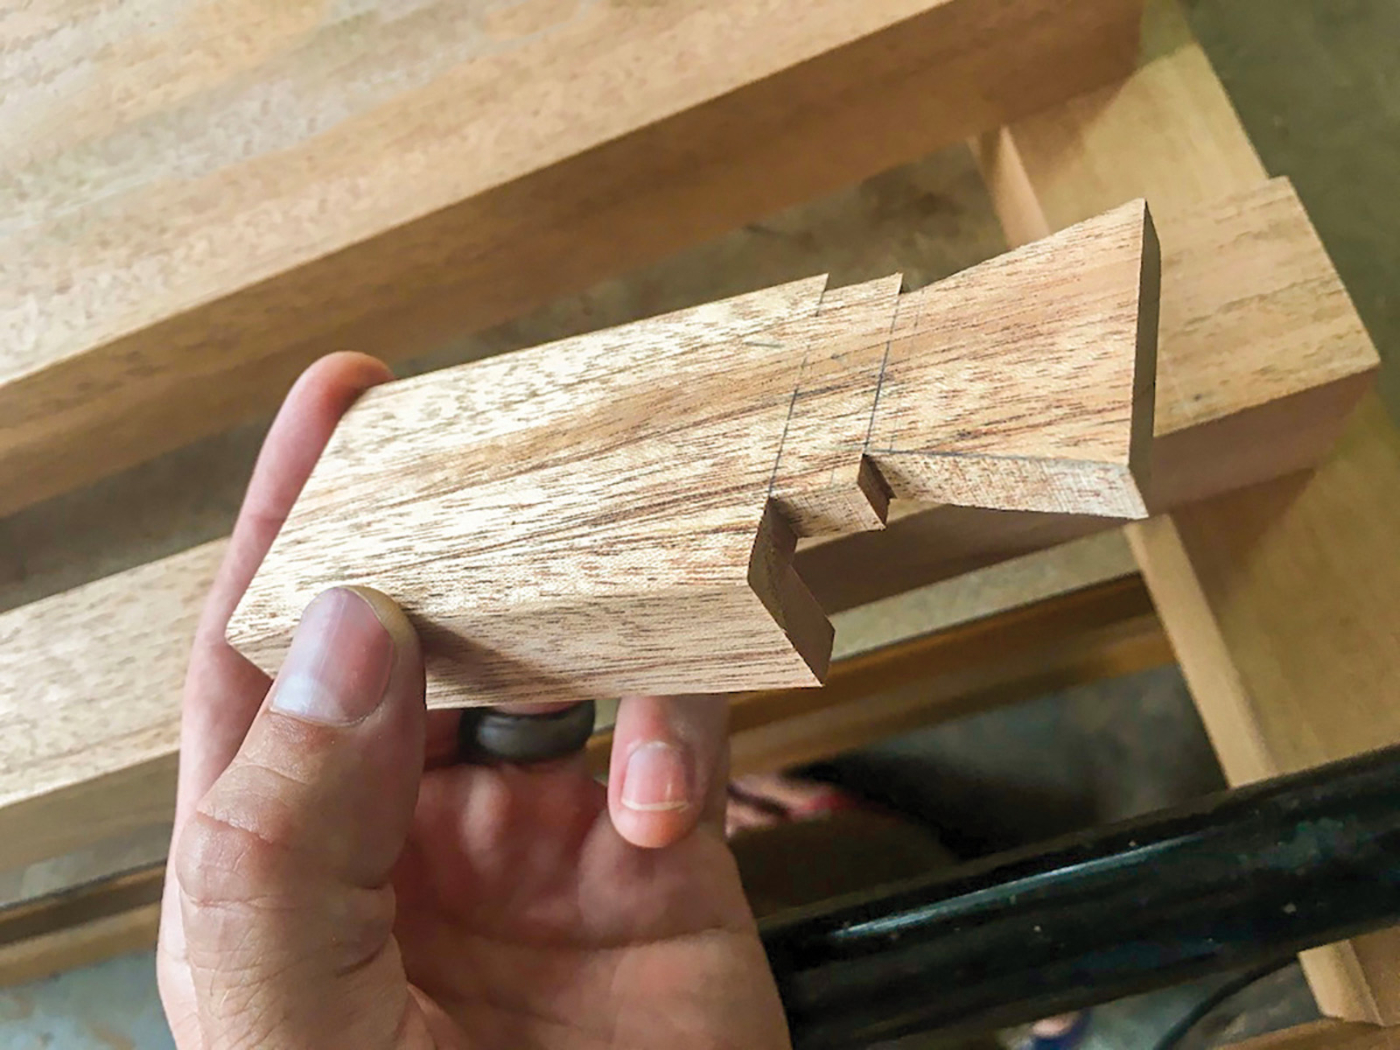
20. To aid in cutting the 14 housed dovetail joints I made a template.
Instead of measuring and marking each of the 14 housed dovetail joints, I made a template. This minimized the risk of costly errors, and aside from the initial time investment it took to make it, layout of the 14 joints was quick and accurate. I did this for the bird’s mouth rafter and shouldered mortise & tenon joints, as well.
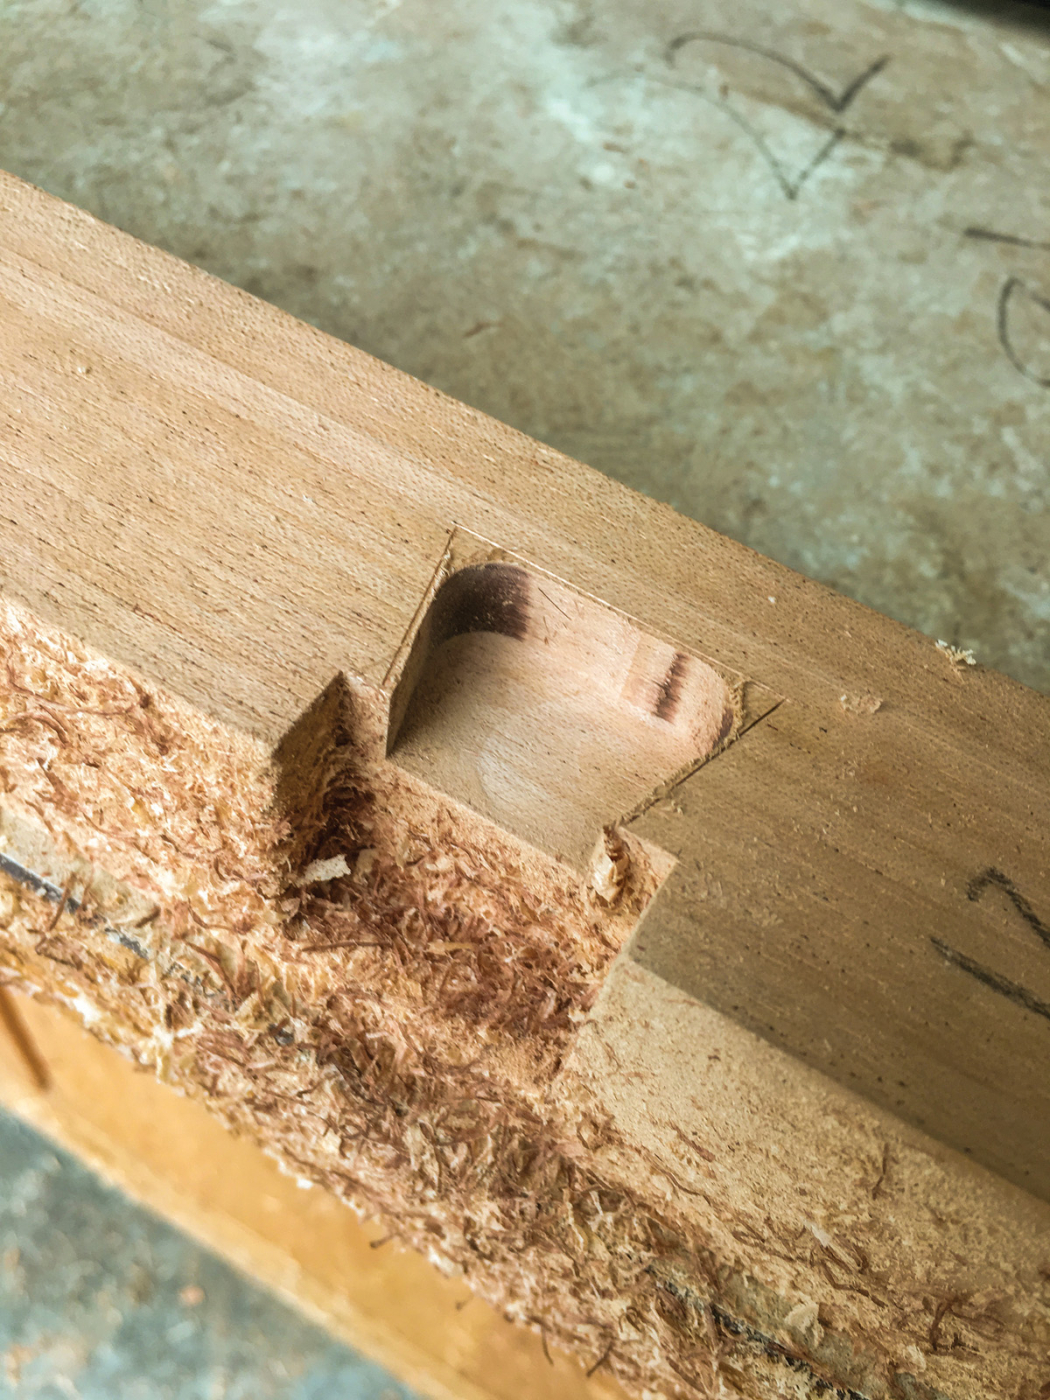
21. I used a trim router freehand to hog out most of the waste, then pared to the layout lines with a chisel.
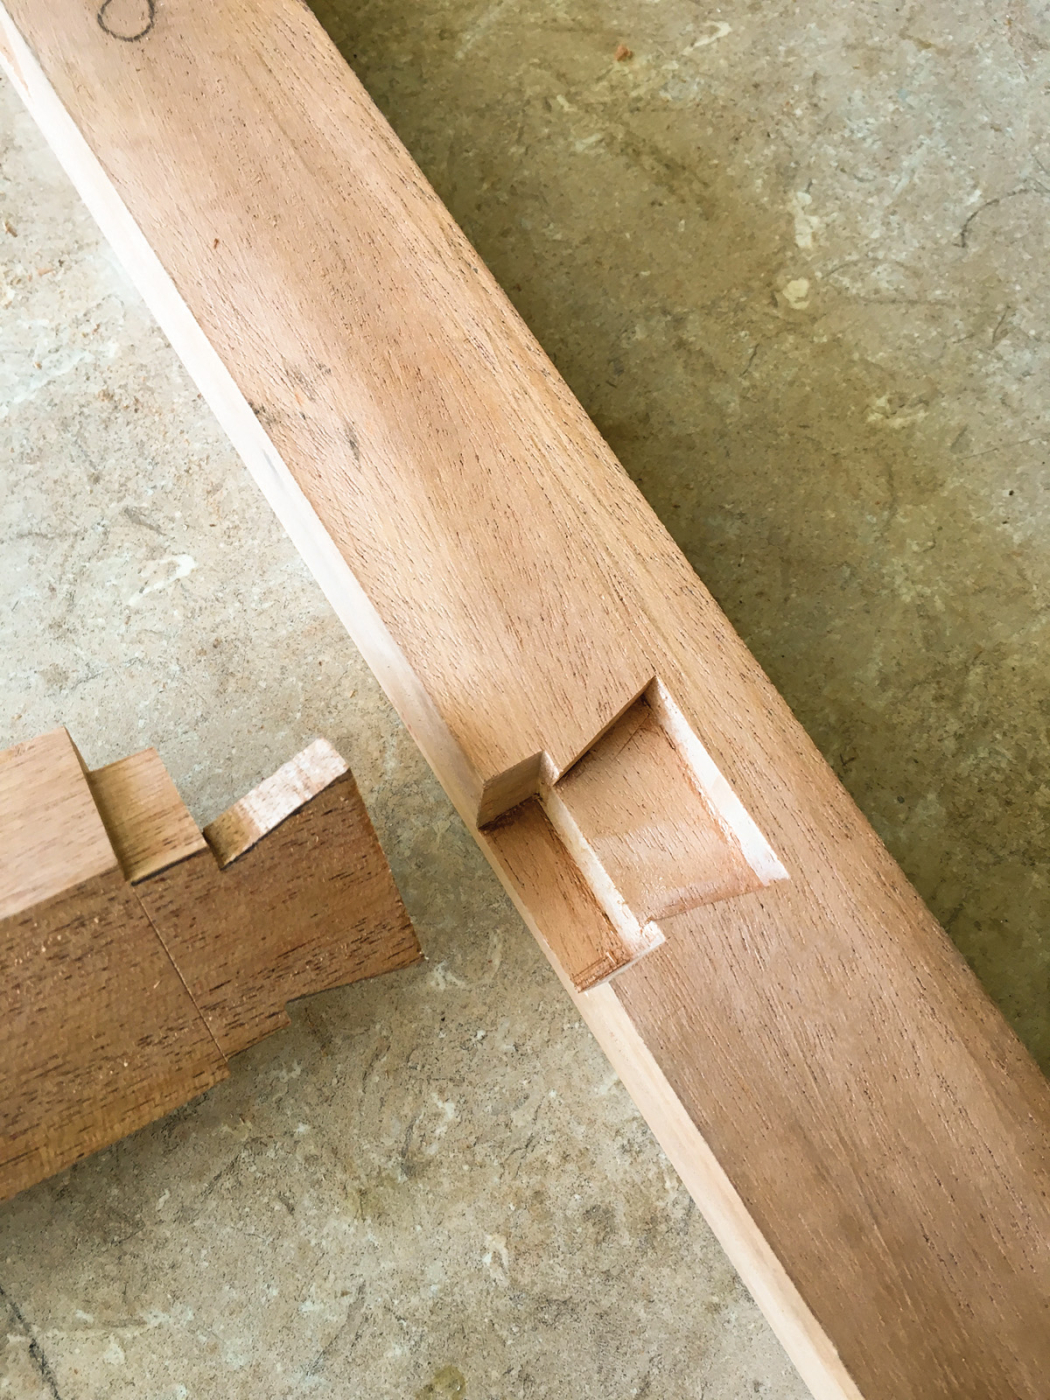
22. You can see here how the joint goes together. The block portion is what supports all the weight of the floor (or mattress, in my case).
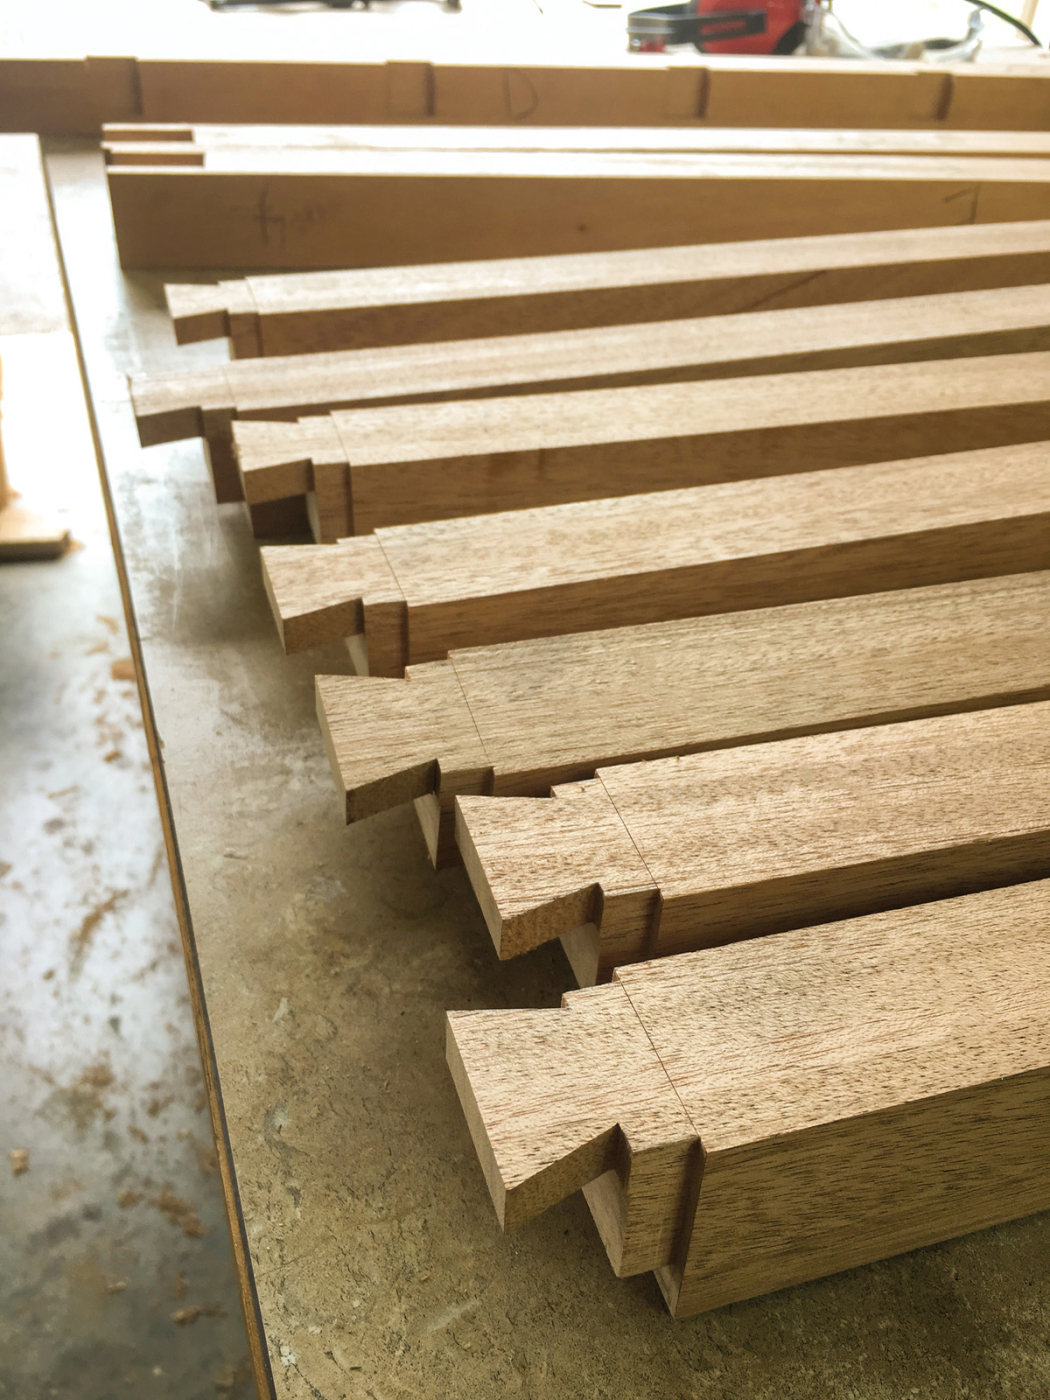
23-24. Seeing all these housed dovetails cut and fitted was one of the high points of the project for me.
Assembly and Finish
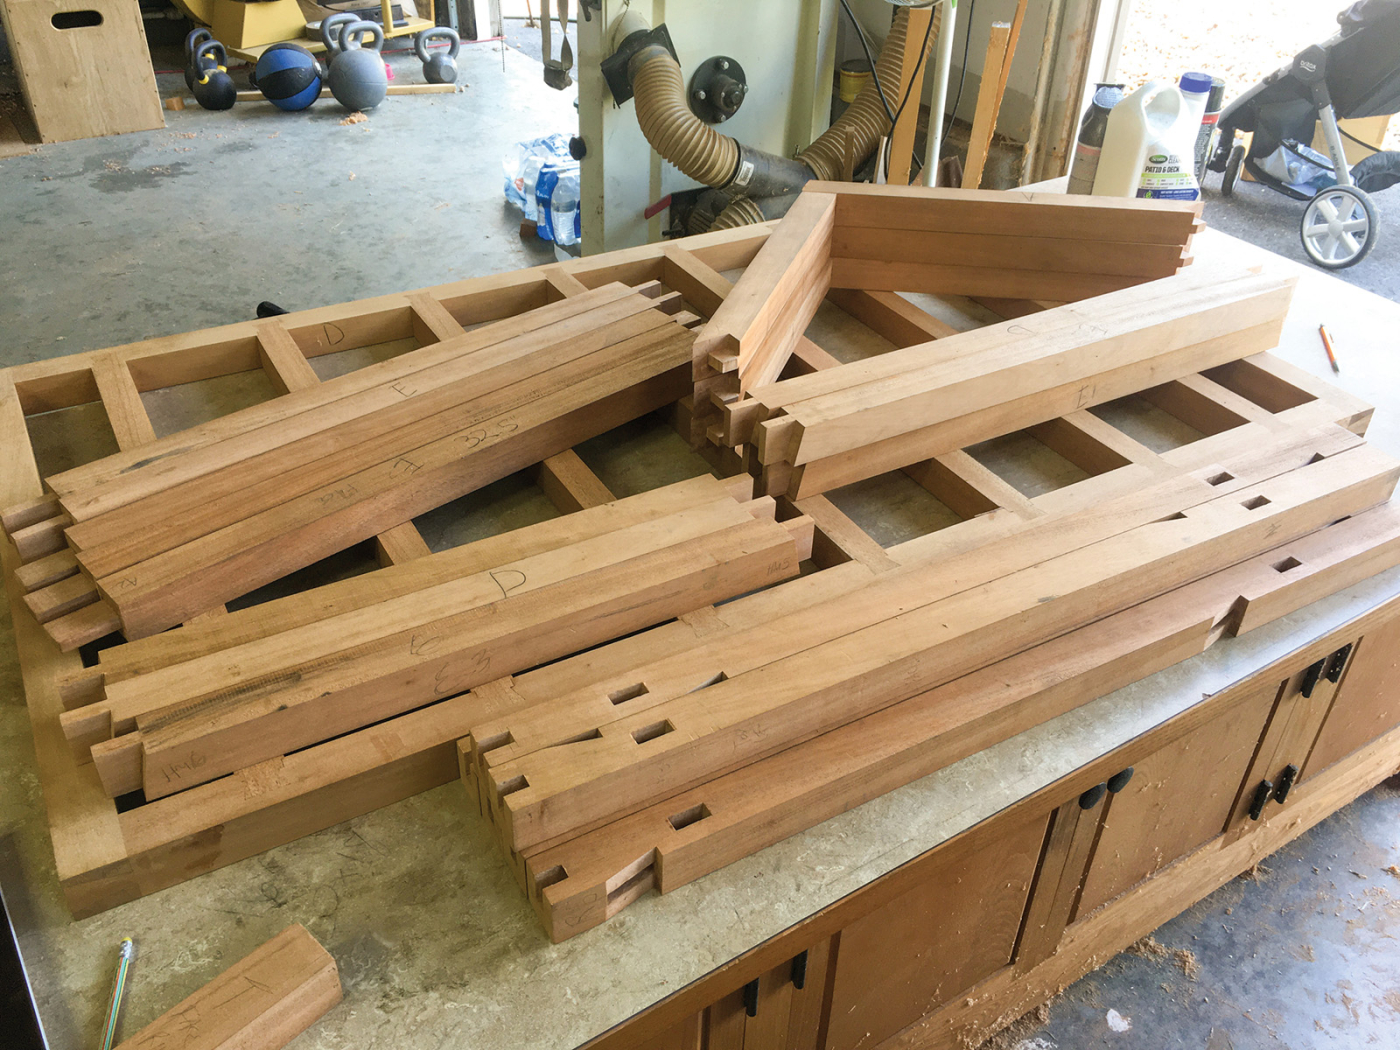
25. All of the pieces ready for assembly. You would find a similar stack of parts on a real timber frame job site.
With all the joinery cut, assembly can begin. And, like a timber frame structure, this one can go together without clamps. I did a dry assembly to plan out which pieces I’d glue, and which were getting mechanically fastened to come apart in a future move. Then I gave the whole structure a final sanding and applied my child-friendly finish.
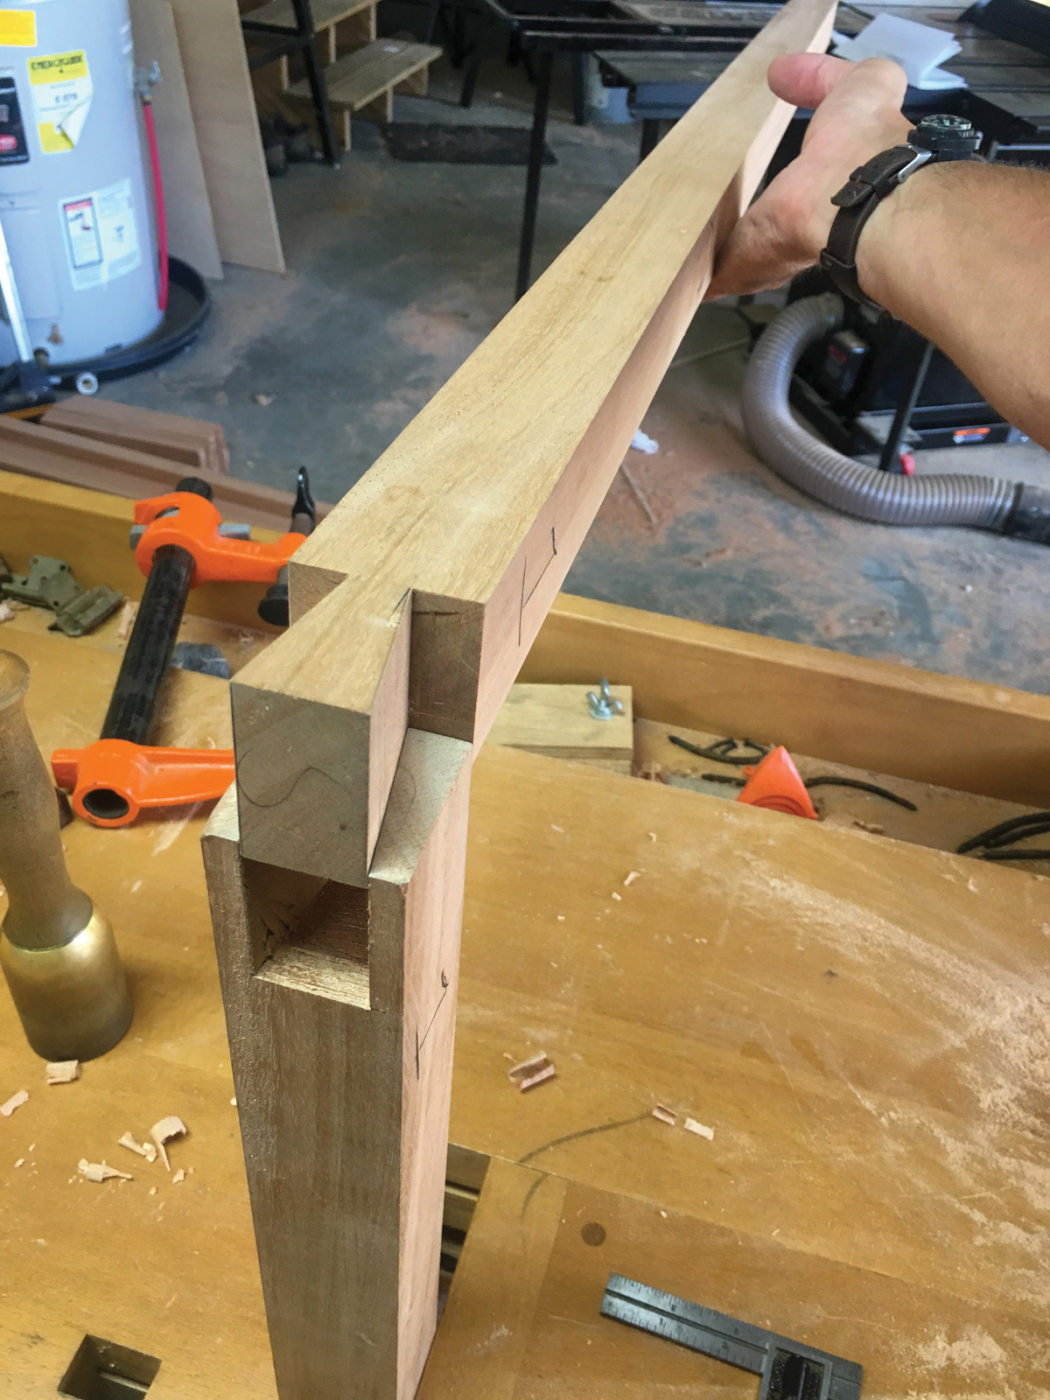
26. The floor frame is joined with single through-dovetails.
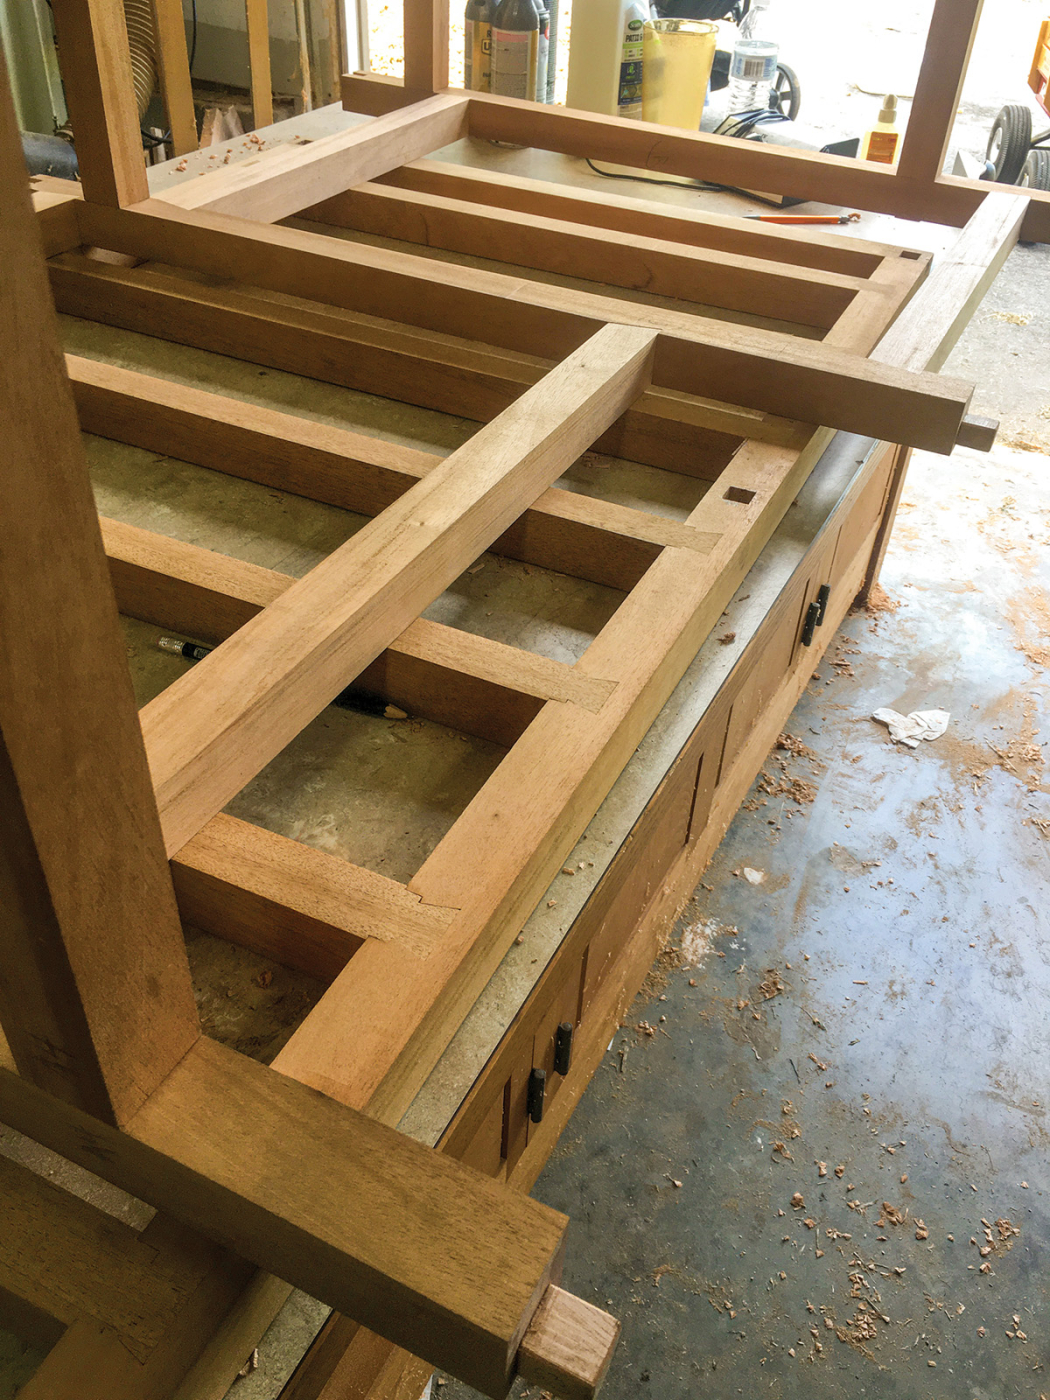
27. I rehearsed the assembly process in the shop before heading into the house. The floor and all three bents can be assembled (and each individually fit through
the doorway).
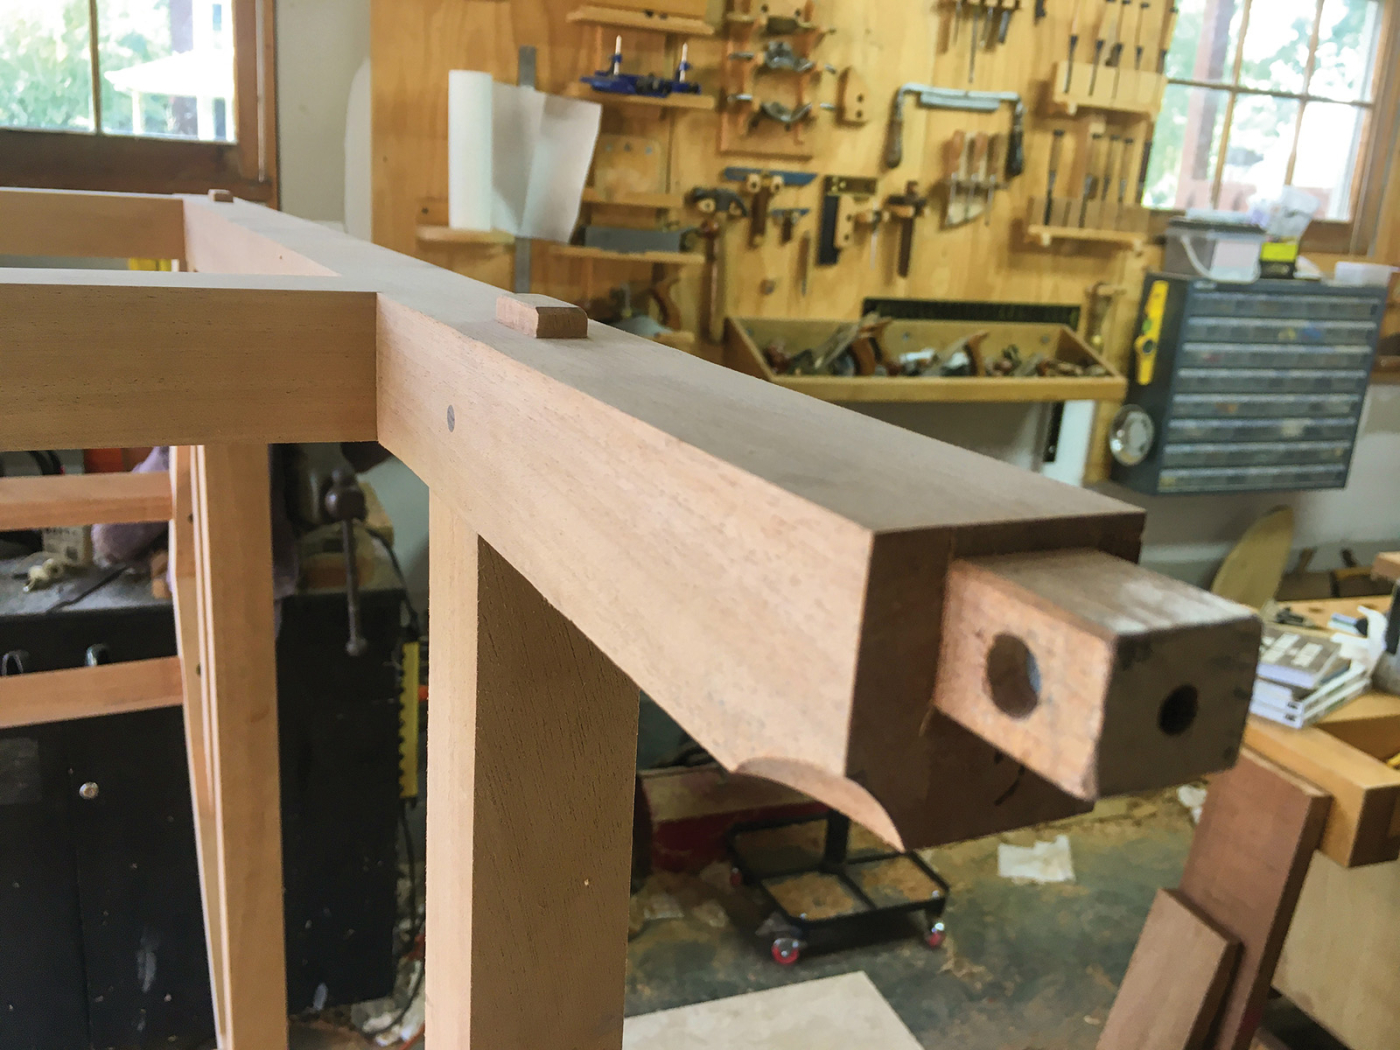
28. As a final touch, I added a small cutaway to the bottoms of the posts where they meet the floor/bed frame.
Here are some supplies and tools we find essential in our everyday work around the shop. We may receive a commission from sales referred by our links; however, we have carefully selected these products for their usefulness and quality.


 Practice Traditional Building


