We may receive a commission when you use our affiliate links. However, this does not impact our recommendations.

The Way Wood Works: Reading Grain Direction
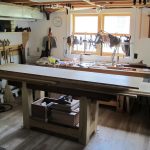
By Tom Caspar
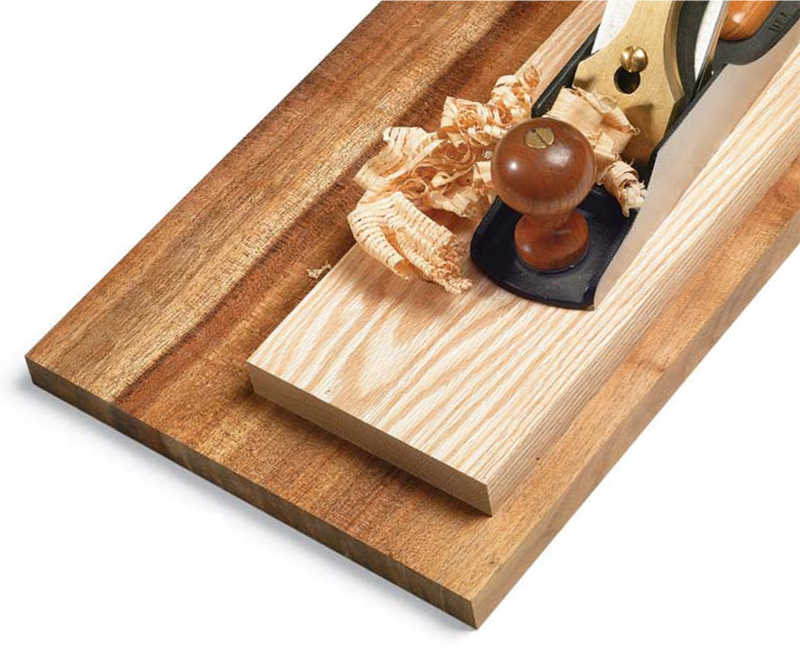
“Going against the grain” is a familiar phrase. It means
doing something the wrong way.When you’re talking about
wood, you always want to go with the grain—cutting or
planing a board in a way that follows the natural structure of
the tree (Photo 1). The result is a smooth surface.
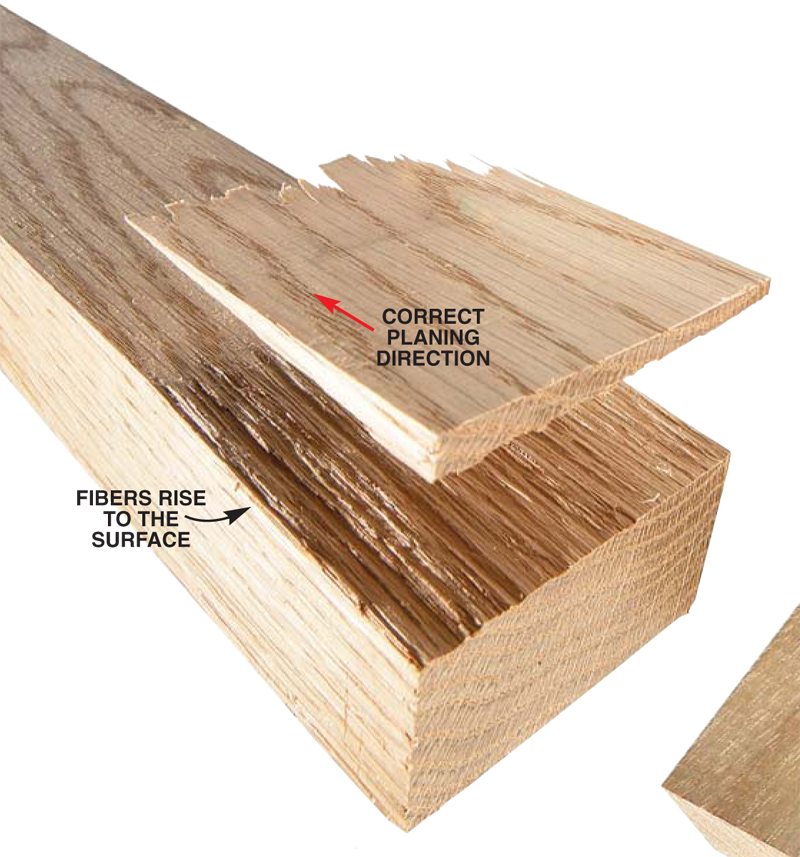
How do you figure out which way the grain goes? Some
folks use the coin-toss method.They’ll joint or plane one side
in an arbitrary direction and observe the results.After all,
you’ve got a 50-50 chance of being right! When you’re
wrong,however,you can be really wrong (Photo 2)
and you’ll get tear-out.Whether it’s shallow
or deep, tear-out means extra work
in planing, scraping or
sanding a board.
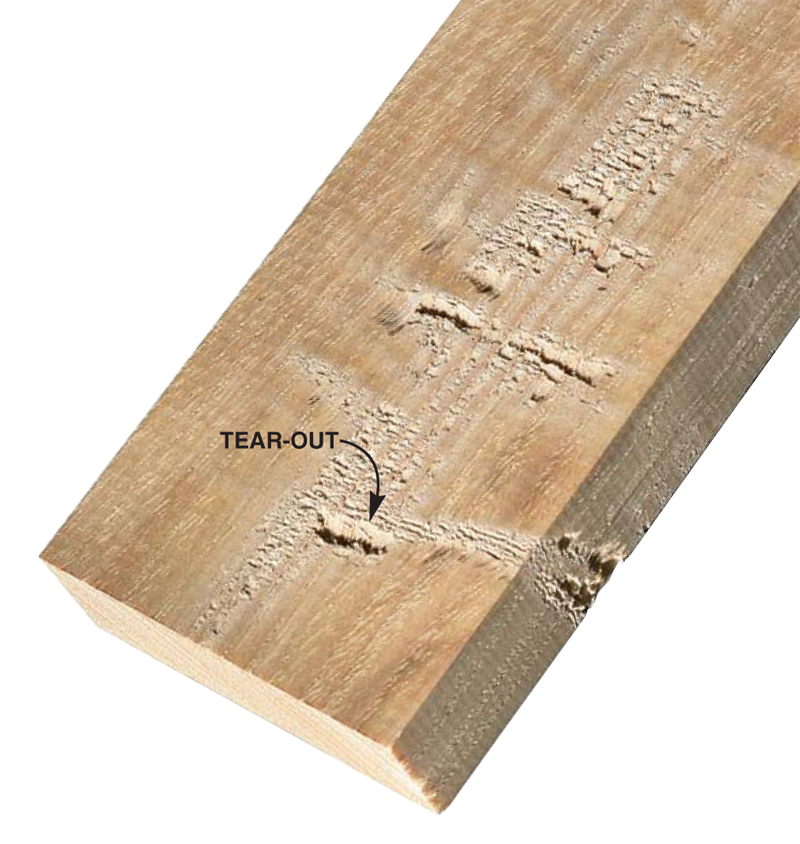
Tear-out will rarely be a problem for you after we
show you how to read the fibers inside a board.Most
woodworkers think that the ovals or lines on the
surface of a board are the key to grain direction,
but this type of “grain” is not completely
reliable for predicting fiber direction (Photo
3). Going with the grain really
means going with the fibers. In the
pages to follow,we’ll show you other
clues that are more dependable in
predicting the fiber direction
in hardwoods.
|
1. Wood is
composed of
long fibers that typically
run at an angle to the surface
of a board. Splitting a board reveals the
direction of the fibers, but we’ll show you
less destructive methods of reading grain
direction on the following pages.
|
|
Click any image to view a larger version.

|
|
2. Nasty
tear-out
is often the result of
planing a board against
the grain.The better you
get at reading grain direction,
the less time you’ll spend
sanding out a mess like this.
|
|
|
|
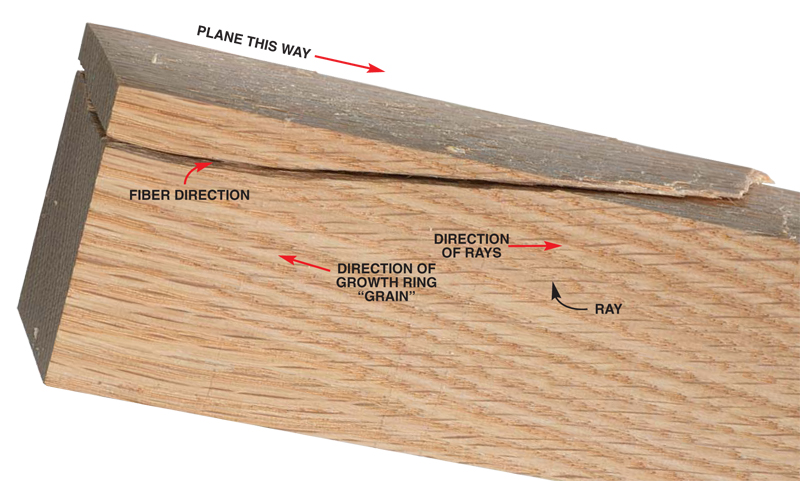
3. Grain direction
can fool you. Normally
we call patterns of
ovals and lines made by
the growth rings the
“grain” of the wood.We
assume that the fiber
direction runs the same
way.The split-off piece of
red oak at right shows
that this “grain” and the
fiber direction don’t necessarily
go the same way.
Small cells called rays are
the true indicators of fiber
direction in plainsawn oak.
(Plainsawn boards are also
commonly called flatsawn
boards. See below for more information on rays
and plainsawn boards.)
|
|
|
|
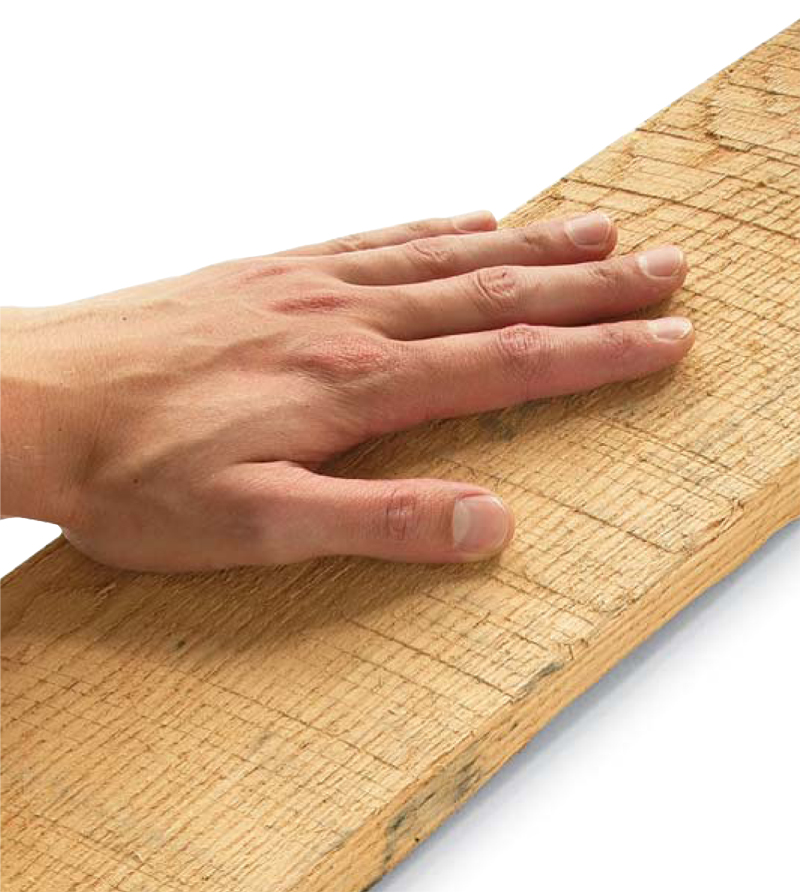
4. Feel the fuzz
on rough lumber.
No kidding, you can tell
which way to plane rough
lumber merely by running
your hand over it! The direction
that the fibers go feels smooth,
while the opposite direction feels
rough and jagged.That’s because many
individual fibers actually stick out above the
surface of rough lumber.You’re feeling their
sharp ends.
|
|
|
|
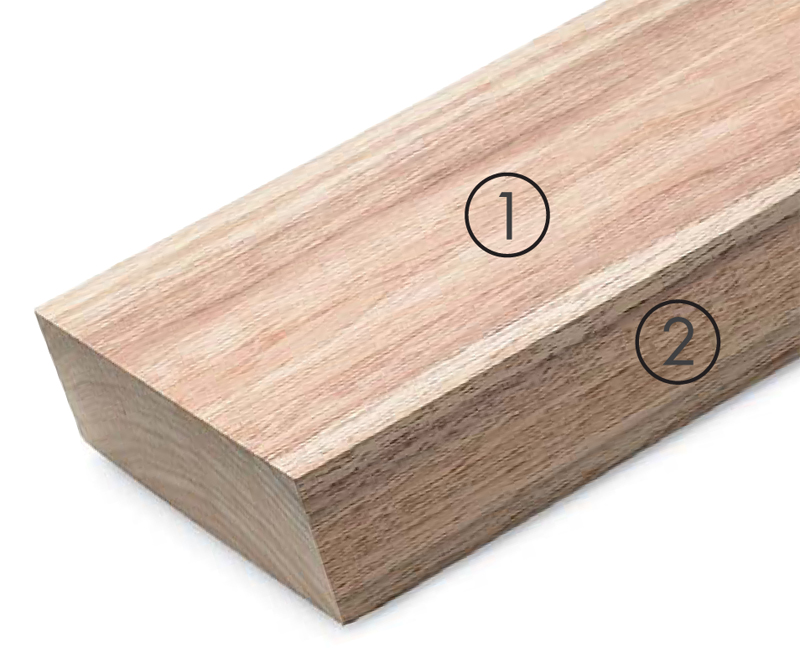
5. Know where to look. On smooth lumber,
the clues to fiber direction are on the surface
of the wood.
You can’t read fiber direction just by looking at
the surface you want to plane, however.
The clues to look for are on the edge
adjacent to the surface you’ll
plane.To plane the top (1),
look at the side (2).To
plane the side,
look at the
top.
|
|
|
|
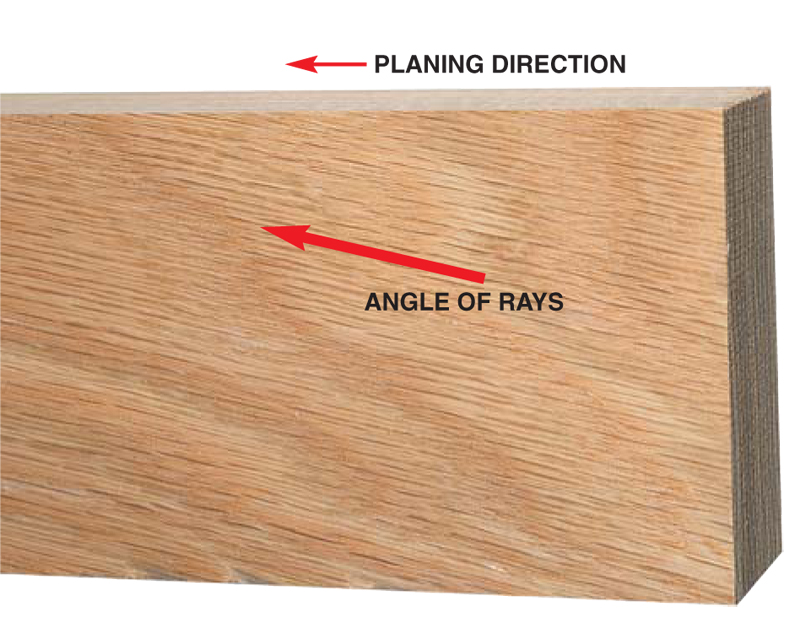
6. Rays are the best clues
to fiber direction in
hardwoods. The general angle
of the rays on the plainsawn face
of a board invariably point in the
same direction as the wood’s
fibers.This typical piece of red
oak is easy to read because oak’s
rays are quite prominent. Beech
and sycamore also have large
rays. Cherry, maple and many
other woods have rays that are
paler and much smaller, but you
can find them if you look closely.
Some hardwoods, such as ash
and walnut, have rays that are
too small to see.
|
|
|
|
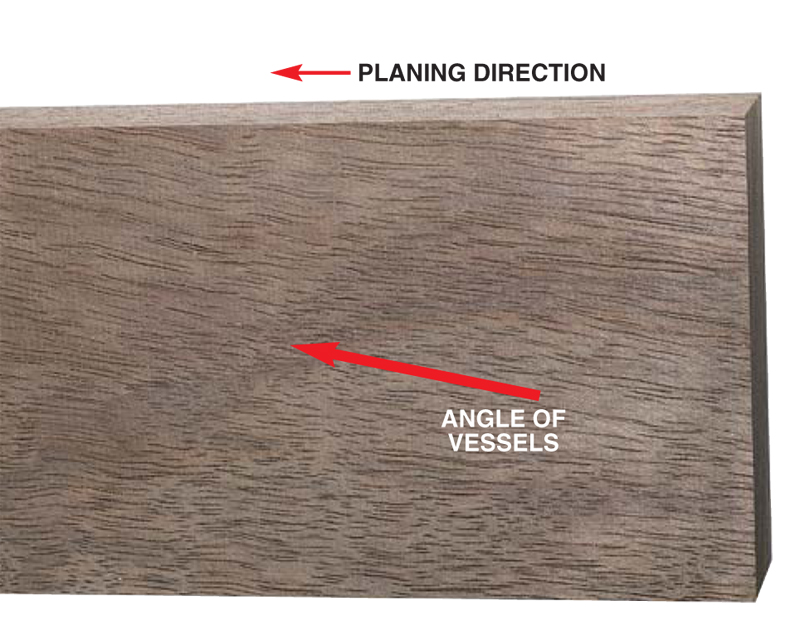
7. Look for vessels to
indicate fiber direction
when you can’t see rays.Vessels
are cells that look like
long, dark dashes.They’re
easy to spot on this piece of
walnut once you know what
you’re looking for. Mahogany,
butternut and birch also have
clearly visible vessel cells, as
do many other woods.
|
|
|
|
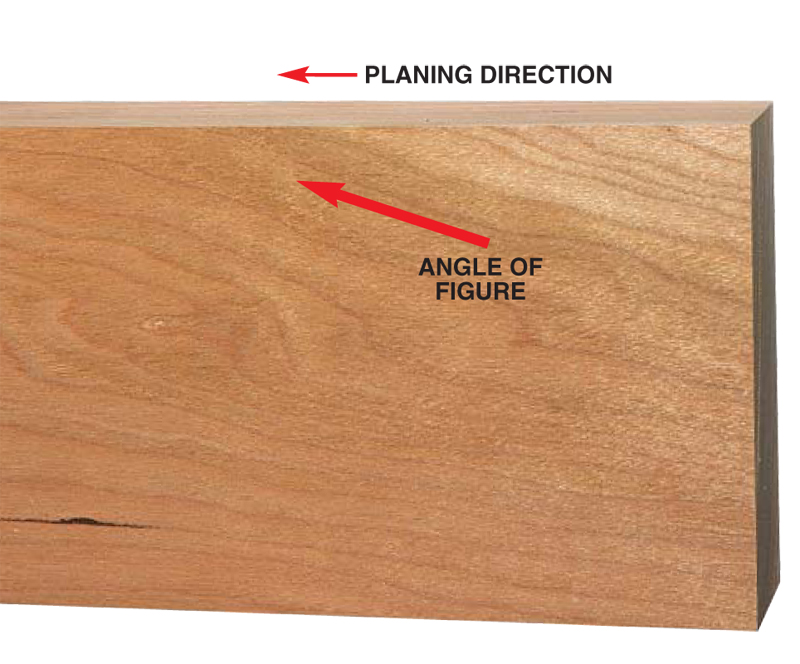
8. Figure is a last resort.
If you can’t see rays or
vessels, go with the angle of the
dark lines that most woodworkers
call the “grain” of a
board. (“Figure” is the more
accurate term.) We’re all familiar
with the concentric growth
rings on the end of a board
(Photo 9). If you follow those
rings around to the face or
edge, they become the lines
and ovals that lend each board
a distinctive figure.
|
|
|
|
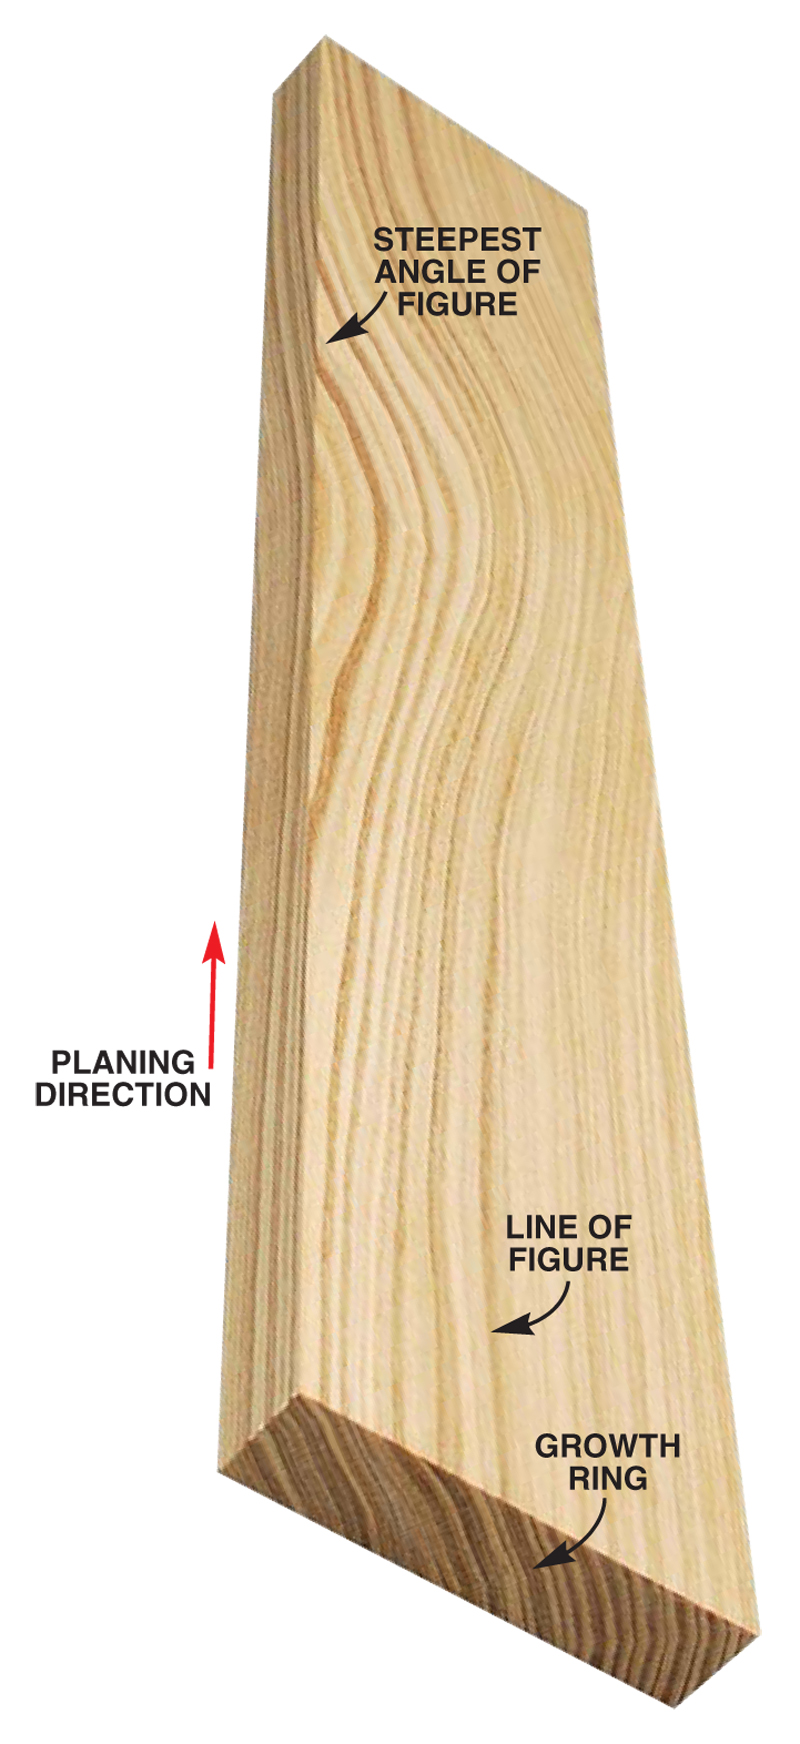
9. Fiber
direction can
often run two ways. Tearout
may be inevitable no matter
which way you plane this board, but
you can minimize it using the clues to
fiber direction given here. In this
piece of ash, the figure made by the
growth rings is the only obvious clue
to follow.The angle of this figure is
steeper at one end of the board than
the other.Always use the steeper end
to decide which way to plane.
|
|

|
|
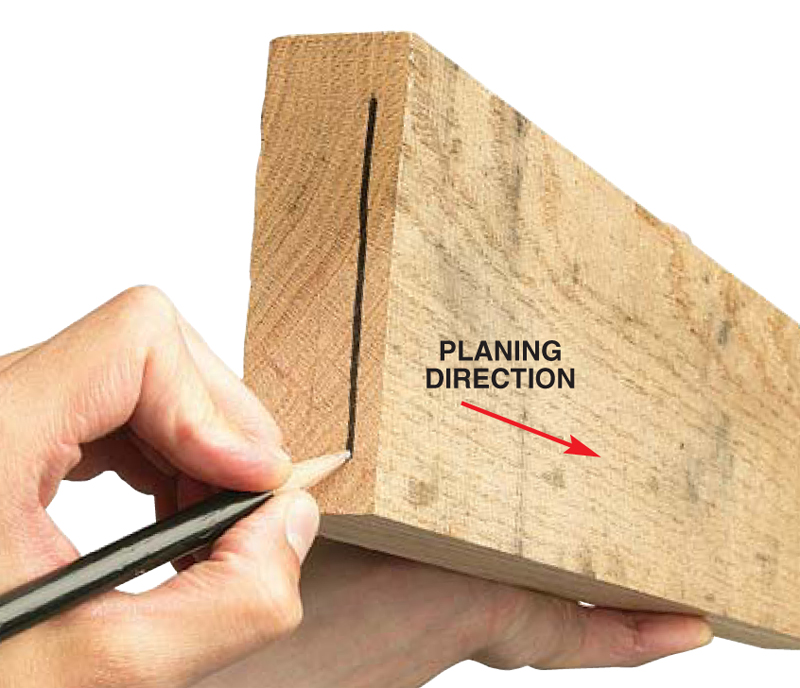
10. Mark fiber direction on the end of the
board.This mark means “begin planing the
top surface here.” It can’t be accidentally removed
as you mill the faces or edges of your lumber.
|
|
|
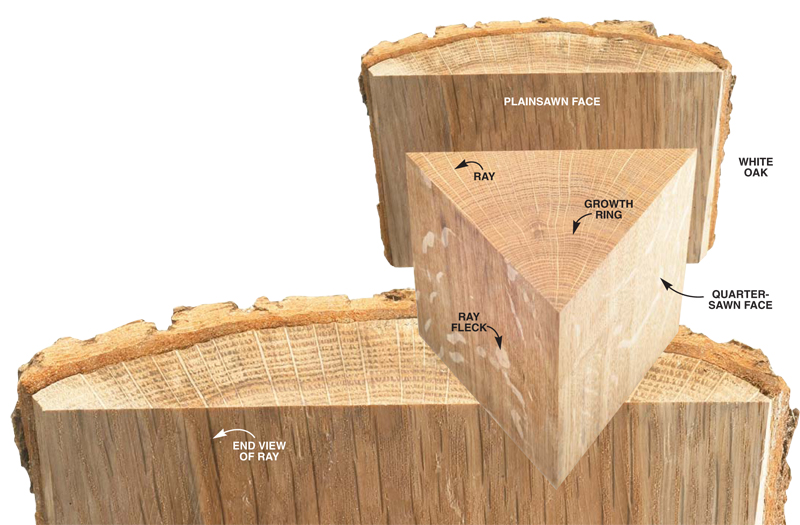
What are rays?
Ray cells radiate from the center of a tree.These
long, thin ribbons show different faces depending on how
the board is cut from the tree.
You can clearly see the wide side of the rays when the
surface of a board runs at a right angle to the growth
rings.This surface is called a quartersawn or radial face,
and the ray’s wide sides are called ray fleck.
When the surface of a board runs more or less parallel
to the growth rings, you only see the narrow ends of the
rays.This is how most boards are sawn, and this surface
is called a plainsawn, flatsawn or tangential face.
|
|
|
Product Recommendations
Here are some supplies and tools we find essential in our everyday work around the shop. We may receive a commission from sales referred by our links; however, we have carefully selected these products for their usefulness and quality.