We may receive a commission when you use our affiliate links. However, this does not impact our recommendations.
Staining Pine
Make this inexpensive wood look like a million bucks.
By Tim Johnson
Purchase the complete version of this woodworking technique story from AWBookstore.com.
|
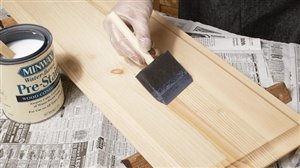
1. Brush on two generous coats of water-based conditioner. With each application, keep the surface wet for three to five minutes, then wipe off the excess. Let the conditioner dry thoroughly, then sand it with 400-grit paper. Go lightly on contours and edges, so you don’t cut through. |
Click any image to view a larger version. |
|
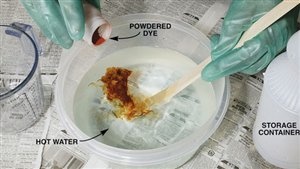
2. Dissolve powdered dye in hot water. When the powder is completely dissolved, transfer it to a lidded container and let it cool. |
|
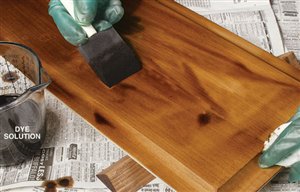
3. Brush on a liberal coat of dye and keep the surface wet. Wipe the end grain occasionally to check its appearance. After the surface is uniformly colored, wipe off the excess dye and let the wood dry. Then repeat the process. |
|
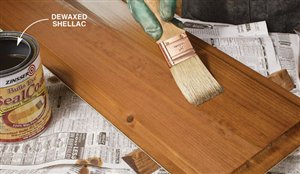
4. Seal the surface with two coats of 2-lb.-cut dewaxed shellac. Sand after each coat with 400-grit paper. |
|
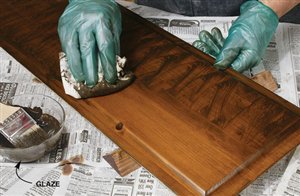
5. Make your own glaze by dissolving artist’s oil into glaze medium (see Sources, below). You don’t have to be scientific about the ratio as long as you use only one color. Don’t go overboard with the amount you mix—a little glaze goes a long way. |
|
6. Glaze acts as a toner on the sealed surface, resulting in a deep, rich color and a uniform appearance. Just brush it on and wipe it off. Blend uneven areas by varying the amount of glaze you leave on the surface. |
|
This story originally appeared in American Woodworker July 2003, issue #101. |
Purchase the complete version of this woodworking technique story from AWBookstore.com. |
Here are some supplies and tools we find essential in our everyday work around the shop. We may receive a commission from sales referred by our links; however, we have carefully selected these products for their usefulness and quality.


