We may receive a commission when you use our affiliate links. However, this does not impact our recommendations.

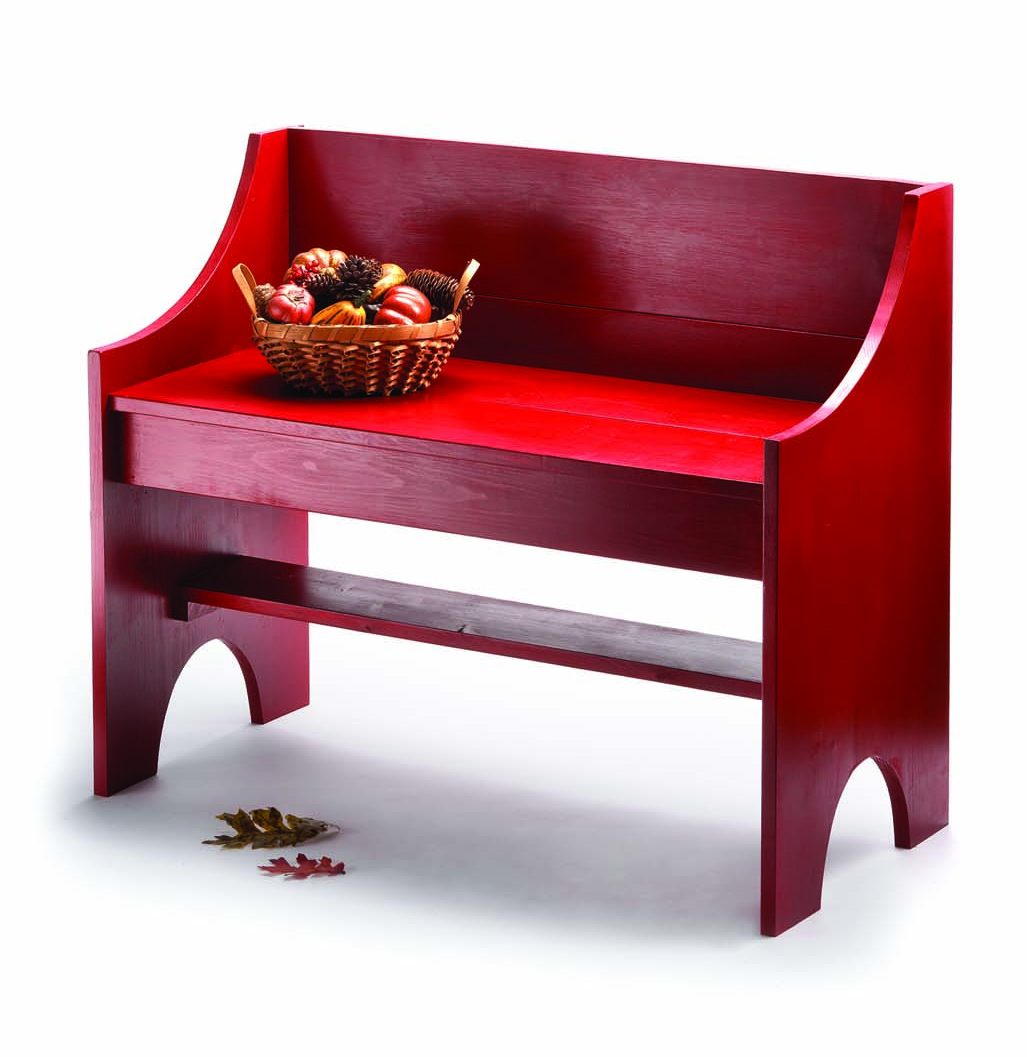
Easy seat. This simple (but good-looking) bench can be built in just a few hours’ shop time.
This simple seat is ideal for a hallway or porch.
This project is inspired by a period choir bench in my mom’s dining room – but I modernized the Gothic revival design of the original with sweeping curves on the arms (instead of shelter arms), and left out the moulding and cutouts.
Panel Glueup
This bench is destined for a front porch, so to protect it from the elements, it’s painted – a good thing, because the side panels are glued up from two distinctly different species of pine (one challenge of buying dimensional lumber from the home center) – and I used sticks pulled from the scrap bin for the cleat material (if you don’t have suitable scrap, pick up 1x material at the home center).
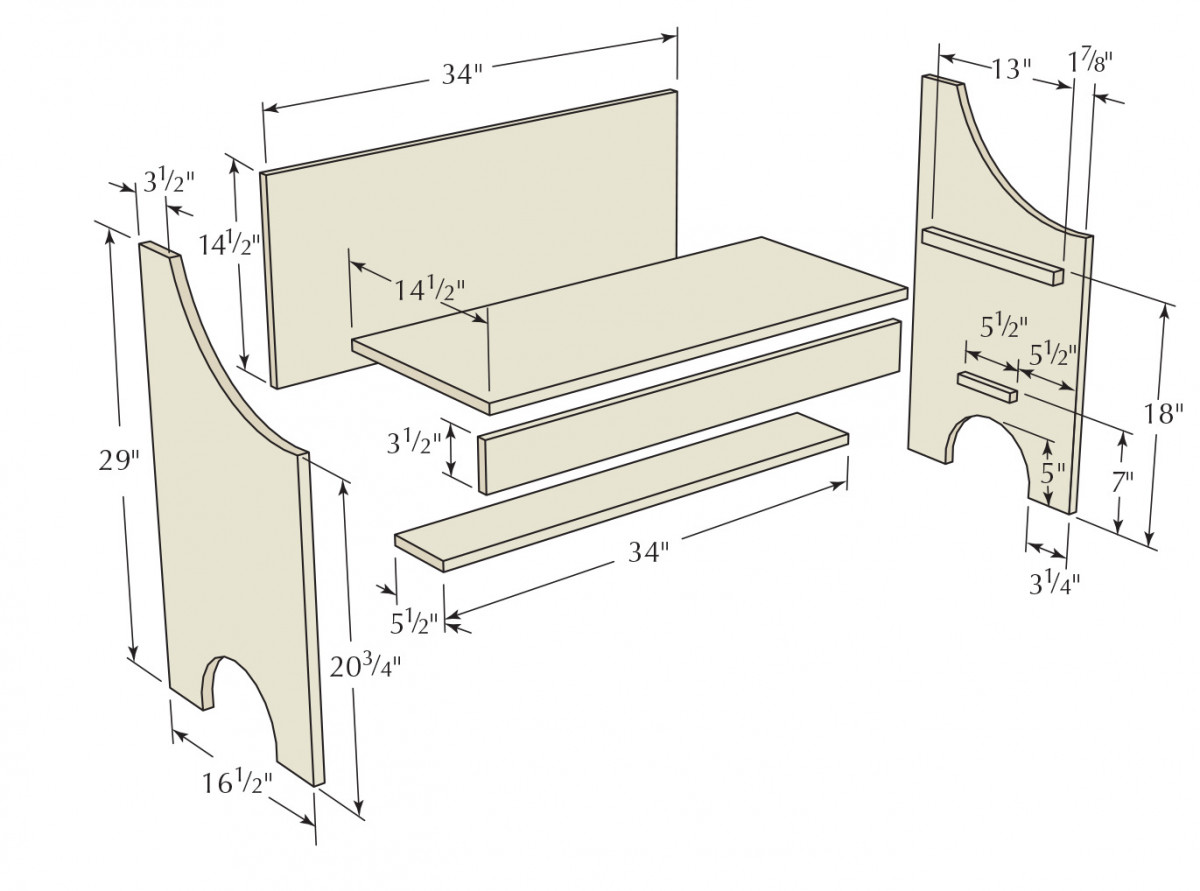
The two side boards are solid panels; I glued up each from one 29″-long piece of 1×10 and one 29″-long piece of 1×8 (while you can purchase panels wide enough for the sides, I think they’re insanely expensive).
So the first step is to set a stop-block 29″ to the left of your miter saw blade, then cut two pieces from a 1×10 and two from a 1×8. Then, glue up your two 16-1/2″-wide panels and set them aside to allow the glue to dry overnight.
Cut the Remaining Pieces
Usually, it’s better to wait to cut your pieces until you need them, because often your actual build won’t exactly match the cutlist. But for this bench, with the exception of the cleats, all the remaining pieces need to be the same length so set up your miter saw once and make all but the cleat cuts. Move the stop-block to 34″ left of the blade, then cut the four boards for the seat and back from 1×8 stock, cut the stretcher from 1×4 stock and the shelf (which also acts as a lower stretcher) from 1×6 stock.
You can now set your stop-block to cut the two 13″-long cleats for the seat, then the two 5-1/2″-long cleats for the shelf.
Curve Appeal

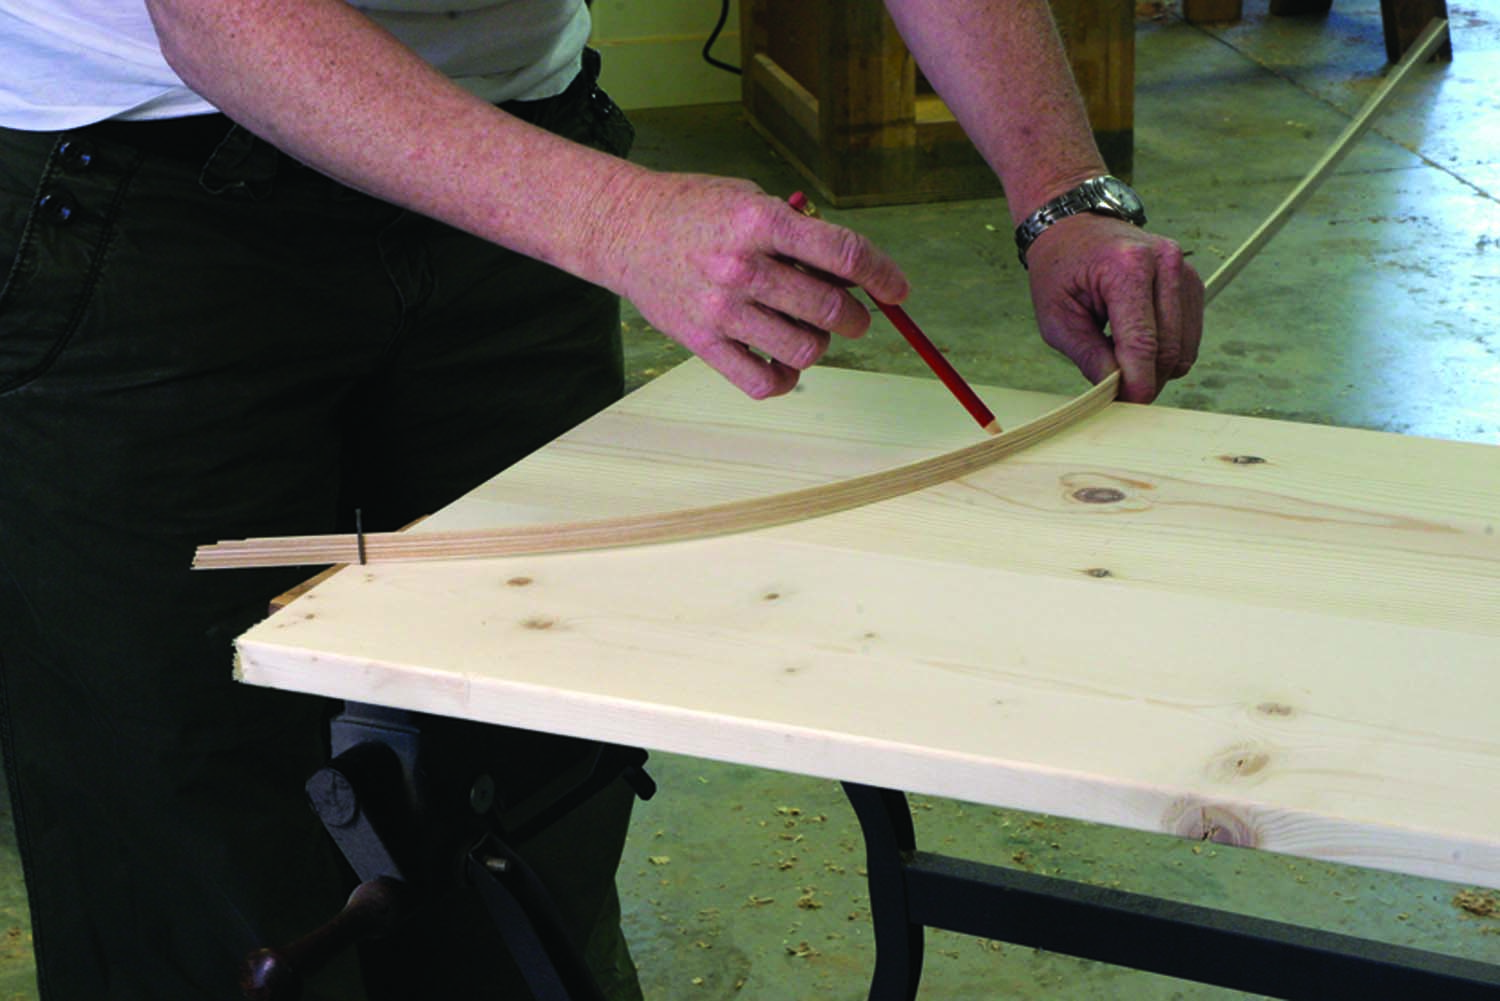
Mark a curve. A nail acts as a third hand while I mark the concave curve at the top of one side piece.
I played with a number of different curves for the arms, including no curve (which felt too boxed in) and a convex curve on the top corners to match the bottom cutouts (it still seemed bulky) before deciding on a sweeping concave curve. You should play around with it, and see what feels right to you.
To mark the curve I used, sink a nail 3-1/2″ in from the back edge, just deep enough to stay in place, then mark the front edge 20-3/4″ up from the bottom (or 8-1/4″ down from the top). I used a thin, flexible offcut from the trash can, but you can use a flexible ruler or anything that will bend neatly, and put one end against the nail, hold the other in place at your mark, then draw the curve with a pencil.

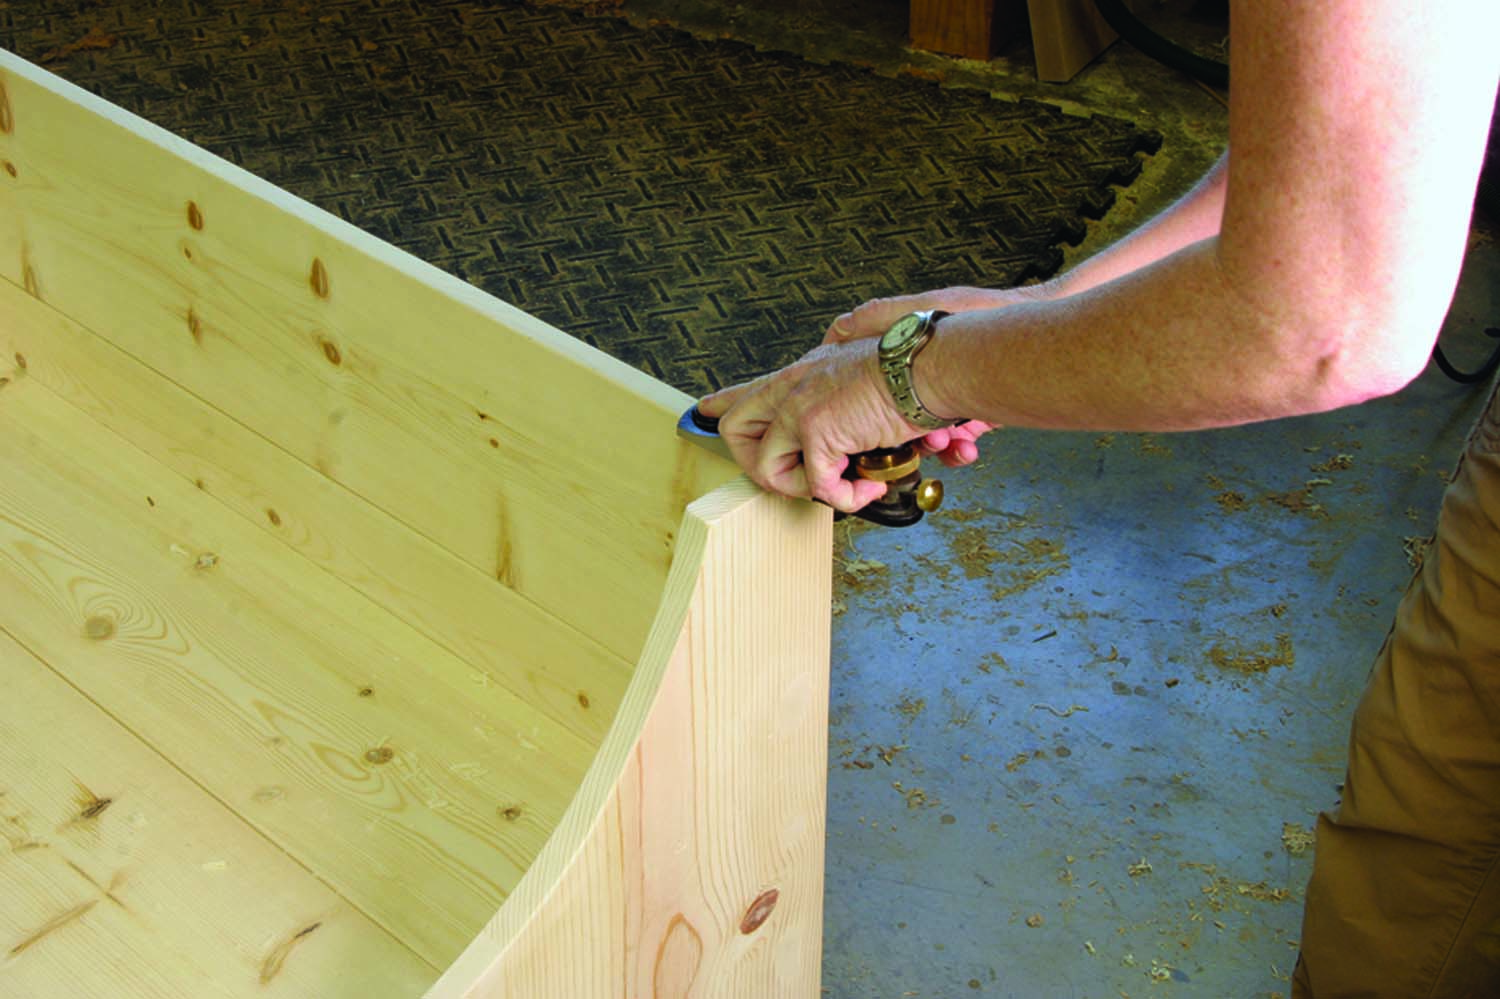
Plane to fit. If your backboards are slightly proud of the sides, take a few passes with a block plane at either end to curve the back pieces in to meet the sides. If the sides are proud and need planing, wet the end grain with alcohol to soften it, then plane them down to meet the backboards.
Now mark 3-1/4″ in from the sides at the bottom, then pencil in a curve for the bottom cutout using the same method – or, if you have a large enough compass, that works, too. (The radius on the curve as shown is 5″.) Be sure to leave enough meat on the ends to support a body’s weight, and don’t go above 6-1/2″ up with the apex of your curve; the top edge of the cleat for the shelf is 7″ up from the bottom.
Use a jigsaw to remove the waste at both locations. If you’ve cut close to your lines, go ahead and use the first side to mark the curves on the second side. If you’re way off the lines, you might want to shape the arm and base arc with a rasp and sandpaper before using it as a pattern.
Once both sides are cut, clamp them together to shape and sand the curves simultaneously so they’ll match.
Start Screwing
Mark the cleat locations from the plan, drill clearance holes and countersinks, then put a line of glue on each, and screw the four cleats in place.
Get someone to help hold a side in place as you drop your seatboards and shelf onto their respective cleats, then clamp across the width just tightly enough to hold things together. Now you can dismiss your helper.
Adjust the front seat board so it’s 1/2″ back from the front edge of the sides, tighten the clamp to hold it securely, then drill, countersink and screw through the outside into the end grain of the seatboard using #8 screws, at least 11⁄2″ long (and make sure you drill straight – you have only a 3/4″-thick piece into which you’re drilling; you don’t want screw tips poking through into seated bottoms).
The shelf can be screwed or nailed to the cleats.
Now loosen the clamp, butt the second seat board against the first, and repeat.
The stretcher butts against the front end of the seatboard cleats. Clamp it in place and again, drill, countersink and screw through the outside of the side pieces.
It’s easier to attach the bottom backboard first, because you can flip the bench on its front to position the lower backboard against the back seatboard (7-1/4″ down from the top edge of the sides). Drill, countersink and screw it in place, both through the sides and into the rear seatboard. Then flip the bench back on its feet and secure the top backboard by screwing through the sides.
If your top backboard ends up proud of the sides (or the sides end up proud of the backboards), a few strokes with a block plane will solve the problem.


A Bright Finish
Fill your screw holes (if you like) with wood filler, let it dry, then sand it flush as you sand the rest of the piece up to #150 grit.
This piece is going on a front porch, so I chose bright red paint for a cheerful welcome.
Extra: View the SketchUp model
Here are some supplies and tools we find essential in our everyday work around the shop. We may receive a commission from sales referred by our links; however, we have carefully selected these products for their usefulness and quality.


I’m thinking you can throw in a matching step stool next to it for ‘foot propping’ while tying shoes:
https://www.popularwoodworking.com/projects/shaker_inspired_step_stool
https://www.popularwoodworking.com/projects/_i_can_do_that_step_stool (sans backrest?)
Lovely bench! I’m thinking of one for the mudroom. You call it simple, but I think it’s quite a complex visual form as well as structurally sound. Simple to build perhaps, but not so simple to design. I like the changes you’ve made.