


We may receive a commission when you use our affiliate links. However, this does not impact our recommendations.
 Arts & Crafts style and knockdown design team up for a winning combination.
 Arts & Crafts style and knockdown design team up for a winning combination.
Imagine this attractive little table residing next to a comfortable chair, holding important items such as a cup of coffee and a book. Its shaped sides and wedged tenons create lots of visual appeal, it has a useful shelf and the construction makes it sturdy enough to support a baby circus elephant. This table consists of only five pieces and all of the joinery is at 90˚, so you can probably build it in a weekend. Once you’ve made the templates, any board 9″ wide and a little more than 5′ long is all you’ll need.
This little gem assembles with wedges and tabletop fasteners, so you won’t need any glue or clamps, and its knockdown construction means you can finish all the parts separately. You can also pack the finished pieces in a flat box, IKEA-style, and mail a table or two to your kids in college or dear Aunt Mary in Velva ND.
Little Table Cut List

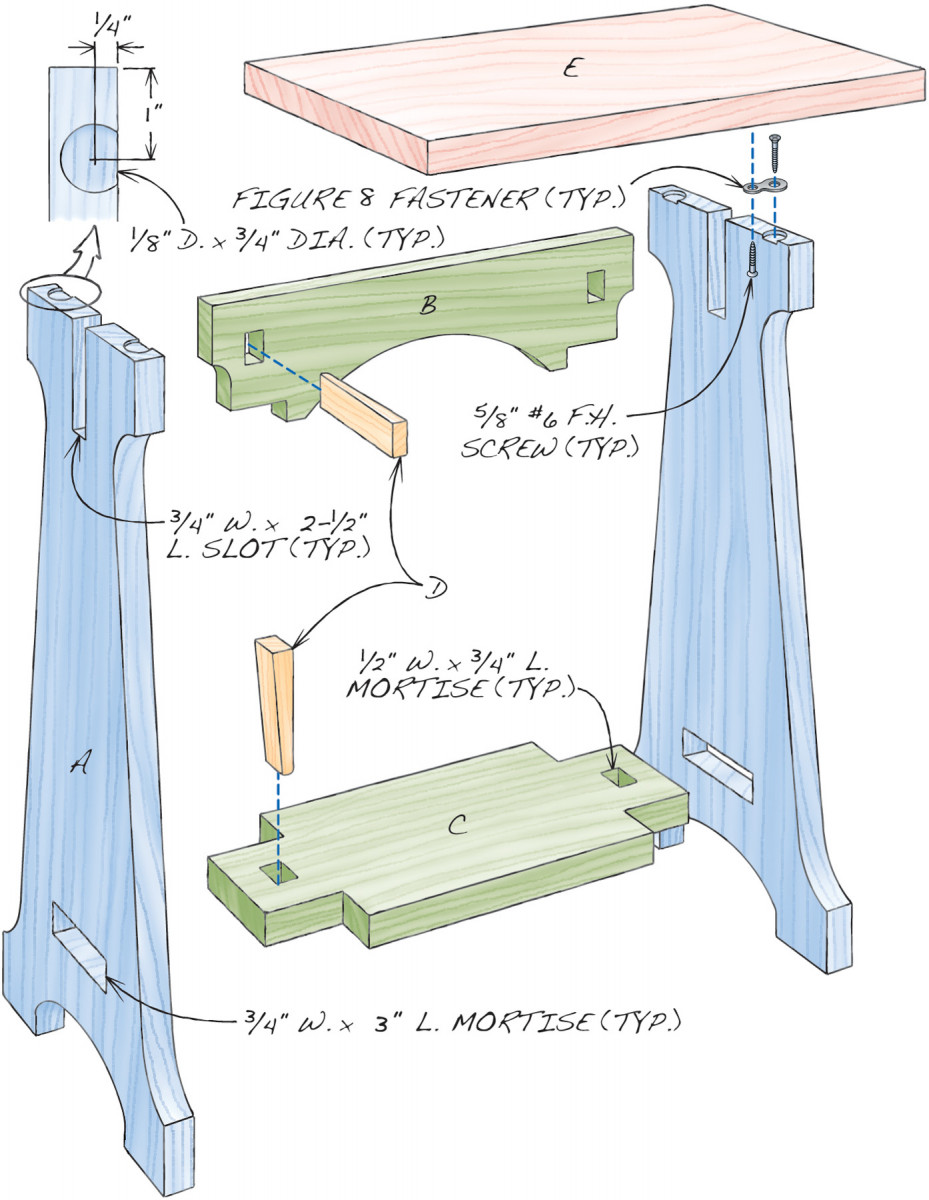
Fig. A) Exploded View
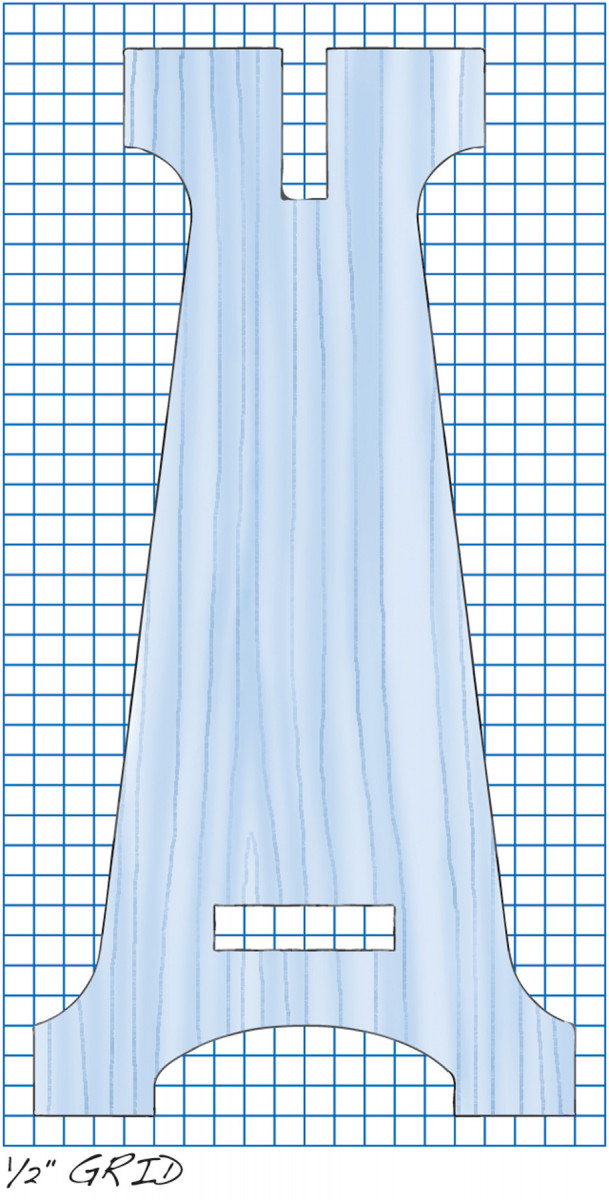
Fig. B) Side Profile
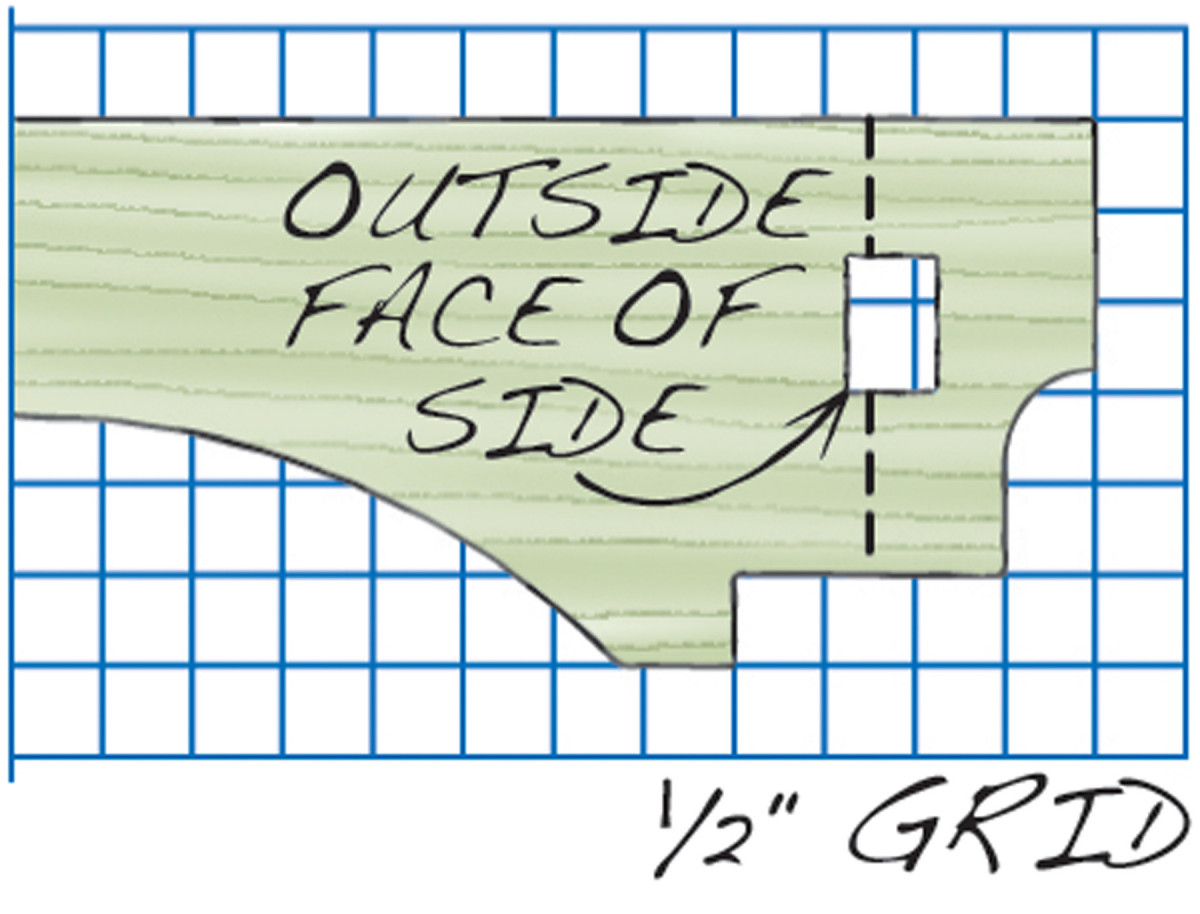
Fig. C) Rail Profile
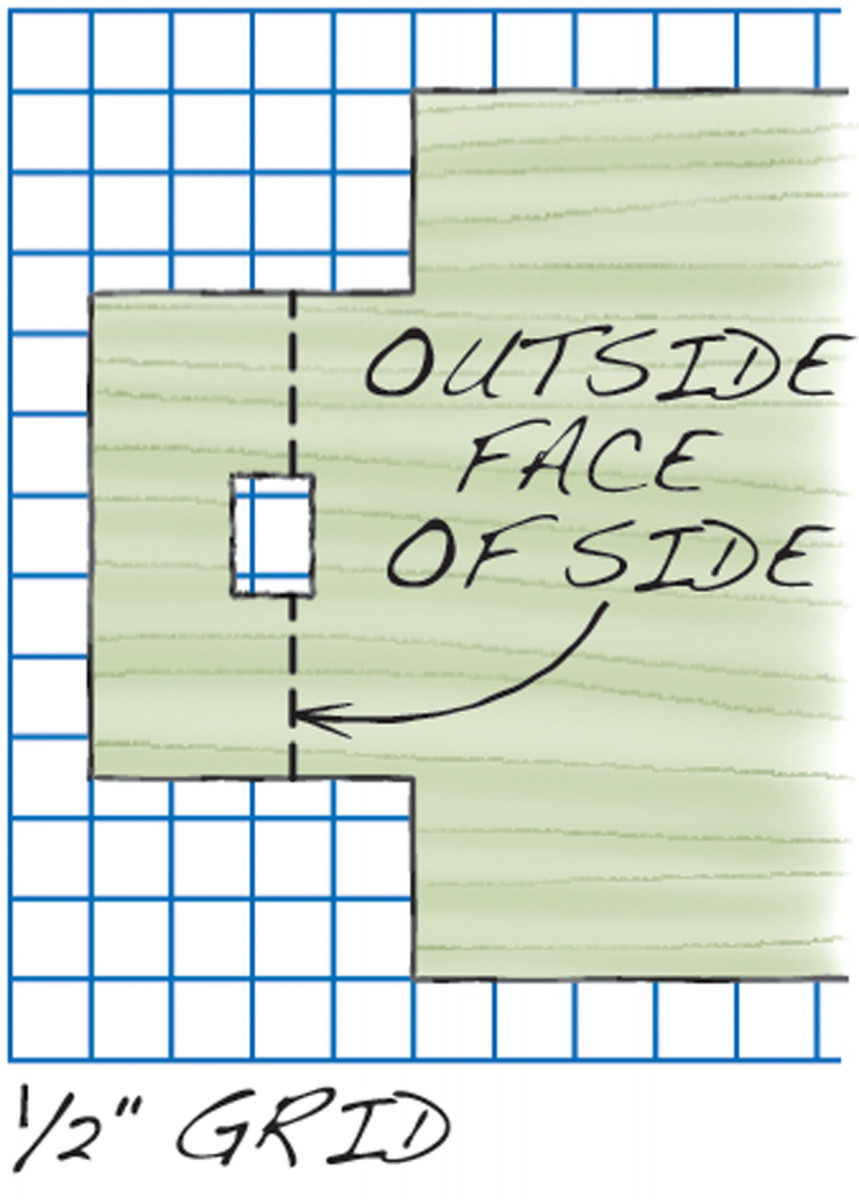
Fig.D) Shelf Tenon Profile
Build it
1. Cut blanks for the sides, rail and shelf (A–C Fig. A and Cutting List).
2. If you plan to build only one table, it’s easy enough to trace the pattern for the sides (Fig. B) onto the blanks, rough-saw and sand to the lines. But if you’re building two or more tables you’ll save time by making a routing template.
3. To make the template, trace the pattern on a 9″ x 17-3/4″ blank of 1/4″ MDF. Use the bandsaw and a fence to cut the slot at the top. Bandsaw the edge profiles slightly outside the lines and use a Forstner bit and a jigsaw to rough out the mortise slightly inside the lines. Finish the edge profiles by sanding to the line; square the mortise with a file.
4. Use the template to transfer the profile to the side blanks. Cut the slots and rough-saw the profiles just as you cut the template. Use the drill press to rough out the mortises.
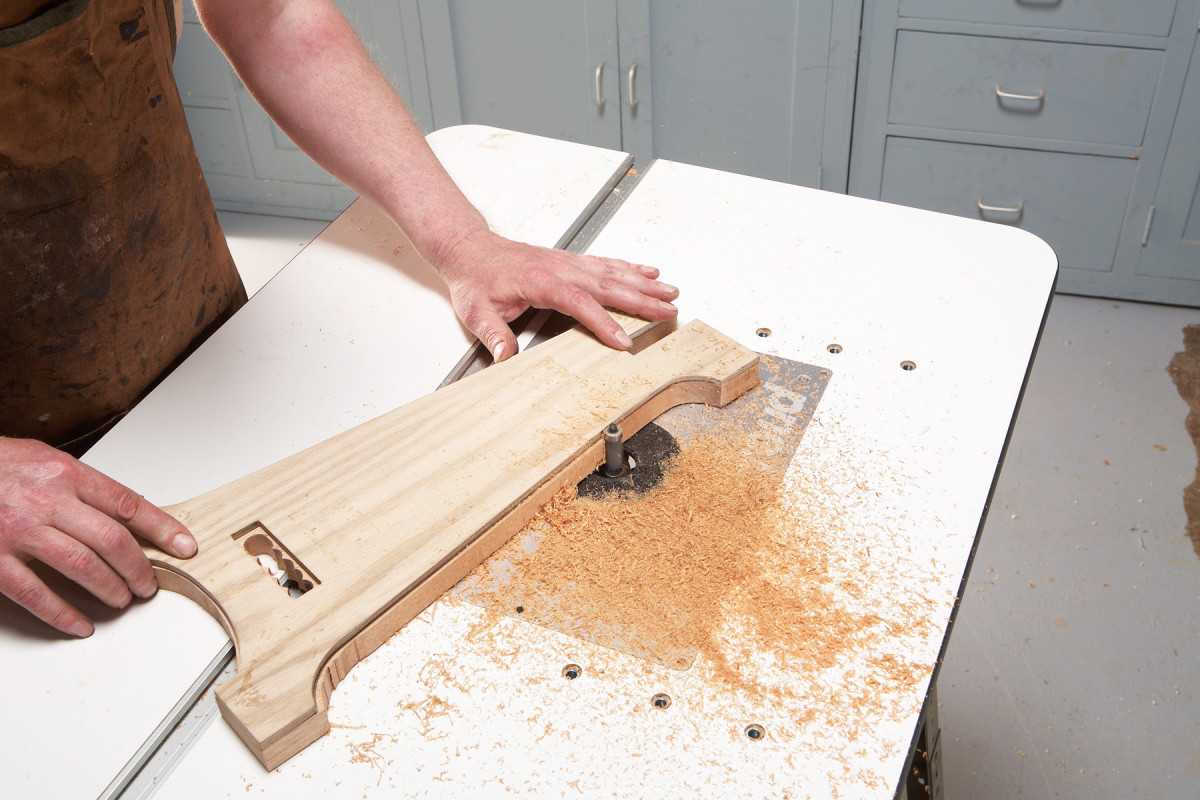
1. Use a template to rout each side profile after rough-sawing the blank.
5. Attach the template with double-faced tape. Then rout the profiles with a flush-trim bit (Photo 1). Take care not to blow out short grain created by the curves. To rout the mortise, turn off the router and place the bit in the center of the opening. Start the router, engage the bit and advance the workpiece against the bit’s rotation. After routing, square the mortise corners with a chisel.
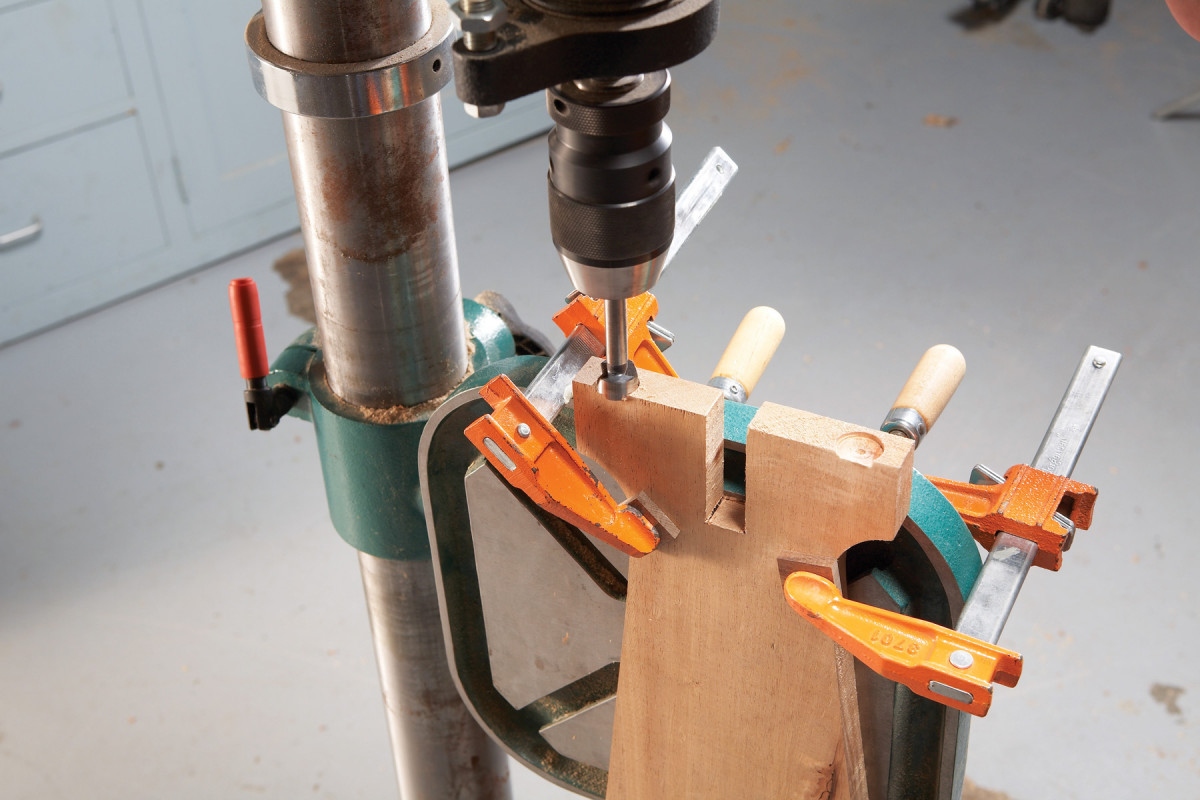
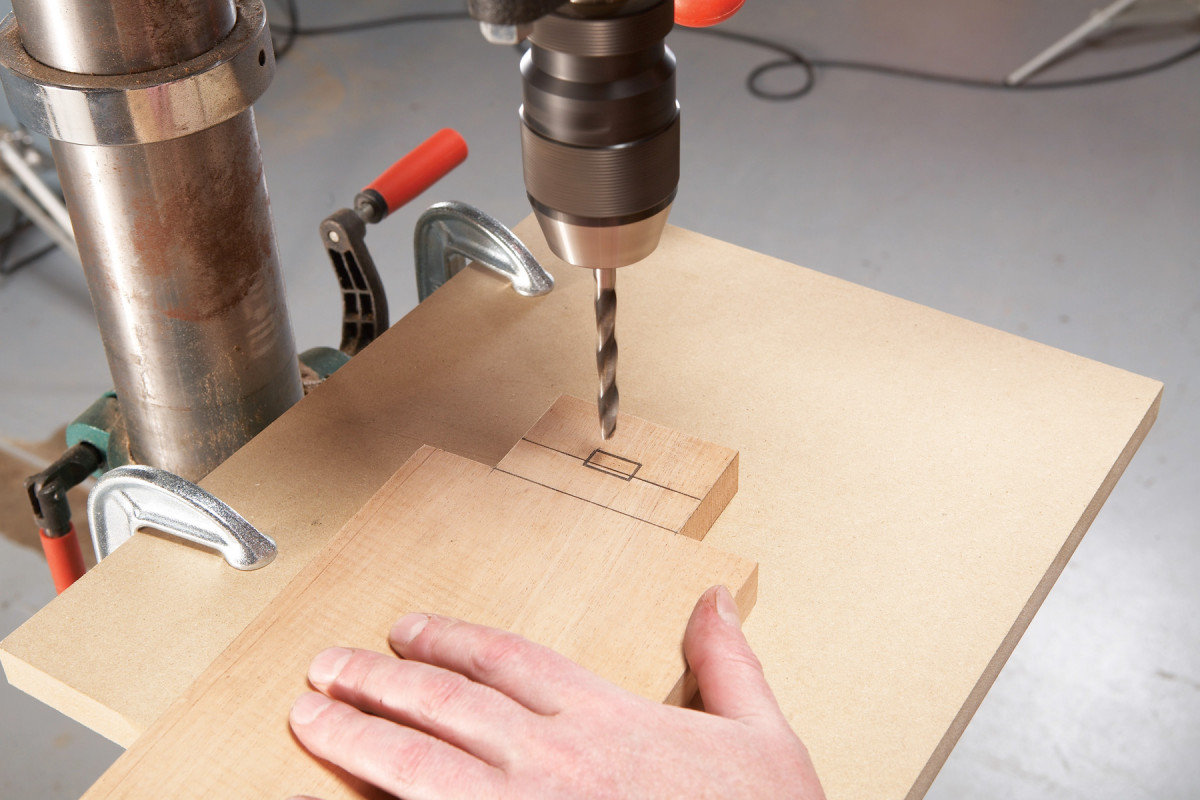
2. Drill offset recesses in the top end of both sides for the “figure 8” style desktop fasteners.
6. Drill 1/8″ deep by 3/4″ dia. recesses for the “figure 8” style desktop fasteners in each side, offset 1/4″ from the inside face and 1″ from each end (Photo 2 and Fig. A). Set your drill press table to the vertical position and use a level to position the side. Clamp the side securely before drilling.
7. Lay out the rail’s profile (Fig. C) on the blank. (If you want to make a template for the rail, use a 1/4″ MDF blank.) Create the tenons by cutting a 1/2″ wide x 2″ long notch in each end at the bottom, using the bandsaw and a fence. Use a miter gauge to square the shoulders.
8. Test-fit the rail by sliding it into the slots in the sides. The tops should be flush. Make adjustments if necessary.
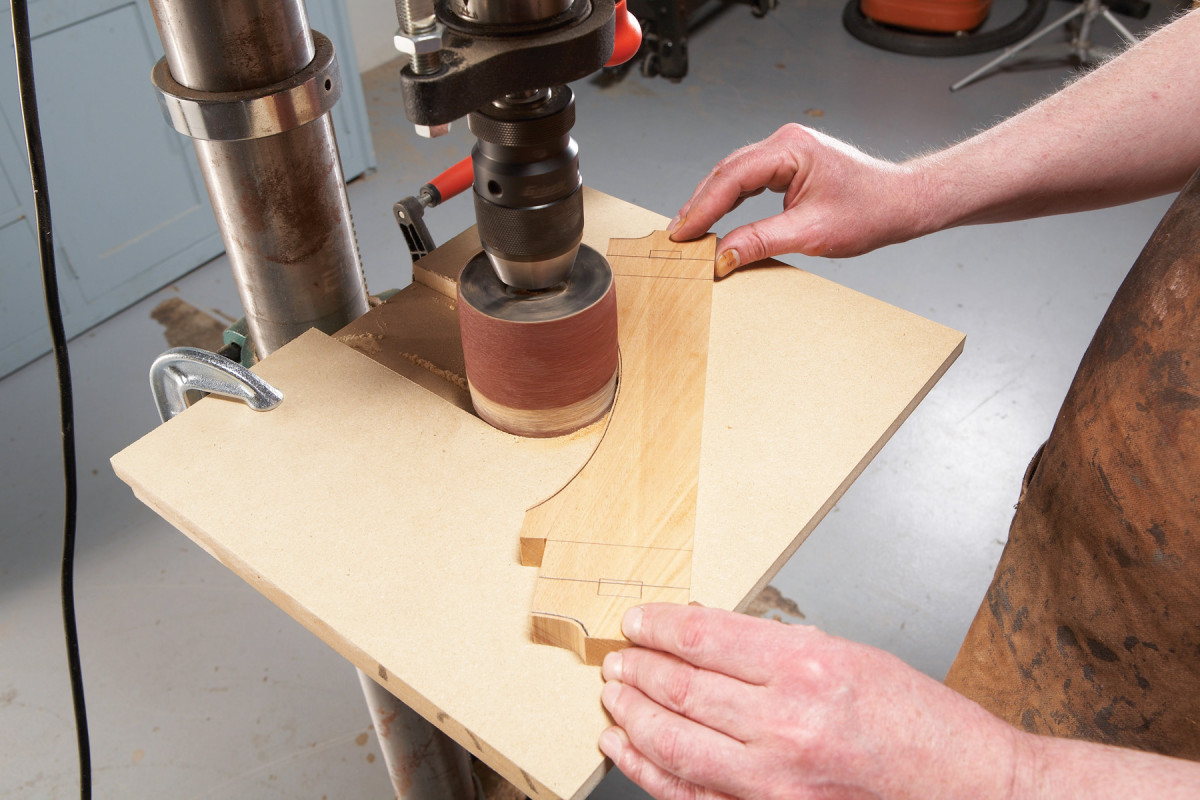
3. Use a sanding drum to smooth the rail’s arches.
9. Rough-saw and sand smooth the arches in the center and on the ends (Photo 3). Use a large sanding drum to smooth the main arch and a smaller drum to smooth the curves on the ends.
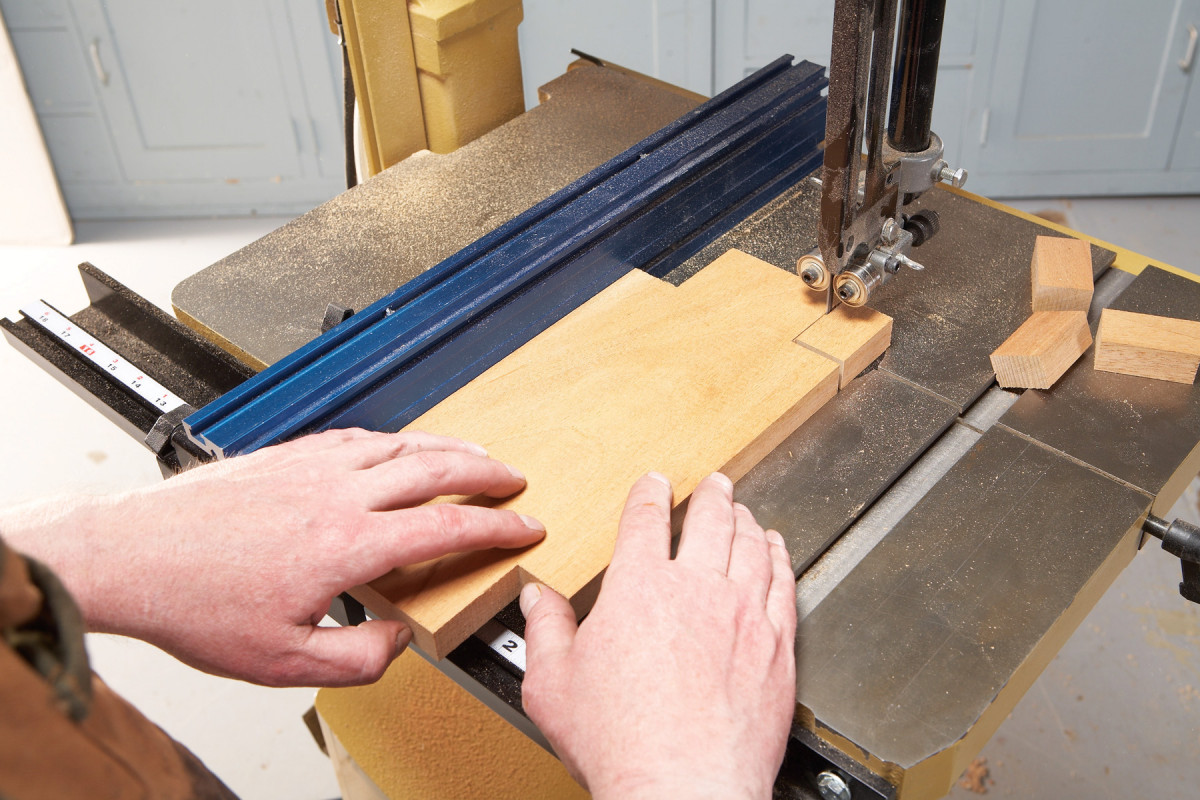
4. Create wide tenons on both ends of the shelf by bandsawing notches in the corners.
10. Use the bandsaw and a fence to cut the tenons on the shelf (Photo 4).
5. Mark and drill mortises for the wedges in the shelf and rail. Square the corners with a chisel.
11. Lay out the mortises on the rail and shelf. These mortises are located 5/8″ from the tenon shoulders, so that when the table is assembled they recess 1/8″ into the sides. This guarantees that the wedges will tightly lock the joints. Drill out the mortises (Photo 5) and square the corners with a chisel.
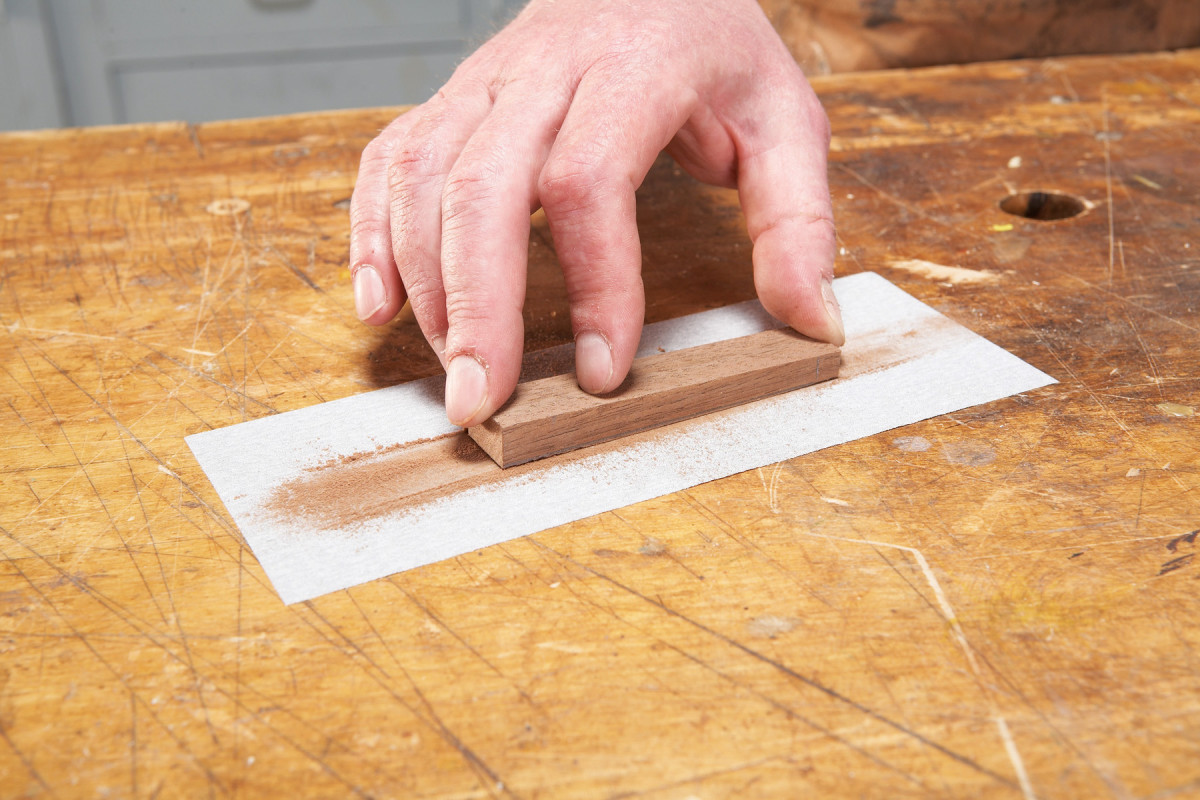
6. Sand each wedge smooth after cutting the taper on the bandsaw.
12. Cut wedge blanks (D) and lay out the end-to-end taper on each one. Bandsaw the tapers and remove the saw marks with sandpaper (Photo 6). The wedges must be smooth on both faces so they won’t mar the finish on the sides when they’re installed or removed.
13. Cut the top (E) to final dimensions.
14. Finish-sand all of the parts and apply the finish. A wipe-on finish is the easiest. To make the top waterproof, add one coat of satin polyurethane.
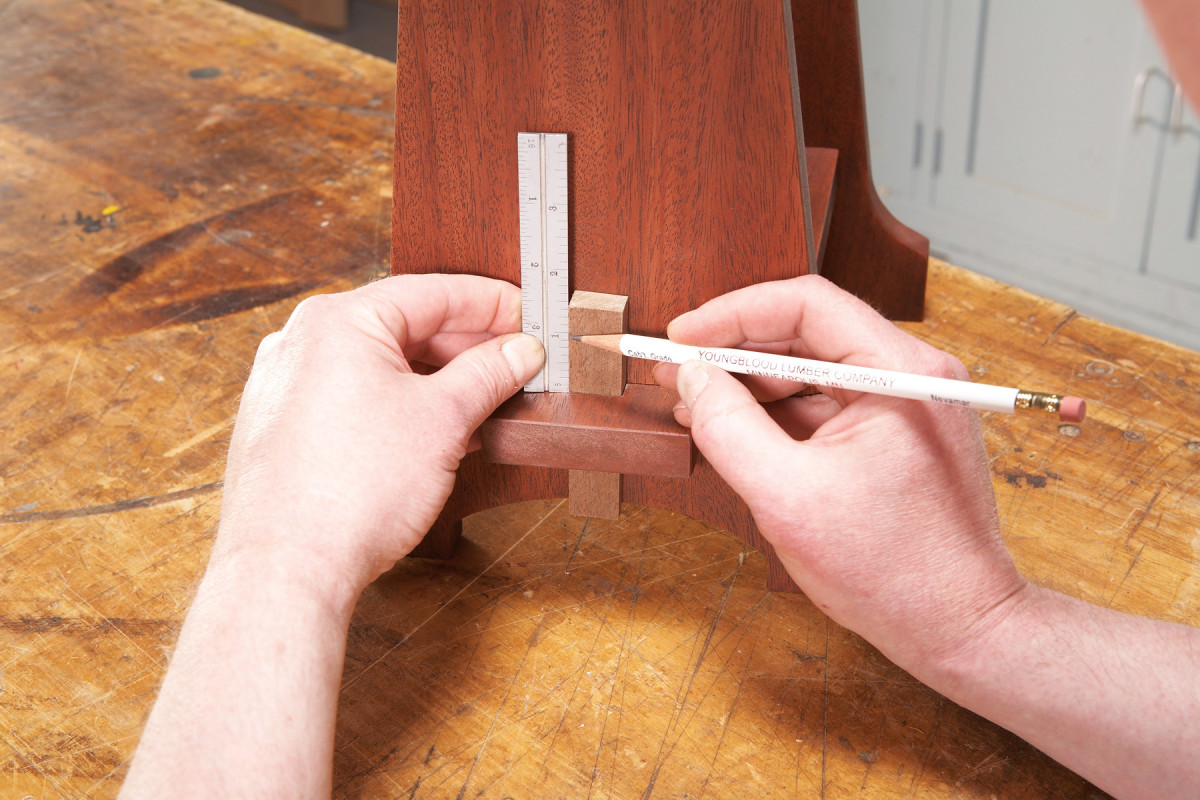
7. Cut the wedges to final length after installing them.
15. Fit the wedges. They start out extra-long because tiny variations in their thicknesses make big differences in where they seat. Assemble the finished sides, rail and shelf, and hold all the joints tight. Firmly seat the wedges in the mortises by pressing or tapping. Then measure and cut them to final length, so they extend about 13/16″ on both sides of the tenon. (Photo 7).
16. Finish the wedges. Staining or dyeing them black creates a nice contrast.
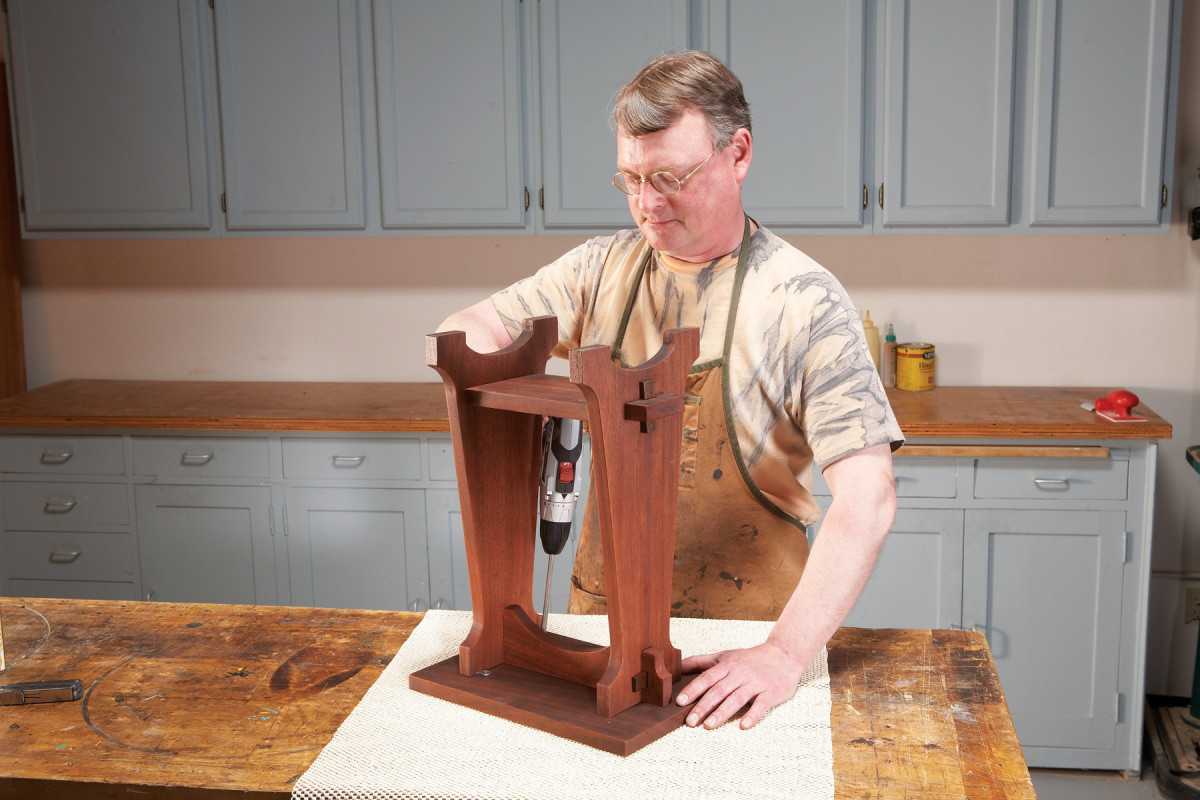
8. Center the base and attach it to the top with screws.
17. Attach the top (Photo 8). Assemble the base and install the desktop fasteners. Center the base on the top. Then install 5/8″ x #6 flathead screws through the fasteners.
Here are some supplies and tools we find essential in our everyday work around the shop. We may receive a commission from sales referred by our links; however, we have carefully selected these products for their usefulness and quality.


