We may receive a commission when you use our affiliate links. However, this does not impact our recommendations.
Look at projects with a different eye. Find a piece with great design, such as a Stickley No. 79 bookcase, then make adjustments to the construction to better match your skillset.
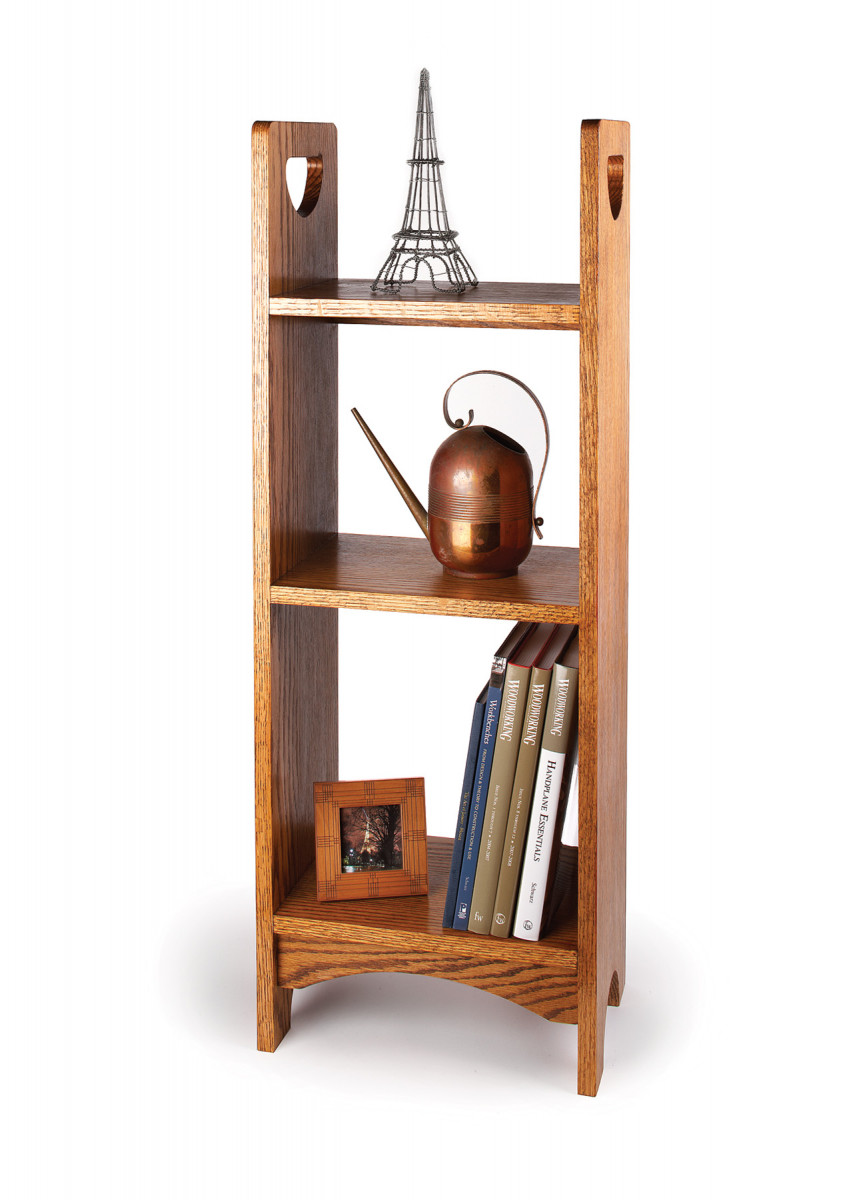
Great design and hidden screws make this a must-build project.
If you’ve perused the pages of our sister publication, Woodworking Magazine, you might have seen this piece in the Spring 2005 issue. We dug through the archives to find a fine bookcase, then did a bit of construction modification to allow the design to better fit the “I Can Do That” column. And that’s something you should be on the lookout for as you read woodworking articles or skim the pages of your favorite catalogs. Find a piece you like and see what changes can be made to match the construction to your skillset and tools.
For this piece, we eliminated the complicated shelf joinery, and we adjusted a few sizes to better accommodate the lumber dimensions found at home centers. But by and large, this bookcase is close to our original project and a great piece to build.
For material, you’ll need an 8′ piece of 1 x 10 for the sides and one shelf, and a 1 x 10 x 4′ for two shelves, the braces and one toe kick. Crosscut the material to the required length, then rip the braces and toe kick.
Simplified Stickley Bookcase Cut List

 Add Design to the Sides
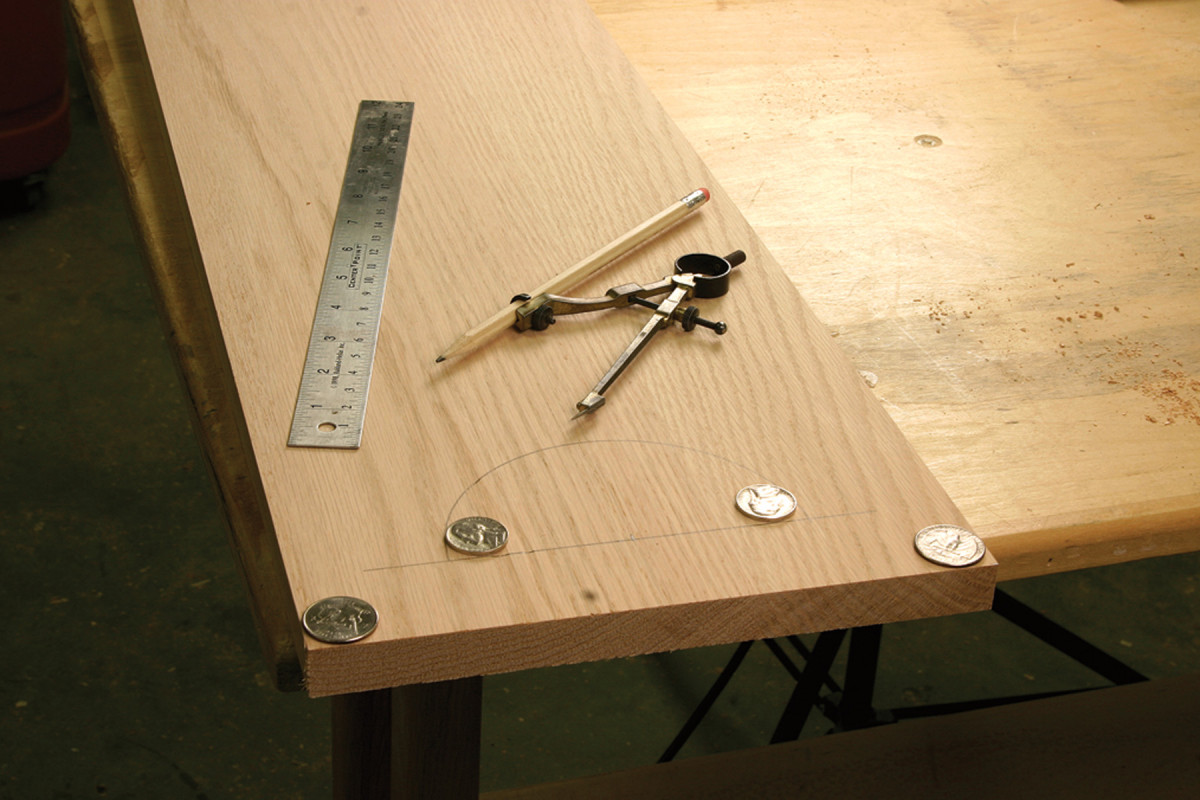
It’s just pocket change. Quarters and nickels make great templates for rounding off corners. The larger the coin, the bigger the radius.
The bookcase sides require the most work, so begin at the handle area. Measure down from the top 1 1⁄4“, then square a line across the grain. Also, find the top center of the sides then square a line off the top edge that extends just across the first line.
The next layout step is to grab a compass that’s set for a 2 1⁄2” radius, position the point of the tool at the intersection of the two lines and mark a half-circle with the flat side parallel with the top edge of the sides. To soften the look, round the sharp corners of the handle area. I used a pair of nickels placed at the corners to establish the radius.
To create the handle opening, use a 13⁄16” bit to drill holes at each corner (the bit closely matches the diameter of the nickels). With the two difficult-to-cut areas done, use a jigsaw to remove the balance of the waste. Insert the blade through one of the holes then cut on the line from hole to hole. After that’s complete, pivot the saw to cut the half-circle line. Stay close to the line, take your time as you cut and slow the blade speed if possible – a slower blade increases your control as you cut. Then clean up your cuts with a file and sandpaper.
Next, make the cutout at the base. This, too, is a half-circle with a 2 1⁄2” radius. Because you can start the cut from the bottom edge of the sides, there’s no need to drill a hole. Use your jigsaw to cut the area, then smooth the cut as you did before.
The last shaping step is to round the top corners. This step is a bit more expensive; use quarters as a template. Draw the profile on your sides, then remove the material with your jigsaw, or use a file and sandpaper.
The only other shaping work required is on the toe kick. Make a mark 1″ in from both ends along the bottom edge of the piece. At the top edge, find the center of the piece then add a vertical pencil line across the toe kick. Move down that line 11⁄4” and mark the location.
Next, instead of finding the appropriate radius with a trammel, bend a ruler or thin stick to create the curve. Hold the ruler at the two points at the bottom edge as you bend the piece to reach the center point of the curve. With the bend set as you like, have a friend mark a line following the bend in the ruler. Cut on the waste side of your line with your jigsaw, then smooth the curve with your file and sandpaper.
No Complex Joinery
Pocket screws make the joinery for this project a snap. Each shelf is drilled for four pocket screws, two at each end, spaced 1 1⁄2” from the edges. The toe kick is drilled for two screws at both ends as well. And the support braces have one hole per end (with the braces held tight to the bottom of the shelves, you need only the two screws for a secure connection).
Set up your pocket-screw jig as directed and drill the pockets. Use 1 1⁄4” screws for this project; fine threads are better because you’re working with hardwood. Note: As you drill in your toe kick, stay toward the top edge of the workpiece. If you bore near the curved portion, it’s possible to have a pocket extend into the curve and be visible in the finished bookcase.
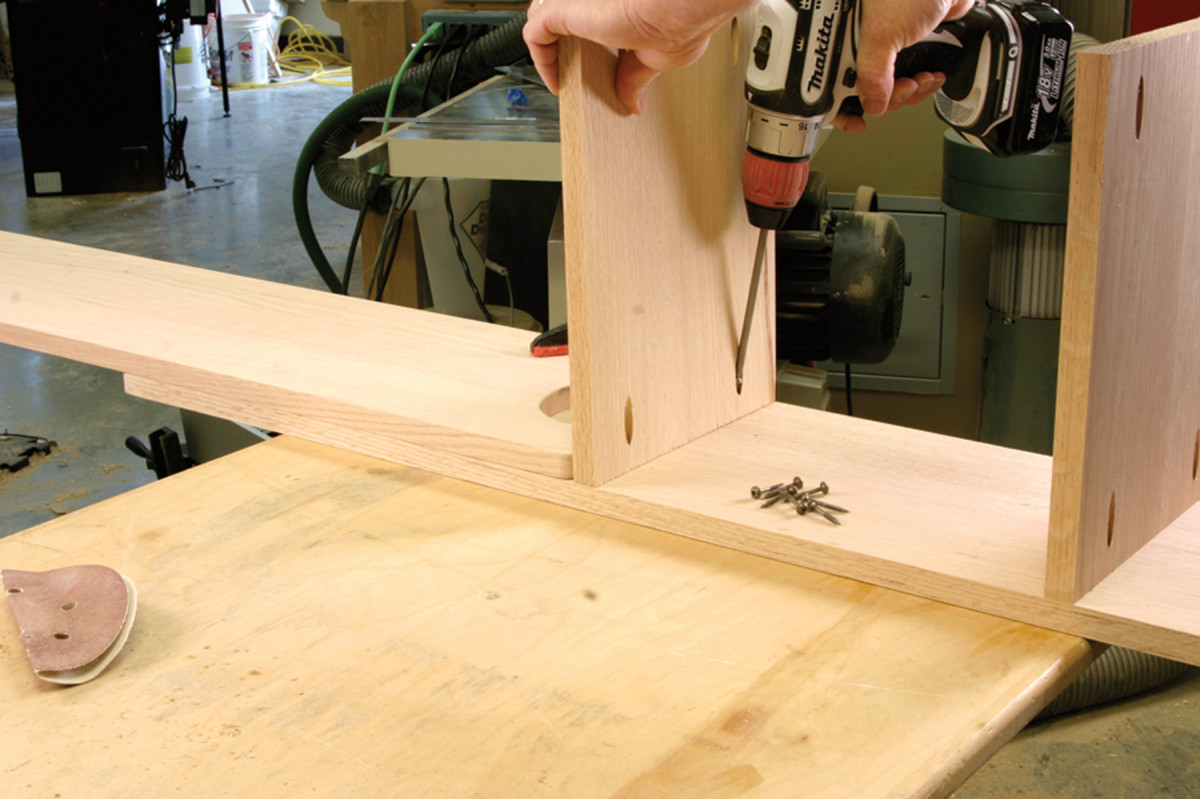
Stop the creep. Use a clamp and stop block, or in this case one of the bookcase sides, to keep your shelves from inching forward as screws are driven.
Curtail Creepy Movement
As you install pocket screws, it’s possible for your pieces to creep slightly. To reduce that possibility, use a stop block and a clamp to keep things in place. To begin, do a simple layout of the shelf locations on the inside face of your sides (a couple short lines set in from the edges is all that’s needed).
Next, clamp a wide cutoff at a layout line that is the top edge of a shelf’s location. As shown in the photo below, with the shelf pressed against that clamped-in stop block there is no problem with creeping pieces. Install the screws to affix all the shelves to one side of the bookcase, then align the second side and add the screws to complete the installation of the shelves.
One support brace fits tight to the bottom edge of each shelf and flush with the back edge of the bookcase. Align the pieces, then drive the screws to lock the braces in place. The toe kick also sits under the bottom shelf but is held back 1⁄2” from the front edge. A clamp added after the toe kick is positioned holds the piece secure and tight to the shelf as the screws are installed.
A One-Two-One Finish
With the construction complete, take the time to knock off any sharp edges (especially around the handle area) and sand the piece to #120 grit. The finish is a coat of “Dark Walnut” Watco Danish Oil followed, when the oil is dry, by two coats of amber shellac. To complete the bookcase, lightly sand the piece with #320-grit sandpaper then apply one layer of paste wax for protection. All that’s left is to put books, family photos or other knickknacks on display.
Here are some supplies and tools we find essential in our everyday work around the shop. We may receive a commission from sales referred by our links; however, we have carefully selected these products for their usefulness and quality.