We may receive a commission when you use our affiliate links. However, this does not impact our recommendations.
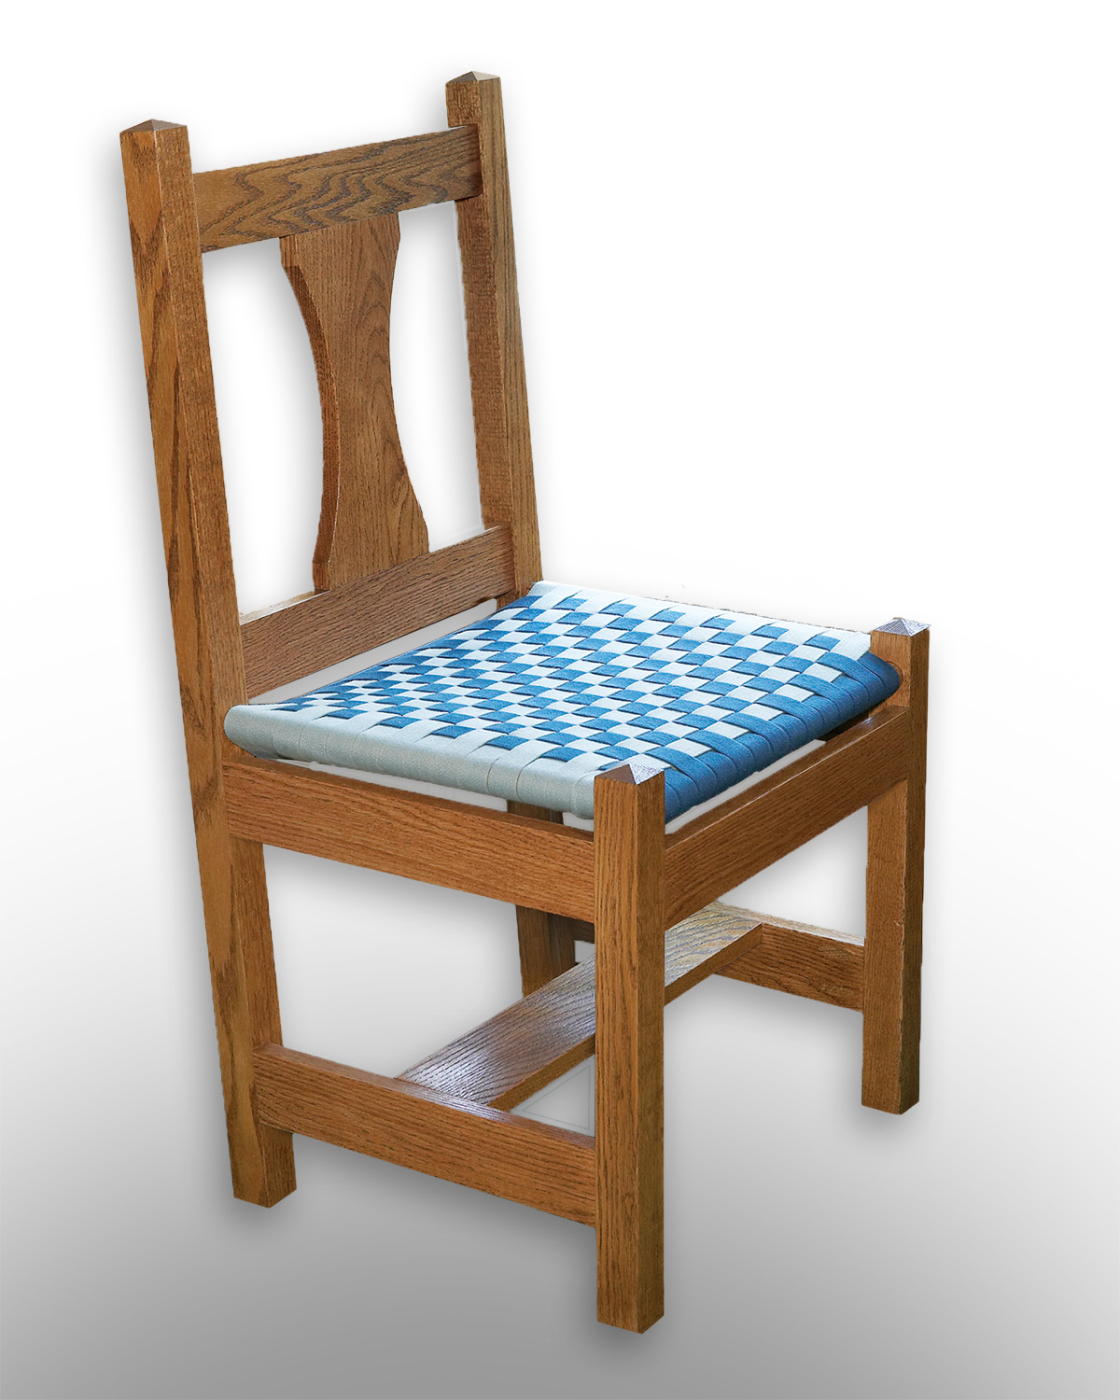
Be seated. This attractive Mission-style chair can be built using simple tools and home-center oak.
A woven seat adds a punch of color to this surprisingly easy project.
Online Extra: For additional photos and a 3-D drawing of the Mission Chair, click here for a PDF.
After years of building furniture, mostly case pieces, I’ve come to understand that chair building is different. Where most casework involves working with panels and straight lumber, most chair building turns to bending stock or forming parts. When you find a chair that fits into the casework criteria, you should take every opportunity to build that piece.
This chair fits into that framework. I envision this chair sitting anywhere, from around the dining room table, to welcoming guests to your home in the foyer, to being perched beside the dressing table in your bedroom. It is sturdy, comfortable and the construction is beginner-friendly to say the least.
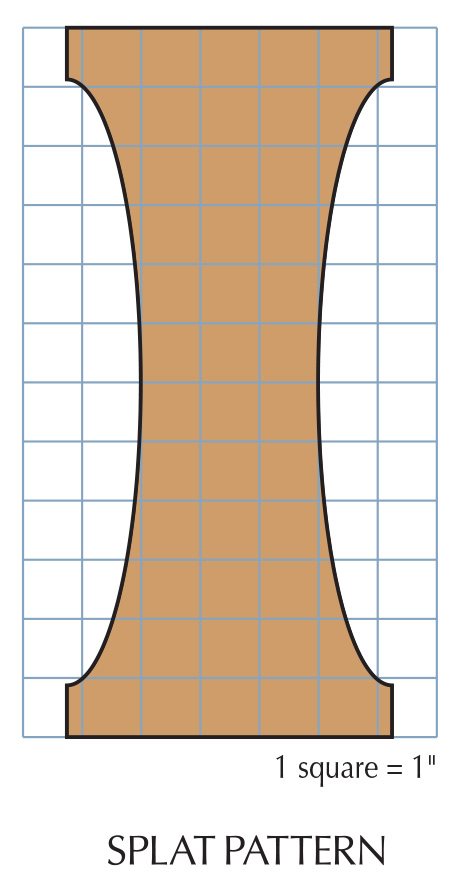
The focus of most chairs is the back and the seat. This chair appeals to the eye with the shapely hourglass back splat and the colorful seat that is woven with Shaker tape.
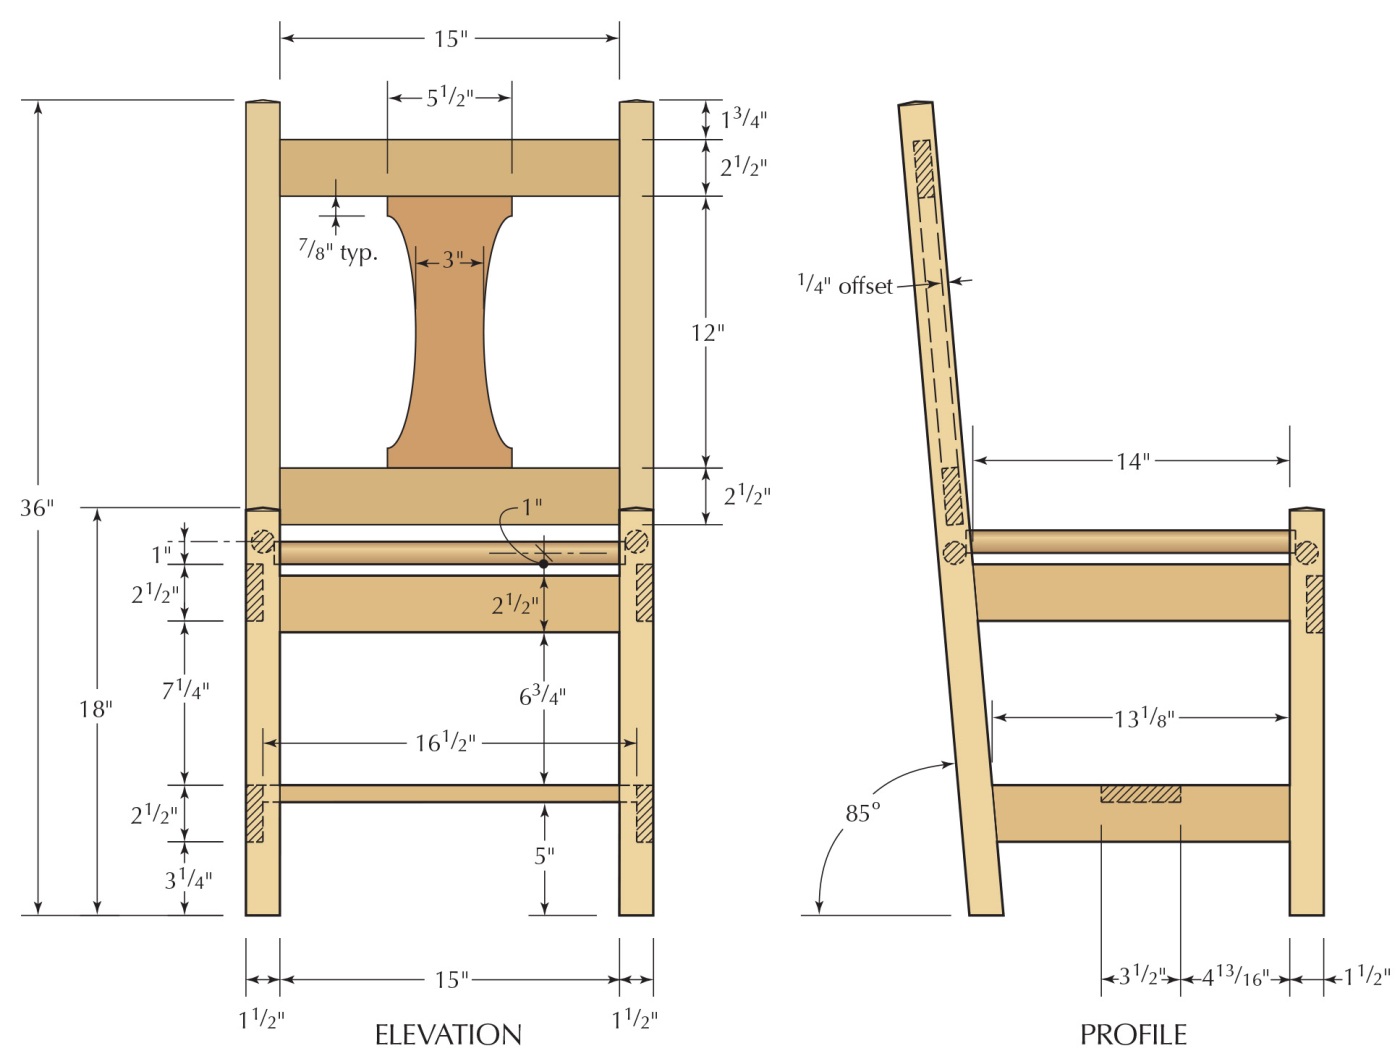
Cutlist and Diagrams

For Starters – Get a Leg Up
Building chairs begins with the legs. Because you’ve already got the width and thickness of the pieces (1-1⁄2” square, which is a 2 x 2) by buying stock material from the home center, the next step is to cut them to length. You’ll need two front legs that are 18″ in length and two back legs that begin at 36″ long.
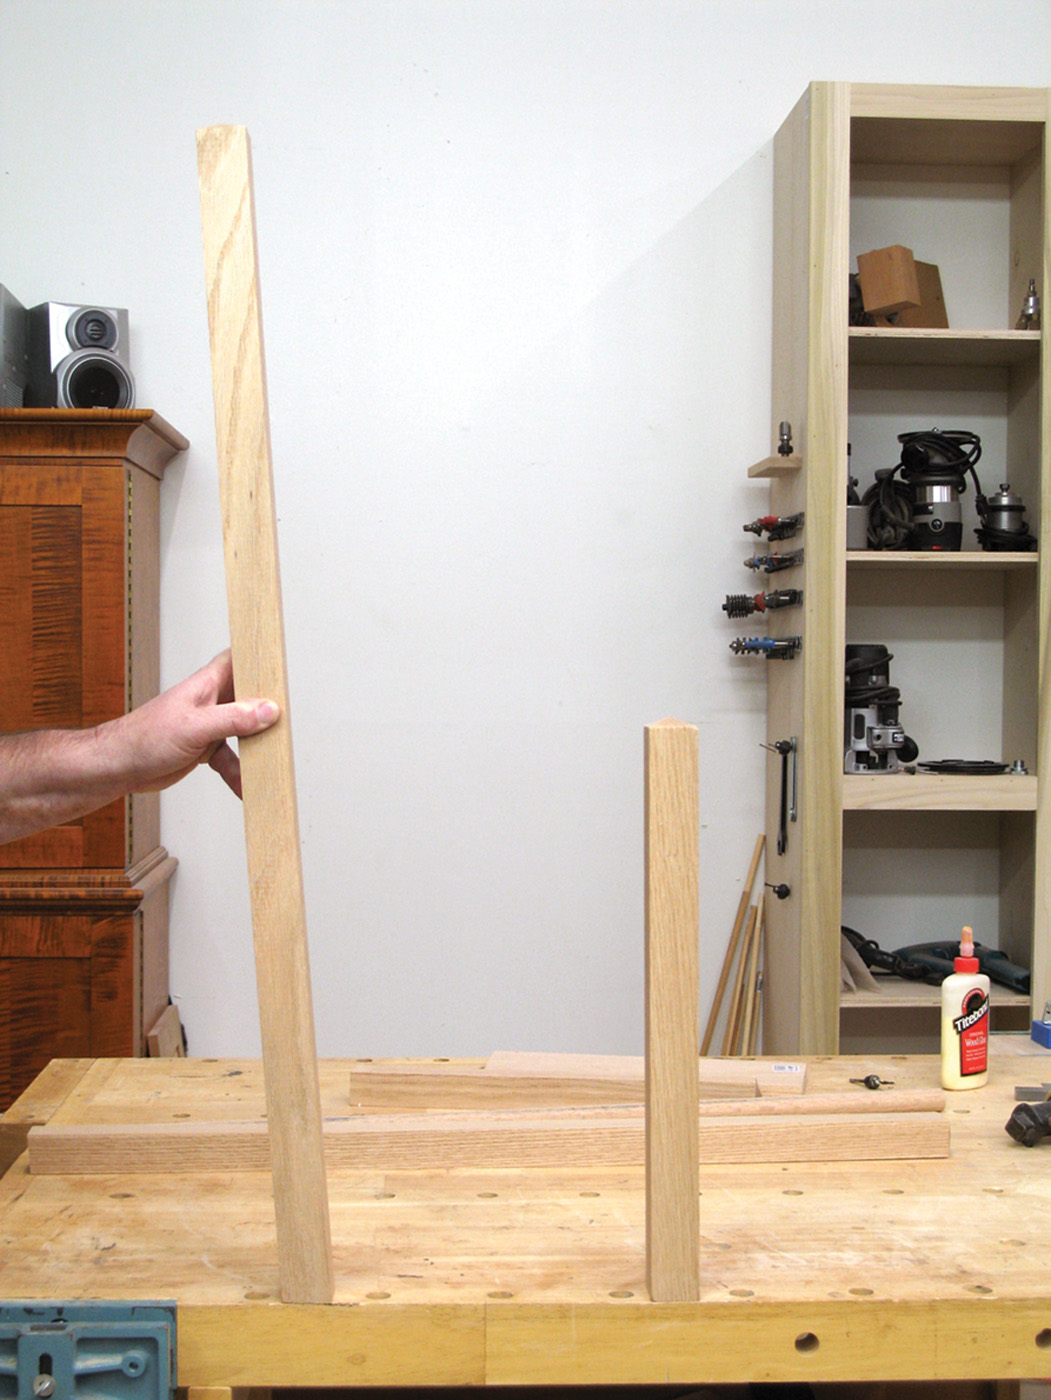
Angle adds comfort. The rear leg (left) needs only a slight (5°) angle cut on the bottom to add about 50 percent more comfort to your chair.
To add interest to the chair, cut the top of each leg to a pyramid shape. Set the miter saw to a 5° angle. Place the leg on the saw so that the cut begins about 1⁄2” down from the top of the leg. Four cuts are needed to create the pyramid – one at each face. Making the cuts is easy enough, but what might present a problem is aligning each cut with your previous cut.
This is best accomplished by setting a stop-block to position each leg and each cut. Place the leg against the block and make the first cut. Next, rotate the leg one turn and make the second cut. Repeat this pattern for each face and each leg. There is one set-up for the front legs and another for the back legs. The finished tops appear as small pyramids.
If you can’t easily add a stop to your miter saw, you can also mark a line all the way around the top of each leg, 1⁄2” down from the top. This will be your cut line.
A chair is not comfortable if the back is straight. I wouldn’t want to spend much time sitting with that posture; it’s unnatural. So, we need to add angle to the chair. Most times to add angle to the chair you need to bend the back legs. We aren’t going to do that.
So how do you create a comfortable angle using straight stock? Easy – tilt the leg. At the miter saw, again with the angle set to 5°, cut the bottom of each back leg. Take off as little material as possible in making this cut. You are not looking to shorten the legs, just to create the 5° angle.
Hold That Seat, Please
Any chair’s longevity depends on keeping the parts together. A lot of times you can find chairs where the seat is actually holding the parts in place. That is what this chair does.
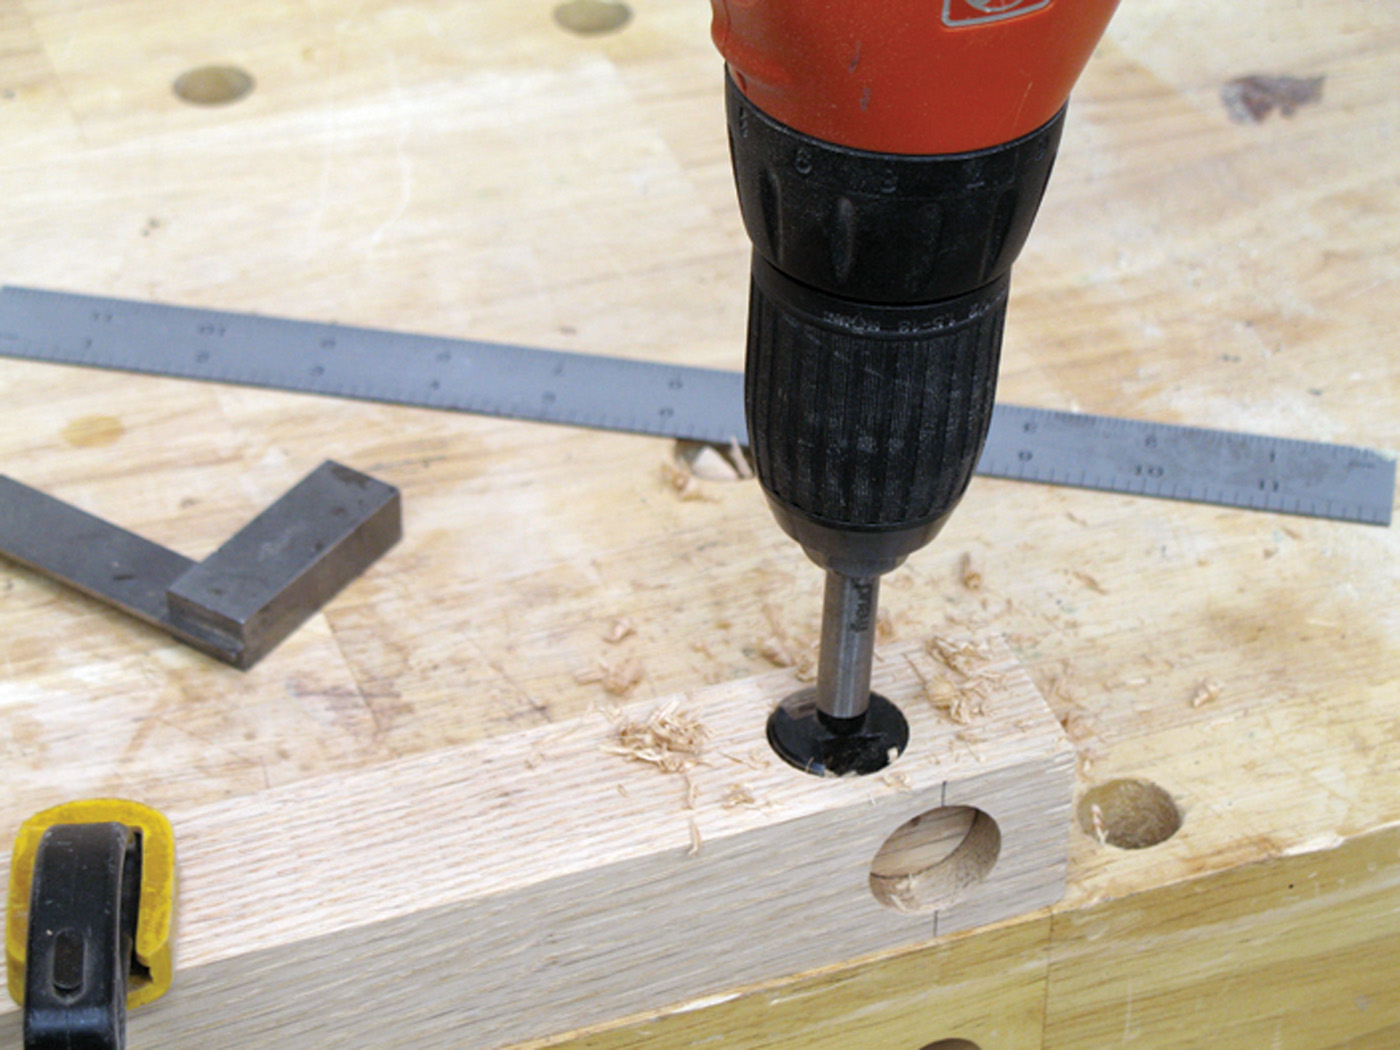
Offset holes. The dowel holes are offset from one another by 1⁄2″. Make sure you’ve marked the front and left, or right face of each to avoid drilling the wrong hole in the wrong face. The depth of the hole isn’t critical, but I tend to drill until the top of the cutting faces reaches the top of the hole. This is usually about 1⁄2″ deep with most Forstner bits. To keep the hole perpendicular to the leg face, you can stand a try square next to your drill to give you a true 90° angle to follow.
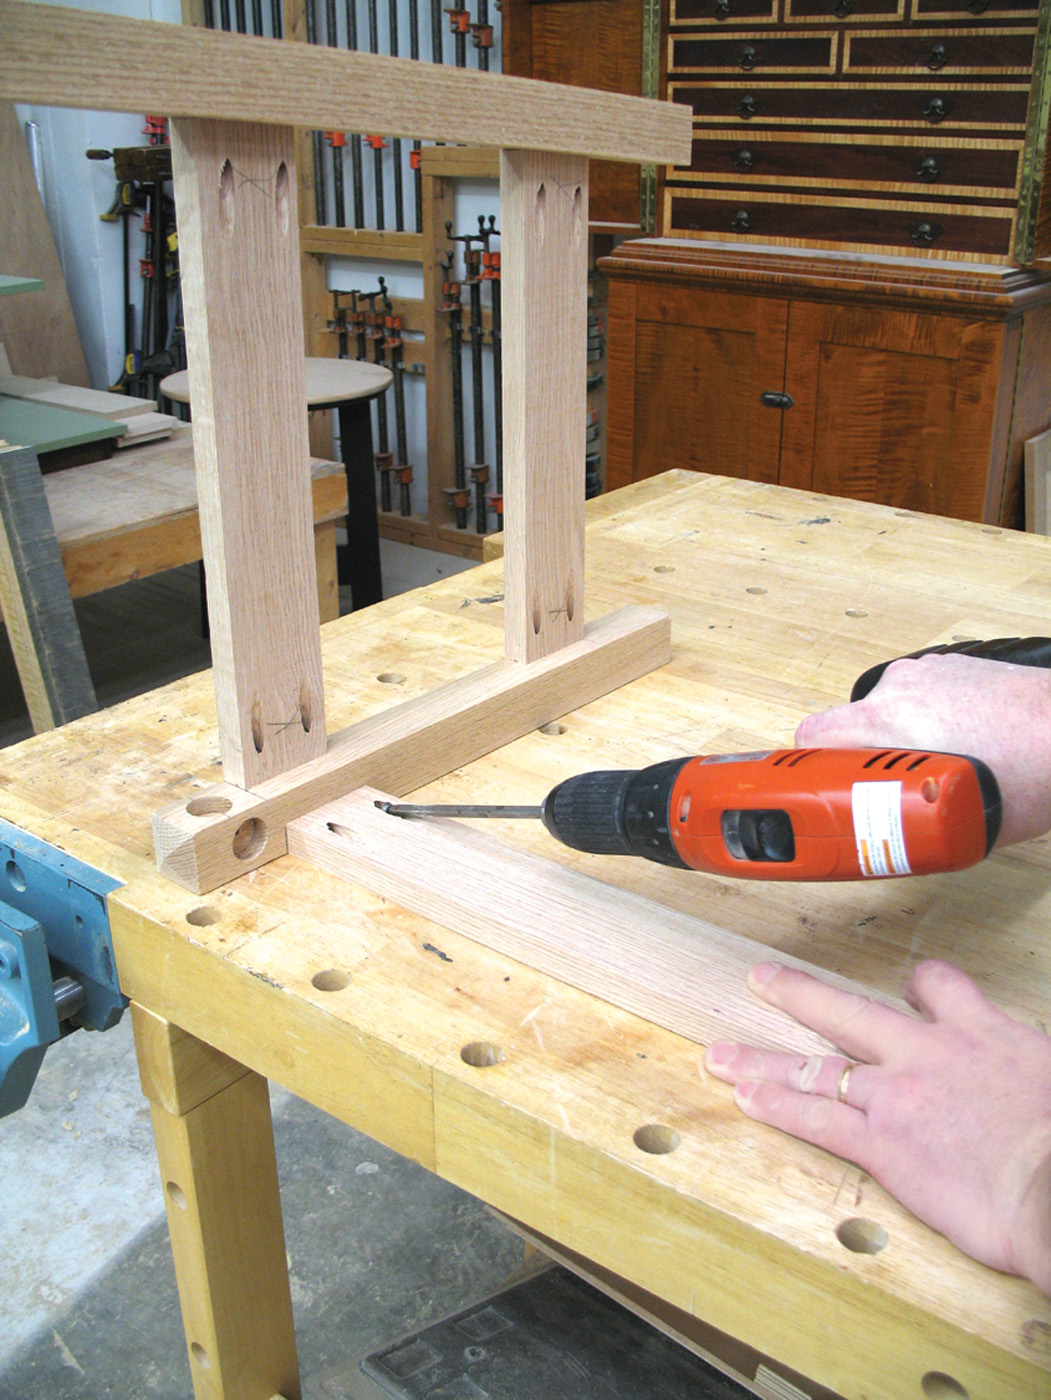
The seat material is wrapped around dowels that are positioned just above the stretchers and slightly offset from one another. Select the front face of the chair legs and mark the side and front edges. Locate the position of the holes for these dowels and drill them into the front legs only.
To find the dowel positions, start from the pyramid cut and move down 11⁄2” for the center of the side dowel location. Slide down another 1⁄2” for the location of the front dowel hole.
Make these holes with a drill and 1″ Forstner bit, squaring the bit to the stock from both directions. Cut the hole about 1⁄2” deep – it’s not critical because you’ll take an exact measurement after the chair is assembled.
Assembling the chair starts with the side profile. Lay the legs of one side of the chair on your bench. Orient the pieces so the angle cut on the back leg is parallel to the edge of the bench. Next, cut the rails for the sides. One end of each piece is cut square while the opposite end is cut at that 5° angle. Both cuts are made at the miter saw.
Fit the rails into position with the legs as shown in the top right photo. Notice that the front leg (in the photo at the right) is positioned with the front dowel hole facing upward. The top side rails will fit 1⁄2” below the bottom edge of the side dowel hole, or 1″ from its center point.
Position the lower side rail starting 3-1⁄4” up from the bottom of the leg. Mark an X at each end of the rails to indicate the area for the pocket screws.
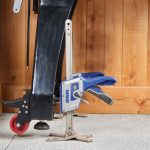
Quick, Strong Connections
Use a drill with the pocket-screw jig to cut the holes in the side rails. Make sure that the ends of the rails fit tightly to the base of the jig; the angled cut will tip the rails to one side.
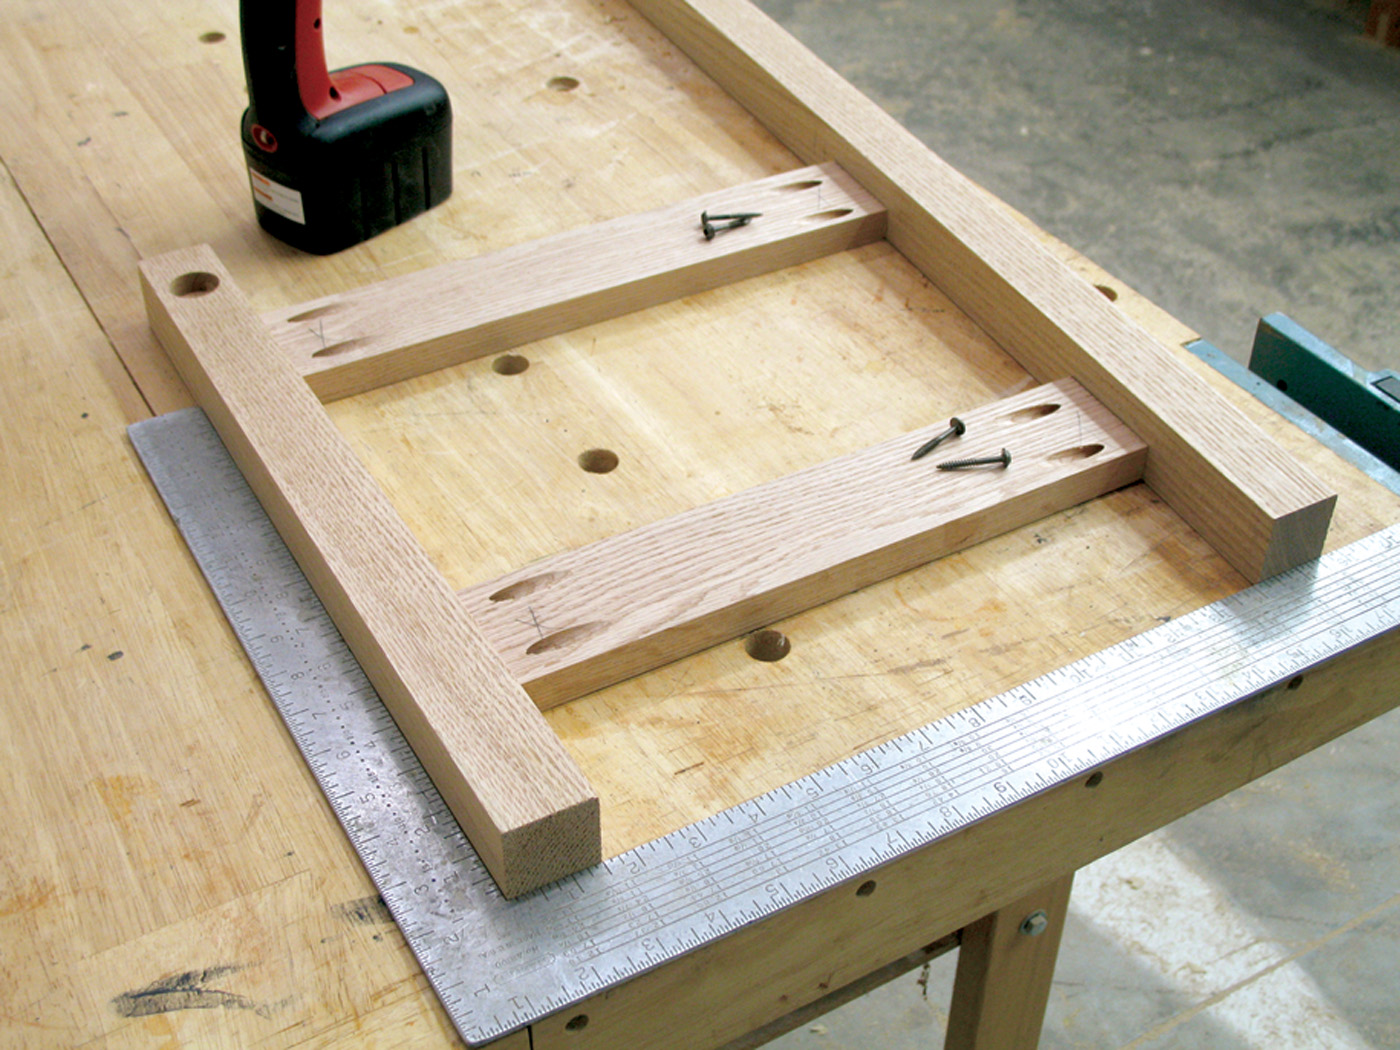
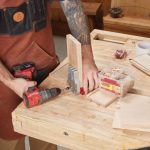
Square assembly. Once the pocket holes are cut, lay the pieces on your bench, square things up and add the screws. Don’t use any glue during assembly.
Place the holes, two per end, about 3⁄4” in from the edges of the rails. Using a framing square will ensure that the chair sides are square to the floor. Position the pieces to the legs as before and make sure that the bottom ends of the legs fit to the square and all faces are tight to the bench. Drive the screws to assemble the sides (don’t use glue). Repeat the same steps for the second side, but this time the chair back or angle must face the opposite direction.
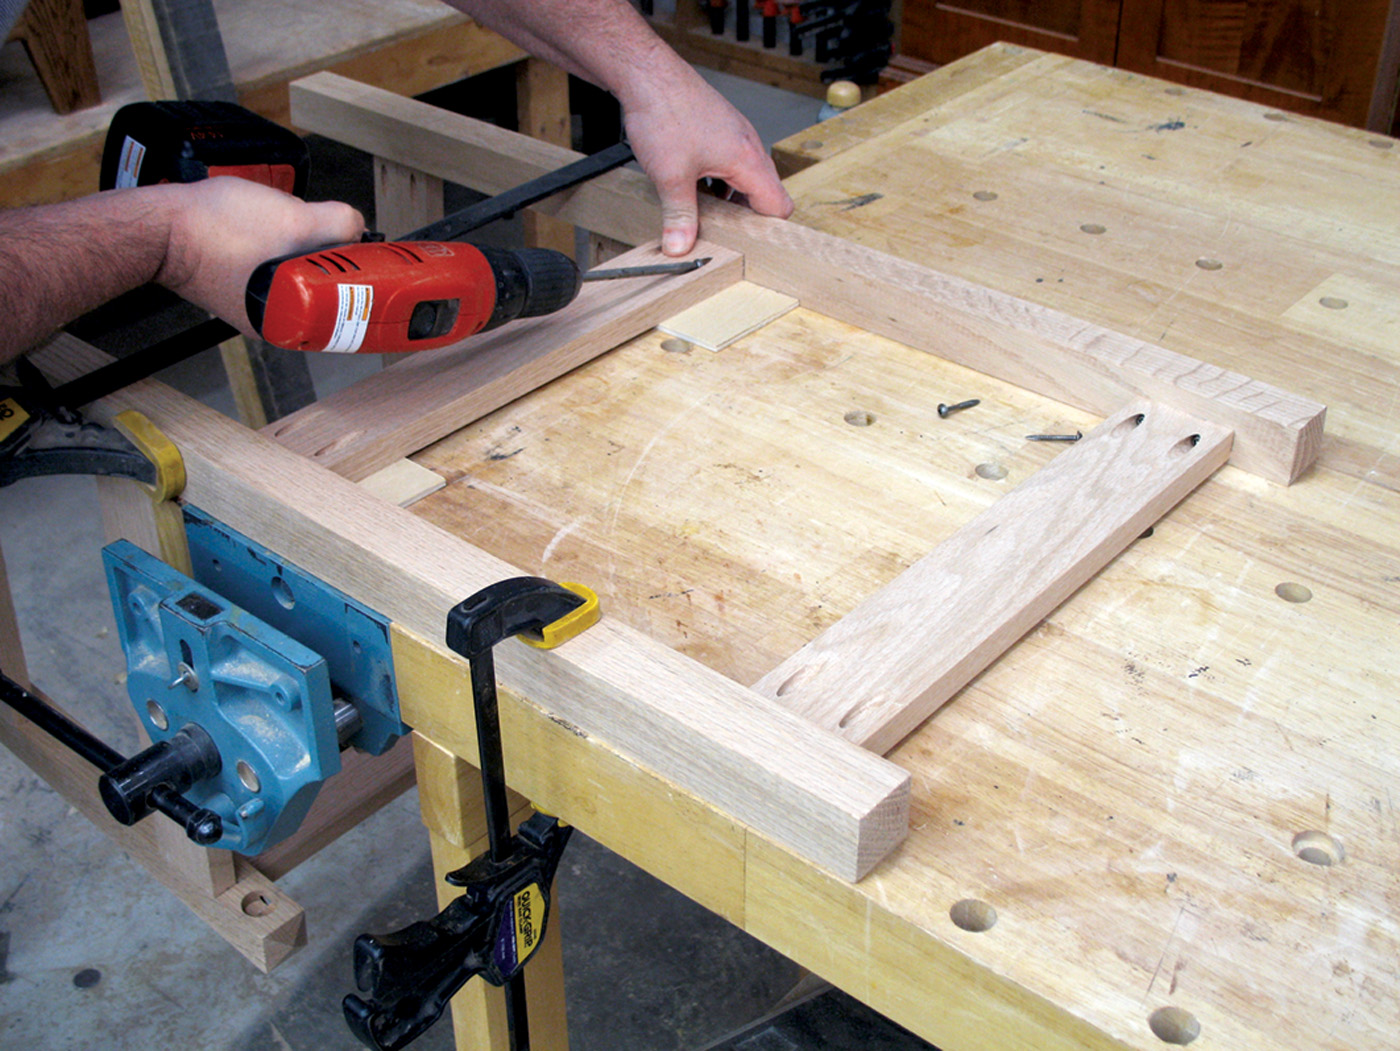
Connecting the sides. With the side assembly sitting on its face on the bench, the front rail is screwed into position 1⁄2″ below the dowel hole.
Because the angle of the back is in the side assembly, installing the front rail is a snap. The ends are square-cut straight from the miter saw and the pocket-screw holes are drilled just as they were for the side rails.
Set the side assembly onto the front leg, front-face down to the bench. Position the front rail 1⁄2” below the bottom edge of the dowel hole. Hold the face of the rail flat to the bench and drive the screws to attach the front rail. Repeat the steps to attach the second side assembly to the front rail.
Adding a Bit of Design
To add a few shadow lines to the chair back, set the rails by spacing them off of the front edge of the legs. To make it easy, slide a scrap piece of 1⁄4” plywood, or something else of a consistent thickness, under the rails before adding the screws.
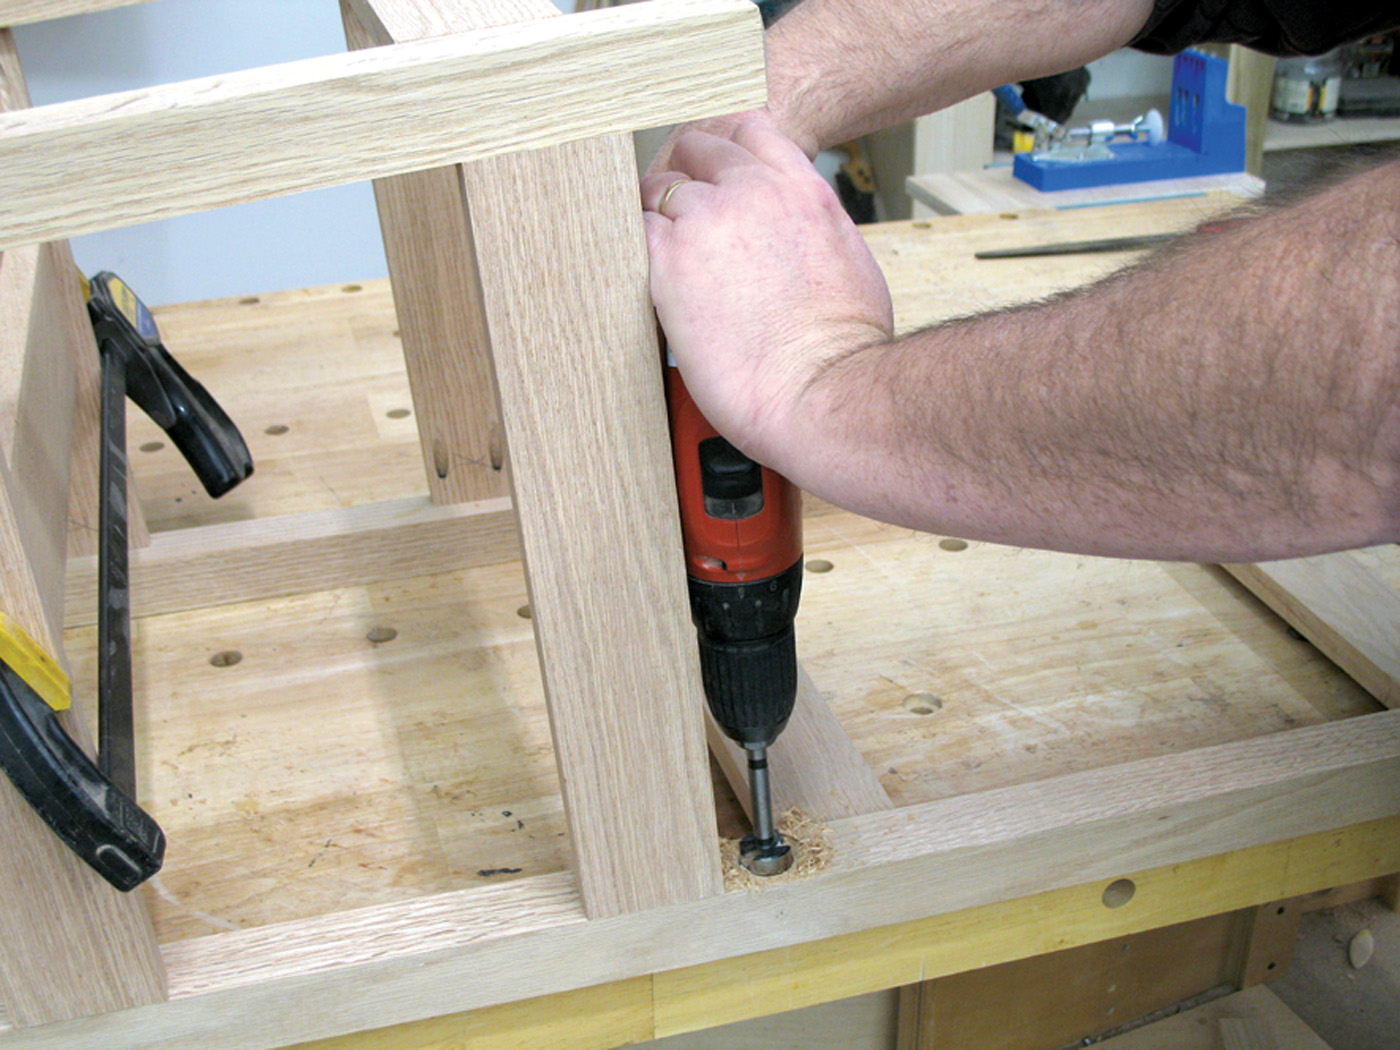
Add a shadow line. With the front faces of the rear legs clamped to the bench and the lower part of the chair hanging over the edge, it’s time to add the back rails. To add some visual interest to the back, I used some scrap wood to hold the rails back from the front edge of the legs as I added the screws.
You’ll find that the chair is starting to gain in weight, so holding the pieces as you assemble the back is a bit of a task. To make it easier, hang the seat portion off the edge of the bench and clamp the top portion of the back leg to your bench. Locate the rails according to the plan, add the spacers under the screw area to create the shadow line and drive the screws to attach the back rails.
Once the chair is assembled you need to take an accurate measurement of the length of the bottom stretcher and fit it to the chair. It doesn’t fit between two legs so it will be a different length than the rail.
If you install the stretcher now it will get in the way of other operations, but clamping it in place will add strength for the next step.
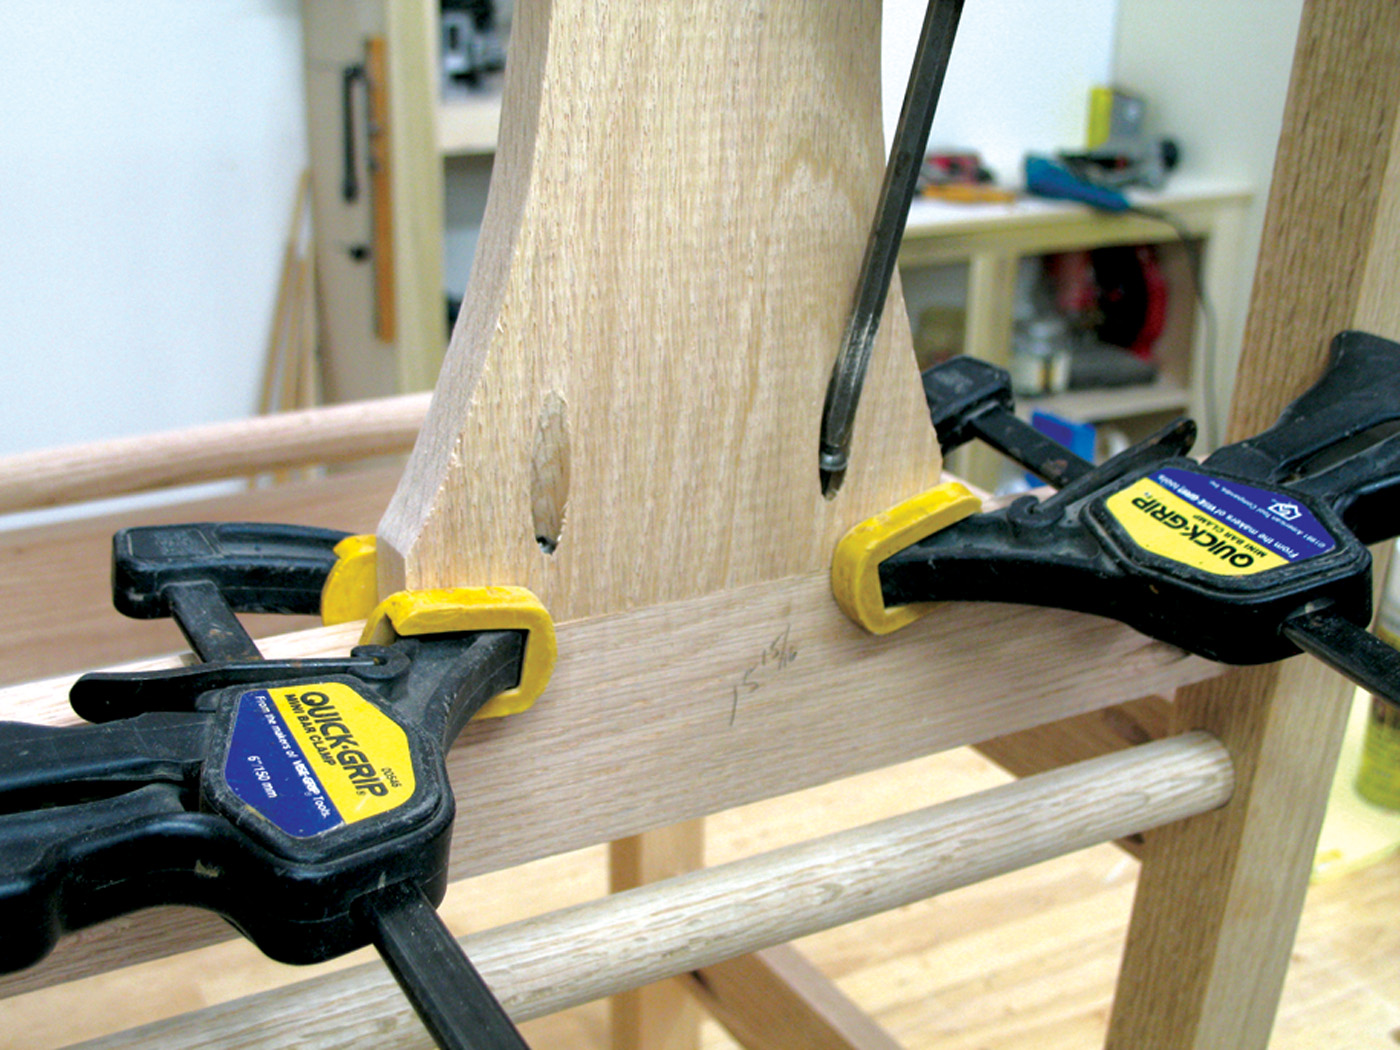
Align to the stretcher. The dowel holes in the rear legs need to be drilled parallel to the side stretcher, not perpendicular to the rear leg; otherwise they won’t fit.
The side dowel is installed in a hole in the back leg that is drilled at an angle. That hole is parallel to the side rail and is set 1⁄2“ above that rail and centered in the leg.
Chuck the 1″ Forstner bit into the drill and set the center point of the bit in position. Drill the hole to a depth of 1⁄2” while remaining parallel to the rail and square to the leg.
Measure the length of the dowels before removing any screws. This measurement is exact for that particular dowel location and can vary depending on the depth you drilled the hole. So, each length needs to be measured. Cut the dowels at the miter saw to guarantee a square end.
There is no possible way to install the dowels in the assembled chair without releasing the hold of the screws. Work one dowel at a time and when the piece is placed in the holes reattach the screws before moving to the next dowel. Also remember to install the stretcher at this time.
Another Shot at Design
The chair back splat is another area where you can influence the overall look of the chair. You can design something fantastic or simply leave it straight. I chose a simple arced cut.
Flushed with clamps. With the splat held flush to the splat rails, the pocket screws are driven home, finishing the assembly of your stylin’ chair.
To develop any design, first you need to find the length of the splat. This could be determined while installing the back splat rails or just find the measurement at this time.
Don’t rely on rulers or measuring tapes for this. You want a snug fit. Lay the chair on its back then square-cut one end of the splat stock. Raise the back off of the bench and slide the splat into position, keeping the square end tight to the lower rail. With a sharp pencil, trace the intersection of the splat with the top rail. This is the exact measurement of the splat. Make the next cut at the miter saw.
To draw the arcs you’ll need a compass that will expand to a radius of 10-3⁄4“. That’s not your average compass! So, you’ll have to make your own. Use a piece of scrap or an older (read as not your everyday ruler) ruler. Drill a small hole at one end of the piece just big enough for a small finish nail. In fact, I often use the nail to “drill” the hole.
Next, move up the piece to the 10-3⁄4” line and drill a second hole for the pencil lead to go through. That’s your compass – also known as a trammel.
Place a scrap of equal thickness perpendicular to the splat material. Measure down 91⁄2” from the intersection of the two pieces and place the nail. This is the pivot point of the compass. As you draw the line you will see that the arc starts about an inch from the end of the splat on both sides. Repeat the steps for the second side of the splat and you are ready to cut those with the jigsaw. Clean up any cut marks with a rasp and sandpaper.
Use pocket screws to connect the splat to the rails. Position clamps over the two back rails, on the face of each piece to keep them aligned as you drive the screws.
Fill any screw holes with the available plugs. This includes all holes in the back and the holes in the side lower rails. Other holes will not be seen once the seat is finished.
To do this, add glue to the hole and tap the plug into place. Allow the glue to dry before sanding smooth.
Adding the Color
The chair is finished with a nice medium-brown stain. Rag on a coat of Minwax Special Walnut stain, allow it to soak for five minutes and then wipe away any excess.
That is followed by a coat of Watco Danish Oil in the walnut tint. This is also allowed to soak for a short time before wiping the chair down. Once the oil dried I elected to spray on a coat of shellac. Shellac can be purchased in a spray can and this allows better control with all the pieces of the chair.
After the shellac has dried, knock down any nubs with #400-grit sandpaper. Add a coat of paste wax.
The final step is to weave the seat. Visit Shaker Workshops for detailed seat-weaving instructions.
Here are some supplies and tools we find essential in our everyday work around the shop. We may receive a commission from sales referred by our links; however, we have carefully selected these products for their usefulness and quality.