


We may receive a commission when you use our affiliate links. However, this does not impact our recommendations.
 All it takes is a router and a bandsaw.
 All it takes is a router and a bandsaw.
You’ll only need two machines to make these Arts & Crafts style knobs: a bandsaw and a router table. Although the saw cuts can be done on a tablesaw; the bandsaw keeps the operation safe and simple. The router table work requires two bits: a 5/8-in. round nose bit and a straight bit.
Shop-made knobs may not save you a lot of money, but they offer a wealth of advantages over the store bought variety. For starters, the knobs will better match the project, because the wood comes from the project’s scrap. In addition, you can customize the knob’s size to fit the scale of the piece. Plus, making your own knobs is a satisfying project by itself.
 Start by ripping 1-1/2-in. strips of wood from 1-1/4-in. thick quartersawn stock. The blanks can be any length, although a minimum length of 8-in. is best for machining. Cut enough blanks to make a few extra knobs; you’re bound to loose a few to test cuts along the way.
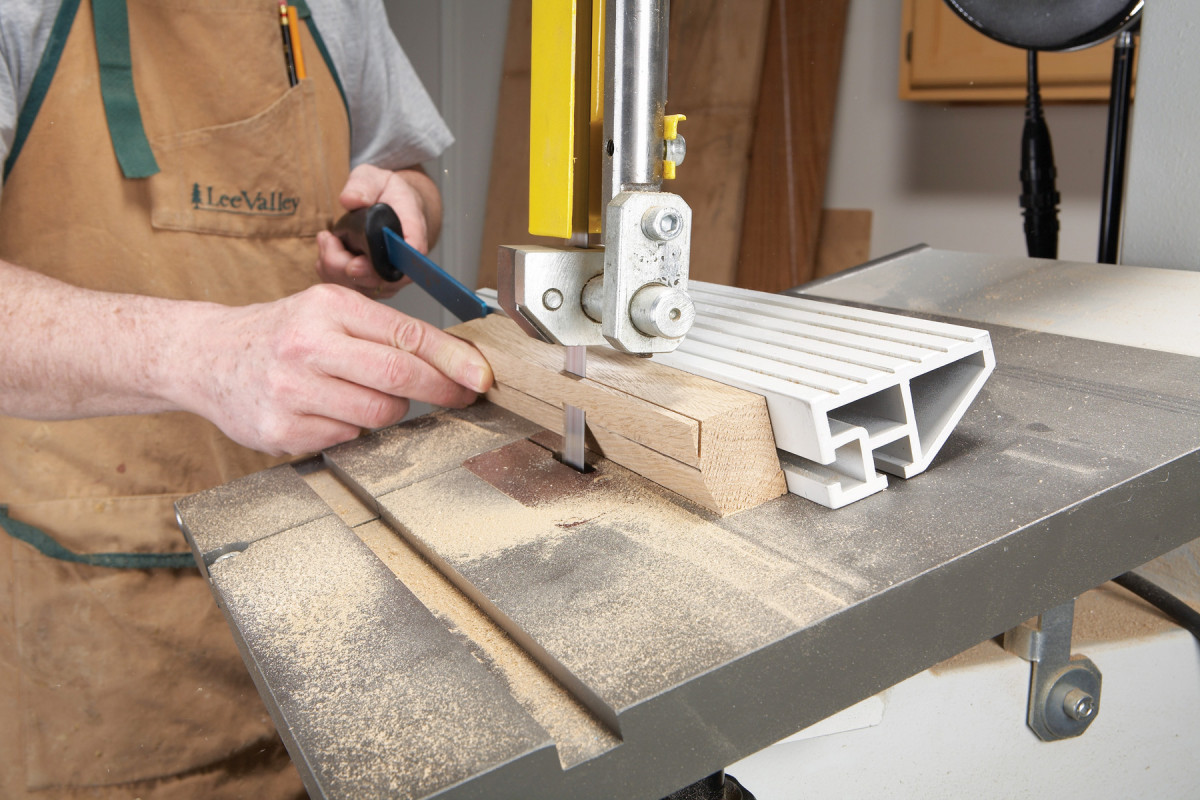
1. Start the knobs by cutting a pair of 15-degree bevels on the face of the blank. Set the fence so the bandsaw blade exits just above the marked centerline.
Lay out a centerline on the face of the blank. Then head to the bandsaw and tilt the table 15-degrees. Set the fence and cut the bevels in two passes (Photo 1).
2. Rout finger grooves along both sides of the blank. Make one heavy pass then a light clean-up pass to avoid tearout.
Take the beveled blank to the router table. Chuck a 5/8- in. core box or round nose bit in the router. Set the bit’s height just shy of 3/8-in. for the first pass. Position the fence to leave a 3/16-in. edge below the bevel, Fig. A, Rout a groove along each edge (Photo 2). Head back to the bandsaw and crosscut the blank into 1-1/2-in. squares (Photo 3).
3. Crosscut the blank into 1-1/2-in. squares. A miter gauge insures a square cut. There’s no risk of a kickback when you make this cut on the bandsaw.
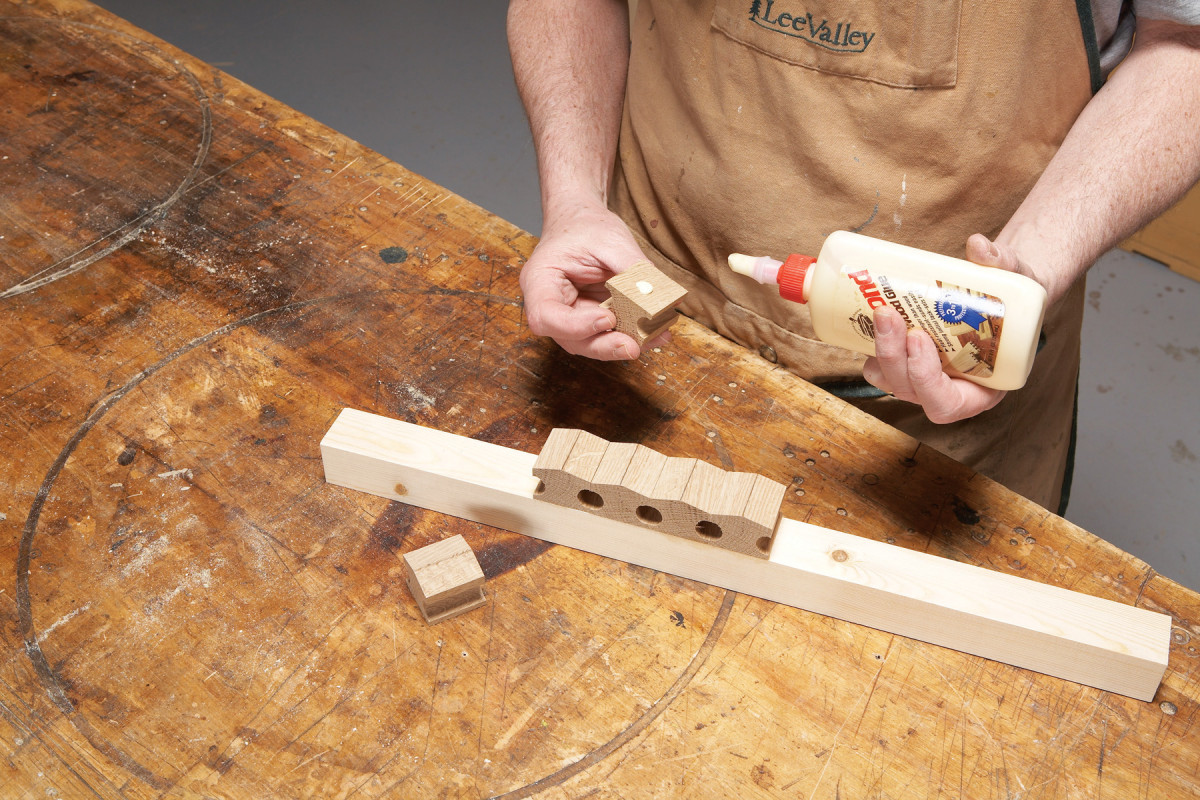
4. Glue the knobs onto a milled sled to machine the endgrain faces. Rotate each knob 90-degrees from its original orientation and use a small dab of glue.
Machining the remaining bevels and grooves on short little pieces, of course, is a bad idea. The solution is to reassemble the knobs in a line as before, but with their grain running in the opposite direction (Photo 4).
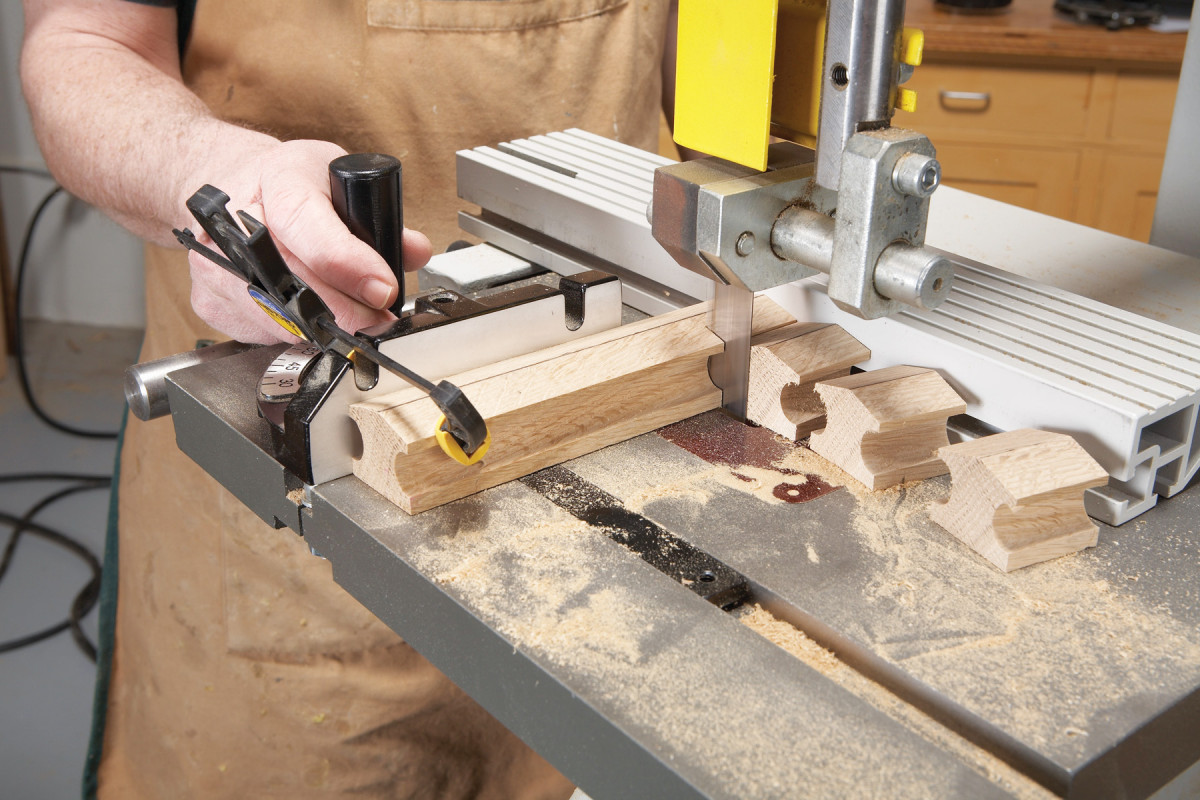
5. Cut the remaining two bevels on the knob faces. Once again, position the fence so the blade just misses the center mark.
Make a sled to hold the knobs from a piece of 2×4 squared up and ripped to the same width as the knobs.
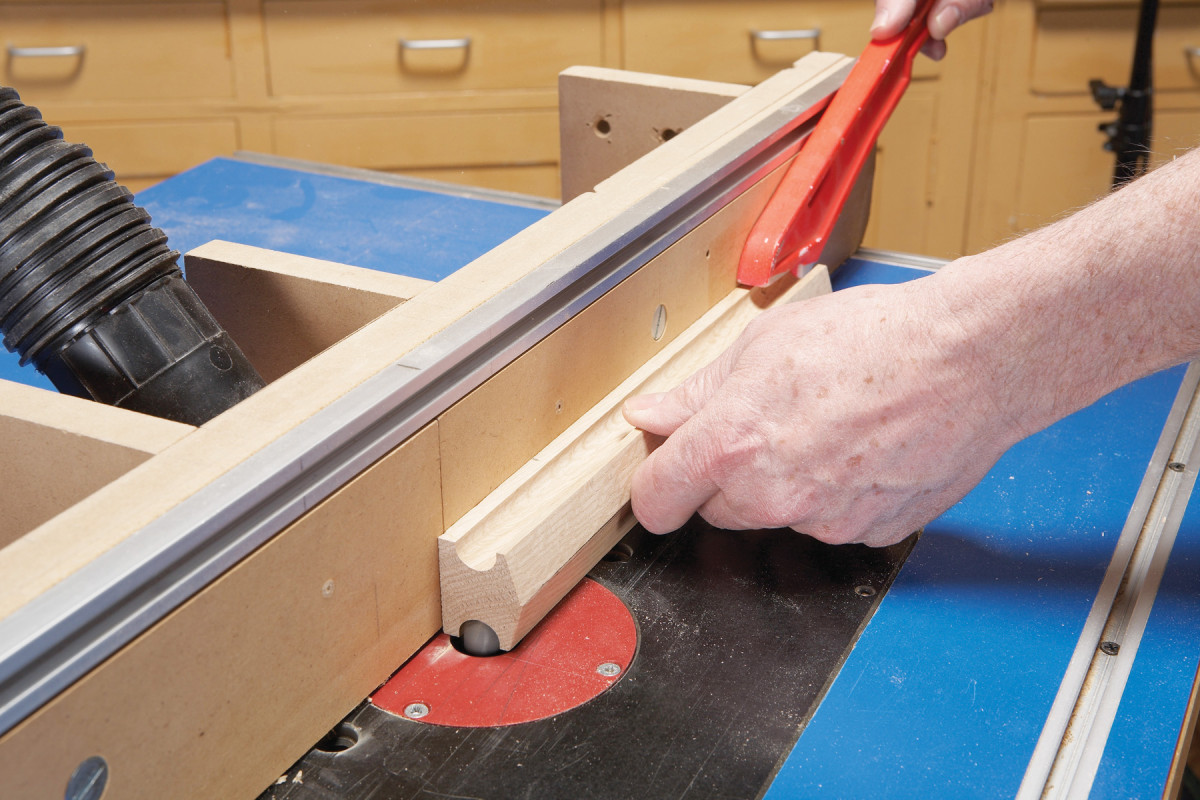
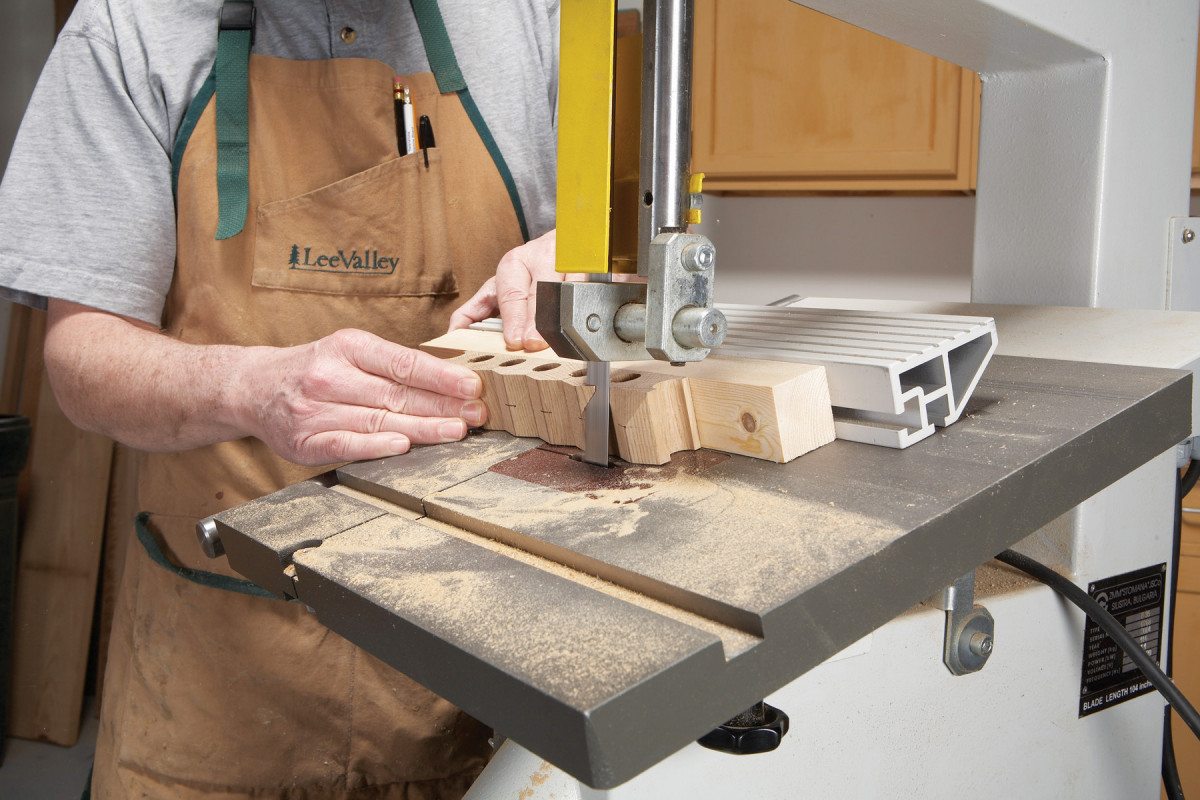
6. Rout the remaining grooves in the knobs. Take light passes and use a slow feed-rate to avoid tearout as the bit enters and exits the cavities between the knobs.
Make sure the knobs line up perfectly flush with each other. Mark the center of each knob face again to help set the bandsaw fence. Cut the bevels and grooves as before (Photos 5 & 6). Cut the knobs free of the sled (Photo 7).
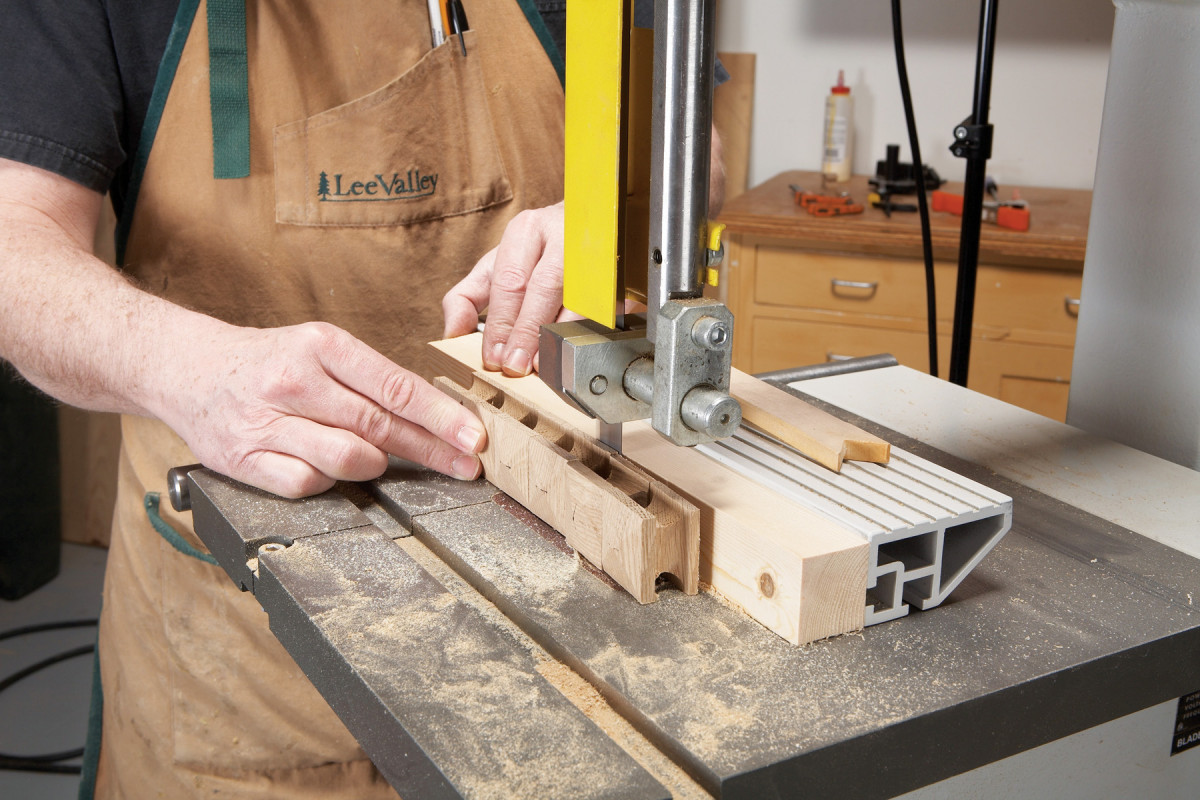
7. Slice the knobs free of the sled. Set the fence so the blade is centered on the glue line.
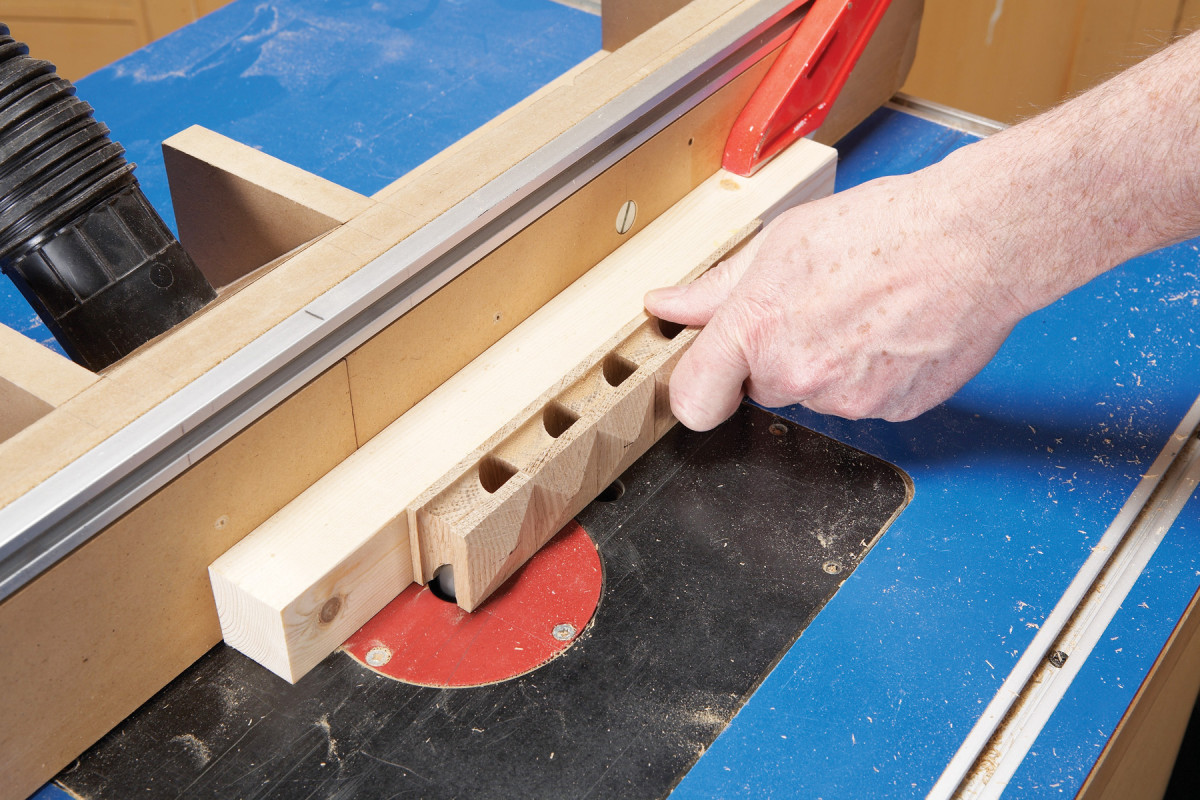
The knobs look their best when the base is smaller than the face. Trim back the base on the router table (Photo 8). A notched 2×4 that’s been jointed flat makes the perfect guide block. Blowing out the back edge is a real issue on these cuts. Start with an end grain cut. Then, rotate the knob 90-degrees clockwise, and cut the first long grain edge. Keep rotating the knob 90-degrees clockwise after each cut. If tearout is still a problem, make smaller incremental cuts.
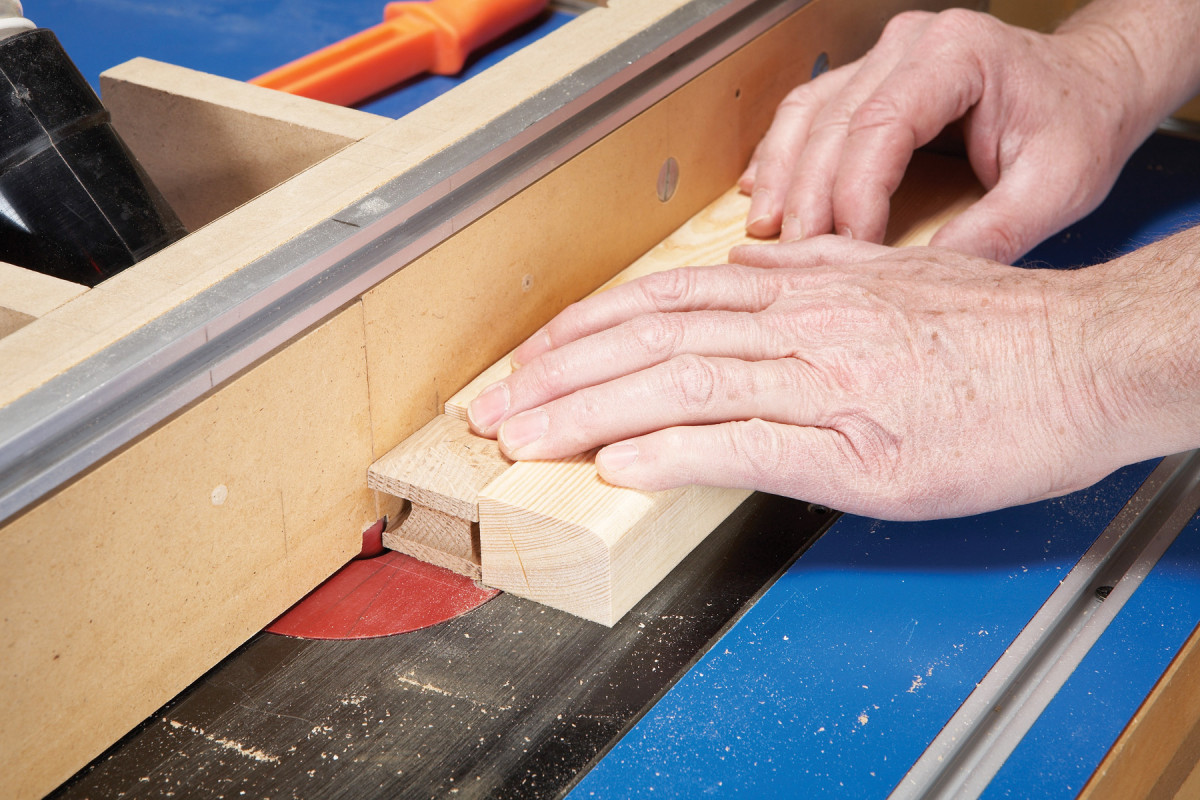
8. Trim down the base with a straight bit and a zero-clearance fence. A block of wood with a notch slightly smaller than the knob, guides the knob safely through the cut.
Finally, sand the knobs, starting with 120-grit paper. Round the corners and soften the sharp edges until the knob feels comfortable.
Here are some supplies and tools we find essential in our everyday work around the shop. We may receive a commission from sales referred by our links; however, we have carefully selected these products for their usefulness and quality.


