We may receive a commission when you use our affiliate links. However, this does not impact our recommendations.

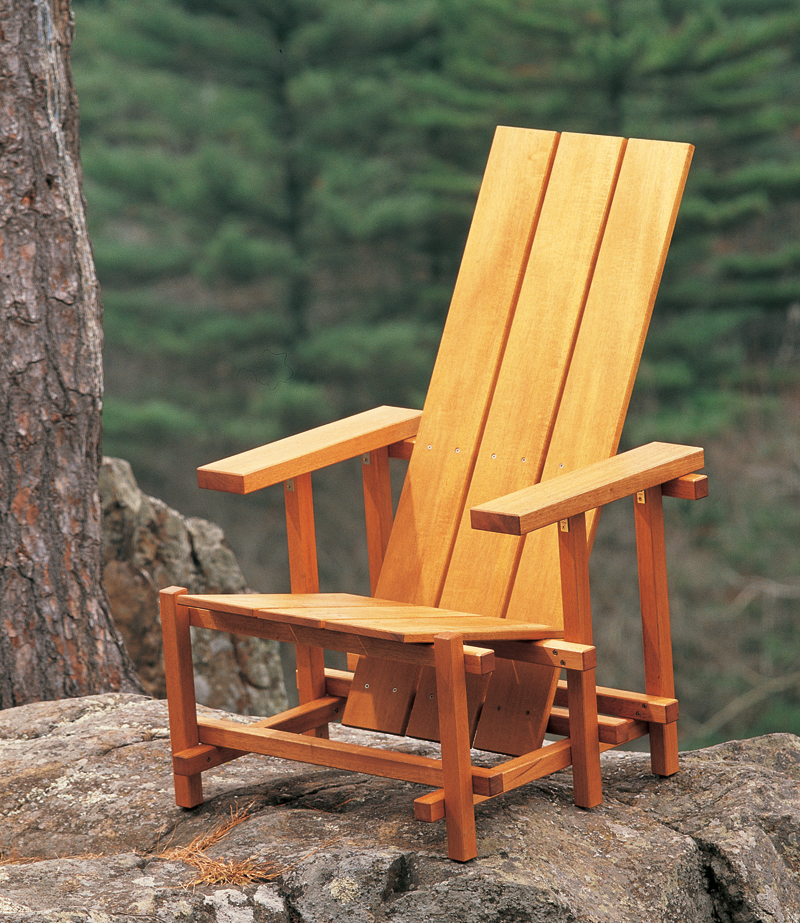
Reitveld Chair
We’ve turned an icon of modern design into a comfortable, easy-to-build outdoor project.
By Tom Caspar
|
In 1918 the Dutch cabinetmaker
Gerrit Rietveld
reduced the idea of a chair to a 3D
grid of painted sticks and boards.
His revolutionary design became
one of the most famous pieces of
20th-century furniture—the Red-
Blue chair.
Let’s take a new look at it.
Although his chair appears easy to
put together, getting all those sticks
precisely located is tough, especially
if you have only two hands. And all
the pieces look alike! To make this jigsaw
puzzle simpler to put together,
I’ve figured out a building system
based on two plywood boards and a
few spacing blocks. If, like most people,
you want to build a bunch of
chairs instead of just one, this system
is the ticket.Once you’ve built the first
chair, the rest will be easy as ABC.
|
|

You may also like…
St. Croix Valley Chairs
Craftsman-Style Outdoor Chair
Stickley Dining Chair
|
|
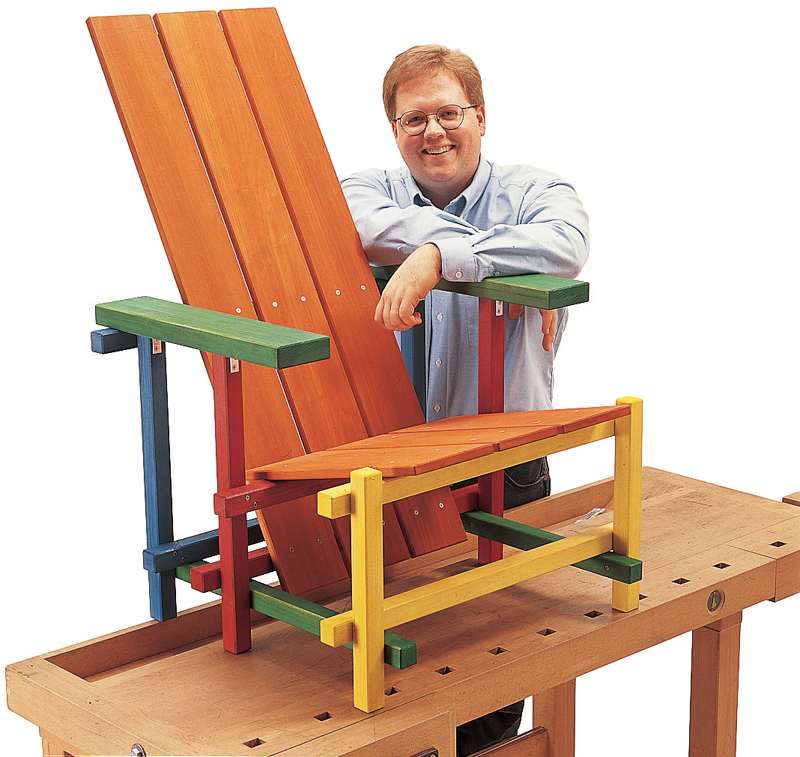
We’ve painted this demonstration
chair to show you how easy it is to
put together. Each color refers to a
separate group of parts.
|
|
Click any image to see a larger version.
|
|
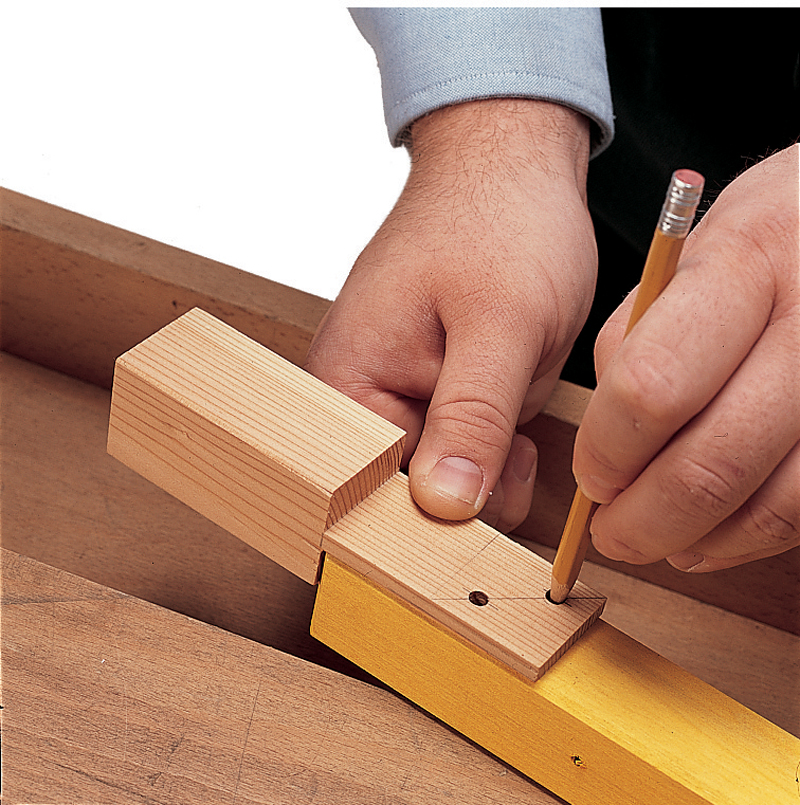
Mark the ends of all the D
rails with this reversible guide block. Drill holes on your marks by
hand or with a drill press. The screws
must easily slip through these holes.
Countersink both sides.
While you have the drill set up, put
holes in rails E and F as well and countersink
both sides.
|
|
|
|
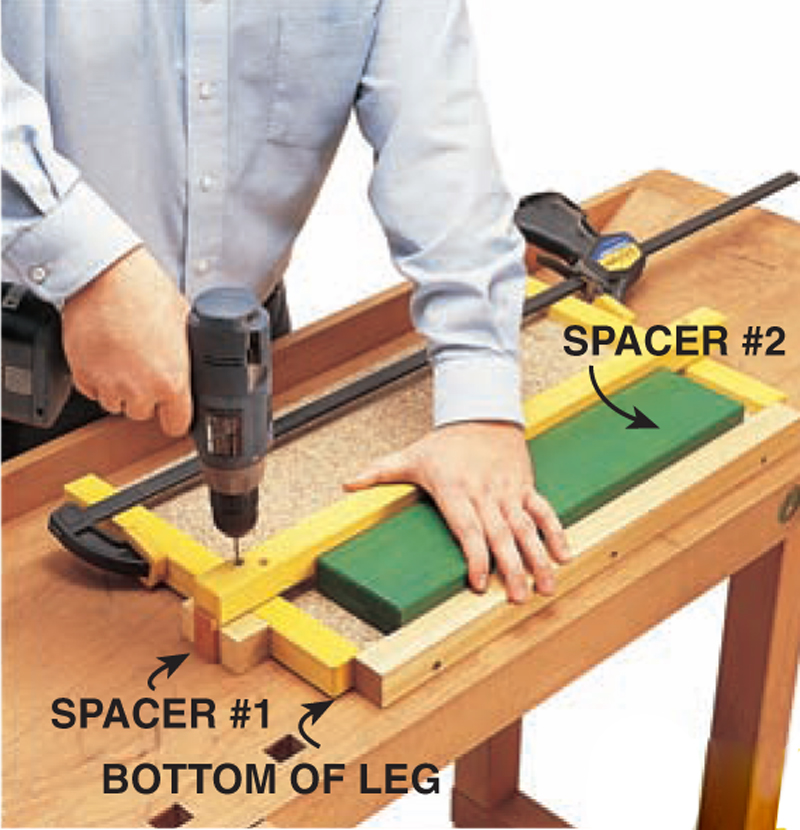
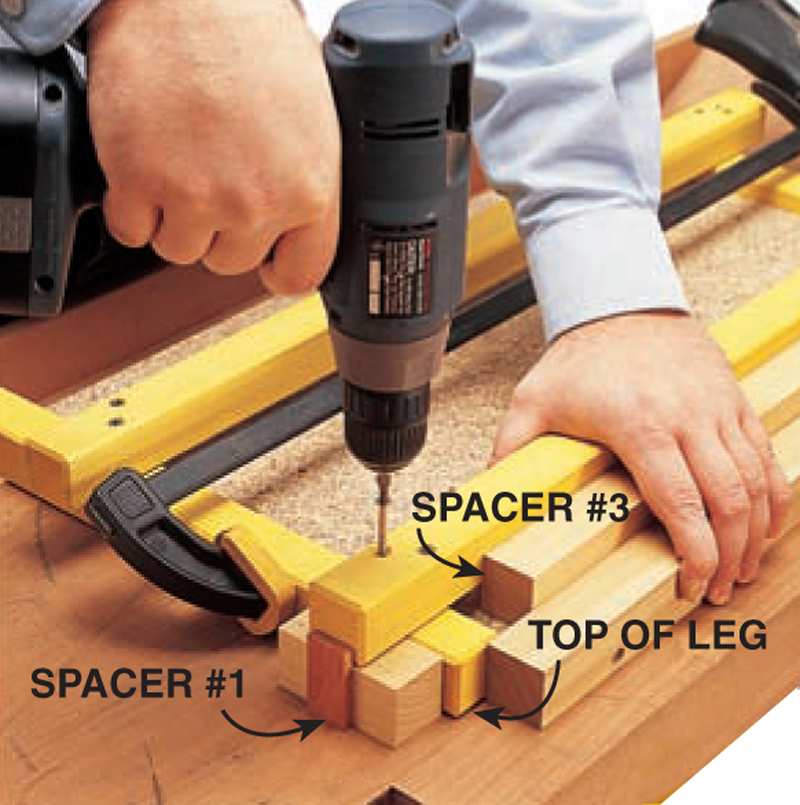
Assemble the front legs
and bottom rail. Lock them in place
on Fixture A. Spacer #1, at the
end of the rail, sets the overhang. Spacer
#2 (which is actually a chair arm) fixes
the rail’s distance from the bottom of
the leg. Drill pilot holes into both legs,
then remove the rail and blow off the
wood dust. Apply water-resistant glue
to the joints. Then replace the rail and
drive in the screws.
Repeat this operation for the middle
and back assemblies.
|
|
|
|
Flip the leg assembly
around and re-install it in the fixture.
Then insert spacer #3 to position the
upper rail.
|
|
|
|
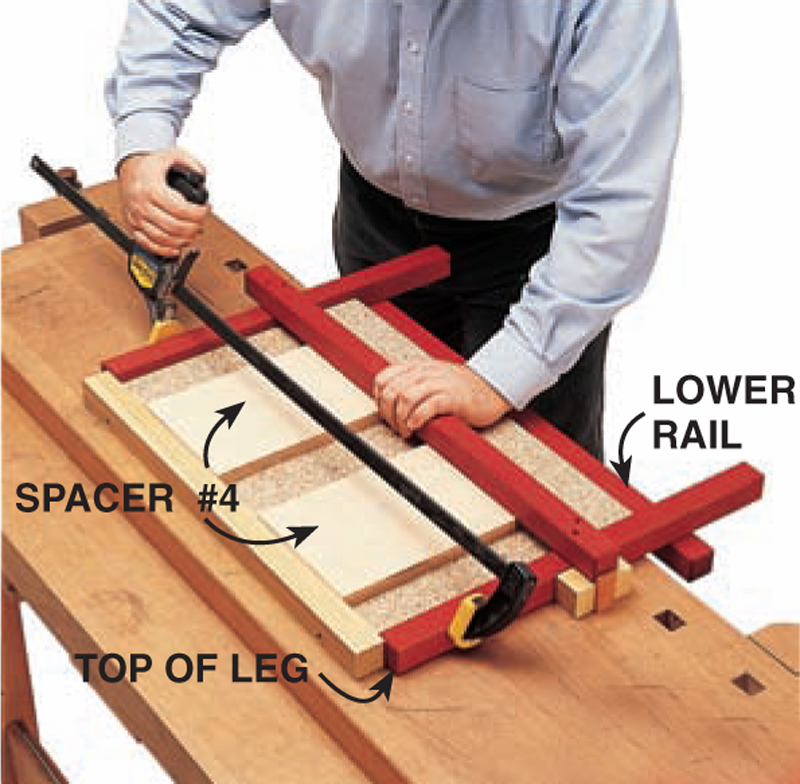
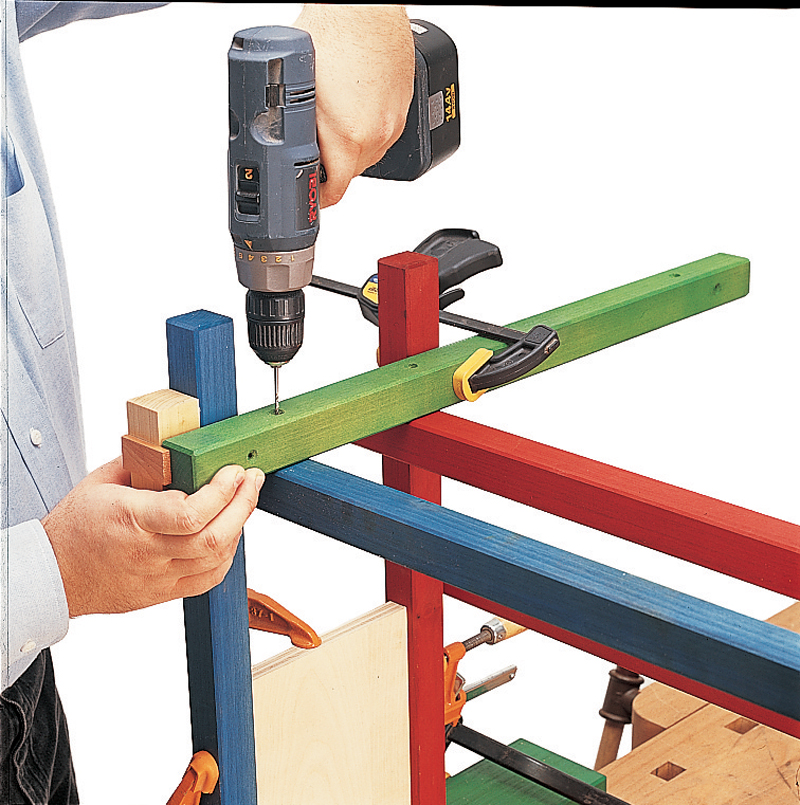
Install the upper rail of the middle
assembly with two #4 spacers.
|
|
|
|
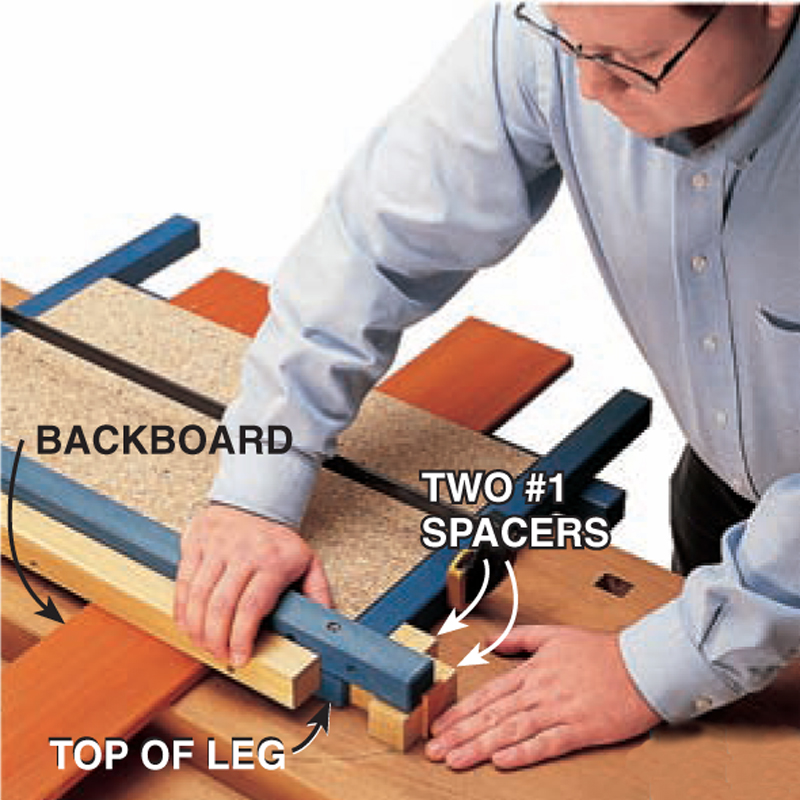
Butt rail E of the back
assembly against the stop stick. Place
two seat boards under the fixture to
raise the stop stick to the level of the
rail. Use two spacer blocks #1 to set
the overhang.
|
|
|
|
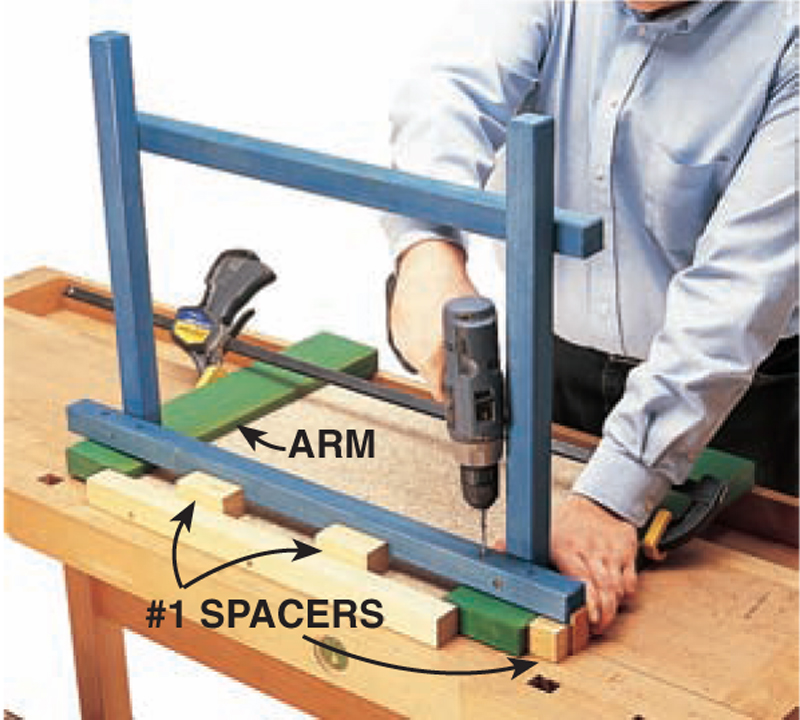
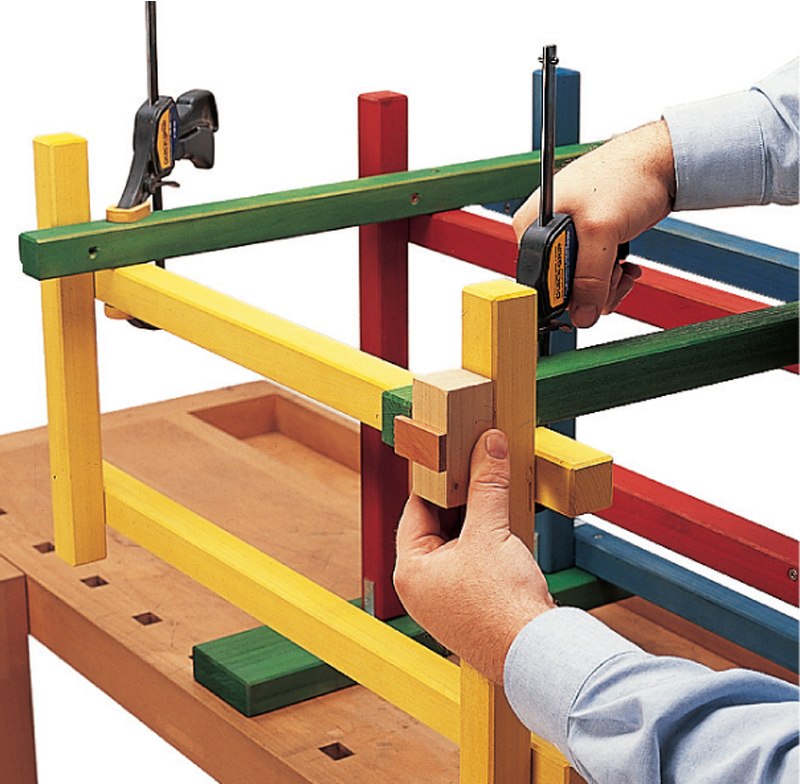
Screw the back leg
assembly to the arms. Clamp the arms
in place across Fixture B. Spacer blocks
#1 position the arm rail from the stop
stick and set the overhang.
|
|
|
|
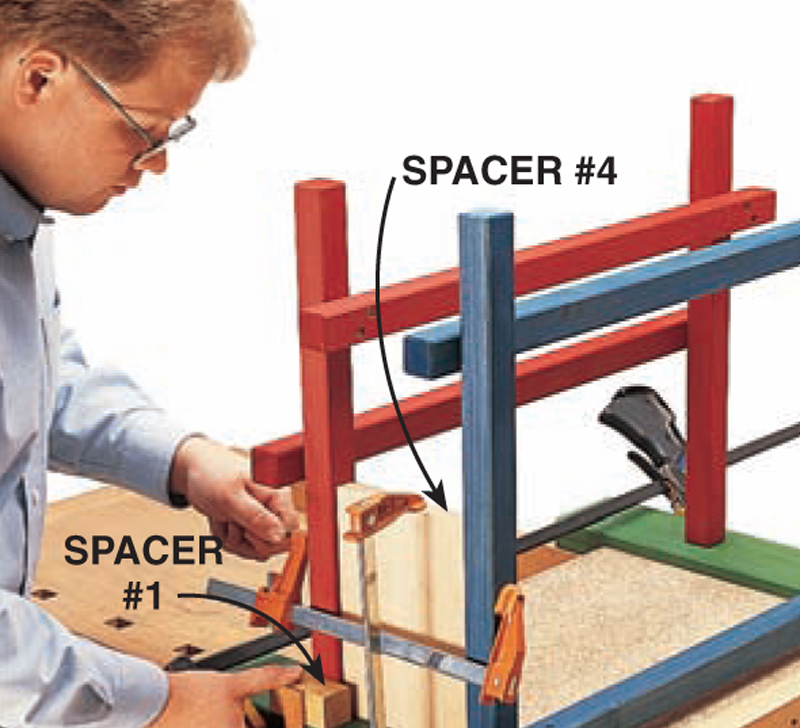
Clamp the middle leg
assembly in place with spacer #4 (the
same spacer you used in Photo 4, but
turned the other way around). Spacer
#1 sets the legs in from the arm’s edge.
|
|
|
|
Drill pilot holes through
rail F, then screw and glue it in place.
Repeat the same process on the other
side of the chair and remove Fixture B.
|
|
|
|
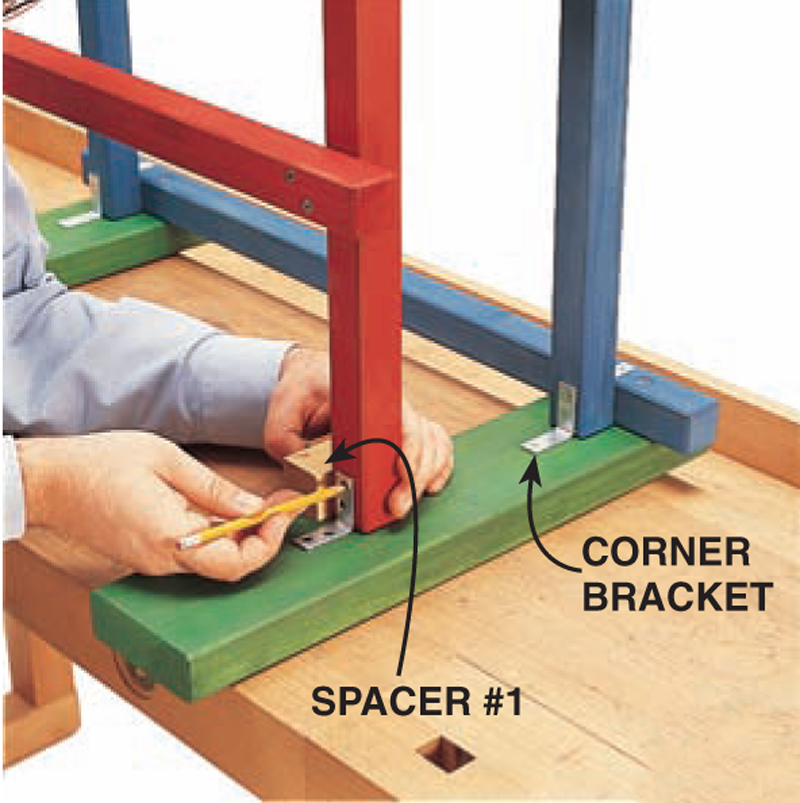
Install three corner
brackets on both arms. Use
stainless steel screws if your chair’s
going outside.
|
|
|
|
Clamp the front leg
assembly in place. Drill pilot holes
into the legs and drive in two screws to
temporarily hold the assembly in place.
Then remove the clamps, drill the pilot
holes into the front assembly’s rail and
remove the temporary screws. Apply
glue to the assembly and drive in all
the screws.
|
|
|
|
Add the backboards. Tilt
the chair back on a support block made
from the spacers. Pre-drill the holes
in the backboards and cut registration
dadoes in them. Then drill pilot
holes into the chair rails and drive in the
screws. This is not a glued joint.
|
|
|
Product Recommendations
Here are some supplies and tools we find essential in our everyday work around the shop. We may receive a commission from sales referred by our links; however, we have carefully selected these products for their usefulness and quality.