We may receive a commission when you use our affiliate links. However, this does not impact our recommendations.

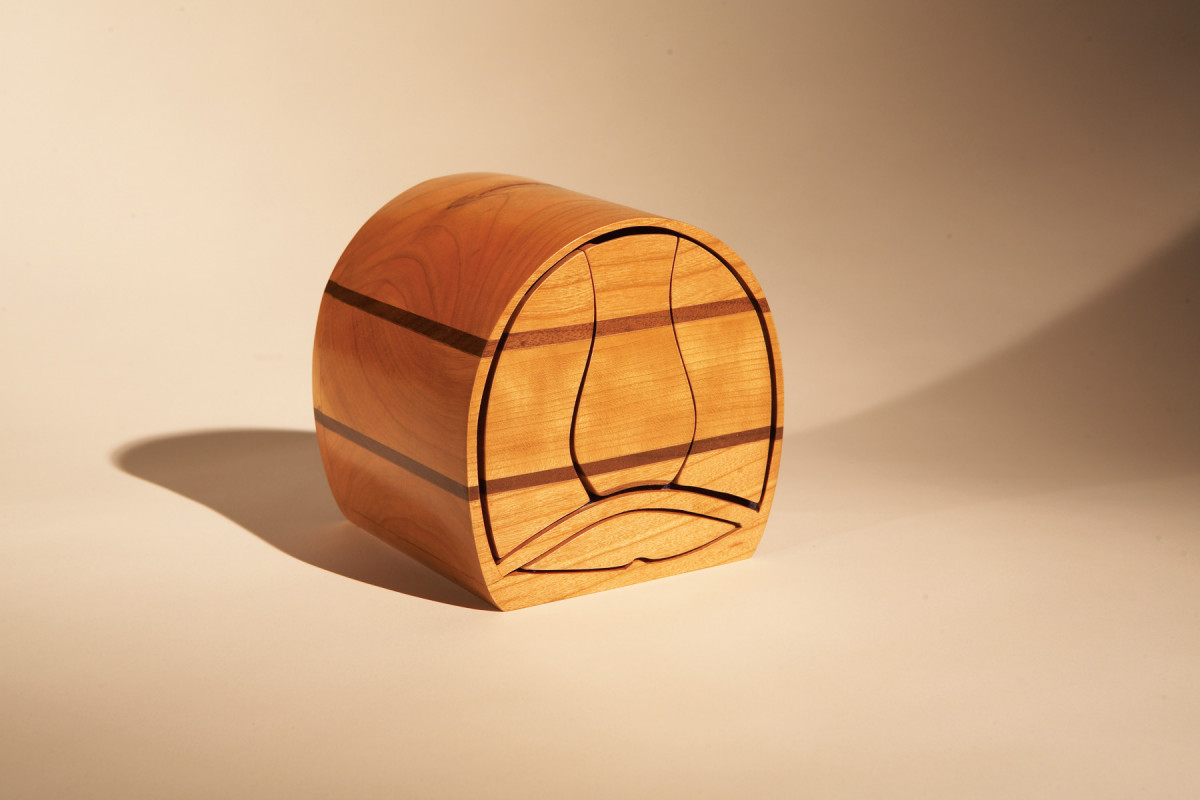
How do you open it? Just push the bottom drawer.
If you’ve ever been to a woodworking trade show, you’ve probably seen me demonstrating on the bandsaw. I’ve been doing it for, oh, 35 years now–a long run. A few years back, I introduced a box whose drawers pop out with the push of a button, and folks have loved it.
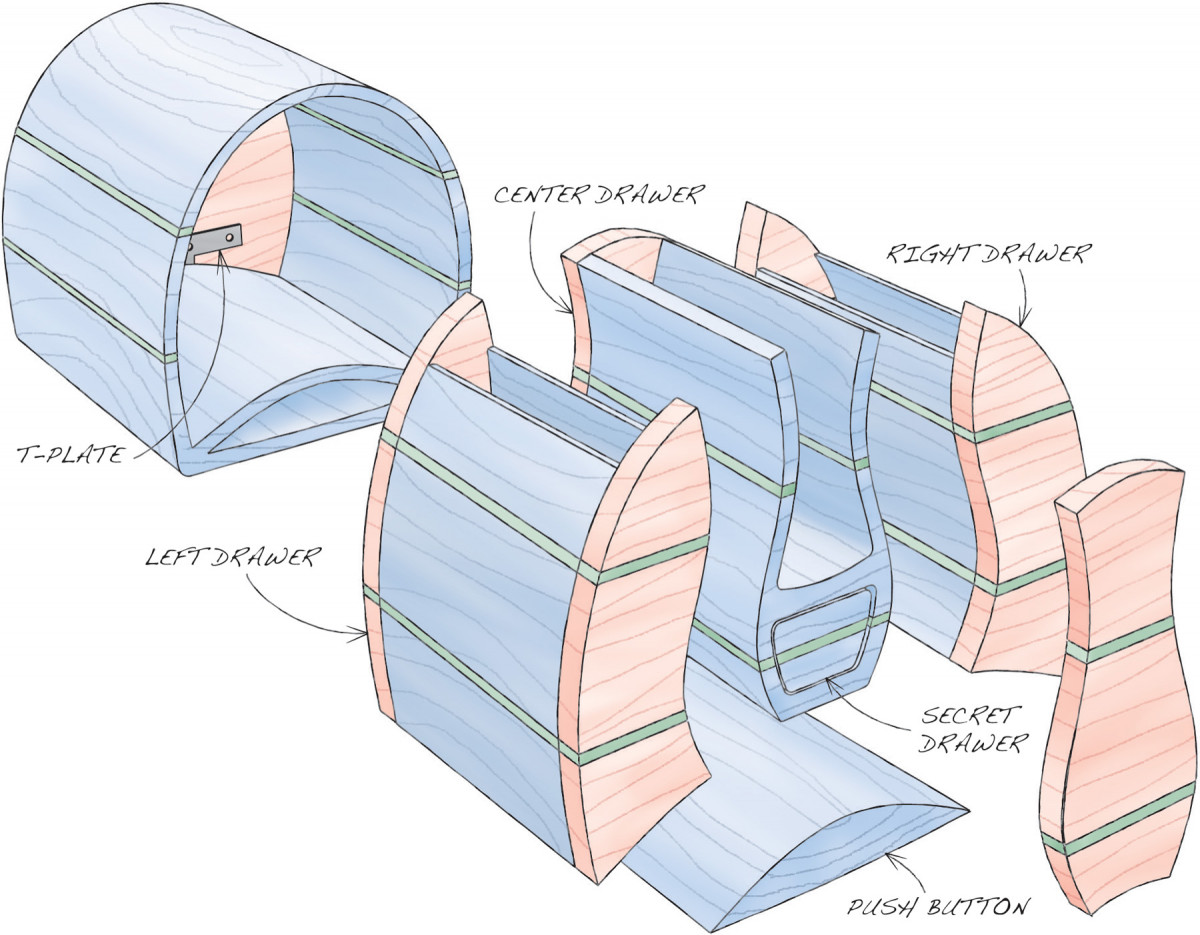
 It took me a while to figure out how to make the mechanism work, but it’s really quite simple (see Fig. A). There’s a T-shaped piece of bent metal hidden inside the back of the box (it’s just a mending T-plate from the hardware store). When you push the bottom drawer, which I call a push button, the T-plate pivots and pops out the drawers above. When you push in the drawers, the T-plate pivots the opposite way and returns the push button to its original position.

Fig. A) Exploded View
If this is your first time around making a bandsaw box, don’t worry. This one is pretty easy, and the pivoting mechanism really doesn’t complicate things. The main idea is that you’ll be cutting things apart, removing a waste piece, and gluing the parts back together. The pictures on the next two pages tell the story quite well, but I’ve also made a video that shows every step of the process.

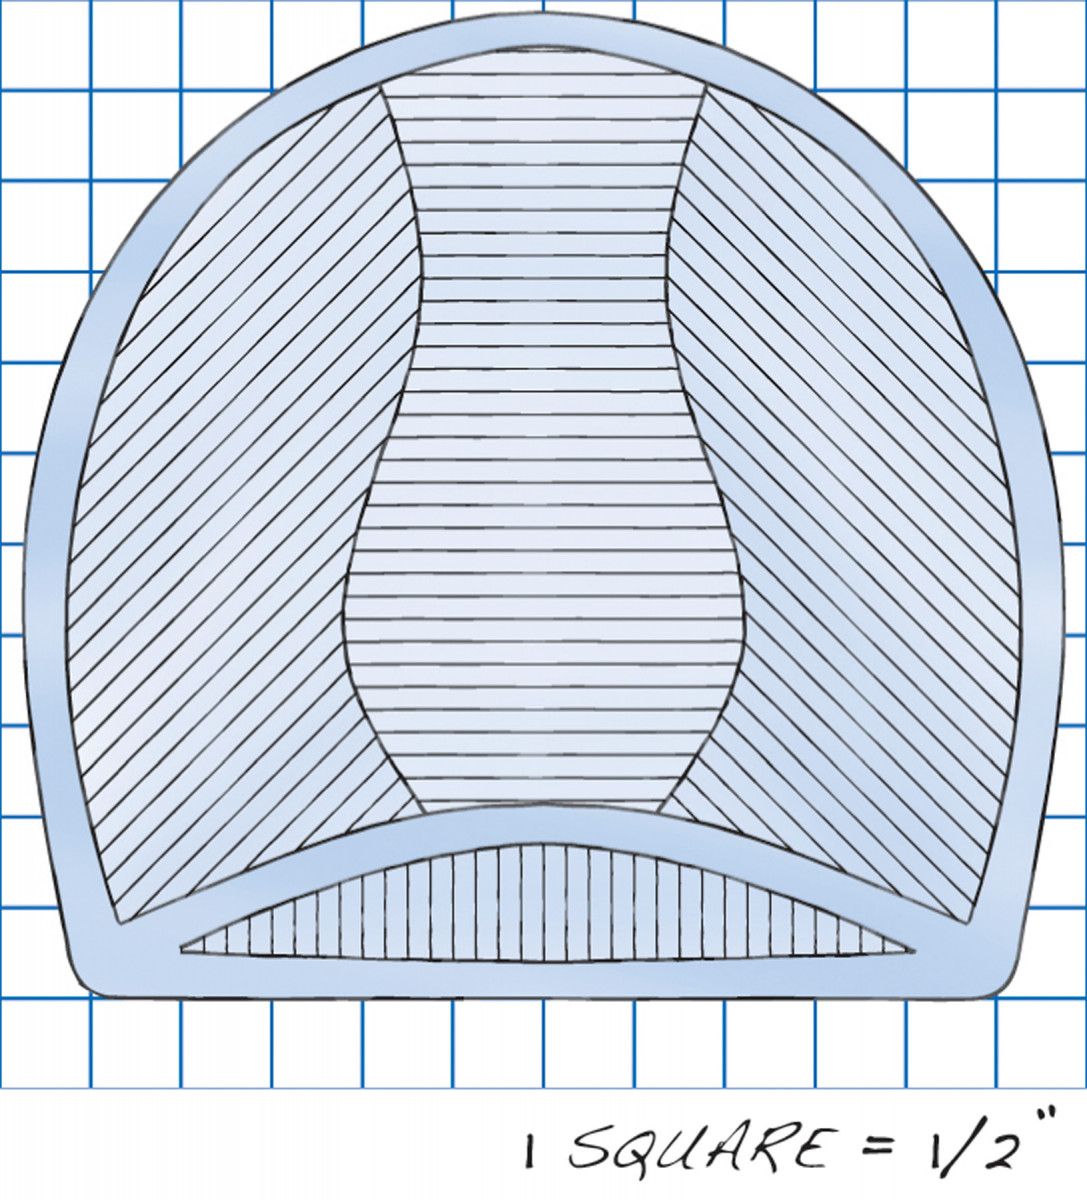
Fig. B) Pattern
Before you begin, make sure that your bandsaw’s table is square to the blade, side-to-side and front-to-back. I use three different blades for making this box (see 7 Tips for Making Bandsaw Boxes), and they really have to be sharp to accurately cut wood this thick. Take care when installing each blade; setting the guides properly is essential for you to be able to follow the cutting lines.

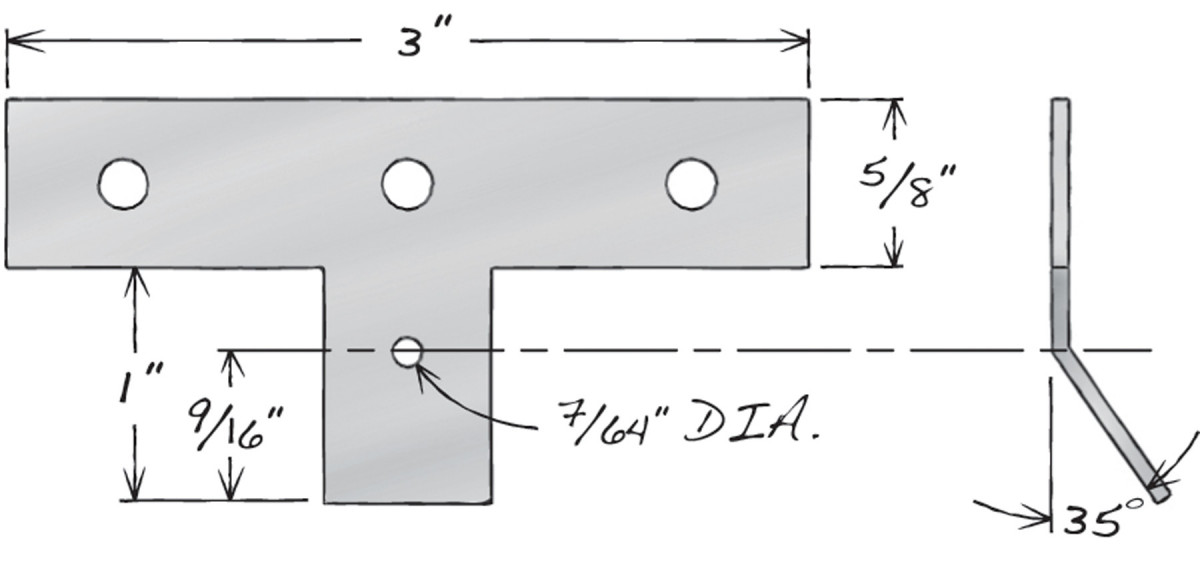
Fig. C) Pivoting Plate
Think carefully about working safely. Your hands will often be very near the blade, but make sure they’re never in front of the blade’s teeth. Cut at a slow but steady pace–don’t force the cut. A new or sharp blade will make this much easier.
Make the blank
The blank is 5-5/8″ thick, 5″ wide and 6″ long. It’s composed of three layers of 1-3/4″ thick wood and two layers of 3/16″ thick wood. I used cherry and walnut. Machine these pieces and make sure they’re flat, then glue them together with plenty of clamps. Joint or saw the blank so the sides are even (they’ll be the front and back of the box).
Saw the case
 1. Glue the paper pattern (Fig. B) on to the blank using a spray adhesive.
 2. Cut the outside edge of the box. (The cutting paths are shown in red in the photos below.) Use a 3/16″, 10 TPI blade. I usually cut these and other walls about 3/16″ thick.
 3. Leaving the box inside the blank, cut off the back, which is 3/16″ to 1/4″ thick. Use a 1/2″, 4 TPI blade and guide the cut with a fence.
 4. Switch back to the 3/16″ blade and cut the bottom edge of the push button.
 5. Cut the top edge of the push button. Remove the button.
 6. Cut the inside edge of the box. Stop at the far corner and back out of the cut.
 7. Cut the bottom edges of the drawers.
Make the outside drawers
 8. Remove the drawer block.
 9. Cut the drawer block into three pieces.
 10. Cut off the fronts and backs of the left and right drawers. Guide these and similar cuts with a fence.
 11. Cut the centers of the drawers.
 12. Glue the left and right drawers.
Make the middle drawer
 13. Cut off the front of the middle drawer.
 14. Switch to a 1/8″, 14 TPI blade and cut out the secret drawer.
 15. Remove the secret drawer block.
 16. Cut the back of the middle drawer.
 17. Cut the center of the middle drawer.
 18. Glue the kerf in the lower corner of the middle drawer created by sawing out the secret drawer. Glue the same joint on the front of the secret drawer.
 19. Glue the front and back to the middle drawer.
 20. Cut the front and back of the secret drawer.
 21. Cut the center of the secret drawer.
 22. Glue the secret drawer. Sand the outside faces of all the drawers.
Glue the box
 23. Apply glue to the two open joints of the box.
 24. Clamp the box.
Make the push button
 25. Cut a T-plate with a hacksaw (Fig. C).
 26. Drill a 7/64″ hole in the T-plate. Bend the T-plate by striking the fold with a 3/4″ wide cold chisel and a ball-peen hammer.
 27. Saw or rout a 1/8″ deep notch in the back of the case. Make the notch exactly as wide as the T-plate. Drill a 1/16″ dia. hole, 1″ deep, in the middle of the drawer divider. Round over the bottom of the notch using a file.
 28. Place the T-plate in the notch. Place a 2d (1″ long) brad in the hole. Cut the brad with a side cutter so that it’s top is flush with the T-plate.
 29. Test the push-button mechanism. Clamp the back to the case and insert the drawers and push button. The T-plate mechanism should swing freely. If it doesn’t, the notch may be too shallow.
 30. Insert all the drawers, flush with the outside of the case. Put in the push button, back side facing out. Mark its excess length. Cut the push button along this line.
 31. Replace the push button, front side out. Its front should be flush with the case. Test the mechanism. Once everything works well, glue on the back. Sand the outside of the case.
Finishing up
 Remove the drawers and apply a finish to all parts. To make the drawers slide better, and to close the gaps between them, cut and apply pieces of adhesive-backed felt inside the case and push button’s opening.
Here are some supplies and tools we find essential in our everyday work around the shop. We may receive a commission from sales referred by our links; however, we have carefully selected these products for their usefulness and quality.


