


We may receive a commission when you use our affiliate links. However, this does not impact our recommendations.
Your handmade pie deserves more than a generic roller.
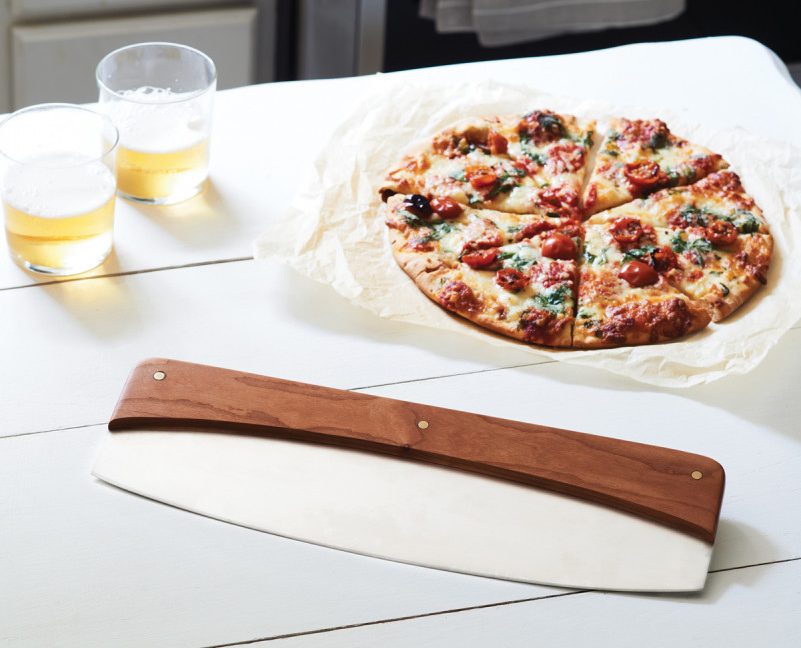
Handmade pizza is a mainstay at my house, but I never knew how much fun cutting up a freshly cooked pie could be until I made a rocker. This baby doesn’t fool around; the hefty blade cleanly slices the thickest of crusts and layers of toppings. After three or four stylish passes, your slice of bubbling hot pizza slides free without dragging that annoying extra cheese or its unsuspecting neighbor. This project also makes an excellent gift for your pizza-loving friends.
Related: Enjoy making your own pizzas? Then you definitely need to make your own pizza paddle.
Begin with Metal Cutter
 1. Start your drawing. Mark a 4“ x 15“ rectangle on your stainless steel. Draw a second line at 5“ and make the center at 71/2“ to indicate the crest of the curve. Freehand a rounded edge from the center of the crest to the 4“ marks. You can also use a cardboard template and trace it.
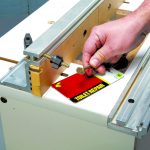
 2. Cut out the steel shape. Make sure to use a new metal cutting blade on your jigsaw, take your time, and take breaks to allow the blade to cool. Cut as close to the line as possible without touching it.
 3. Clean it up. Smooth the edges of the cutting blade to the line with 80-grit sandpaper on a belt sander or a disc sander. (Sheets of sandpaper on a flat surface also work if you’ve got the elbow grease.) Be sure to wear hand, eye, and lung protection when sanding steel.
 4. Mark the cutting bevel. Use a permanent marker to draw a line that matches the rounded edge about 3/16“ in.
 5. Sand the bevel. Angle the blade and use a belt sander (or sandpaper and block) to sand the bevel on each side to the 3/16“ marker line.
 6. Make it shine. Sand the faces of the blade to your desired sheen. The higher grit you go, the more mirrorlike the finish.
Next Create the Handle
 7. Begin the handle. Cut a piece of hardwood to 3/4“ x 2 1/2“ x 15 1/4“. This is cut slightly longer so it can be sanded down to the finished size.
 8. Create a decorative look. To give your pizza rocker a better look, draw a curved line instead of a straight line on the wood where the handle will meet the blade. Use the curvature of blade as your template.
 9. Cut along the curved line. Use a bandsaw or jigsaw to cut along the curved line you just drew. Follow that up by sanding the curve smooth.
 10. Cut the handle in half down the middle. With it cut to a curve and sanded smooth, resaw the handle right down the middle to make up the two halves that will sandwich the cutting blade.
 11. Give the curved edge a roundover. Add a small 1/8“ roundover on the outside face of each piece. Do not round over the inside that will make contact with the blade. This roundover is easier to do before assembly.
Attach and Finish
 12. Glue it up. Use five-minute epoxy to glue to blade between the two handle halves. Clamp it together and allow to dry for 24 hours.
 13. Mark the holes. With the glue dried, mark the holes to be used for the brass dowels. Make a horizontal line 3/4“ in from the top and the two outside dowels inset 3/4“ from the edge. Put the third hole directly in the center.
 14. Drill it out. Use a drill to bore a 1/4“-diameter hole completely through the three markings.
 15. Cut the brass dowels. Using a hacksaw, cut some 1/4“-diameter brass rods slightly longer than the thickness of your assemble handle.
 16. Add the brass dowels. Apply some epoxy to secure them and pound in the dowels.
 17. Sand everything smooth and round over. Once everything is dry, sand all handle edges so the steel and wood create a nice flush edge. Use the belt sander to flush brass dowels as well. Round over the outside edges of the handle so the cutter has a nice feel when using it. Use a 1/8“ roundover bit like you did in Step 11.
 18. Give it one final sand and finish. Do a few passes with your sander or sandpaper up to 220 grit. Finish the hardwood handle with a food-safe oil. Any off-the-shelf cutting board oil will do the trick.
Looking for stainless steel?
Stainless steel may be found at home centers, but McMastser-Carr is your best bet online. Their 304 stainless steel sheets are perfect for this application and come in 0.036″ thickness. 304 Stainless Steel [McMaster-Carr]

This project is an excerpt from the book Make Your Own Kitchen Tools: Simple Woodworking Projects for Everyday Use. [Amazon]
Here are some supplies and tools we find essential in our everyday work around the shop. We may receive a commission from sales referred by our links; however, we have carefully selected these products for their usefulness and quality.


Any thoughts on where to source the stainless steel?
Great question- sometimes you can find it at home centers, but McMastser-Carr is your best bet online. 20ga is 0.038″ and they have sheets in 0.036″ thickness, which should be close enough. https://www.mcmaster.com/stainless-steel/shape~sheet-and-bar/multipurpose-304-stainless-steel-6/
I’ll update the article with this information as well.
Very nice project. I will have to make one of these. I do have a question about the order of a couple of steps. Would it not be better to do the round over, on the inside curve at least, before cutting the handle in half? To me, it would give the bearing a larger surface to ride on and the thicker piece would keep hands further away from the cutter.
I don’t see any reason why that wouldn’t work, at least for the inside curve. The outside curve might reduce stability when trying to resaw on the band saw.