We may receive a commission when you use our affiliate links. However, this does not impact our recommendations.

Two jigs let you crank them out flawlessly!
By Randy Johnson
Everyone I know has a drawer stuffed with photos that are waiting to be framed. What often keeps us from getting those treasures up on the wall is the high cost of professional framing.
If you’ve ever tried making picture frames, I’ll bet you got frustrated cutting the miters and clamping the corners. We’ve got the perfect solution.
We’ve designed a great looking two-part frame that’s downright cheap and easy to make. The pieces are small, so you can use up some of that scrap wood you’ve been unable to part with. Plus, with our surefire mitering and clamping jigs, you can make frames by the dozen.
The frame and jigs shown here are set up for 8 x 10 or smaller photos. By using different mats, you can use one frame size for different-size photos. You can also make the frame and jigs larger or smaller to custom-fit almost any size picture.

Our frame design has two parts, which can be made of different woods or even used as two separate frames!

Two small photos mounted witha twin mat in a walnut frame.
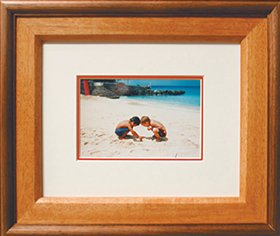
4 x 6 photo mounted with a double mat in a mahogany and walnut frame.

8 x 10 photo mounted without a mat in a cherry and walnut frame.

5 x 7 photo mounted with a vertical mat in a maple and walnut frame.
Tools and Materials
To make the frames you will need a tablesaw, a router and router table, plus a dado blade and router bits. To build the jigs you will also need a hand drill, jigsaw, hacksaw and a few spring clamps.
Machining the Frame Material

1. Rout the frame profiles on your router table. Keep things safe by using featherboards and push sticks.

2. Cut the rabbet in the inner-frame material with a dado blade. Use a zero-clearance insert to fully support the frame material and featherboards to keep the material against the fence while making the rabbet.
Caution: Blade guard must be removed for this cut.

3. Cut the rabbet in the outer-frame material. Adjust the outfeed featherboard so it rides inside the rabbet.
Caution: Blade guard must be removed for this cut.

4. Make a miter sled for cutting the frame pieces. Begin by gluing the guide rails to the sled board. The 1/8″ spacer strips hold the guide rails slightly above the top of the table. Use a piece of tape to mark the center of the saw blade and align the center of the sled board with this mark. Flush the edge of the sled board with the table edge. Add some weight to the top and allow the glue to dry.

5. Center the tip of the plywood triangle with the middle of the saw kerf and against the rear sled fence. The dust bevel on the bottom edge prevents dust buildup.

6. Screw the T-track and the safety shield in place. Add the stop block and the sled is ready to use.

7. Cut the first miter with the frame material on the right side of the miter sled. We marked our miter sled to remind us of the cutting order.

8. Cut the second miter with the frame material on the left side of the miter sled. Set the adjustable stop block for the required lengths.

9. Make a clamping jig to help assemble the frames. Glue and clamp the sides to the jig base. Make sure the inside of the sides without threaded inserts are perfectly square to each other.

10. Rub glue on the end grain of your frame parts. Let it dry about 10 or 15 seconds. If it seems to soak in a lot, add a little more glue, rub again and let the parts rest for another 5 or 10 seconds. When the glue seems a bit tacky (no longer runny) you can put the parts in the clamping jig. Note that the filler boards are already in place.

11. Assemble the frame in the clamping jig one part at a time. Start with a long side (part 1) and add parts 2, 3 and 4 in order. Line up the miters and you’re ready to apply clamping pressure.

12. Apply clamping pressure a little bit at a time. Turn each clamp lightly at first. Double-check that the miters are still lined up and then apply more pressure. When the risk of slippage seems to be gone, apply firm pressure to the clamping bolts. Don’t overtighten.

13. Finish your frames. A spray-on finish is the easiest. We bevel-cut a 2×6 in half and screwed on a piece of plywood at both ends to make a simple finishing rack. The open design allows the overspray to blow through rather than bounce back onto the frames. Replace the masking tape when it gets covered with finish.
Making and Using a Miter Sled
This tablesaw sled makes perfect miters every time. You’ll be able to quickly cut accurate multiple frame parts. Start by cutting all the parts for the sled (Fig. C). You’ll have to size the guide rails to fit your tablesaw because slot sizes vary between saw brands. Make the guide rails so they slide freely, yet have minimal side-to-side movement. Make them about 1/16″ thinner than the depth of the slots in your tablesaw. Also make a pair of 1/8″-thick spacer strips to use when gluing the guide rails to the sled board.
After attaching the guide rails, add the front and rear fences. Put the sled on your tablesaw with the blade raised about 1″. Now slide the saw sled into the blade until the plywood is cut to about half of its width.
Next, make the plywood triangle. Start with a 16″-square piece of plywood and cut it diagonally with a jigsaw. Don’t forget to rout the dust bevel on the bottom side of the triangle. This bevel helps prevent sawdust from building up against the triangle and causing miter-fitting problems (see Oops!, below).
Center the triangle on the saw kerf and attach it to the sled base with screws. Complete the saw sled with the addition of the T-track, adjustable stop block and the safety shield.
Cutting frame parts with this miter sled is a simple two-step process.
Making and Using the Clamping Jig
This clamping jig takes the pain out of gluing and clamping miters. Unlike the old one-corner-at-a-time clamps, ours takes care of all four corners at once!
The clamping jig shown here is made specifically to fit our frame sizes. You can clamp other size frames by making the clamping jig larger or smaller.
To make the jig, cut the parts according to Fig. E. Drill 3/4″ holes, then cut out the glue drip slots with a jigsaw. Next, drill for the threaded inserts and screw them in place. Now glue the sides to the base. To ensure perfectly square frames, the jig sides that don’t have threaded inserts must be perfectly square to each other.
To complete your clamping jig, make the filler boards (Fig. F). These boards keep the frame centered in the jig, help distribute the clamping pressure evenly and protect the frame from the ends of the clamping bolts.
Follow the steps in Photos 10 through 12 to clamp up your frames. It may take you a couple of frames to get the hang of clamping all four corners at the same time, but once you do you’ll be amazed at how fast you can make perfect frames. After the glue dries, sand the frames. The inner and outer frames can be glued together before finishing or brad-nailed together after finishing. If clamping one frame at a time seems too slow for you, make several clamping jigs and you’ll really be in the production business.
Oops!

Sawdust buildup can keep your frame material from laying tightly against the triangle fence. This causes miter alignment problems later on. We learned this the hard way when we built our prototype miter sled (photo, above). That’s why it’s important to bevel the bottom of the triangle fence to give the sawdust a place to go.
Sources
(Note: Product availability and costs are subject to change since original publication date.)
Rockler, rockler.com, 800-279-4441, 2′ Universal T-track, #22104;
5/16″ x 18 x 1-1/2″ T-slot bolt, #83311;
5-star jig knob, #23812;
2″ T-knob, #71514;
5/16″ x18 threaded inserts, #28811.
Rust-Oleum, rustoleum.com, 877-385-8155, American Accents, available at
hardware, paint and discount stores nationwide.
Fig. A: Outer-Frame Profile

Fig. B: Inner-Frame Profile

Fig. C: Miter Sled

Fig. D: Adjustable Stop Block

Fig. E: Clamping Jig

Fig. F: Clamping Jig Filler Boards

This story originally appeared in American Woodworker October 2002, issue #122.
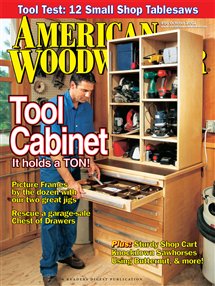
Finally, this rare issue of American Woodworker (Digital Issue) magazine can be yours! Discover the fascinating contents of the October 2002 issue including such plans, projects, and articles as:
- Tool Test: 12 Small Shop Tablesaws
- Tool Cabinet: It Holds a Ton!
- Picture Frames by the Dozen with our Two Great Jigs
- Rescue a Garage-Sale Chest of Drawers
- Plus: Sturdy Shop Cart Knockdown Sawhorses Using Butternut, and More!
Here are some supplies and tools we find essential in our everyday work around the shop. We may receive a commission from sales referred by our links; however, we have carefully selected these products for their usefulness and quality.