We may receive a commission when you use our affiliate links. However, this does not impact our recommendations.
 The holidays are busy for most everyone, but there’s always enough time to knock out a project like this on your scroll saw. I sped up the process even more by buying 1/8” veneer instead of cutting it myself. Once you’ve created your template and get into a rhythm, you can make an ornament for everyone on your list.
Stack It Up & Cut
The key is gang cutting all of the pieces at once. I used a low-tack, double-sided tape to hold the stack together, then transferred the template to the top of the stack. Use enough tape to hold the wood together securely, but not so much that you can’t pull it apart later.
I used a scroll saw for the entire ornament, which makes achieving straight cuts more difficult. To make it easier, I used a no. 5 blade that was 0.45″ wide for all my straight cuts. The blade thickness means it won’t break cutting through the hardwood, and the width helps keep the blade aligned. You can also use a band saw for the straight cuts and finish on the scroll saw.

A wide scroll saw blade will make cutting straight lines easier.
I made my shorter end cuts first, which are more forgiving to adjustments after the fact. Plus, it allowed me to practice cutting in a straight line and getting a feel for the blade. When making a long cut freehand, you don’t want to focus on the area right in front of the blade, as your line will end up wavy from a multitude of corrections. Instead, look at the overall cut, especially the endpoint, and line everything up to where you want the cut to finish.

For the tight curves of the bird, switch to a narrower blade.
For the birdhouse bottom, I cut all of the outside edges first. Then make the two long cuts going down the interior side. I roughed out the area around the bird, so I would only need minor adjustments later. Lastly, I drill small holes in the inside corners to make clean turns with the wide blade.
Final Steps & Assembly
Before separating your stack and making final cuts, you’ll want to clean up what you already have. I used a file, sandpaper, and my bench-top belt sander to fix uneven lines, cut marks, and rough corners.
Now peel one piece of veneer off of the bottom birdhouse stack—this will be your final bird silhouette. Take the remaining stack and make a clean cut along the bottom. Then swap in a tight-radius blade and finish cutting out the bird on the last veneer piece.

An old paint brush helps apply precise amounts of glue.
The assembly process is a breeze—do your final sanding, drill a hole in one roof piece for your twine, and pre-paint your bird. Start stacking and gluing your ornament. I used my cutoff pieces as spacers and a small paint brush to apply the glue to prevent squeeze out. Don’t forget to install your twine before glueup; it’s a pain to try and fish it through after the fact. Tape off the twine and the bird to protect them, then finish with a spray lacquer.

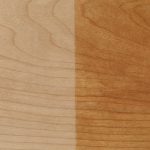
Cherry Veneer

Maple Veneer
Here are some supplies and tools we find essential in our everyday work around the shop. We may receive a commission from sales referred by our links; however, we have carefully selected these products for their usefulness and quality.


