We may receive a commission when you use our affiliate links. However, this does not impact our recommendations.
 This traditional, lightweight stool is an excellent first step toward chairmaking.
One highlight of a visit to historic Old Salem in North Carolina is the beautiful Moravian furniture and woodwork in the village’s buildings. My favorite piece in the town is a small stool that shows up in many of the buildings. It’s a tough little guy – the costumed interpreters sit, kneel, stand or even saw on reproductions of this stool every day.
This form is also common in rural Europe, especially in eastern Bavaria, which is close to the origin of the Moravians in the Czech Republic. In Europe, it’s also common to see this stool with a back – sometimes carved – which turns it into a chair.
But the best part of the stool is that it requires about $10 in wood and two days in the shop to build – and it has a lot of fun operations: tapered octagons, sliding dovetails, compound leg splays and wedged through-tenons. And by building this stool, you’ll be about halfway home to being able to build a Windsor or Welsh chair.
This particular stool is based on originals owned by Old Salem that are made from poplar. The stools are remarkably lightweight – less than 4 lbs. Like many original stools, the top of many Old Salem stools have split because of their cross-grain construction. Despite the split, the stools remain rock-solid thanks to sliding dovetail battens under the seat. I like to think of the split as just another kind of necessary wood movement.
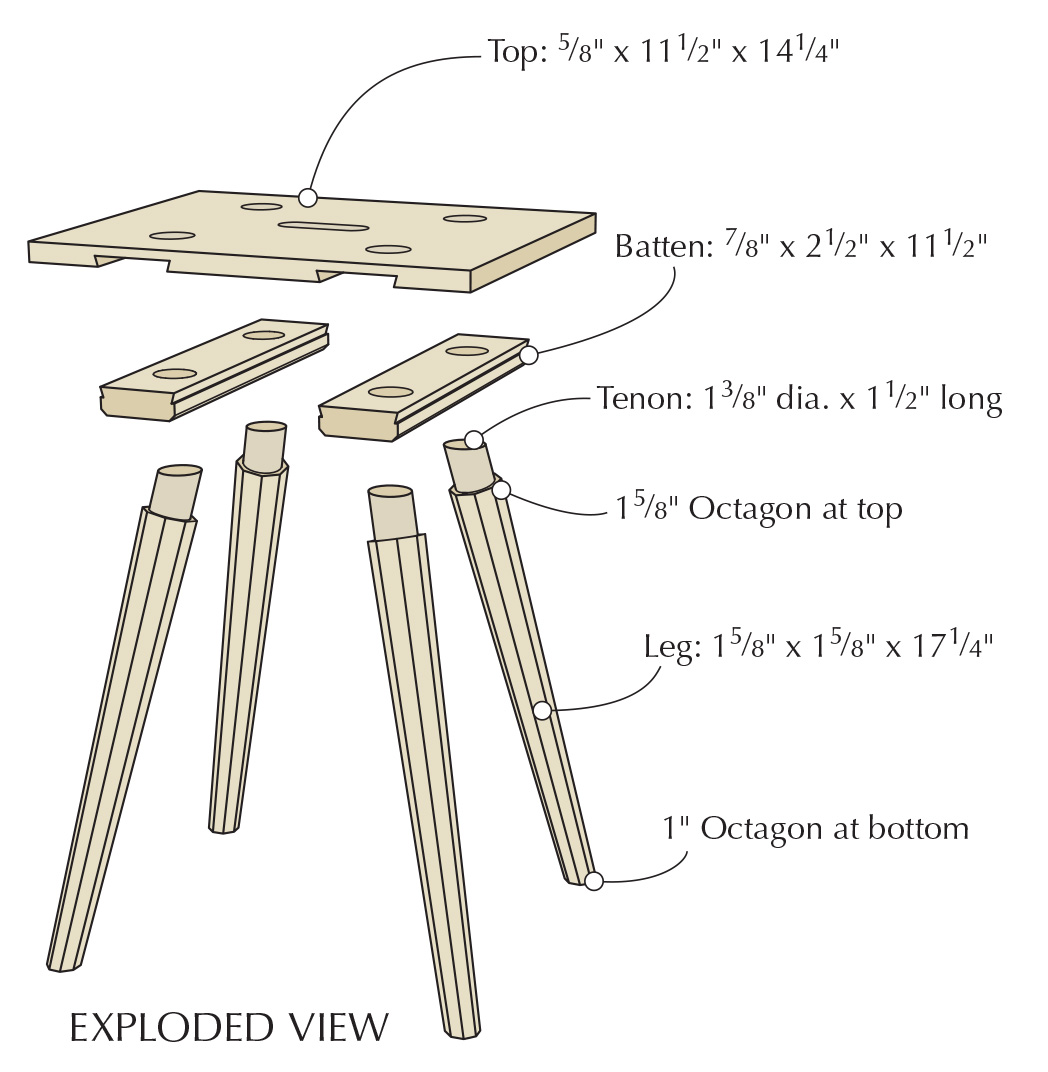
Here’s how the stool goes together: The thin top is pierced by two sliding-dovetail sockets. Two battens fit into those sockets. The legs pierce both the battens and the stool’s top, and they are wedged in place through the top. This is the cross-grain joint that will make the top split in time. The best place to begin construction is with the legs.
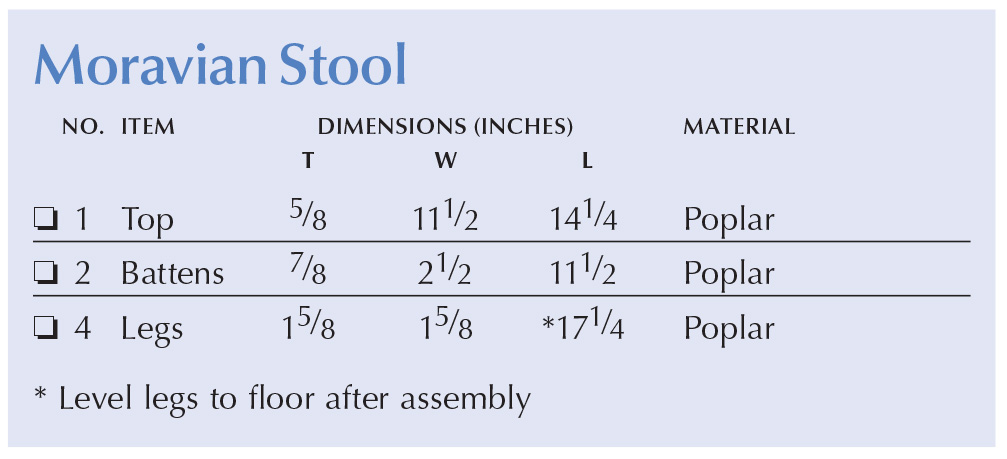
Moravian Stool Cut List and Diagrams


 Geometry 101
The legs are tapered octagons. They are 1-5⁄8″ square at the top and 1″ square at the foot. The top of the leg has an 1-3⁄8″-diameter x 1-1⁄2″-long round tenon. To make the legs, first mark the 1-5⁄8″ octagon on the top of the leg and the 1″ octagon at the foot. See “Octagons Made Easy” below.
With your octagons drawn, saw each leg into a tapered square – 1-5⁄8″ at the top and 1″ at the foot. I cut these tapers on the band saw, though I’ve also done it with a jack plane.
With the legs tapered, you can connect the corners of your two octagons with a pencil and a straightedge. Then it’s just a matter of planing the four corners down to your pencil lines, which creates an octagon.
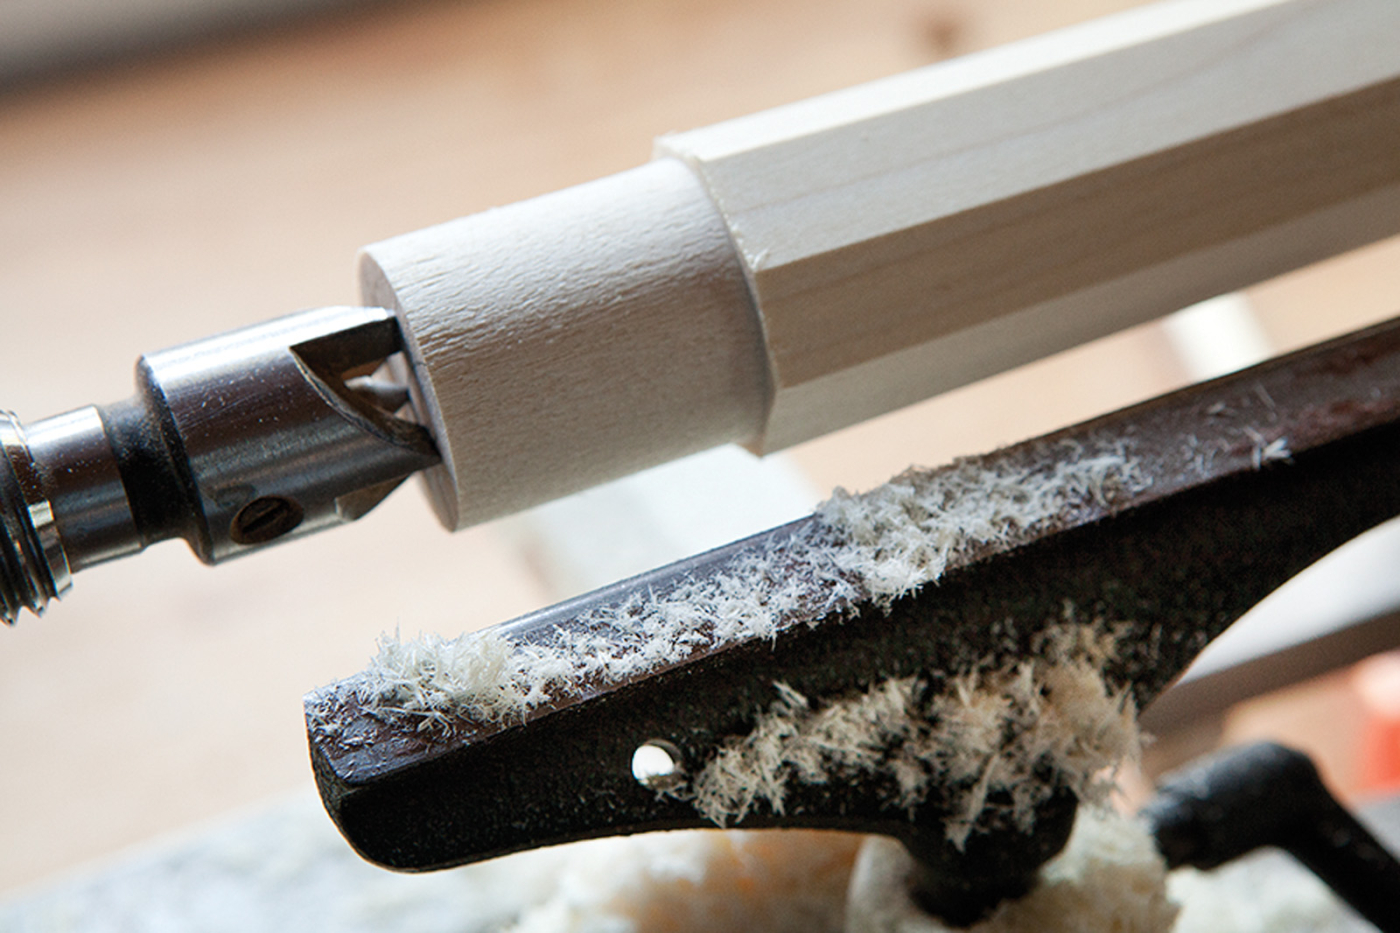
Tenon the legs. Turn a 1-1⁄2″ long by 1-3⁄8″-diameter tenon on the top of each leg after you’ve finished planing the octagons.
Now turn the tenons on the top of each leg. The tenons are 1-3⁄8″ in diameter and 1-1⁄2″ long. This is a quick operation with a parting tool. Measure your tenons with dial calipers to ensure they are exactly 1-3⁄8″ or just slightly less. If they are even slightly fat, they won’t go in.
Octagons Made Easy
Making a proper octagon is a mystery for many beginning woodworkers, but it is easy. All you need is a compass, a center point and four corners of a square.
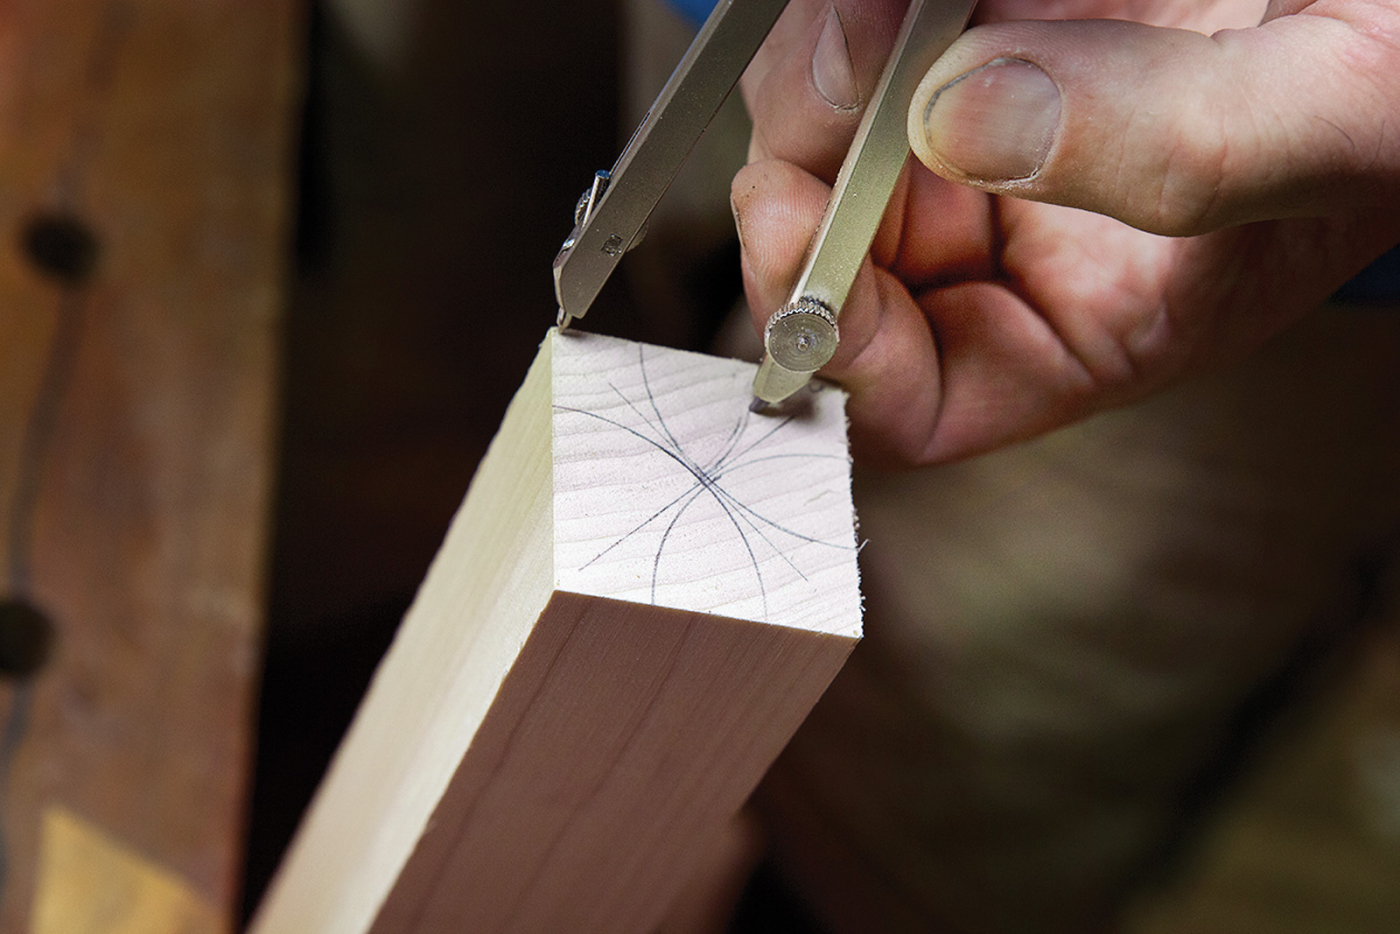
One compass setting. To make an octagon, set your compass for the distance between the center point of your square and one corner.
1. Set the compass to the distance between one corner and the center point of the square you wish to make into an octagon.
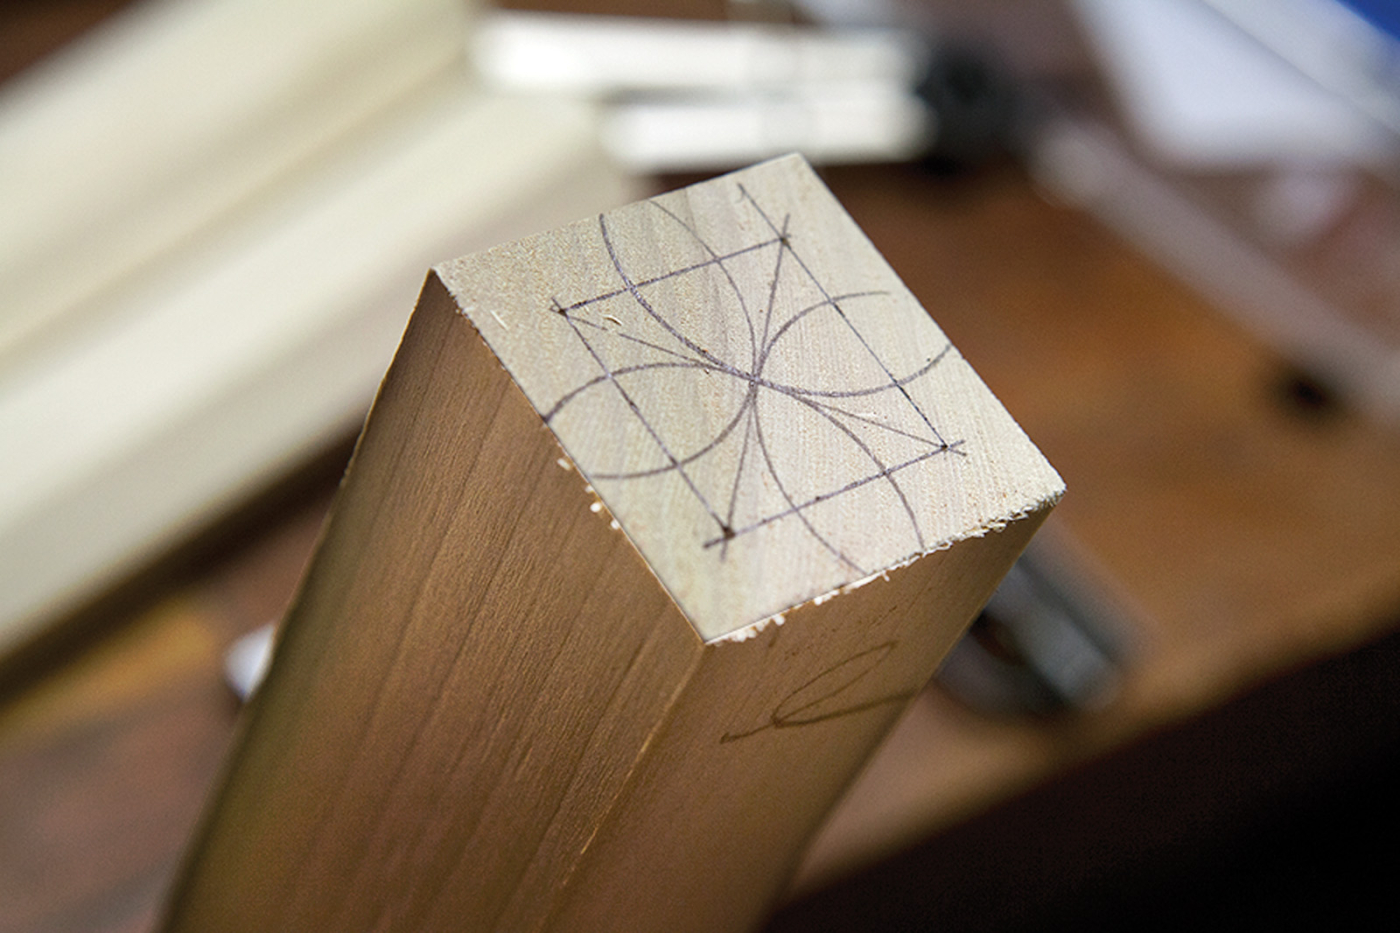
Smaller octagon. For the small octagon at the foot, mark the square you want to turn into an octagon, reset your compass and repeat the process.
2. Place the point of the compass at one corner and strike an arc across the square.
3. Repeat this process at the other three corners of your square.
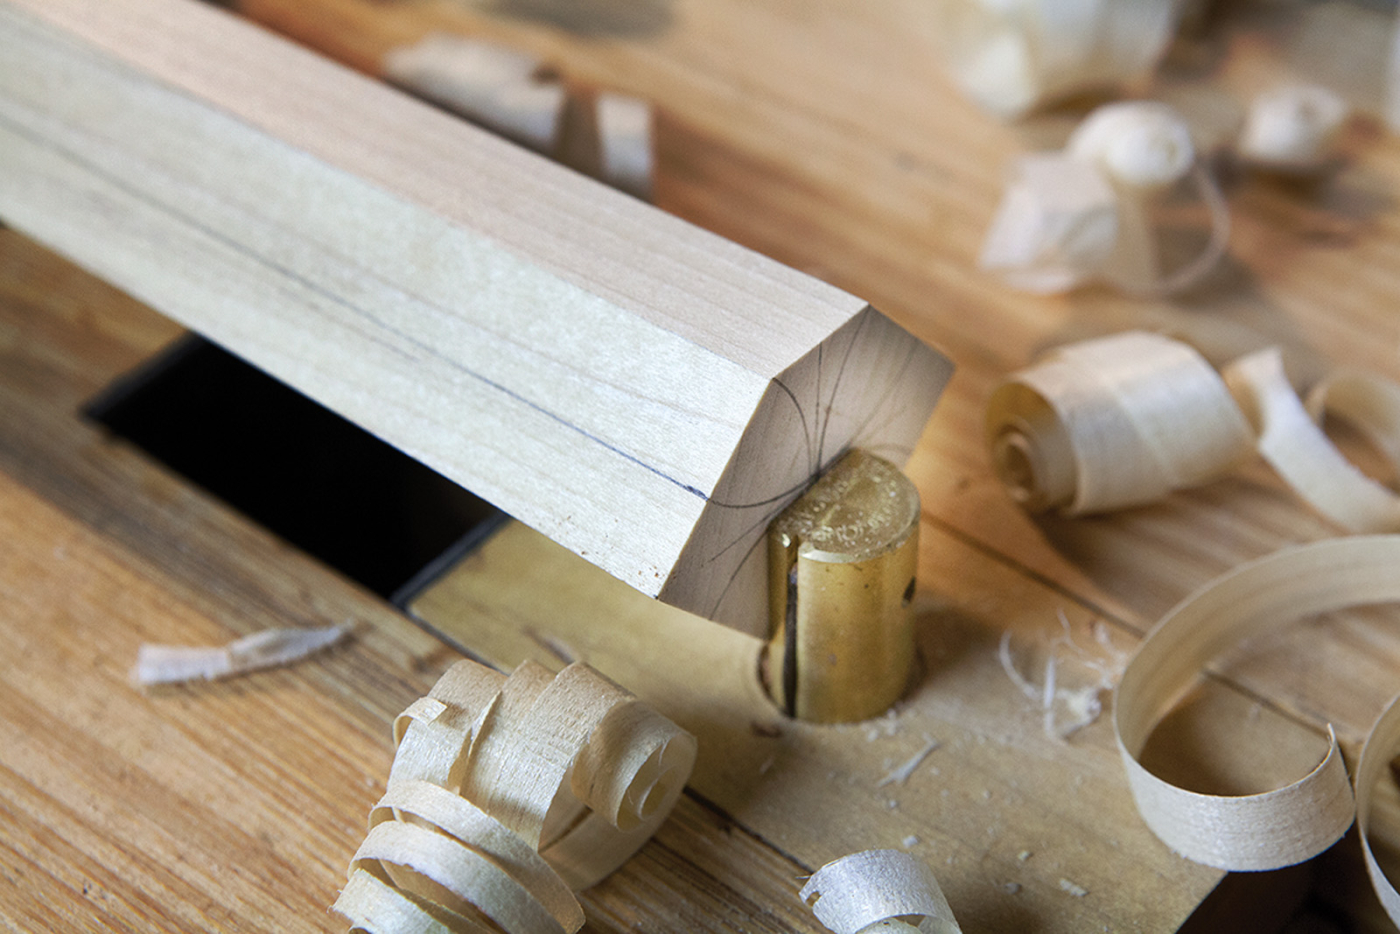
A diamond in the square. Here you can see the arcs of the octagon and how they create the facets of your octagon.
4. The resulting pattern looks a bit like a flower. The eight points where the arcs intersect the square are the points of your octagon. Plane down to those lines and you have a well-proportioned octagon.
Big Sliding Dovetails
Many beginners are intimated by sliding dovetails because they are hard to fit, especially when made by machine. It seems to take a lot of hammering to get the joint seated without gaps.
When you make them by hand, you can build in a little forgiveness that makes them both easy to assemble and tight. The trick? A shoulder plane. But I’m getting ahead of myself. First we have to cut the long and wide socket on the underside of the stool’s top.
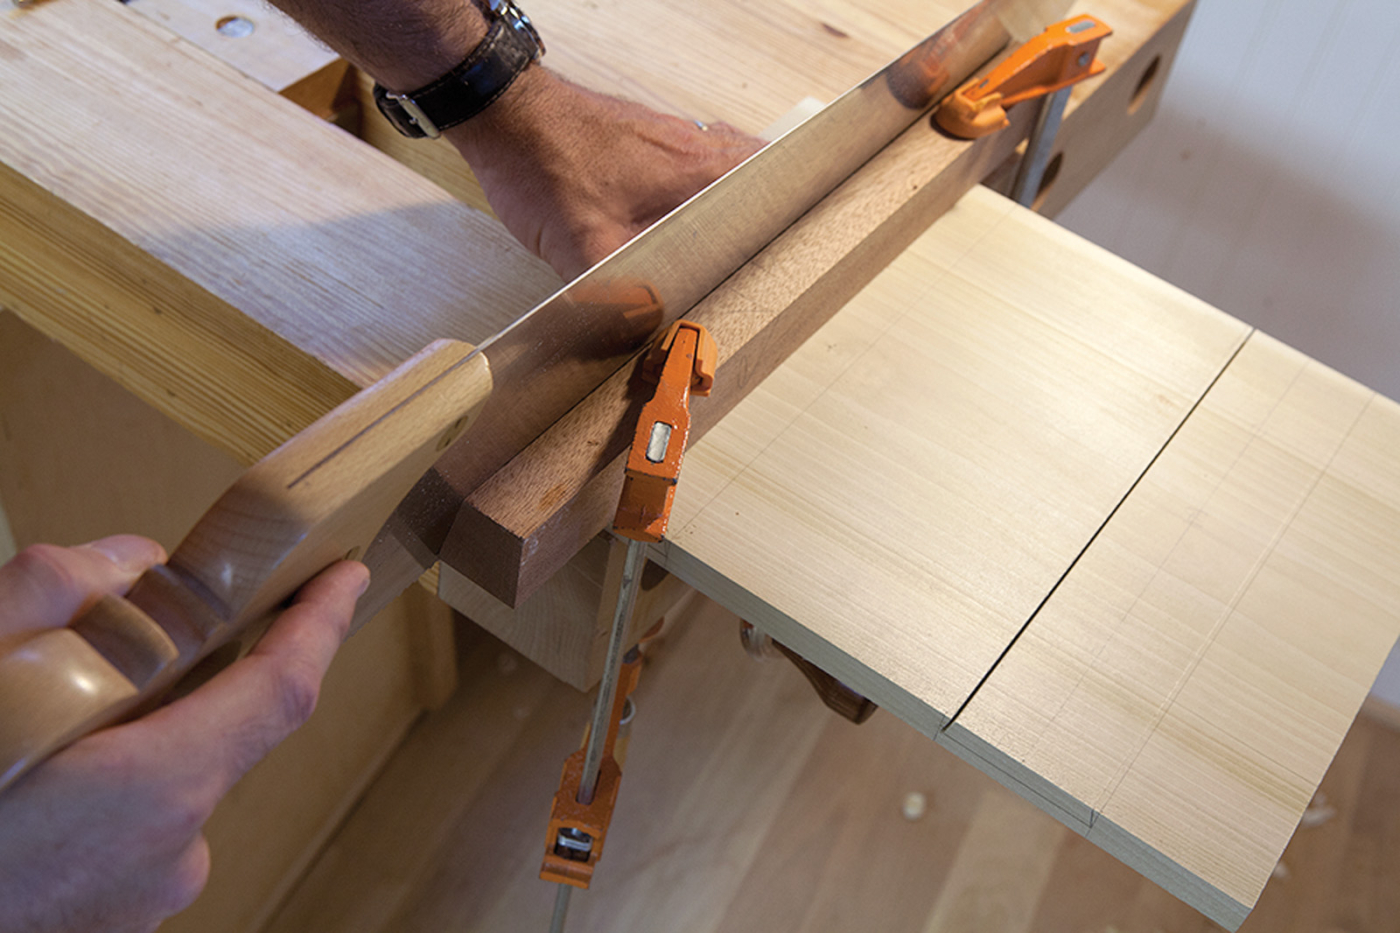
Saw perfect walls. The 16° guide is made from scrap and is clamped to the underside of the stool’s top. An 8-point crosscut handsaw was used to make these four kerfs.
Fetch your sliding bevel and set it to 16° off of 90° (or 106°). Lock it. Tight. That is the only angle you need for the entire project – even the compound splay of the legs.
The 16° is the angle of the walls of the sliding dovetail. Lay out the locations of the battens so they are 2-1⁄8″ from the ends of the top. The dovetail socket is 3⁄8″ deep, 2-1⁄2″ wide at the bottom and has 16° splayed walls. Lay out the sockets on the underside and edges of the top.
Now you need to saw the angled walls of the sockets. With short sliding dovetails (for drawer blades, for example) I’ll just kerf them freehand. But because these sockets are 11-1⁄2″ long, I make a guide for my handsaw.
The guide is just a piece of 2″-square scrap that has one edge sawn or planed to 16°. I clamp the scrap to the underside of the bottom and saw the walls by pressing the sawplate against the guide while stroking forward and back.
Remove the majority of the waste with a chisel and mallet. Then finish the bottom of the sockets to their final depth of 3⁄8″ using a router plane.
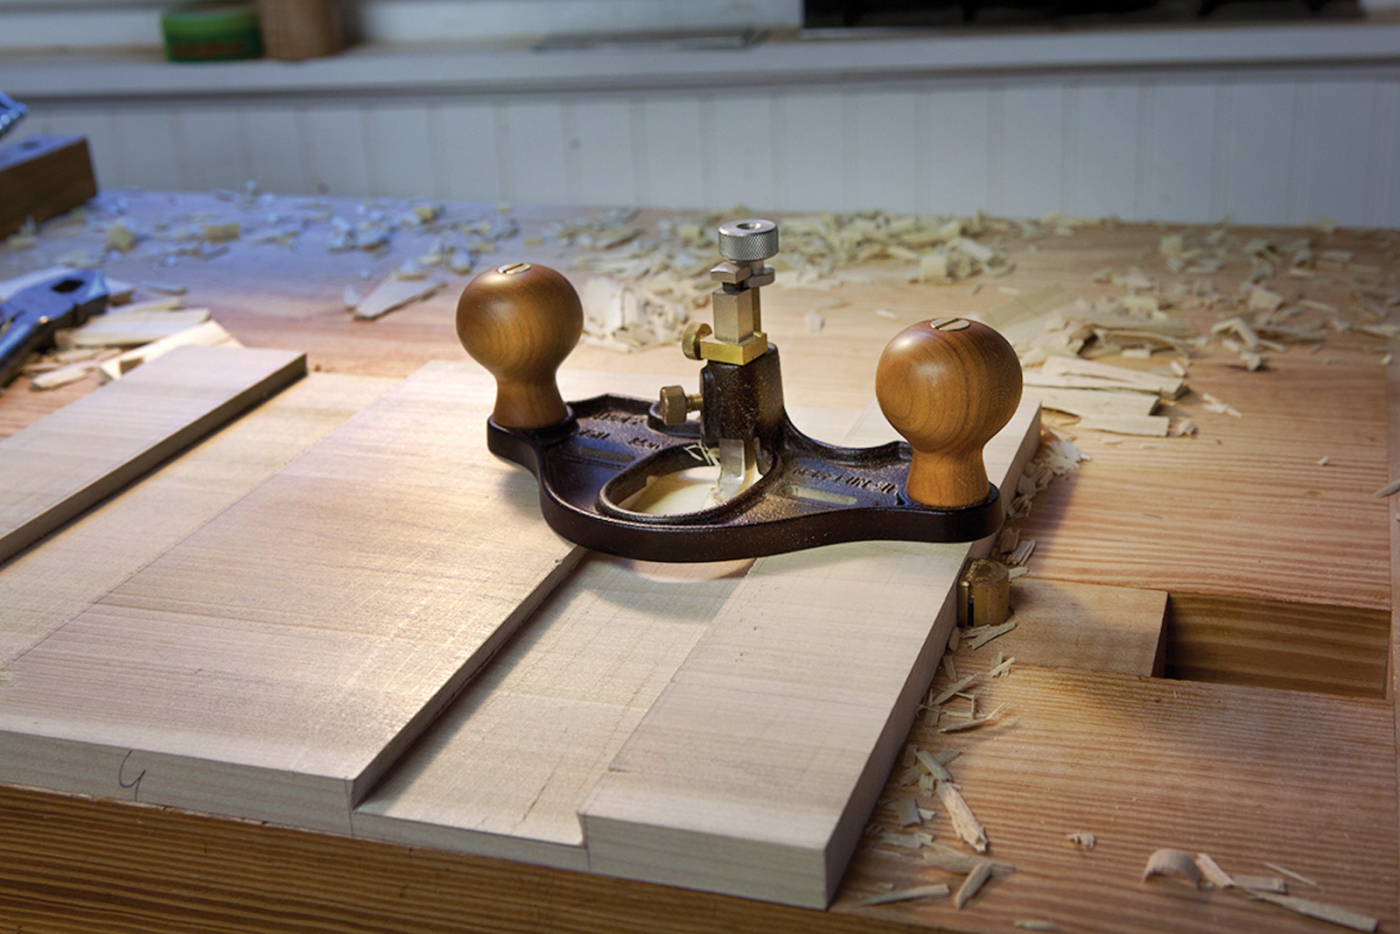
Flat & finished. Router planes excel at making housed joints perfectly flat. You could do this work with a chisel, but it would be a fussy process.
Shape the Battens to Fit
The battens have the complementary shape cut into them. Unlike the sockets, there is very little material to remove to make the male section of the joint – just little slivers on the edges.
The dovetail is 3⁄8″ thick and has 16° bevels. Lay out the 3⁄8″ thickness on the two edges and two ends of the batten. Then use your sliding bevel to scribe the 16° angle. The angle should touch the corner of the batten and your 3⁄8″ scribe line. Then you just have to remove the material in the two right triangles created by your pencil.
There are lots of ways to do this, but the most straightforward is to remove the majority of the waste with a shoulder plane (or a rabbet plane) and tease the waste out of the corner with a fine handsaw or chisel.
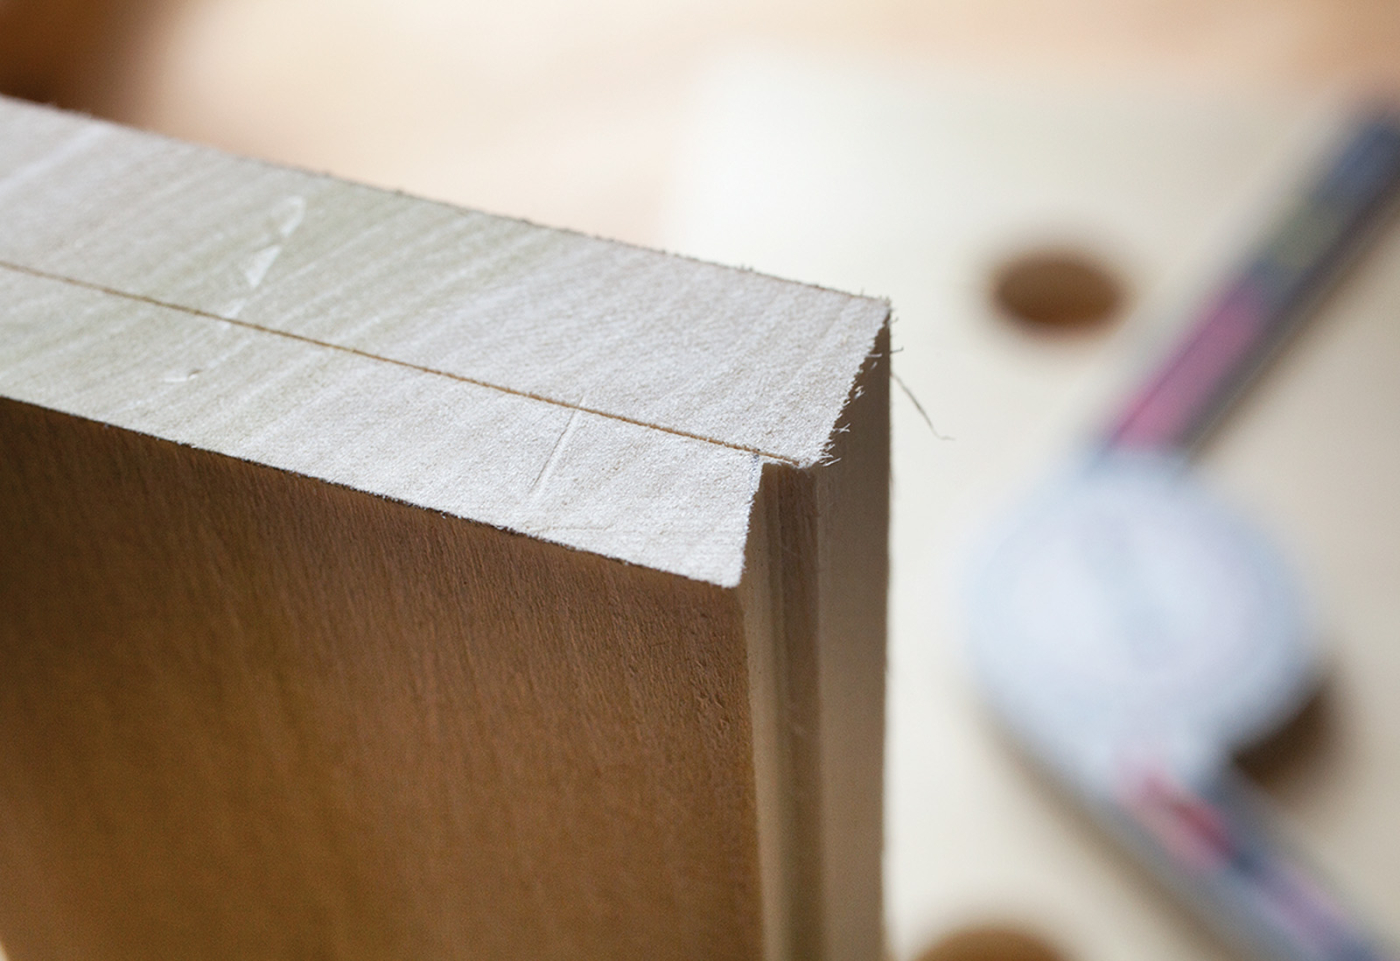
Little triangles; big strength. Here’s the little triangular section that creates the dovetail, which was cut with a shoulder plane. The waste in the corner can be removed using a saw or chisel.
Plane down to your layout lines and clean up the joint for a test-fit. Decide which way the joint will go together and compare the ends of the batten to the sockets in your top. When both ends of a batten will fit in their socket, the temptation is to hammer it home. Resist.
Instead, return to your bench vise and clamp your batten in place. Mark the sliding dovetail about 1-1⁄2″ from both ends of the batten. Then make stopped shavings between those two pencil marks until the plane stops cutting. Repeat this process on the other 16° walls.
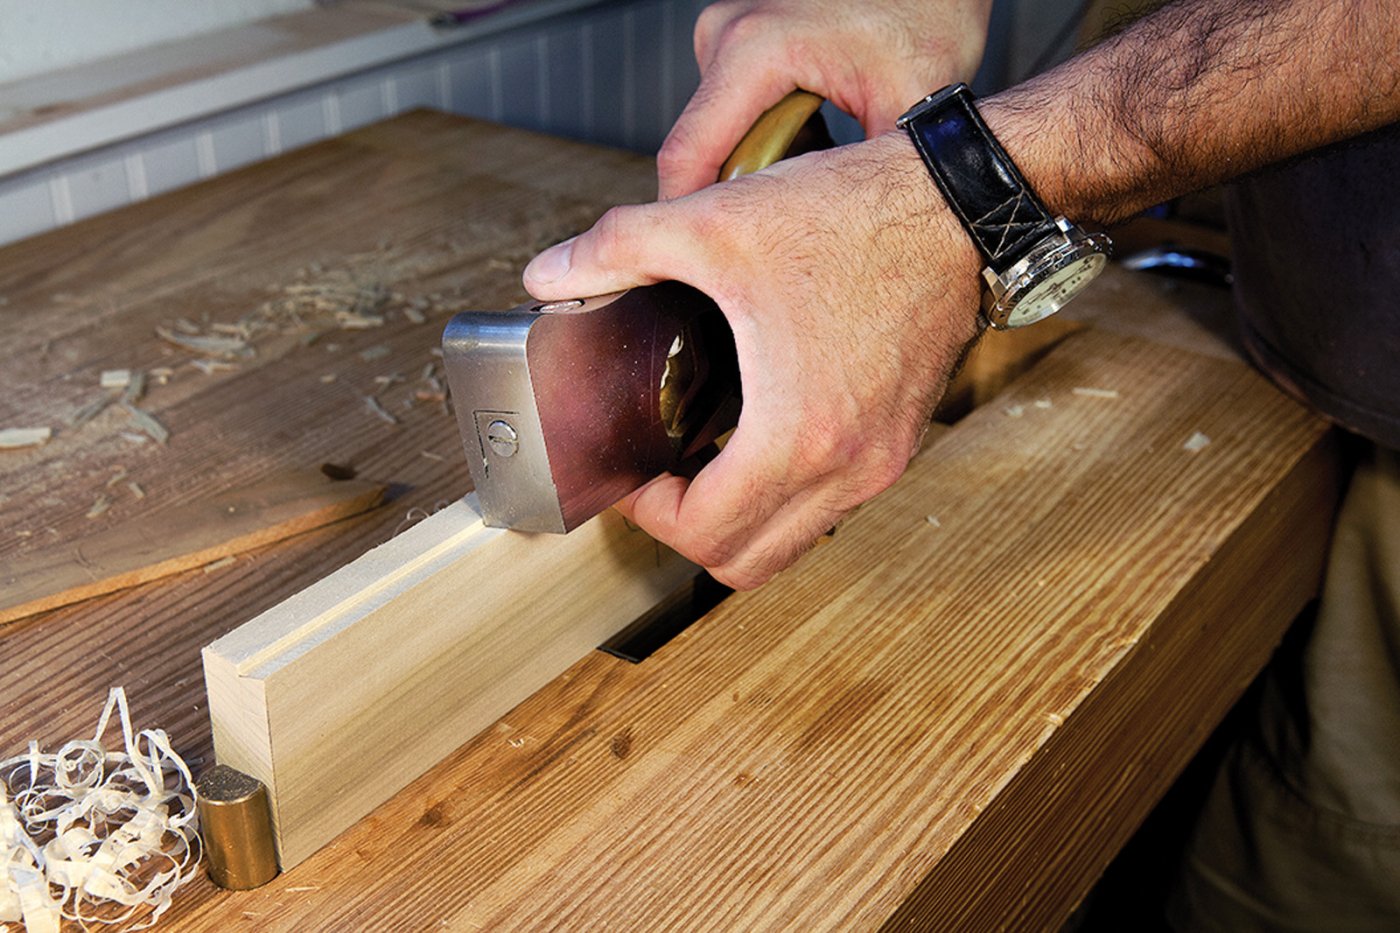
Plane the middle. There is so much friction in assembling a sliding dovetail that it’s best to hollow out the middle of the joint with a few “stopped shavings” along the joint’s bevel.
These stopped shavings hollow out the middle of the sliding dovetail, which makes fitting the joint much easier.
Now use a mallet to drive the battens in place. No glue. You should be able to get the batten to slide in place with the same sort of force you would use for chopping dovetail waste. If you are whaling on the batten and denting it, your joint is too tight. Remove the batten and plane a little more off.
Once the battens are fit, plane a 3⁄16″x 3⁄16″ chamfer on their long edges to reduce the physical and visual weight of the stool.
Legging Up
By far the most stressful part of the project is “legging up” – where you bore the compound-angle holes through the battens and seat. Luckily, there are some chairmaking tricks that make this process a snap.
The first trick is to ignore the fact that the legs are inserted at a compound angle – called rake and splay. Instead, lay out the leg angle from the center of an “X” drawn between the locations of the four leg mortises. By working out from the center point of the seat, you can drill the holes at a single angle. The resulting hole produces a compound angle, but by working from the center point, you only have to worry about one angle, which is what we call the “resultant angle” in chairmaking.
And here’s the best part: For this stool, the resultant angle is 16° – the same angle setting as the sliding dovetail.
First step: Lay out the center point of the four leg mortises on the underside of the assembled seat. The center point of each leg hole is 2-1⁄2″ from the long edges and 3-1⁄2″ from the ends. Draw a big “X” on the underside that connects these four points – yes, it’s a pain to draw because of the battens. Now you have a choice: Chuck up a 1-3⁄8″ Forstner in your brace or cordless drill and eyeball the angle using a sliding bevel placed on the “X.” This is how I usually do it with chairs.
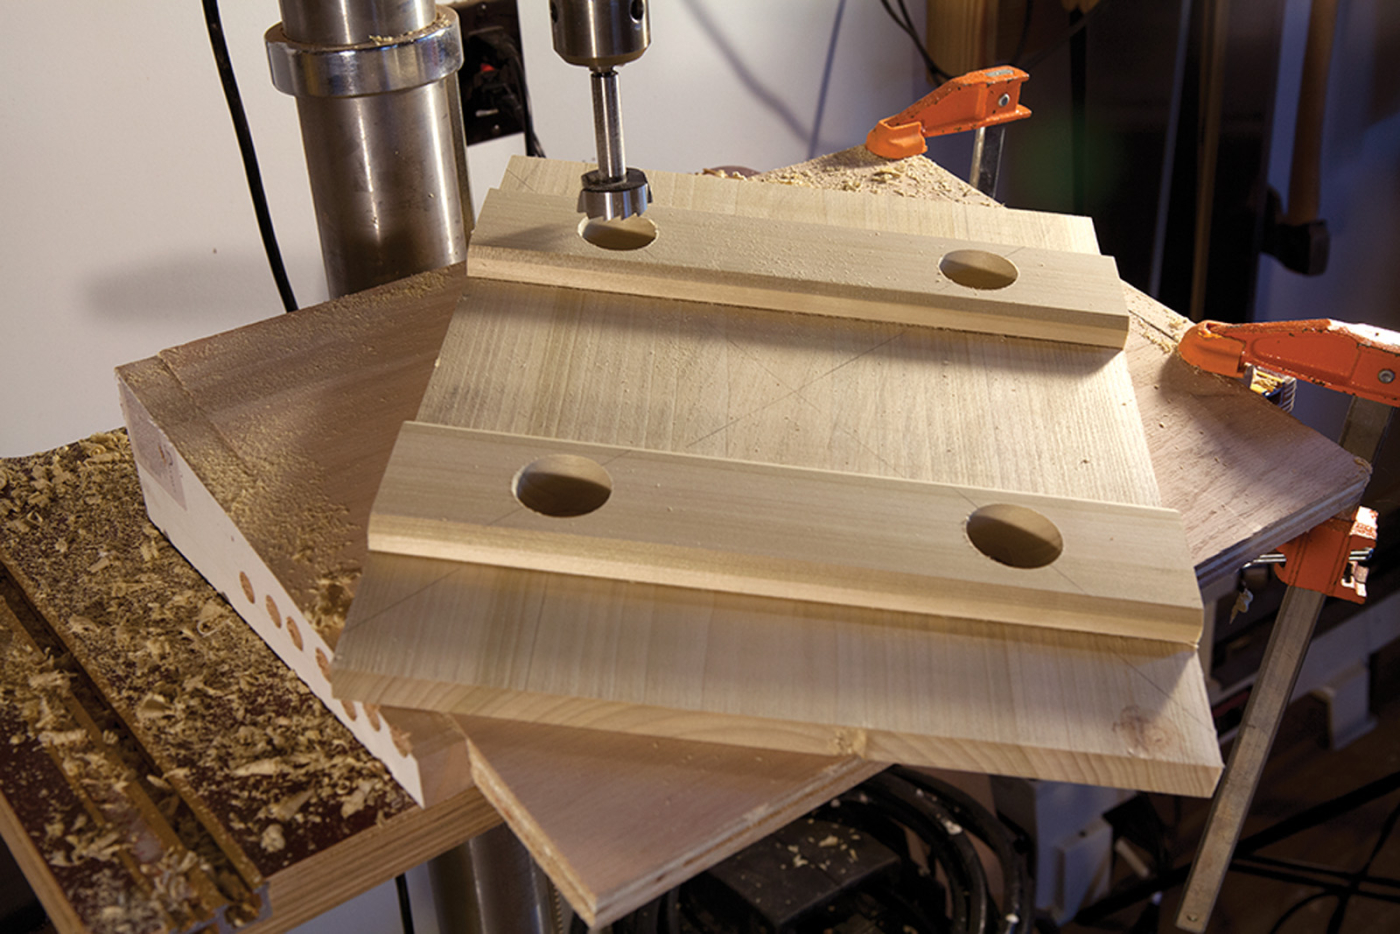
Quick & flawless. The platform raises the seat to the 16° resultant angle. The pencil lines ensure that the angle is in relation to the centerpoint of the seat.
Or take the chicken road and do it on the drill press. Here, I demonstrate the chicken method. Make a small platform that bevels the seat at 16° on your drill press’s table. Clamp the platform to the drill press. Chuck a 1-3⁄8″ Forstner in your drill press. Line up the long line of your “X” with the shank of your bit and the post of your drill press. That will ensure the hole is at the true “resultant angle.” Drill through the seat and take it slow so you don’t splinter the seat when the bit breaks through.
Rotate the seat and repeat the process for the three other holes.
Brief Detours Before Assembly
These stools have a handle in the middle that makes them easy to carry around. This handhold is 1″ x 3″ and runs parallel to the grain. Bore it out using a brace and bit or a drill press and finish the shape with rasps.
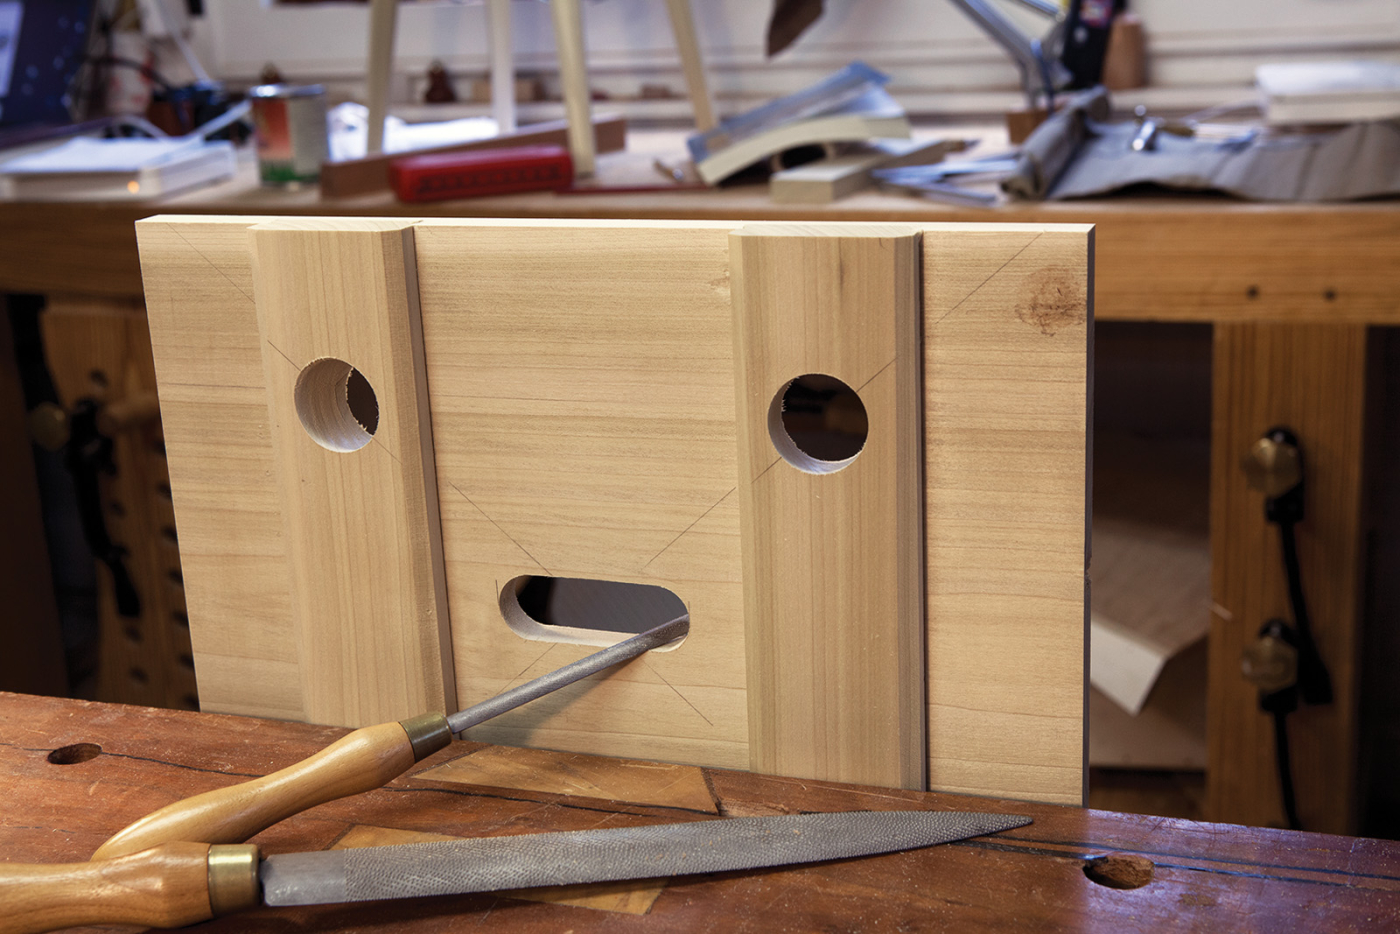
Friendly for the fingers. The 1″ x 3″ grip for the stool is a little tight for most adult hands, but it looks right. You might consider making it a little bigger if you have big mitts.
Another thing you need to do before assembly is to make some 1-3⁄8″-wide wedges to drive into the tenons on the legs. I use wedges that have a 6° included angle and are about 1-1⁄4″ long. Make them from hardwood – I usually use oak – and make them by splitting or sawing. (I’ve provided a short video that shows how I do this on a band saw; see the Online Extras below.)
If your tenons fit tightly in the mortises, you will need to saw kerfs in the tenons so the wedges will go in. If your tenons are loose, you can split the tenon with a chisel after driving the legs home.
Last detail: Chamfer the rim of your tenons with a rasp. This will help prevent your seat from splintering when you whack the legs in place.
Traditional Glue
I use hide glue for most things, but especially chairs and stools. Any household article that will take abuse and might require repair is an excellent candidate for hide glue because it is reversible and easily repaired.
Brush the glue on the mortise and the tenon and drive the legs home. If you sawed a kerf in the tenon, align the kerf so it is perpendicular to the grain of the stool’s top. If you don’t do this, the wedge will split the seat.
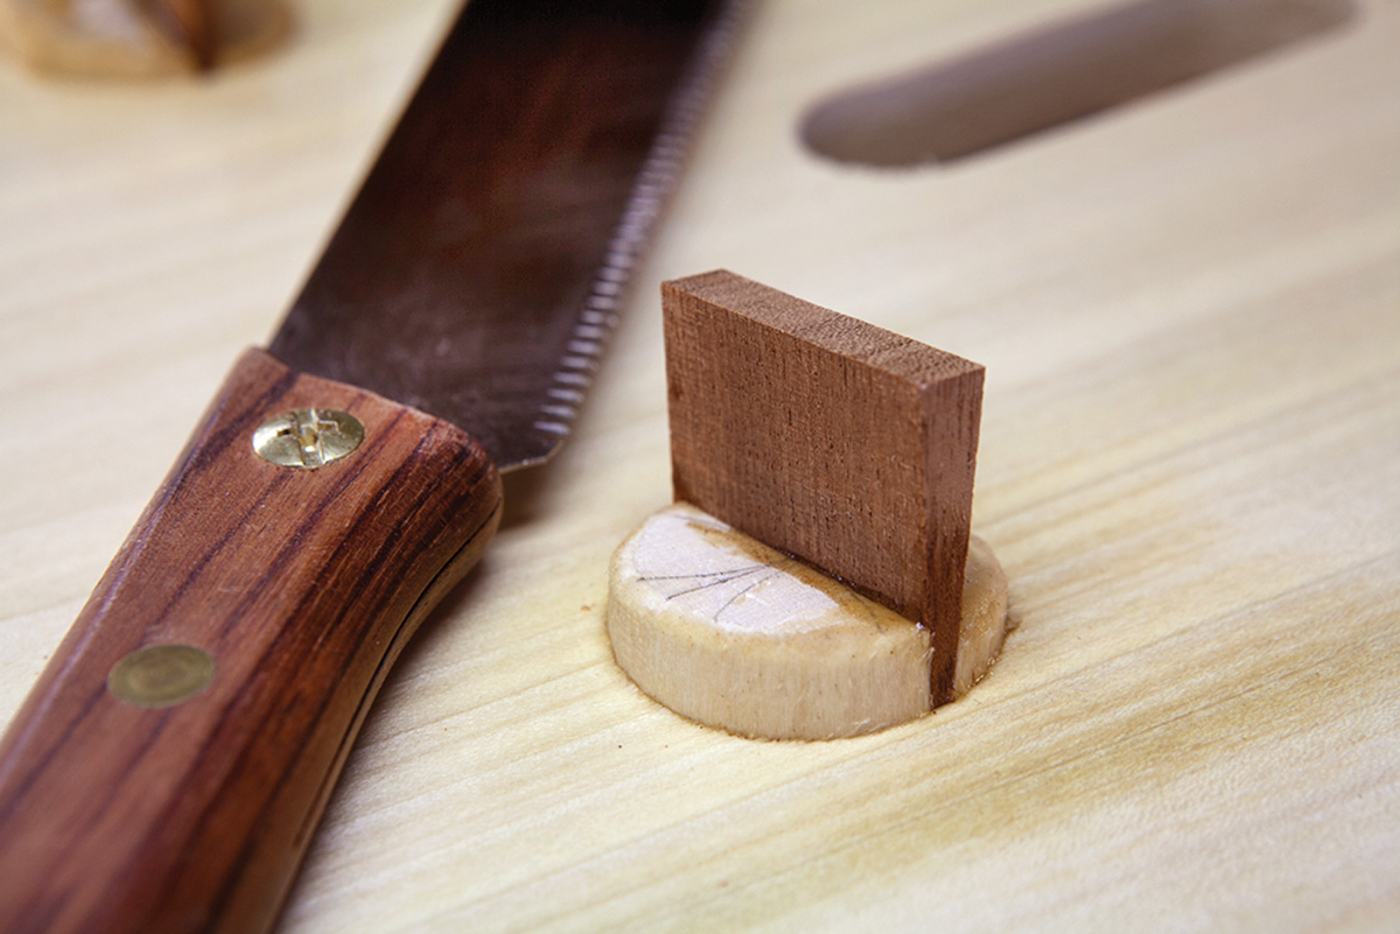
Set for life? Wedging the tenons will keep them tight even after the glue fails. To prevent splitting, the kerf in the tenon is perpendicular to the grain of the seat.
Drive the wedges home. Stop tapping them when they stop moving deeper into the tenon. Wait for the glue to dry, then saw the tenons flush to the seat.
Cut the feet so they sit flat on the floor – this article explains how to do this (even with the missing photos). Then break all the sharp edges on the stool with sandpaper.
Many of these stools were painted. I applied three coats of General Finish’s “Tuscan Red” milk paint, sanding between coats with a #320-grit sanding sponge.
With the stool’s construction complete, you only have to wait for nature to take its course. One night while you are lying in bed you’ll hear a sharp crack or pop – it’s the sound of your stool’s seat splitting and becoming historically accurate.
Download the PDF for the cutlist and illustrations. MoravianStoolPDF
Here are some supplies and tools we find essential in our everyday work around the shop. We may receive a commission from sales referred by our links; however, we have carefully selected these products for their usefulness and quality.


 This traditional, lightweight stool is an excellent first step toward chairmaking.
 Geometry 101


