We may receive a commission when you use our affiliate links. However, this does not impact our recommendations.
 Turn your miter saw into a precision cutting tool by building this storage-packed miter saw station.
Project #2420 • Skill Level: Intermediate • Time: 3 Days • Cost: $600
Over the years, I’ve found two opposing mindsets when it comes to miter saws. One group believes that, while miter saws are okay for trimming a house, they’re best reserved to whacking a board to shorter lengths before finish cutting it to size at the table saw. The other group, of which I’m a proud member, believes that a miter saw can be a precision cutting tool, if you take the time to set it up correctly, calibrate it, and take care in its use. Of course, this becomes a lot harder if you’re using a portable miter saw stand that gets set up and taken down every time you need to use it.
 With this in mind, as we started to plan our shop space, I knew that I wanted to set aside space specifically for a miter saw station. The design I came up with is what you see here. It features a wide surface that will easily support full-length boards, has recessed fences with stop blocks for accurate, repeatable cuts, and has a ton of storage, which is always a valuable commodity in the shop. Now, the design here is meant to hold the Festool Kapex at a comfortable height (and a dust extractor under the saw), but you can certainly change the height to accommodate your saw.
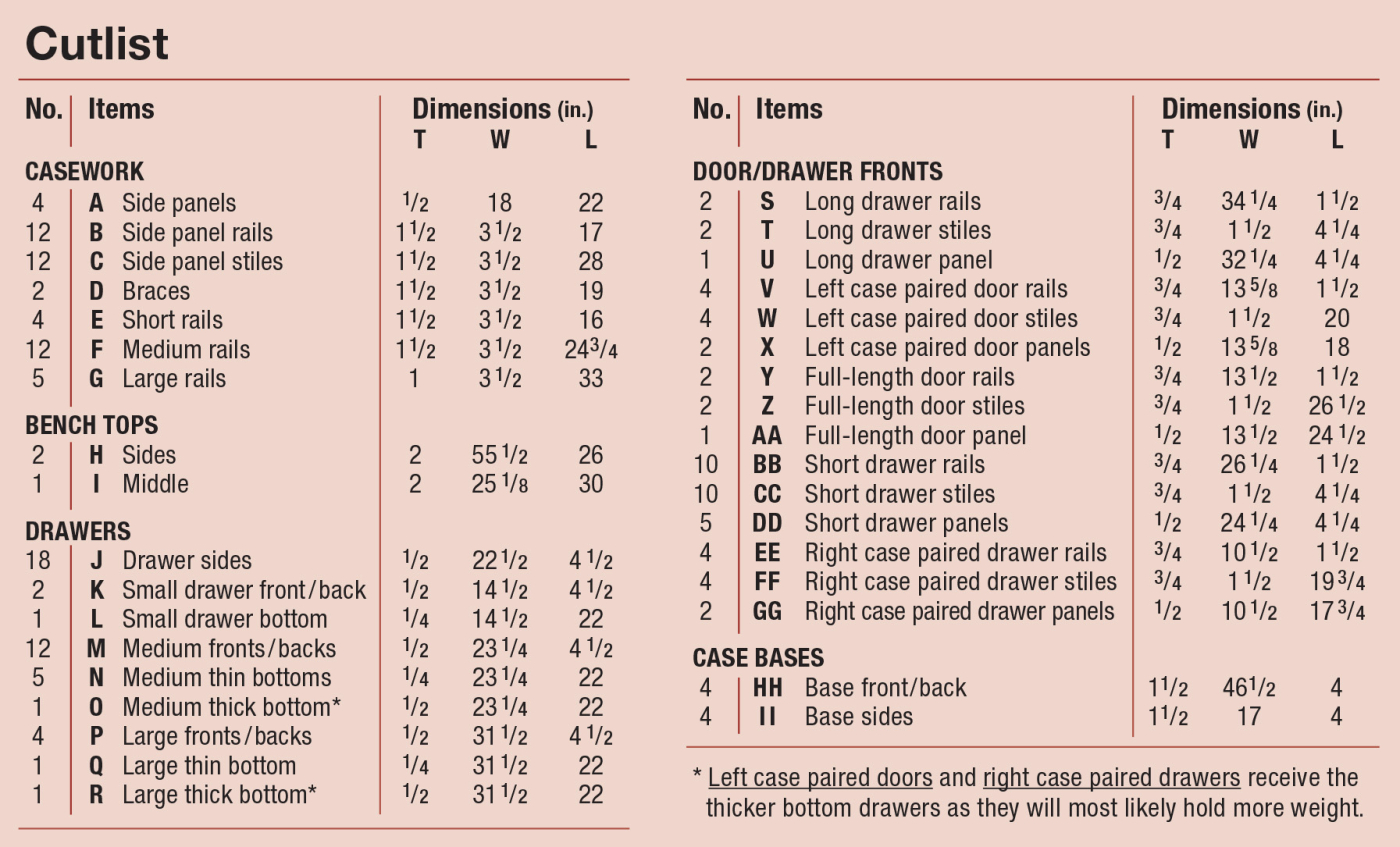
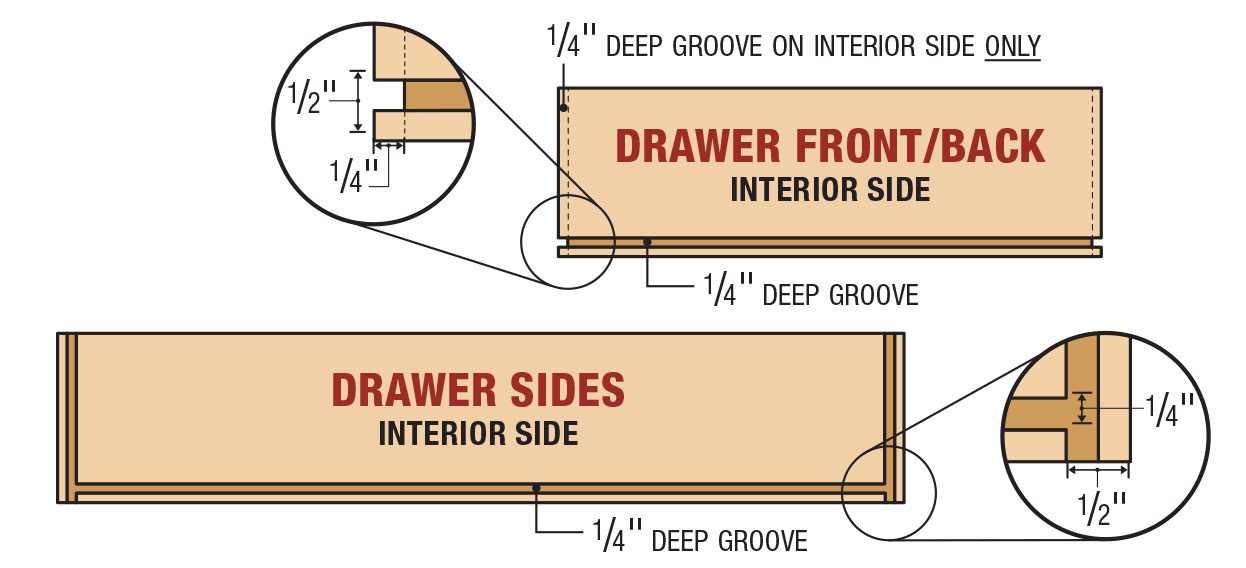
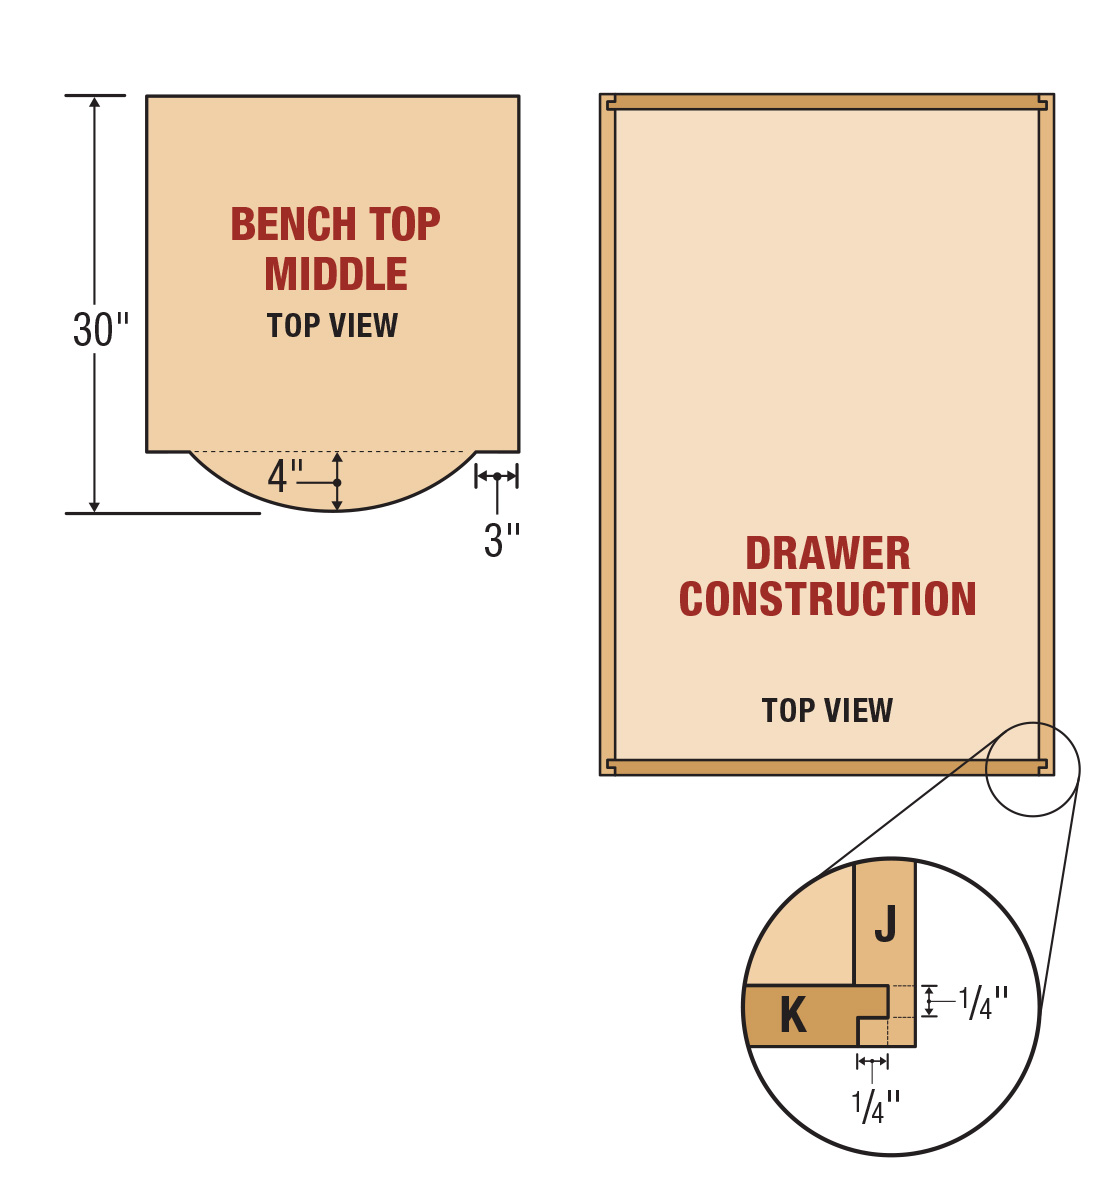
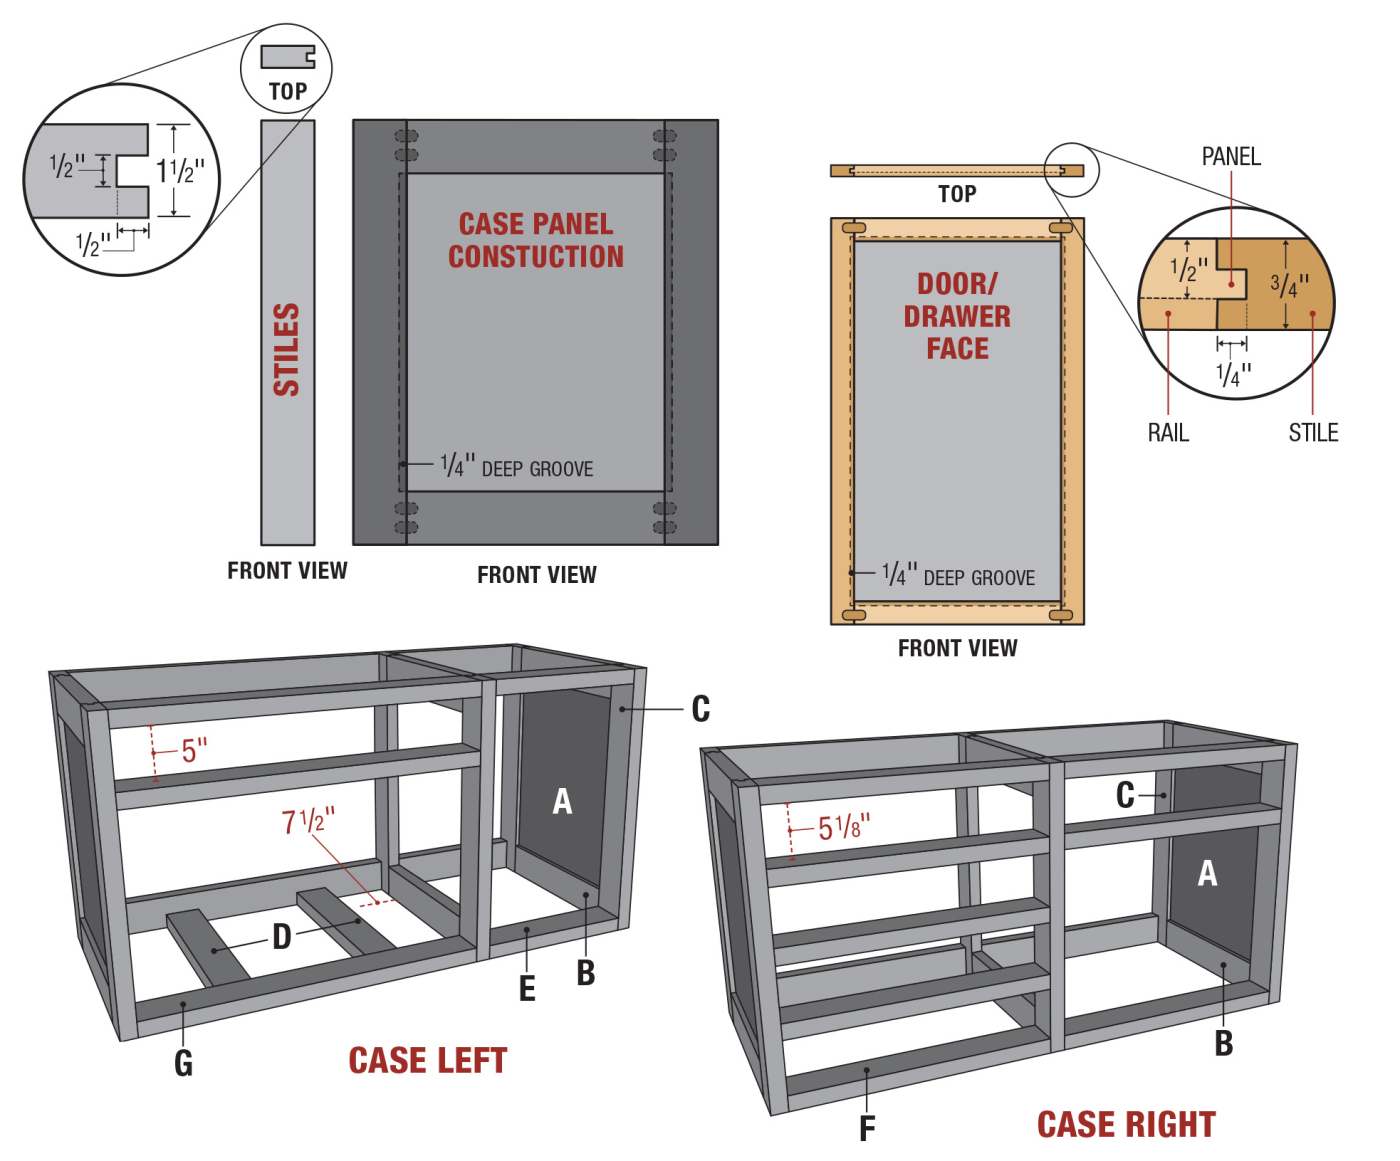
Cutlist and Diagrams
Large Frame and Panels
The building blocks of this miter saw station are frame and panels at the ends and the middle of each cabinet. As you look at the photos in this artilce, and the photo at top, you’ll see that the panels are all painted. I decided to use poplar to build the frames, as it paints well and is cheap. However, I sized the frame pieces to be the same size as two-by-fours, so you could use material from the lumber yard.
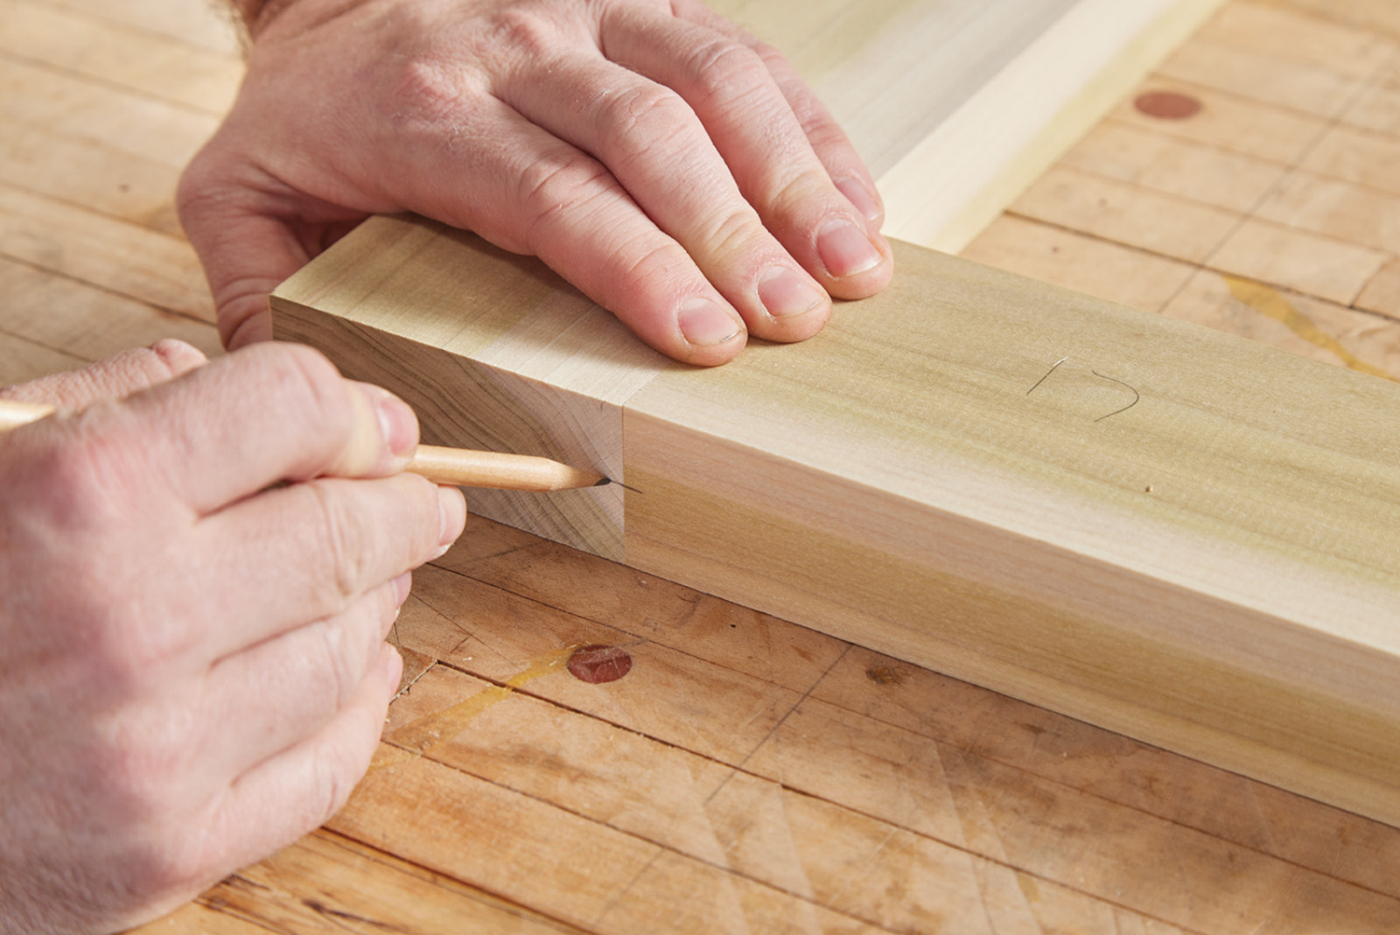
1 Mark the top and face of the joint where the joinery will be located.
The frames themselves consist of a pair of rails and stiles. The rails are connected to the stiles with a pair of lose tenons. To put a brand name with it—I used the Festool Domino to connect the parts. However, any number of different connectors can be used. Pocket screws, dowels, etc. could all accomplish the same results.
Looking at Photo 1 above, you’ll see how I laid out the parts to mark the joints. After sizing my stock (jointer, planer, then table saw), I laid out the frames and loosely clamped them together. Then, I marked a line where I wanted to center each Domino. I decided to use two Dominoes in opposing orientations. Photos 2 and 3 show the orientation of the mortises in the parts.
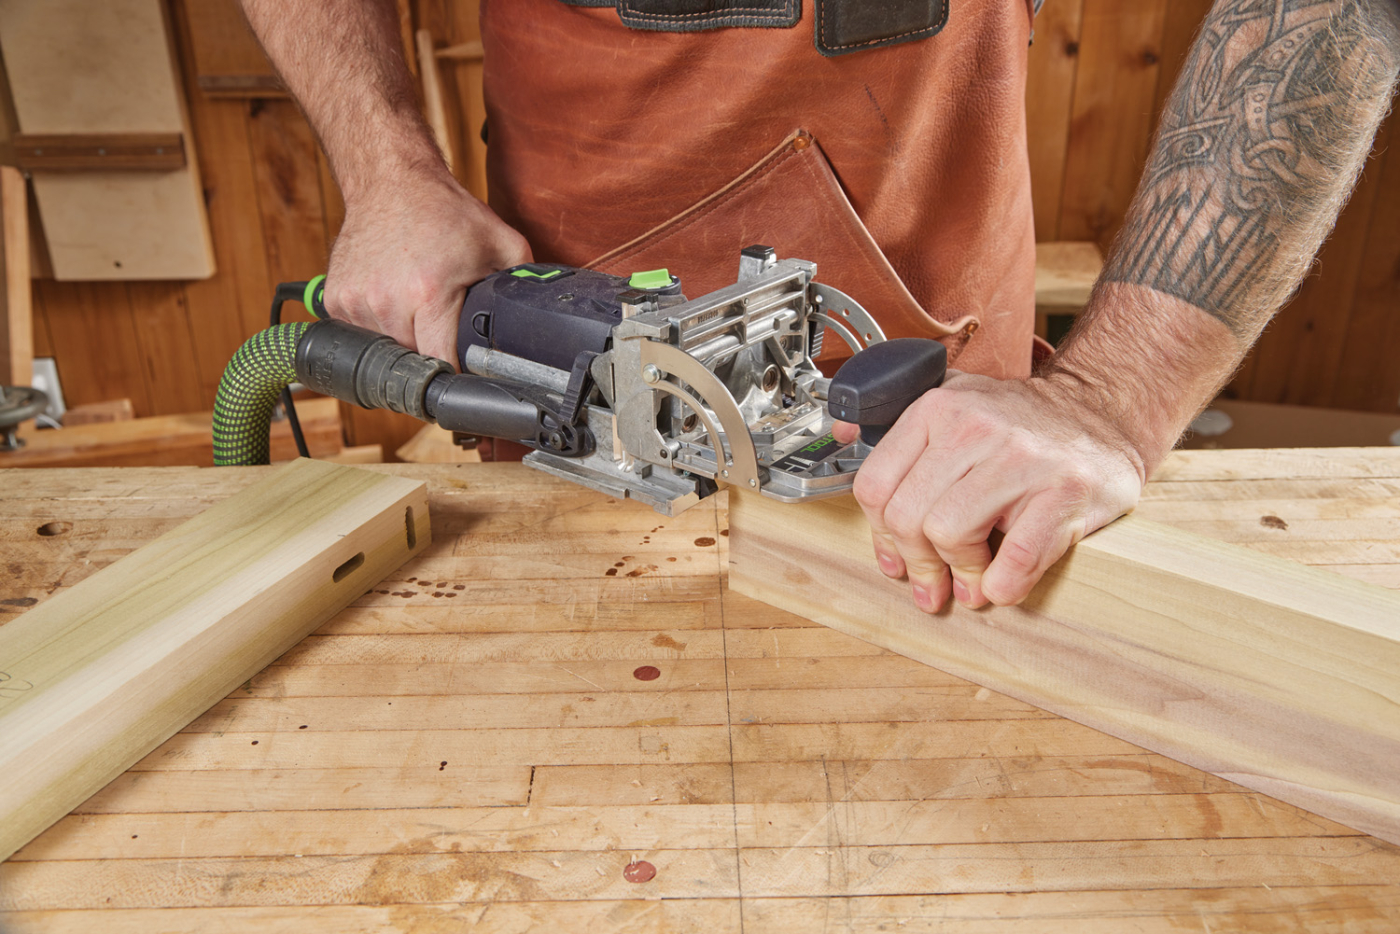
2 With a Domino, I cut the vertical and horizontal mortises.
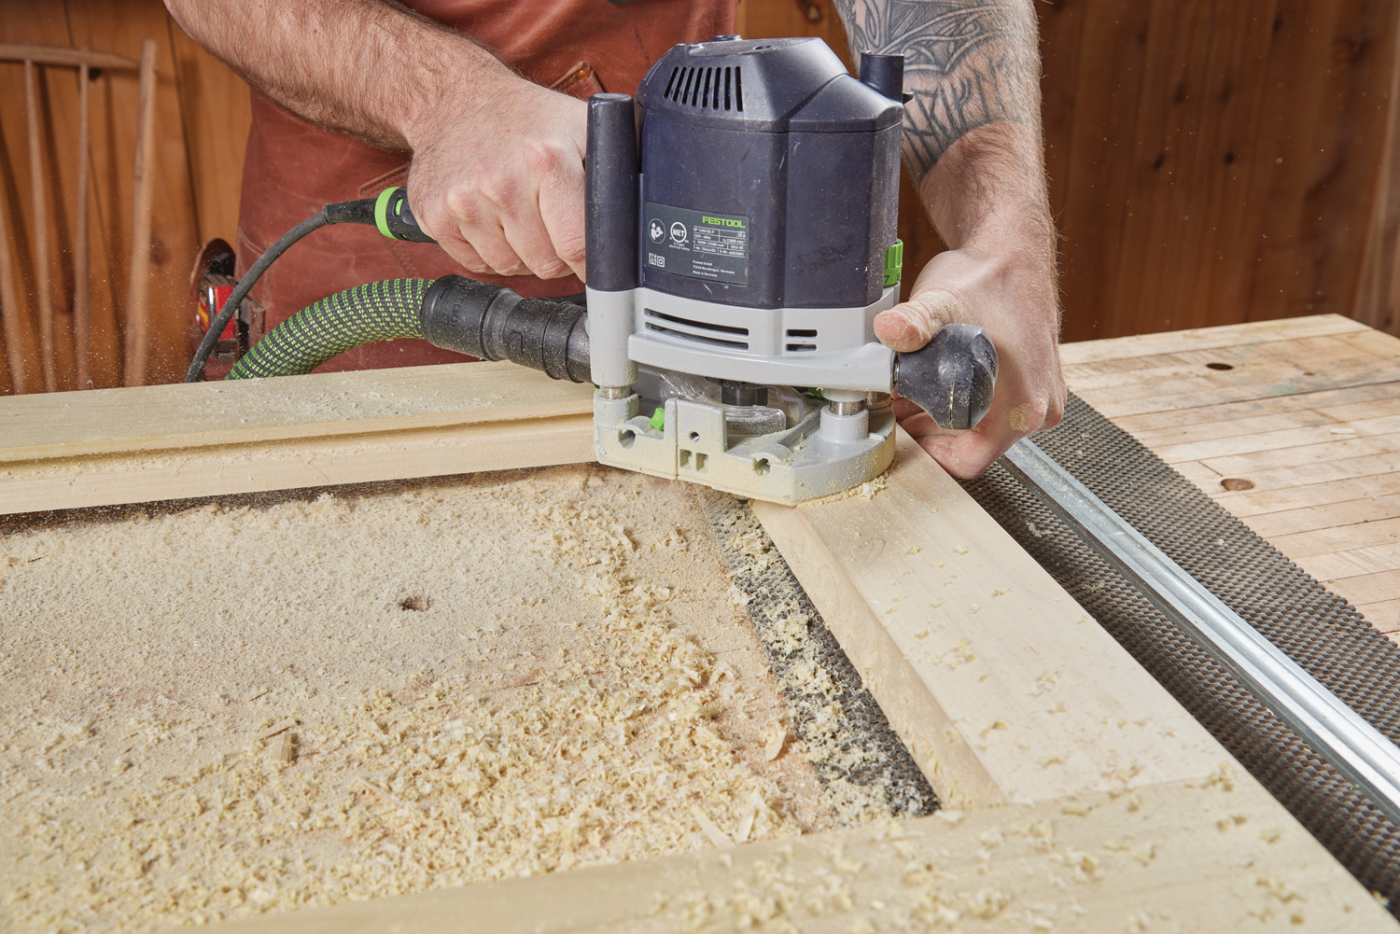
3 Clamp the frames together and rout a groove inside the parts.
Once the mortises are complete, clamp the frames together. I routed a groove around the inside of the assembled frame. This will fit an MDF panel. The left and right cabinets each have three frames. The two end frames of each have MDF panels. I did not put a panel in the interior panel. You certainly could, but I didn’t think it was necessary.
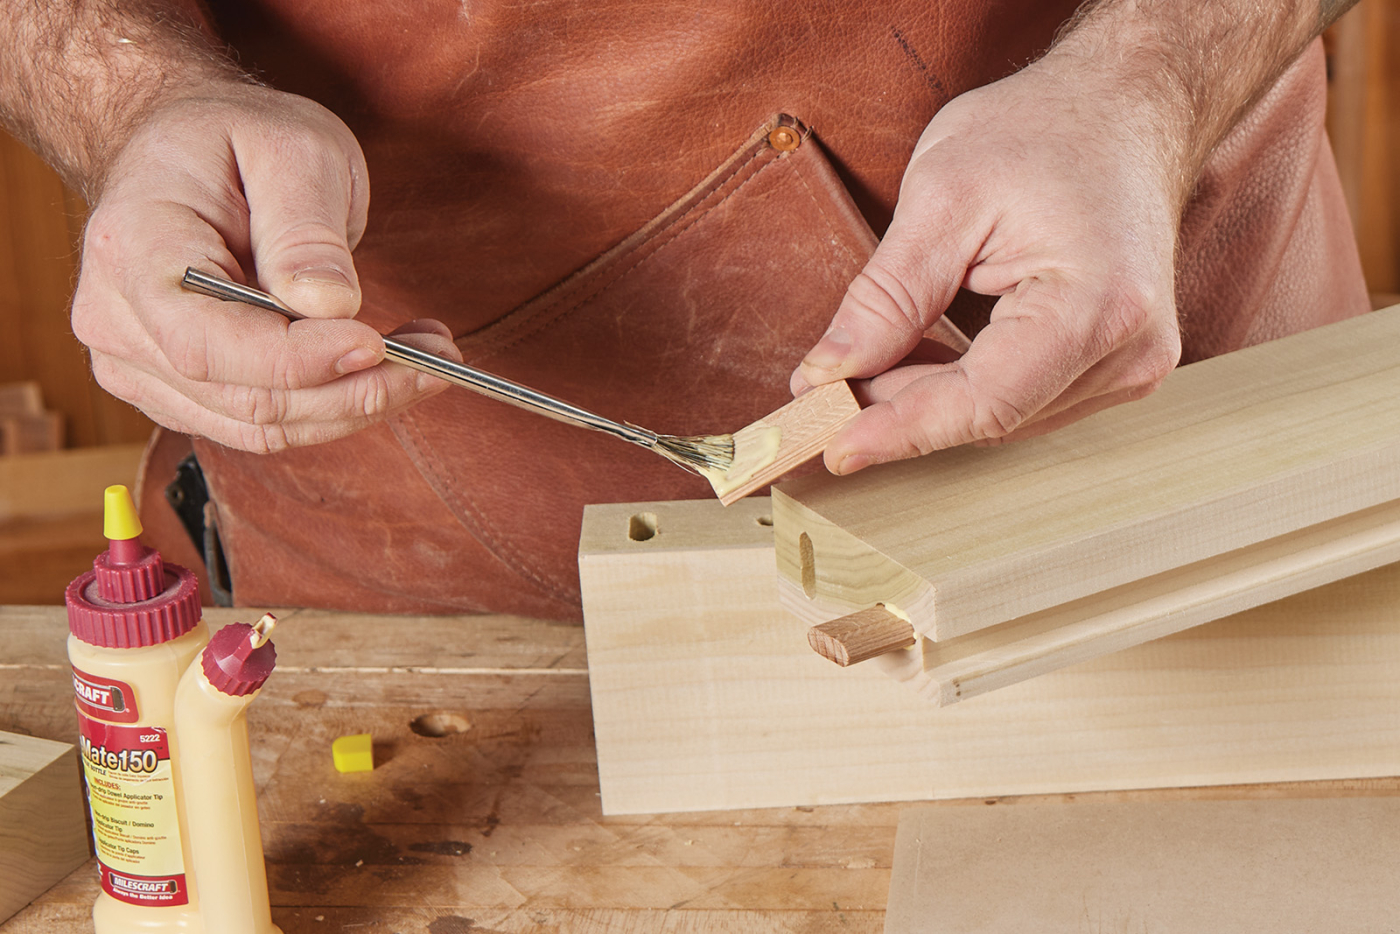
4 Glue the frames together. Insert the MDF panel in place.
With the frames and panels glued up, it’s time to connect them with the connecting rails. These get mortised like the frames. For the frames without a reference face, I used a handscrew as a reference point. You can see this in Photo 5. The number of connecting rails will vary, depending on what you want your layout to be. For mine, I had 9 rails on the left cabinet, forming one drawer, and two door cubbies. The right hand cabinet has 12 connecting rails (5 drawers, one door cubby).
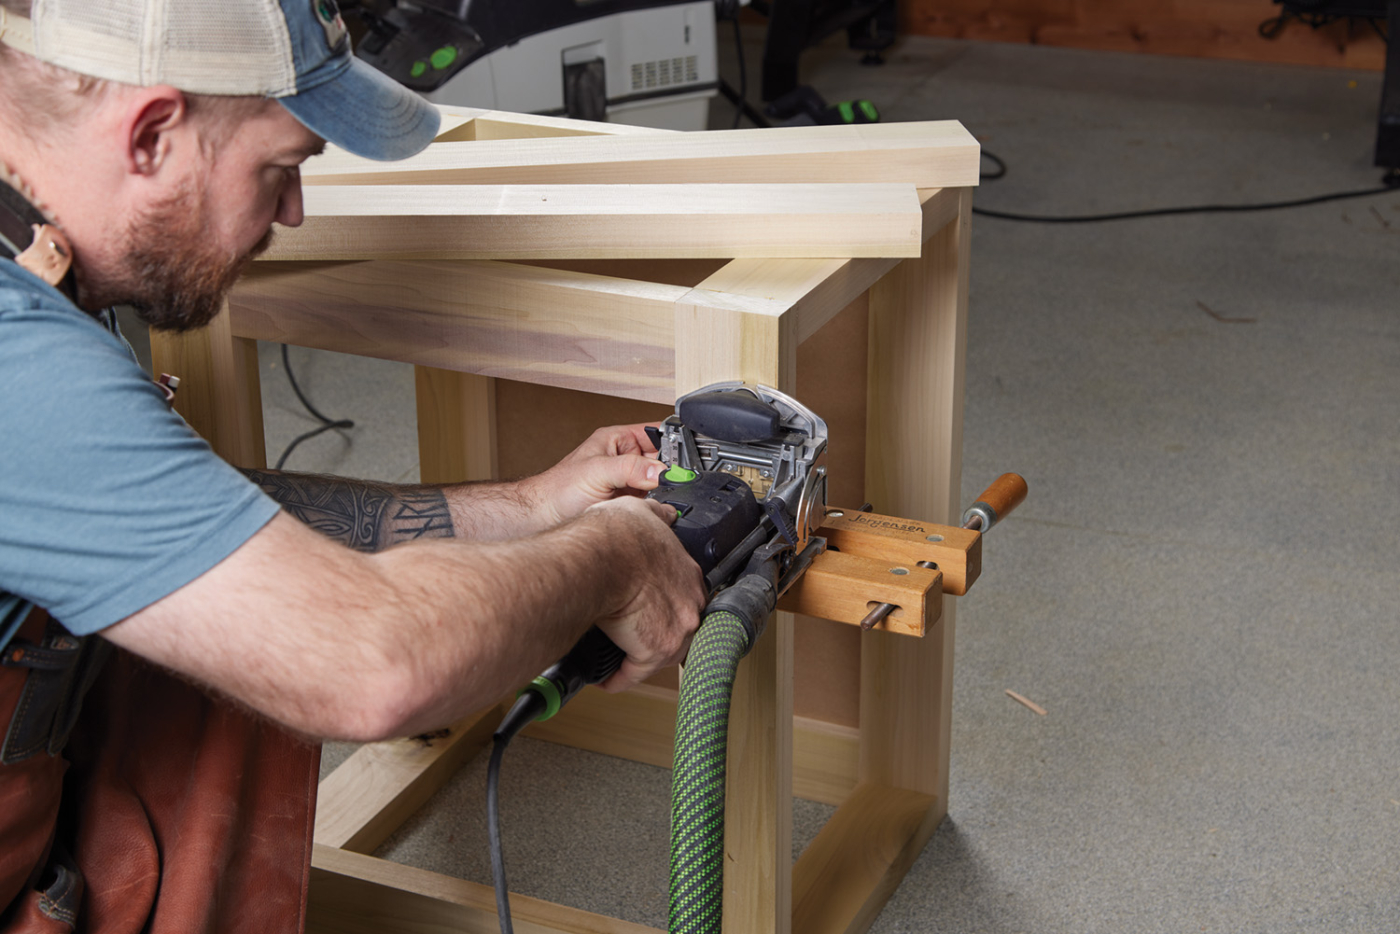
5 Mortise the inside of the frames for the connecting rails.
Assembly and Setting
Once you have your layout set up, and mortise cut, you can work on the assembly. The trick here is making sure you have clamps long enough, or gluing up the cabinets in sections. I chose the section approach, like you see in photo 6. I glued up one section, let it cure, before adding the next section of connecting rails. In Photo 6 you can clearly see the layout of the frames. The end panels each had MDF panels, while the middle one does not.
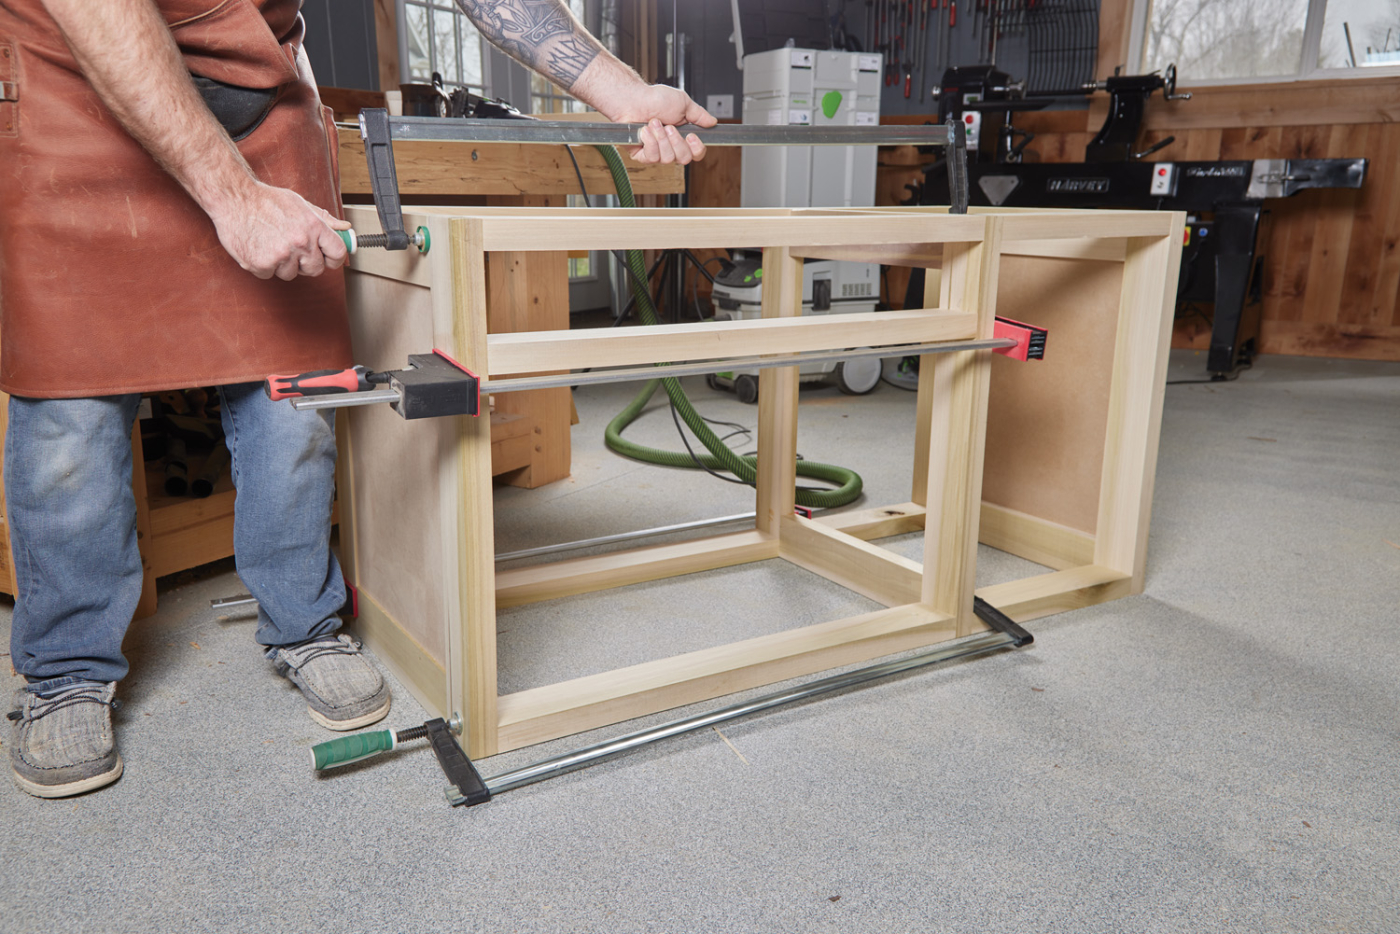
6 Clamping the entire cabinet can be tricky. A two-part glue-up can be more manageable.
With the cabinets drying, I built a pair of bases. These bases are simply butt joints screwed together. Building the base separate allows you to level the it before putting the cabinet on top. As you can see in Photo 7, I put the base in place, and used shims to level it out, both left-to-right and front-to-back.
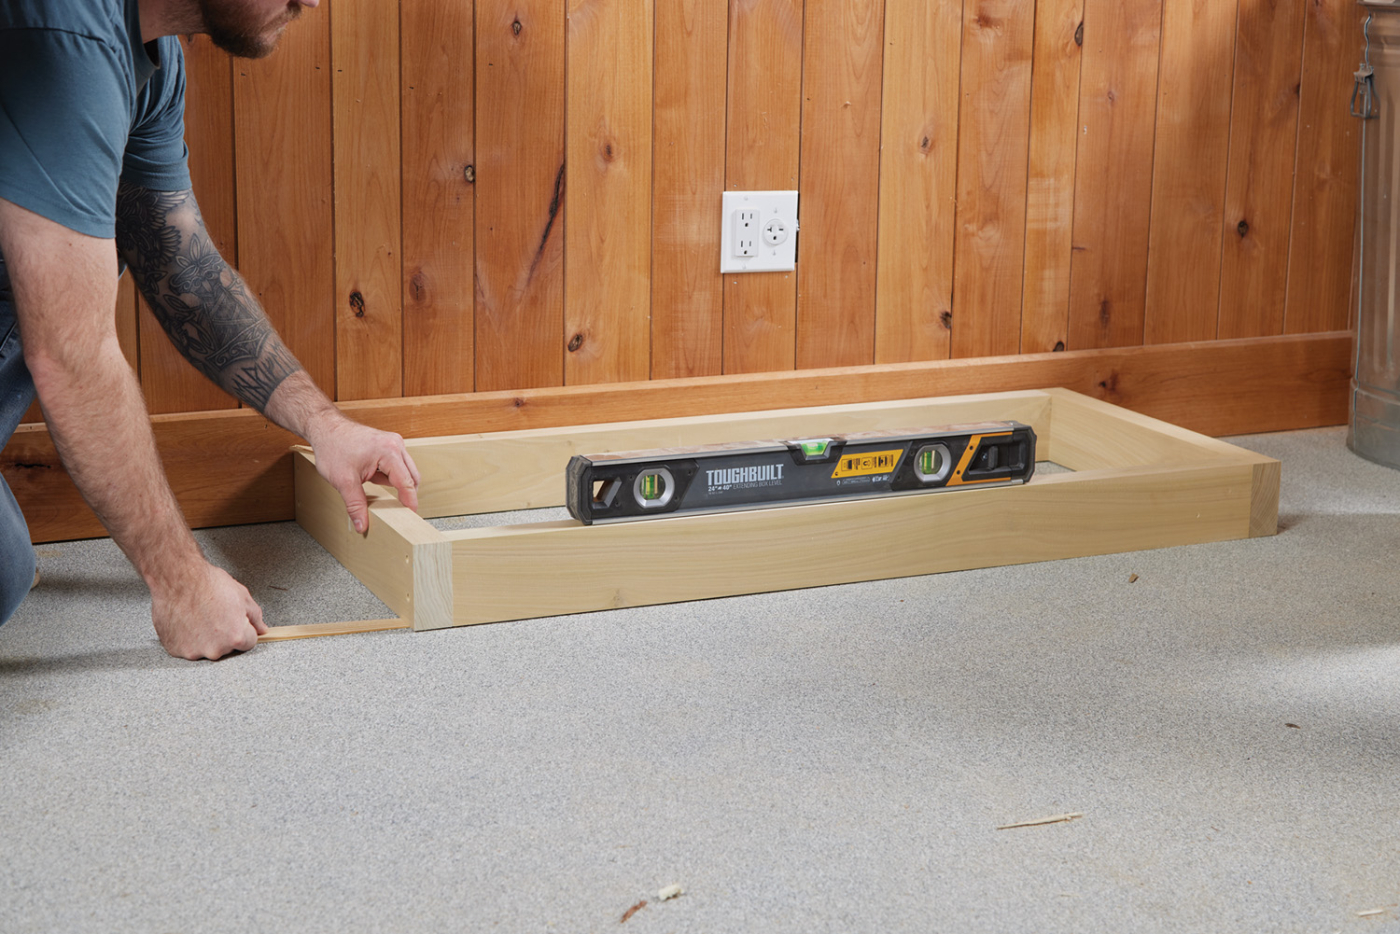
7 Level the base using shims.
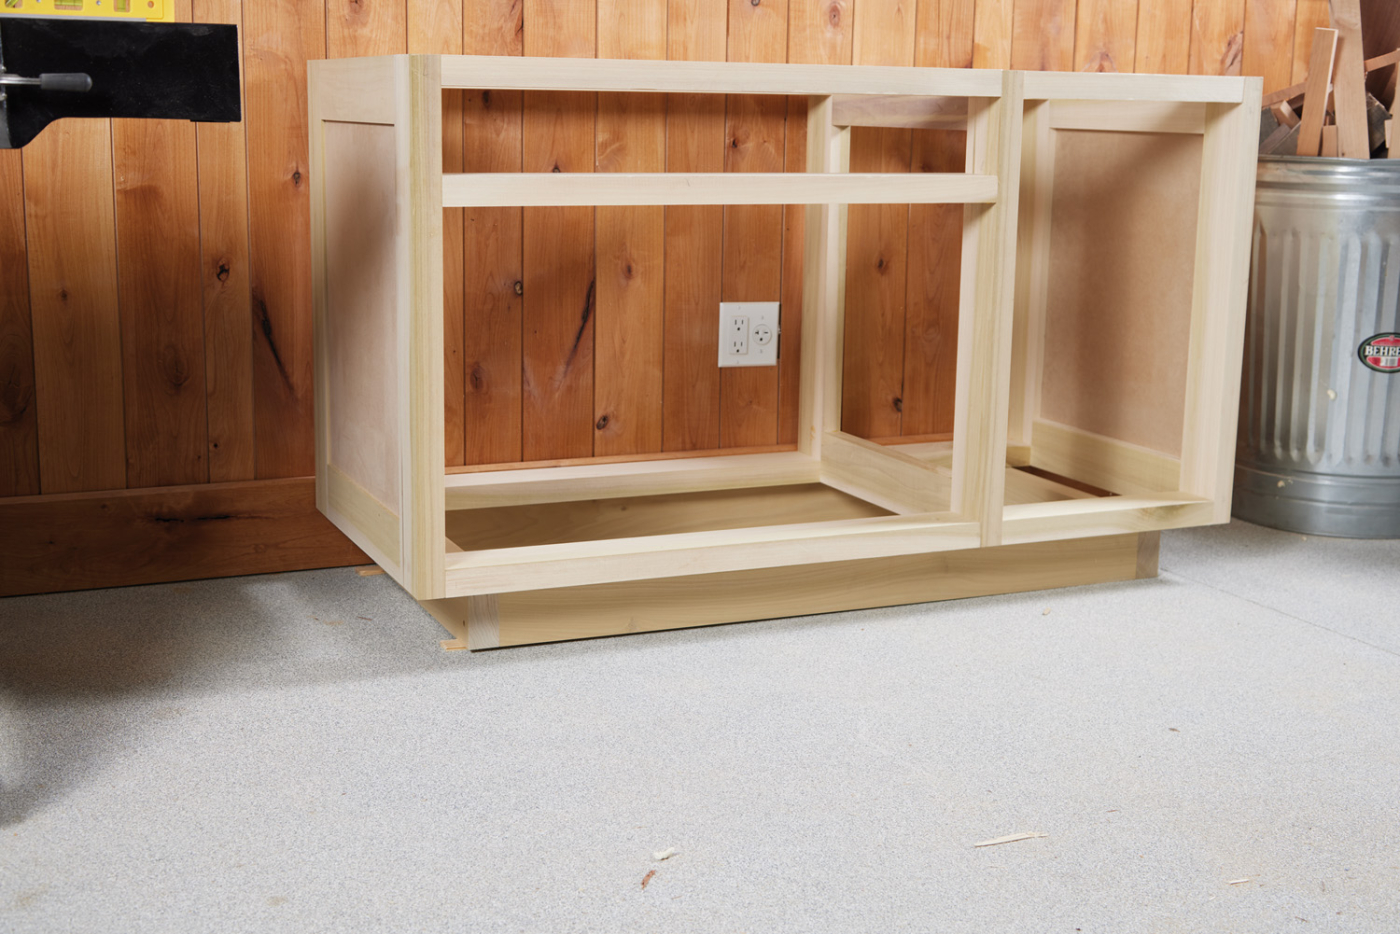
8 Once it’s leveled, you can drop the cabinet in place.
After the cabinet has cured, I put everything together to see how it looked (at least, the left cabinet). Photo 8 shows the final look. Once I was happy with everything “woodworking-wise,” it was time for paint.
Tips for Perfect Paint
Now, let me be clear —getting a perfect painted finish is a robust topic. But, I’ll give you a few tips that I’ve found help when I’m doing “cabinet-style” paint jobs.
First, surface prep is key. A ding will show up through paint. Saw marks will probably show up through paint. Sand down to about 150-grit. Then, use some form of filler. I like Durhams Water Putty. Fill screw holes, and pack any exposed endgrain (such as on the ends of the base). Inspect all of the joints, and if needed apply filler anywhere you have a little gap.
I like to start with a high-hide (or high-build) primer. I always spray it on, concentrating on show surfaces. Then, follow that with some light sanding with 320-grit. For the final top coat, I prefer a high-quality, acrylic enamel. Again, I concentrate on the show surfaces. If you want to see a video where I talk a bit more about surface prep, visit our YouTube channel and look for “A Perfect Painted Finish.”
A Quality Top
Do you ever start a project with one giant question from the get-go? For me, it was the top of this miter saw station. My original plan was to build it from plywood. However, the sizes of the tops would require four sheets of plywood, which was a bit rich for my blood. Instead, I found a material from our lumber supplier called BauBuche. It was an interesting material, and I have to say I quite enjoyed using it. You can read a bit more about it in a future article.
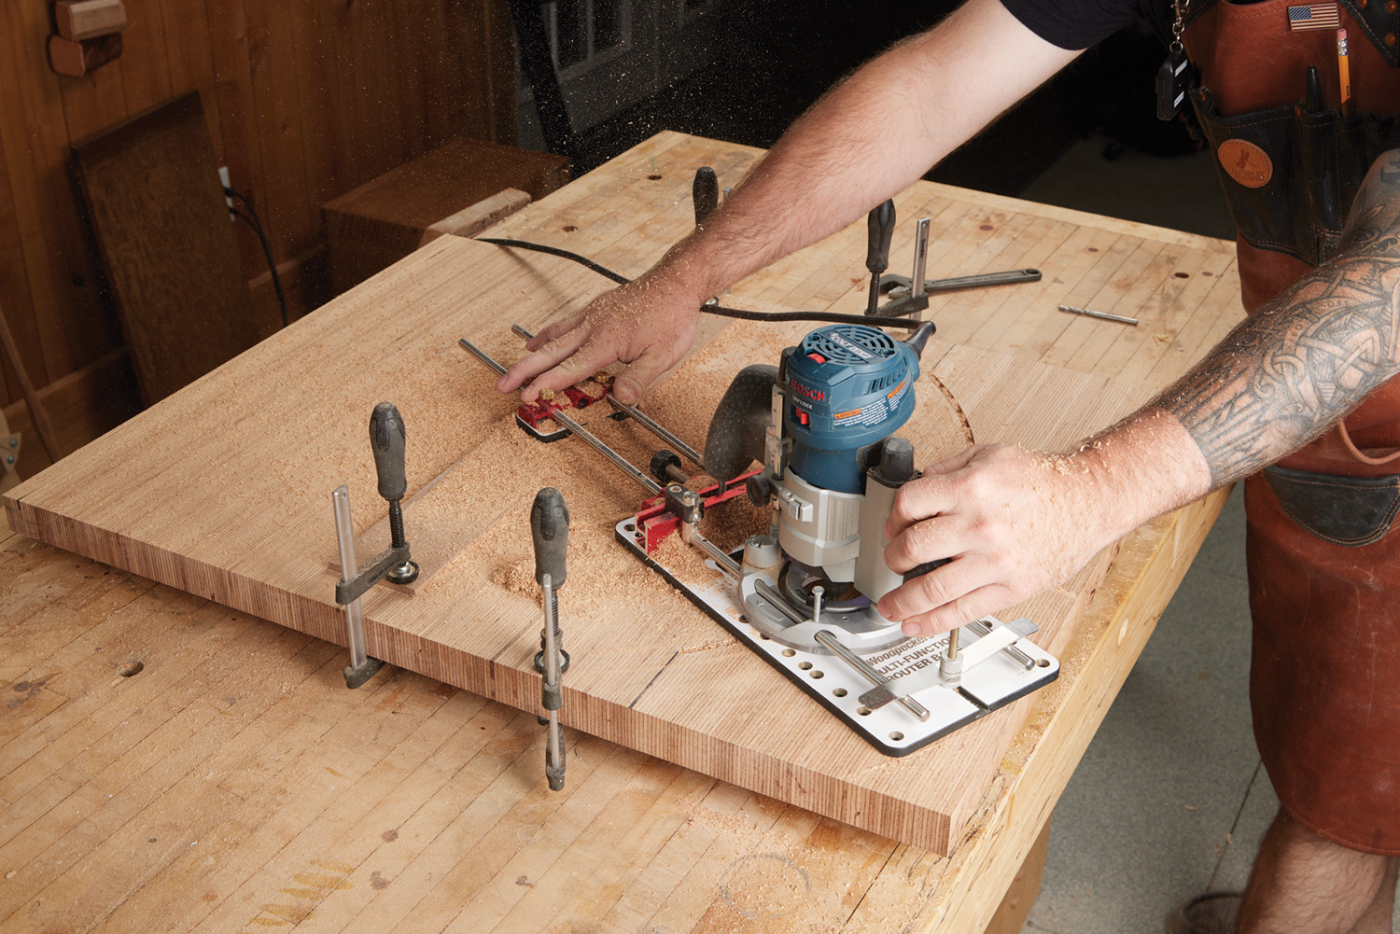
9 A router trammel is the perfect tool to cut circles or arches.
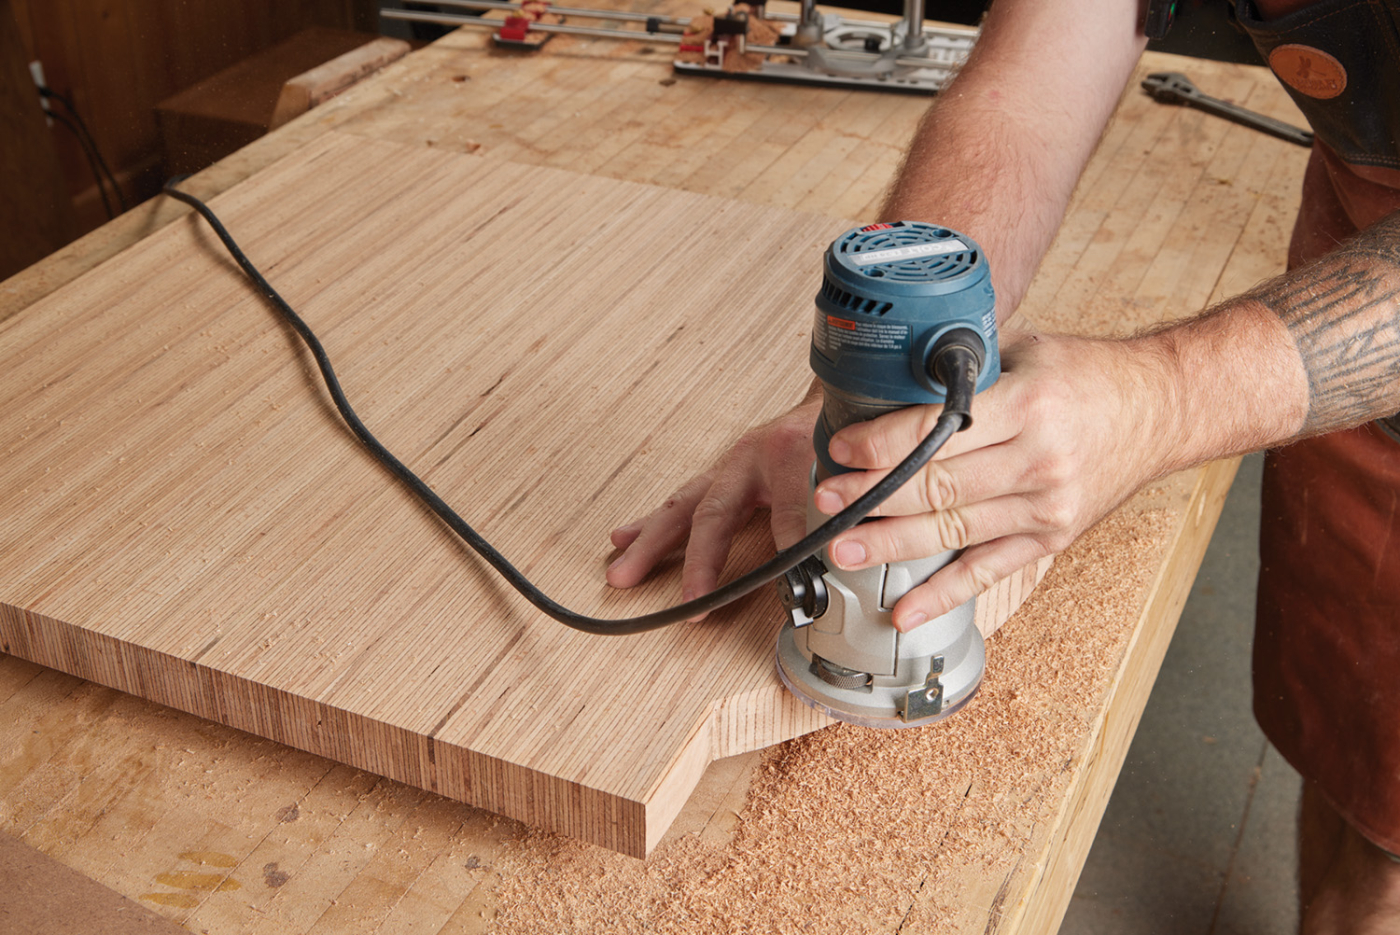
10 A straight bit and small passes make a smooth, clean arch in the thick top.
The left and right tops are simply cut to size. The center section? Here, I decided to pizazz up a bit. To angle the miter saw, the handle swings in an arc. I decided to shape the center top in a matching arch. To shape the arch, you can see my process in Photos 9 and 10. I laid out the arc with a marker, and used a router trammel with my palm router to rout the arc. The arc was done in several passes, each a bit deeper than the last. The arc starts and stops at a straight section — just make sure to not rout into it. Once the arc is cut through, the straight ends can be nipped with a hand saw.
After a bit of sanding, I routed a chamfer along all of the “exposed” edges of the top. Because the miter saw surface is going to take a beating, I wanted a tough finish. I tried a new product (to me) called KBS Diamond Clear. The application was tricky, but after I figured it out, I’ve been happy with it. I’ll cover it a bit more in the next issue (after I see how it wears a bit). A conversion varnish, or thick polyurethane would work as well.
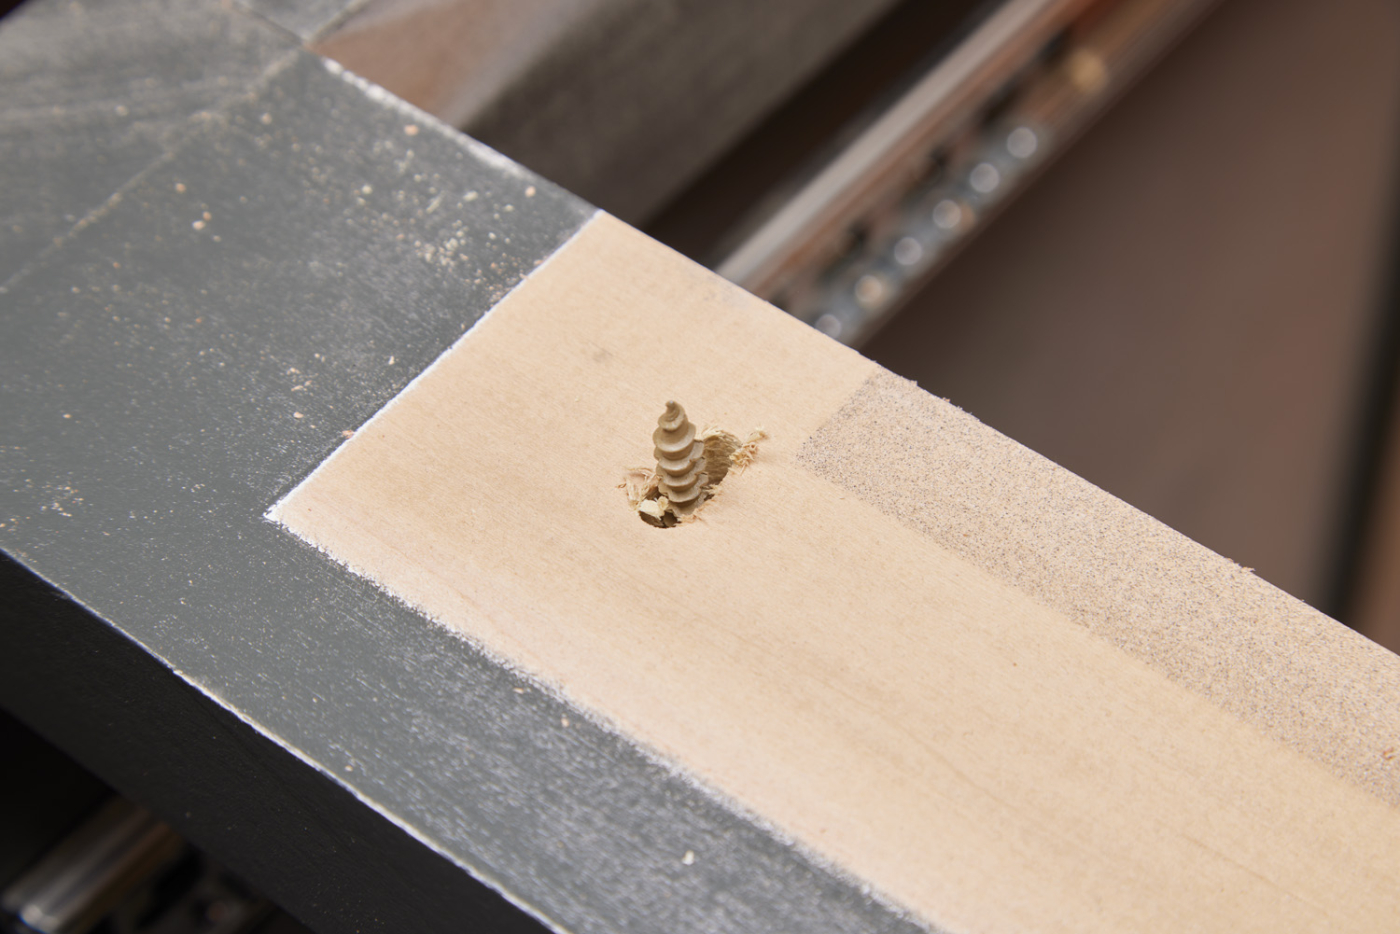
11 Slots in the cabinet allow the top to expand if it needs to.
I’ll be honest—because this is the first time I’ve used BauBuche, I don’t know how much it’s going to expand and contract. I don’t think it will expand a whole lot, as it’s essentially quartersawn, but just to be safe, I mounted the top with screws in slots in the cabinet (see Photo 11).
The Fence
There are a lot of miter saw fences available. You read about one at the beginning of the magazine. The one I chose for this is a low-profile, recessed fence from Woodpeckers. The StealthStop miter fence recesses in the top, and can be used with or without the back fence. Personally, I like having a fence to push my work against, so I went for the two-track configuration.

12 A laser is a great way to align the fences to each other, and the miter saw.
Setting up any fence in line with a saw can be tricky. I started by using a laser guide to square up the saw to the top. Then, without moving the laser, I positioned the fences to the left and the right of the saw. Minor taps move the fence to where it needs to be. I’m looking for the laser to just tickle the edge of the fence the entire length of it—check out photo 12. Now that the fences are in place, they need to be recessed.
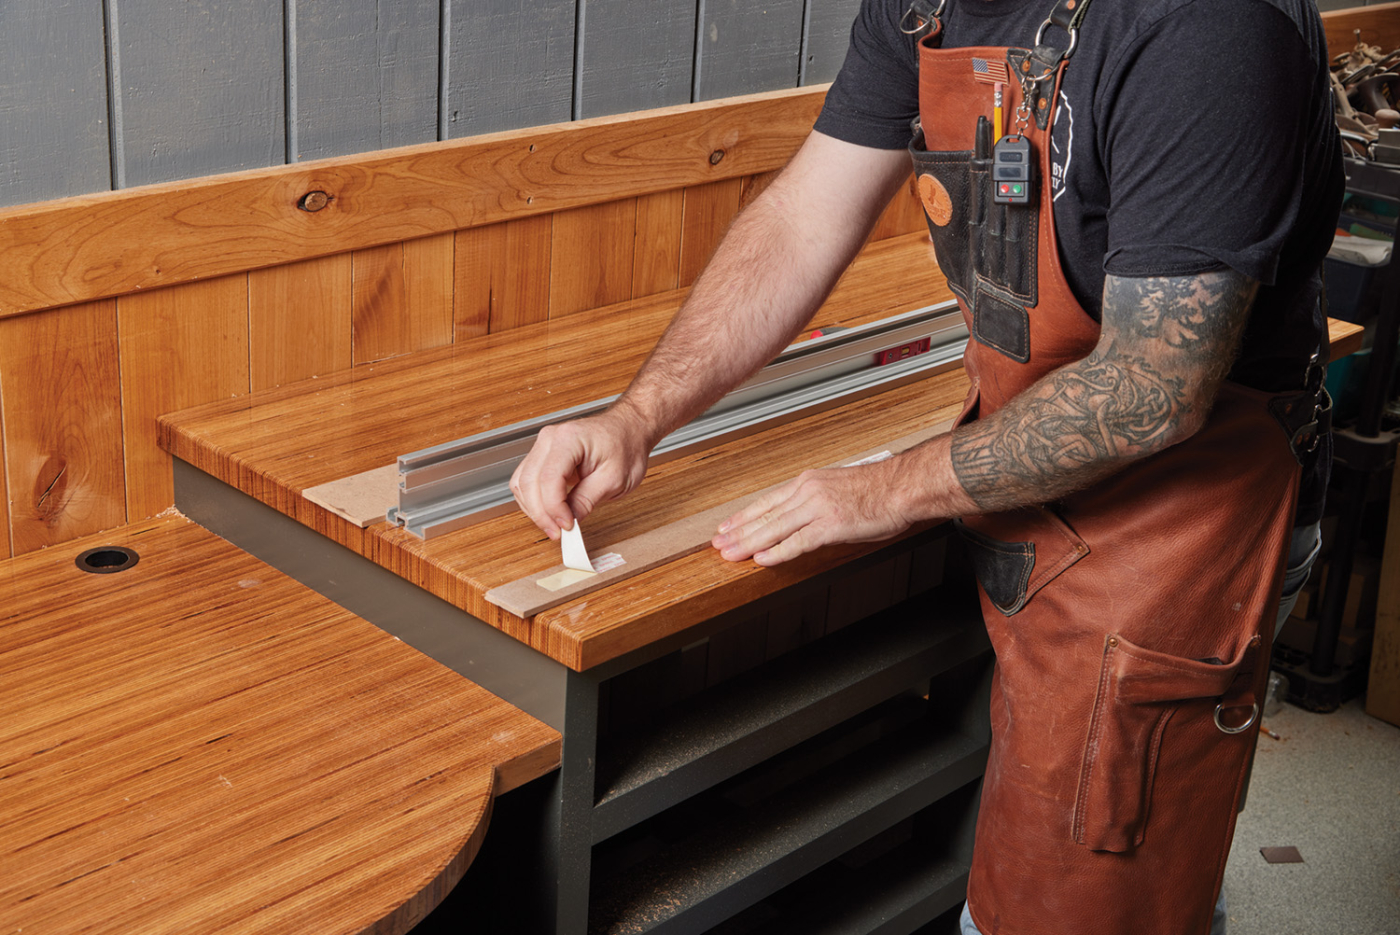
13 Use a dado clean-out bit in a router to start to form the groove.
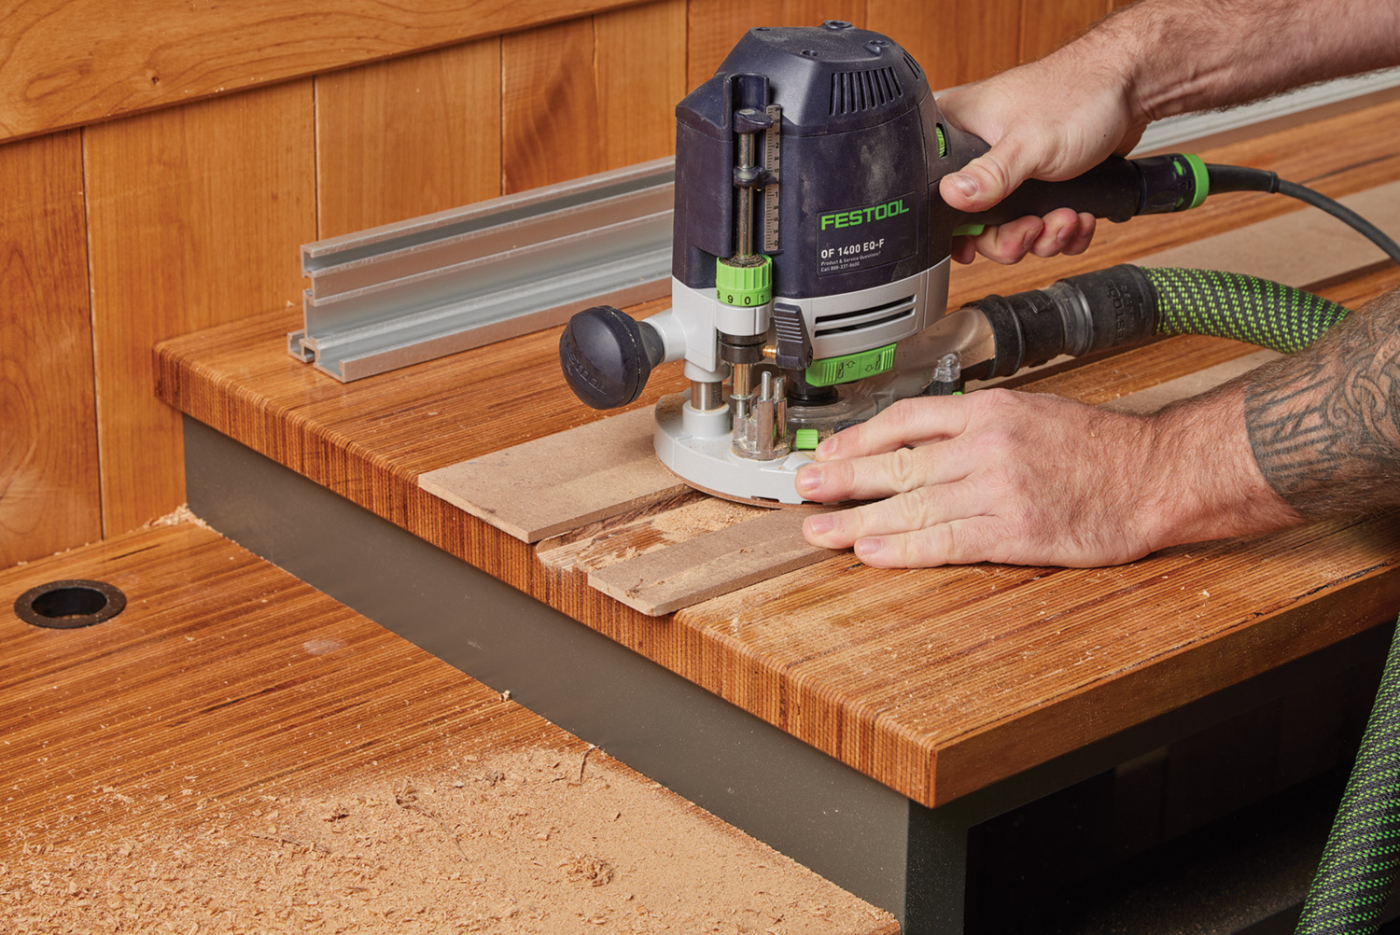
14
As you can see in Photo 13, I used a pair of hardboard fences with double-sided tape. Butt them tight up against the fence and press down firmly. With the fence removed, you’re left with perfect guides where the edge of the fence sits. All that you need to do now is to use a dado clean-out bit to rout a wide groove in the top.
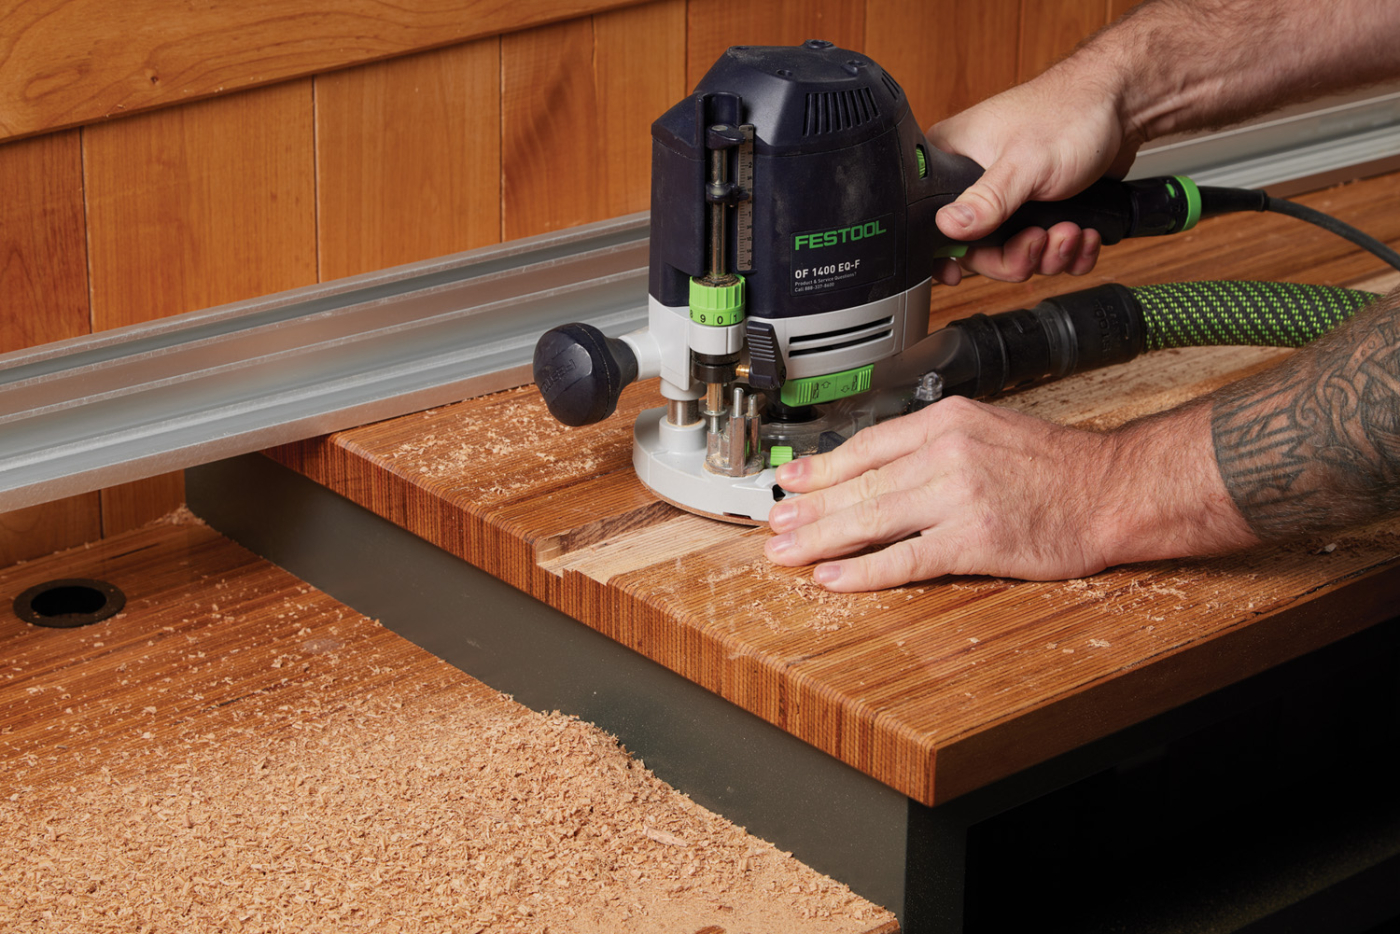
15 The groove needs to be the same depth of the miter saw fence, which will probably require several passes. You can remove the fences after the first pass to deepen the groove. Clean up the corners of the groove with a chisel.
Depending on your fence style, you may just screw it down to the top. The Woodpecker’s fence needs to have bolts passed through the top into the cabinet. The spacing of these aren’t super important —I just spaced out 5 of them on each fence, and popped a hole through he groove into the cabinet. Then, the bolt slides through the top and gets cinched down with nylon nuts from the bottom side.
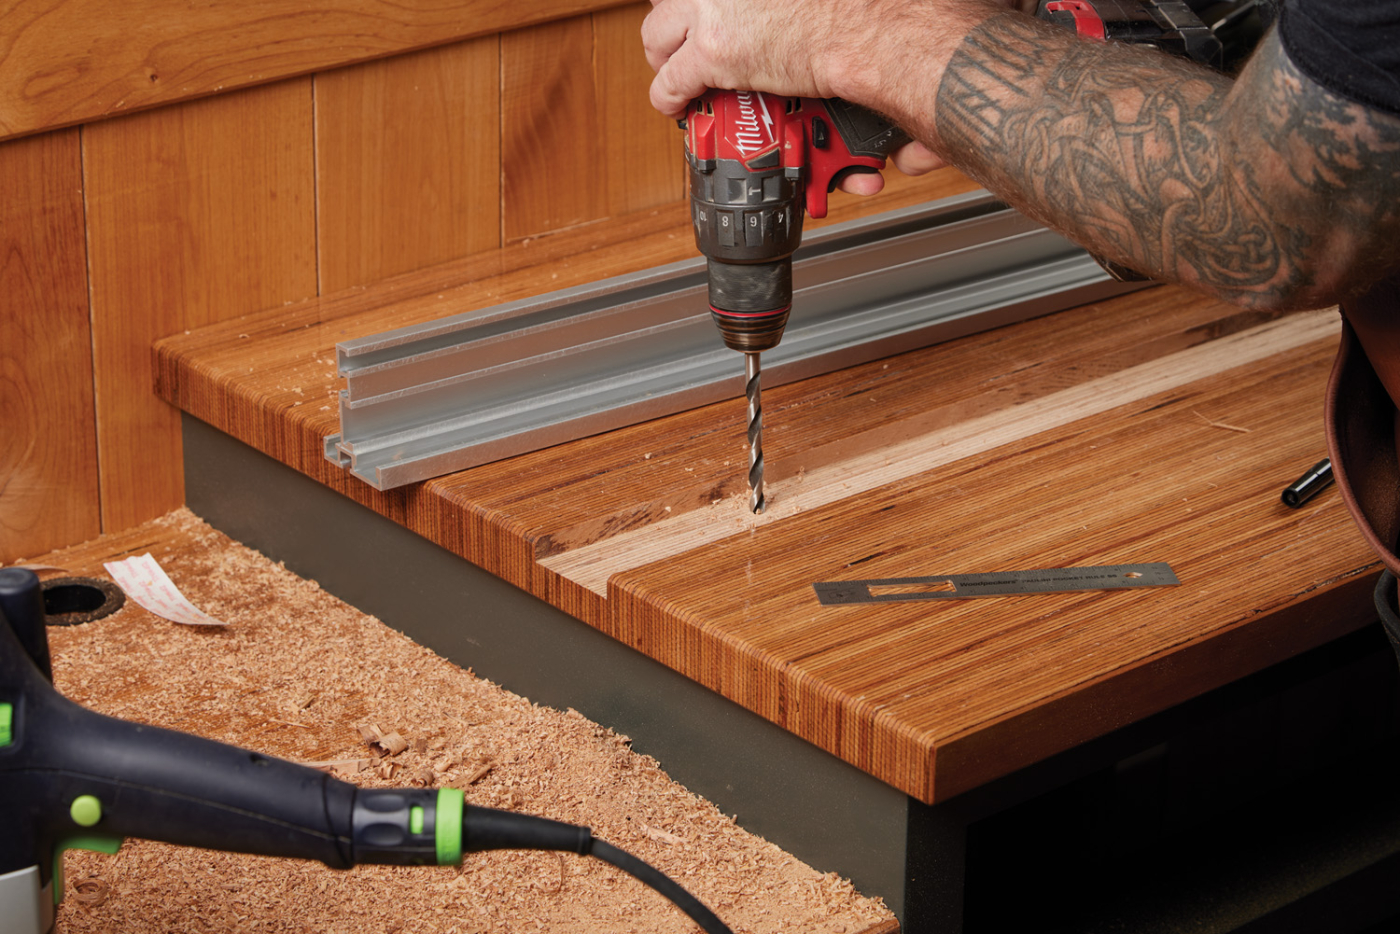
16 The fences are installed using bolts in the t-track, passed through the top of the miter saw station.
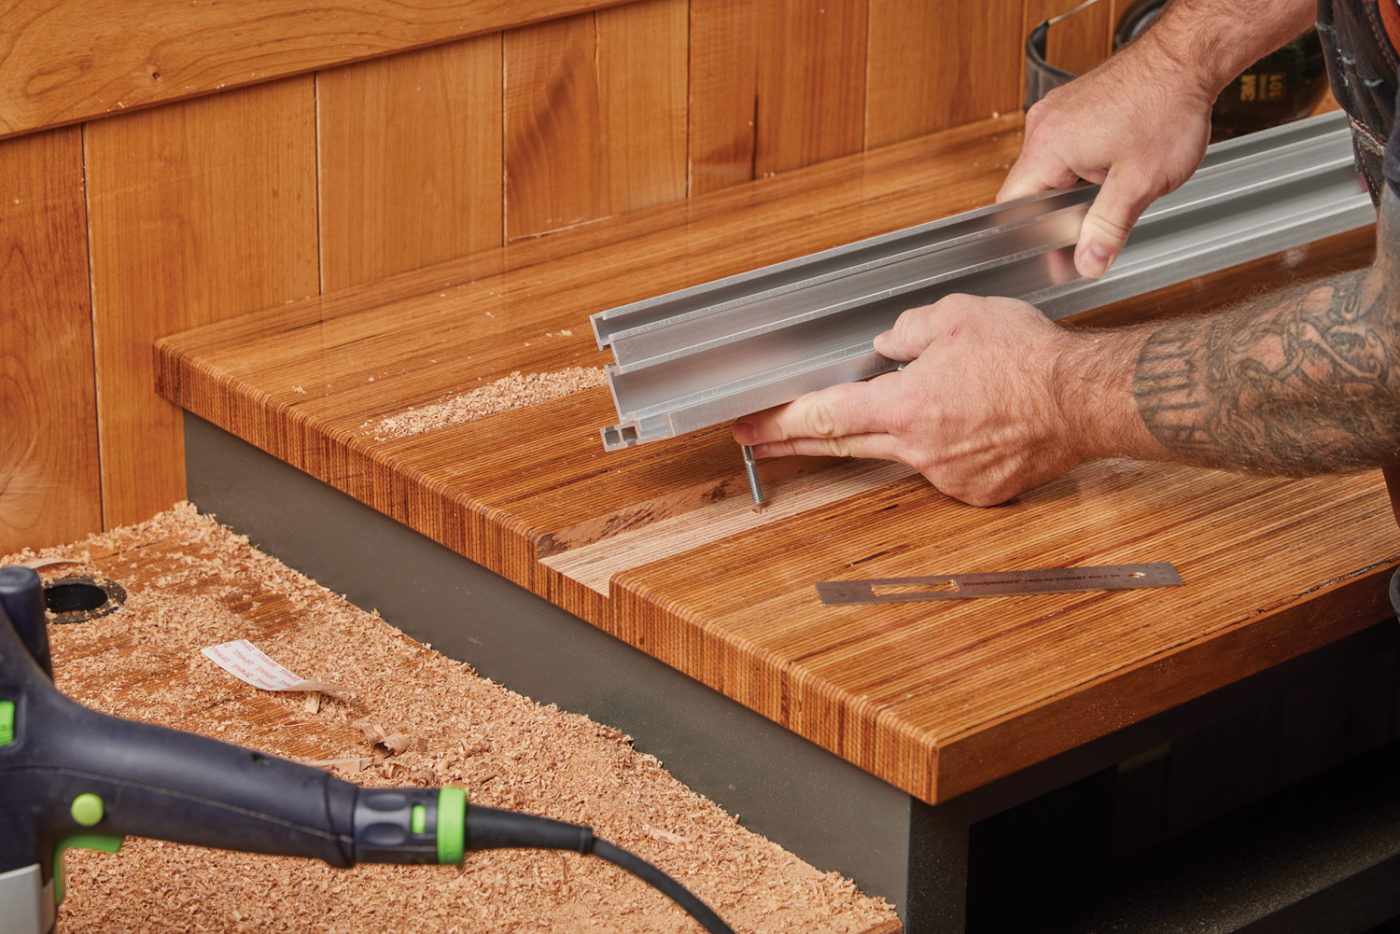
17 Washers and nuts on the bottom will tighten everything in place.
Now is the time to really check the fence settings. Using a freshly jointed board, lay it along the fences. It should lay flat along the left and right fences, as well as the face of the miter saw. Yes, I am aware that some people prefer to have the fences set back a bit from the saw. Not I.
Now the Guts
The inside of the miter saw cabinet is full of storage. How you fill it out is up to you. Because of the depth, even the door-covered cubbies have pullout drawers. I’ve found shelves just have a tendency to get filled up and you lose what’s in the back.
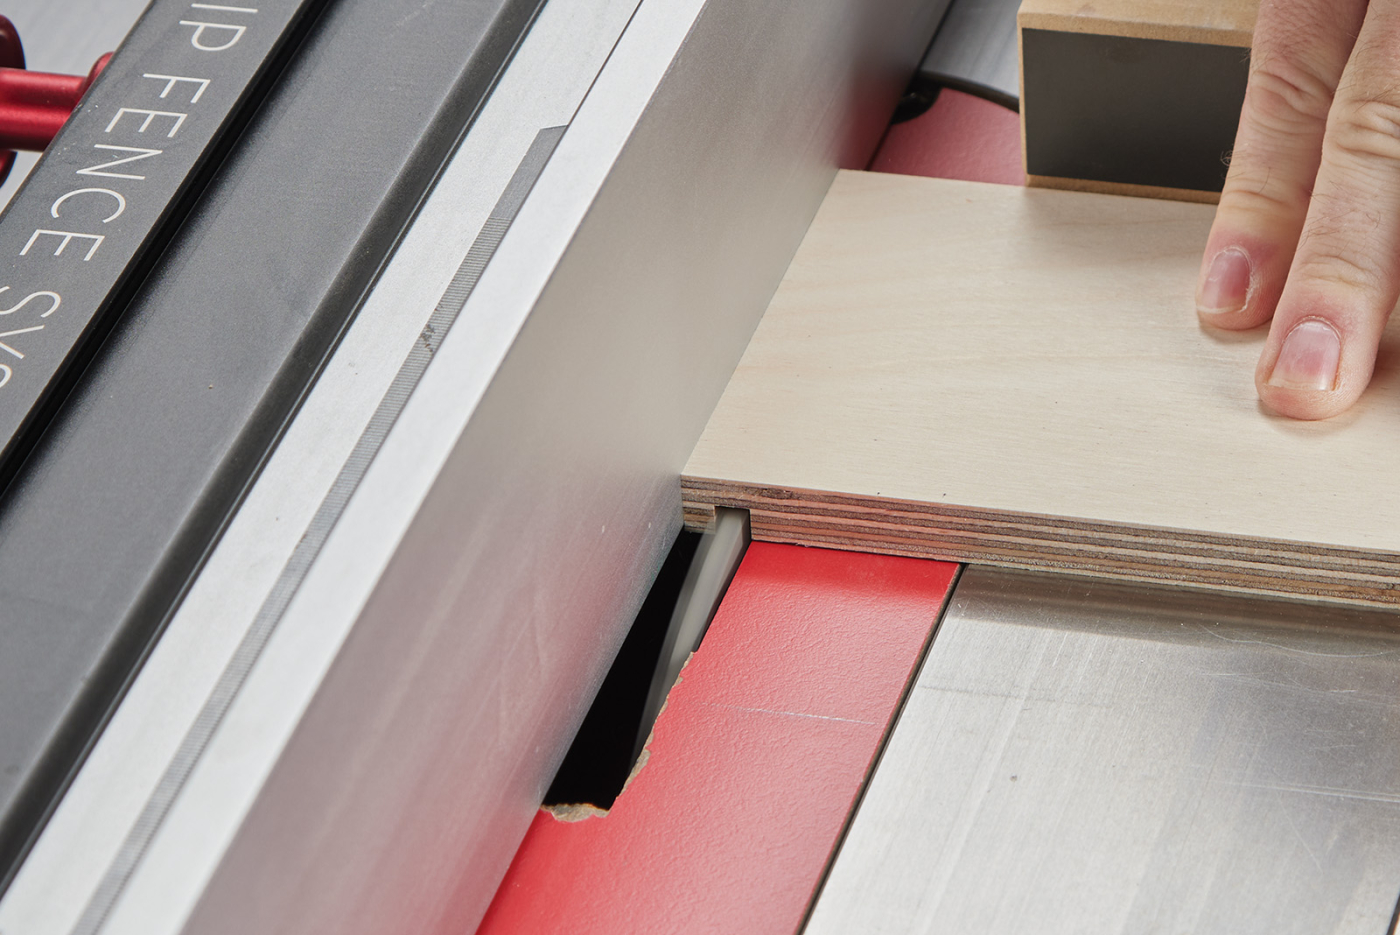
18 The drawer boxes are made with a tongue and dado joint.
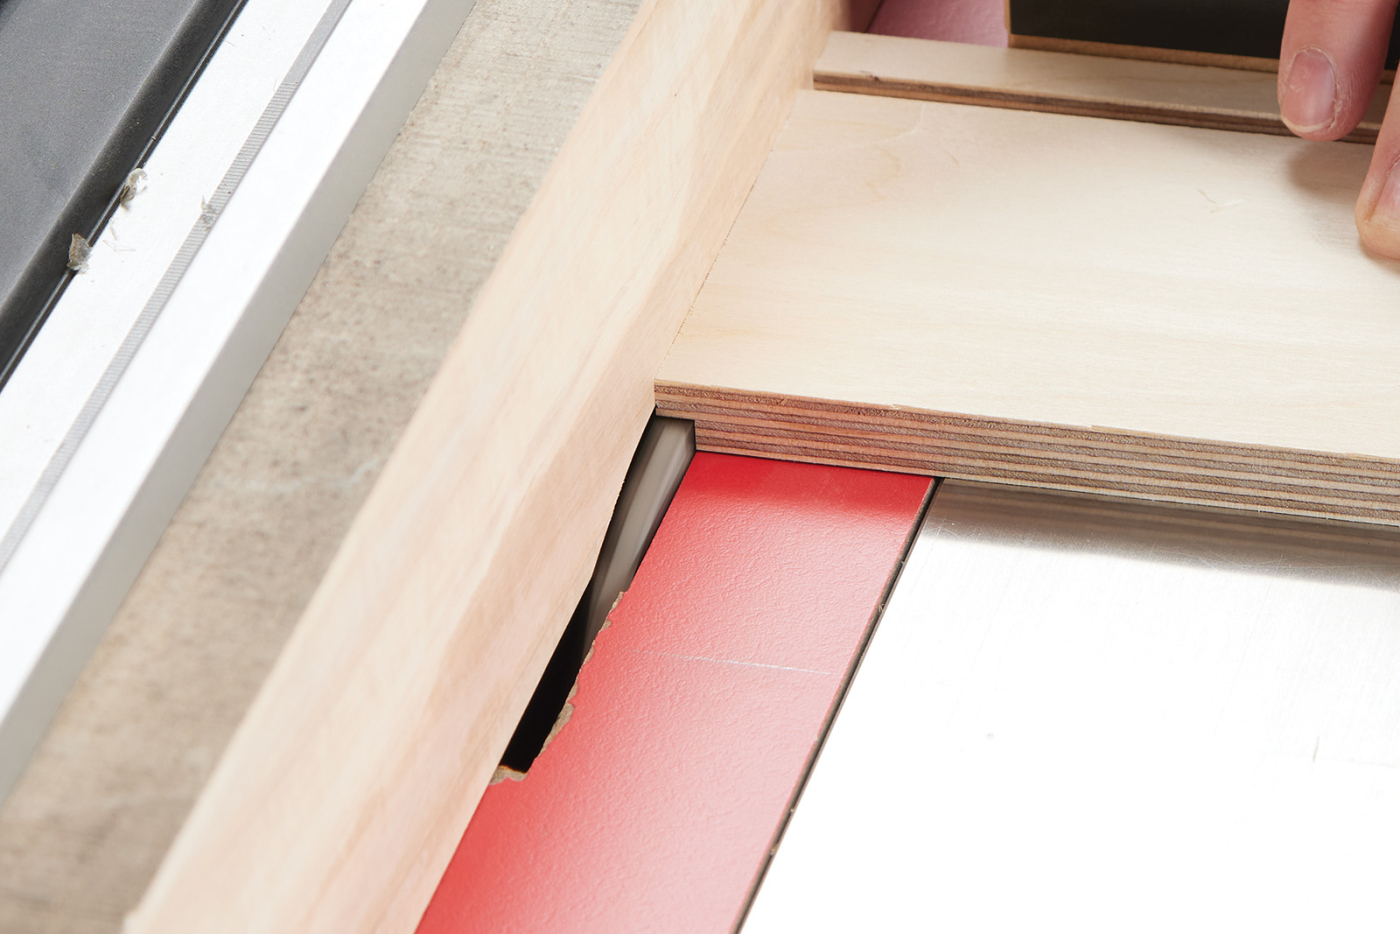
19 The joinery is all cut with a wide-kerf, flap top ground blade.
The drawers are all tongue and dado joinery. You can see this in Photos 18 and 19. The smaller drawers have 1/4“ MDF as the bottom. The drawers that will have heavier weight get 1/2“ MDF bottoms. After glue up, the drawers are installed on full-extension drawer slides. The slides mount to the front and back stiles within the case. You may need to pop an additional hole in the drawer slide to mount it.
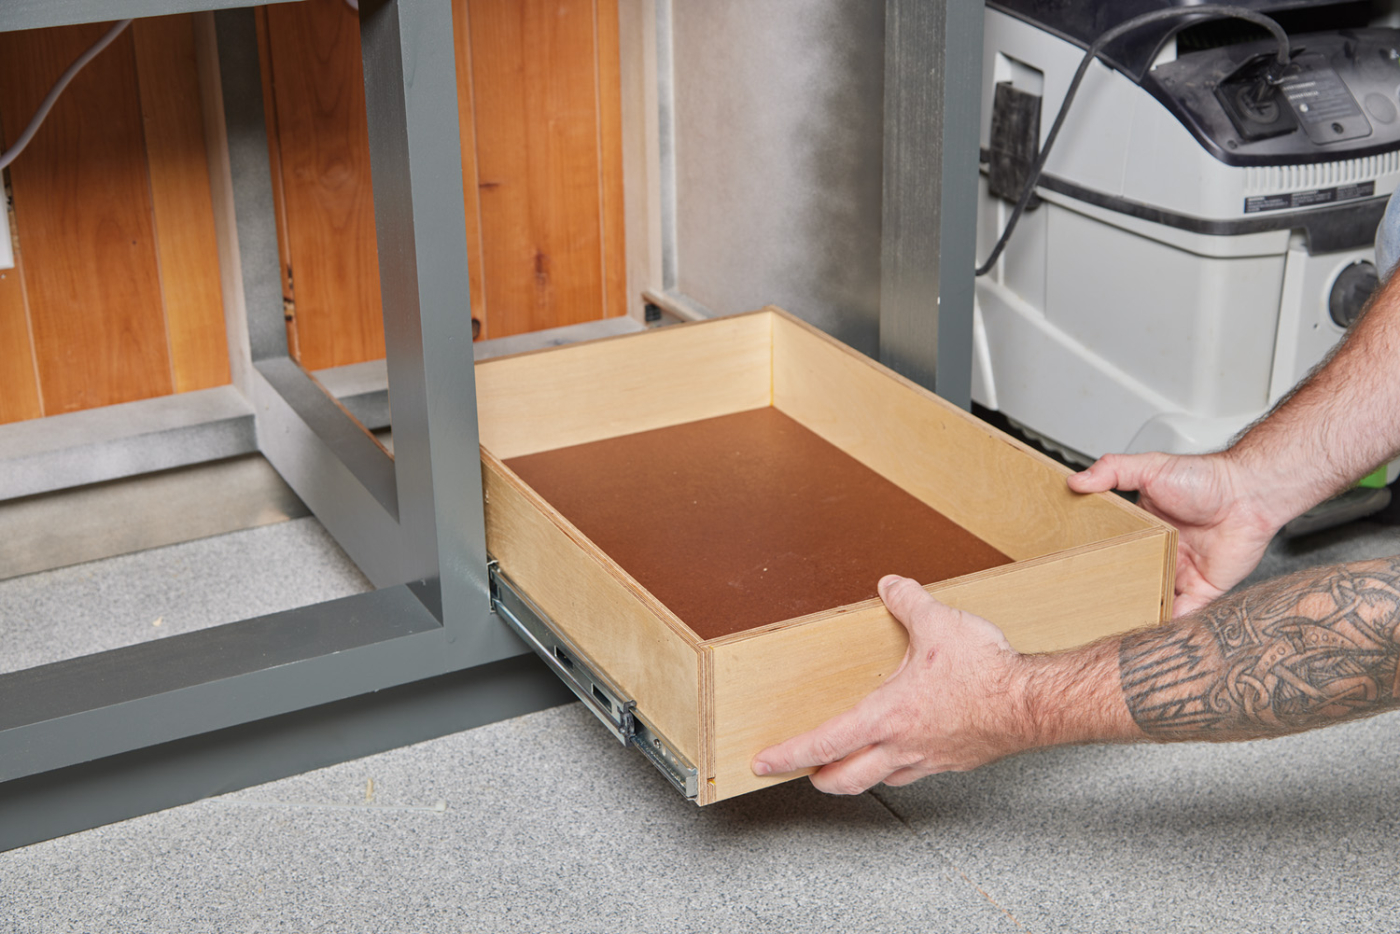
20 The drawer boxes are installed on full-extension drawer slides.
Door & Drawer Fronts
The door and drawer fronts mimic the frame and panel ends. The parts are cherry, and are cut to size before being joined together with the domino. You can see this in Photos 21 and 22. The panels for the door and drawer fronts are 1/2“ MDF that is rabbeted—this means the back of the drawer face will sit flush on the drawer box. Rout the groove on the inside of the frame parts at the router table (Photo 22). The stiles will need to have a stopped groove—simply drop the part over the spinning bit, and lift it up before you pop through the other end.
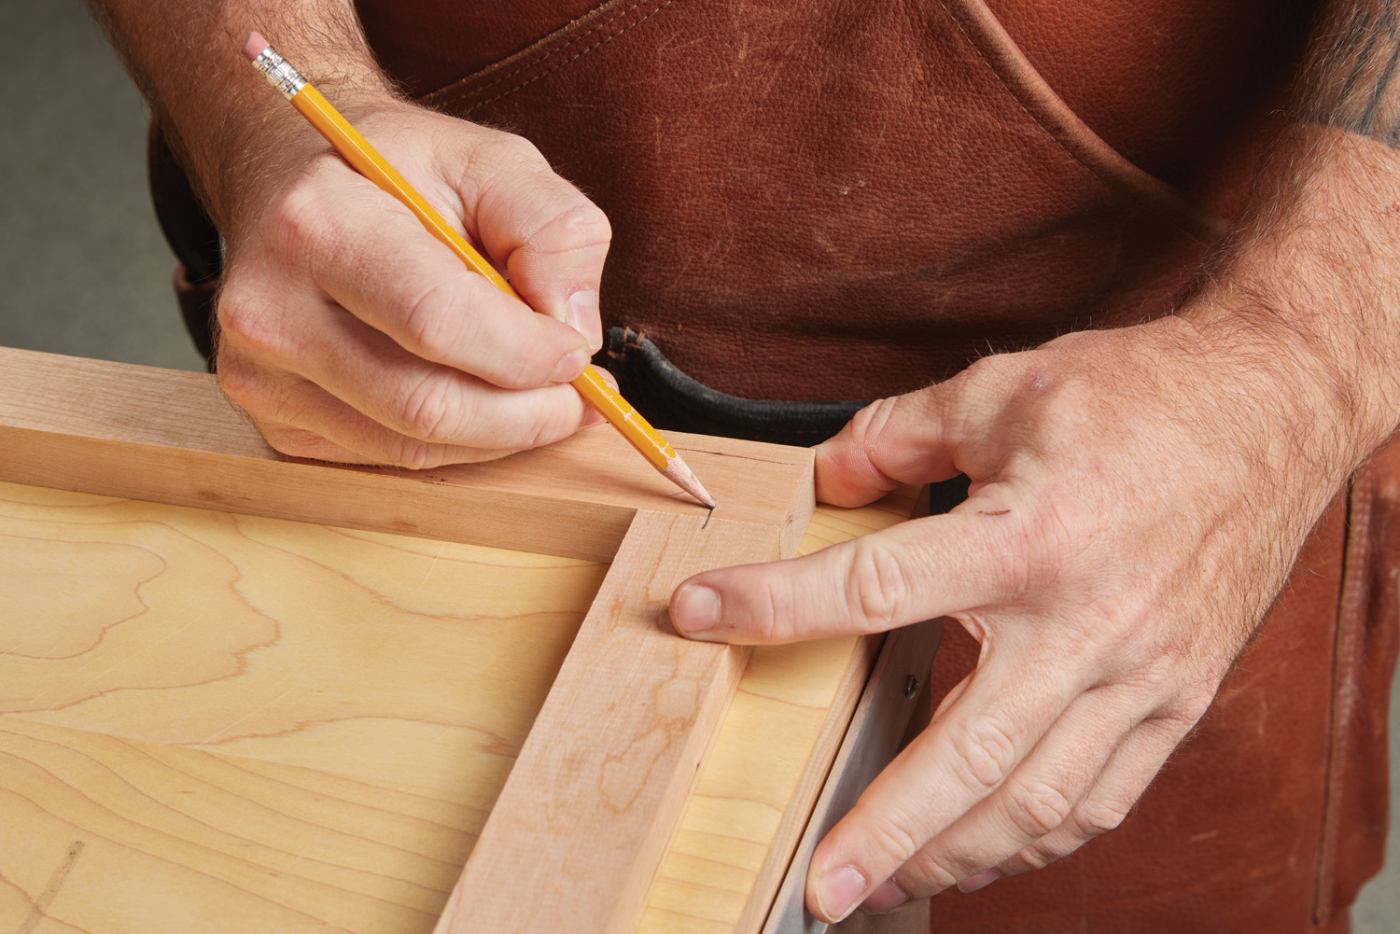
21 Lay out the door and drawer frame pieces and mark the joints.
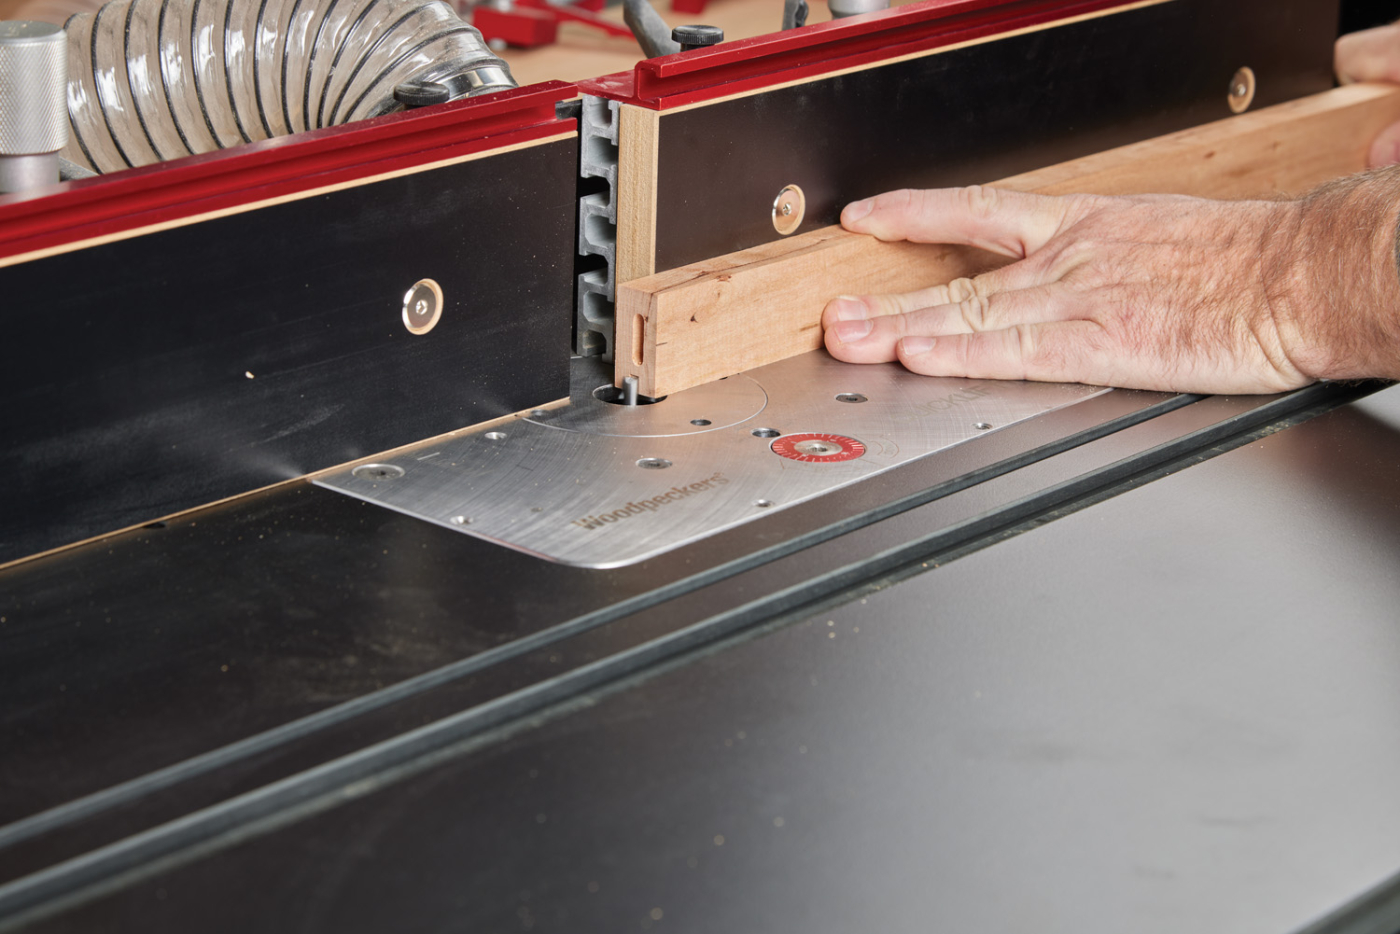
22 Rout a groove for the MDF panels.
Prefinish all of the door and drawer face parts. The cherry gets spray lacquer (taping off the mortises). The panel gets painted the same way as the cabinet. The doors are installed using 155° European style cup hinges. This style of hinge allows a lot of adjustment after it’s hung. The drawer fronts need to be installed a bit more accurately.
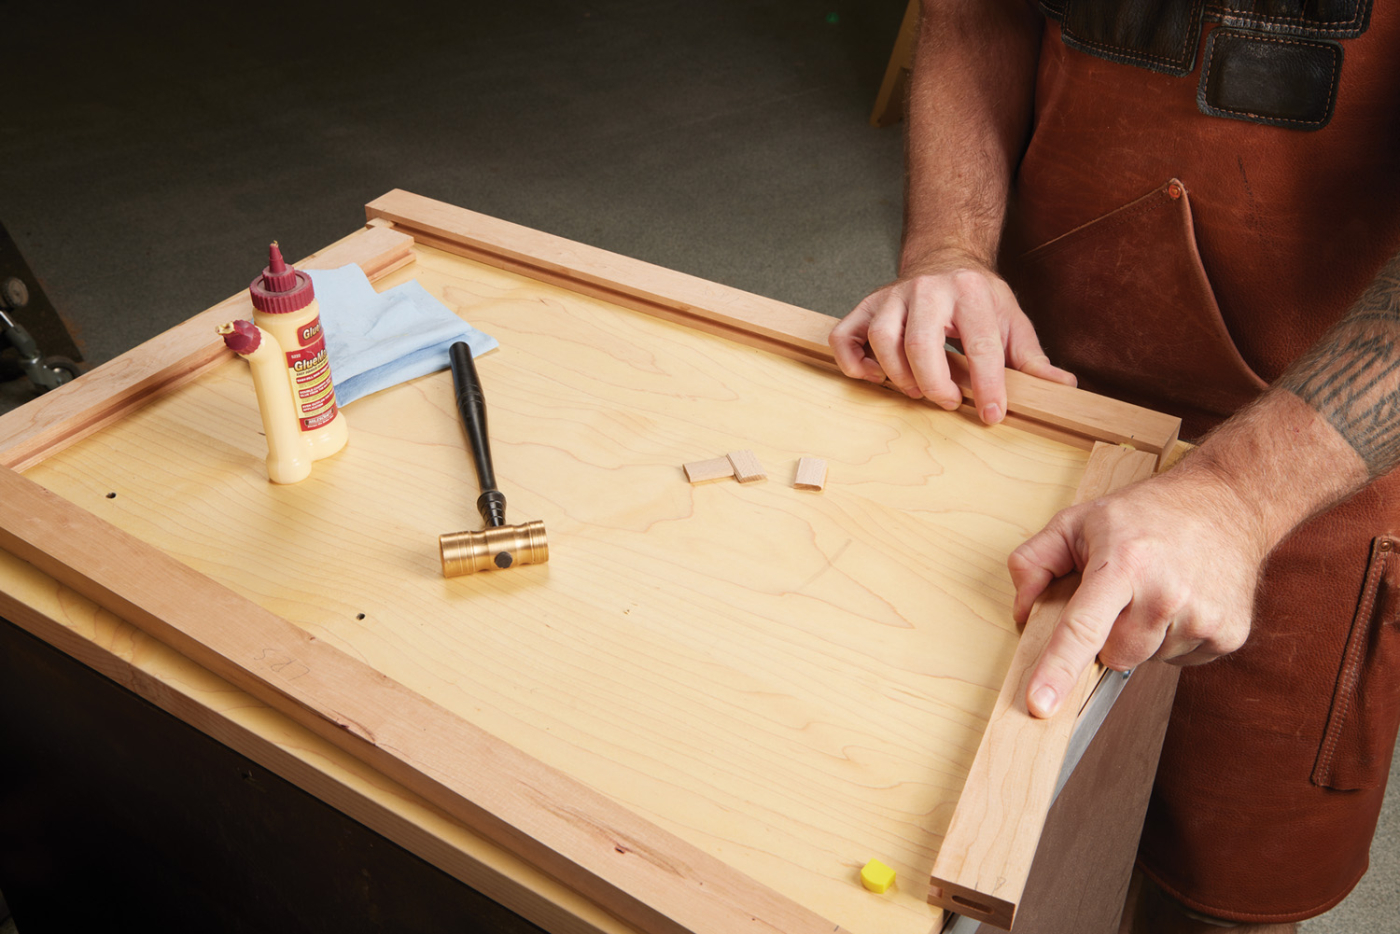
23 Pre-glue opposing corners to easily hang and spray parts before final assembly with the painted panel in place.
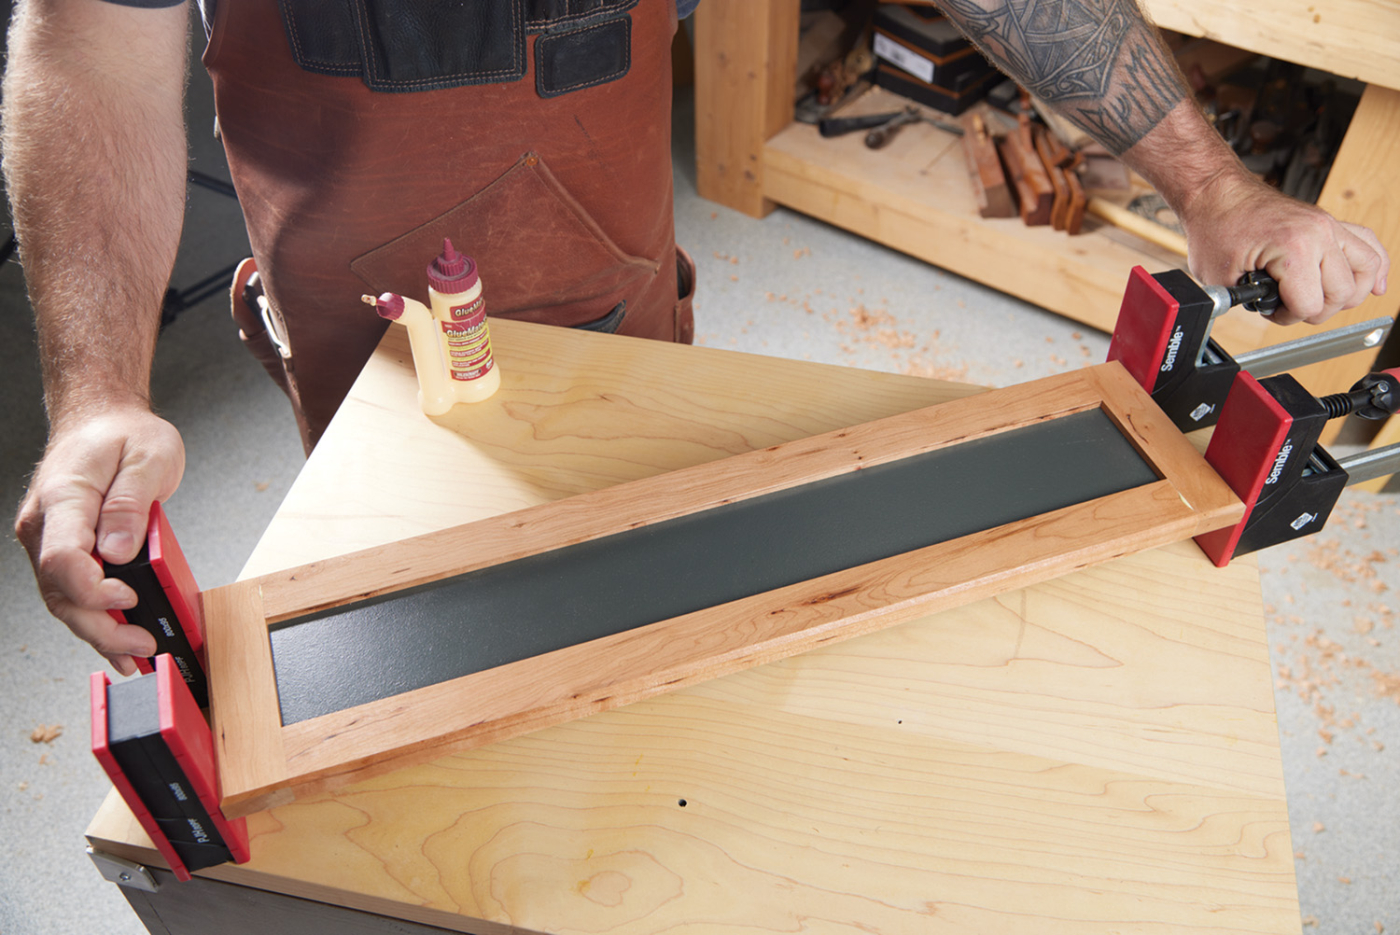
24 Glue up the drawer and door faces. The pre-painted panel and lacquered frames give a clean look.
False Front Install
Installing the drawer fronts is a two-part process. First, apply double-sided tape on the drawer box (Photo 25). Then, use a spacer to space out the front from the doors (or other drawers). Stick the drawer front in place, and then drive a couple of screws from the inside.
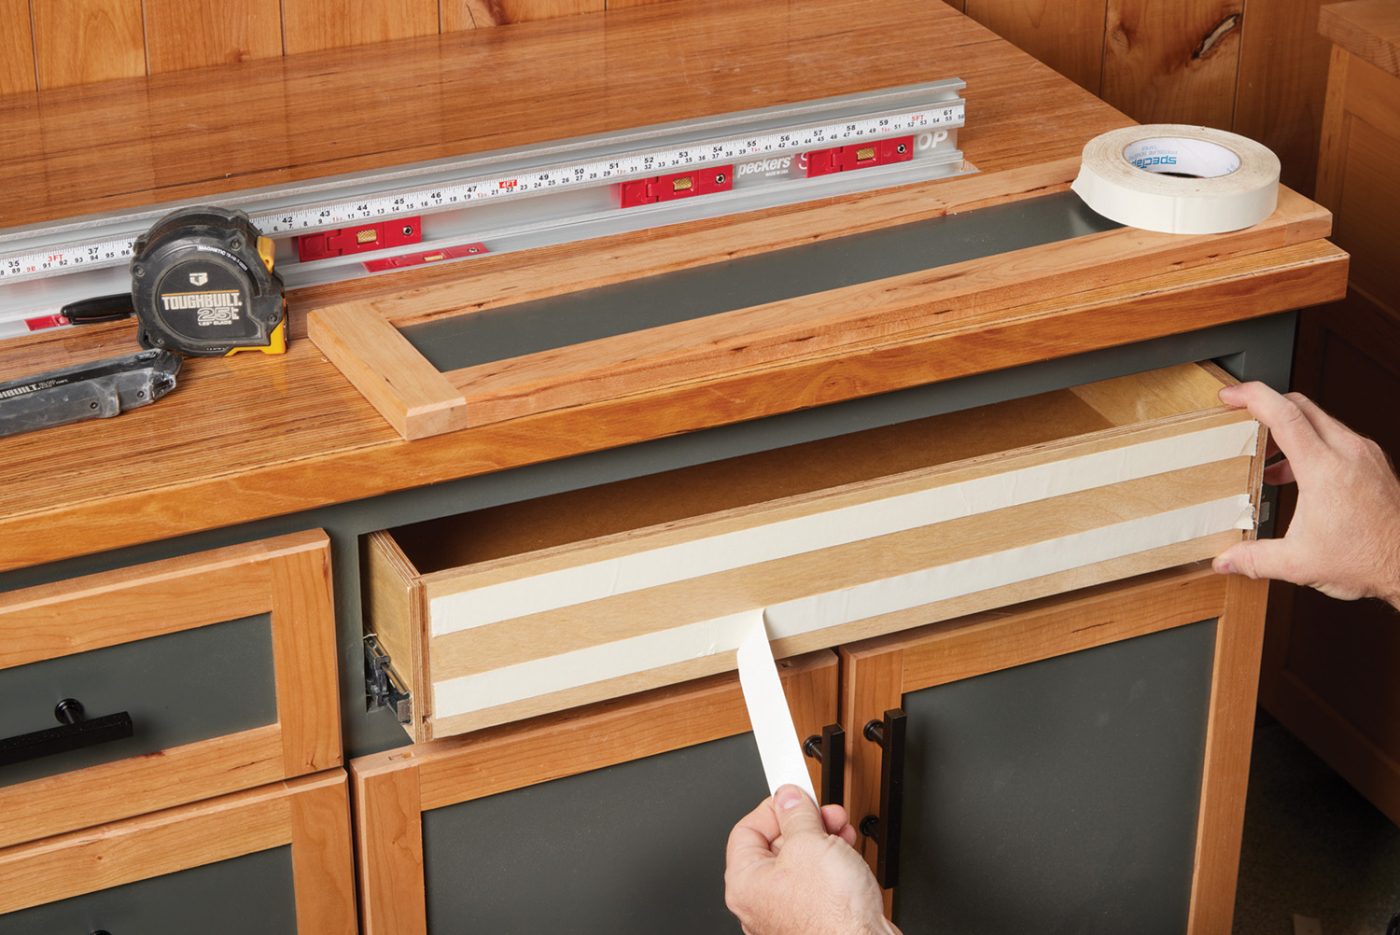
25 The drawer faces are installed first with double-sided tape and shims between for an even reveal.
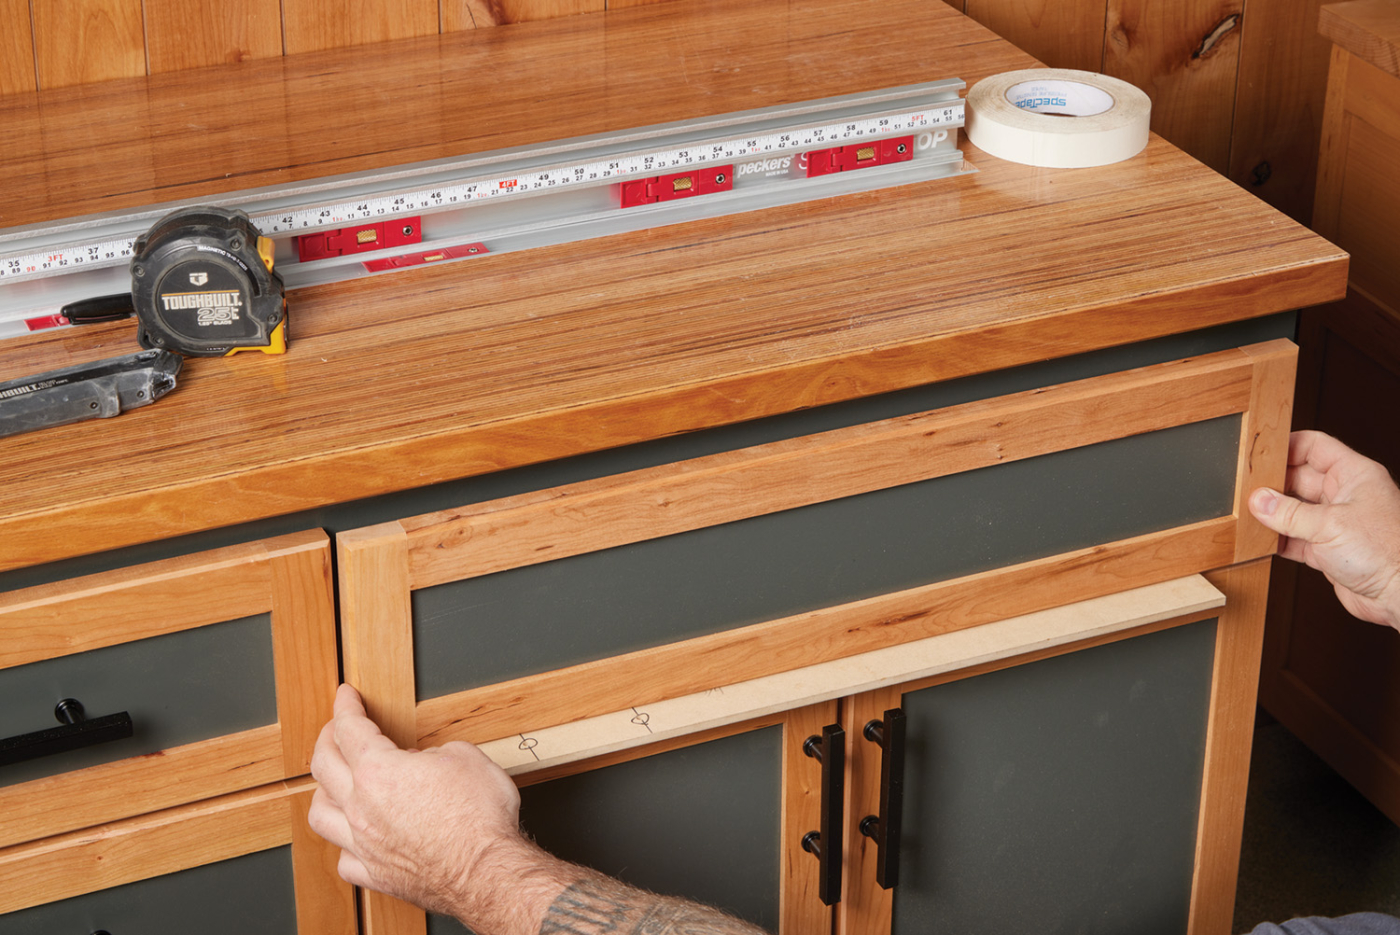
26
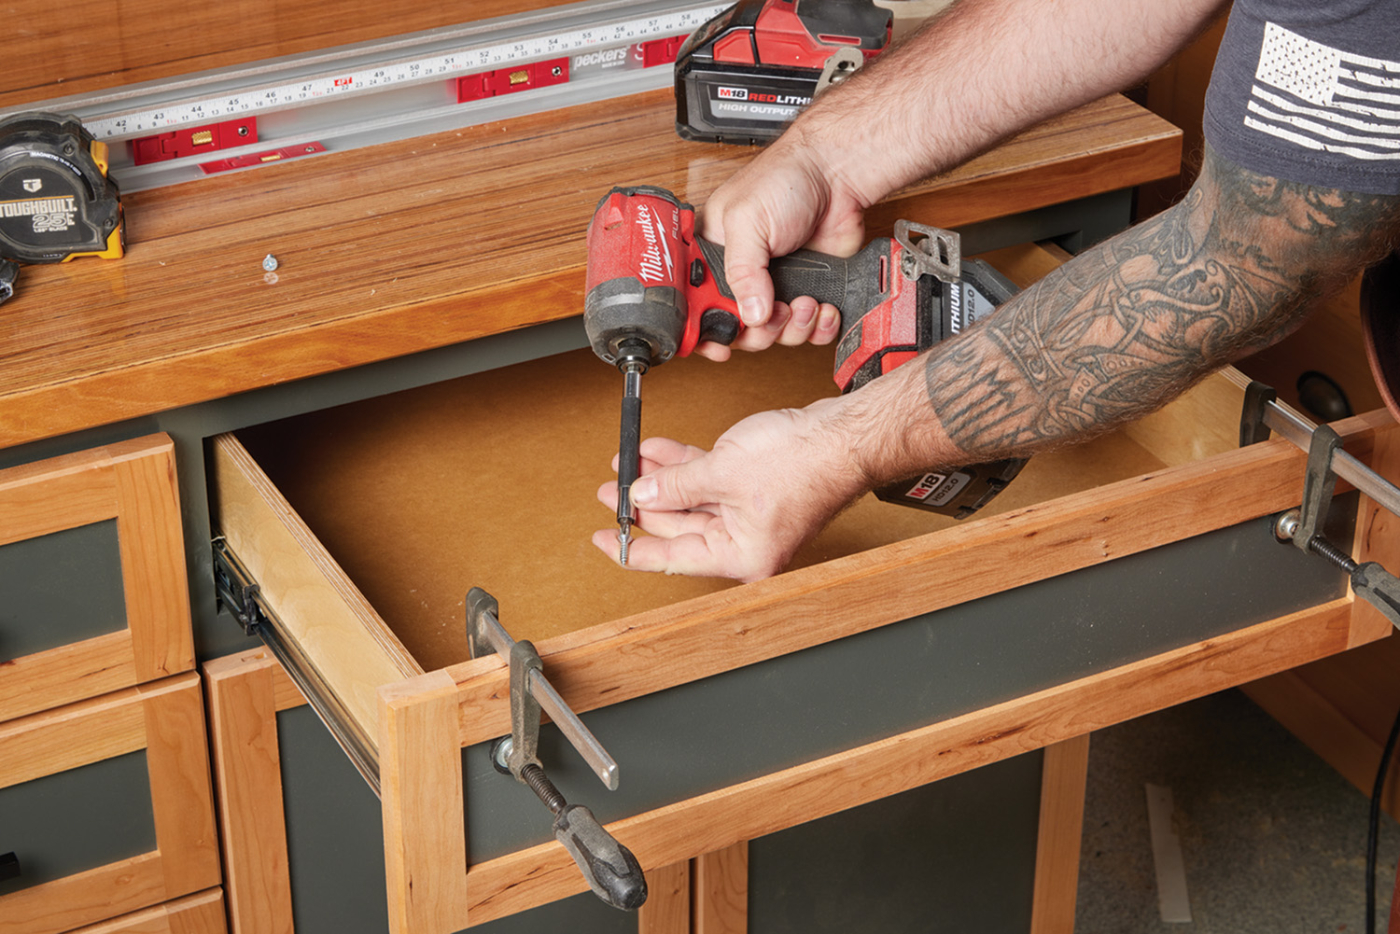
27 Finally, a pair of clamps are added before driving screws from the inside.
The final thing is to install hardware. I just picked out some simple black pulls from the hardware store. I like to make a story stick for installing pulls out of MDF.
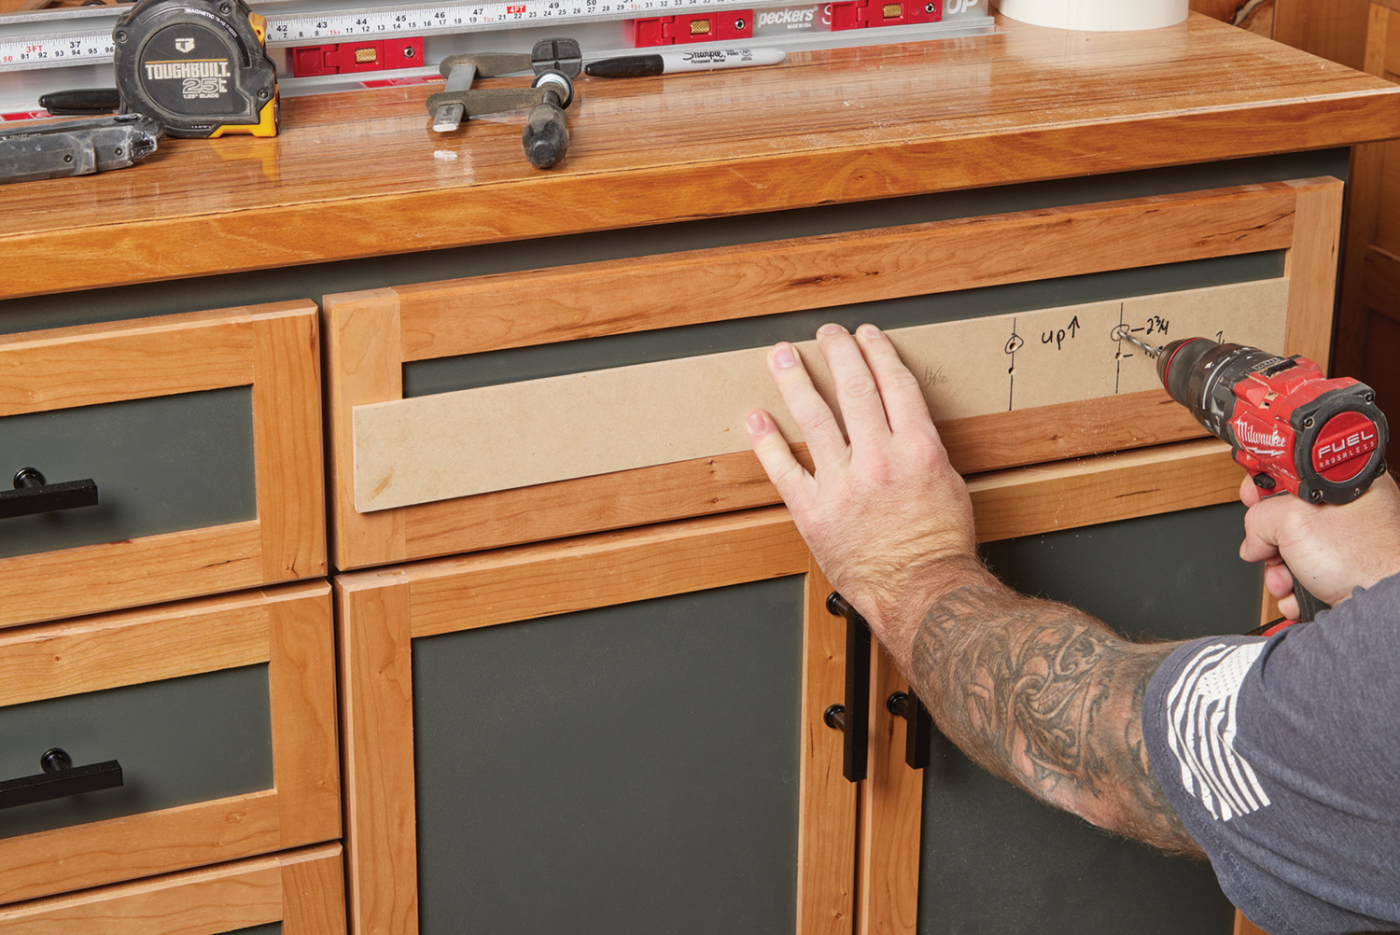
28 Use a template to quickly and accurately install the handles.
Now, I designed the sizes of the drawers and doors to house a lot of my larger power tools that are stored in Systainers. If you decide to build one of these for your miter saw (or heck, even just for a little extra storage in your shop), I invite you to customize your layout to what will work for you. And if you do that, please shoot me some pictures so I can see your take on this project.
Here are some supplies and tools we find essential in our everyday work around the shop. We may receive a commission from sales referred by our links; however, we have carefully selected these products for their usefulness and quality.


