We may receive a commission when you use our affiliate links. However, this does not impact our recommendations.

This nearly lost layout tool is surprisingly accurate and useful.
A surprising number of woodworking tools and furniture forms have been lost to time. Some for the better (the motorized coping saw?) and others for no apparent reason.
A lot of my research into early woodworking consists of examining old texts, paintings and drawings. Before the Industrial Revolution, almost everything was made out of wood, and almost everyone’s job had something to do with the material. So paintings are a rich source of information.
Several years ago, a fellow researcher named Jeff Burks told me to take a close look at Albrecht Dürer’s famous 1514 engraving “Melencolia I,” and my life has never been the same. This German engraving has a lot of interesting woodworking stuff in it, including an early straightedge, a now-disappeared fastener called the “clasp nail” and a fantastic try square.
After spotting the square in “Melencolia I,” Burks and I turned up similar images of it in dozens of paintings, drawings and sculptures all over Europe, from Sweden to Romania. The form appears quite a lot in the 16th century and disappears in favor of other forms, including the right-angle try square we use today.
The Square Details
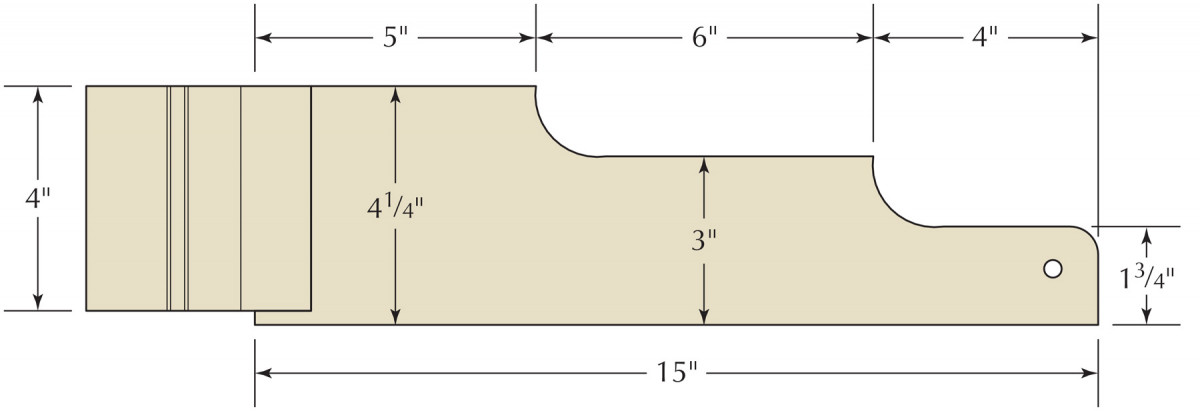
I had to build a Melencolia square. After scaling its dimensions from a variety of sources, I ended up with a square with a 15″-long blade and a stock with a bearing surface of about 4″. That might seem like an odd combination of dimensions, but I assure you that it is just what you want.
The 4″ bearing surface gives it the same potential accuracy as a Starrett combination square. The 15″-long blade makes it ideal for working on casework. And the wooden construction makes it lightweight and easy to true up.
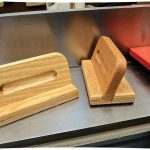
The stock, or handle, is moulded. Perhaps craftsmen made these squares from offcuts of moulding, chair rails or bannisters. We don’t know. The blade is usually tapered with decorative shapes. Perhaps these shapes aided layout on the job, perhaps they looked pretty or perhaps they helped keep the square true by exposing end grain to the atmosphere.
Here’s how I made mine (and I’ve made about 20 in the last two years).
Stick Some Moulding
Any profile. The exact profile isn’t important. Use scrap moulding or something from the home center. It’s just a place your hand grabs the tool.
I have made the moulded handles two different ways. I have grooved and moulded a solid piece of stock, and I have made the handle from two pieces of wood that are rabbeted and moulded. I prefer the second method, though it might not be authentic.
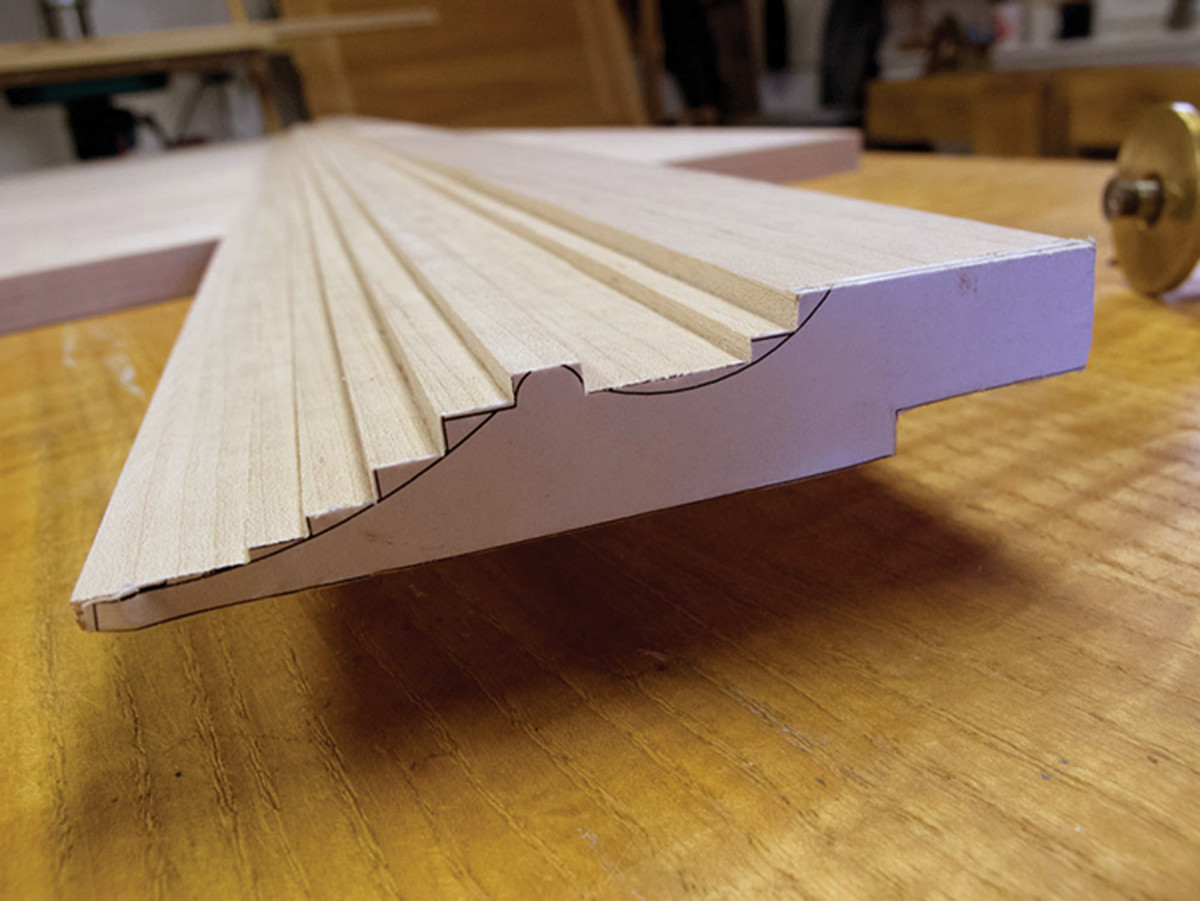
The moulding profile I used is adapted from several sources, including “Melencolia I.” It is a double cove with a fillet and bead. I made the moulding using hollow and round planes on a long stick of maple. Then I cut a 3⁄16“-deep x 1”-wide rabbet in the underside of the moulding.
I crosscut the moulding into 4″ lengths and glued two of them together to produce a handle with a 3⁄8“-wide x 1”-deep groove for the blade.
‘Melencolia’ Try Square Cut List
No.ItemDimensions (inches)Material
t w l
❏ 2 Handle pieces 3⁄4 4 4 Maple
❏ 1 Blade 3⁄8 41⁄4 15 Maple

Rabbet Layout
Elevation
The Blade
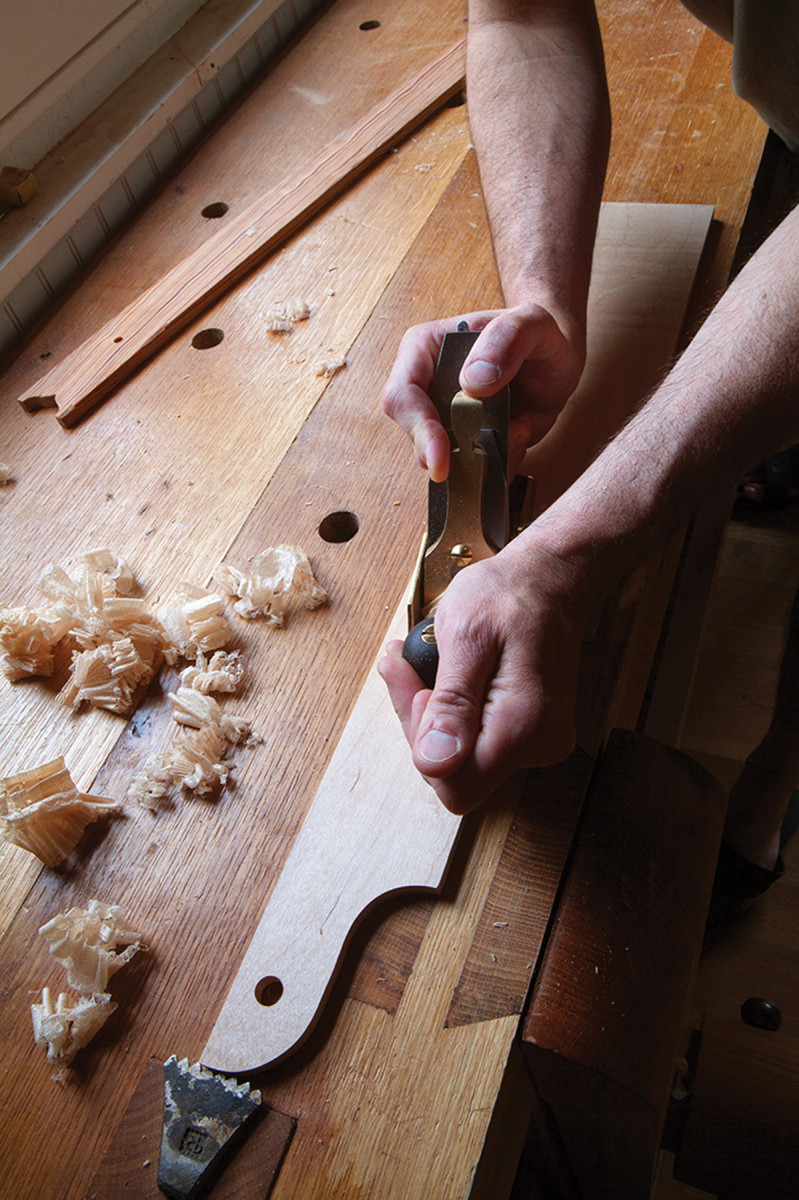
Plane to fit. Make the blade so it’s a wee bit over-thick. Then plane it to fit the groove in the completed stock.
The blade is 3⁄8“-thick quartersawn maple with straight grain. The blade is slightly wider (41⁄4“) than the stock is long (4”). The extra width makes it easy to true up the square (this was a feature we found in Romanian squares).
The exact shape of the blade is immaterial, though the coved steps are common. The hole at the end is a convenient hang hole, and it gives an animistic touch to the square.
I glued the blade into the stock. After the glue dried, I trued up the square like any square in the shop. I prefer to true the blade instead of truing the handle. If you true the handle, you have to true up two surfaces instead of one. That leads to error.
Finally, I finished the square with a homemade mixture of equal parts varnish, mineral spirits and boiled linseed oil – my favorite finish for shop projects.
This square has traveled all over the world with me – and I’ve used it on every project since I’ve built it, from knocking down rough stock to laying out dados to confirming the squareness of a glue-up. It is more nimble than a framing square, and it lies flat on the work so you can focus on striking a perfect line with a pencil or knife.
Our ancestors were whip-smart when it came to working wood, and the Melencolia square is more evidence that staring at old paintings can reward your work in the shop.
Plan: Download a SketchUp model of this project from our 3D Warehouse.
Here are some supplies and tools we find essential in our everyday work around the shop. We may receive a commission from sales referred by our links; however, we have carefully selected these products for their usefulness and quality.