We may receive a commission when you use our affiliate links. However, this does not impact our recommendations.
In the 1970s, wooden counters and tabletops made from narrow laminated boards—a staple of restaurant kitchens—began to appear in upscale residential kitchens. These trendy surfaces came with the catchy name “butcher block,” which tied in perfectly with the growing interest in practicing the culinary arts at home. In fact, these work surfaces are only distantly related to the classic butcher shop chopping block for which they’re named—but they’re far more useful.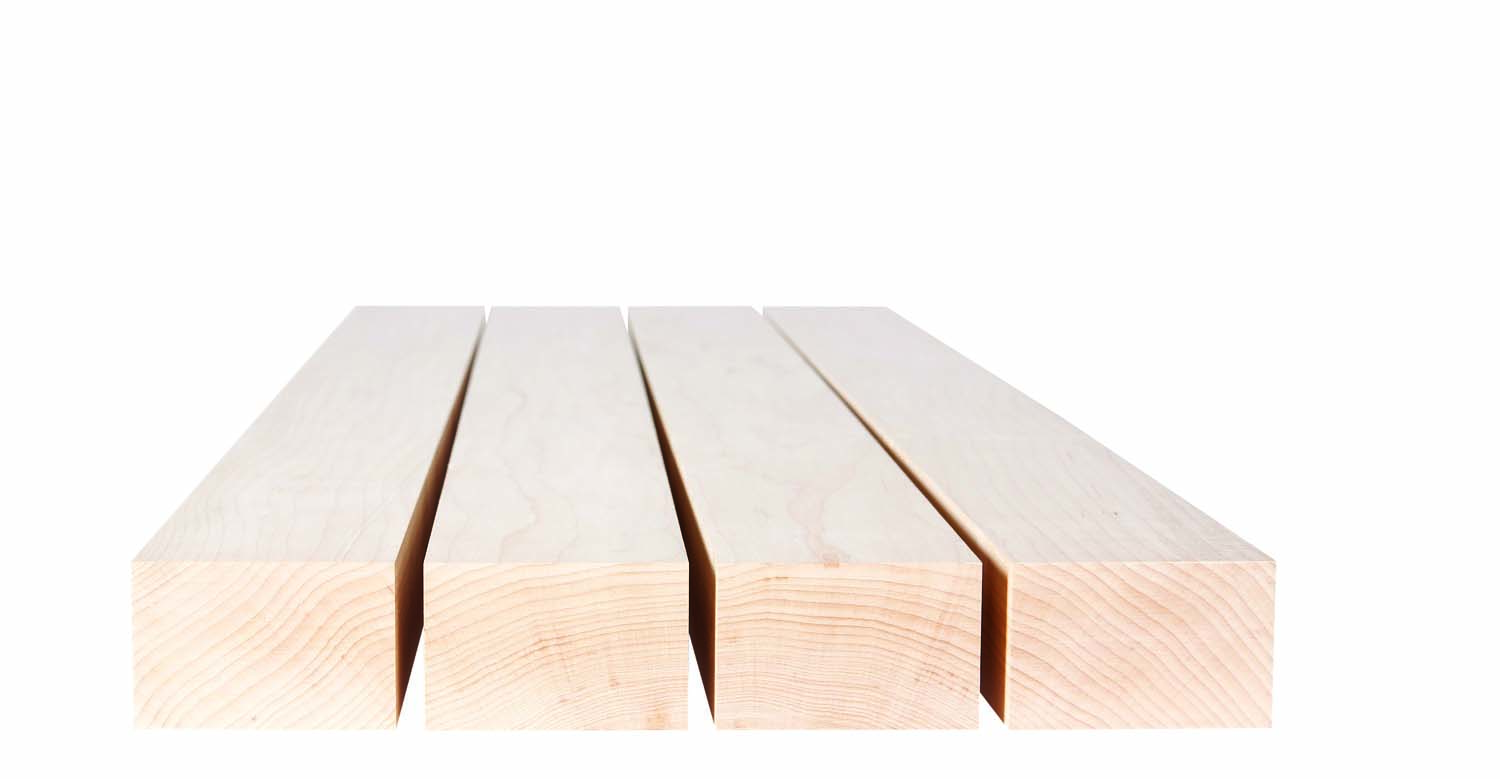
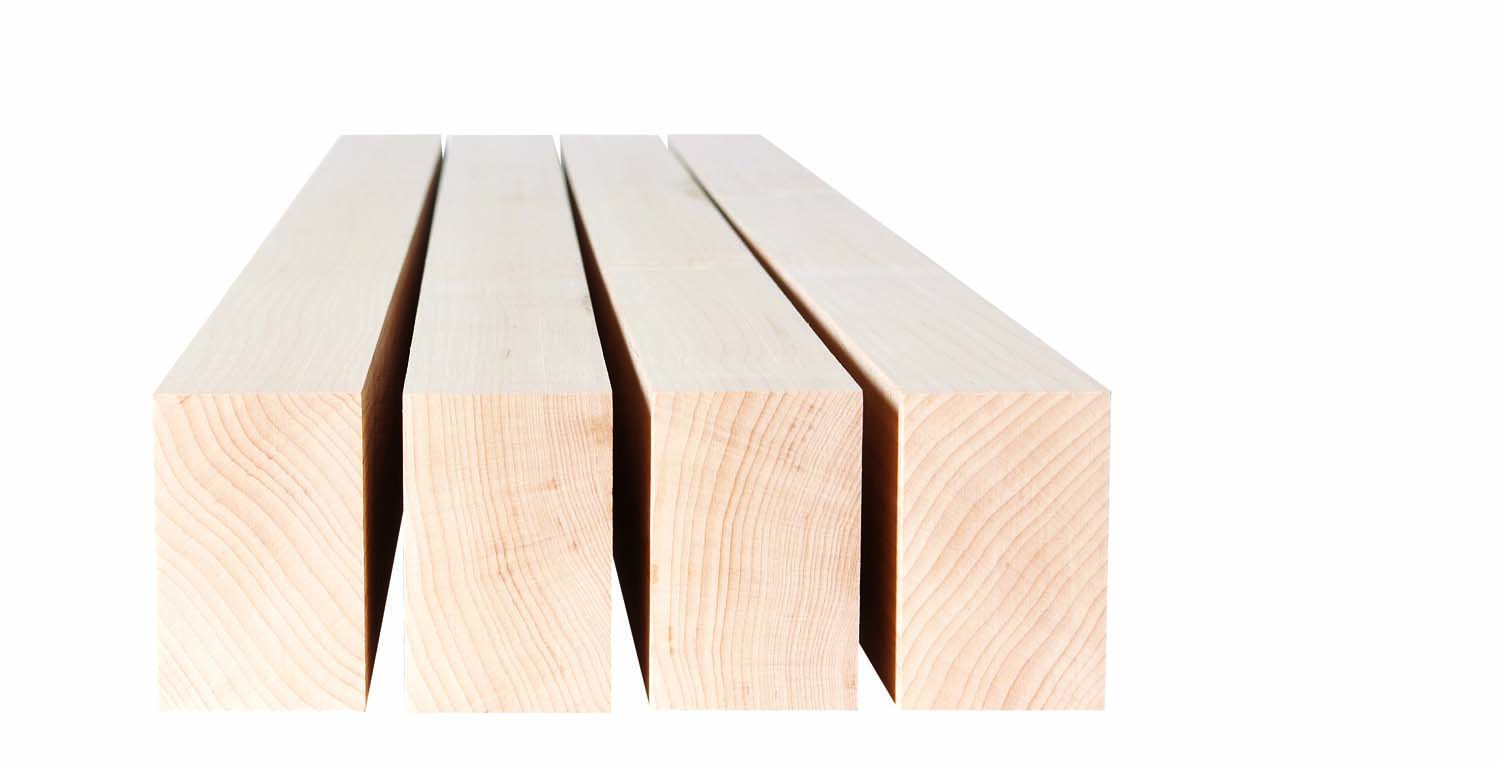
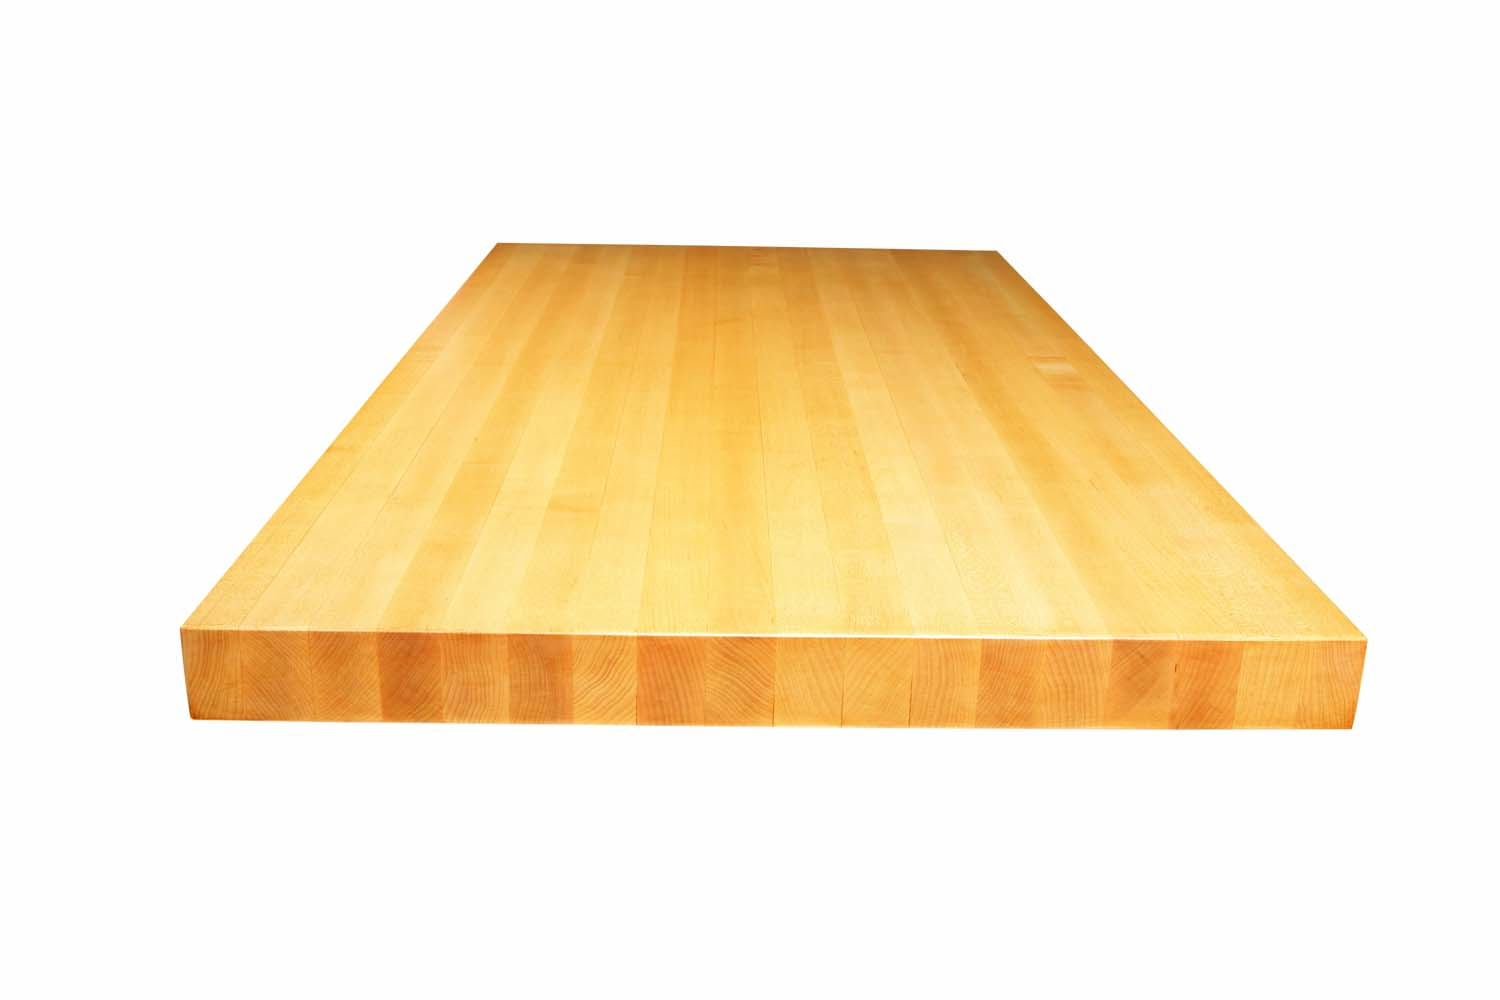
Fig. A. Butcher Block Construction Rip a plain-sawn board into narrow pieces. Then stand these pieces on edge to create the butcher block’s rift-sawn surface. The width of the narrow pieces determines the thickness of the assembled butcher block. The board’s thickness determines the width of the butcher block’s laminations.
Construction
You can make a perfectly good butcher-block top by gluing together leftover strips of wood. But this story focuses on a construction method that’s more elegant and purposeful (see Fig. A). This method creates a top that will stay flat, because its surface is entirely riftsawn (or even quartersawn) and stabilized by multiple glue joints. Such a surface much less likely to cup or warp than a plainsawn surface and will exhibit noticeably less seasonal movement. It also has an orderly appearance, because all of its pieces are the same thickness, show straight grain and are oriented so the grain runs in the same direction.
This method also saves money, because it allows creating a thick solid-wood top without using thick lumber—which is both costly and hard to find. Woodworkers will recognize a top made this way from traditional European-style workbenches as the classic surface for working wood
Tools
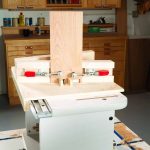
Because the building process consists mainly of ripping, jointing, clamping and planing, you’ll need a well-equipped shop. Make sure to have a tablesaw outfitted with a rip blade, a 12″ planer, a long-bed jointer (8″ width is best; plan to add infeed and outfeed support tables, if necessary), a bucket full of pipe clamps, a quart or two of waterproof glue and a clamping surface that’s flat and suitably sized. Plan to use your circular saw and router, too.
Rip narrow pieces
Calculate the number of boards you’ll need to create a butcher-block surface of the desired dimensions. Then begin by milling the boards flat and to thickness. The surface shown here was made using 8/4 hard maple milled to 1-3/4″ thickness, but you can use almost any wood (except knotty wood) and stock of any thickness. Thinner stock just requires more laminations to create of equal width.

Photo 1. Mark the slope of the grain across both faces of each plain-sawn board. Then joint one edge flat, following the grain.
Joint one edge of each board flat after determining which way the grain runs. Maple grain can be hard to read, so make passes from both directions and go with the direction that provides the best result. Then draw an angled line across both faces of each board to indicate the slope of the grain (Photo 1). You’ll use these lines throughout the building process to orient the pieces to minimize tearout. Make sure the lines on both faces slope in the same direction.
Install a rip blade in your tablesaw. A rip blade is specifically designed to cut with the grain. It will cut cleaner, faster and with less effort than a general-purpose or combination blade. Set the fence to cut the board into narrow pieces. Some of these pieces are likely to bow as the board is cut, so plan to cut them at least 3/16″ wider than the top’s final thickness. Due to the bowing that’s likely to occur, it’s essential to install a splitter or a riving knife for this operation, along with anti-kickback pawls, to reduce the risk of a dangerous kickback.
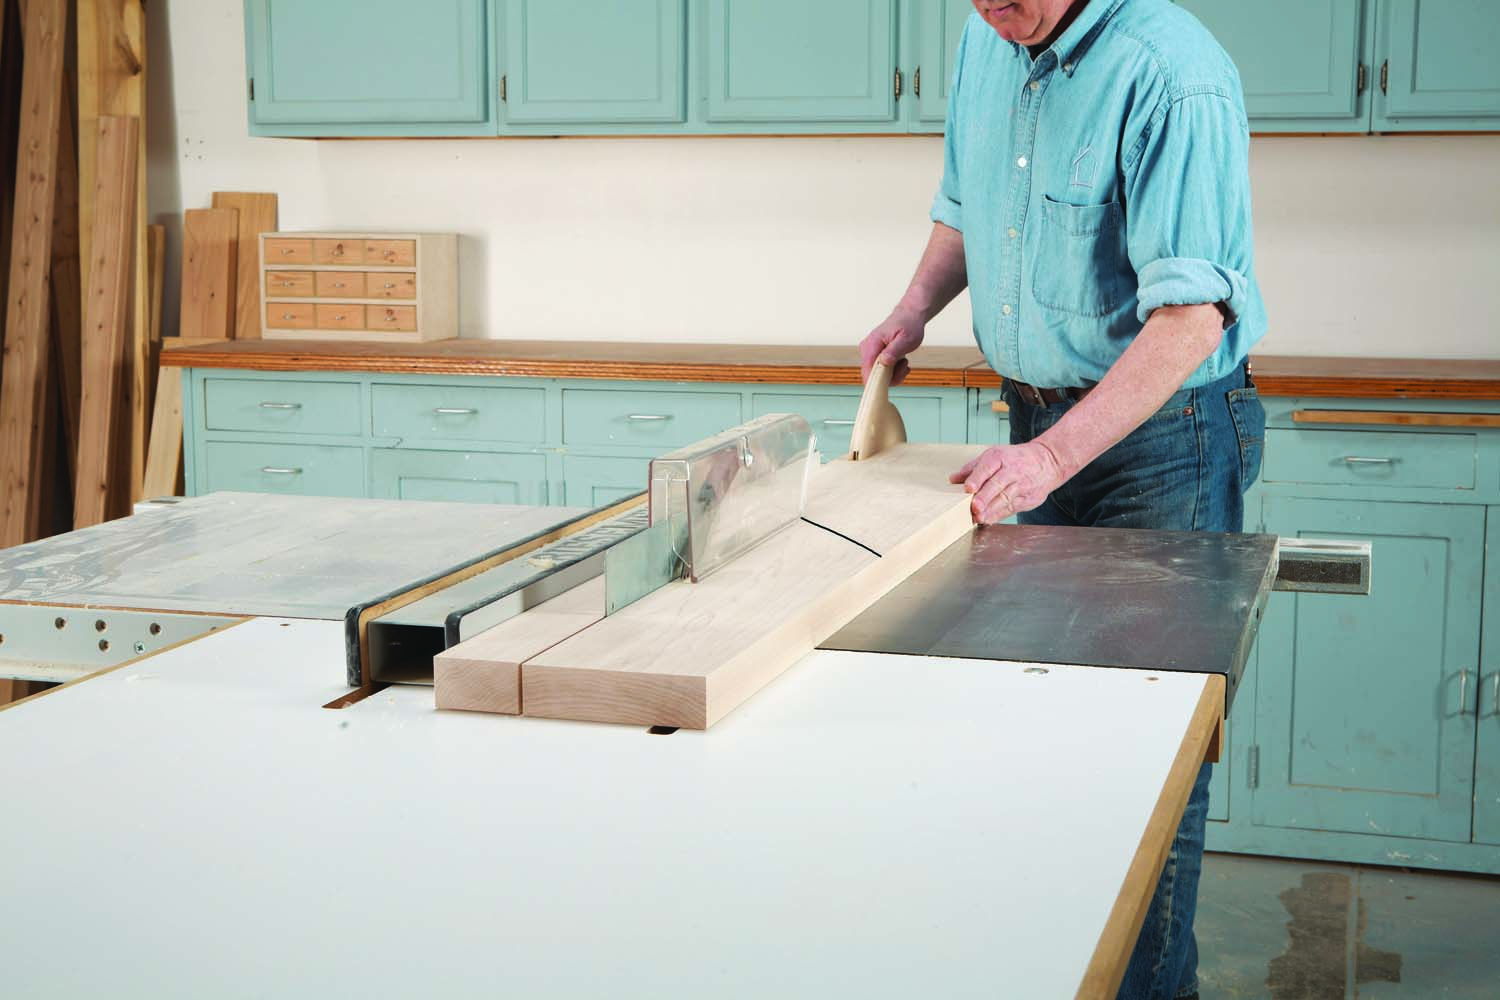
Photo 2. Rip each board into narrow pieces. The width of these pieces determines the thickness of the top.
Cut the first narrow pieces after orienting the jointed edge of each board against the fence (Photo 2). Set the narrow pieces aside. Return to the jointer and joint the sawn edge of each plain-sawn board. Then make another ripping pass. Continue until all the boards have been cut into narrow pieces. Then joint one edge of each narrow piece (Photo 3) and rip them all to the same width.
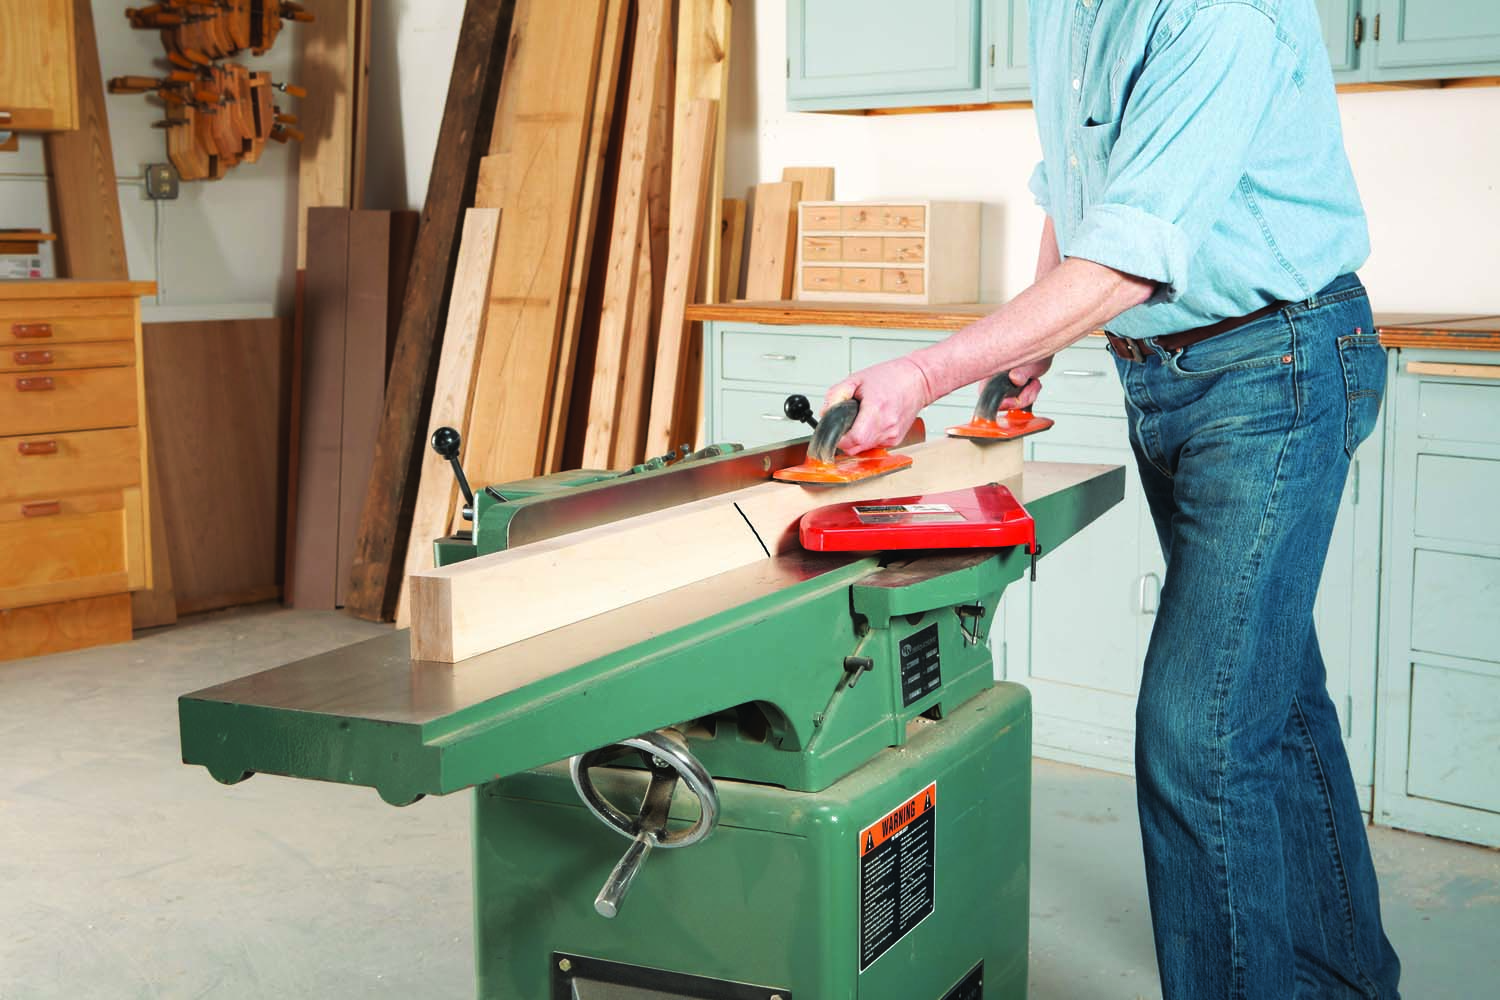
Photo 3. Joint one edge of each narrow piece, following the grain according the mark made earlier. Then rip all the narrow pieces to the same width.
Assemble in sections
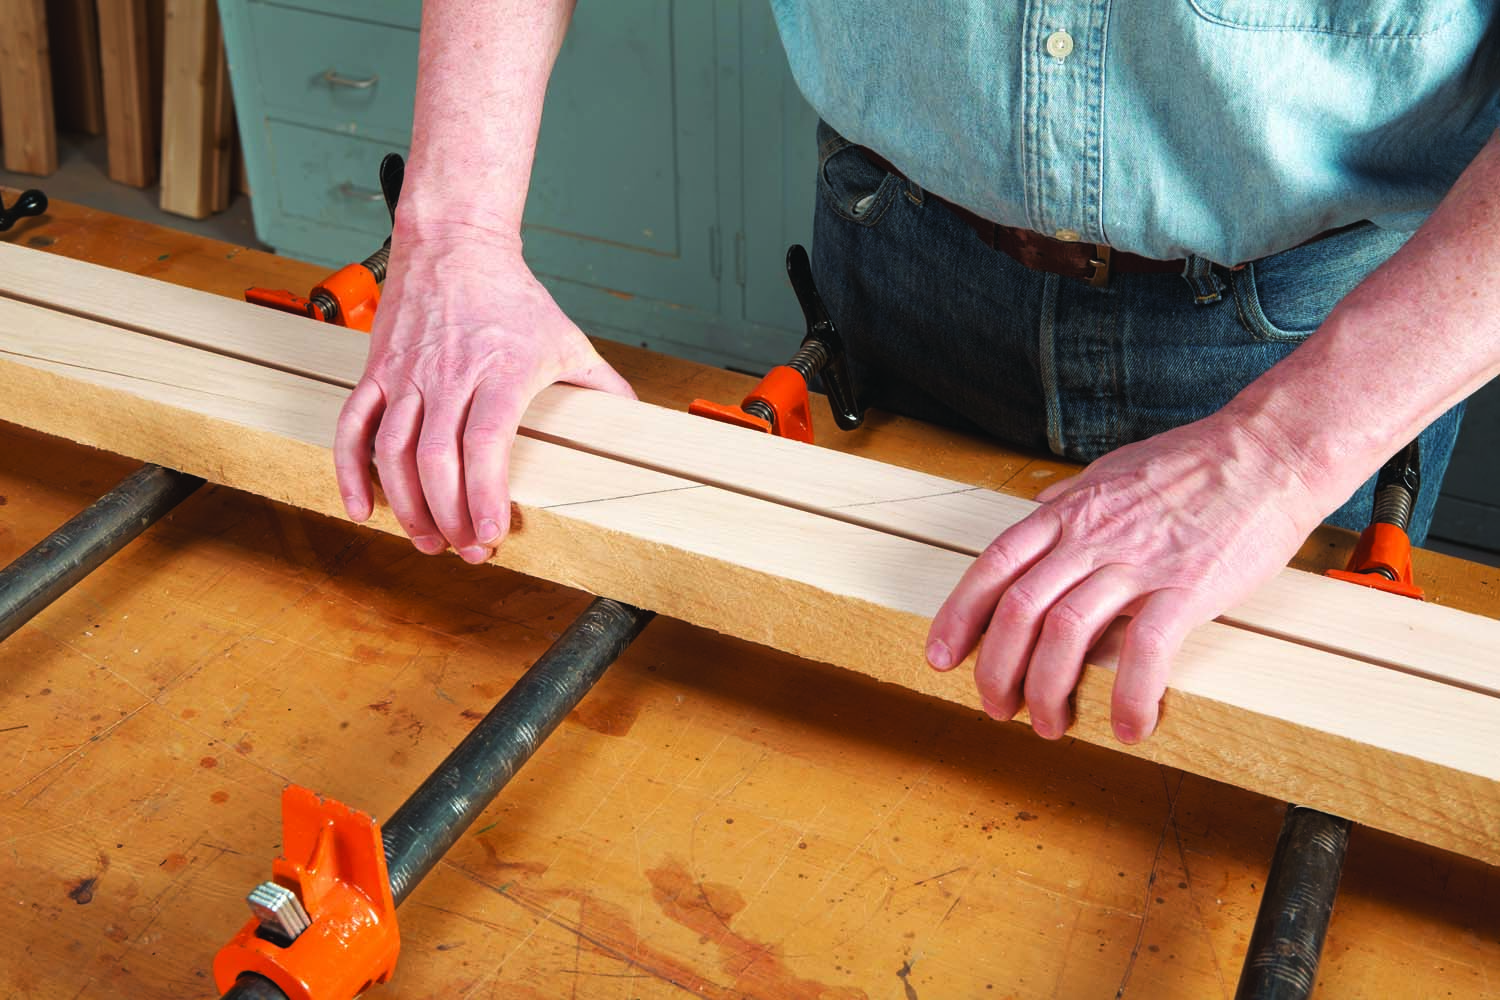
Rip the narrow pieces to rough length after dividing them into sections that will fit your planer. If you come up short, dig through your offcuts; you may be able to use some of the pieces you discarded. Leave one piece in each section extra long to accommodate the planer’s snipe. Clamp each section together with the pieces on edge, using the marks made earlier to make sure all the grain runs in the same direction. Orienting the grain the same way helps to minimize tearout when the section is planed during the next step. It also creates a more uniform appearance.
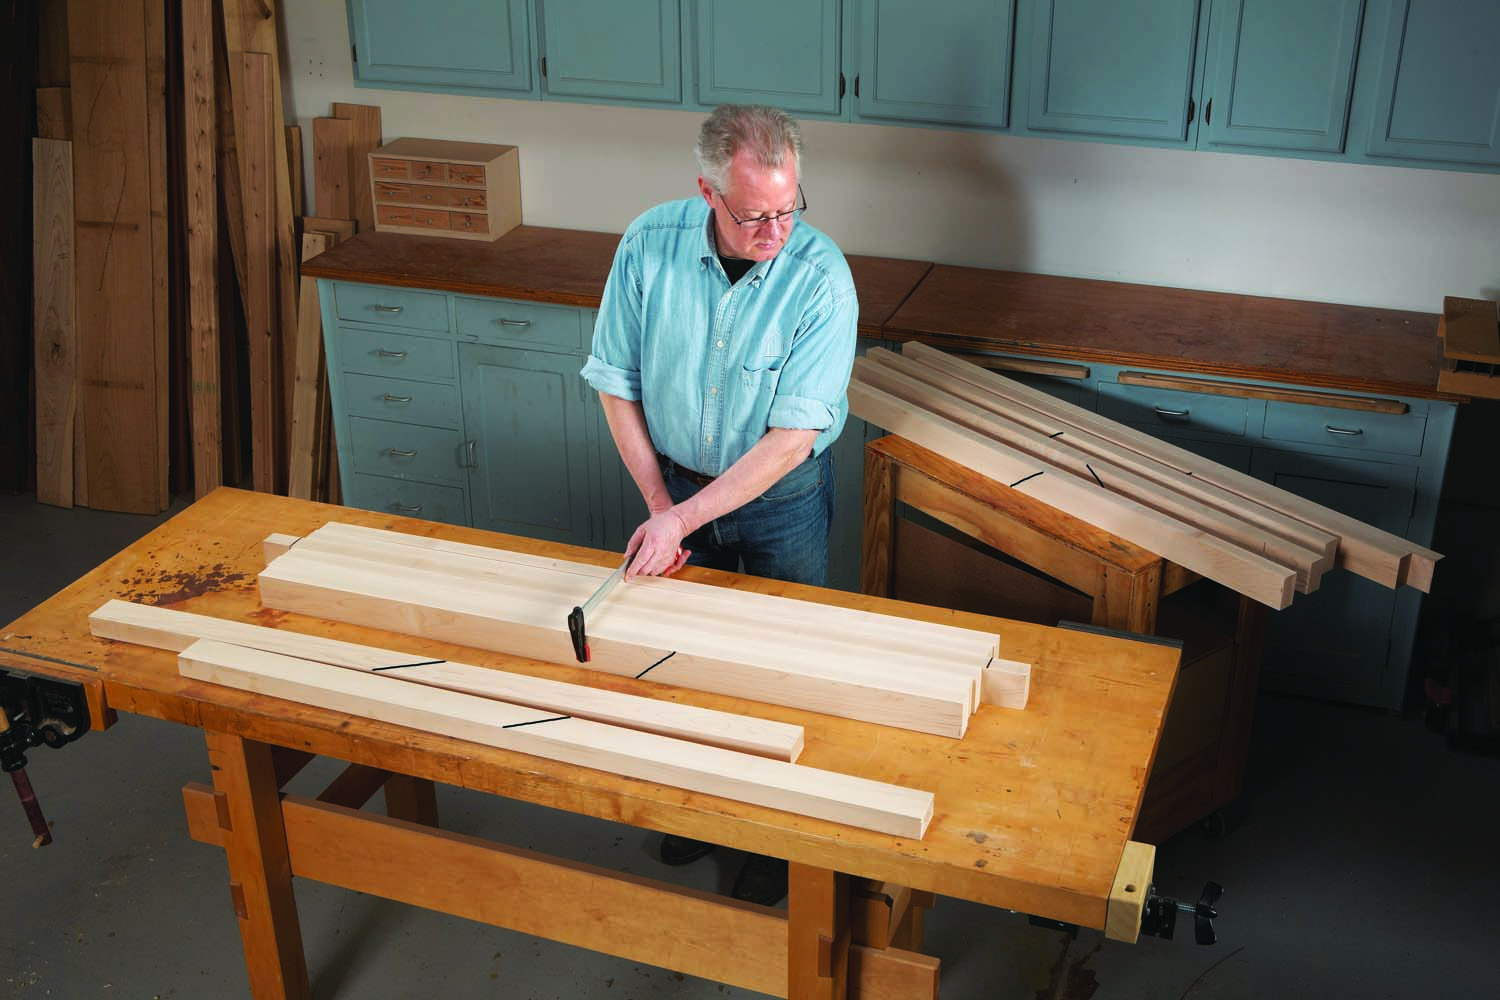
Photo 4. Group the pieces in sections sized to fit your planer—including a long piece to eliminate planer snipe—and test the joints by clamping the center. Gaps at the ends indicate joints that require refitting.
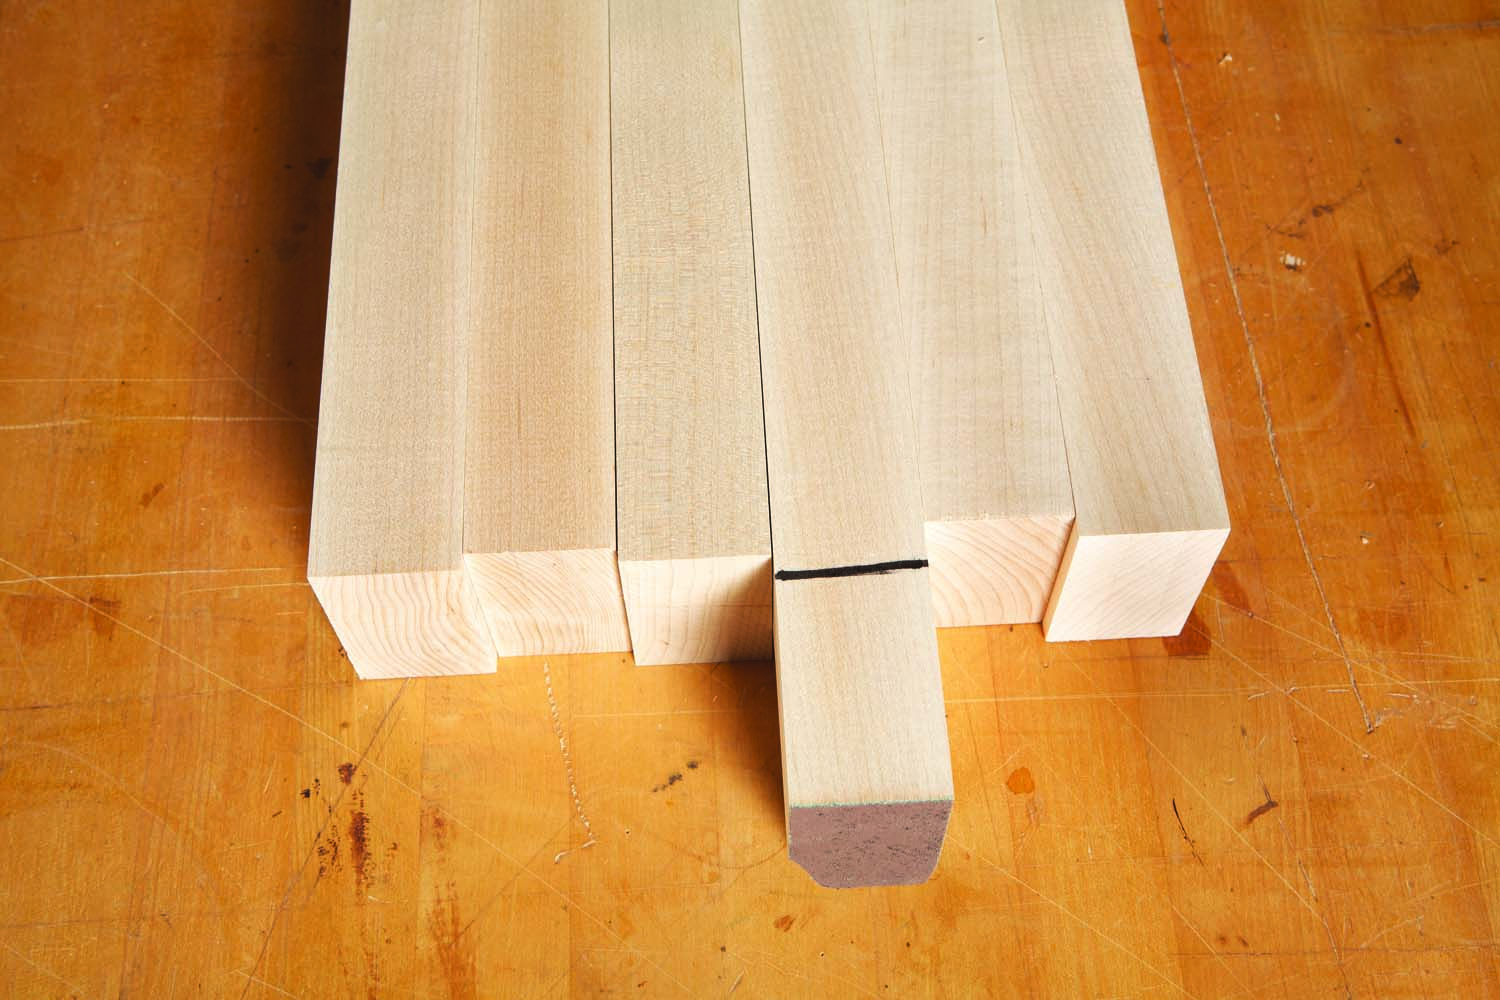
Rearrange the pieces as necessary—while maintaining the correct grain orientation—to minimize the gaps at the end (Photo 4). Then mark the location of each narrow piece so you can correctly reassemble the section. Remove the clamp and carefully joint the faces of the first pair of pieces to eliminate the gap between them. Take your time with this step. Plan to glue each section together one or two joints at a time (Photo 5). I use waterproof glue.
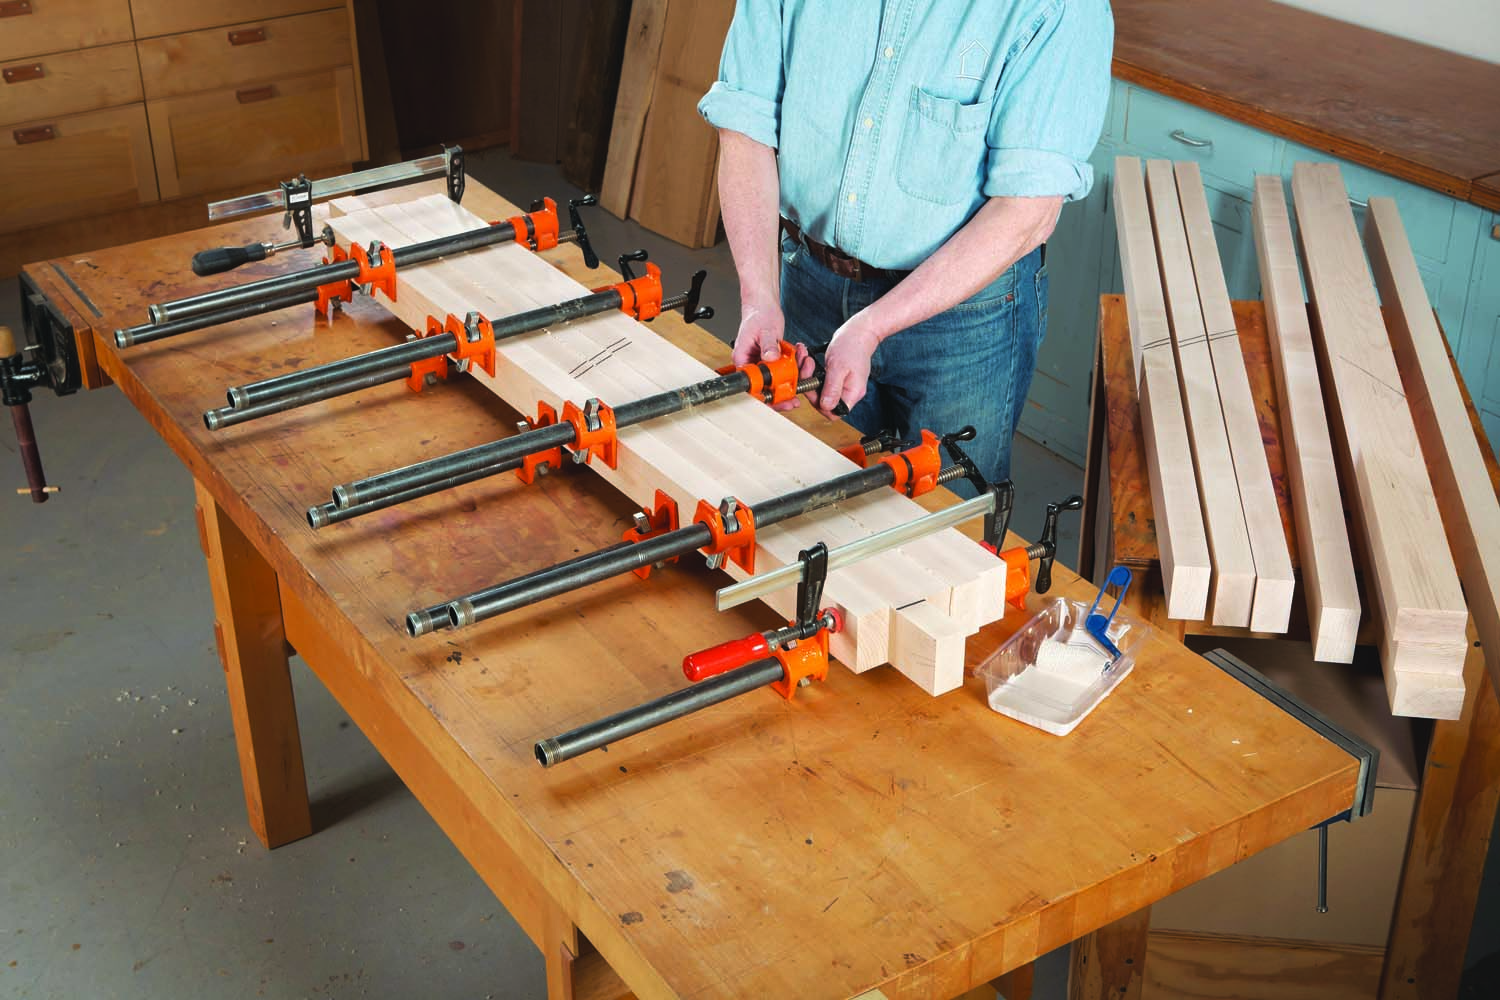
Photo 5. Glue each section in stages, two or three pieces at a time, so you can pay attention to each joint. Use a roller to spread the glue and cauls to spread the clamping pressure.
Flatten each section
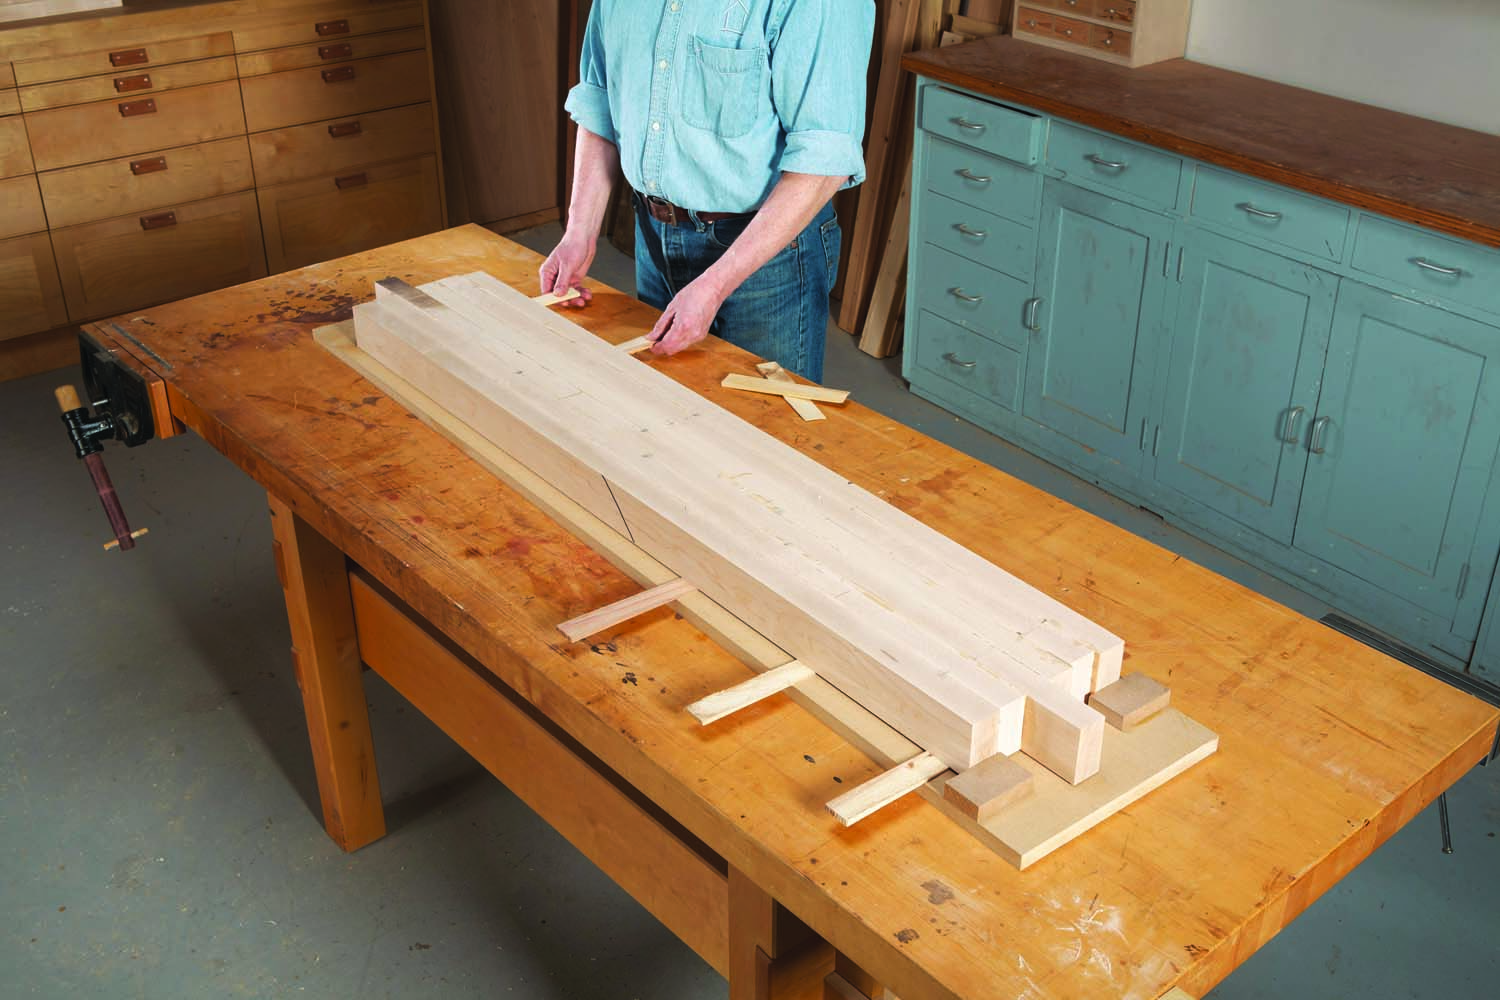
Photo 6. Make a sled to support each section so you can use the planer to flatten its top face. Position the section against stop blocks on the front end. Then install wedges under the high spots.
Joint one face of each section flat, using the planer and a sled (Photo 6). The sled is just a piece of MDF that’s longer and wider than the section, with stop blocks attached at the front end. Orient the section for planing with the grain and butt it against the stop blocks, with the anti-snipe extension between them. Install wedges under all the high spots. Note that the section shown in the photo has a twist, which could cause real problems unless it’s removed. Secure the wedges to the MDF and the section with hot-melt glue. Set the planer to make a very light pass and then feed the assembly through it, stopped end first (Photo 7). Make additional light passes until the surface is flat.
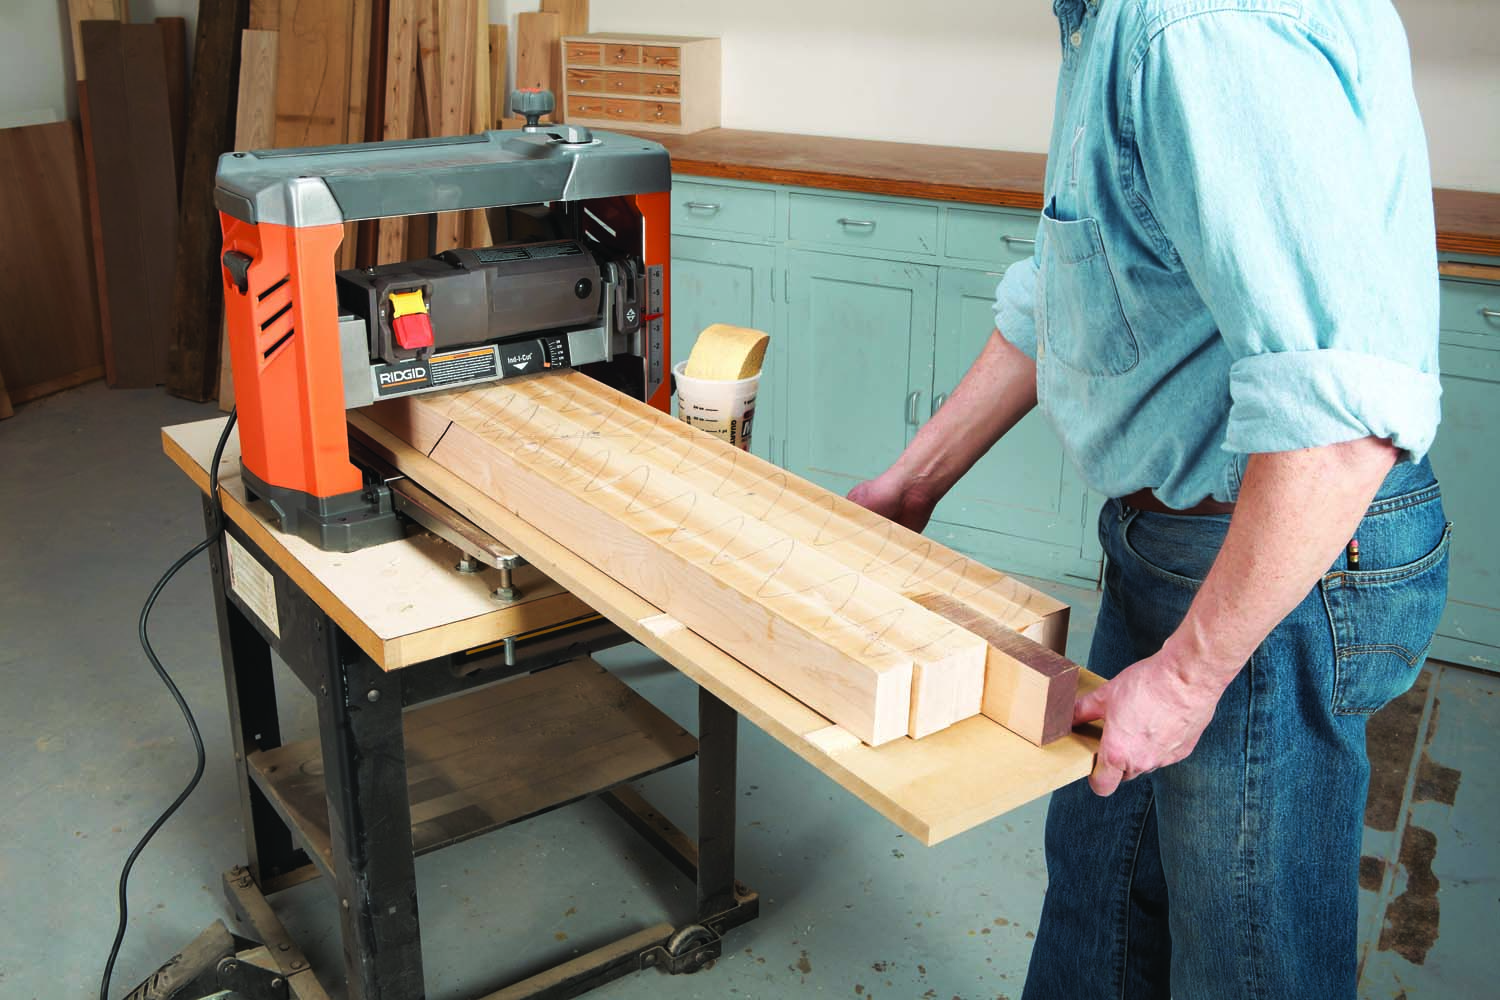
Photo 7. Cover top of the section with squiggly lines before planing it. When the lines are gone, the surface is flat. Minimize tearout by dampening the surface before each pass.
Tear-out at this stage could cause real problems. Here’s a neat trick that will significantly reduce the risk: Simply dampen the surface with a sponge just before you plane it. You’ll be amazed by the results. After flattening one face of each section, plane them all to final thickness. You don’t need the sled for this step, but it’s a good idea to dampen the surfaces before planing.
Glue together the sections
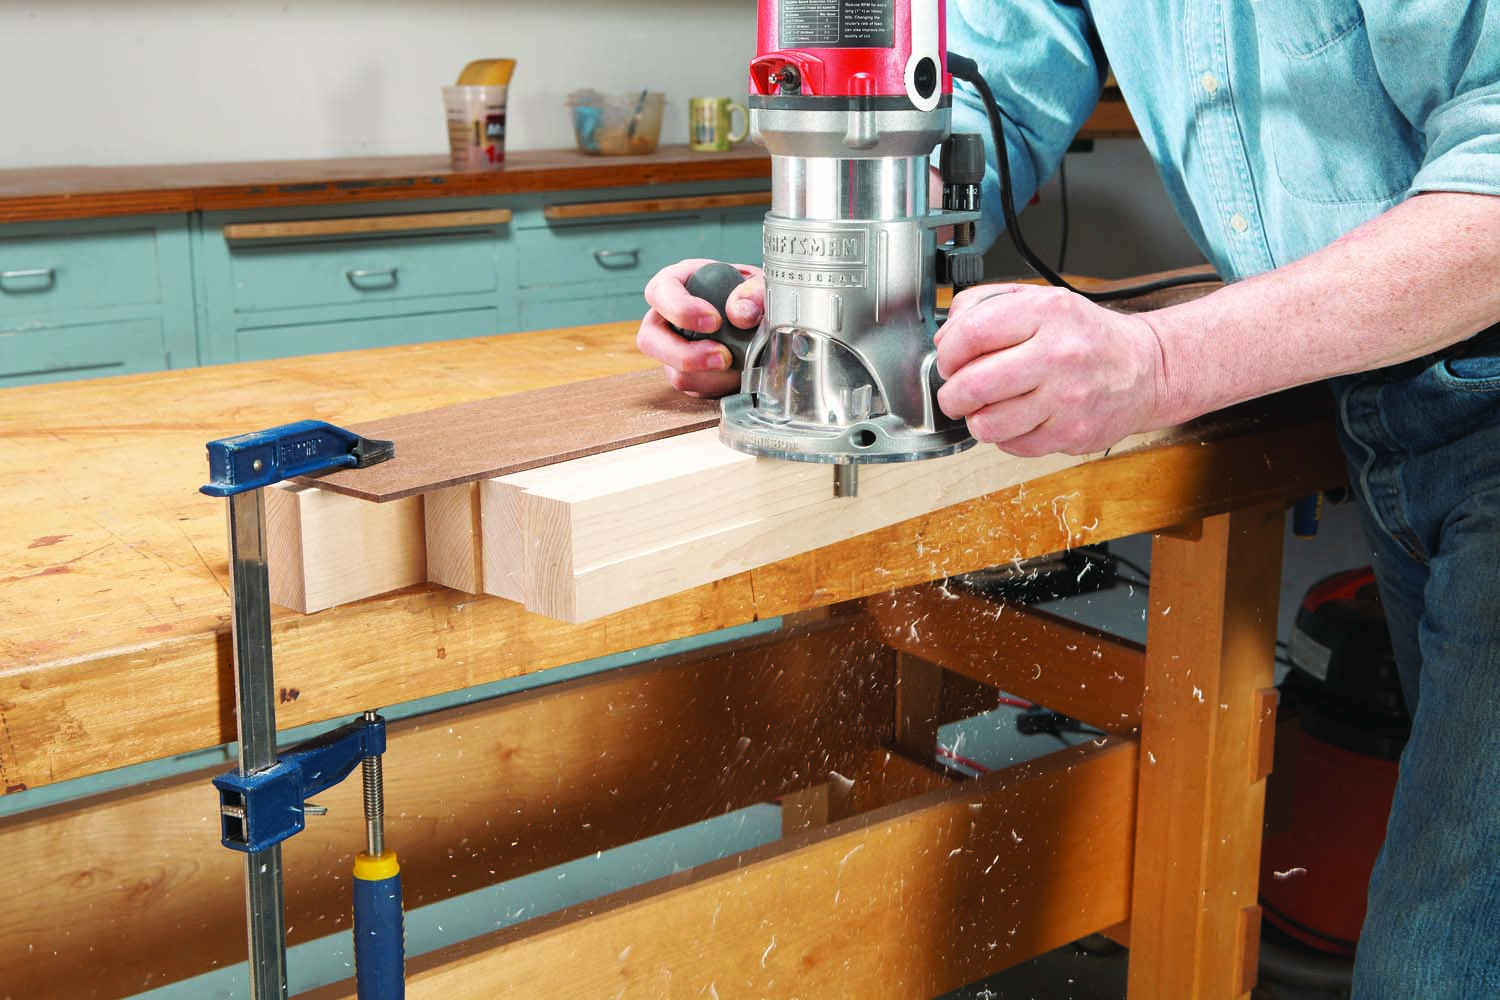
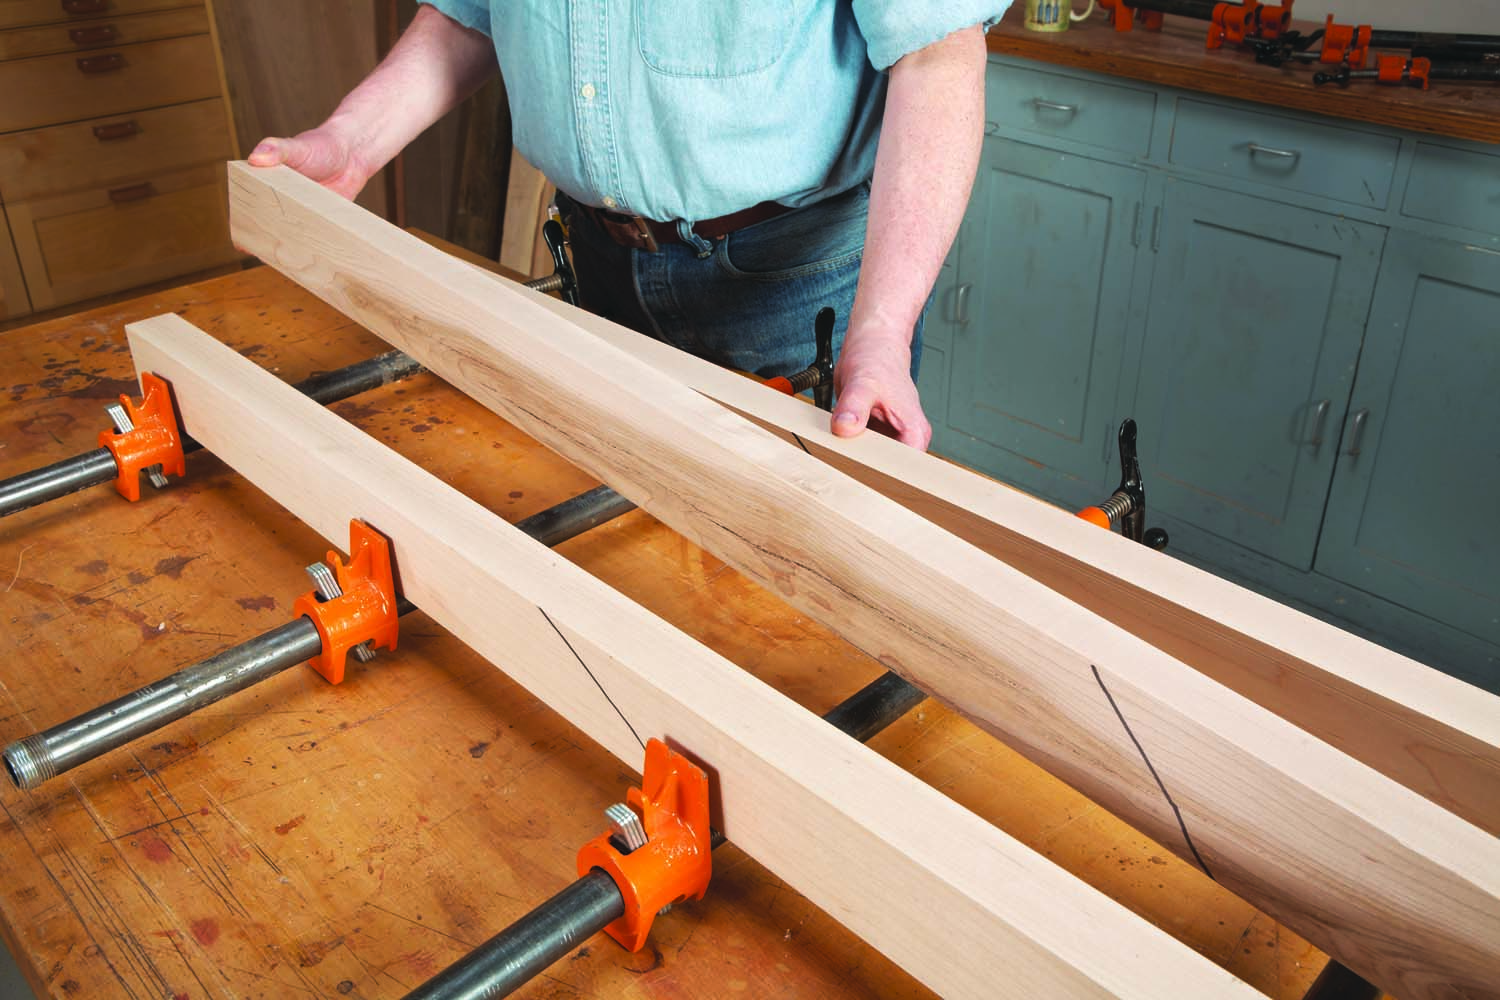
Photo 8. Joint both edges of each section. If the section is too long or heavy for your jointer, use a straightedge and a router and make two passes. Start by cutting a shallow rabbet.
Joint both edges of each section. If the sections are too long or too heavy for your jointer, a good alternative is to use a router and a straightedge (Photo 8). The straightedge can be a board with a jointed edge or the factory edge of a piece of hardboard or MDF.

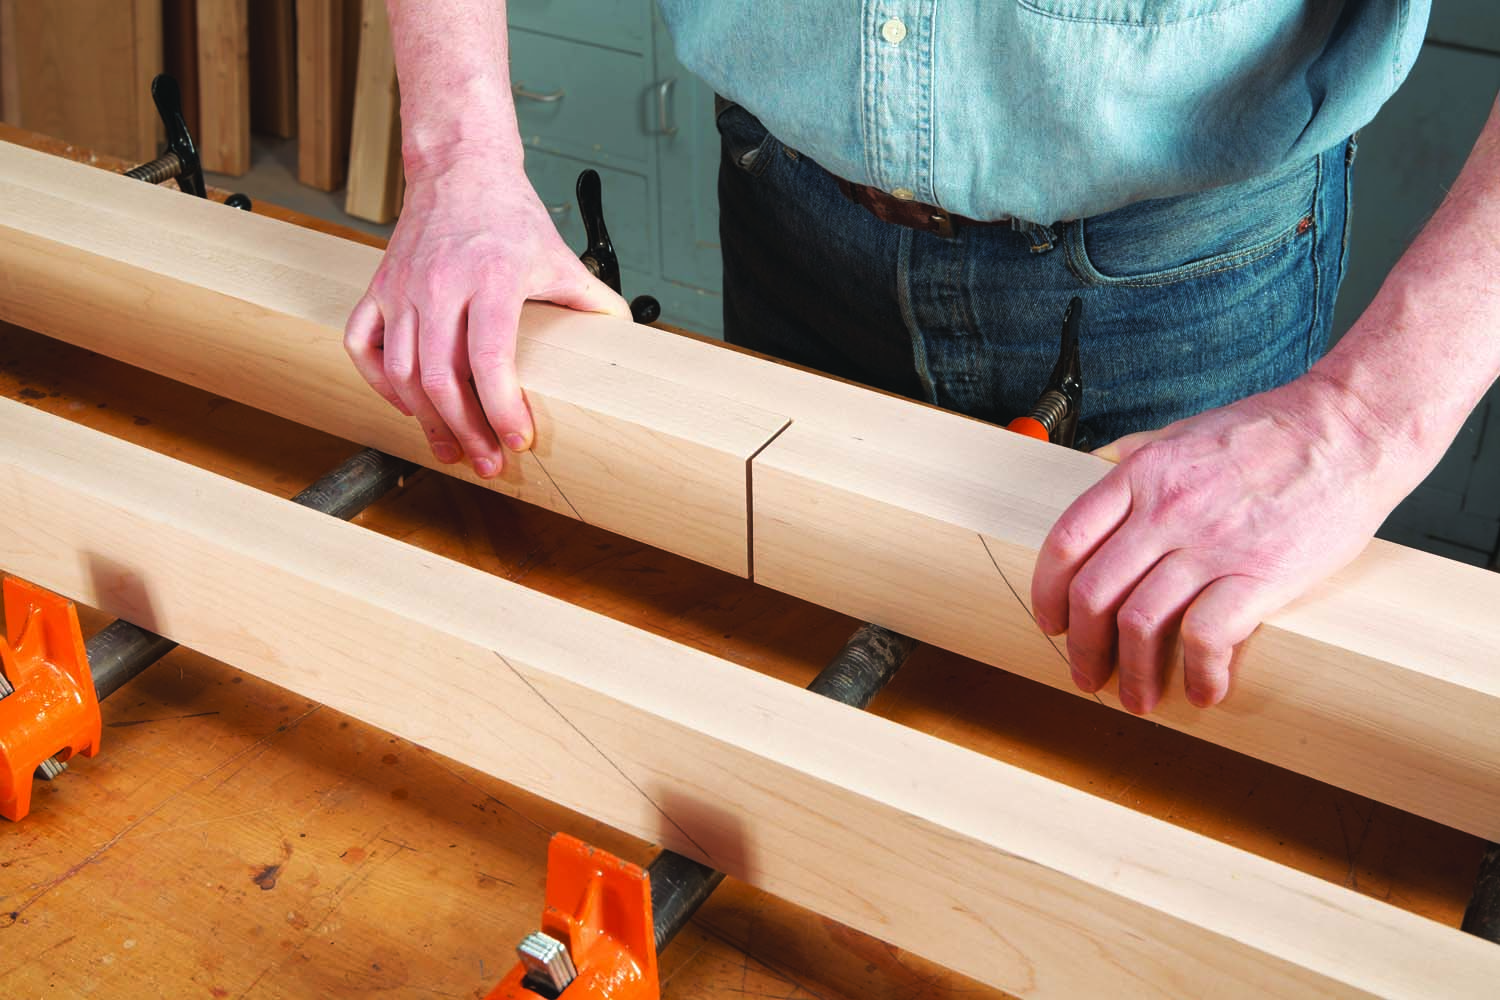
Photo 9. Flip over the section and use a flush-trim bit to finish jointing the edge. Position the bit so its bearing rides on the rabbet.
Position the straightedge for a shallow cut and make sure it’s long enough to support the router at the beginning and the end of the pass. A thick section like the one shown here will require two passes. Install a large-diameter straight bit to make the first pass and cut a rabbet that extends slightly beyond the midpoint of the section’s thickness. Then install a flush-trim bit to complete the cut (Photo 9). Re-mark the grain direction on the edge immediately after jointing.

Photo 10. Complete the top by gluing the sections together one joint at a time so you can make sure their faces are flush. Clamps at both ends help to keep the joints aligned.
Clamp the sections together with the grain oriented in the same direction. Inspect the joints and make any necessary adjustments to eliminate gaps. Make sure the surfaces are flush when you glue the sections together (Photo 10).
Cut to length and finish
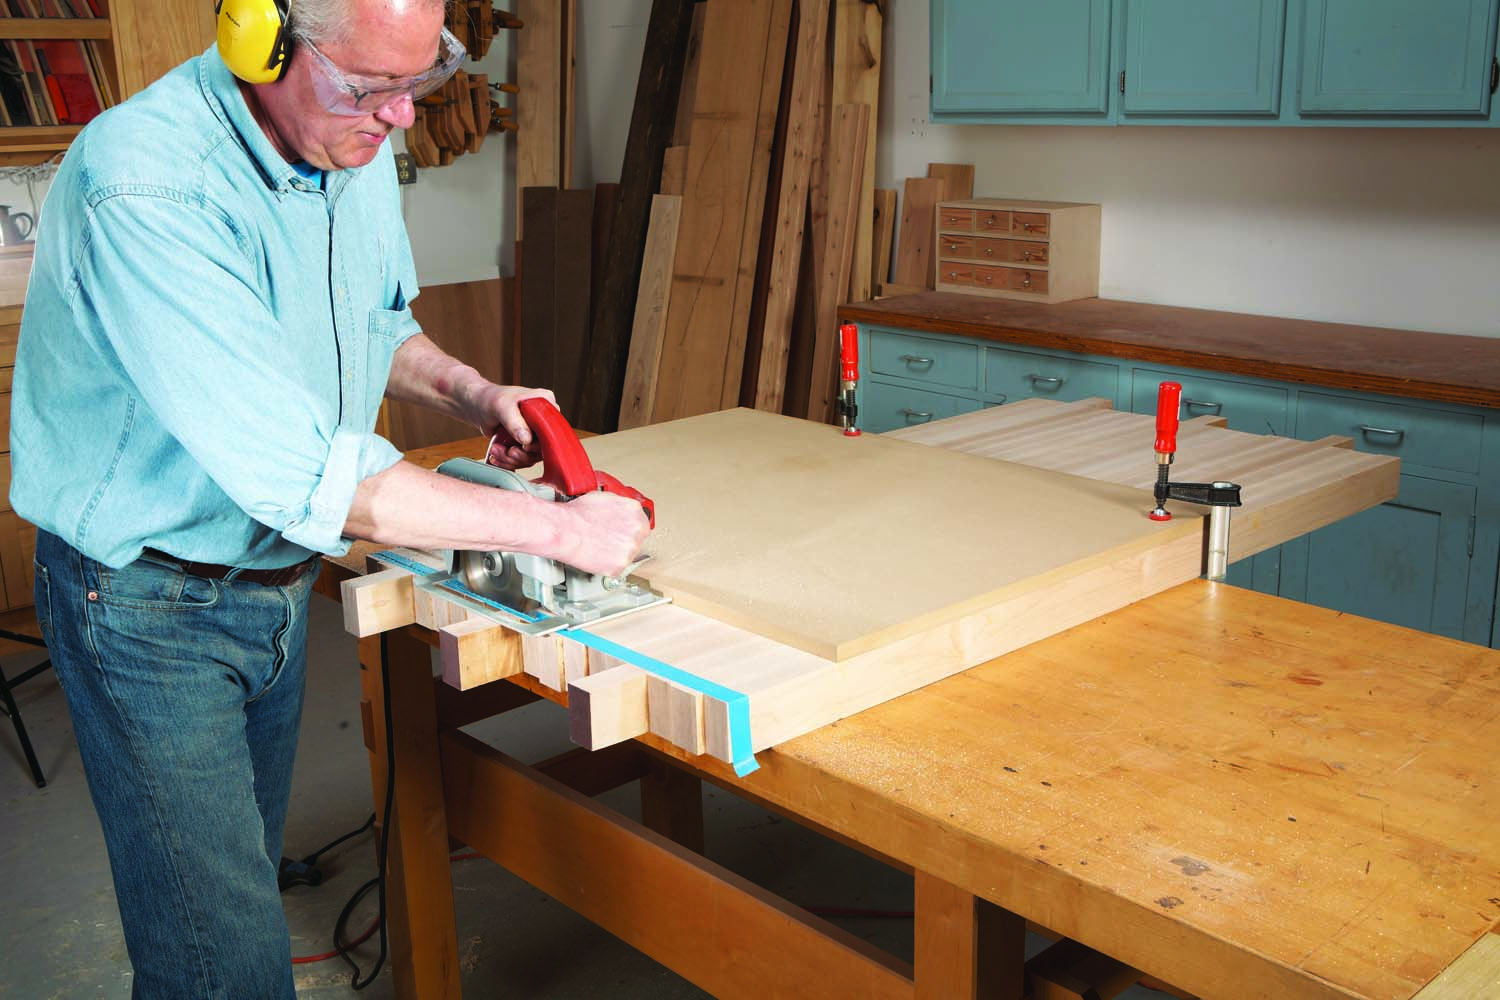
Photo 11. Square the ends using a straightedge and a circular saw. This straightedge has a factory corner, so it’s clamped flush with the edge of the butcher block.
Check the joints after removing the clamps and scrape or sand them flush, as necessary. Then cut the butcher block to final length (Photo 11). For the best results, spend $15 for a new crosscut blade. Rip the block to final width and remove the saw marks by routing as before or by sanding.
Sand the end grain, starting with 80 grit to remove the saw marks. Then work your way through the grits until the sanding scratches are invisible. Why? Because sanding end grain to this level makes it look as good as face grain—end grain can be beautiful!
Finish-sand the top (and the sawn edge) to the same grit as the end grain. Then ease all of the block’s sharp edges and corners using a router equipped with a 1/8″ round-over bit. Lightly sand the rounded edges, as necessary, and then remove all the sanding dust and apply a finish. For looks and durability, polyurethane is the best choice.
Sidebar: Get the Most from Your Boards
Using plain-sawn boards to build a butcher block can be costly, so it’s important to make the best use each board. First, have a plan when you go to the lumberyard. Know the width of the narrow pieces you plan to rip the boards to, so you can minimize waste when you select the boards. Here are three more tips to help keep lumber costs in check.
Create additional lengths of narrow stock by gluing together offcuts left by ripping. Then joint one edge of this glued piece and rip to width as for the other narrow pieces.
Hide ugly stock inside the section. Only the top and ends have to look good. Avoid using stock that’s twisted or contains unstable wood.
Butt short pieces together inside the section. Glue the butted joint and clamp it lengthwise from end to end when you glue the section together.
Here are some supplies and tools we find essential in our everyday work around the shop. We may receive a commission from sales referred by our links; however, we have carefully selected these products for their usefulness and quality.