|
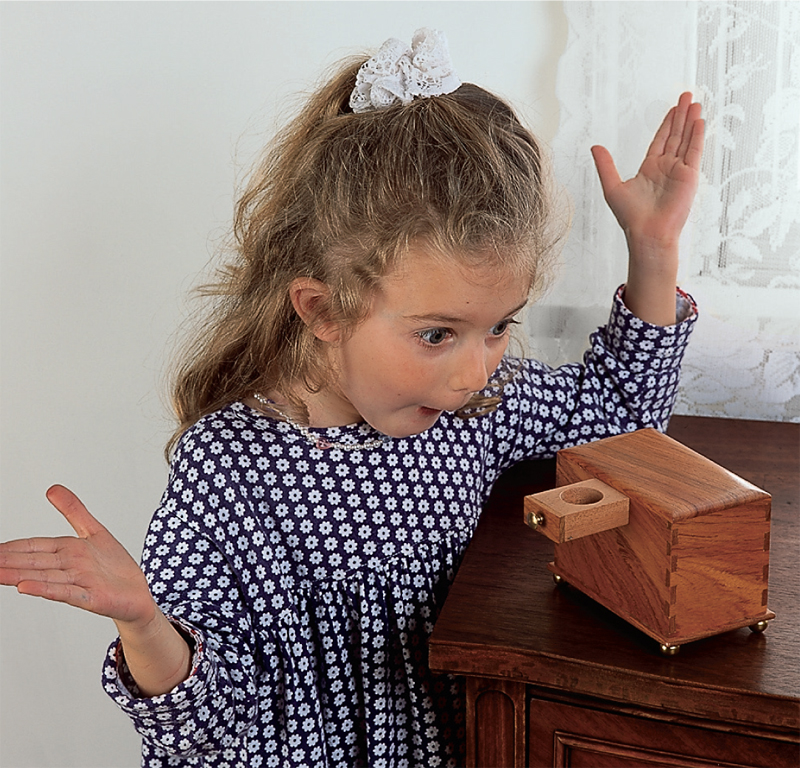
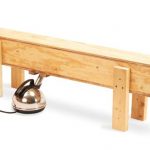
Kids love secrets—and so do adults! This small
bank with its sneaky false drawer is a kick to
make. You won’t need any fancy mechanism
to make the drawer; just a few brads. Start building
your nest egg; the coin slot is large enough to fit a
Sacagawea Golden Dollar!
Making the box
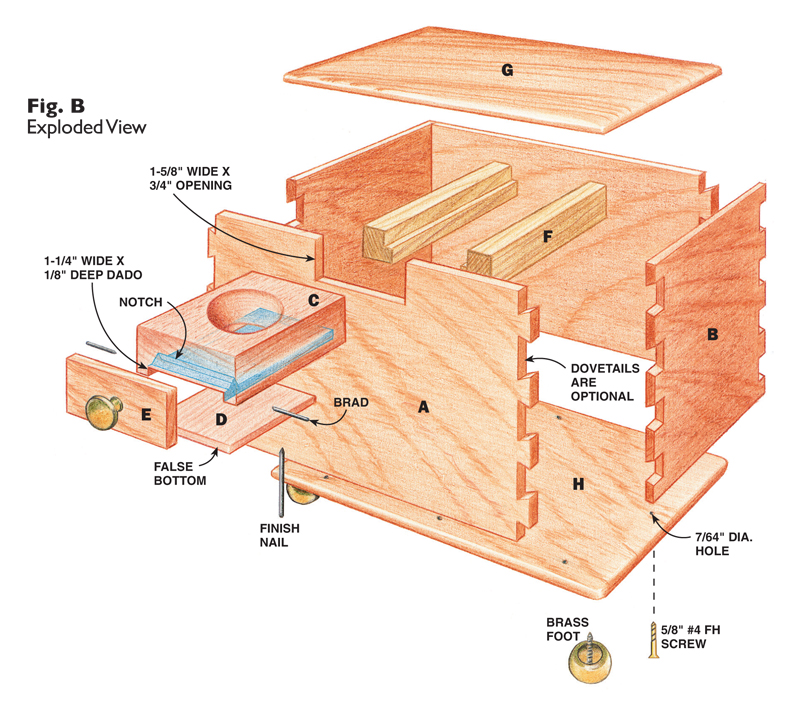
Cut the four sides of the bank box from 1/4" thick
wood. Cut out the drawer opening with a dado set.
You can join the sides of the box any way you want;
dovetails, box joints, even a nailed and glued butt joint
will do. Glue the box together and plane or sand all the
edges and faces even.
Making the drawer
Use a 12" long, 3/4" thick piece of hardwood for the
drawer. The finished drawer is actually much shorter,
but the blank will be easier to mill as a long piece. Cut
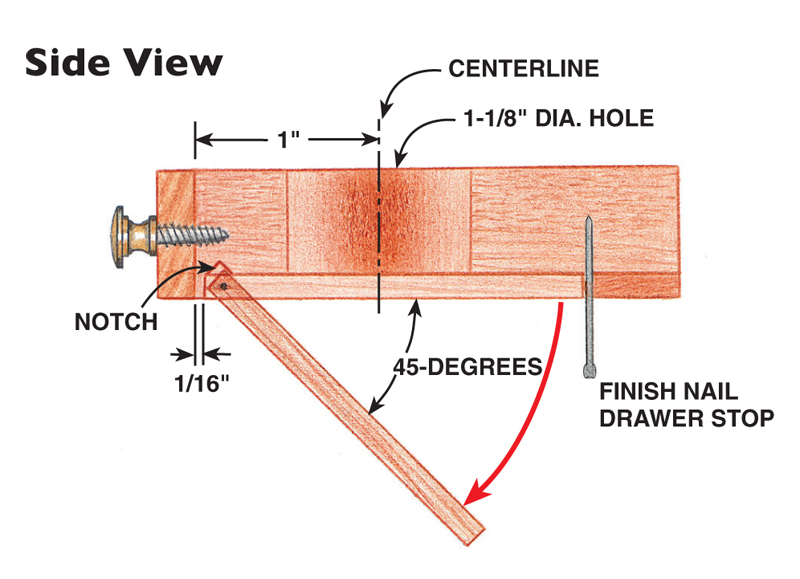
the blank to width, drill the coin hole in the middle
with a Forstner bit and then cut the dado that holds the
false bottom. Cut a notch with a chisel for the bottom
to pivot in. Then cut the blank to length.
Make the false bottom from the same wood as the
drawer. Attach it to the drawer with small brads. Cut the
drawer front to size and glue it to the end of the drawer.
Hanging the drawer
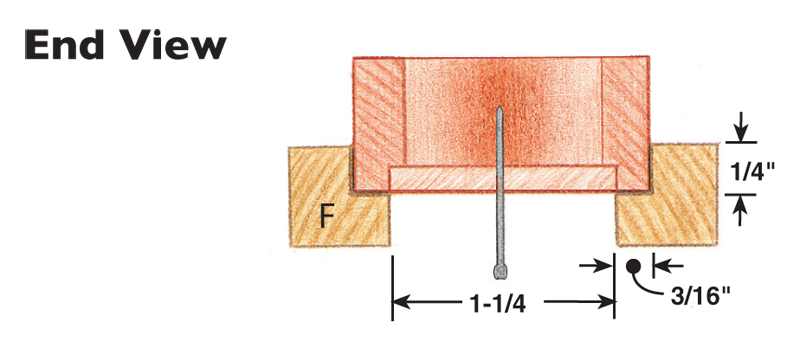
Make the two drawer runners as one piece about
12" long. (One long piece is safer to machine than
two short ones.) Cut the rabbet, then crosscut the
runner into two pieces to fit your box. Apply glue to
the ends of one of the runners and position the runner
in the box.
After the glue is dry, use the drawer as a guide to
position the second runner. First, apply glue to the
ends of the runner. Then, wrap the drawer in a piece
of paper to act as a shim, and insert it and the runner
into the box. Squeeze the runner tight to the drawer,
and remove the drawer and paper. The paper shim
ensures a smooth sliding drawer.
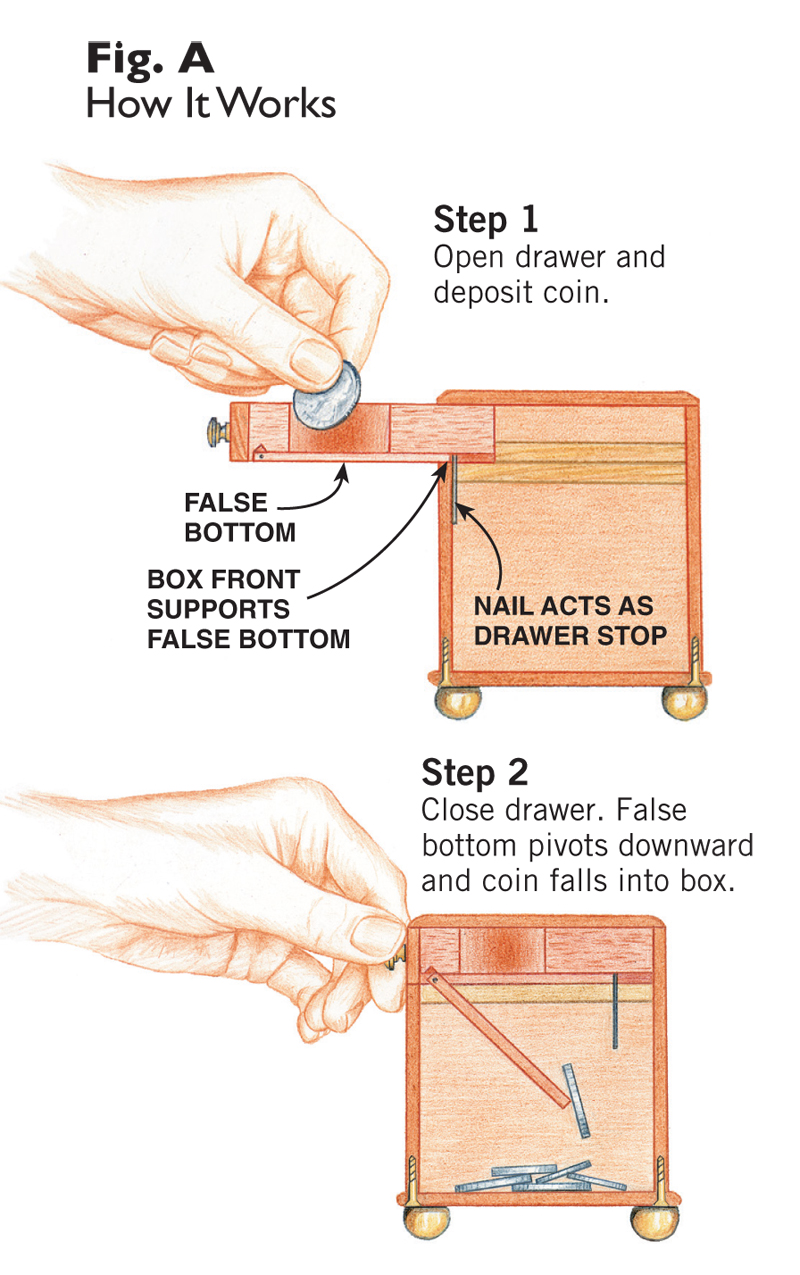
Pre-drill a small hole and tap a small finish nail
into the underside of the drawer to act as a drawer
stop. Hold the nail with a pair of pliers.
Attaching the top and bottom
Once you’re sure the drawer works, glue the top on
the box. Drill pilot holes and screw the bottom in
place. To empty the bank, unscrew the bottom.
Epoxy the brass feet and drawer knob so a child
can’t unscrew them. These small parts are a potential
choking hazard.
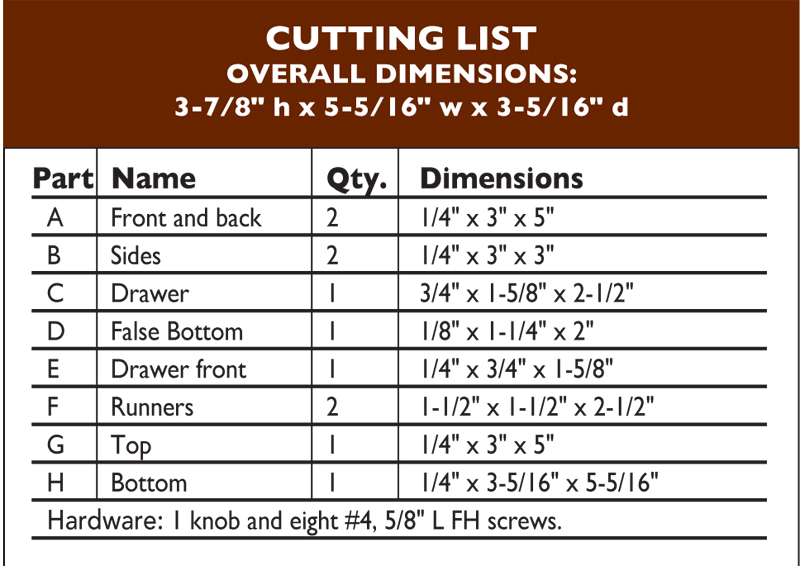
Cutting List

This story originally appeared in American Woodworker June 2001, issue #87.
|