We may receive a commission when you use our affiliate links. However, this does not impact our recommendations.
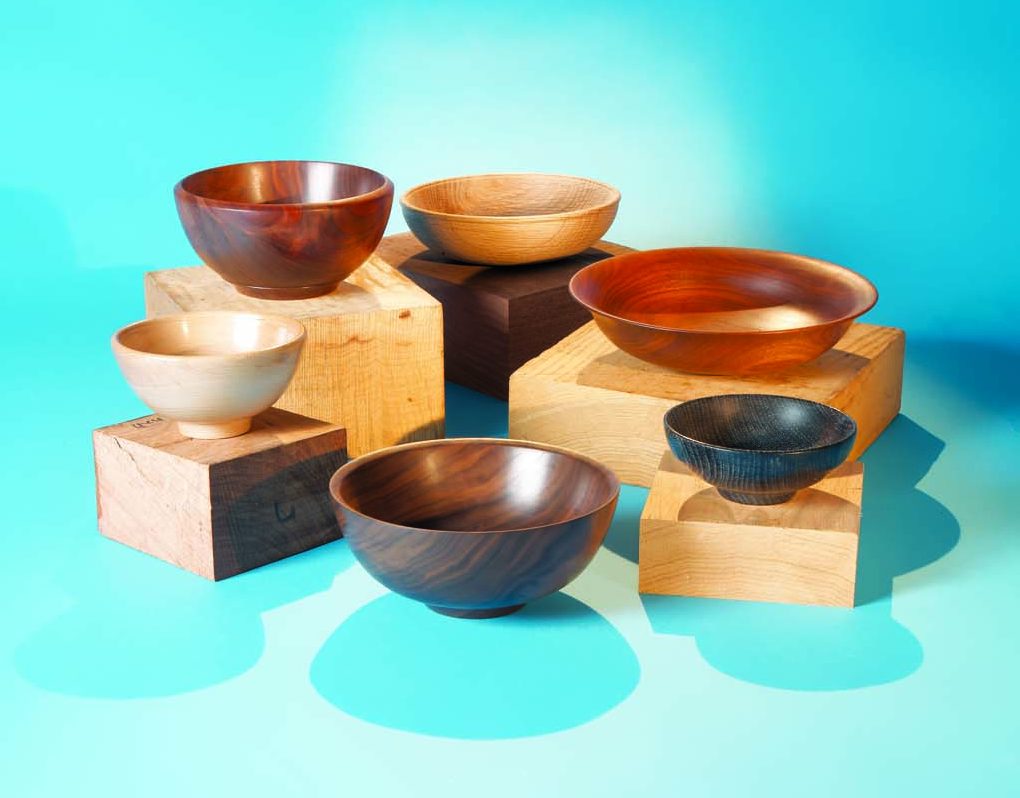
Although most bowls are turned from green material, working with kiln-dried lumber has its advantages. You don’t have to deal with checks and cracks or significant distortion. Sanding is far easier and you can apply finish immediately. However, turning dry wood has its own challenges and real differences over turning wet wood. And as wet wood often costs nothing, dry wood—especially thick stock—usually costs more. So, if you’re up for a challenge, have money to burn and a burning desire to turn a bowl, you’re in luck.
Choosing stock
Rough-sawn kiln-dried hardwood lumber is available in thickness ranging from 4/4 (1″) to 16/4 (4″). Sizes 8/4 and thicker make decent bowl material. Thinner stock is excellent for turning plates and platters. Lumberyards typically stock various hardwood species in 4/4, 5/4, 6/4 and 8/4 sizes and one or two species in 10/4, 12/4 and perhaps even 16/4 sizes.
Some lumberyards allow buying a portion of a board. For example, cutting 4′ from the end of a 12′ board—or 2′ from a 10′ board—leaves a saleable 8′ length. So, before you buy an entire board, ask if the yard sell one end.
Traditional furniture and cabinet woods such as walnut, ash, mahogany, hard and soft maple, beech, cherry, birch and white oak are excellent choices for this type of turning. Some pines, cypress and cedar may also have merit.
Prepare the wood
Cut the wood into square sections. The wider the board is, the larger the bowl’s diameter can be. Decide which side will be the top (the inside of the bowl). Hollowing into the bark side of the board (against the curve of its annual rings) usually creates fairly straight grain patterns. Cutting into the pith side of the board creates curving patterns that I find more interesting.
Flatten the bottom face of the section. Then locate its center and use a compass to draw the largest possible circle. Mark the center point left by the compass, so it’s easy to find. Then head to the bandsaw and saw out the disc.
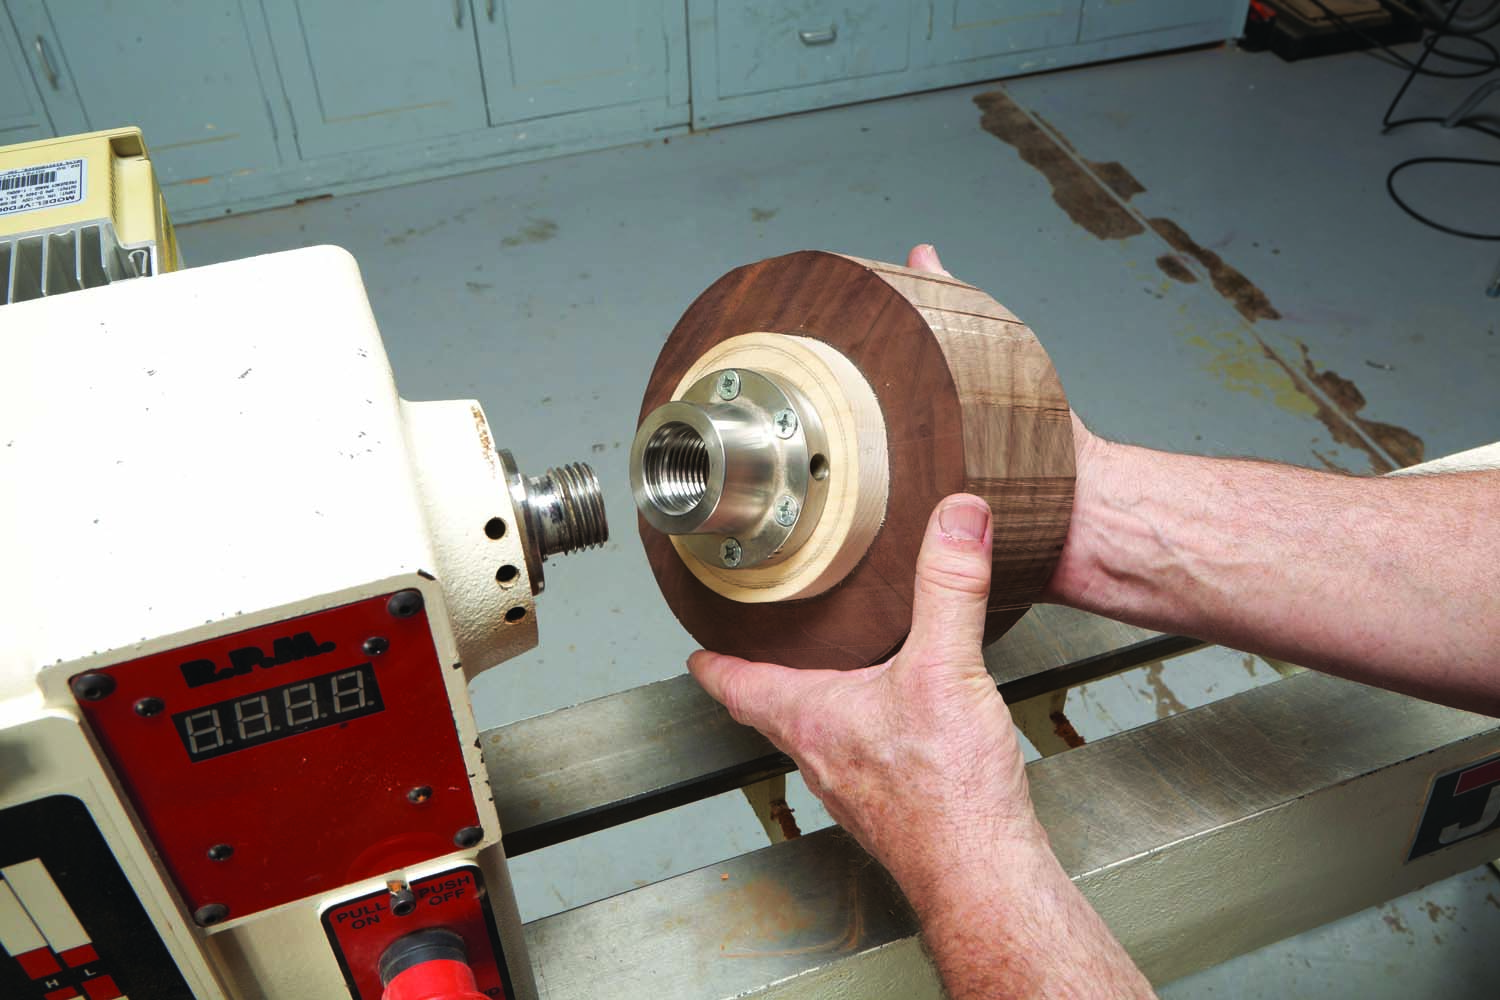
Photo 1. Maximize the blank’s usable thickness by gluing a poplar waste block on its bottom to hold the faceplate’s mounting screws.
A lack of thickness is one downside of using kiln-dried lumber, so it’s important to choose a mounting method that minimizes wood loss. I usually use a faceplate that screws into a waste block of poplar or other hardwood scrap that’s glued to the disc’s flattened bottom surface (Photo 1).
Cut the waste block into a disc that’s about 10% larger than the faceplate’s diameter. Use the center point from the circle drawn earlier to draw a second circle on the blank that matches the faceplate’s diameter. Then use this circle to locate the waste block. Glue on the block using yellow or white glue, clamp it securely and allow it to dry overnight. Draw a circle on the block for centering the faceplate. Then attach the faceplate directly to the waste block using #10 or #12 sheet metal or SPAX screws.
Use the right tools
In almost every case, the correct tool is a bowl gouge made from 1/2″ or 5/8″ diameter high-speed steel rod. DO NOT use a spindle roughing gouge. Supplement the bowl gouge with a round-end bowl scraper for areas that are hard to reach with the bowl gouge or that just require light finishing or blending.
True the disc
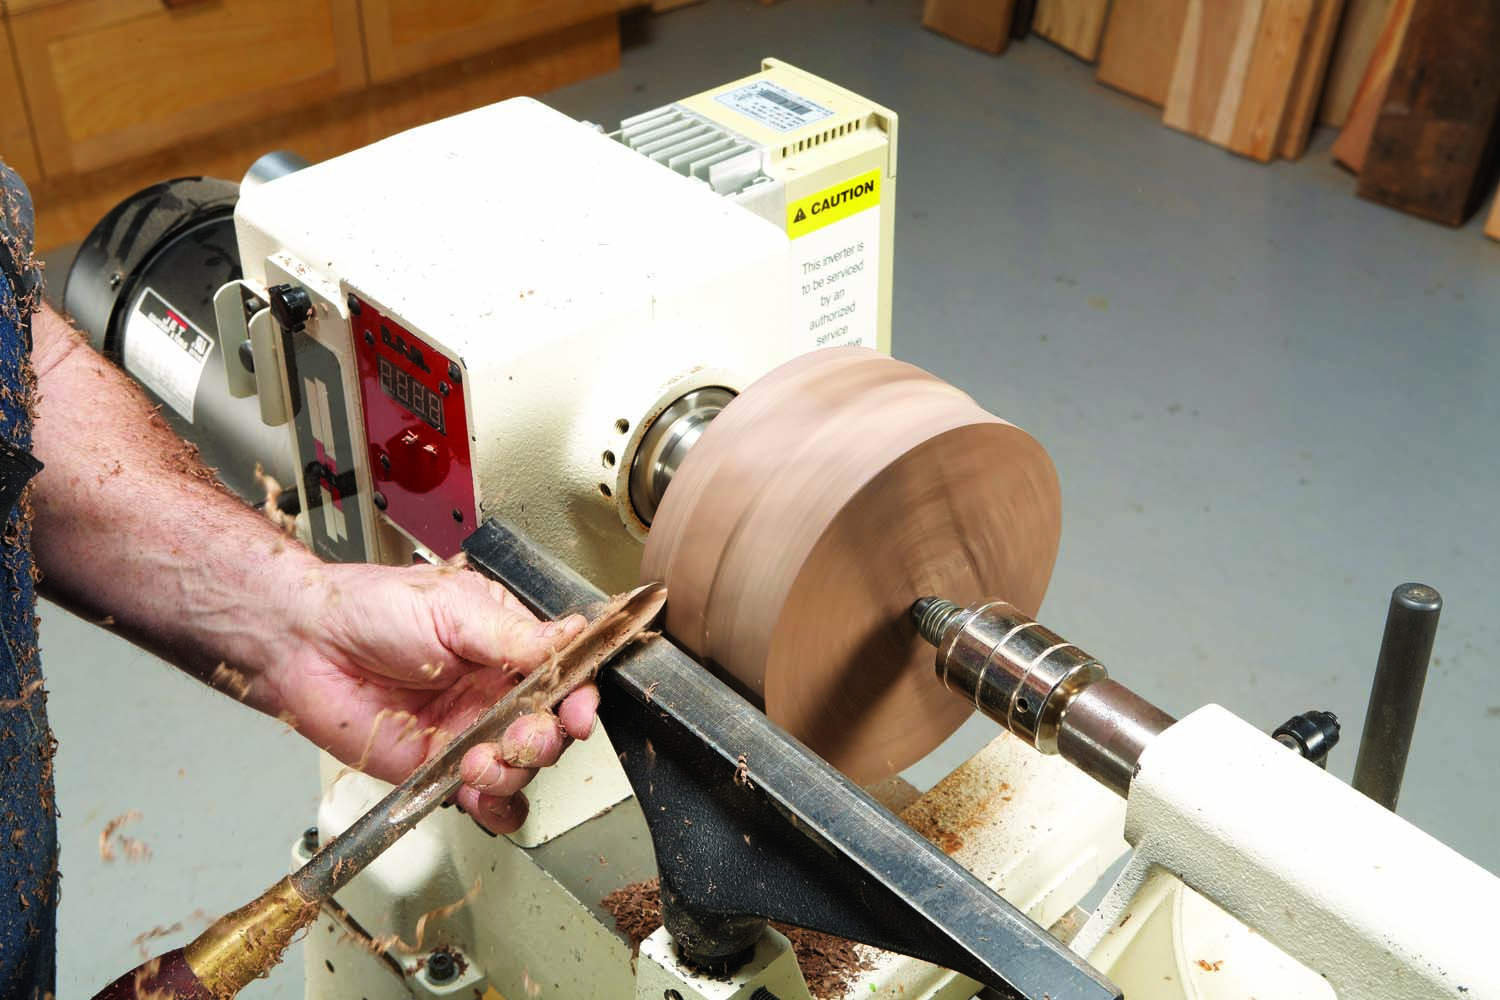
Photo 2. Establish the bowl’s maximum diameter by truing the blank. Cut from the outside to the center on both the left and right, so you don’t chip out the edges.
Screw the faceplate/disc assembly onto the lathe’s headstock and bring up the tailstock for extra support. Set the lathe at slow speed—the larger the blank the slower the speed. (For roughing, I typically set the speed below 600 rpm.) Then use the bowl gouge to round the disc, working from the outside in (Photo 2).
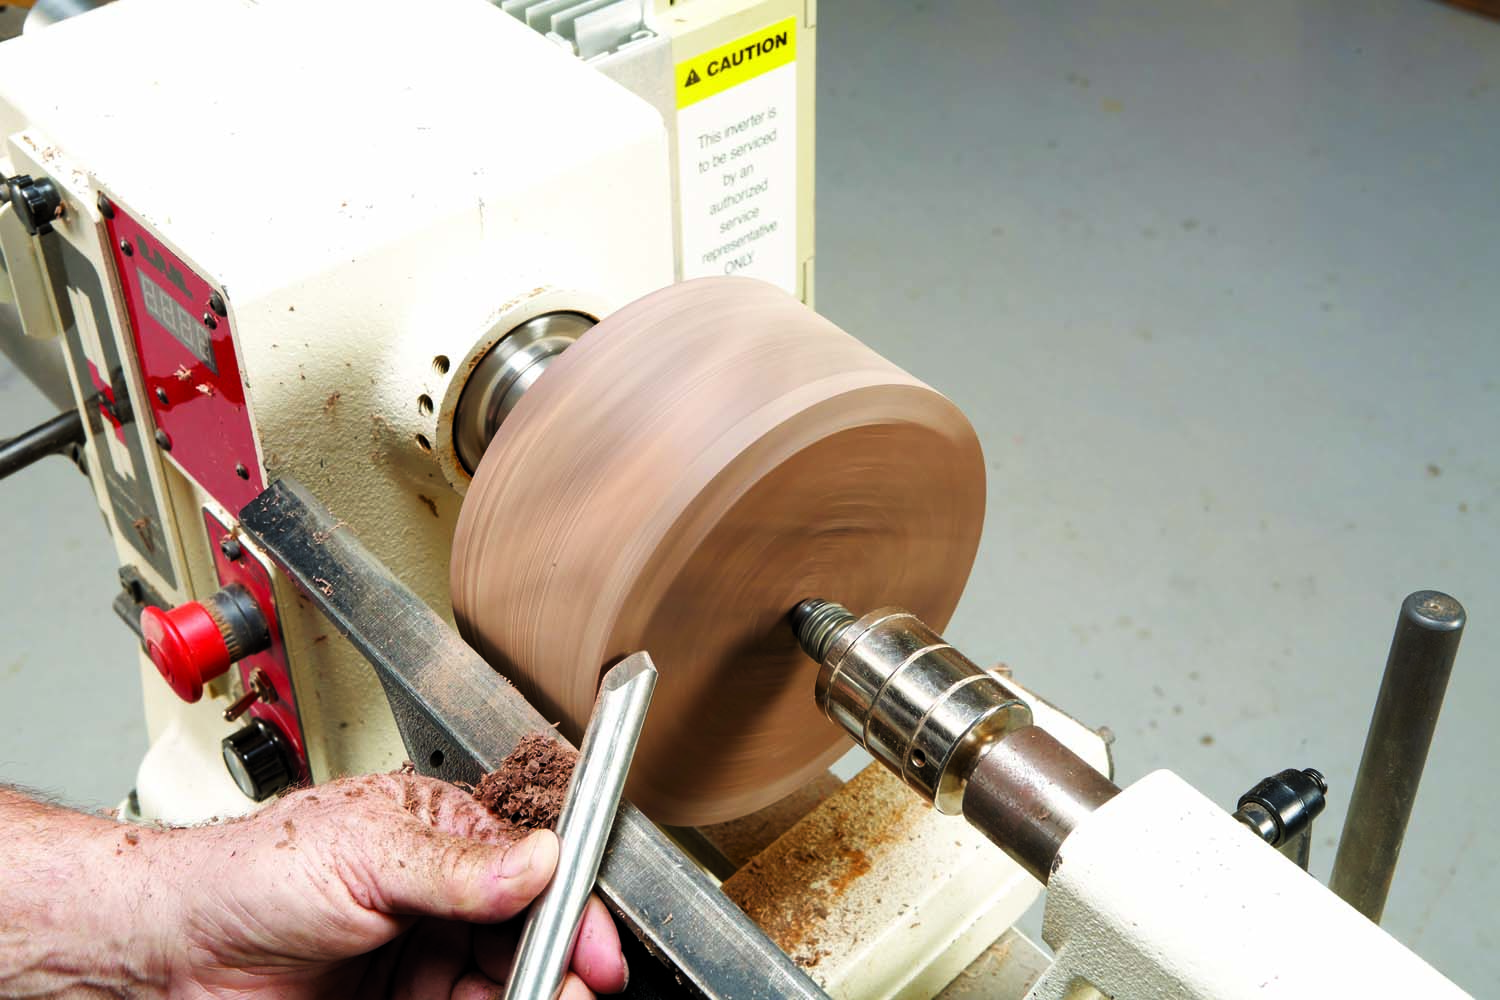
Photo 3. Establish the bowl’s maximum height by leveling about 1″ of the top. To make this cut, roll over the gouge and use a delicate scraping action with its bottom edge.
Next, level the top of the disc, using a scraper or a bowl gouge rolled over to a scraping angle (Photo 3). As most of the top will be hollowed, you only need to level about 1”. When you make this scraping action, make sure the top edge of the gouge doesn’t contact the wood.
Shape the outside
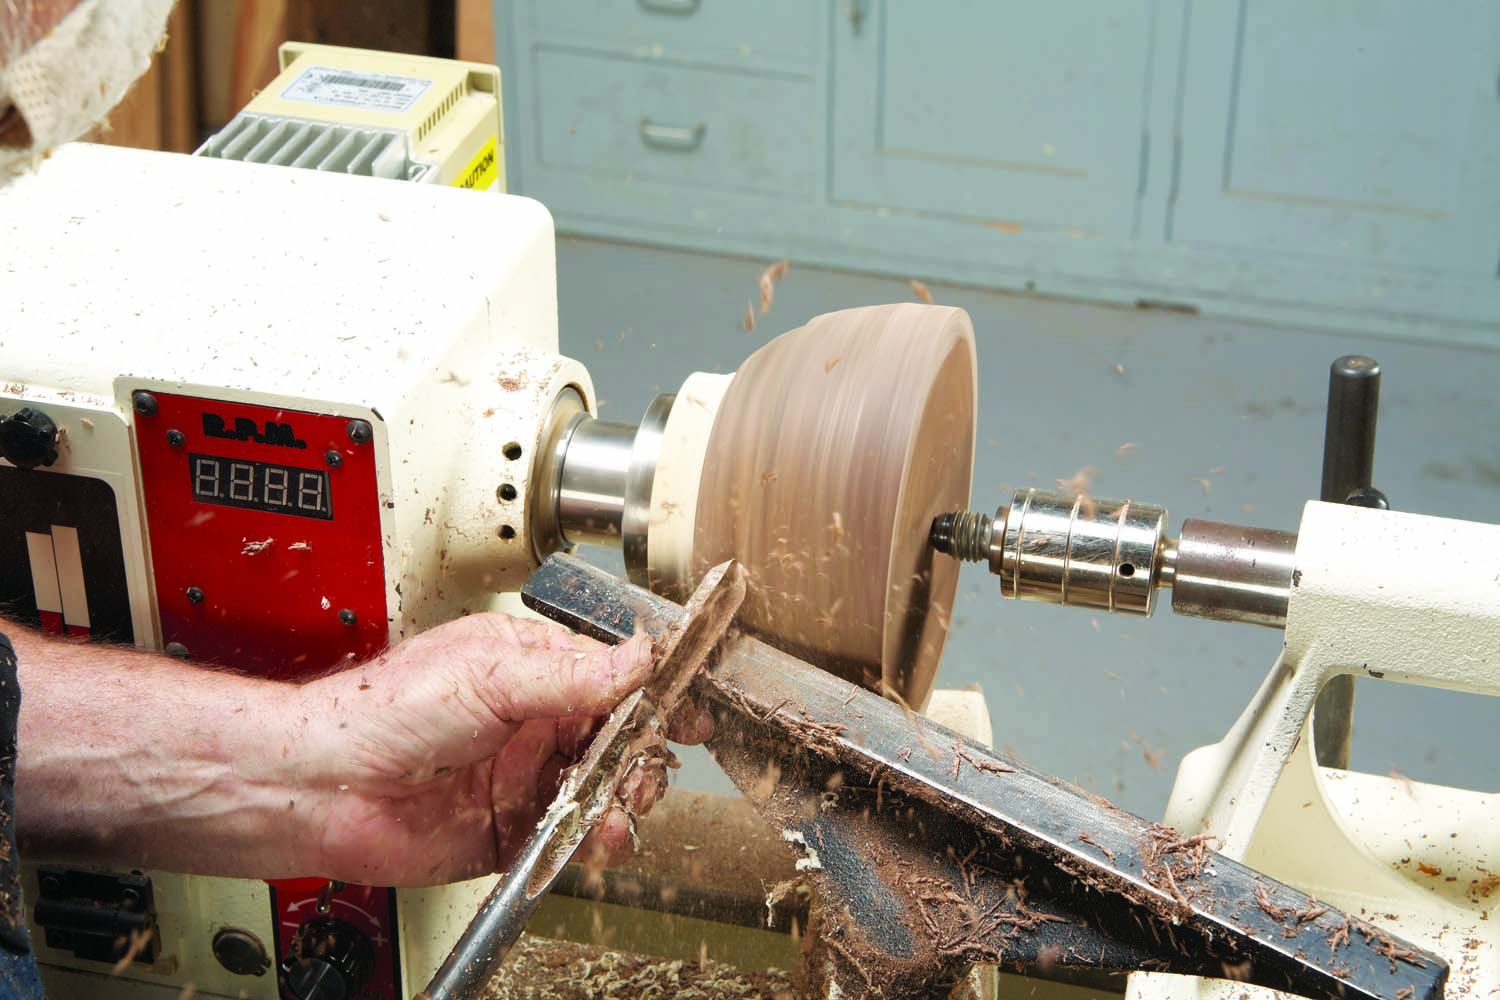
Photo 4. Shape the outside of the bowl by making multiple passes. Work from smaller to larger diameter. Stop just short of the top edge and finish by cutting in from the top.
Determine the bowl’s profile. The sweeping U shape shown here is relatively easy to create (Photo 4). If you’re new to bowl turning, it’s a great shape to start with.
This disc is “face-grain mounted,” so in order to work “with the grain” while shaping the outside, you have to turn from smaller to larger diameters. Using the bowl gouge, make successive cuts, starting at the bottom edge of the blank and working toward the top to gradually reduce the diameter and create the bowl’s “U” shape. As before, do not run off the top. Stop about 1/2″ from the edge, switch directions and work back from the rim. This eliminates any chance of chipping out the top edge.
Turn the base to near its final dimensions—unless you decide it will be smaller than the faceplate.
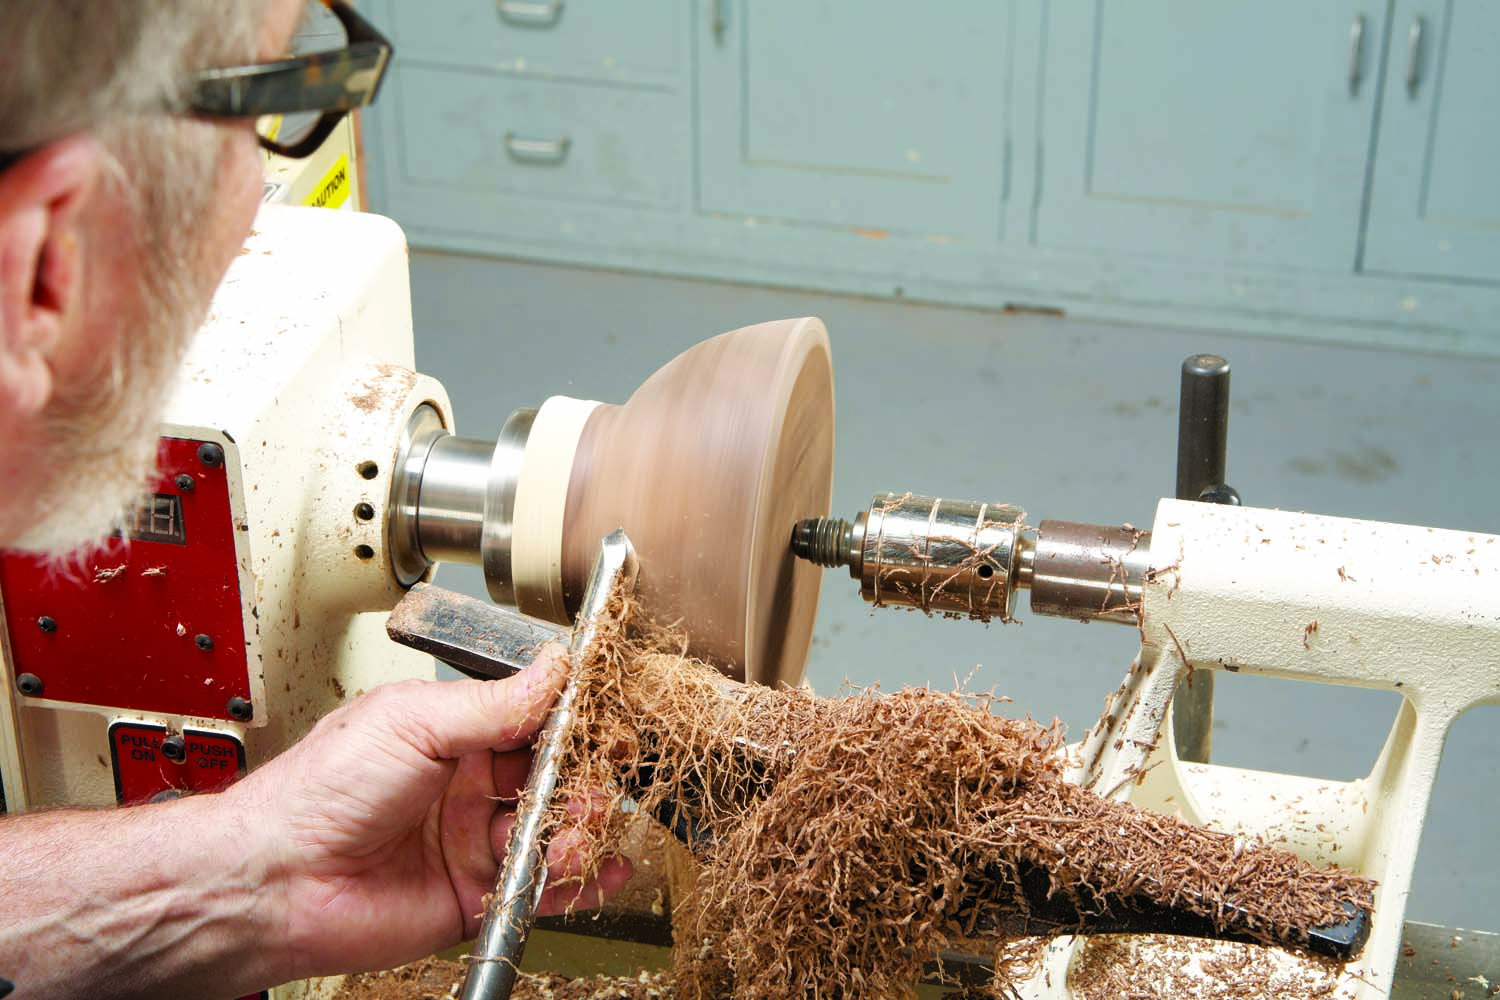
Photo 5. Refine the surface by making a shearing cut. Hold the gouge at about a 45° angle to the tool rest. Rub the bevel, cut lightly and watch for long, twisted shavings.
To improve the surface after the shape has been roughly determined, hone the edge of your bowl gouge so it’s razor sharp and then make progressively lighter and lighter cuts. To go one step farther, try shear cutting (Photo 5). Long twisted shavings appear when you achieve this cut.
Power sand
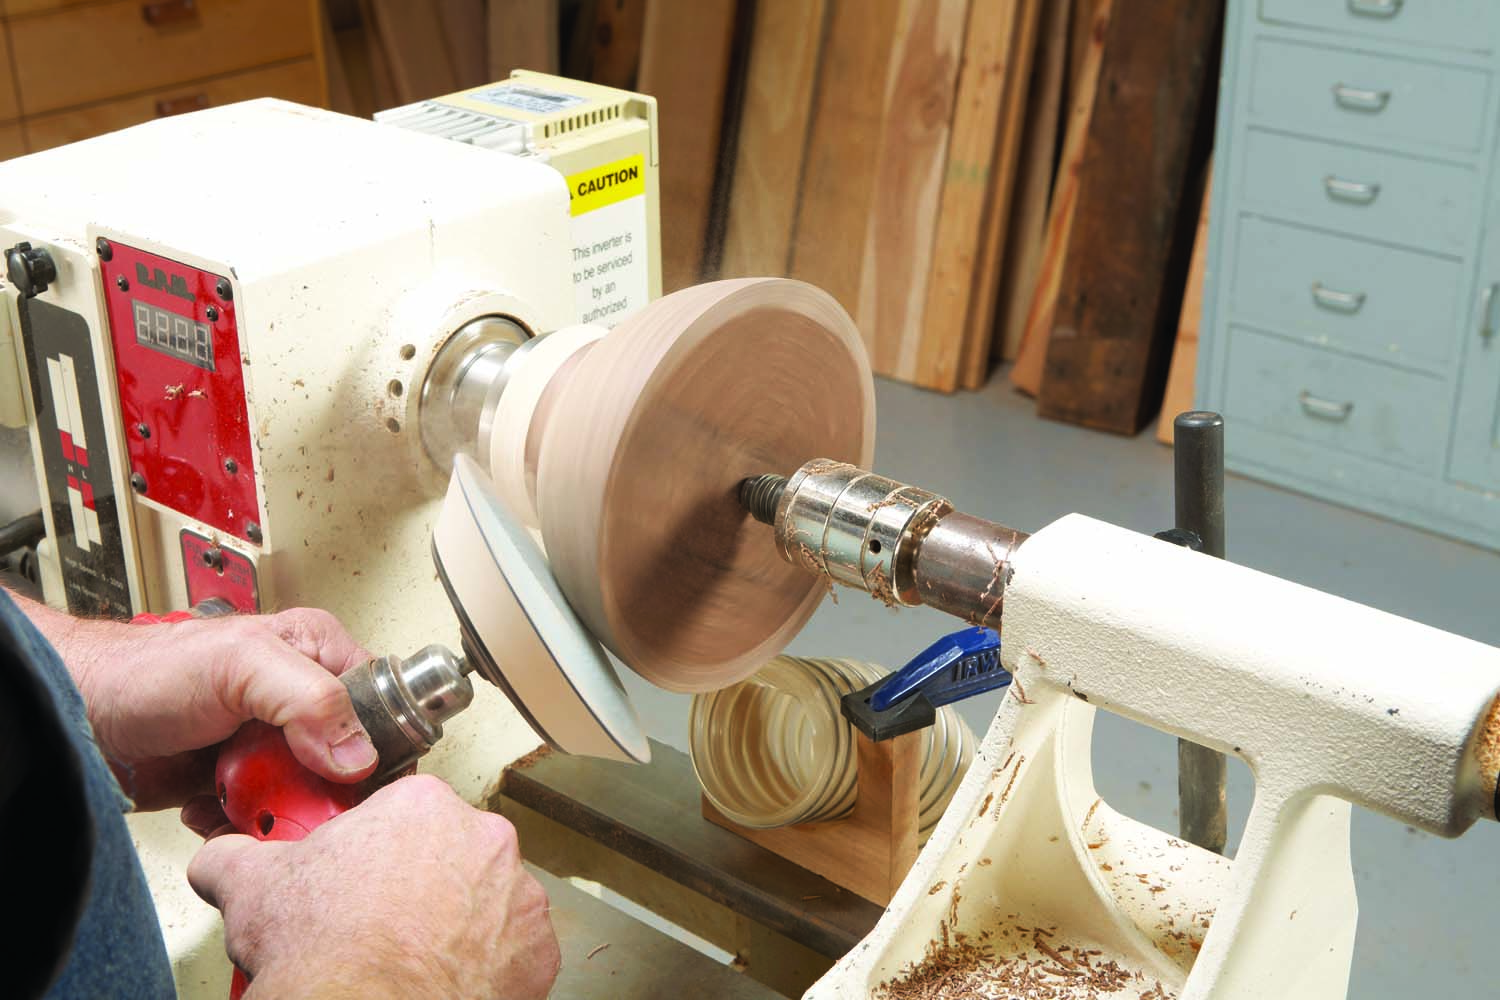
Photo 6. Sand the outside using a padded disc and a drill. This method leaves a superior surface than holding folded sandpaper against the surface.
This is the best time to sand the outside of the bowl. Holding sandpaper on the bowl as it spins tends to produce rings that can be tough to remove. One solution is to power-sand using padded discs in a drill (Photo 6; see Sources). Any reversing drill will work; a drill with an angled head is a luxury. Set the drill to rotate so the abrasive spins up to meet the bowl (rather than spinning in the same direction as the bowl). You may have to adjust the rotation depending on the area being sanded. Use a hard padded disc for grits below 180, soft pad for 180 and above. If your tool work was well done, start with a 120 grit disc and sand through finer grits until there are no visible scratches.
Hollow the interior
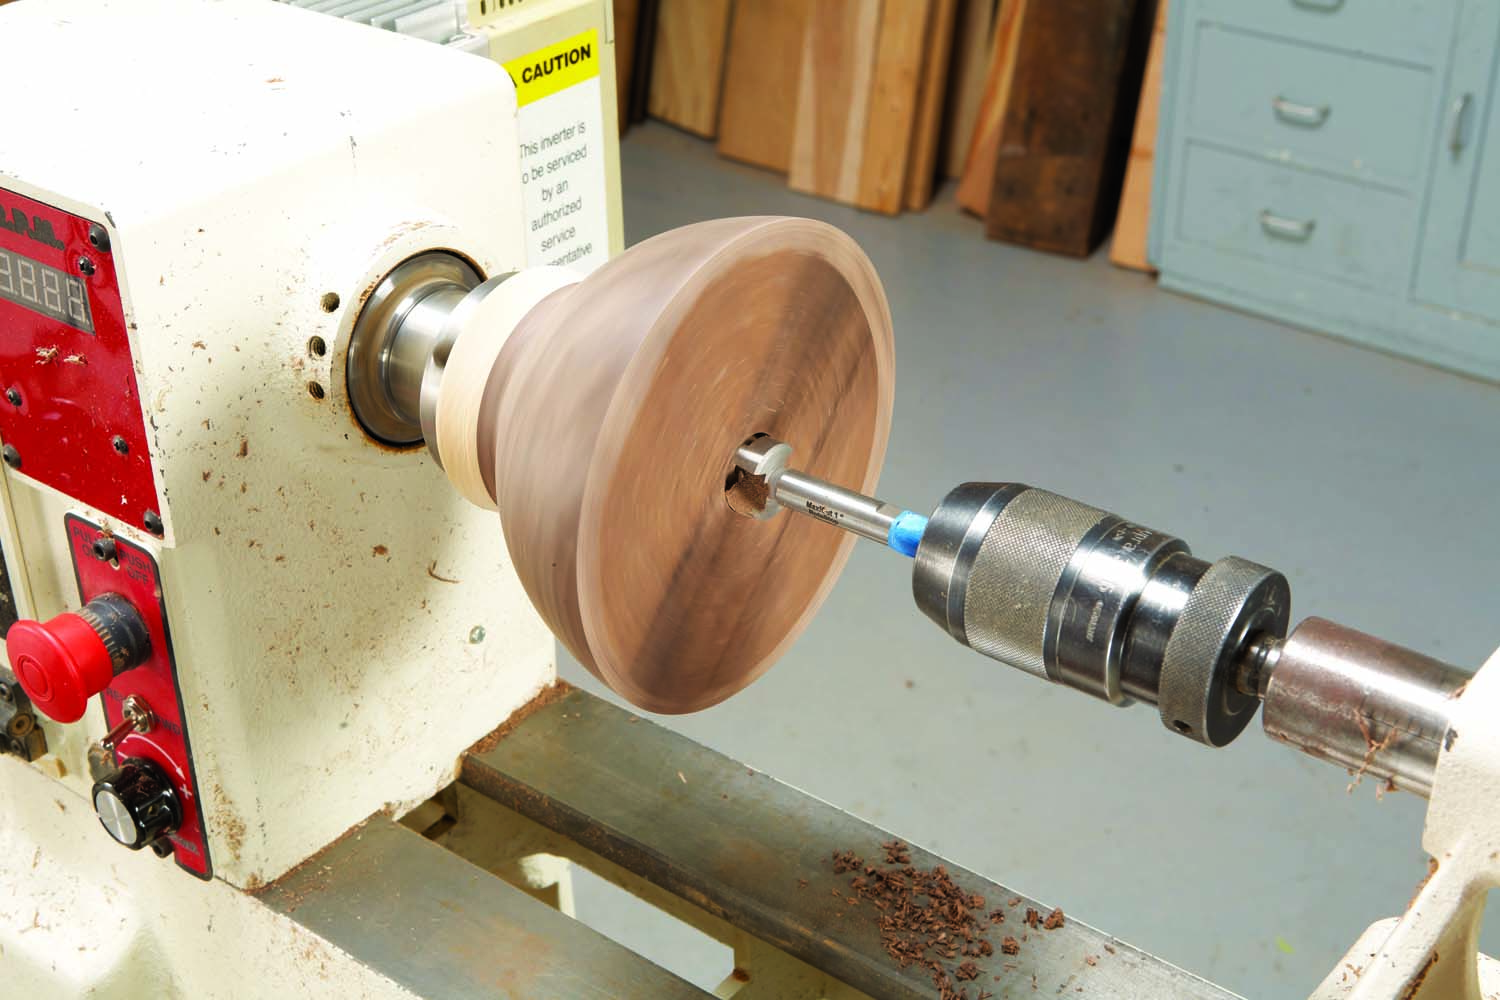
Photo 7. Drill out the center of the bowl to roughly establish its depth and provide clearance for the gouge. This also eliminates the wood at the center, which is difficult to turn.
Mount a Jacob’s chuck in the tailstock and drill a hole just large enough to provide an air pocket for the bowl gouge to work into. In most cases, 1/2″ to 1″ dia. bits are sufficient (Photo 7).
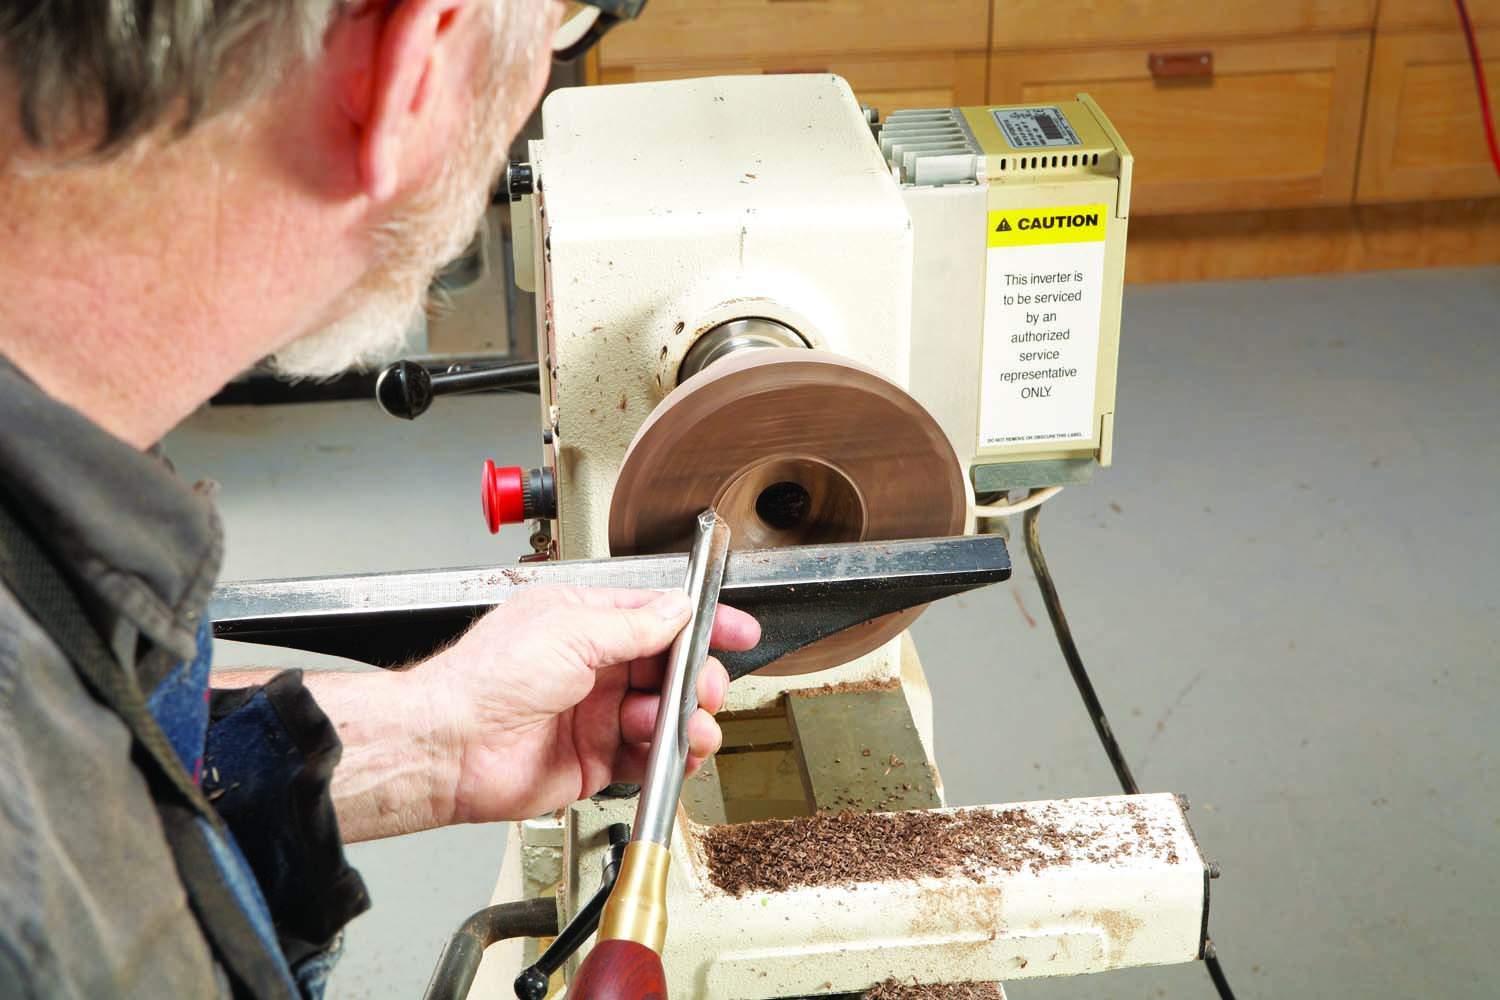
Photo 8. Begin hollowing the interior by making a series of wider and deeper concave cuts. Establish a groove to support the gouge’s bevel and work backwards from the hole toward the edge.
Begin hollowing by making light, concave cuts towards the drilled hole. A good way to understand this approach is to picture the blank as if it consists of a series of small bowls that get progressively larger as you reach the intended thickness of the “final” bowl. Begin by hollowing the smallest bowl and work backwards until you reach the desired wall thickness of the bowl you’re creating (Photo 8).
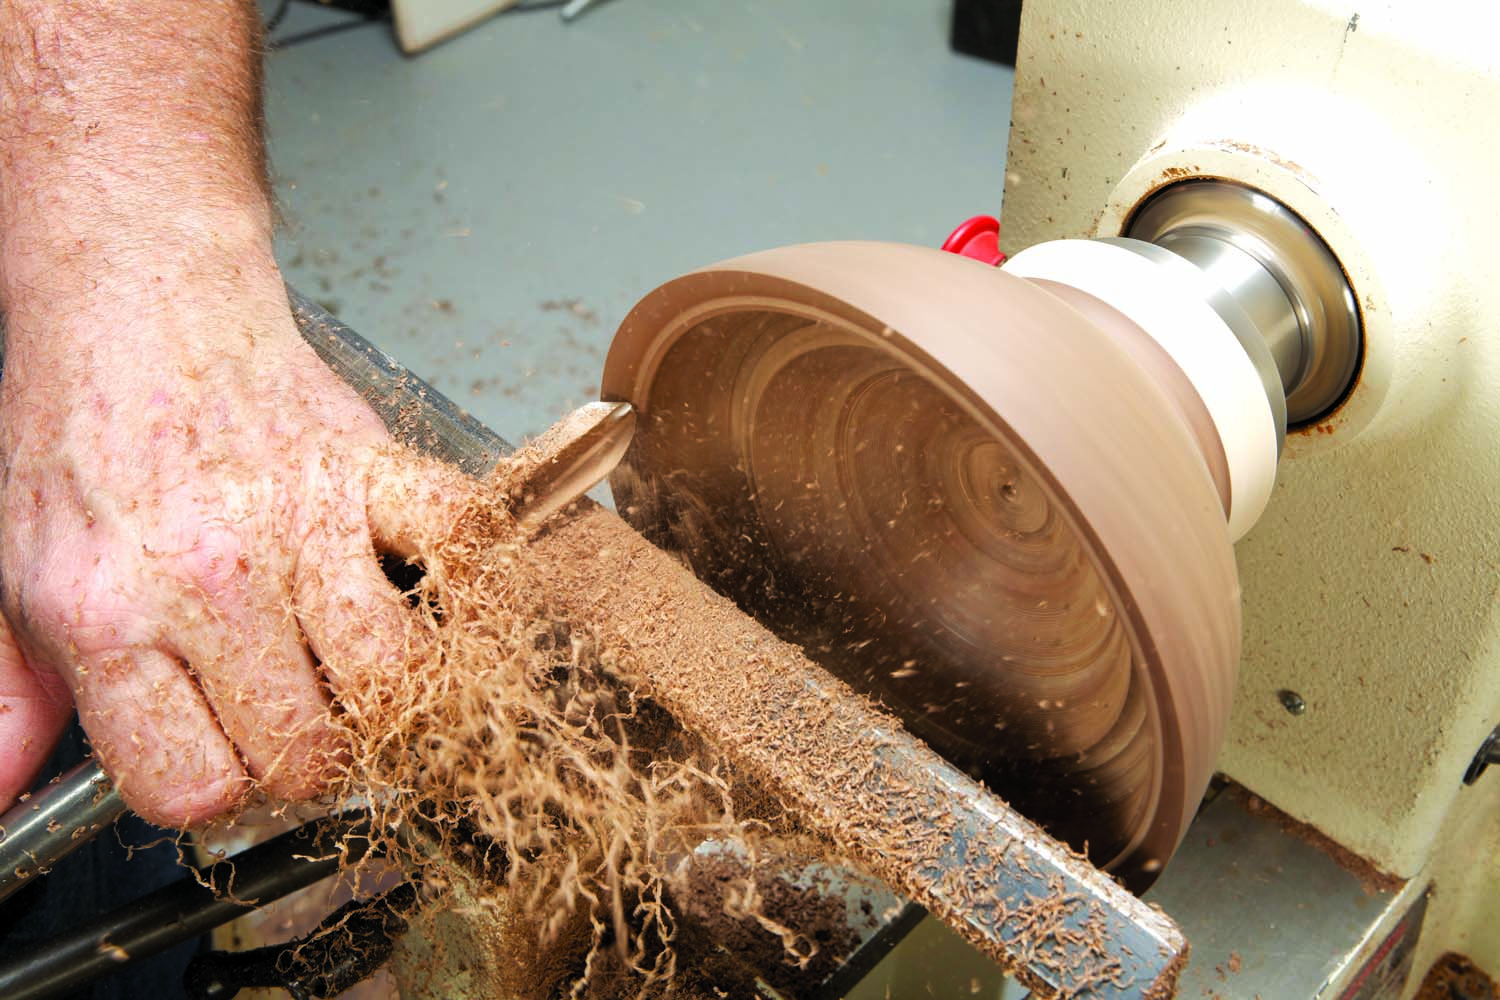
Photo 9. Establish the shape of the rim before completely roughing out the interior, while there’s still enough wall thickness to support the cut.
But before the wall thickness is less than 1″, stop to determine the shape of the rim (Photo 9). Rolled, dropped, coved, tapered out or tapered in (as shown)—these are a few of the options that look better than an ordinary flat-topped rim.
As you near the final wall thickness, use double-ended calipers (see Sources) to help make the thickness consistent from the bottom of the bowl to the top. Cracking is not an issue with kiln-dried material, so you can leave the walls a bit thicker and heavier than if you were working green wood. However, the heavy weight and feel of a thick wall often distracts from a nice form. Depending on the bowl’s diameter, wall thickness between 1/4″ and 1/2″ is both strong and more elegant in look and feel, in my experience.
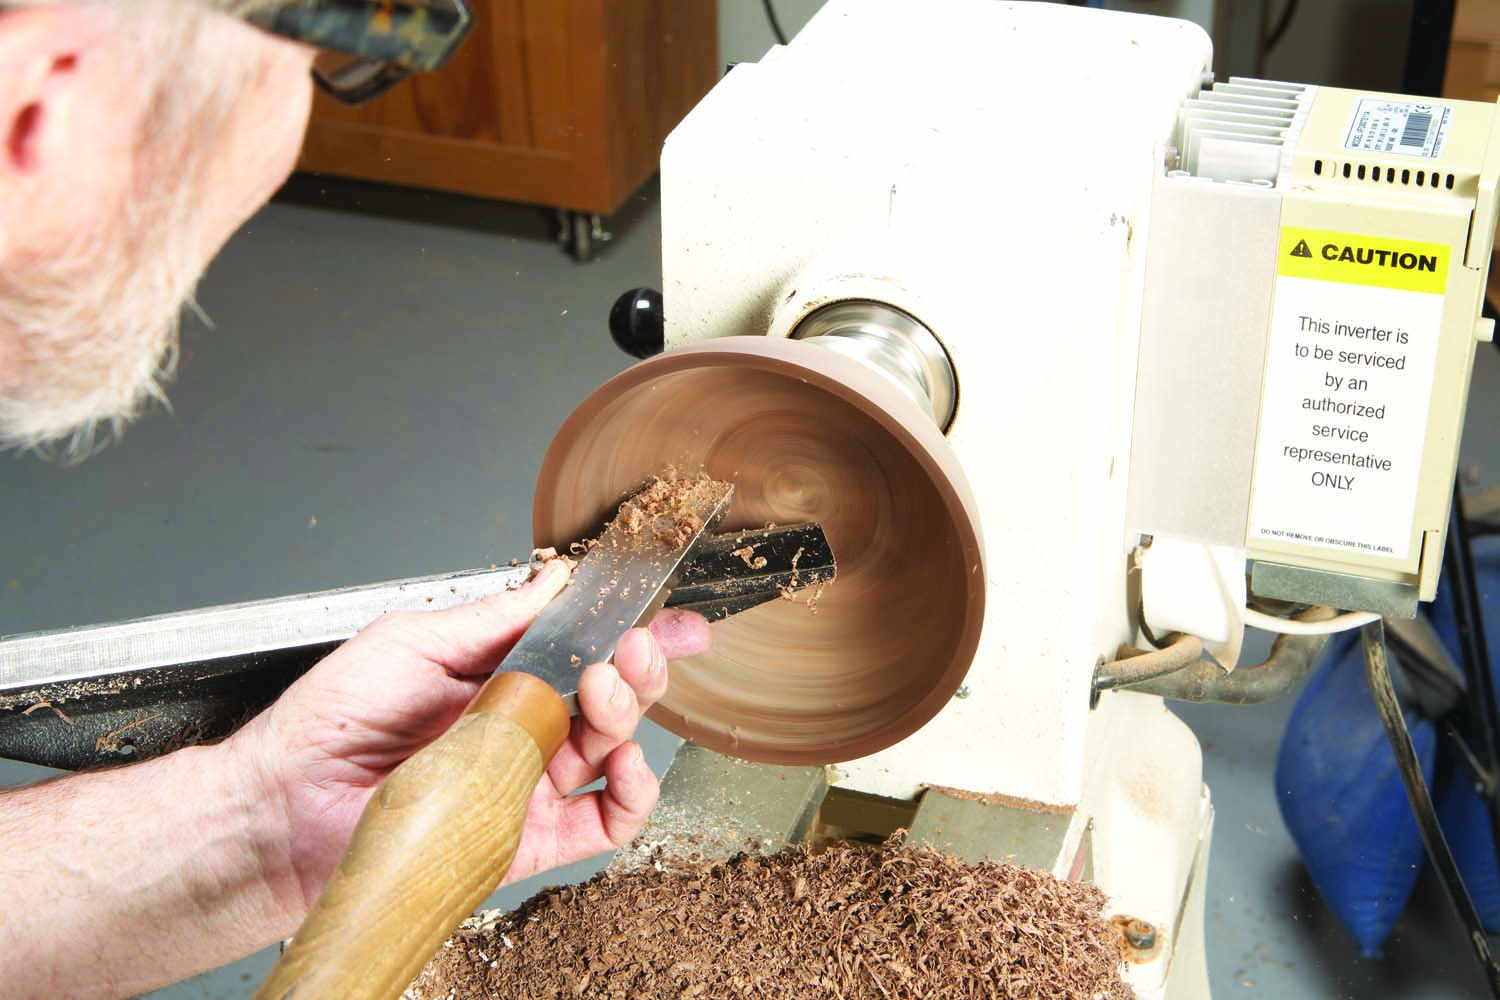
Photo 10. Use a scraper to blend the lower sides and bottom. Position the tool rest close in and hold the scraper with the end of its handle slightly elevated.
Making a uniform and flowing cut with the bowl gouge to blend the bowl’s lower interior wall with the bottom is desirable—but difficult. Using a heavy scraper is easier (Photo 10).
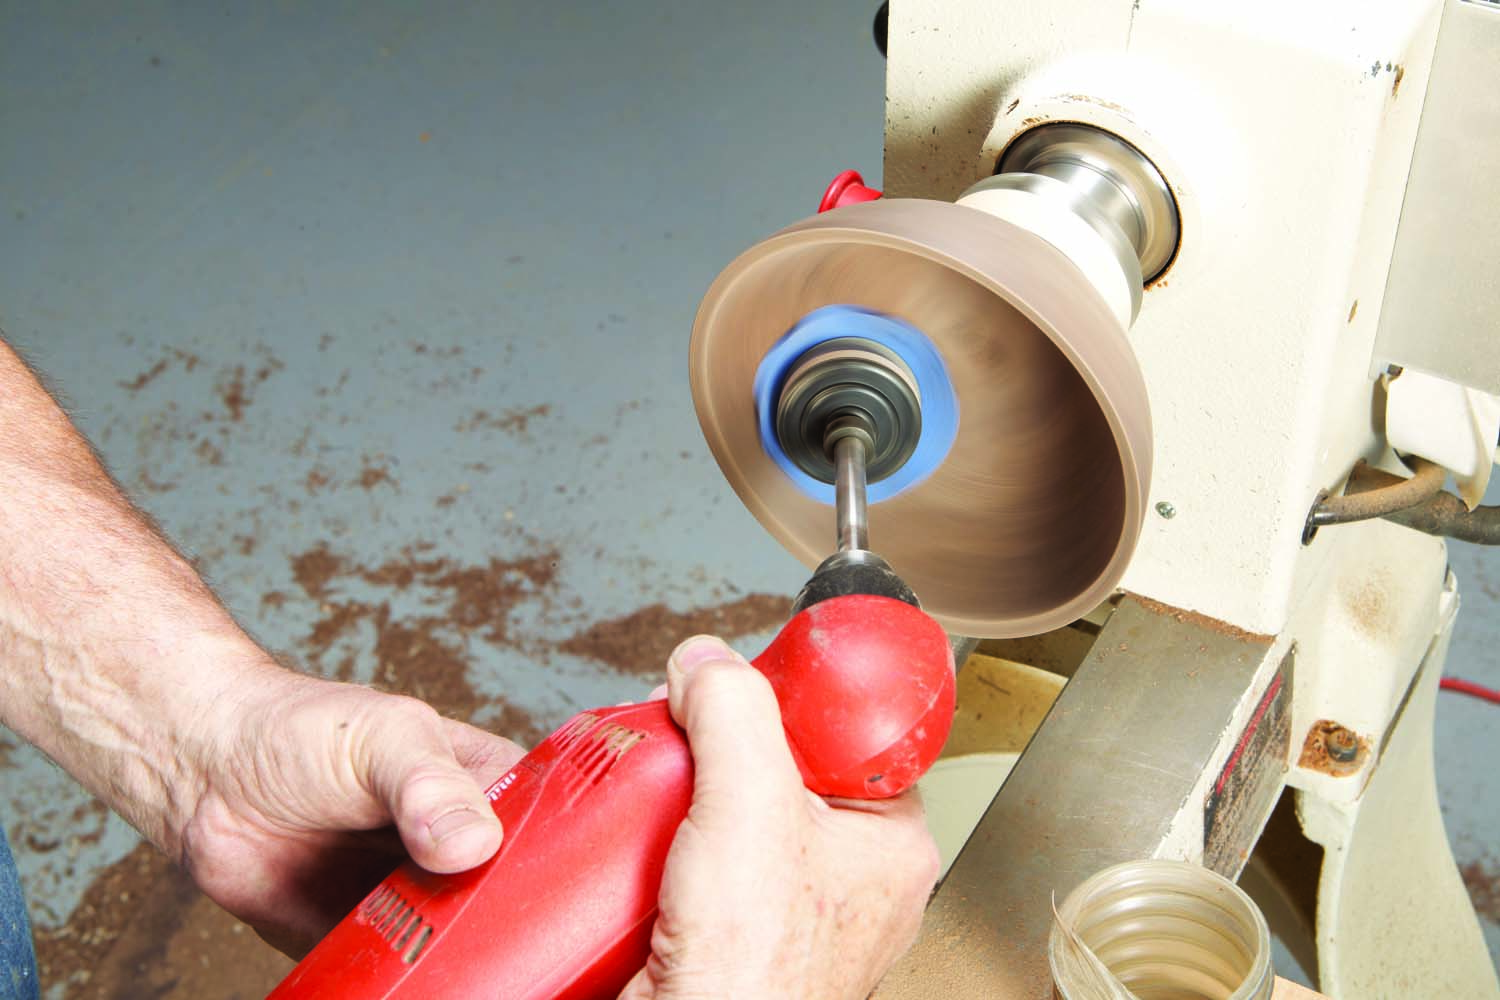
Photo 11. Power-sand the inside of the bowl. An oversize sanding disc mounted on a smaller soft pad conforms to the concave contour and leaves a scratch-free surface.
Sand the rim with folded paper, but try power-sanding the inside, using a 2″ to 3″ soft padded disc held in a drill (Photo 11).
Complete the bottom
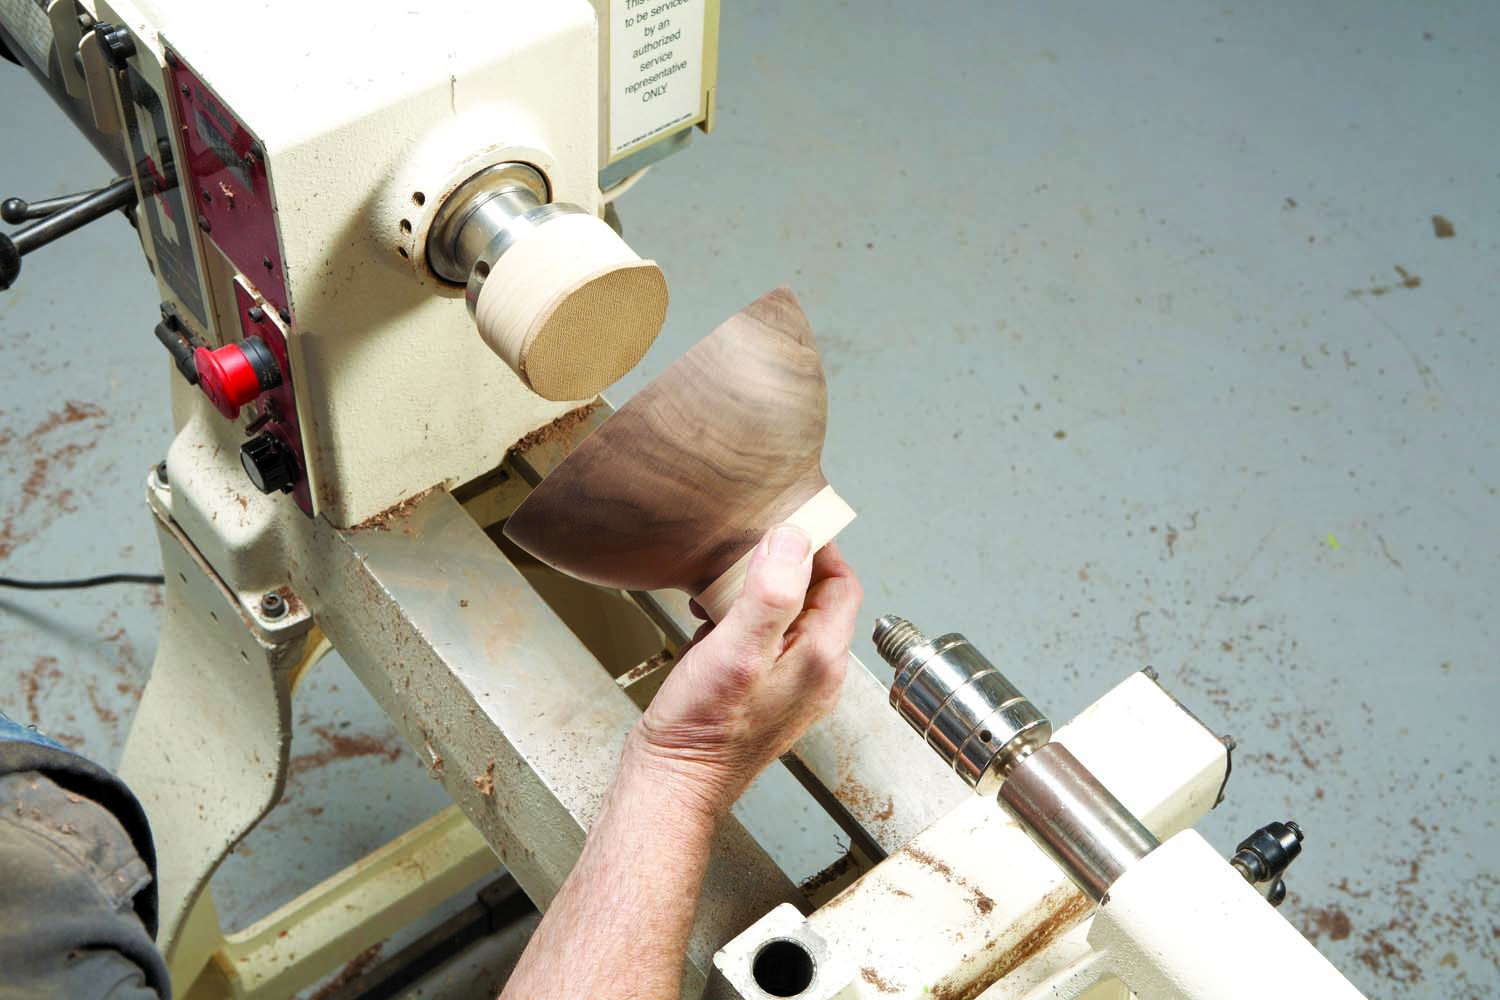
Photo 12. Remount the bowl between the tailstock and a wooden block covered with a rubberized pad. Called “reverse chucking” this allows completing the bowl’s base.
In order to maintain good workmanship when finishing the bottom of the bowl, reverse chucking—turning the bowl around so you can get at the bottom—is absolutely essential. Several commercial and turner-made chucks are available for this purpose, but a very simple version for shallow bowls like the one shown here is a block (usually 1-3/4″ thick) that’s screwed to the faceplate, turned round and faced flat, and then covered with a soft, grippy material, such as a routing pad (Photo 12).
Place the bowl over the block and bring up the tailstock center to lightly support it. Then center the bowl while turning the lathe by hand. As the bowl rotates, position a pencil near the rim to mark the high spot. Slightly reposition the bowl and recheck until the pencil mark is continuous. Then secure the bowl with firm pressure from the tailstock center.
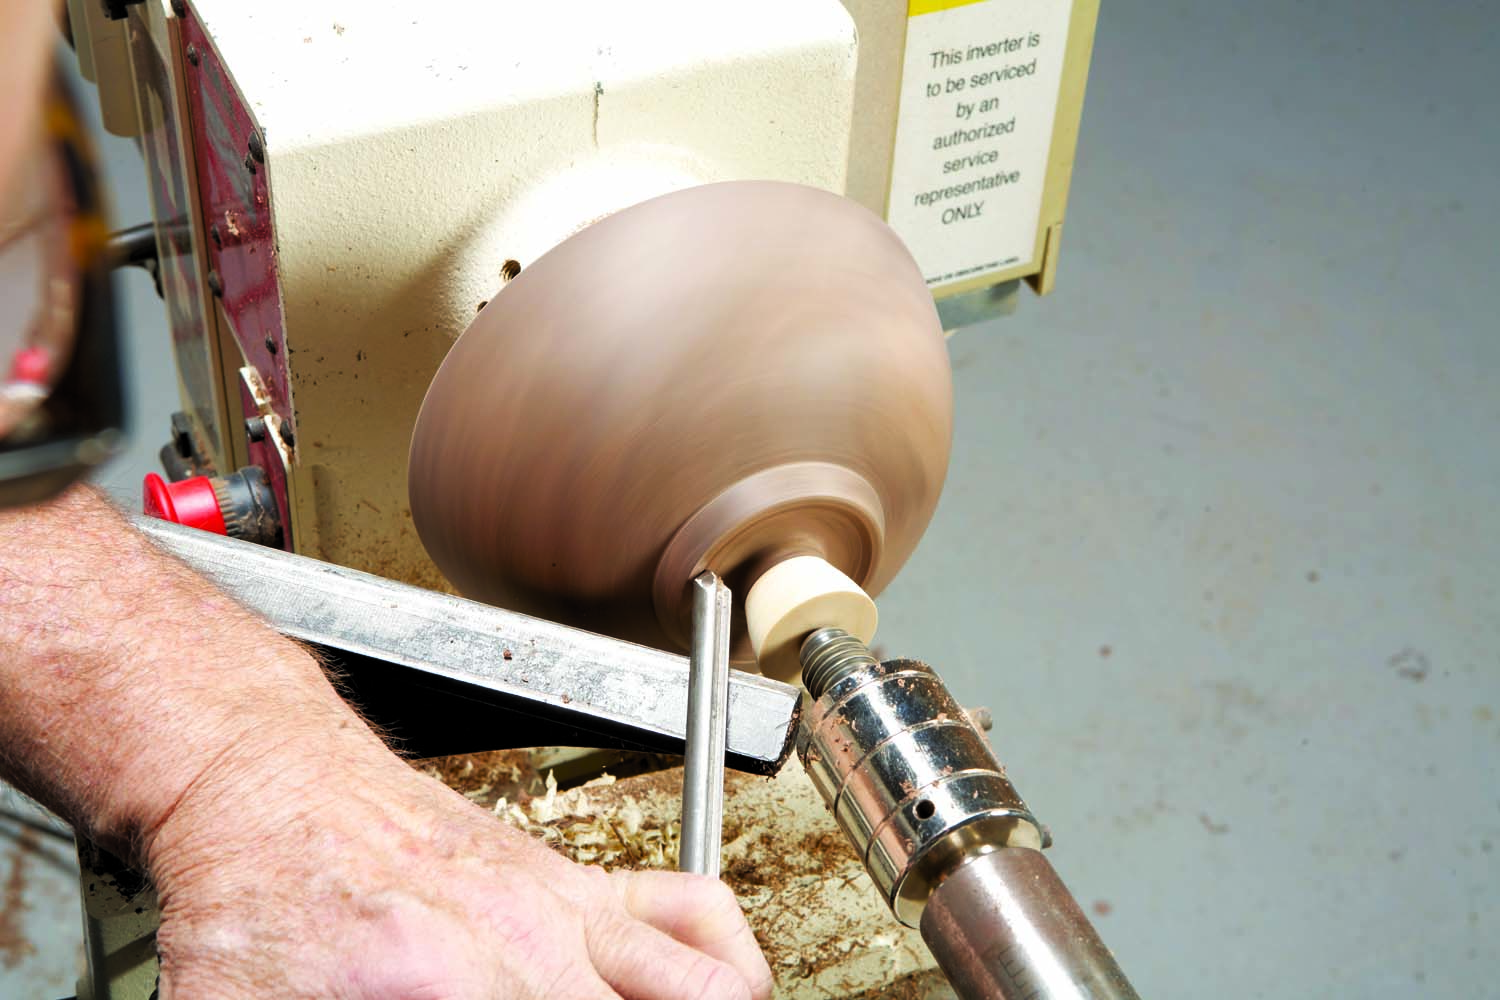
Photo 13. Finish turning the bottom of the bowl. After refining the lower outside, undercut the base so the bowl sits on a rim.
Turn the base and lower portions of the bowl, leaving a tenon (about 3/4″ in diameter for this size of bowl) to keep it securely mounted (Photo 13). I think a concave base with a rim looks much better than a simple flat base. It also tends to sit better. Finish-sand the lower sides using the padded disc. Use folded paper inside the rim.
Remove the bowl from the chuck with the small tenon attached. (This tenon is all that remains of the waste block.) Orient the bowl to access the tenon’s end grain and give it a sharp rap—the tenon should snap off easily. Carve and sand the area at the break to the same quality as the rest of the bowl.
Apply a finish
If a bowl is more decorative than functional, choose a finish for its appearance. Film finishes such as wipe-on poly, shellac, water based finishes and lacquer give the wood a pleasant range of sheen or luster. Oil type finishes (oil varnish blend, polymerized oils, mineral oil, walnut oil, tung oil, boiled linseed oil) add color and emphasize the grain. All common wood finishes are food safe once they’ve cured or aren’t harmful to begin with, as with mineral and walnut oil).
Bio
Alan Lacer is a turner, writer, demonstrator and instructor living near River Falls, WI. For more information on Alan, visit alanlacer.com.
Here are some supplies and tools we find essential in our everyday work around the shop. We may receive a commission from sales referred by our links; however, we have carefully selected these products for their usefulness and quality.