We may receive a commission when you use our affiliate links. However, this does not impact our recommendations.

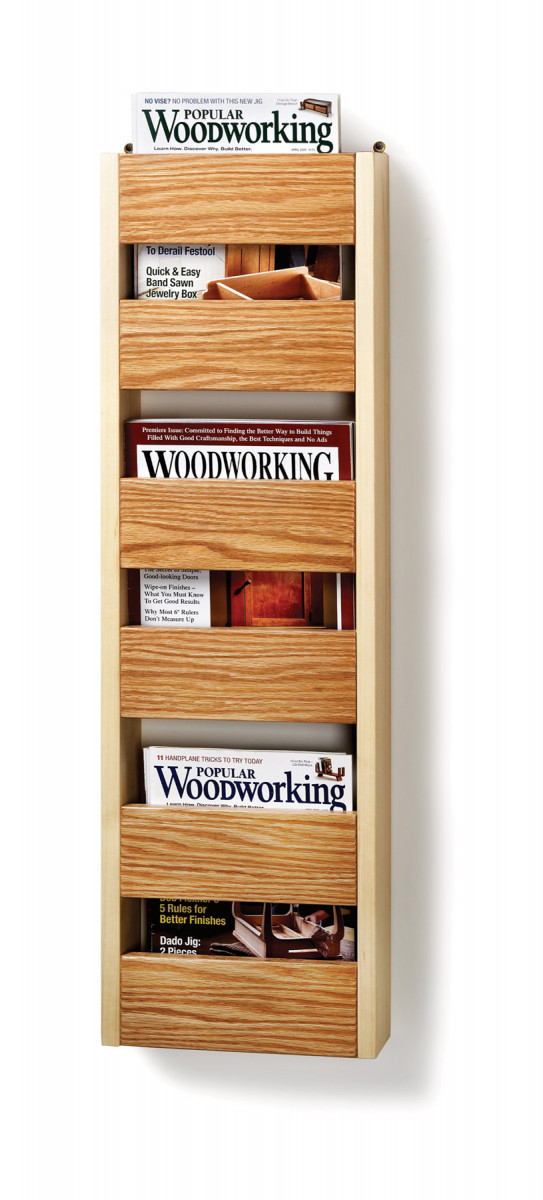
In the round. Slightly rounded edges soften the overall look of a linear design.
Three tiers from two pieces of lumber equals one boatload of storage.
This article appeared in the June 2009 issue of Popular Woodworking.
I might be going out on a limb, but I’m willing to bet that if you visit the library or special reading room (also known as the potty room) of most woodworkers, you’ll find scads of magazines for occasional perusal. At one time in my bathroom I had a basket filled to the brim with periodicals. Some dated as far back as June 1991.
After my basket collapsed, I began to stack my collection in a corner on the bathroom floor. So when this project presented itself, I gladly stepped forward. A wall-hung magazine rack is just what I need.
A trip to the store to pick up materials is always the first step for “I Can Do That” projects and with only two pieces of stock, the material is not only easy to carry, it’s also light on your wallet. One 6′ piece is cut for the sides and one 10′ piece provides all the face pieces, shelves and the hanger support. I opted to combine two wood species for a non-traditional design – aspen for the sides and red oak for everything else.
A Stop-block for Consistency

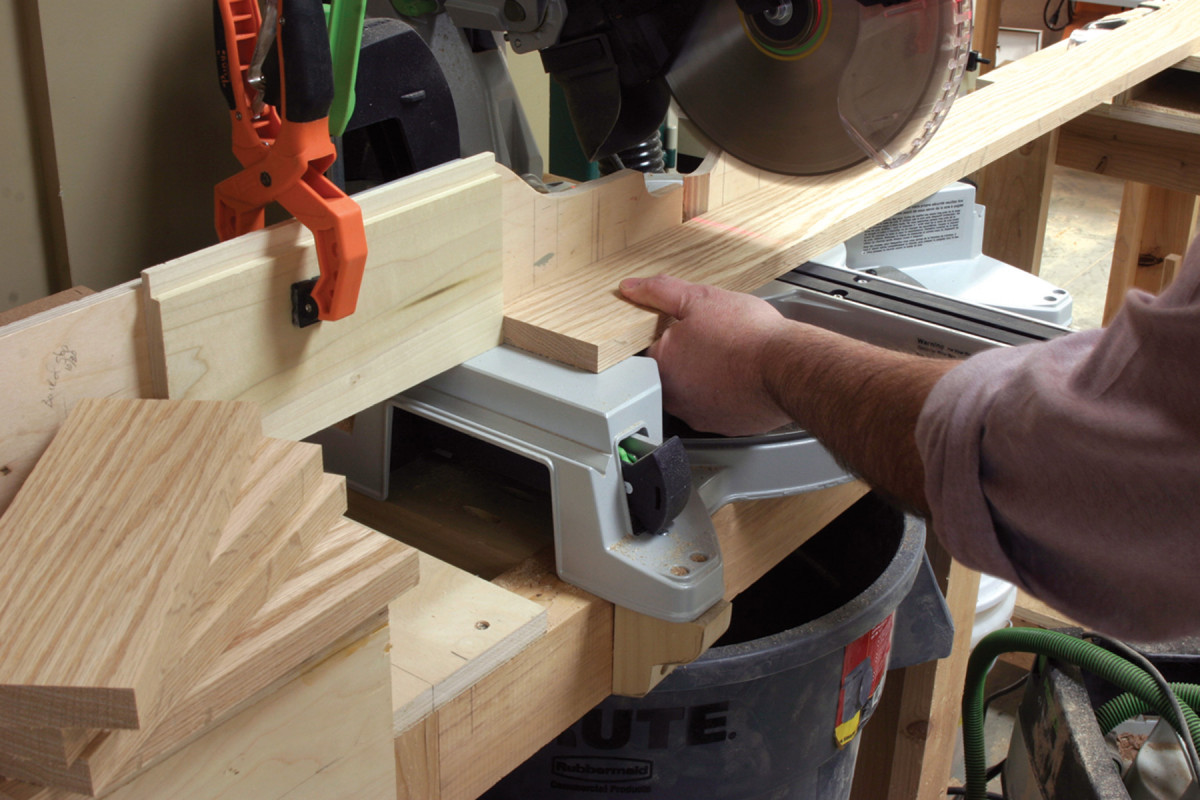
Consistent lengths. A stop-block and your miter saw work in unison to provide pieces that are equal in length – no matter the number of parts needed.
Begin by cutting the sides to length. I’ve seen many woodworkers stack two or more pieces together in preparation to cut parts identical in length. While you sometimes can get away with this shortcut, it’s better to add a stop to your miter saw setup if you have an extended table – or accurately measure, mark and cut your material.
After crosscutting the sides, the remaining parts for the rack are all cut to the same length. For this operation, set up a stop-block. This is easily done on most miter saws even if there is no extended table, and it’s worth the effort to do so. Seven of the 10 pieces are their finished size, but three pieces need additional work. Those pieces are the shelves and each needs to be ripped to fit.
To measure the width of the shelves, position a front piece face down and snug it against a rack side that’s set on its edge. Set the body of a combination square flat on the rack’s side with the ruler extending to just touch the front piece. Lock the square.
Next, use your combination square setup and a pencil to mark a cut line on each of the three shelf pieces. Hold the pencil at the end of the square and slide the unit along the shelves. Use a jigsaw to make these cuts and stay just to the waste side of each line. A block plane trims the shelves to their final width. A couple passes should be all that’s needed.
Although the pieces for the magazine rack are all at final sizes, additional shaping of the stock is required to soften the look. It’s sometimes difficult to perfectly flush the face of the fronts with the front edge of the sides. Any variation is noticeable and would need to be sanded flush. To hide any slight variations, lightly round over the edges of the fronts and sides.
This is easily done with your block plane and sandpaper. Set your plane for a light cut and make several passes along the edges of the fronts. Begin on the end-grain edges. Cutting across end grain is a snap, but it’s possible to blow out the long-grain edges as you work. By rounding the ends first, you remove any possible long grain tear-out as you plane the remaining edges. After your edges are rounded with a plane, finish the process with #150-grit sandpaper. A couple quick passes per edge is all it takes.
How to Connect
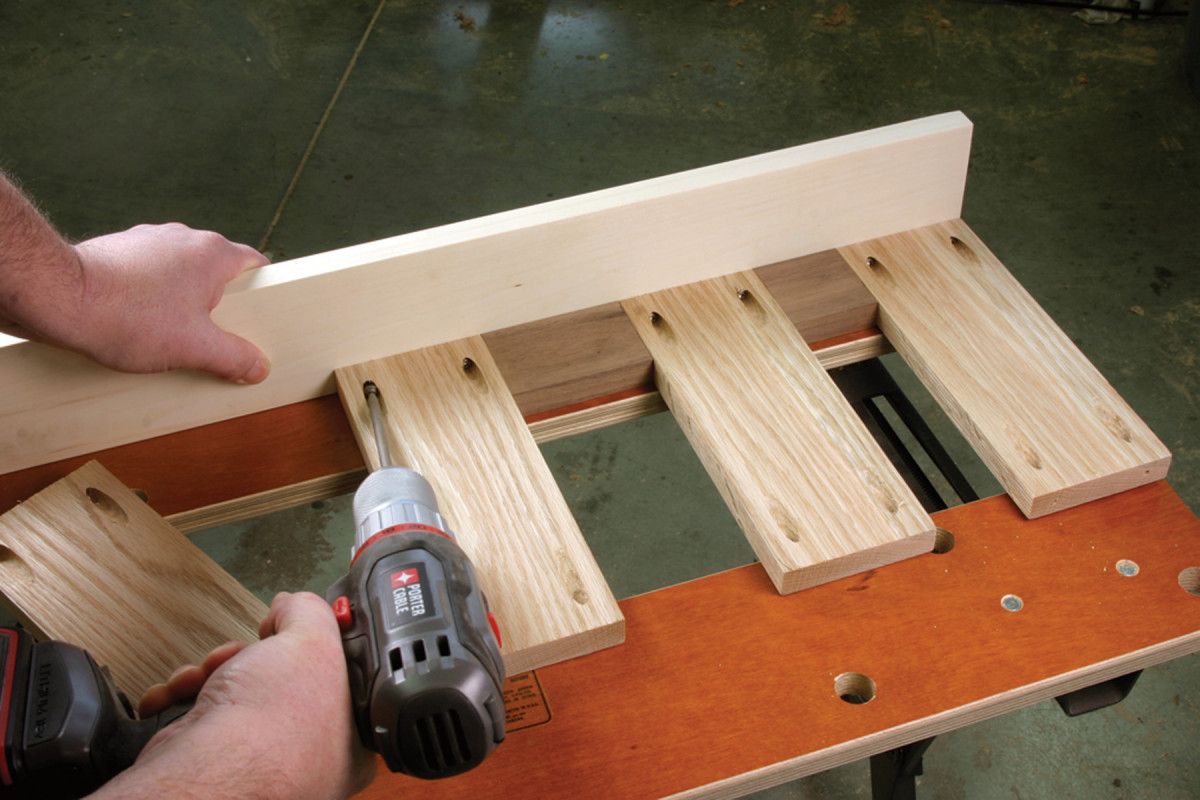
All horizontal pieces of the magazine rack are joined to the sides with pocket screws. Create four pocket-screw holes in the back face of each front piece and the hanger support (two per side); choose your ugliest piece for the support. If you wish to reduce the pocket-screw work, drill only two holes in the front pieces that connect to the shelves. While this saves six holes, I didn’t find the additional holes that much of a burden.
The shelves need only three pocket-screw holes drilled, one for a screw into each side and a third – centered in the shelf – to affix the shelf to the adjacent front. Finish-sand all the parts before moving forward.
With the pocket holes drilled and parts sanded, you’re ready to begin assembly. It’s important to stand the side piece on its edge on a flat work surface, and to position the front piece face down with its end tight to the rack’s side. Attach the front pieces to one side at this time. Begin at the top. Drive the screws while keeping the front flush with the end and front edge of the side.
Block Out the Locations

Appropriate spacing. Lay out the locations with pencil marks – these have to be sanded out prior to adding any finish – or you can use spacer blocks to locate the front positions.
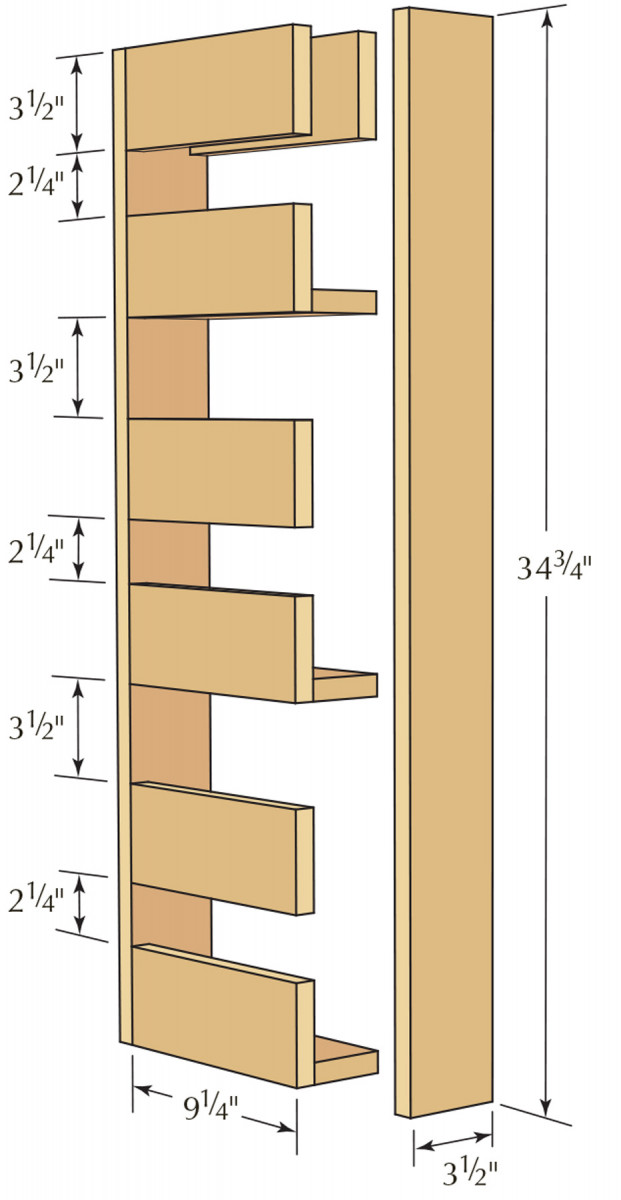
Each front piece is spaced either 21⁄4” or 31⁄2” from the piece attached directly above it. Cut a spacer block for each size. Set the narrow block just below the intersection of the front piece and side, then slide the next front piece into position. Drive screws to secure the front piece. Position the wider spacer block below that front piece to locate the third front. This pattern is repeated along the entire height of the magazine rack.
After the fronts are connected to one side, add the second side to the assembly, then drive the screws to secure those connections. The width of the unit makes this part of the build rather tight, but a standard pocket-screw driver in your drill does the job.
Now that the fronts are in place and attached, slip the shelves into position. Drive the center three to lock the shelf to the corresponding front, then drive the remaining two screws.
Add the hanger support with the pocket-screw holes facing the back of the rack – the hanger support acts as a spacer to keep the upper part of the sides aligned. Sand again as needed and you’re ready to apply a finish.
I used shellac and wax as my finish. Purchase a spray can of shellac and the task becomes toolless. After a couple coats of shellac, sand the entire piece with #320-grit sandpaper and apply a coat of paste wax.
Add brass hangers to the back – make sure you find at least one stud in the wall for needed support – then have a friend hold your rack in place as you complete the installation. Store your most treasured Popular Woodworking issues, then enjoy your solitude. PW
Glen is a senior editor of this magazine, the author of several woodworking books and the host of several woodworking DVDs.
Library Magazine Rack Cut List
No. item dimensions (inches) material
T W L
❏ 2 Sides 3⁄4 x 3 1⁄2 x 34 3⁄4 Aspen
❏ 6 Fronts 3⁄4 x 3 1⁄2 x 9 1⁄4 Red oak
❏ 3 Shelves 3⁄4 x 2 3⁄4 x 9 1⁄4 Red oak
❏ 1 Hanger
support 3⁄4 x 3 1⁄2 x 9 1⁄4 Red oak

Exploded view
Here are some supplies and tools we find essential in our everyday work around the shop. We may receive a commission from sales referred by our links; however, we have carefully selected these products for their usefulness and quality.


