We may receive a commission when you use our affiliate links. However, this does not impact our recommendations.
Laminated Pedestal Table
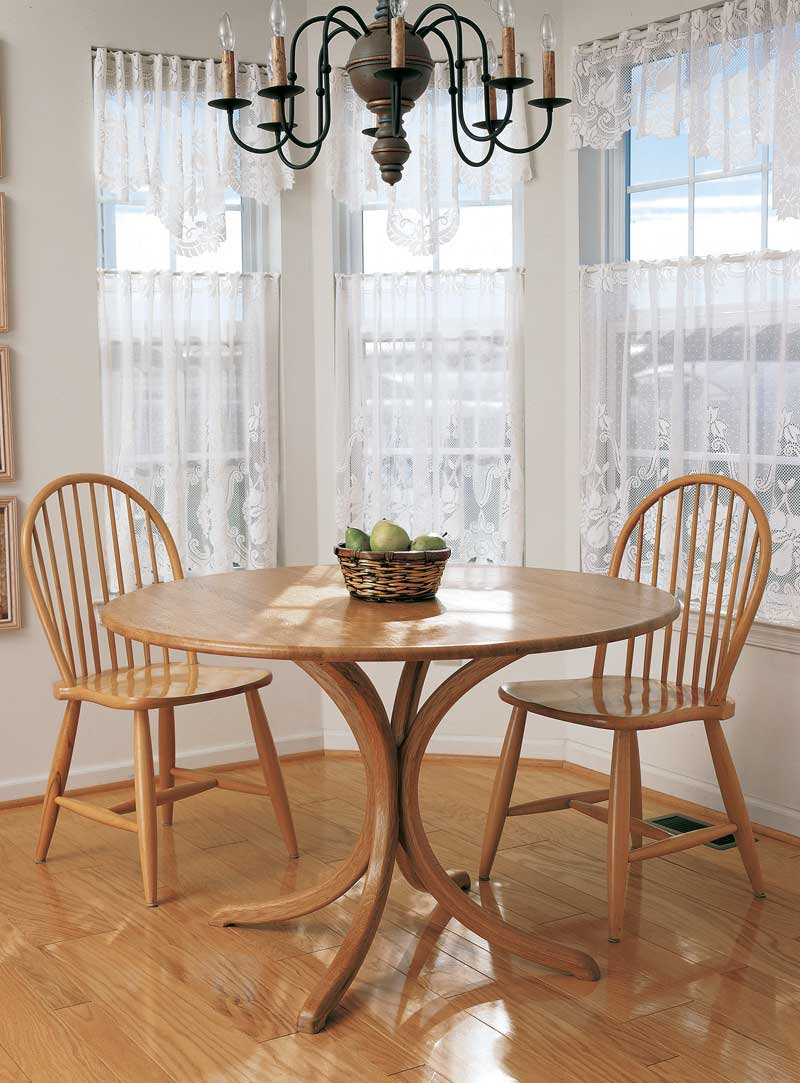
Curved legs make this table strong, practical and attractive.
By Fred Matlack
| After knocking my knee on the leg of our kitchen table and spilling the gravy for the umpteenth time, I realized it was time I made a pedestal table for our kitchen. We wanted a table in white oak—one that felt really solid, with seating for four or five.
The pedestal handsomely resolved the knee-banging problem. It’s made from four curved legs joined together at the center. Each leg is glued up from thin strips of oak, using a form to get the curve. I made the top out of thick boards with a wide bevel on the underside so it doesn’t look thick and massive. The finished table has a light appearance that belies its strength and solidity. Here’s how to build one yourself.
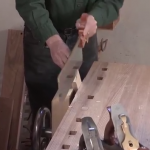
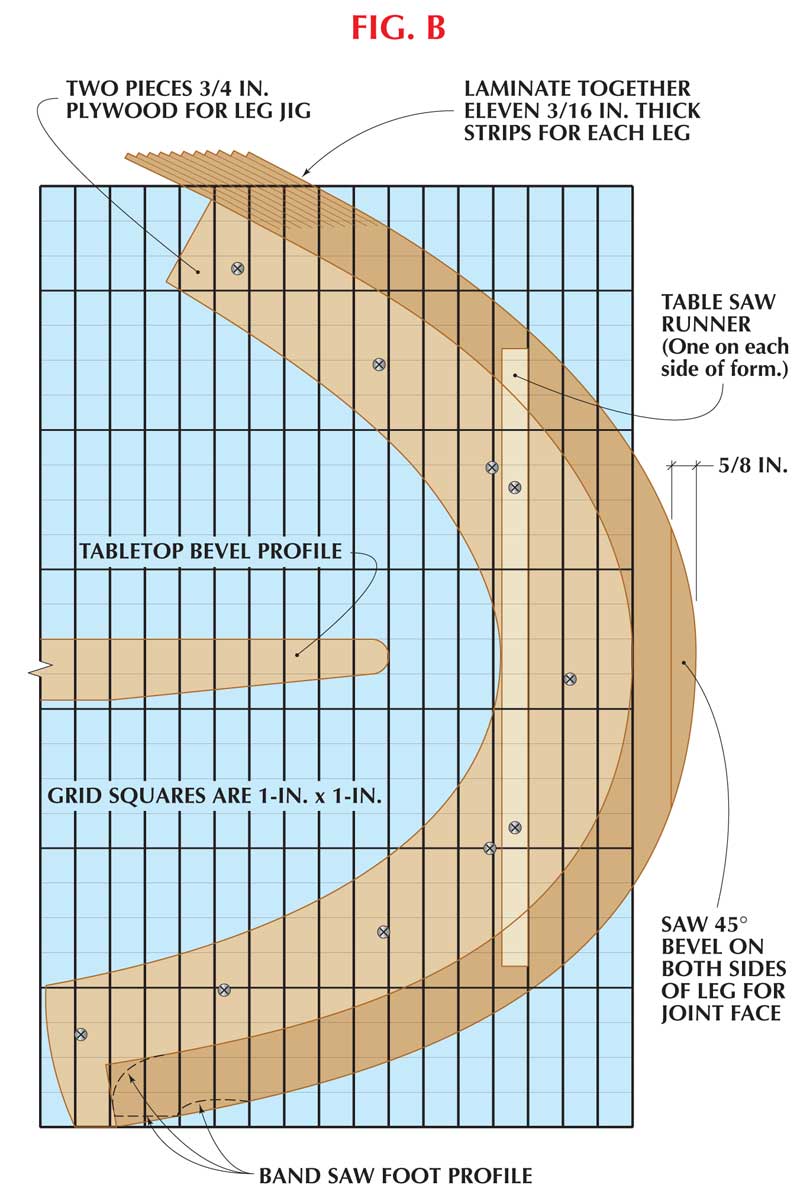
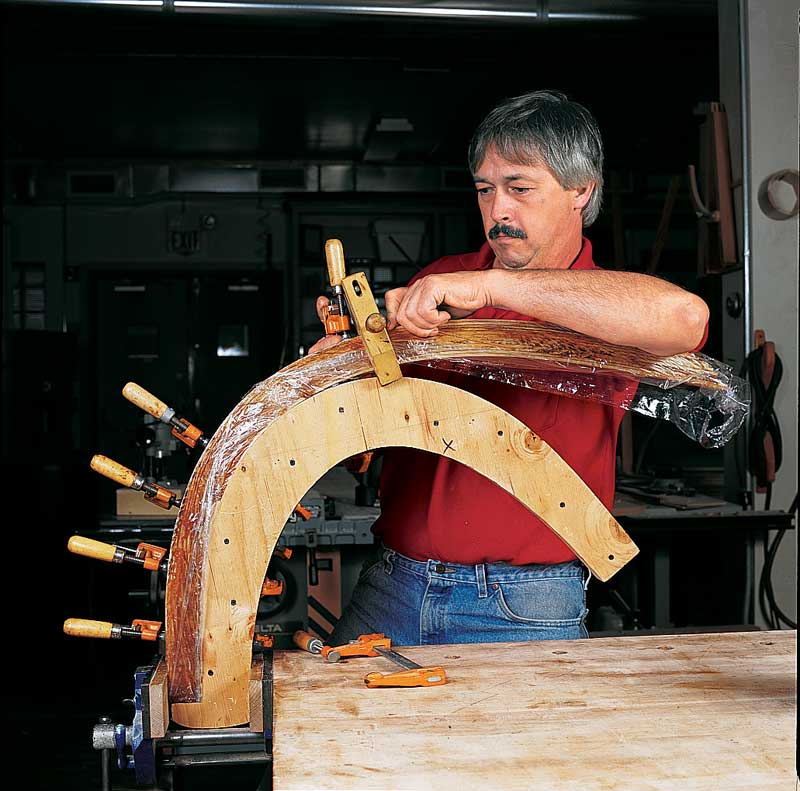
Laminate the legsFirst, make a curved form for gluing up the laminations. Glue and screw together two pieces of plywood to form a 1-1/2 by 16 by 28 in. blank. Enlarge the pattern shown in Fig. B, trace it onto the blank, and bandsaw to shape. (Watch out for the screws!) Smooth the curved side, then attach the foot. Choose 2-in. thick rough lumber for the leg strips. Draw reference lines across the wood. After you’ve cut the strips you can assemble them in their original order and the grain will look continuous. Rip the 3/16-in.-thick strips, 11 for each leg. I used a thin-kerf, 50-tooth combination blade, which kept waste to a minimum and produced smooth enough surfaces for gluing. Not all woods bend as easily as oak, so if you choose another wood, try some practice strips—they may need to be thinner. I recommend a urea resin glue, Unibond 800, to bond the strips that make up the legs (available from Vacuum Pressing Systems, 207-725-0935). It sets slowly, cures hard, leaves no dark glue line and doesn’t creep over time. For speed, apply the glue to the strips with a 3-in. paint roller, working on a sheet of plastic to protect your bench. Stack the strips in order, and cover them with plastic film wrap so they don’t stick to the form. Bend the strips over the form (Photo 1), and clamp. Let the glue dry overnight. Laminate all four legs before moving on.
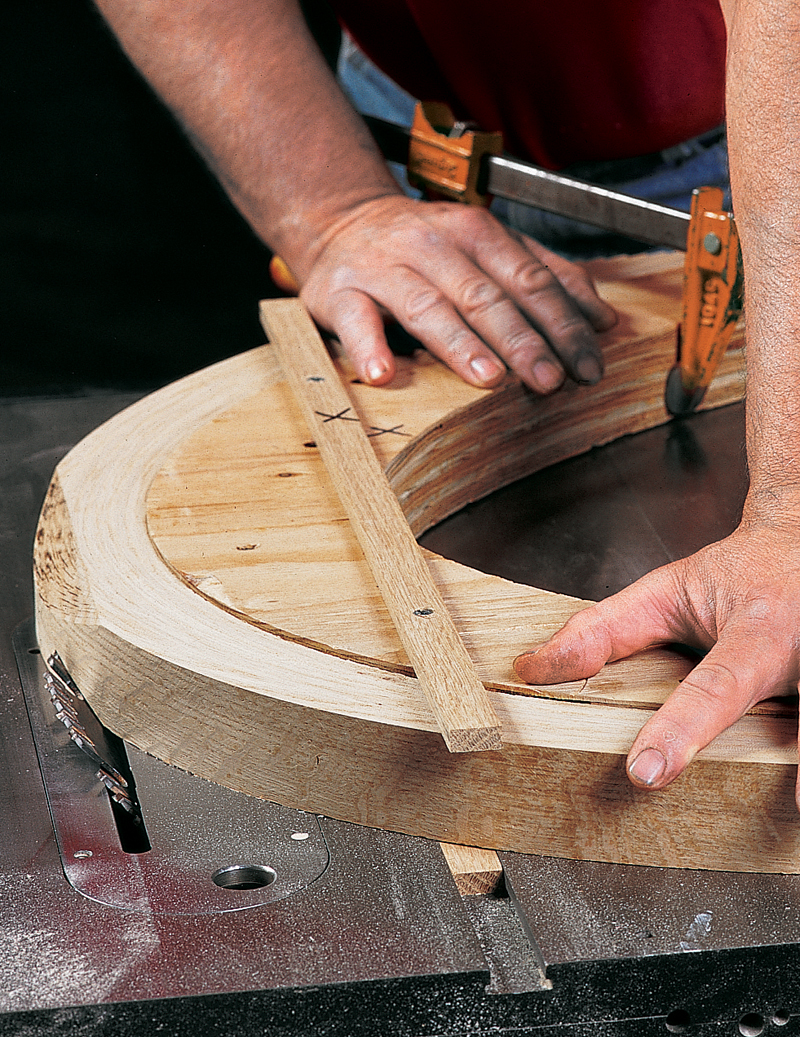
Assemble the pedestalFirst, surface the legs to a uniform 1-3/4 in. thickness (Photo 2). Next, cut two opposing 45-degree bevels on each leg where they will be joined. The easiest way to do this is to take your bending form and attach two strips so you can use it as a sliding table on your tablesaw (Photo 3). Bandsaw the foot shape on each leg. Then rout a 1/2-in. roundover on the edges of the leg, stopping 1 in. from the bevels. Later you’ll finish these roundovers with a file. Test-fit the four legs to make sure they fit together tightly. Mark each pair so you can glue them up in the same order, and mark each pair of legs for their biscuit slots. Cut two No. 20 biscuit slots on each bevel (Photo 4). Join the legs in pairs (Photo 5). If the inner face that results on each pair is not flat, plane it flat before you glue the two pairs together (Photo 6). Make sure you do a dry run of this final glue-up on a large flat surface. The inner faces of the legs must meet well and all four feet must be flat on the bench (Photo 7). After glue-up, let the pedestal stabilize for a couple days, during which time you can complete the edge roundovers where the legs are jointed together. Scribe the tops of the legs for a good fit to the top (Photo 7).
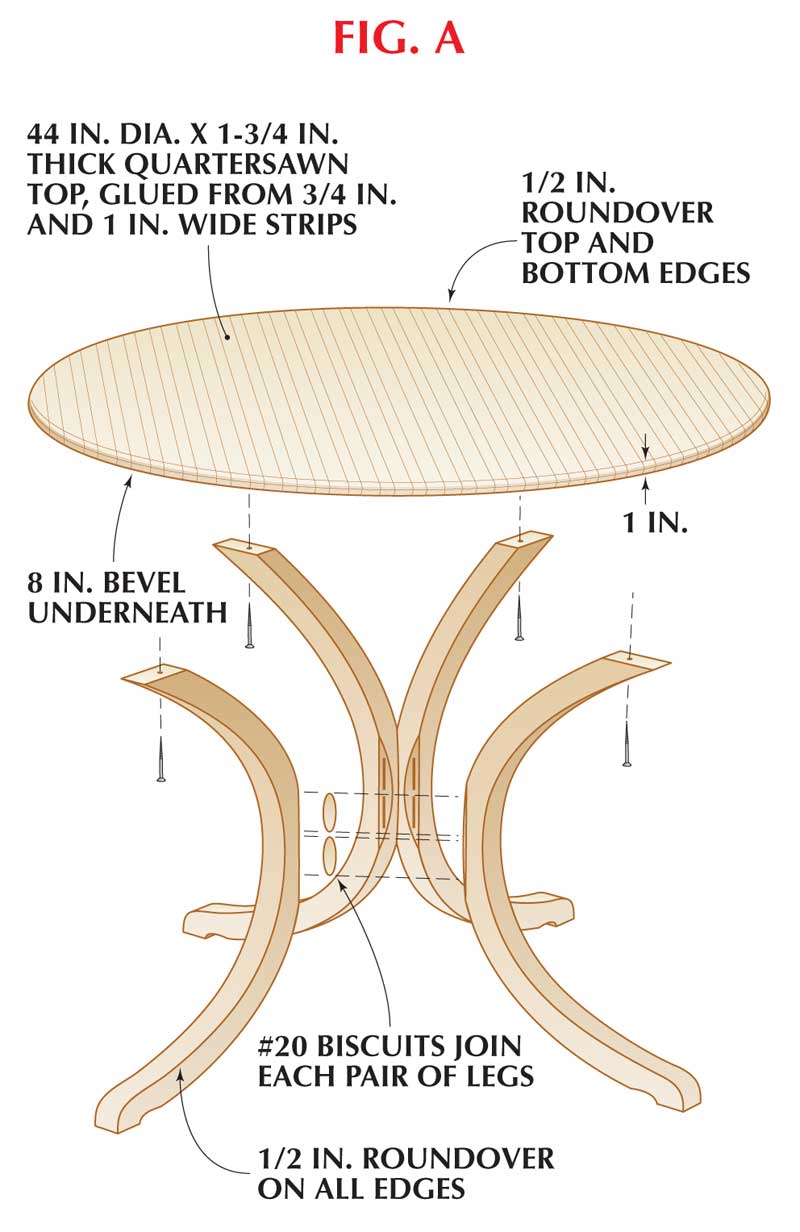
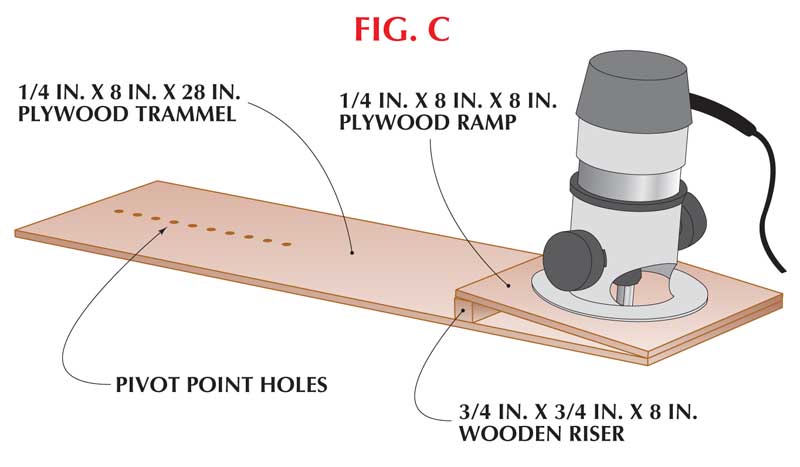
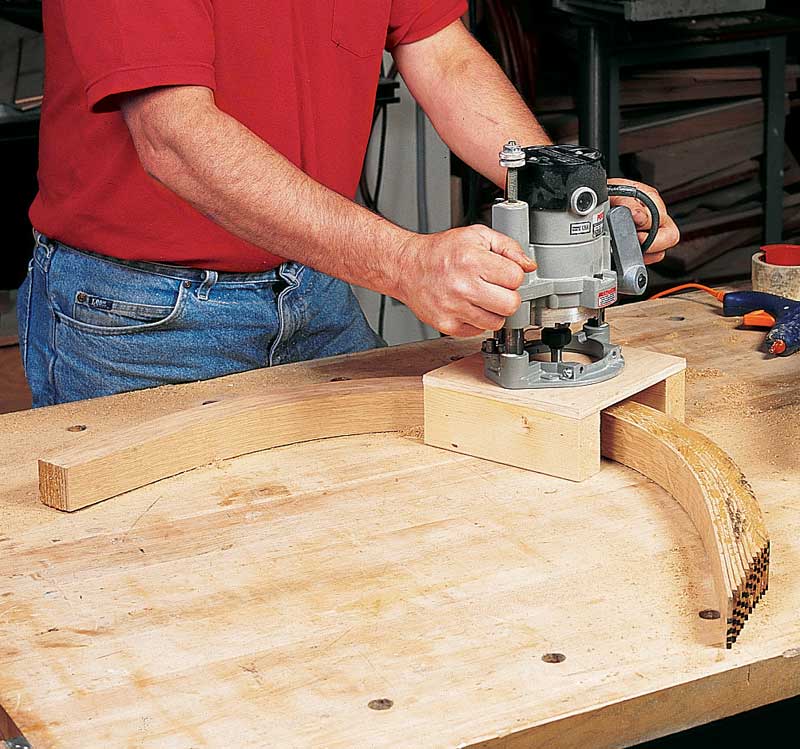
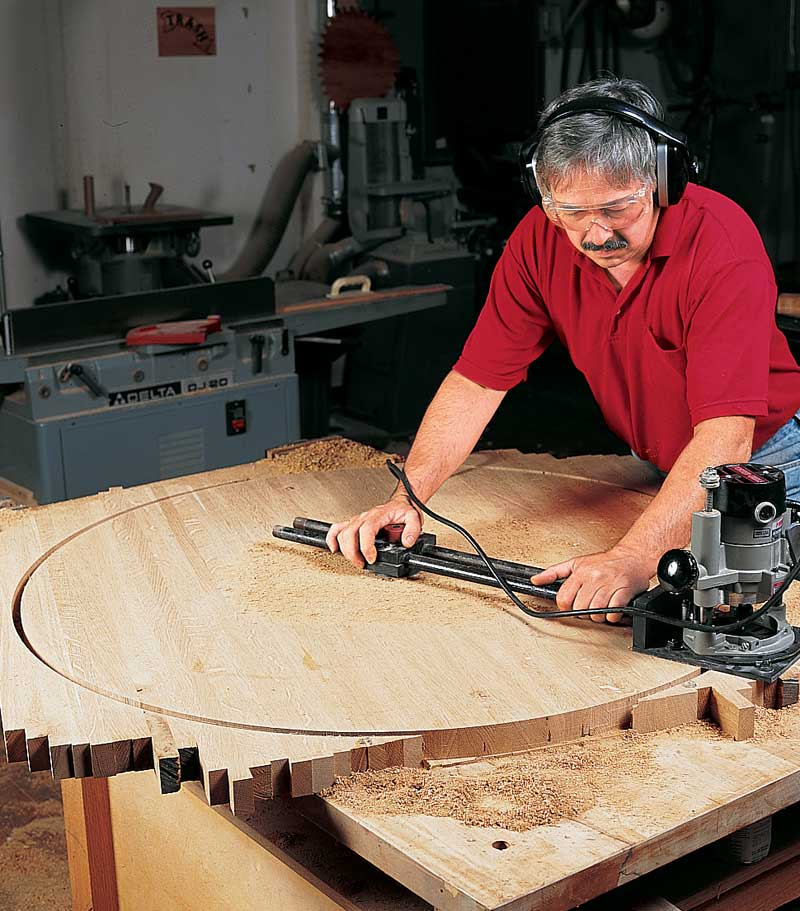
Glue-up the topI wanted a quartersawn look for the top, but thick quartersawn oak is very difficult to find. I cut thinner, flatsawn boards to 2-in. strips, flipped them 90 degrees and glued them together to make the quartersawn top. Make the 2-in. strips from both 4/4 and 5/4 flatsawn boards. The two thicknesses will make the top more attractive. Glue strips into slabs that will fit through your planer. Plane the slabs smooth and glue them together to form the top. TIP: Mark the quartersawn face of each strip with an arrow to indicate the “downhill” direction of the grain. When you’re gluing the slabs together, make sure the arrows all point the same way. This will permit you to run the gluedup slabs through your planer with minimum grain tear-out. Rout the rough top to a circle, as shown in Photo 8, working from the underside. I used a commercial trammel to hold the router, but you could make your own, as shown in Fig. C. Because you’re working on the underside, you can screw the center of the trammel directly to the top.
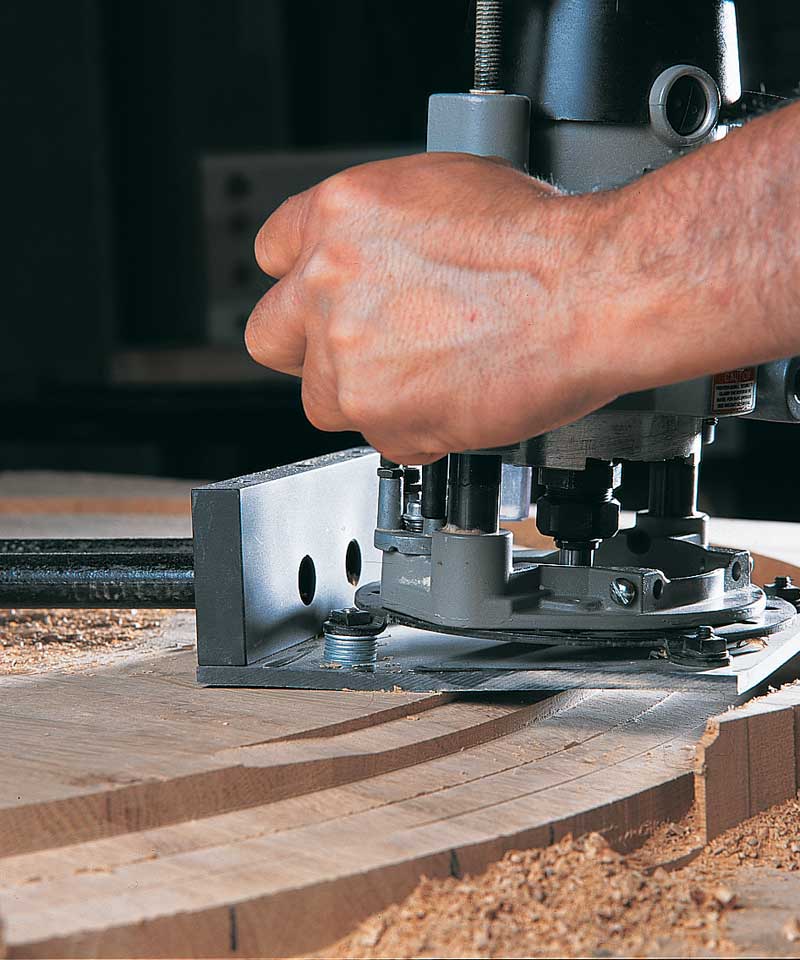
Bevel the topThis design has an 8-in.-wide bevel that stops short of the ends of the legs. If you change the diameter of the top, be sure to change the width of the bevel to compensate. To rout the bevel, tilt the base of the router on the trammel (Fig. C). Because the bevel rises 3/4-in. over 8 in. of width, adjust the router base so it does the same. Begin routing at the edge, making several passes until the edge is 1-in. thick. Use a wide, straight bit or a mortising bit, that leaves a smooth cut. I used a 1-in.-dia. bit. After the first cut, reset the trammel to a slightly smaller diameter and rout until you meet the first cut. Proceed until the entire bevel is cut. Turn the top over and release the waste by making the final circular cut with your router and a flush trim bit. Clean up the top with a belt sander and round the top and bottom edges with a 1/2-in. roundover bit. Turn the top upside down and position the legs, then drill for the screws that connect them.
Finishing touchesFinish-sand the entire table. I applied a brush-on lacquer, so I only needed to go to 120 grit on this coarse-grained wood. If you apply another finish or use another wood, you may need to do more sanding. Finish the top and base separately, then screw them together. You may want to add leveling feet to the pedestal if it came out a bit twisted or if your floor isn’t flat. Fig. A
Fig. B
Fig. C
1. Laminate the legs on a curved form. Line up the strips at the foot of the form, clamp them, and proceed up the form, clamping every 4 to 6 in. A handscrew clamped loosely across the form keeps the strips from sliding around.
2. Surface the legs with a router in a straddling jig, using a wide, straight bit. Hot-melt glue the legs to a flat surface to hold them.
3. Cut 45-degree bevels on each leg where they will come together. The bending jig can be converted to a handy sliding tablesaw jig by attaching a pair of strips to fit the miter gauge slots.
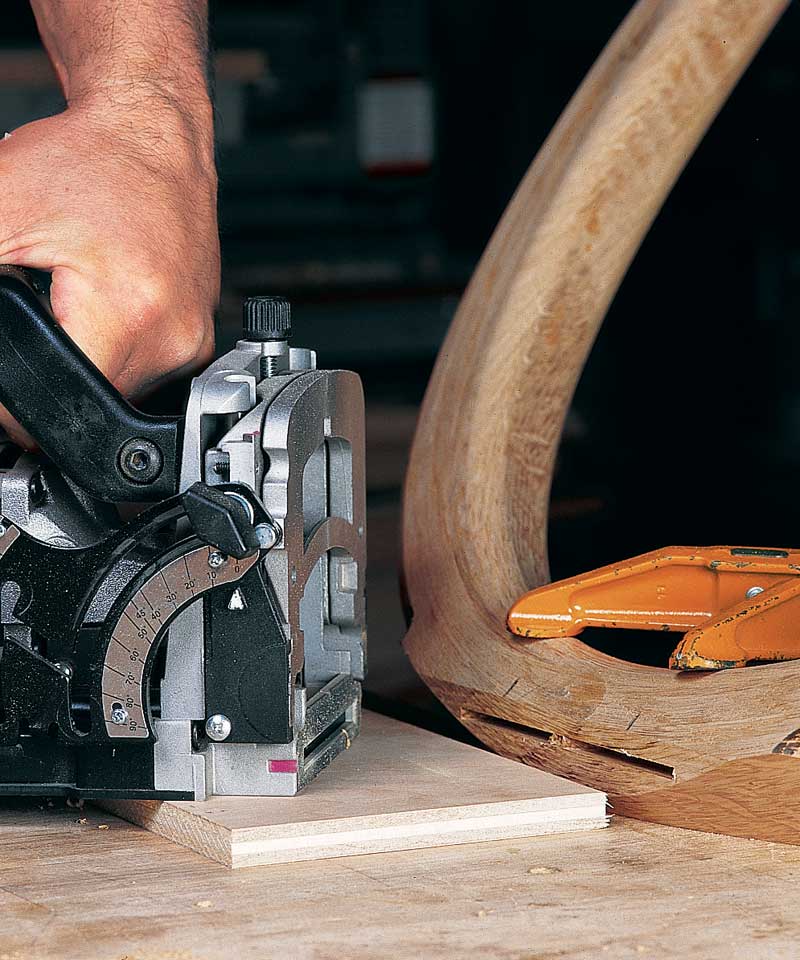
4. Cut biscuit slots on the beveled faces of each leg. You’ll need to clamp the leg with one bevel flat on the bench, and raise your biscuit joiner with a piece of 1/2-in. scrap to position the slots.
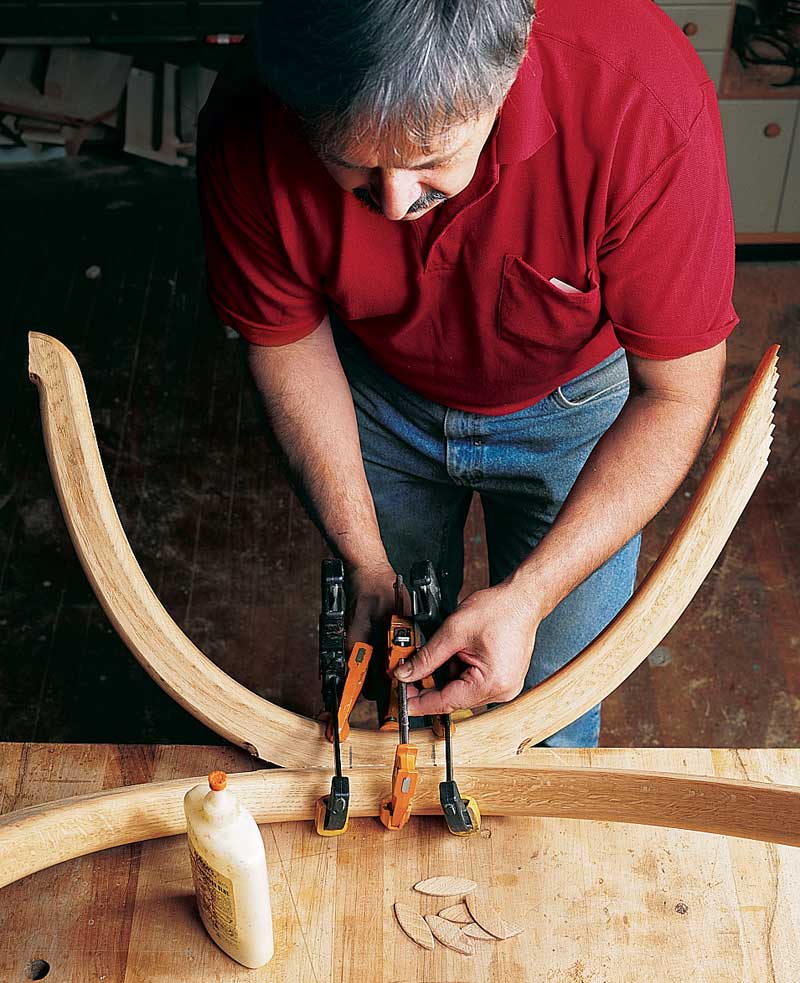
5. Join the legs in pairs using glue and biscuits. The inner face of each pair should be planed flat after the glue has dried.
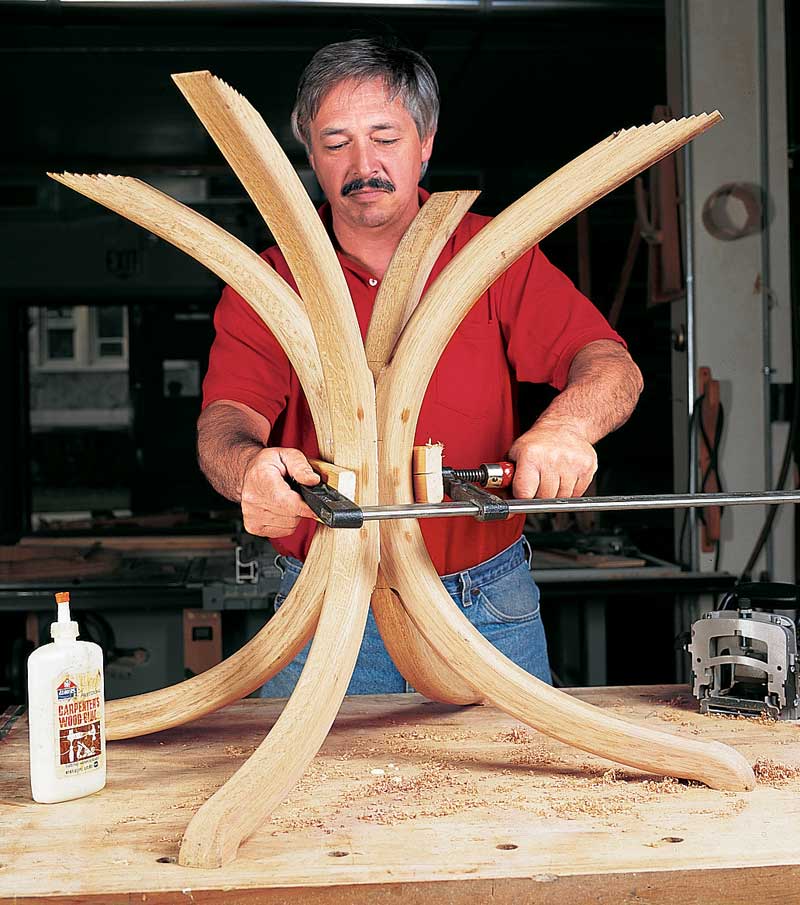
6. Assemble the pedestal by gluing the two leg pairs together on a flat surface. All four feet must rest solidly on the surface. A dry run is helpful.
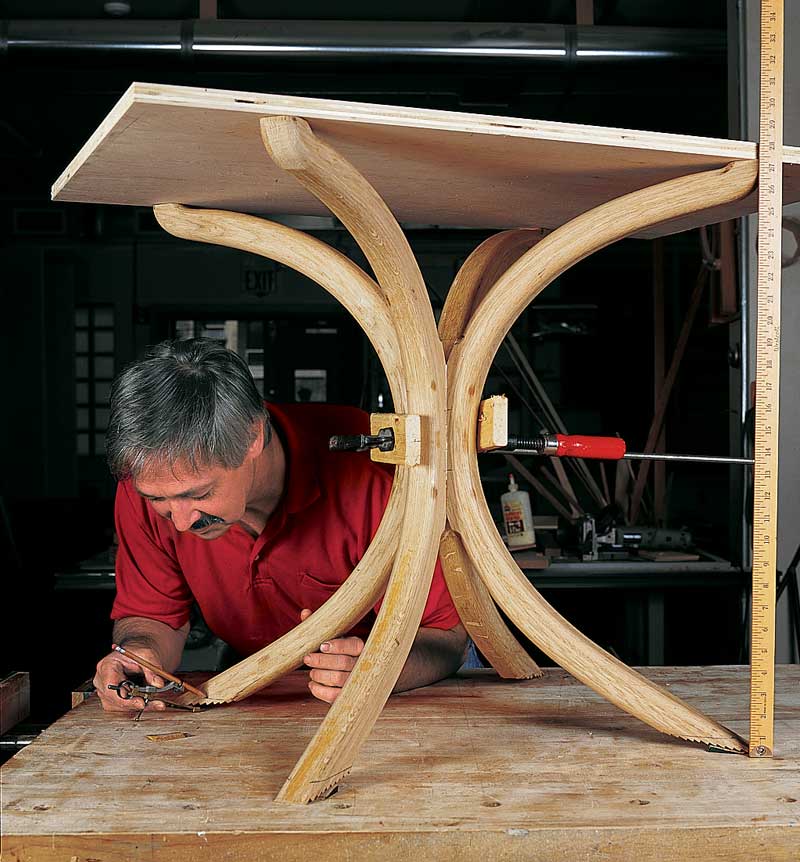
7. Trim the leg tops by flipping the assembled pedestal upside down, with a piece of plywood on the feet. Shim the legs so the plywood is parallel to the bench, then scribe and trim.
8. Cut the circular top using a router and a trammel. Do all but the final 1/8 in. of the cut, so the waste is still attached. This allows you to keep the top fastened down for routing the bevel.
9. Cut the bevel on the underside by tipping the base of the router (washers act as shims on this commercial trammel). Using a wide straight bit, rout concentric circles, each shallower than the last. This story originally appeared in American Woodworker April 1999, issue #72.
|
Here are some supplies and tools we find essential in our everyday work around the shop. We may receive a commission from sales referred by our links; however, we have carefully selected these products for their usefulness and quality.