


We may receive a commission when you use our affiliate links. However, this does not impact our recommendations.
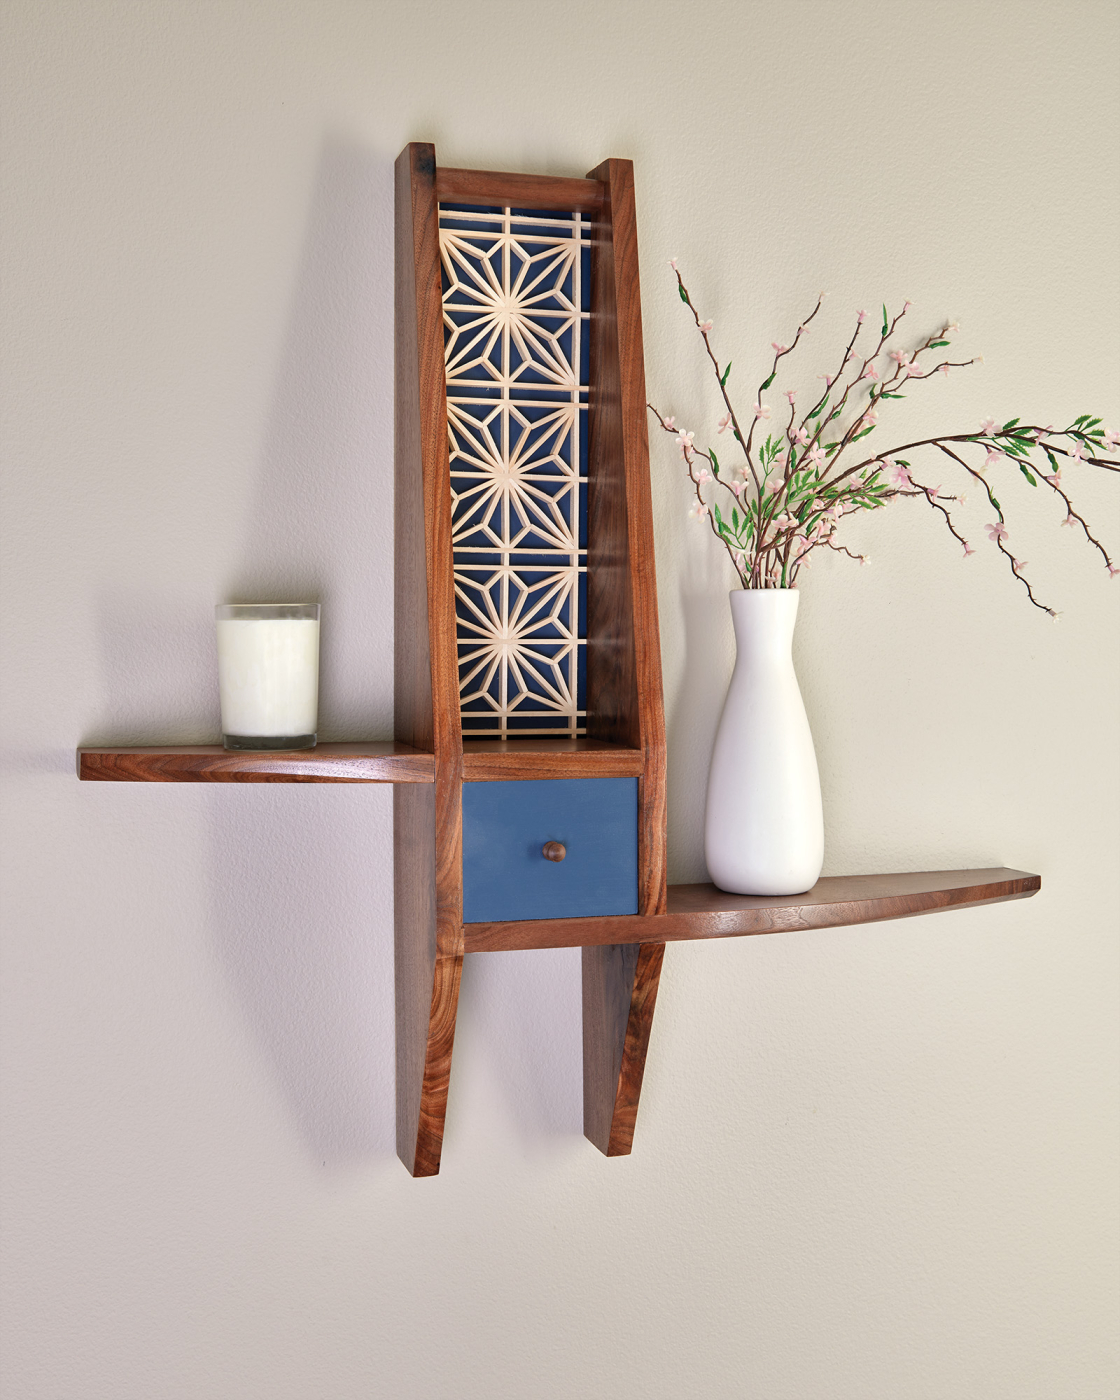
This wall shelf is an elegant, simple way to showcase a special piece of woodworking —an Asa-no-ha Kumiko panel.
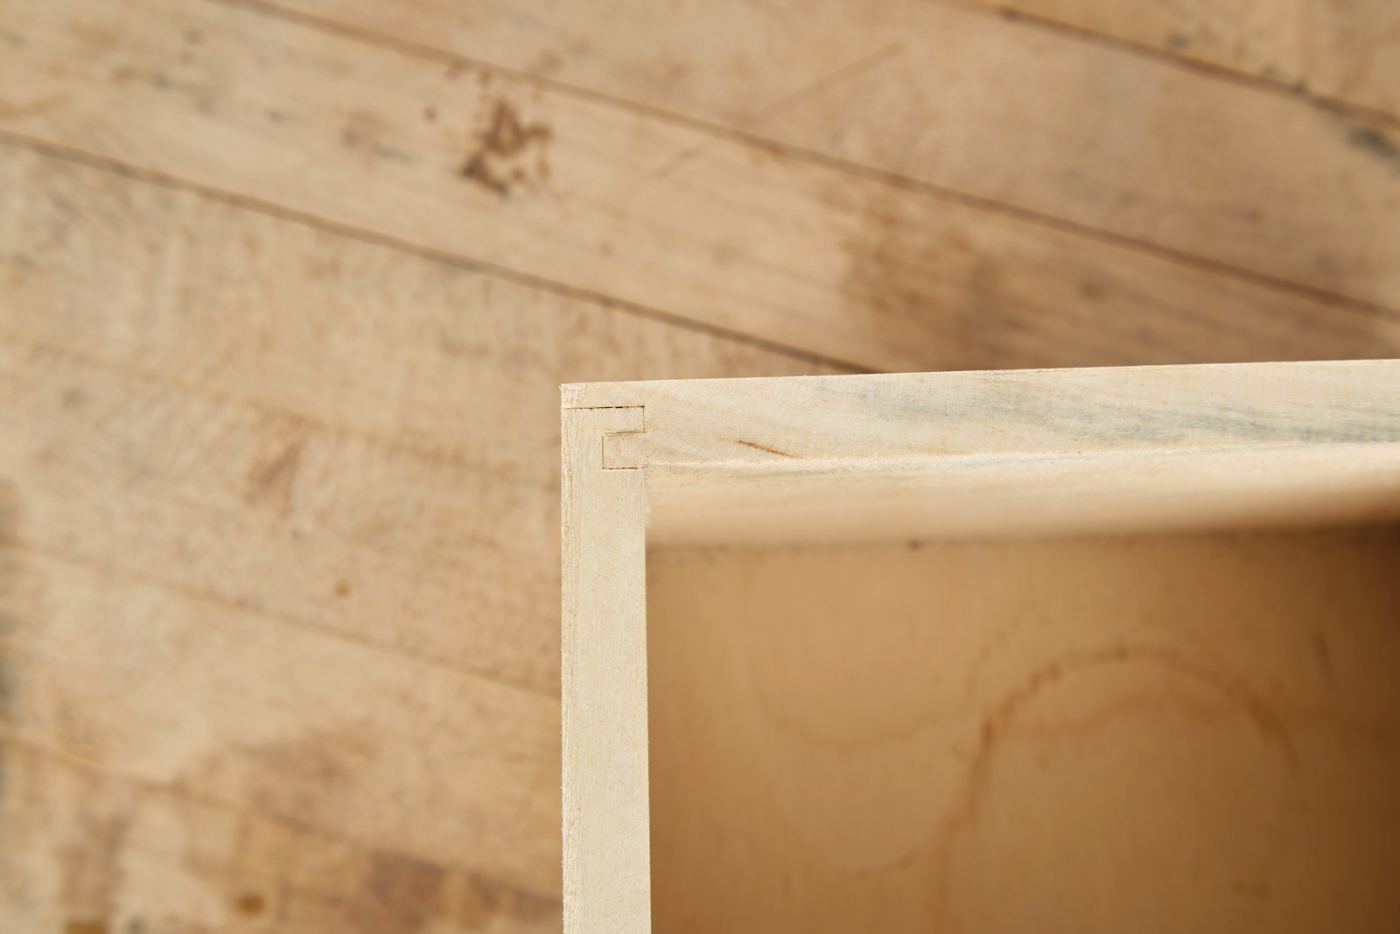
Project #2218 • Skill Level: Intermediate • Time: 2 Days • Cost: $75
Inspiration can come from any number of places. Often, I find (furniture) pieces in antique stores, flea markets, and garage sales. I don’t buy them usually—I have too many hobbies the way it is. What I do instead is take photos of them. That way, as I’m working on a design, I can reach back into my phone’s library and pull design elements from these pieces I’ve come across.
Sometimes, however, it isn’t a design or furniture piece that inspires. Instead, it’s a technique. That’s precisely what happened when I got a hold of a copy of Matt Kenney’s book, “The Art of Kumiko‚” a couple of years back. Not that I hadn’t been aware of Kumiko. In fact, it seems to have been the “in” thing the last few years. What really struck me was the way that Matt laid out the process. It seemed approachable and logical, so off into the mental design library it went. When I started working on the design for a wall shelf, I thought this was the perfect place to incorporate one of these Kumiko panels.
Additional Reading: Check out The Art of Kumiko by Matt Kenney, which is available in our store.
Cutlist and Diagrams


 Break Down the Stock


 Break Down the Stock
This wall shelf doesn’t take a ton of stock. I usually try and sell relativity high-quality material that I’ve cut, but I always end up with a “bargain bin” stack that I like to use where I can. The walnut for this shelf came from that stack—it had some knots, cracks, and pith streaks. But, nothing we can’t work around.
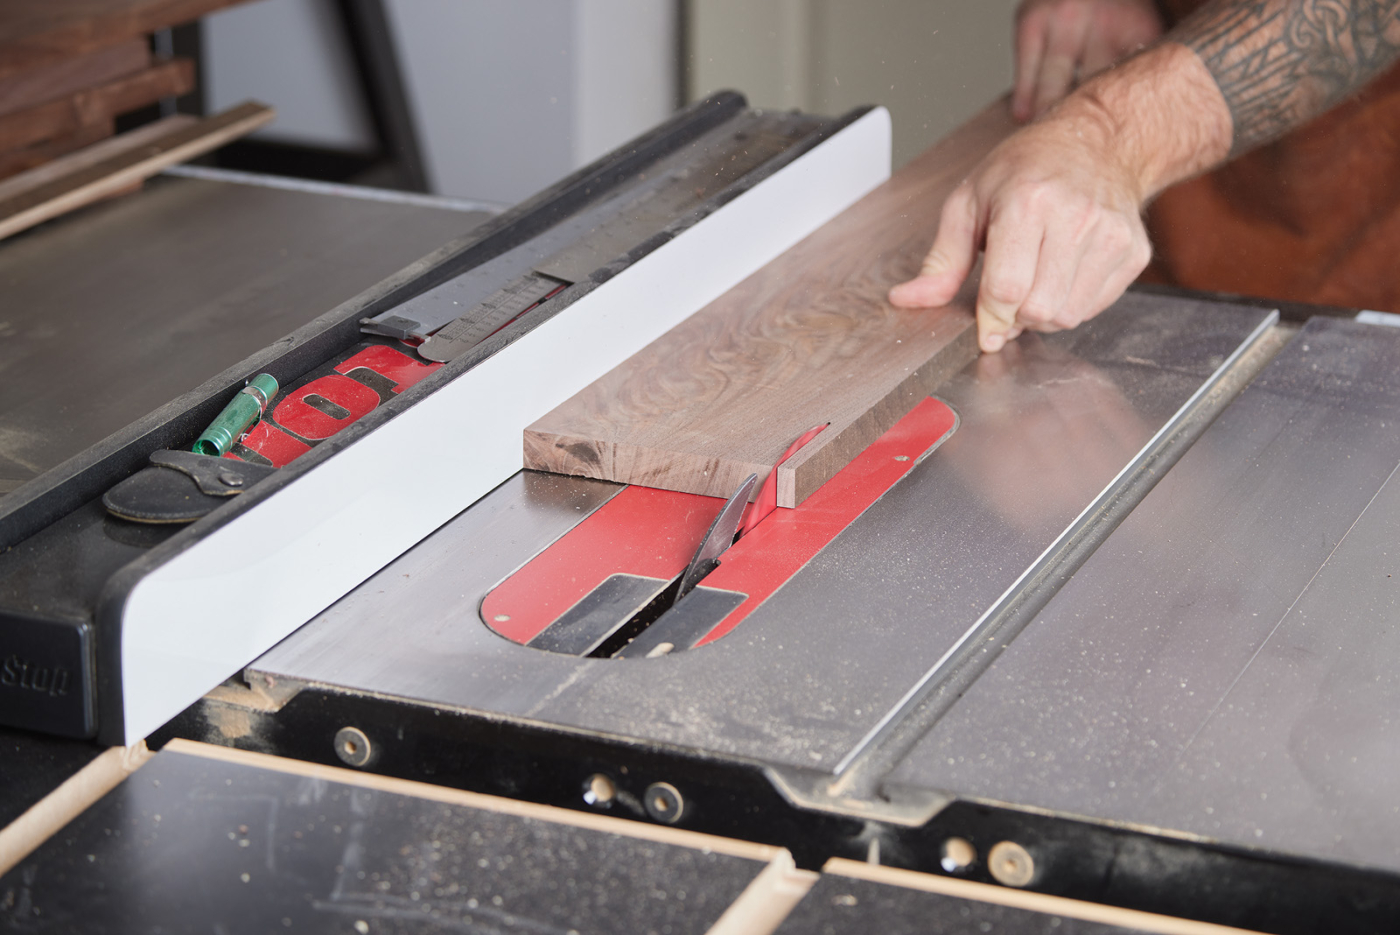
1 The wall shelf requires a small amount of stock. I selected a piece of walnut I had in my collection that was too “gnarly” to sell. Some strategic ripping removed most of the defects.
After laying out all the parts on my rough stock, I spent a few minutes breaking down parts with a hand saw. There were a few major defects that I wanted to cut out, so I made a few strategic cuts at the table saw. Sometimes this means jointing an edge, ripping off the opposite side, and re-ripping the jointed edge. Once I had my final width dialed in, I ripped all of the stock at the same time, as this keeps all of the parts the exact same width.
2 A crosscut sled is a great way to cut parts to length accurately.
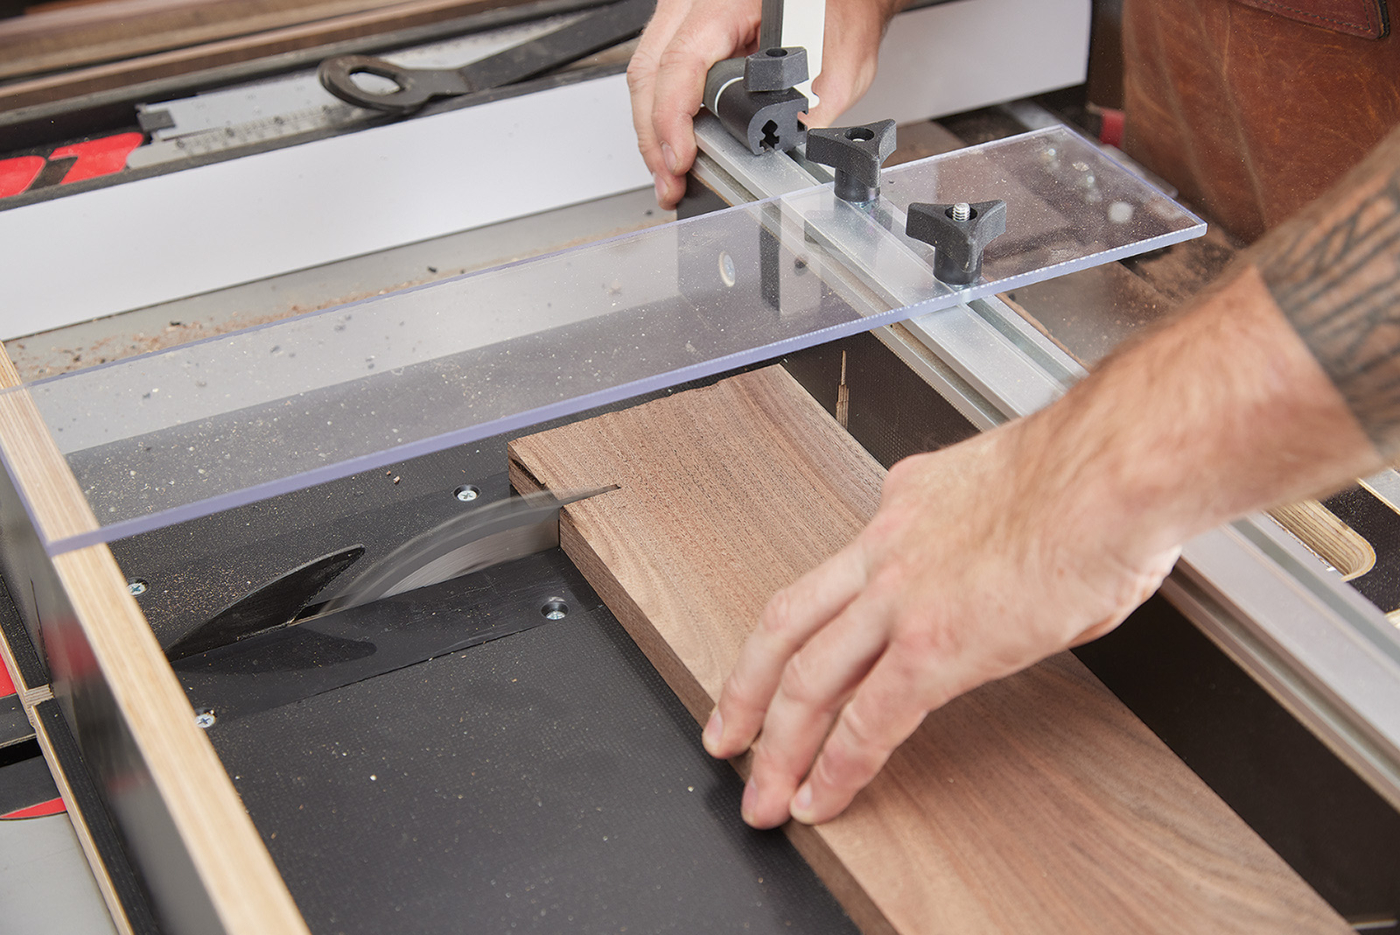
While at the table saw, I also set up a thin ripping guide to rip a series of basswood strips for the Kumiko panel. The thin ripping guide allows you to safely rip consistent-sized strips quickly. I ripped a small trailer full, which ended up being almost three times the amount I needed.
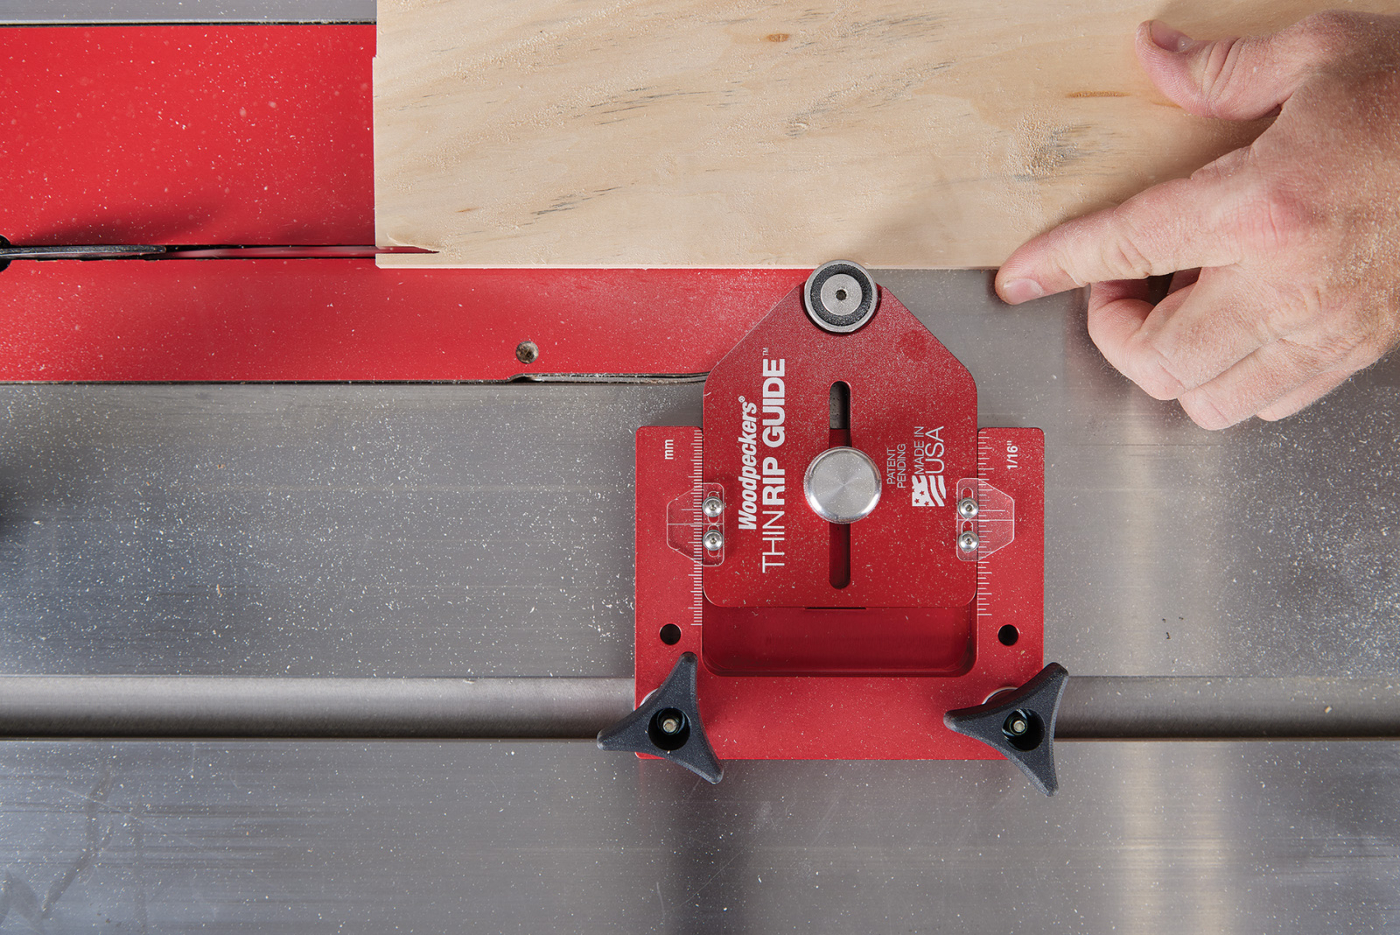
3 While at the table saw, I used a thin rip guide to rip a small semi-trailer full of strips for the Kumiko panel.
Joinery Before Shaping
The joinery for this wall shelf is fairly straightforward. The two shelves, which are asymmetrical, are joined to one side with a stopped dado and the other side with a half-lap. You’ll see what I mean when by checking out the drawing at the top of this article. Before cutting either the tapers on the uprights or the curves on the shelves, it’s best to take care of the joinery while the parts are still square.
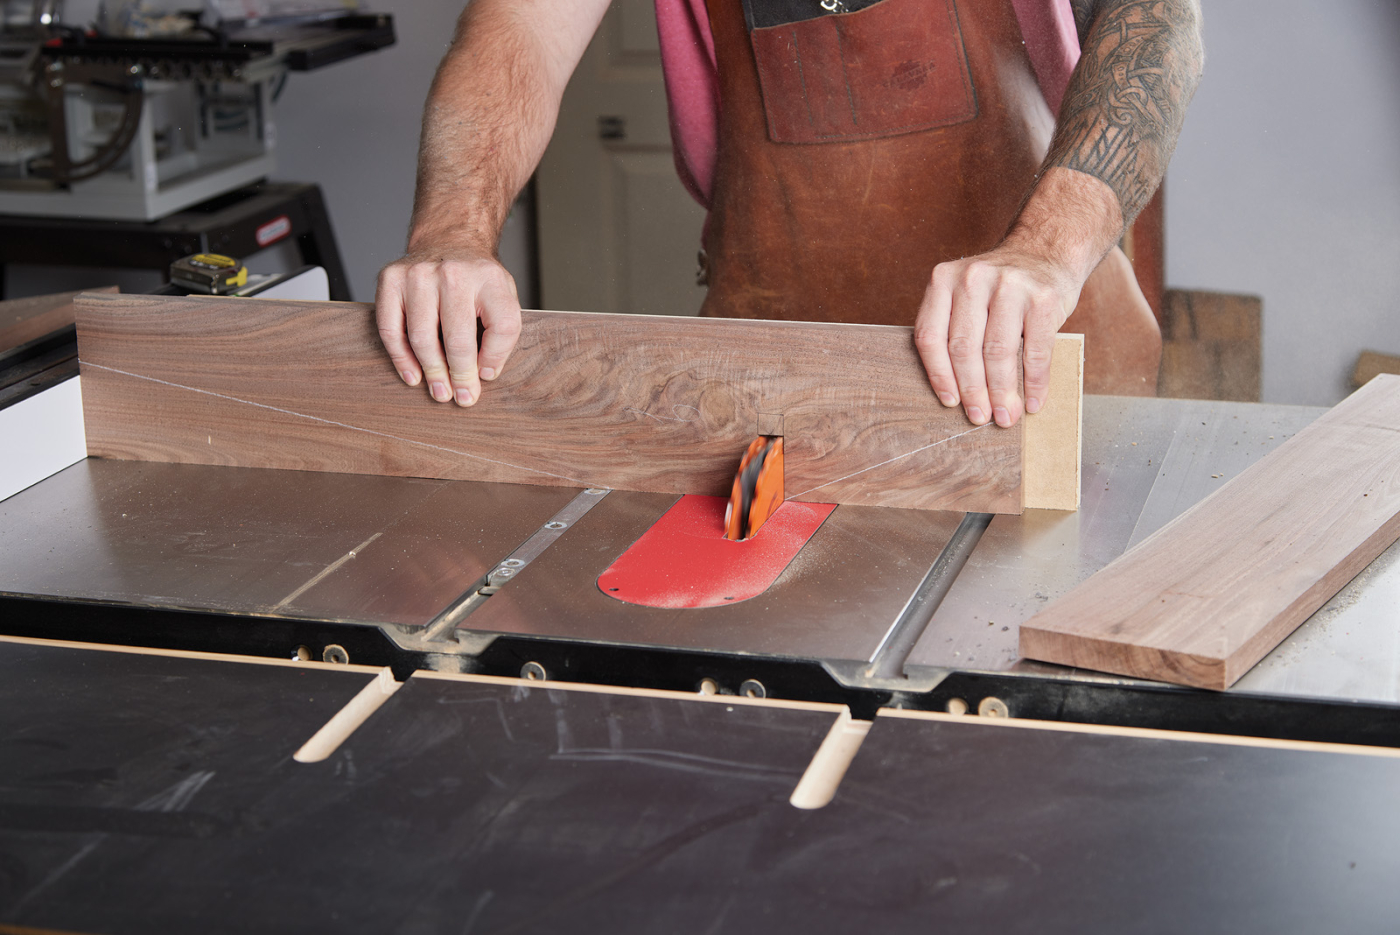
4 Cutting the large half-lap in the sides and shelves can be a trick. Start with a dado blade set at maximum height. An 8″ dado blade will cut approximately 2″ deep. This design calls for 2-1/2″ deep laps.
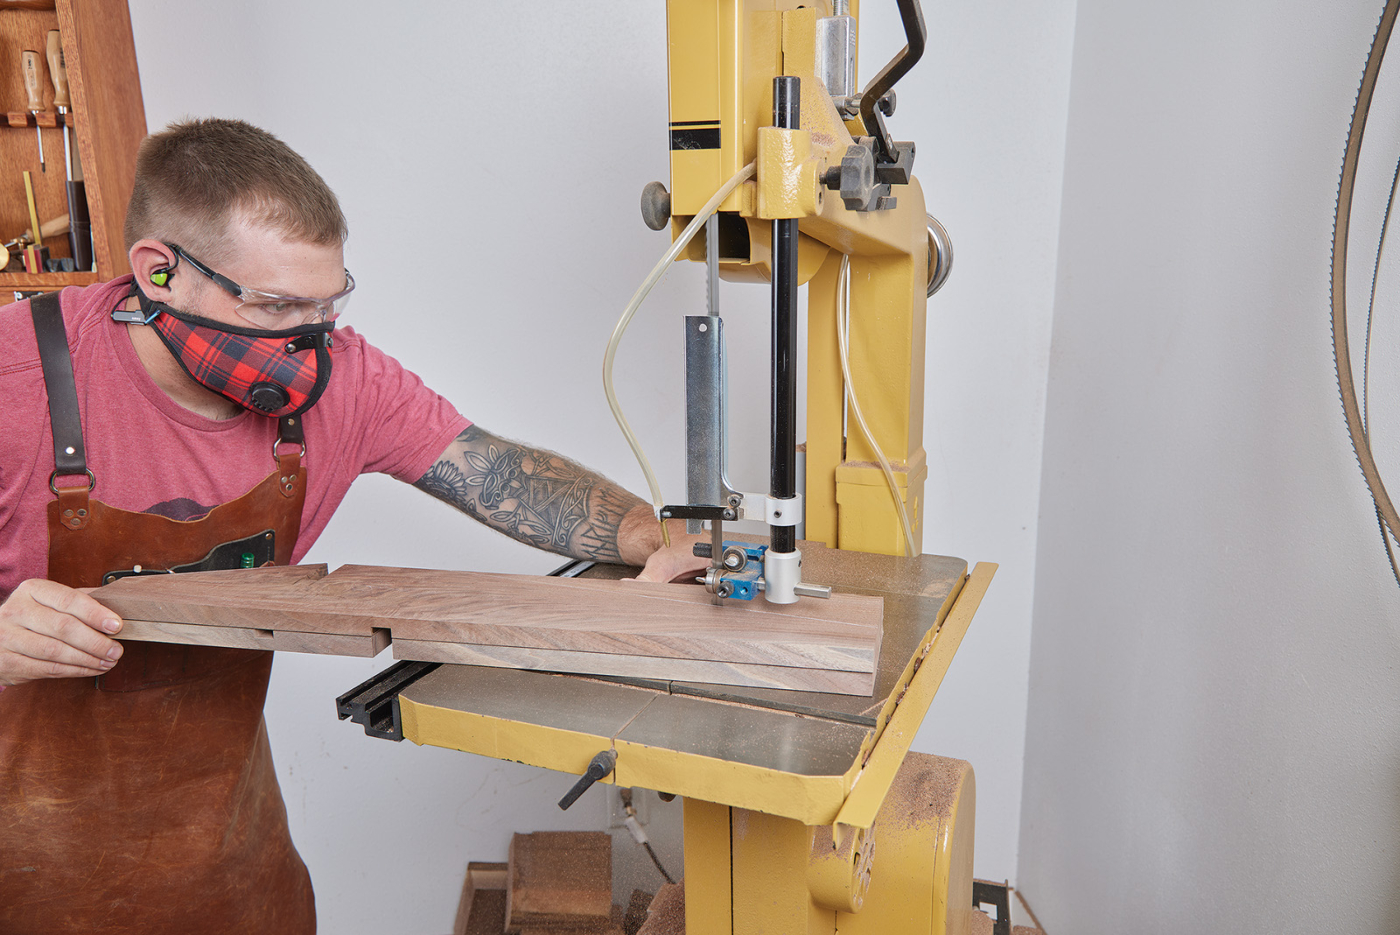
After dialing in a dado blade to match the stock thickness, I cut the half-lap as deep as possible, using the miter gauge with an auxiliary fence to guide it. Now, this notch isn’t deep enough—but the dado blade at least gives you a start. After notching the uprights and the shelves, I used a marking knife to lay out the rest of the notch and cut it at the bandsaw (Photo 5). Any final paring can be done with a chisel.
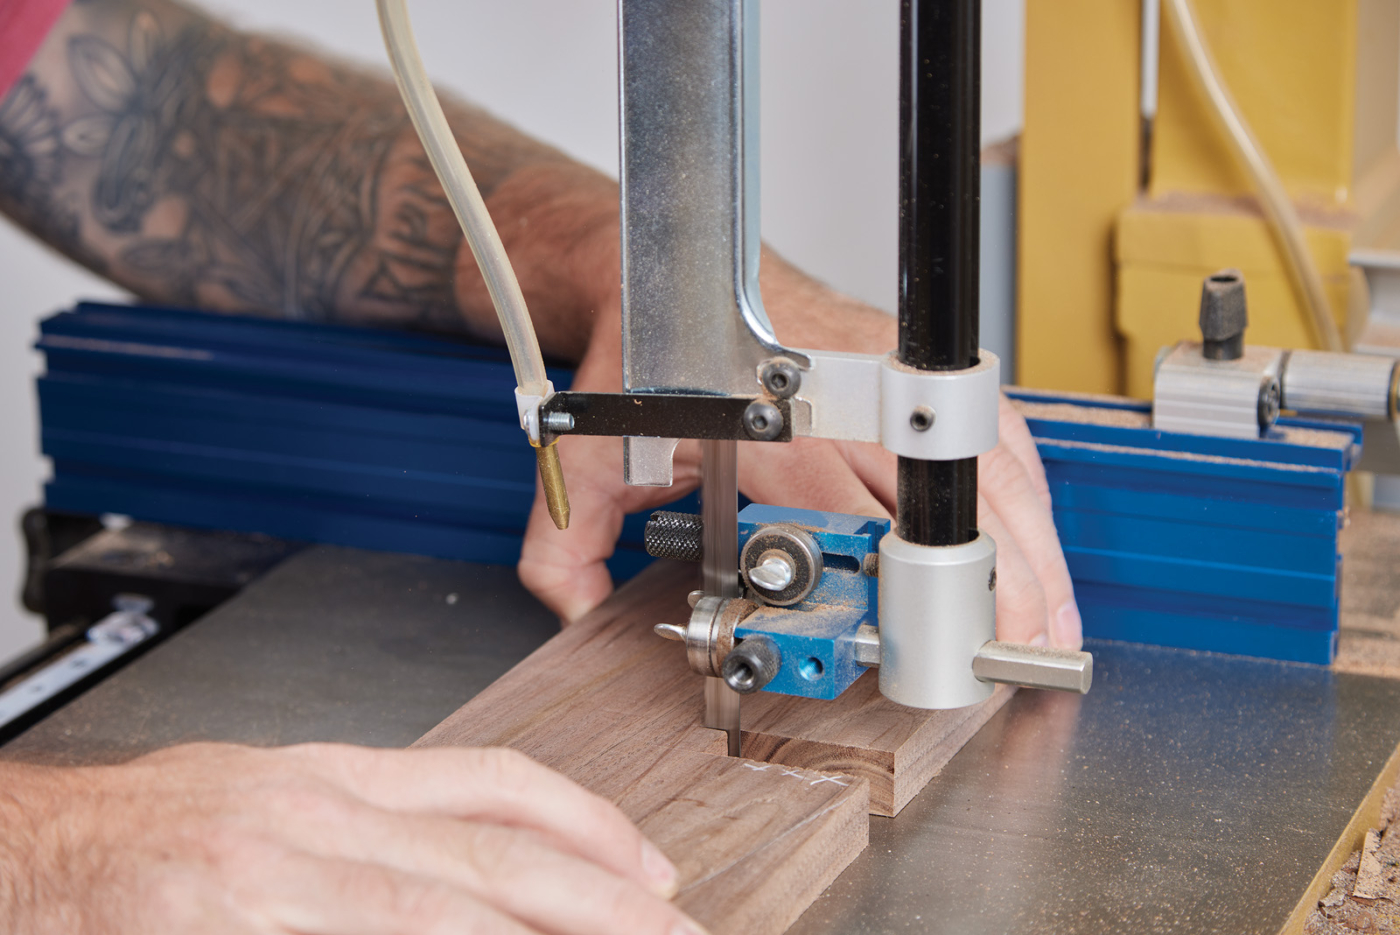
5 Extend the half-lap lines by making a marking knife mark and cut rough cut them at the bandsaw. You can then use a chisel in the knife line to clean up the laps for a perfect fit.
While the dado blade is loaded in the saw, you might as well cut the stopped dado as well. Here, we don’t want to cut all the way through the part (the “stopped” part of the stopped dado). To do this, I mark a “ballpark” mark on the table saw insert and stop my cut when the part touches that mark. The sloped dado can quickly be cleaned up once you return to the bench. Just square up the end with a chisel (Photo 10), and then hog out the waste. A router plane will help make the end of the dado the same depth as the dado-blade cut portion.
6 On the side opposite each half-lap, there’s a stopped dado for the end of the shelf. This can be cut with the same dado blade. Simply mark the table saw insert plate with a stopping point, and stop the cut when your part kisses the mark.
Shape the Parts
With the joinery cut, you can now start shaping all of the parts. The uprights get a pair of tapers on them. To make the parts consistent, I used carpet tape to hold them together and cut the taper at the bandsaw. Any marks left from the bandsaw can be cleaned up at the bench with a handplane.
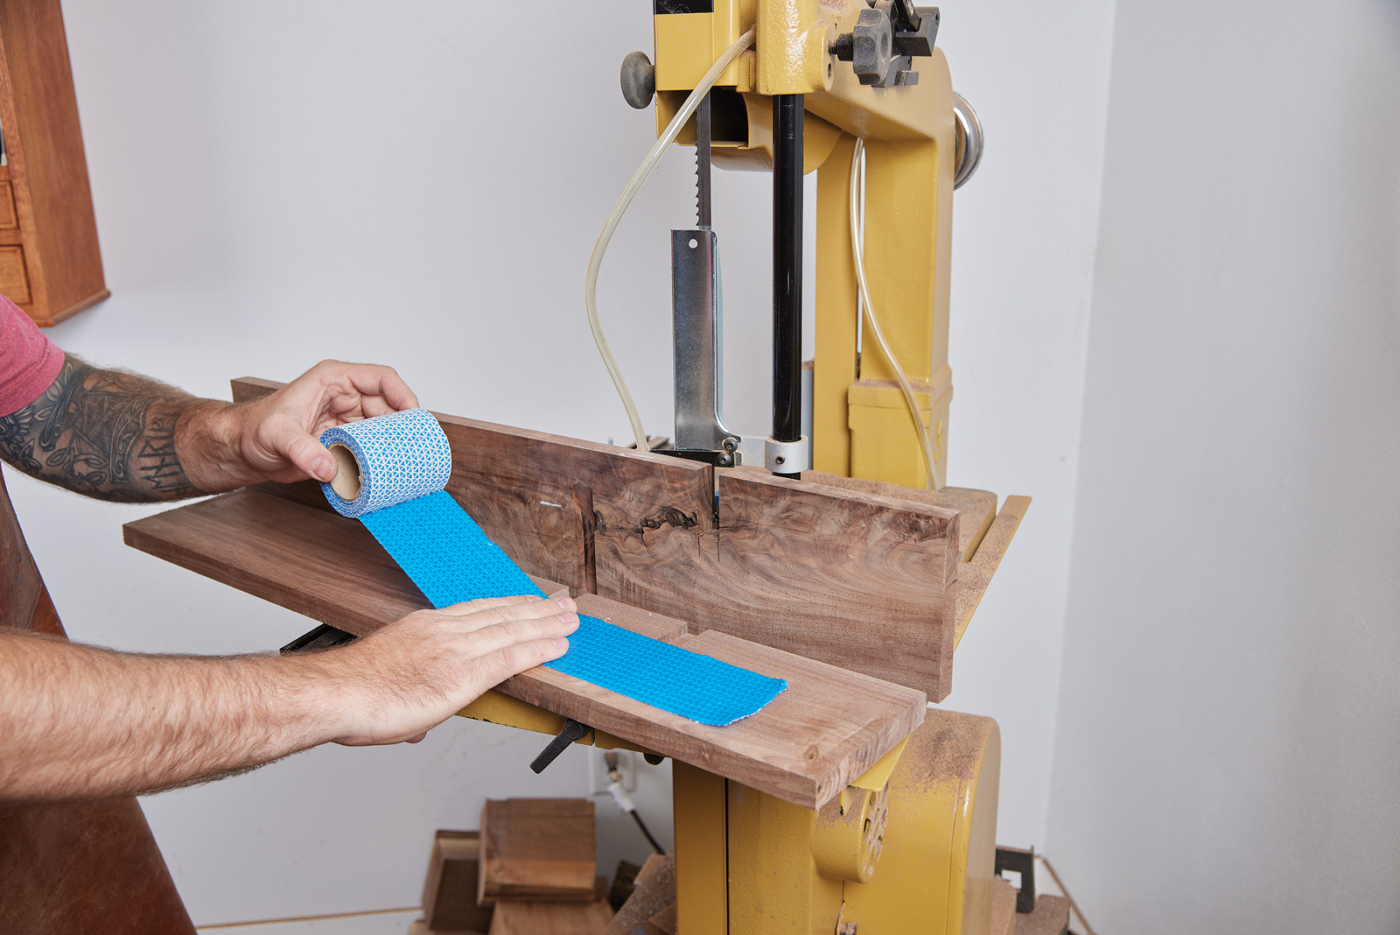
7 Some wide carpet tape is a quick way to gang cut parts.
8 A well-tuned saw will track straight and just leave you with only minor cleanup.
The shelves get a gentle curve on the front edge. The radius of each is a little different due to the shelf lengths, so I just used a flexible straightedge to mark a gentle curve and cut it to shape at the bandsaw. Cleaning up this curved shape can be done with sandpaper or a rasp, but a sharp block plane will follow the curve pretty well and leave you a nice surface.
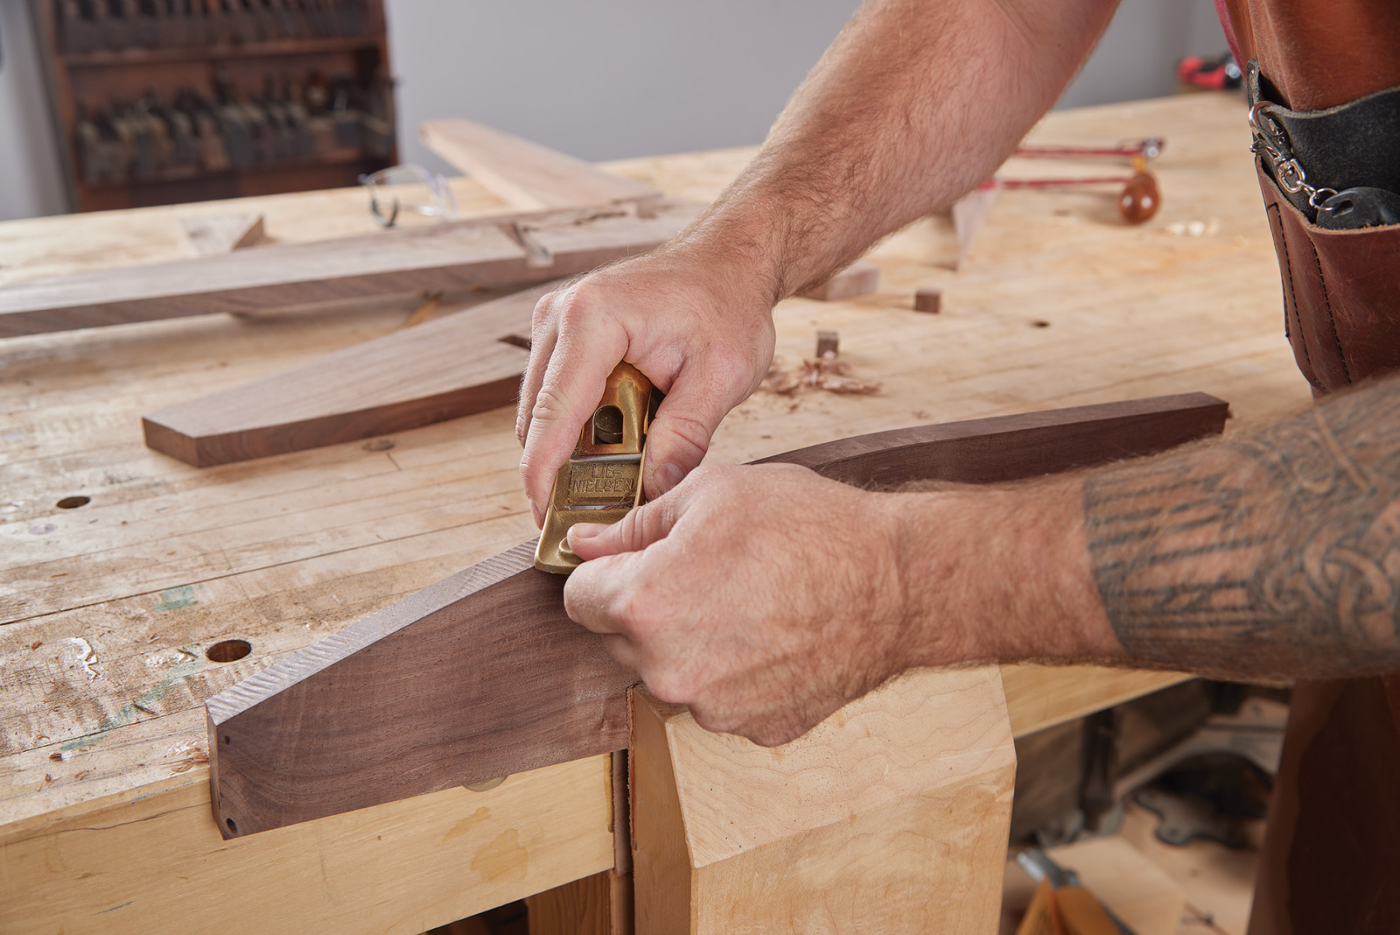
9 Clean up the curved front of the shelves with a block plane. Some gentle rolling strokes will clean up any saw marks from the band saw.
While at the bandsaw, spend a moment cutting the notch in the front edge of each shelf. This will mate inside the uprights on the shelf and will conceal the dado. As when working the half-lap, a sharp knife line, careful cutting, and paring to the line with a chisel will yield a clean, gap-free fit.
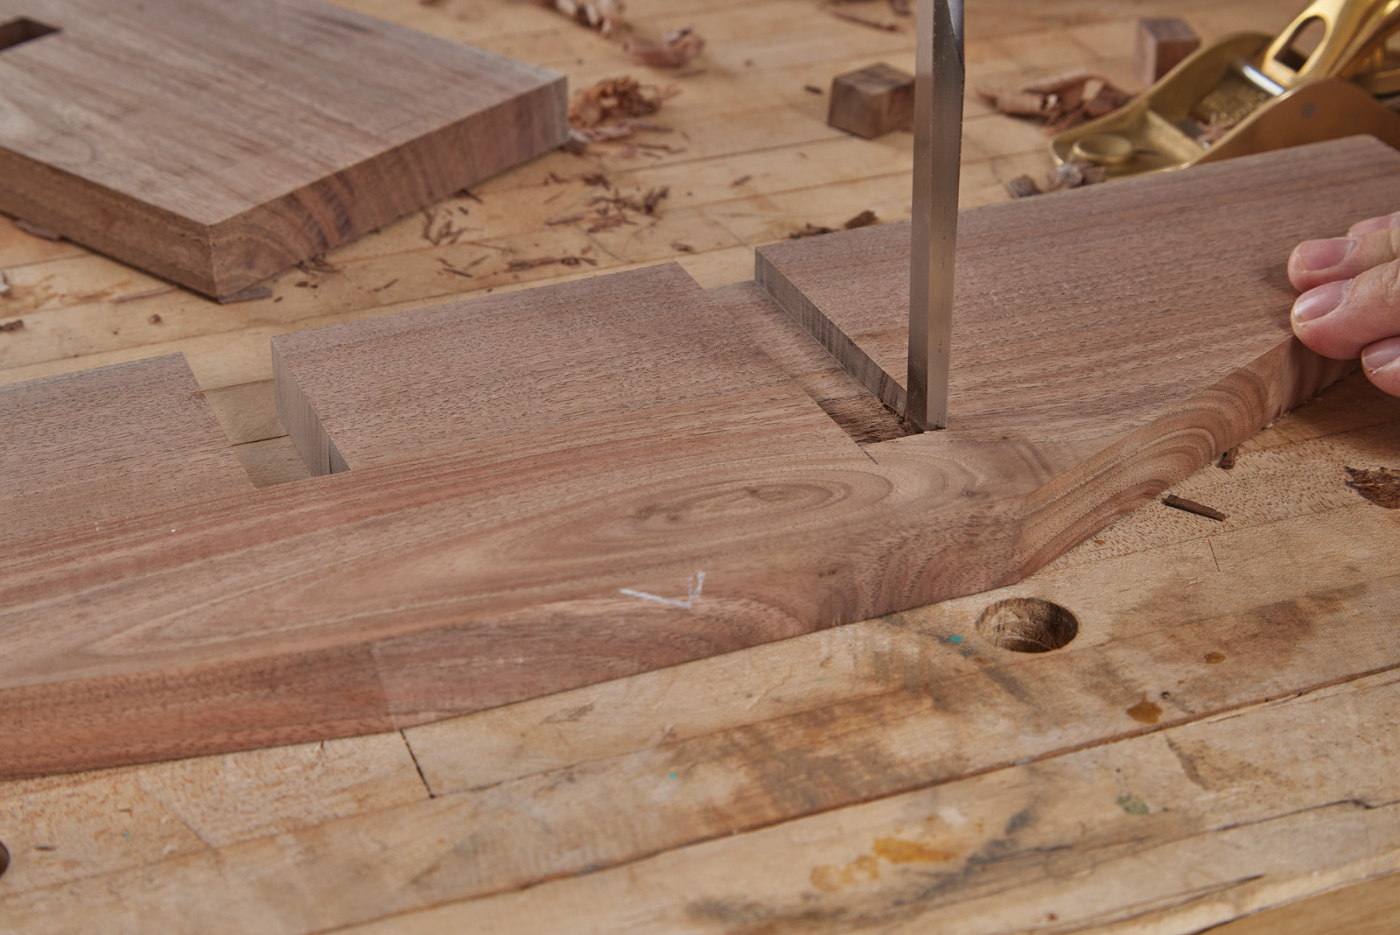
10 Square up the sloped end of the stopped dado with a chisel and router plane (below).
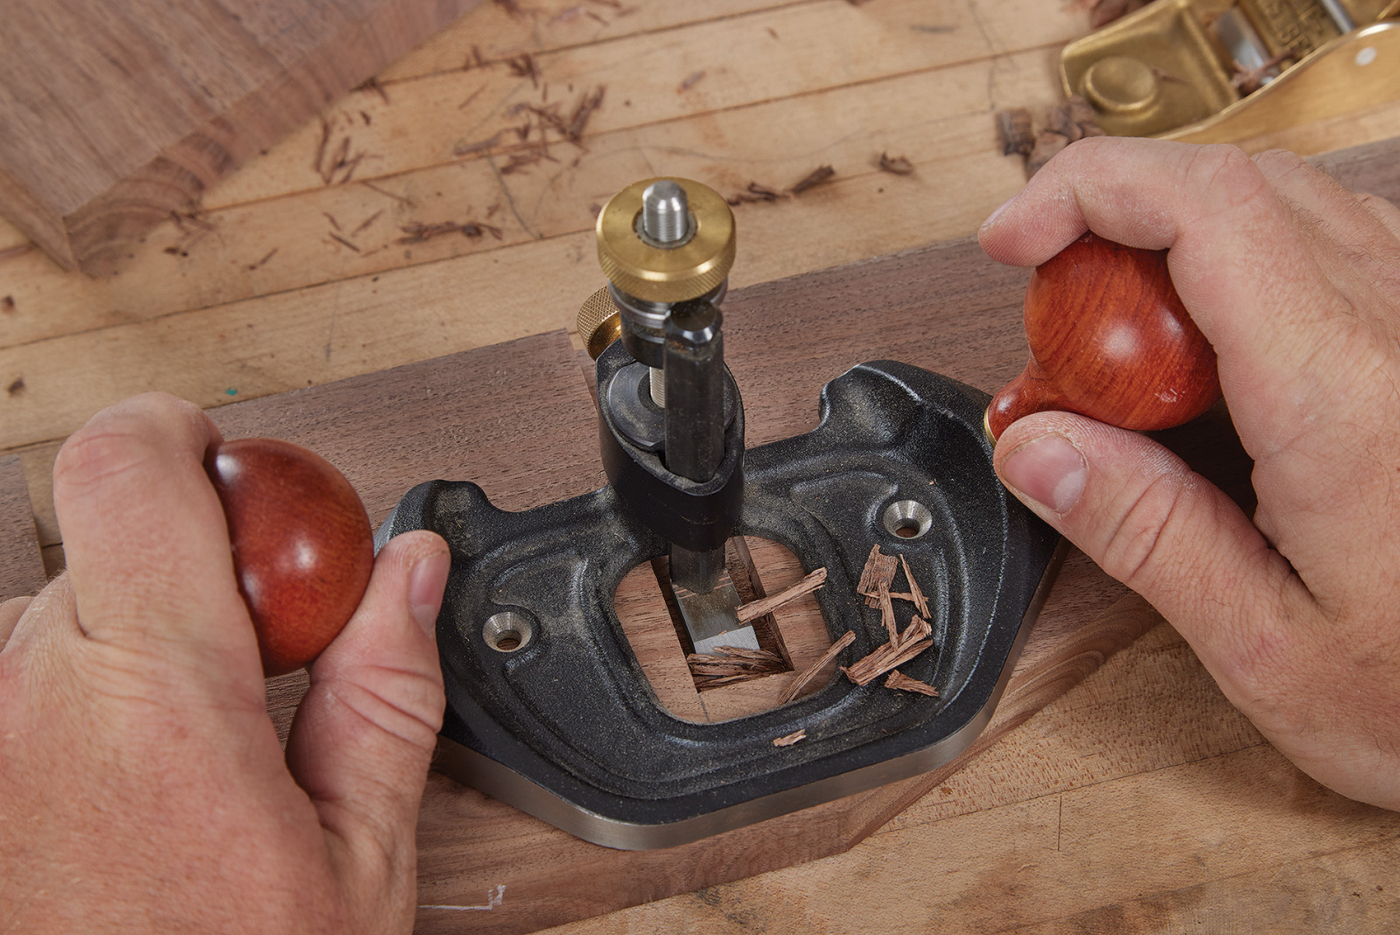
11
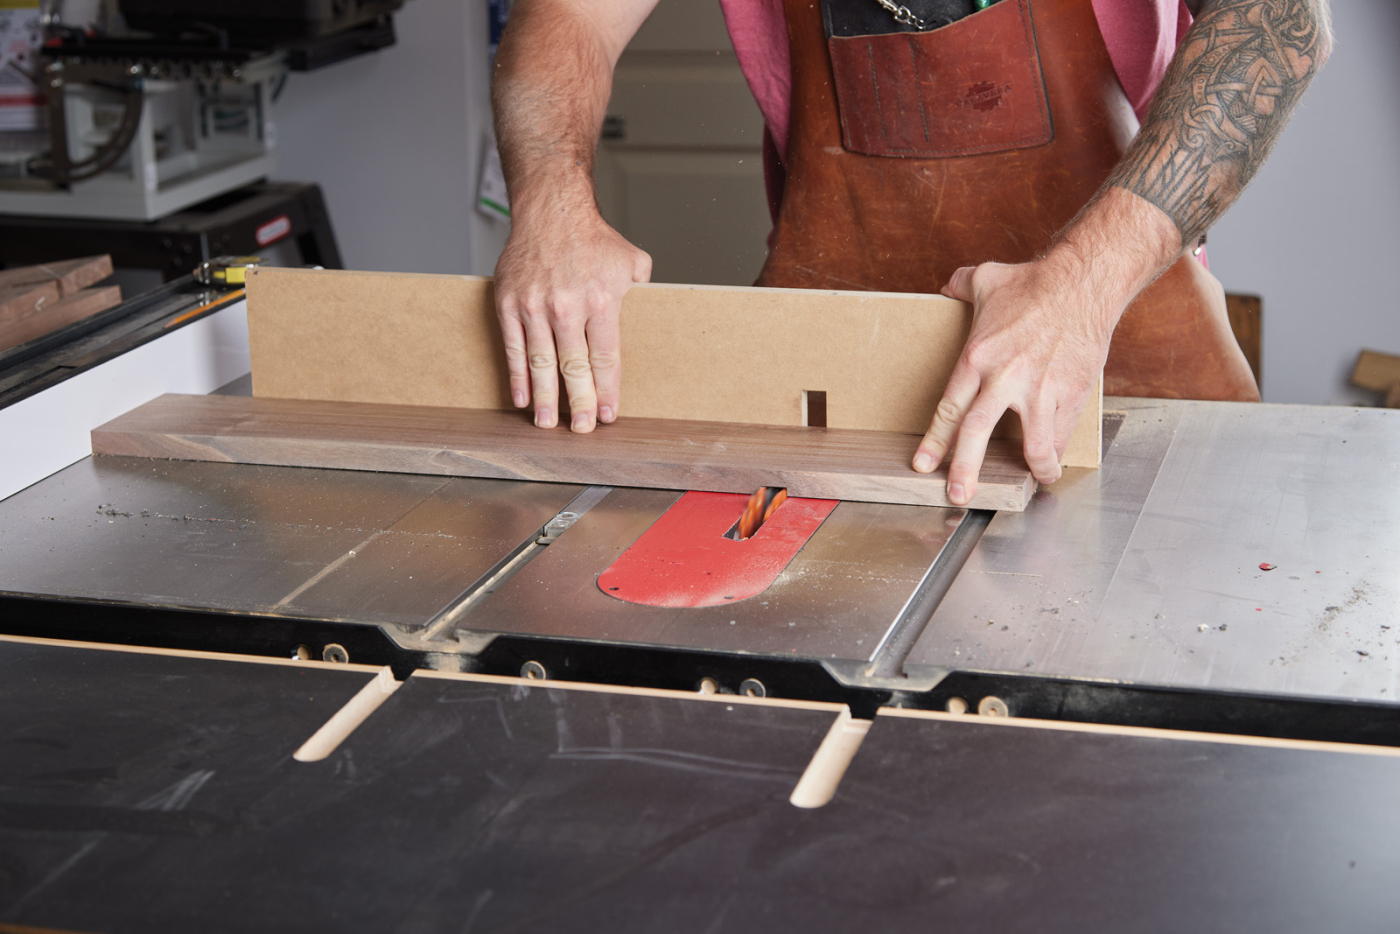
There are two final tasks to take care of on the shelf before assembly. The first is routing a stopped dado for the top. This can be done using a dado clean-out bit and an MDF template, like you see in Photo 12. The resulting dado will have rounded corners that can be cleaned up with a chisel. The top itself is simply cut to size, notched like the ends of the shelves, and a roundover routed on the front edge.
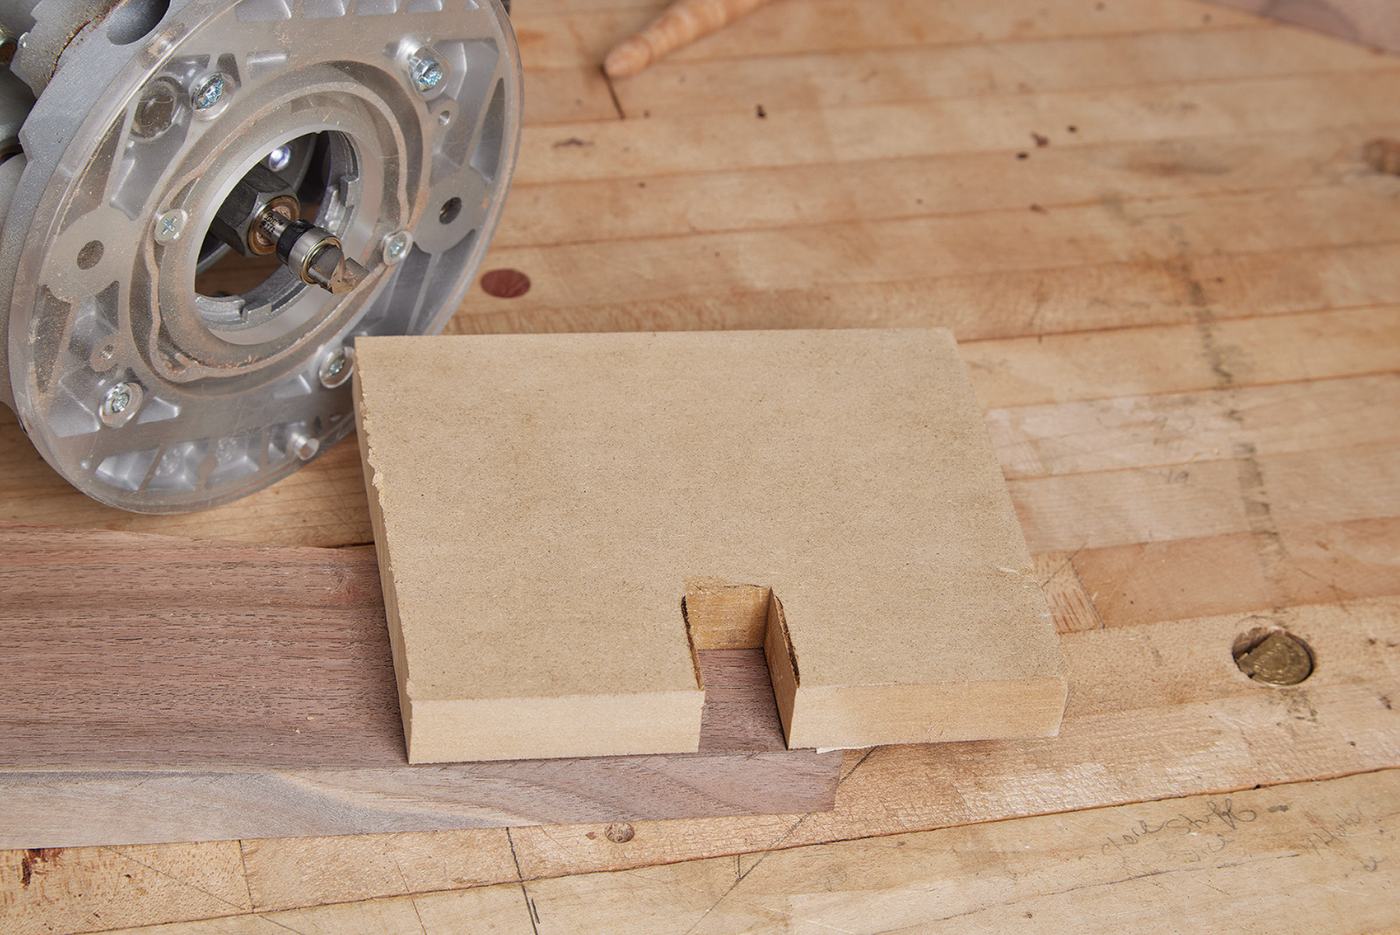
12 A simple MDF template allows you to rout a stopped dado for the top.
One final small detail that’s easier to do now is to plane a chamfer along the bottom edge of each shelf. The chamfer is tapered, however. Instead of being a consistent size, the chamfer starts at the upright and gets larger toward the end of the shelves. This adds a little lightness to the shelf, along with a little movement.
Assembly
The glue up on this shelf should go pretty smoothly if you’ve done your due diligence as you cut everything. There is a process that I found works the best, however. I start by assembling one upright with its corresponding shelf. Spread a little glue inside the half-lap and slide them together. There’s a lot of end grain in that joint, so the glue won’t do much, but it makes me feel better having a little bit of glue spread in there. Once you have the pair of uprights assembled with the shelves, you can bring the two halves together. Spread some glue in the dadoes and slip the shelf ends in place. As you start bringing everything tight, glue the top in place as well. Here, I like to use some parallel clamps to spread the clamping pressure, especially since the end of the shelf is narrower than the upright. You can see this in Photo 13.
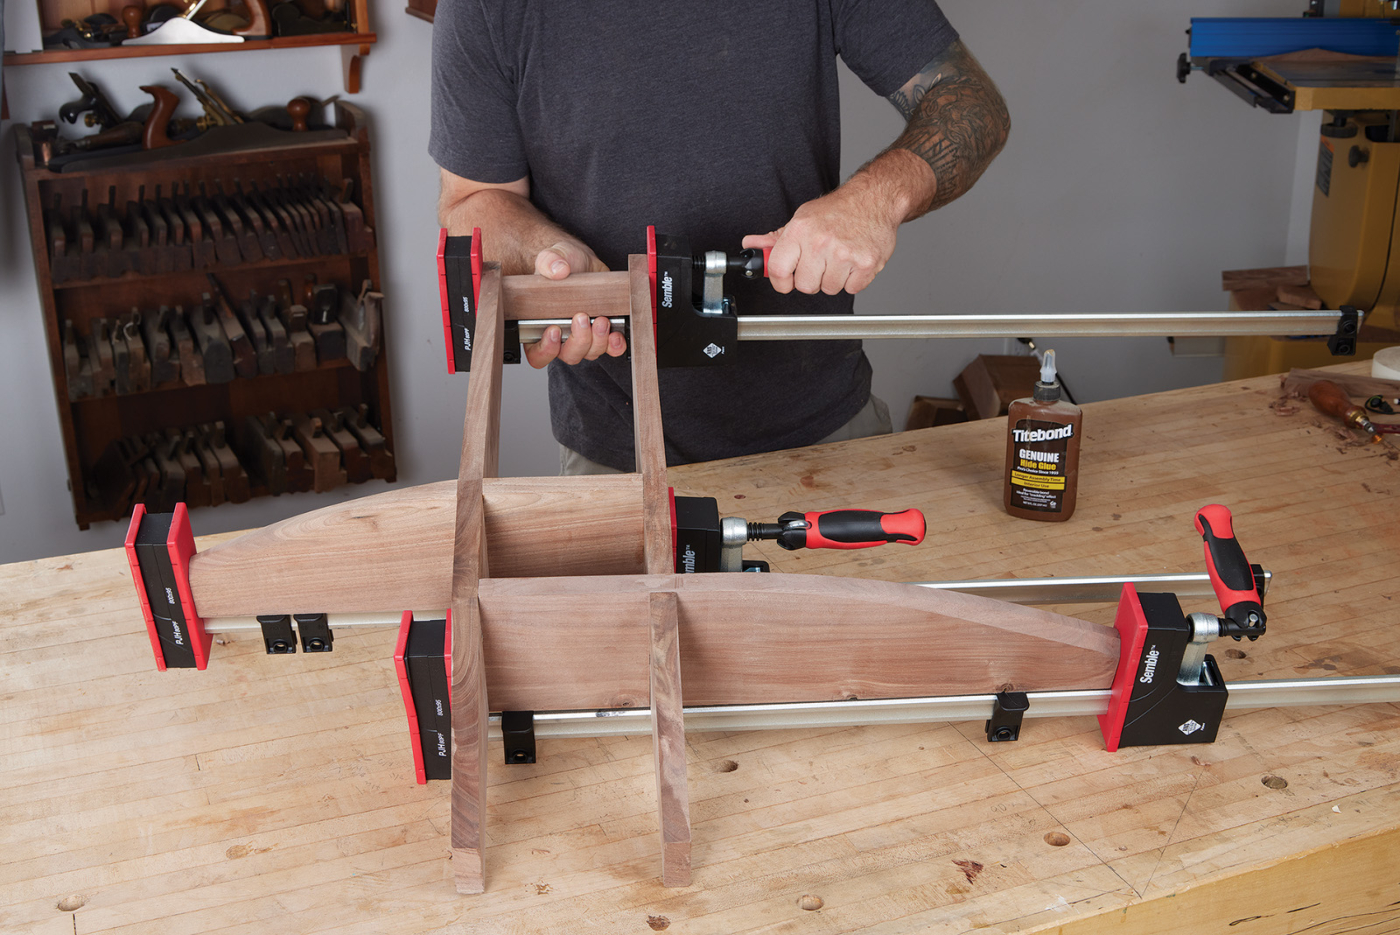
13 Assemble the shelf. Some long parallel clamps apply even clamping pressure.
As the glue cures, you can contemplate whether you want to add some form of a decorative panel or not. As I mentioned earlier, and as you could surmise from the lead photo, I included a Kumiko panel. To house the panel, I decided a rabbet along the back was appropriate. A rabbeting bit in the router table makes quick, albeit messy, work of this. As with any routing operation like this, a little chisel work will square up the corners.
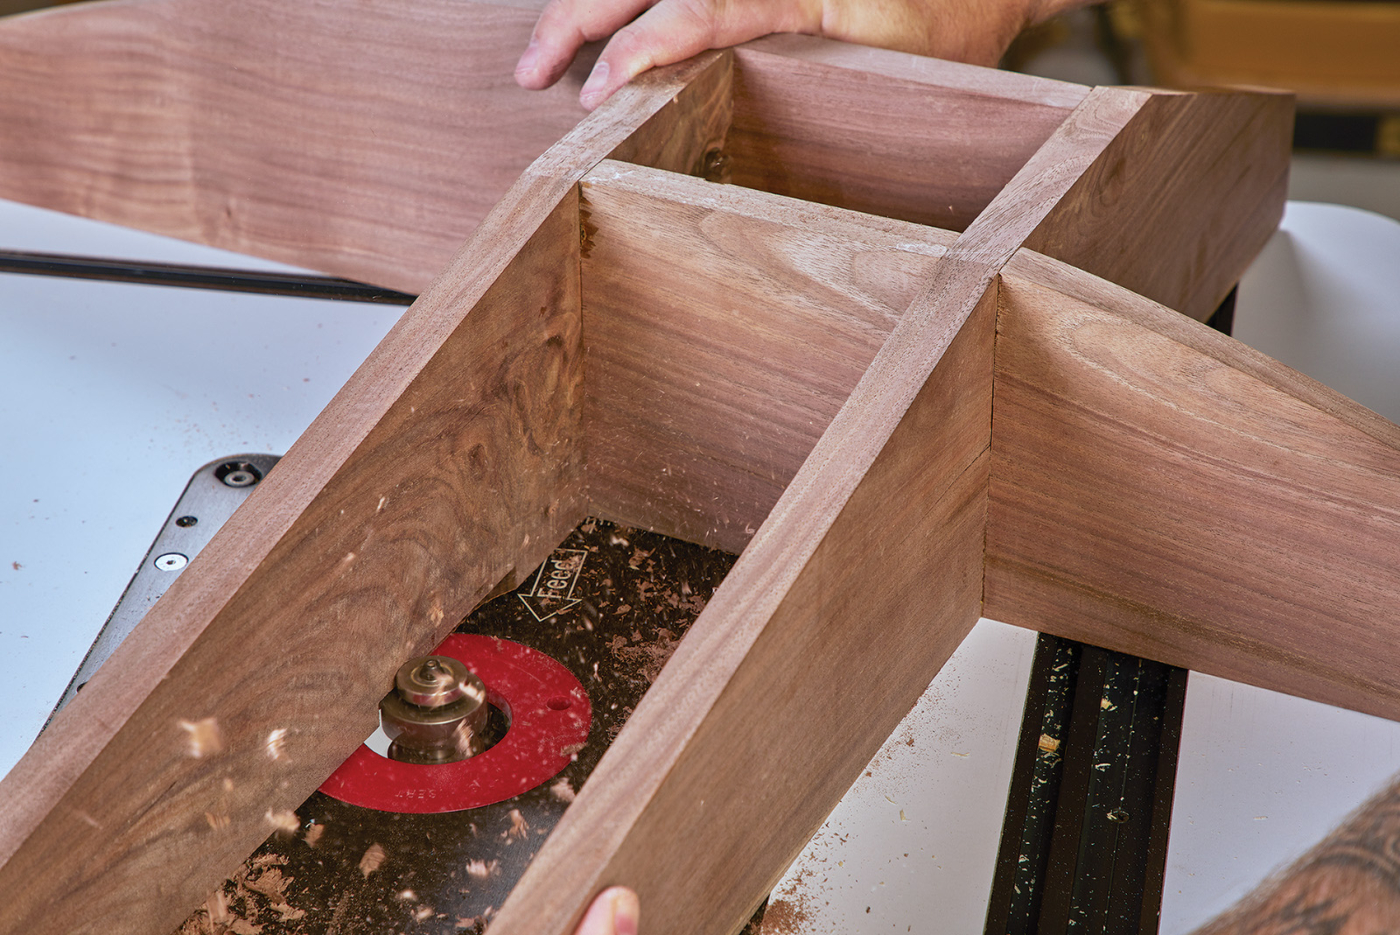
14 After assembly, rout a rabbet for the Kumiko panel.
Little Drawer
The opening between the shelves begged to have a drawer in it. It’s a small drawer, sure. However, I’m sure we all have those odds and ends that could fit well in there. Because I had already milled up a bunch of basswood for the Kumiko, it seemed appropriate to make the drawer out of this lightweight wood as well.
The joinery I chose to use on this drawer is a simple locking rabbet joint. With the thin stock, you can easily rout all of this joinery with a small straight bit at the router table. My only complaint about the basswood and router bit is that it has a tendency to fuzz a little bit. It just means a little extra time to sand and smooth out the mating joints before applying glue.
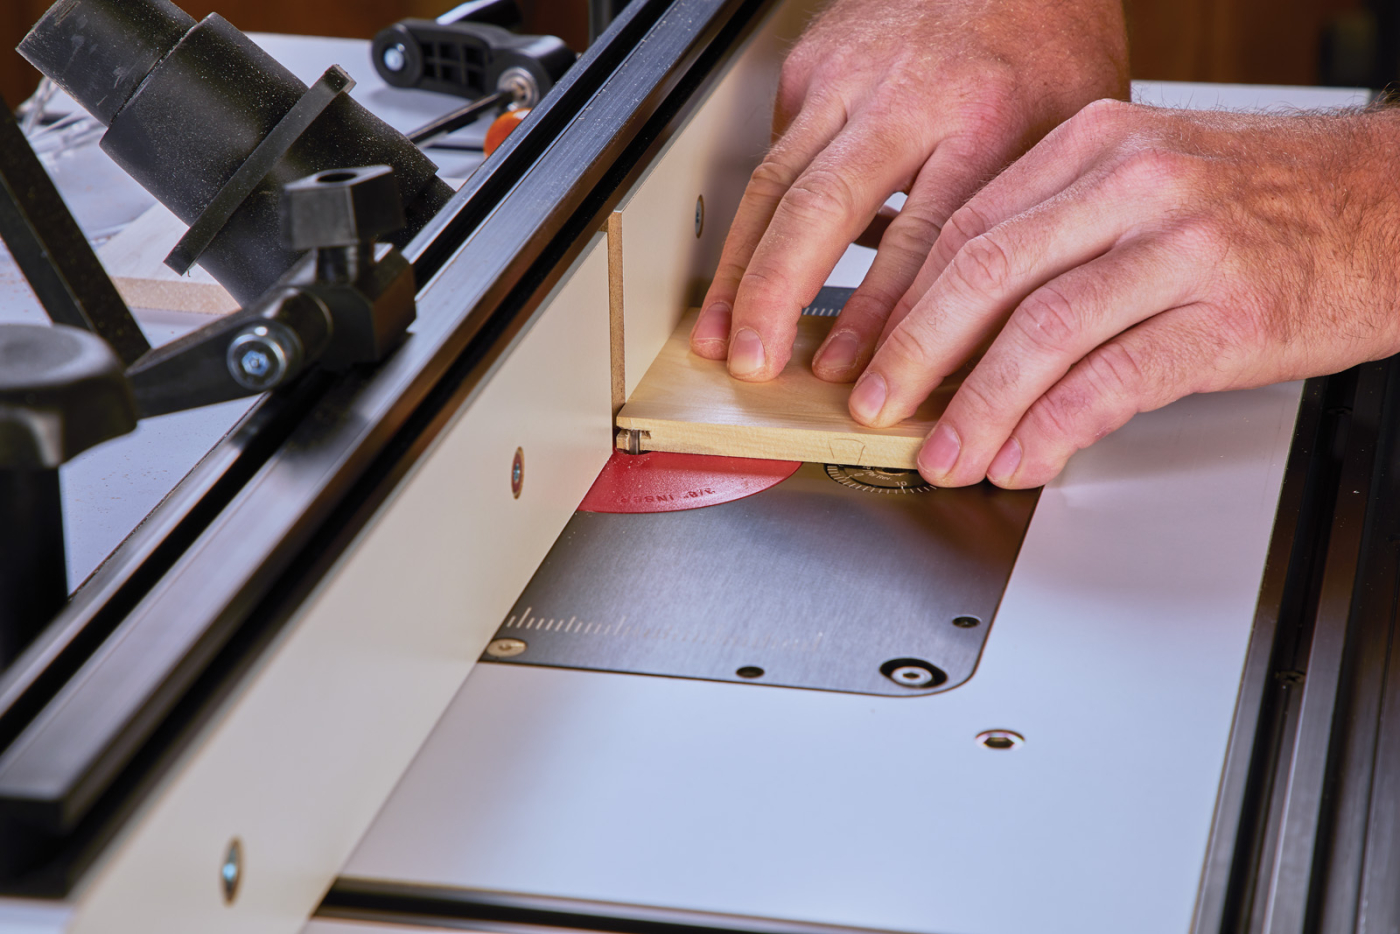
To create the locking rabbet, we’ll first need to rout a groove in the ends of the drawer front. The bit needs to be centered on the drawer stock, and set to the height of the drawer sides. You can see this in Photo 15.
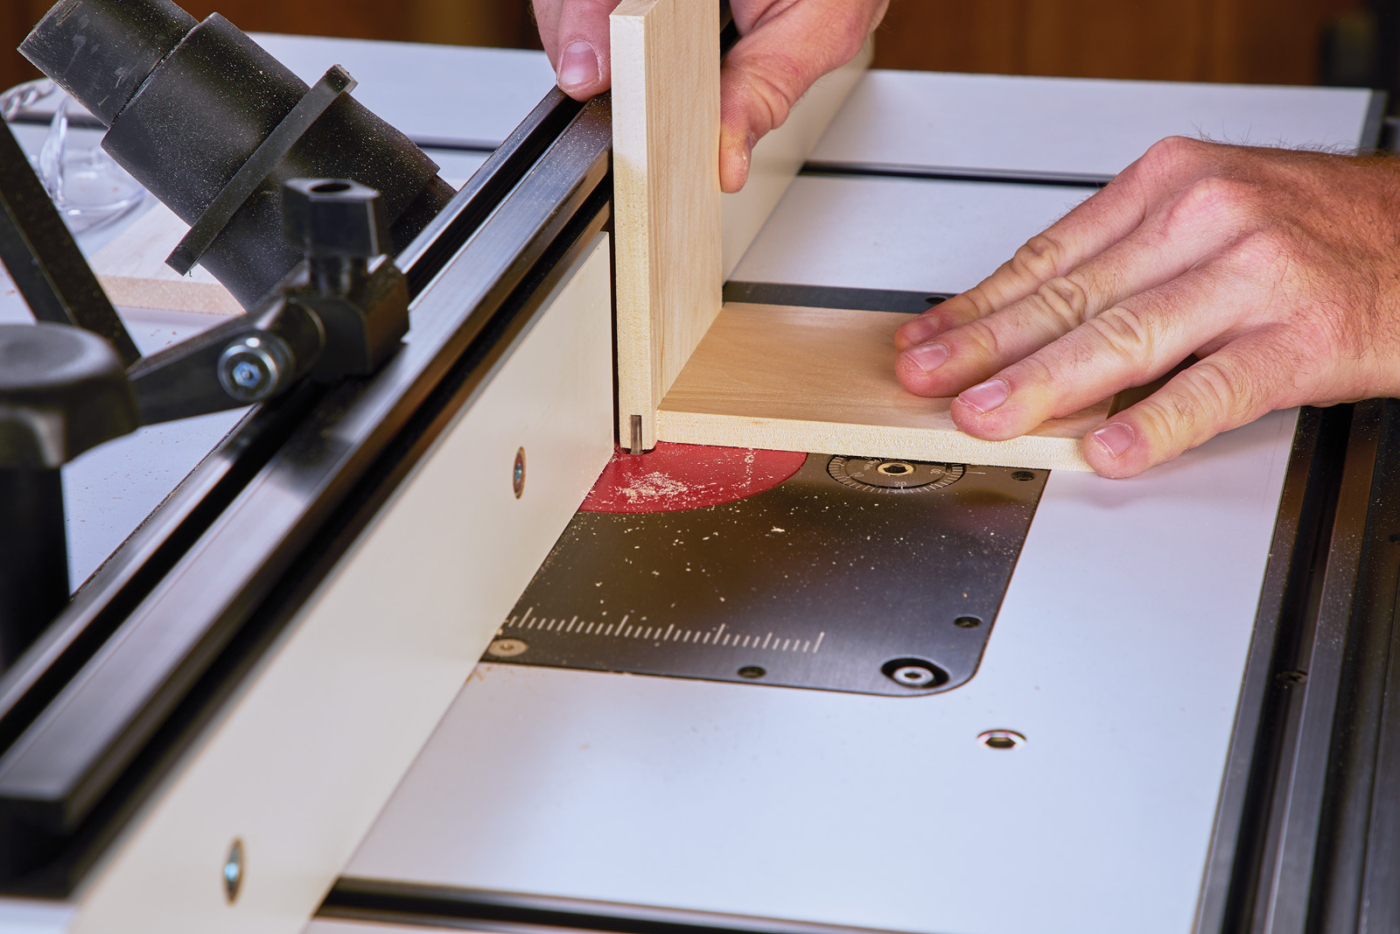
15 Groove the end of the front.
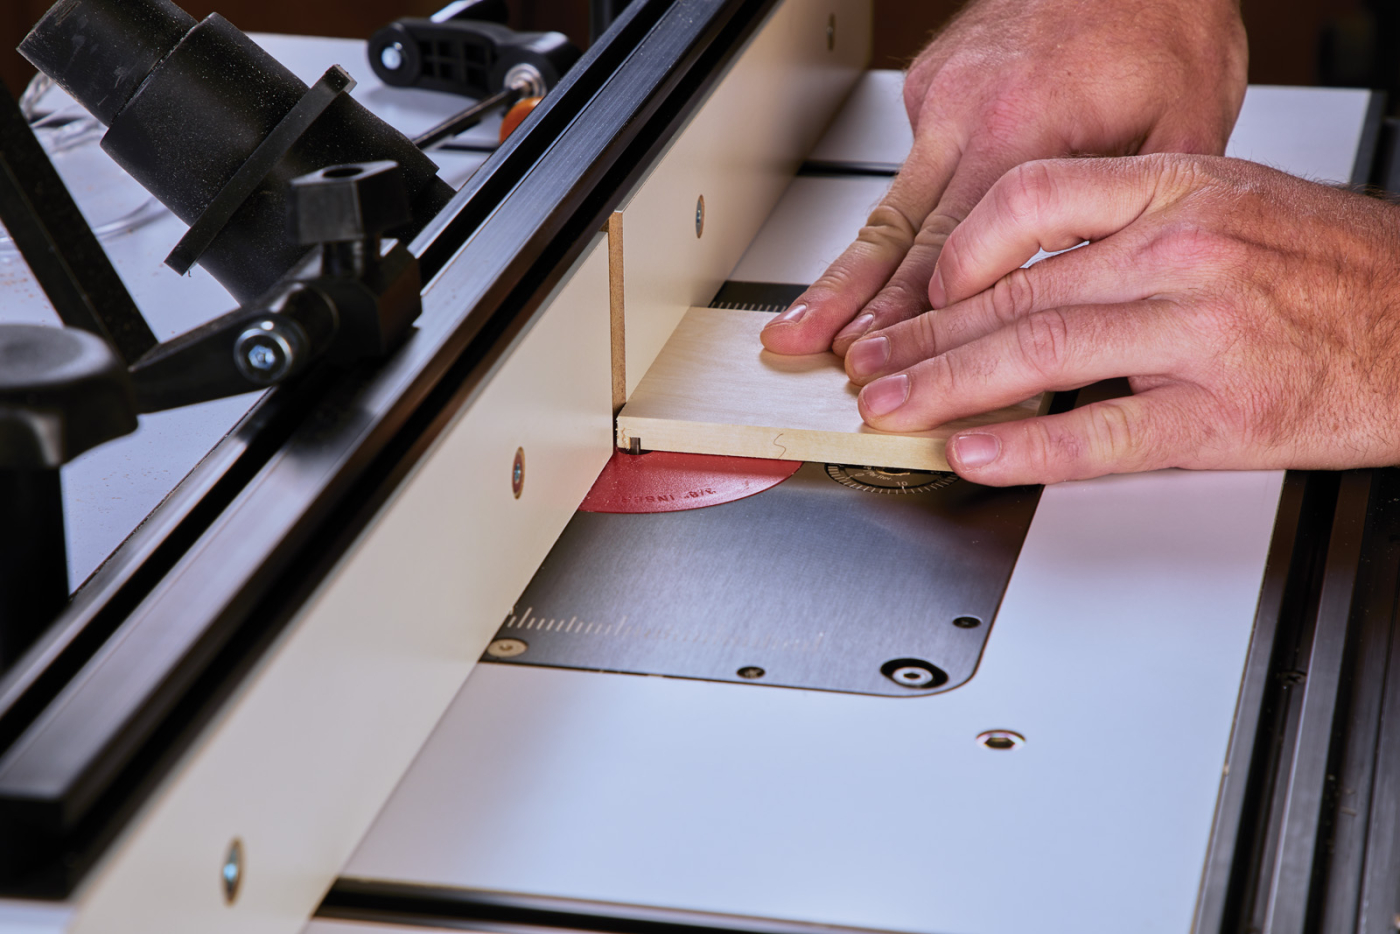
Next, the bit is lowered a little, and the inside tongue on the front is nipped in half. This leaves one long tongue and one short tongue on each end (Photo 16). Finally, the drawer sides get a dado routed in them. This dado grabs the short tongue on the drawer front and locks everything together. Lastly, rout a groove along the bottom edge for a plywood bottom.
16 With the same set up, nip off one of the tongues.
17 Finally, rout the dado in the sides. This same setup can be used for the bottom groove.
It’s best to try out a sample piece to dial everything in. Once you do, this is a great, quick-to-make joint that looks good and is strong. With that said, these small parts are delicate, so be careful with the joint until it’s glued together.
18 Carefully glue up the drawer. The small size of the joinery makes this a very delicate process due to the short grain. If you’re going to paint the drawer front like i did, I suggest doing so before you assemble the drawer.
As you probably noticed in the main photo, I chose to paint the drawer front to match the panel behind the Kumiko (more on that in a minute). I feel like it’s a bit easier to paint the drawer front before gluing up. Basswood tends to fuzz a little bit, so when painting it, I use shellac as a sealer. Not only does it keep any grain from raising, but it also provides a good “primer” coat and allows you to get a smooth surface.
After glue up, you can spend a few minutes fitting the drawer. Basswood doesn’t move much with humidity changes, so I planed it down with a handplane for a good, suction type fit. A simple style drawer pull looks best on this shelf, I think (my wife, however, thought it looks a little too plain). Pick a style you like, but ask your significant other’s opinion first! The one I added is a simple little walnut pull that I turned at the lathe.
Before we tackle the Kumiko panel, let’s talk about hanging it. Because of the asymmetrical design, I used a pair of keyhole hangers routed into one upright. This provides two attachment points, and I just make sure to drive the mounting screws into studs.
Hemp Leaf Panel Layout
 Kumiko Panel
 Kumiko Panel
The defining feature of this wall shelf is the Kumiko panel. While the process of creating the Kumiko panel isn’t difficult, it does take some careful setup. Matt’s book does a fantastic job of explaining the process in depth, and if this is something you’re interested in, I suggest you pick up a copy for the entire process. (Full disclosure—“The Art of Kumiko” is available for purchase on PopularWoodworking.com.) What I’ll give you here is a brief synopsis.
The Kumiko panel is made of basswood strips. The framework (horizontal and vertical pieces) are half-lapped together at the table saw. There are several traditional designs that you can use in the Kumiko. The one shown here (and on the front of Matt’s book) is the Asa-no-ha, or hemp leaf pattern. The various diagonal pieces that make up the hemp leaf pattern need to be accurately cut and mitered to fit into place. To do this, you use a set of mitered guide blocks, as you see in Photo 19 and 21.
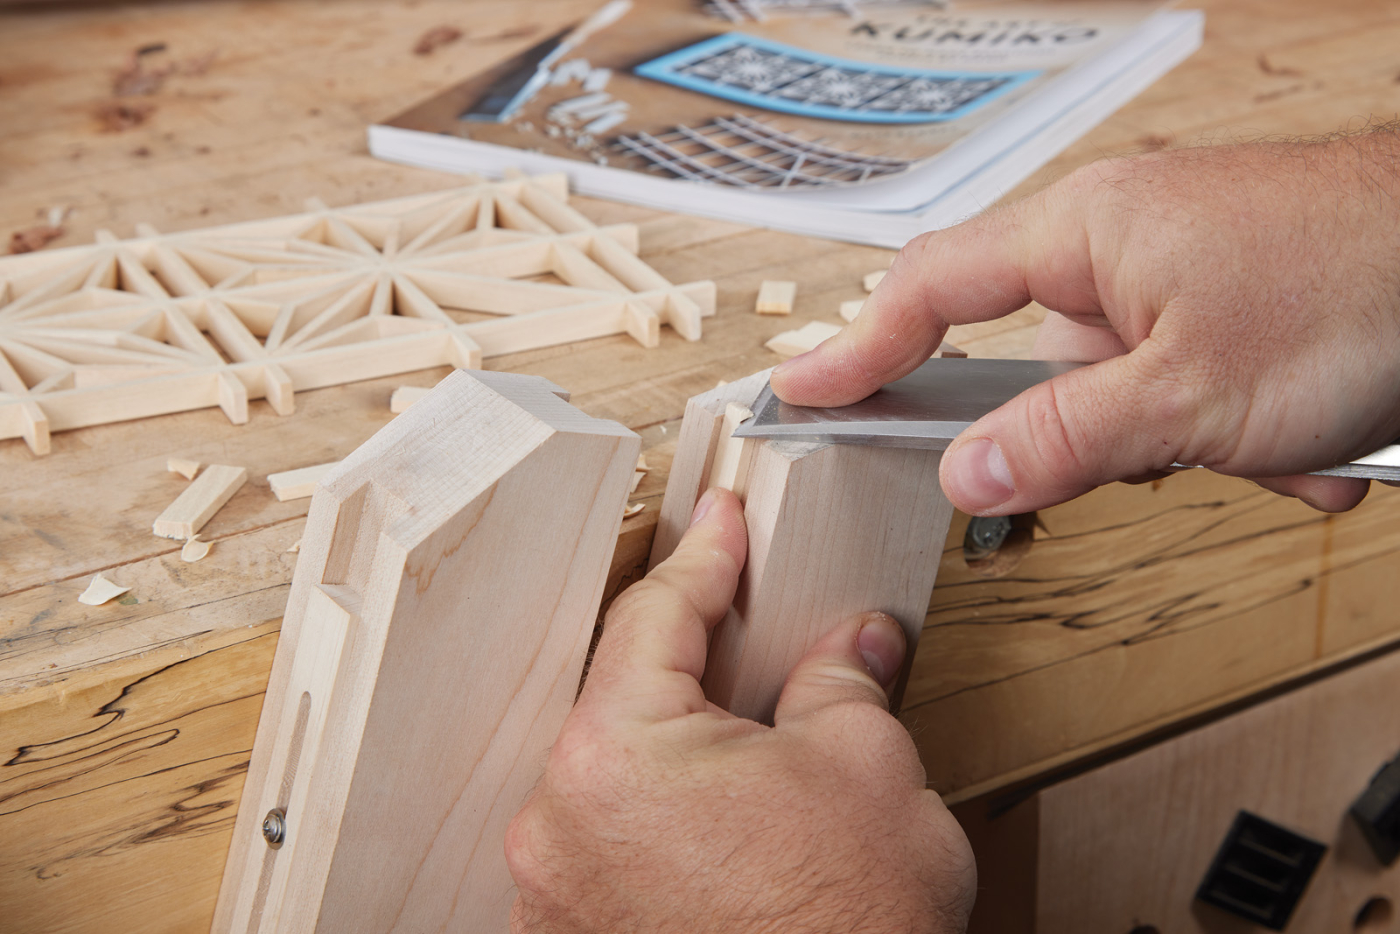
19 The Kumiko panel consists of small parts that are accurately mitered to fit together with only tension holding them in place. A sharp chisel (wide Barr framing chisel) and guide blocks help achieve this precise fit.
The guide blocks have an adjustable stop recessed into them. This allows you to precisely dial in the length of the part, and the angled face of the block gives you a reference surface for your chisel to ride against as you pare the basswood to the proper angle and length. A sharp, wide chisel (I use my Barr framing chisel for this — you can read more about it in this article) makes the process go smoothly.
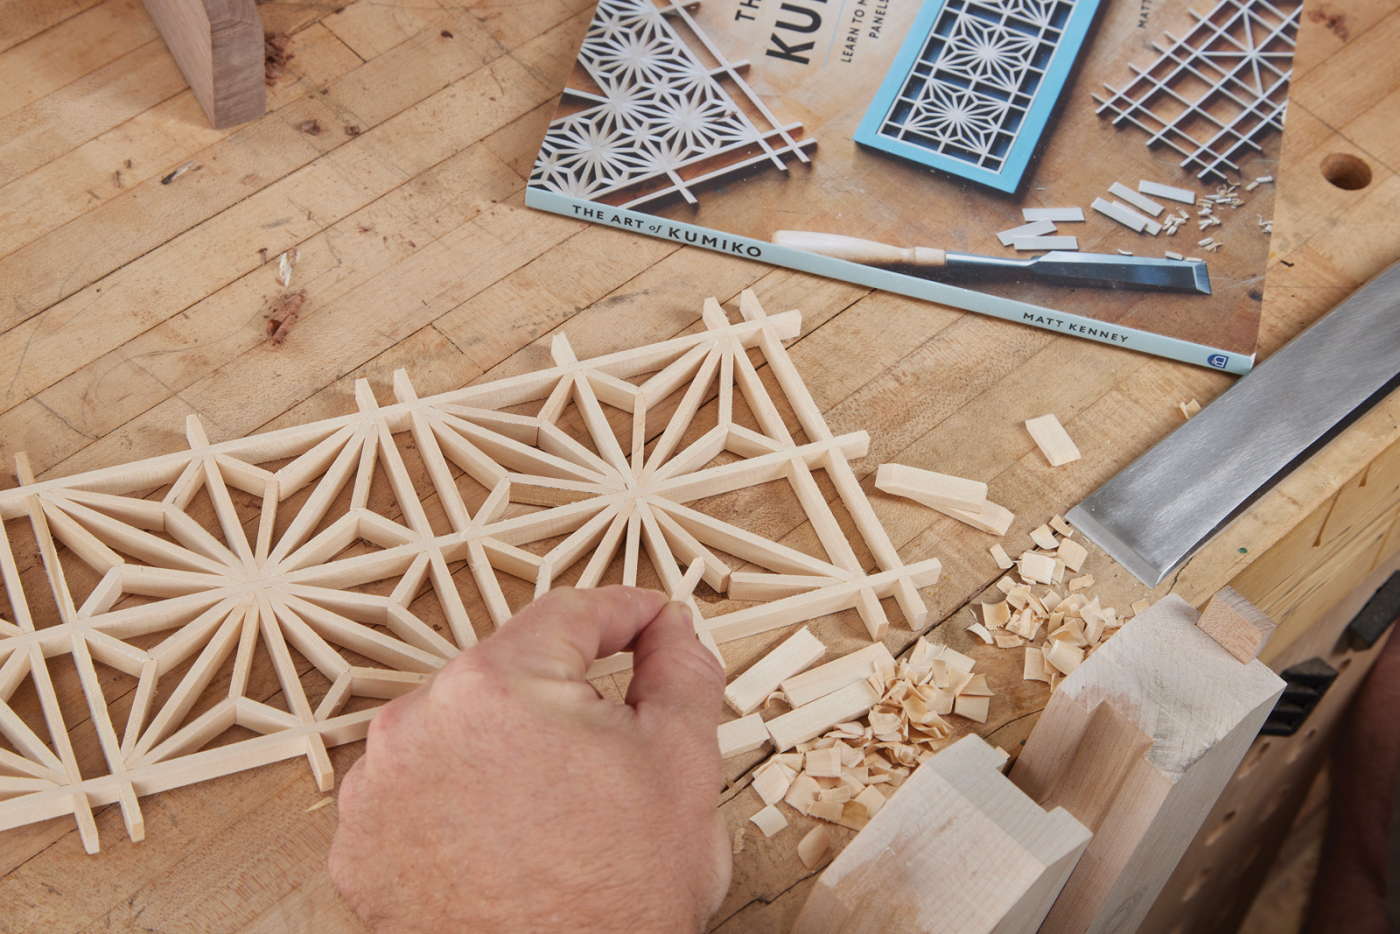
20 The subtle beauty behind a Kumiko panel is the fact that the entire thing is assembled without glue. Once the pieces are fit, a final locking piece tensions the entire quadrant and holds it in place.
The guide blocks are easy to make, but if you want to purchase them, Matt and others sell pre-made blocks. While the process seems tedious, after dialing everything in, it goes quickly. The panel you see in Photo 21 took me about four hours to put together. It takes a very small amount of material and a bit more time, but it yields some impressive results. To be honest, I picked up a set of Matt’s guide blocks and milled a bunch of the basswood strips, as I thought these panels would be a very good project to throw in a tote and bring with me as I’m camping.
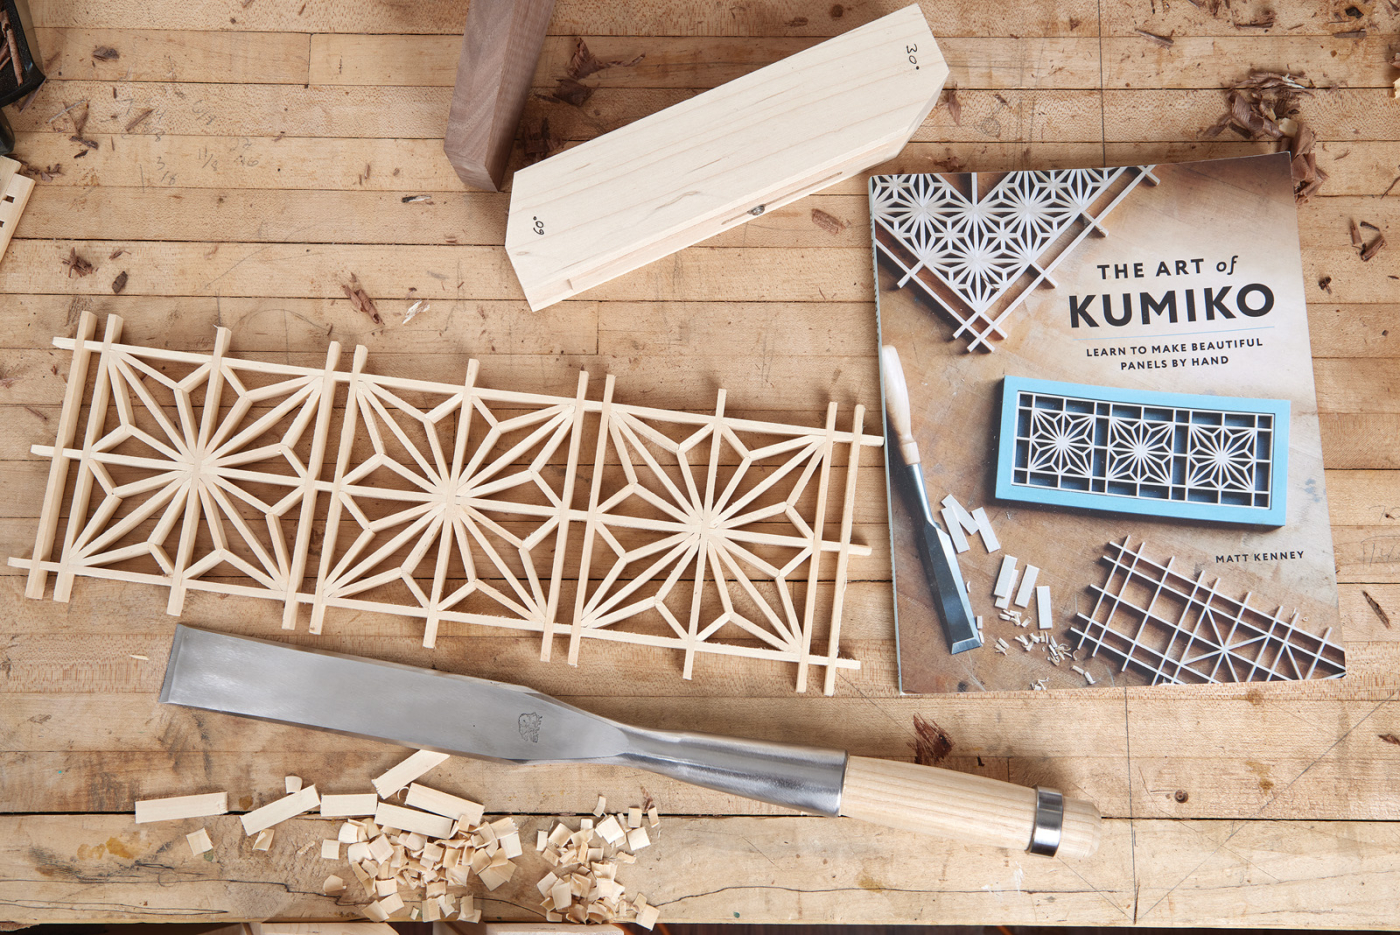
21 Creating the Kumiko panel is a zen-like practice. It takes a little getting used to, but Matt Kenney’s book “The Art of Kumiko” is the perfect guide for this fun technique.
After completing the panel, I installed it into the rabbet on the back of the shelf. To add a little bit of contrast to the Kumiko, I added a thin panel of painted plywood behind the Kumiko. The entire assembly (Kumiko and plywood panel) are held in place with a series of brass toggles installed on the edges of the uprights. Then, the shelf is hung up with screws into studs.
Here are some supplies and tools we find essential in our everyday work around the shop. We may receive a commission from sales referred by our links; however, we have carefully selected these products for their usefulness and quality.


