We may receive a commission when you use our affiliate links. However, this does not impact our recommendations.

Knots
Knotty boards are beautiful, yet frustrating! Here’s how to get the most out of them.
by Tom Caspar
Knots are usually considered defects in wood. They’re cut out of boards and thrown on a scrap heap. But take a closer look at a knot. In a hardwood, it’s surrounded by stunning grain. Why not make it the focal point of your next project?
The best knots crop up on some of the least expensive, lowest grade boards available. Dealing with knots can add extra work to a project, but you don’t need any special equipment. You just have to know what you’re up against. To begin, take a look at where the three basic types of knots come from in the photos at right.
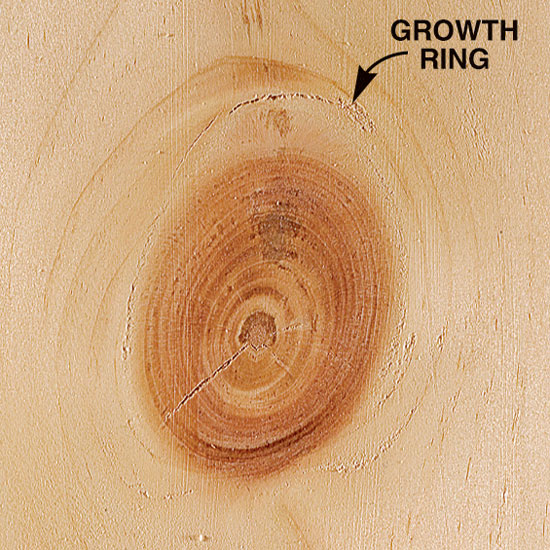
| An intergrown knot is the base of a living branch within a tree. It’s surrounded by a halo of circular growth rings. An intergrown knot is also called a “tight” knot because it’s tightly bound to the wood around it. |
|
 |
| An encased knot is formed when a tree grows around a dead branch. It’s surrounded by a dark ring of bark, and its center is often decayed. An encased knot is also called a “loose” knot, because the bark prevents the knot from tightly binding to the wood around it. |
|
|
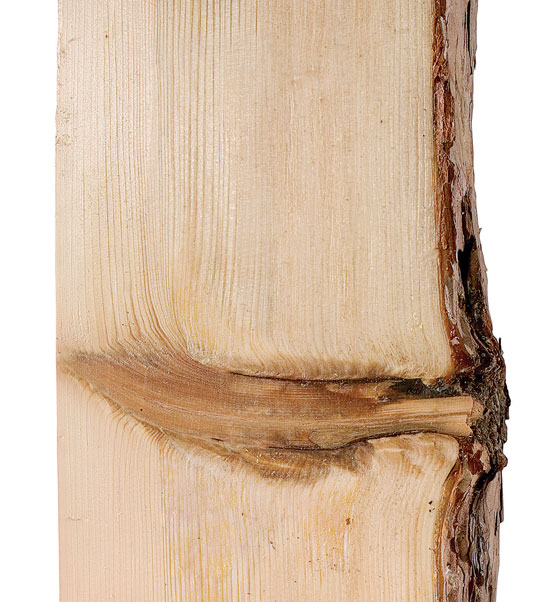
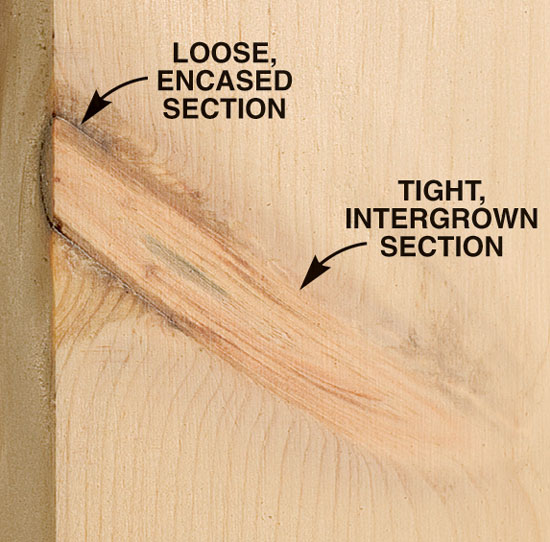
| A spike knot is formed when a board is cut right through the length of a branch. A spike knot may be tight at its base (the intergrown portion) and loose at its end (the encased portion). |
|
|
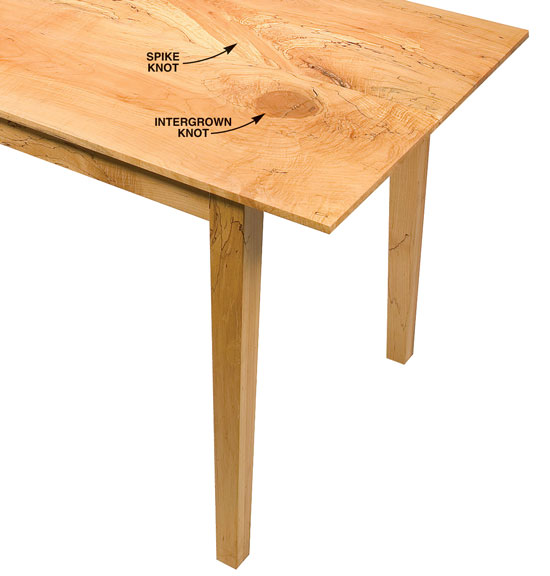
| Use knots for drama. Here’s an opportunity to have fun with unusual patterns, as in this spalted-maple kitchen table. It has a comet-shaped pairing of a huge intergrown knot and a very long spike knot. Showing off the incredible swirling grain around a knot turns an inexpensive, lower grade board into a beautiful example of nature’s art. |
|
|
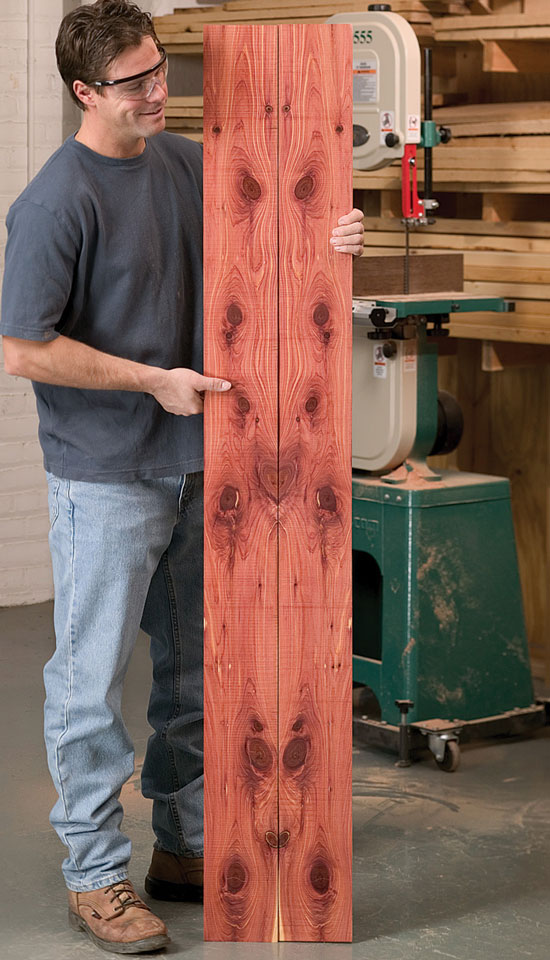
| Resawing can be spectacular! A board with knots near an edge yields the most interesting mirror-image patterns, as shown in this piece of aromatic red cedar. Before you cut a board down its length on a bandsaw, hold the board on edge against a mirror. The outside of the board and its reflected image give you a pretty good idea of the book-matched pattern you’ll get after resawing. |
|
|
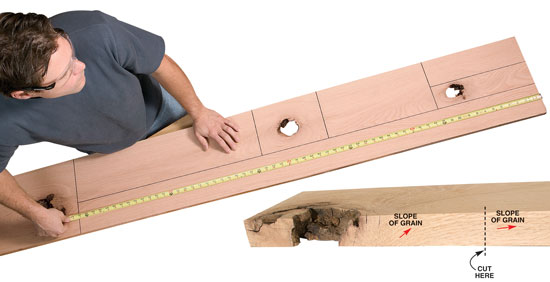
| Keep your distance from knots when you’re cutting them out. It’s tempting to get the last inch out of every clear piece, but often it’s not worth it. The wood fibers around a knot have a very steep slope. (Right next to the knot, they run almost vertically, the same direction as the branch grew on the tree.) Wood fibers with a steep slope are called “short grain.” Short grain weakens the end of a board, making it unsuitable for rails and legs. Short grain may also cause the end to chip out when you joint or plane the board. |
|
|
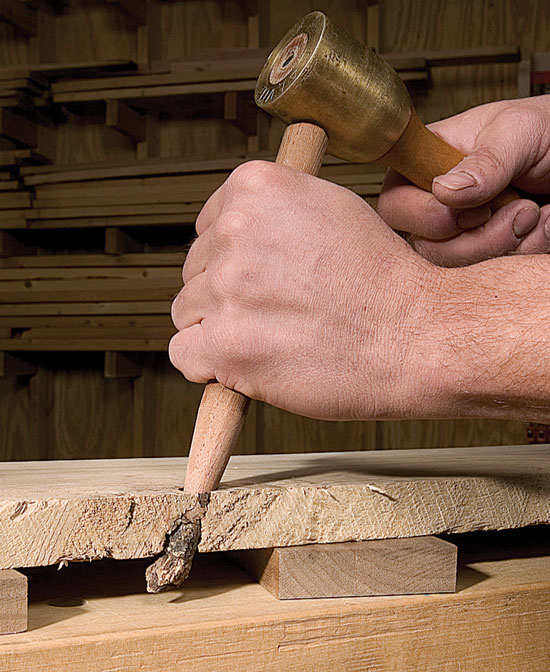
| Pound out an encased knot before ripping a board on the tablesaw. If a saw blade were to catch this knot, it would launch it like a missile! The best tool to drive out a knot is a large dowel, rather than a slender metal punch. A punch can get stuck inside a decayed knot, but the wide end of a dowel pushes the whole knot through. Taper the dowel so its end is about the same diameter as the knot. |
|
|
| Glue a loose knot that you want to keep with 5-minute epoxy. Epoxy is the only type of glue that can span the gaps between the knot and the solid wood around it. Scrape off loose bark around the knot and inside the hole before gluing. |
|
|
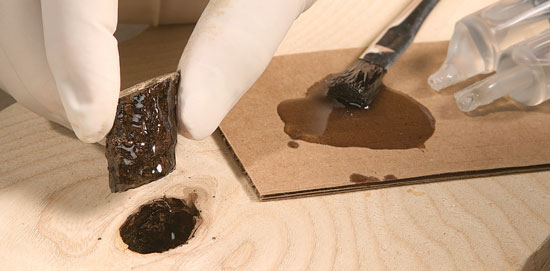
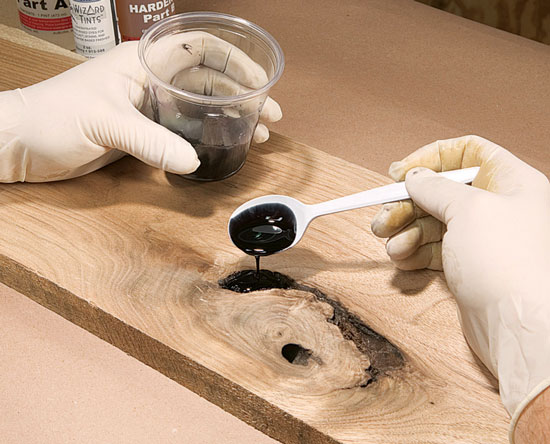
| Fill voids around a knot with slow-set epoxy. Color the epoxy with a few drops of dark concentrated dye (see Sources, above). Slow-set is better than fast-set epoxy for this use. Slow-set epoxy takes a few hours to harden, so unsightly air bubbles have a chance to rise to the top and pop rather than get trapped inside. Mix the epoxy and dye very slowly to minimize the number of bubbles. Slightly overfill the hole and sand the hardened epoxy flush. |
|
|
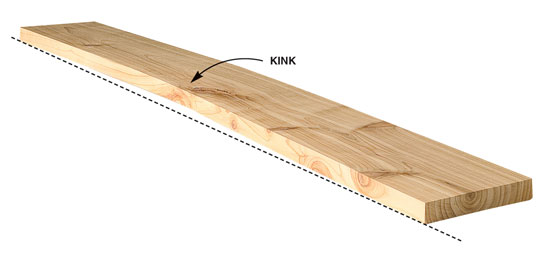
| A knot near the edge can cause a sharp bend or “kink” in a board. The wood around a knot is under an incredible amount of stress caused by supporting the weight of a branch. The stress is balanced when the knot is in the middle of a board, and unbalanced when the knot is near the edge. Kinks are trouble, so they’re a good place to crosscut a board. |
|
|
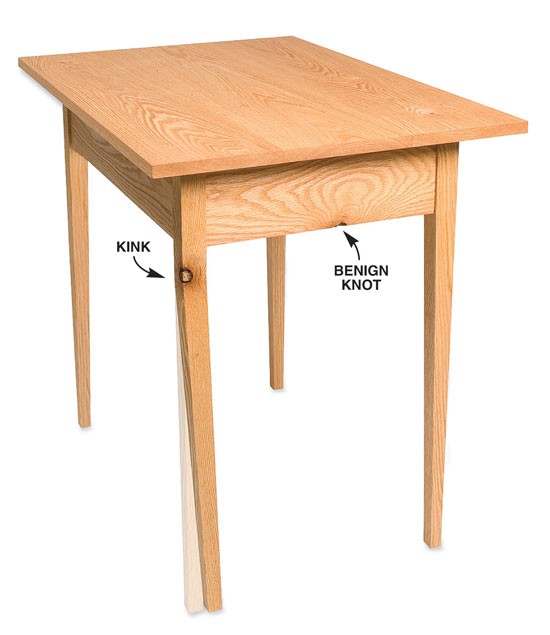
| Avoid placing a knot in a slender piece. For example, a knot weakens this leg and may eventually cause it to kink. The small knot on this table’s rail shouldn’t cause any distortion problems, however. It’s surrounded by a great deal of straight-grained wood. The knot can be hidden from sight by rounding over the edge. |
|
|
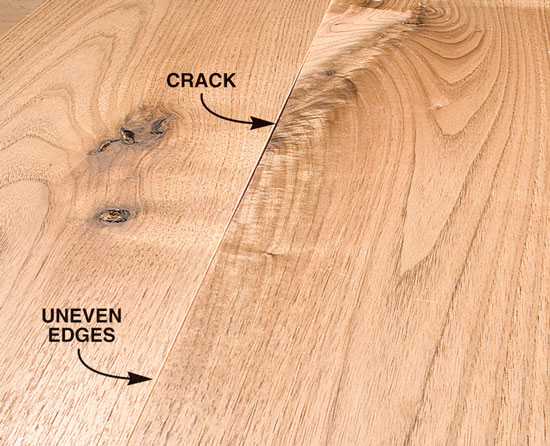
| A knot near a glue line may eventually cause the glue line to open up or the boards to become uneven. The extreme slope of the grain around a knot is the culprit. It causes the wood around a knot to expand and contract differently than the wood in the rest of a board.
Knots can be so beautiful that it would be a shame never to make a top like this, however. A little unevenness is perfectly acceptable in many fine antiques, after all!
Here’s a tip for building a new piece: When you join boards in a top with knots near the edges, rout a 1/8-in.-deep V-groove down the center of all the glue joints. This will disguise any small cracks or unevenness that may crop up later. |
|
|
| Wide boards with large knots are generally free of distortion problems, as long as the knots are located in the middle and far enough from the ends. The stresses inside the wood around the knot are balanced, so the boards are unlikely to kink. The ends of the boards are plenty strong, and there are no uneven glue joints to worry about. Piles of 10- to 14-in.-wide lower grade wood often have beautiful knotty boards waiting to be discovered. |
|
|
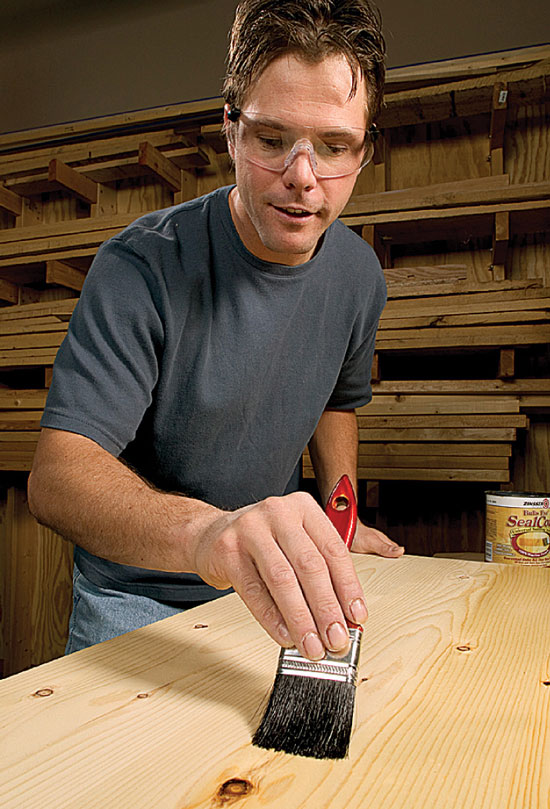
Seal knots with dewaxed shellac before applying a top coat. Brush on two coats of a two-pound cut. Without this seal coat, small bubbles may appear in your finish above the knots. The bubbles are called “bleed-through,” and they’re caused by oils in the knots reacting with the finish. Pine knots are the worst offenders. Shellac is the most effective barrier to these oils. When its wax has been removed, shellac can be used under any finish.
Sources
(Note: Source information may have changed since the original publication date.)
Woodworker’s Supply, woodworker.com, 800-645-9292, Wizard Tint (concentrated dye), 2 oz., #913-567 medium walnut, #913-588 ebony, $17 each; System Three slow-set epoxy #119-423 resin, 1 qt., $26, #119-435 #2 slow-set hardener, 1 pt., $17.
WoodFinishingSupplies.com, woodfinishingsupplies.com, 866-548-1677, Zinsser’s SealCoat shellac (dewaxed, 2-lb. cut), $8/qt.
This story originally appeared in American Woodworker March 2004, issue #106.
|
|
|
Product Recommendations
Here are some supplies and tools we find essential in our everyday work around the shop. We may receive a commission from sales referred by our links; however, we have carefully selected these products for their usefulness and quality.