


We may receive a commission when you use our affiliate links. However, this does not impact our recommendations.
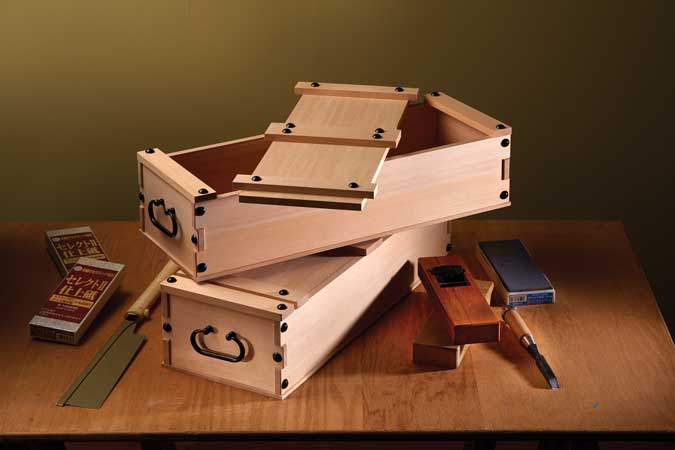
This clever and simple piece is great for storing tools, toys or a kimono
While picking though a table of vintage Japanese tools for sale I spotted this sliding-lid box under the vendor’s table; it was blackened by age, soot and rust. Despite its scars, however, the box was still graceful and functional.
The owner, a Japanese carpenter, wouldn’t part with it. But he let me measure and photograph the piece both inside and out so I could make a respectable version for myself.
The carpenter said it was a toolbox, and it would indeed fit a small kit of tools. But other experts in Japanese furniture said it was more likely a generic storage box that could be used to hold anything – wooden Tupperware, if you will.
The original was made using Douglas fir. For this article I made versions in both vertical-grain fir and Port Orford cedar, another wood preferred by Japanese joiners. The biggest challenge of the project was finding the dome-head nails. I settled on using No. 5 dome-head tacks (called “taiko byo”) for Japanese drum making, though upholstery tacks with a head 1⁄2” diameter or smaller are a more economical choice. (Both choices are listed in the “Supplies” box.)
Construction is simple, yet achieving perfection is difficult thanks to all the small details. The corners of the box are joined by finger joints. Everything is reinforced by the dome-head nails.
Finger Joints
The finger joints at the corners of the carcase are quite large. This makes the layout simple, but the execution a challenge. I first laid out and cut the single socket on the side pieces, then transferred that shape to the ends to cut the single pin.
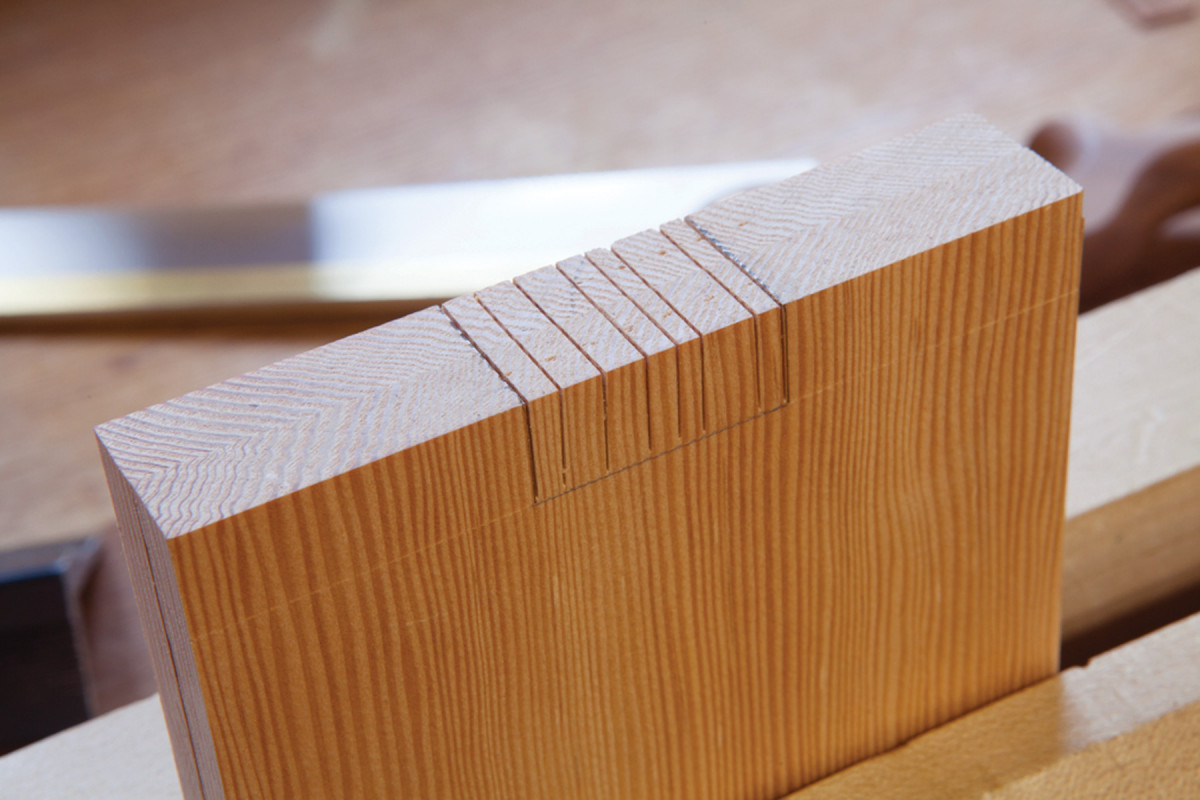
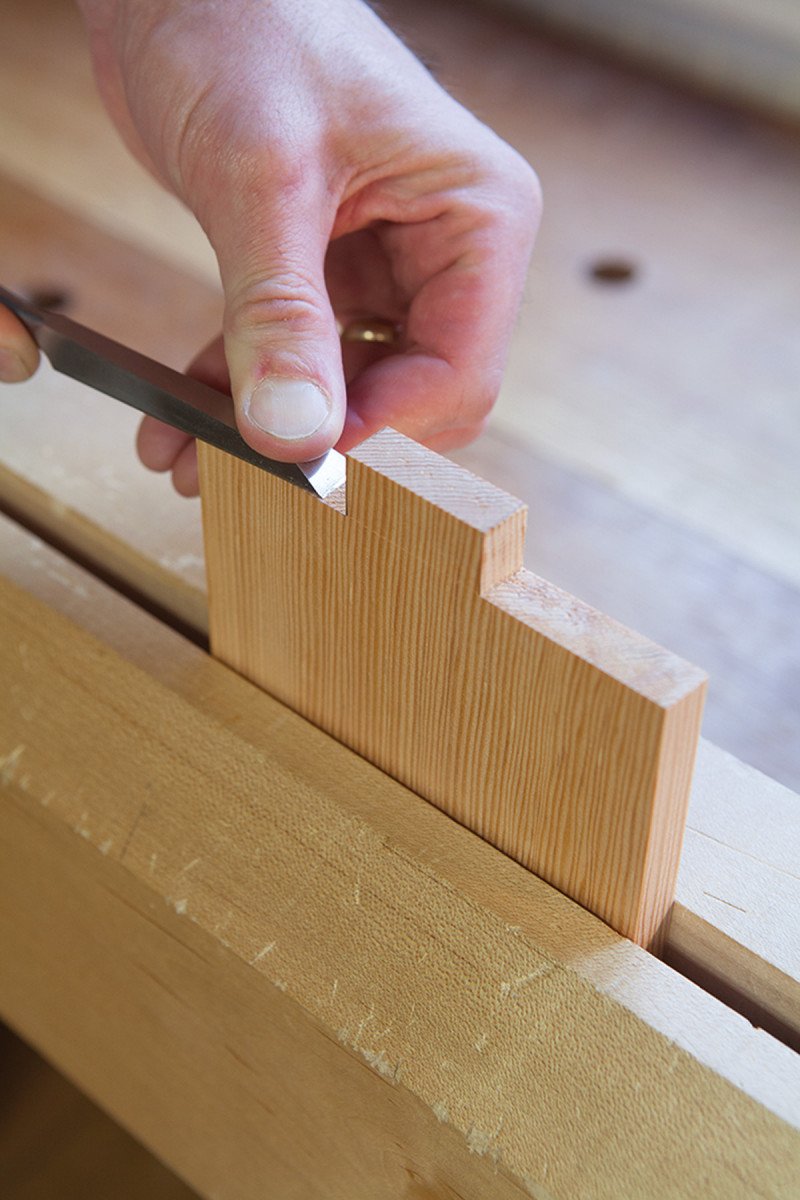
Make the socket. Hand-cut finger joints are more demanding than dovetails. To ensure you are sawing square and plumb, first make several warm-up kerfs in the waste area before sawing the walls of the socket.
Don’t forget that the sockets are 5⁄8” deep in 1⁄2“-thick material. This creates an 1⁄8” overlap at the box’s corners and creates nice shadow lines.
After sawing the socket on the side pieces, remove the waste between with a coping saw and a chisel.
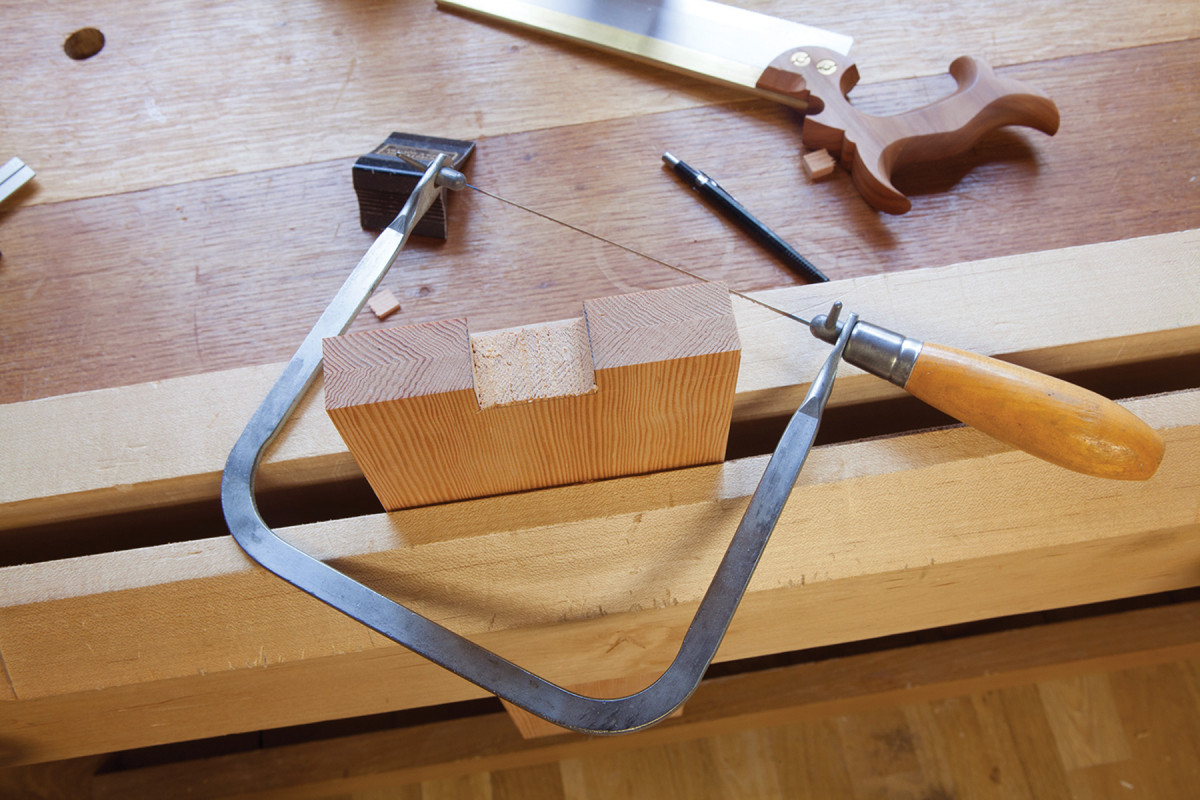
A quick sweep. A coping saw will quickly remove the waste in the socket. Then chop and pare the remaining waste away with a chisel.
After sawing all the sockets, transfer their shapes to the end pieces to cut the single pin on the end of each end piece. To ensure the baseline of the side pieces is mated perfectly with the ends, tack a wooden ruler to the baseline of each side piece. This makes the transfer process foolproof.
Cutting the single pin on the end pieces is a chisel challenge. Saw and cope the waste. Then use a chisel to level the end grain. A square and a little patience will pay off.
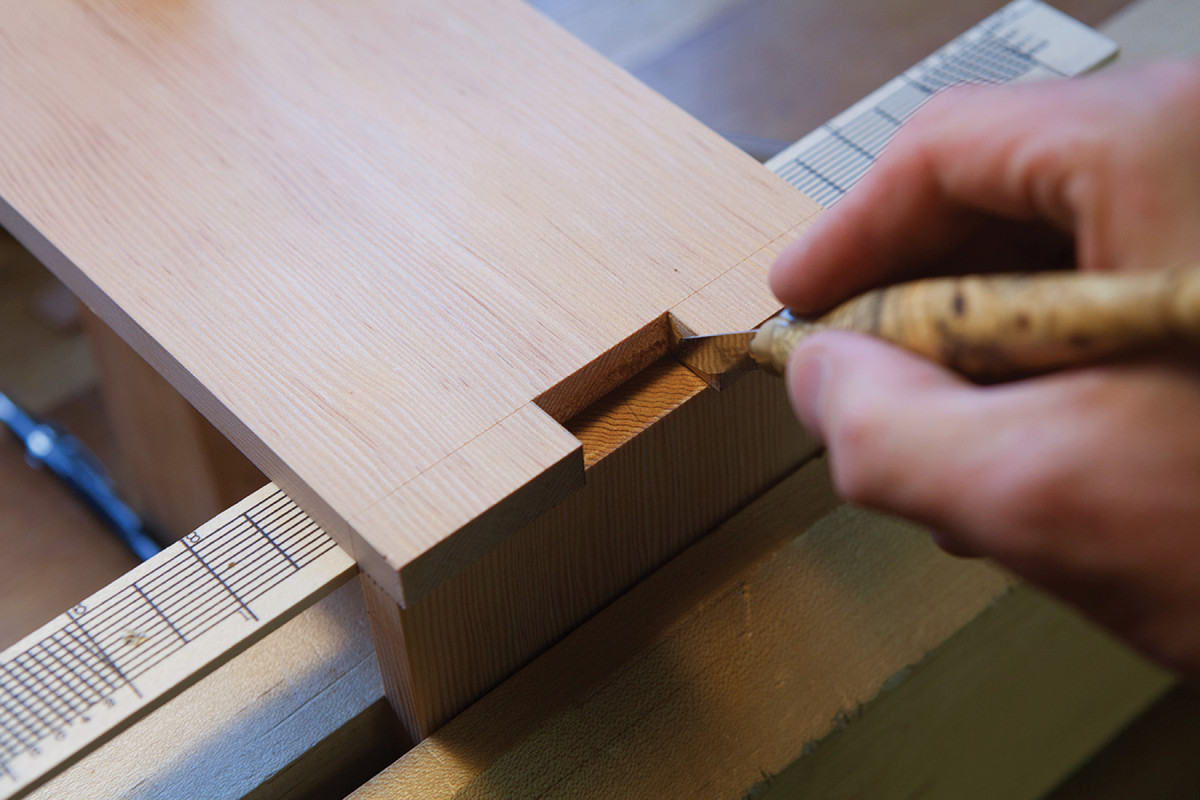
No measuring. No matter how good a sawyer you are, every corner joint will be different. Transfer the shape of each socket onto its mating end piece using a knife.
Now fit the joints together. If you have never cut finger joints by hand before, read this next sentence with care: Hand-cut finger joints have to be assembled like dovetail joints.
What does that mean? You can’t just hammer the end pieces down into the side pieces. Unless your sawing was perfect – 90° in all directions – they won’t go together easily, or at all. Instead, slide the end pieces into the side piece sockets to pull up “one way.” This might sound confusing until you cut the joint. But it’s really no different than realizing that the tailboard and pinboard of a dovetail joint go together in only one way.
Flat & square. Work to the baseline with a chisel. Take light cuts and confirm the end grain is flat and square to the faces using a square.
The last bit of work before assembly is to chisel a 1⁄16” x 1⁄16” chamfer on the corners of the finger joints. Lay out the chamfers in pencil, then use a chisel to remove the pencil lines.
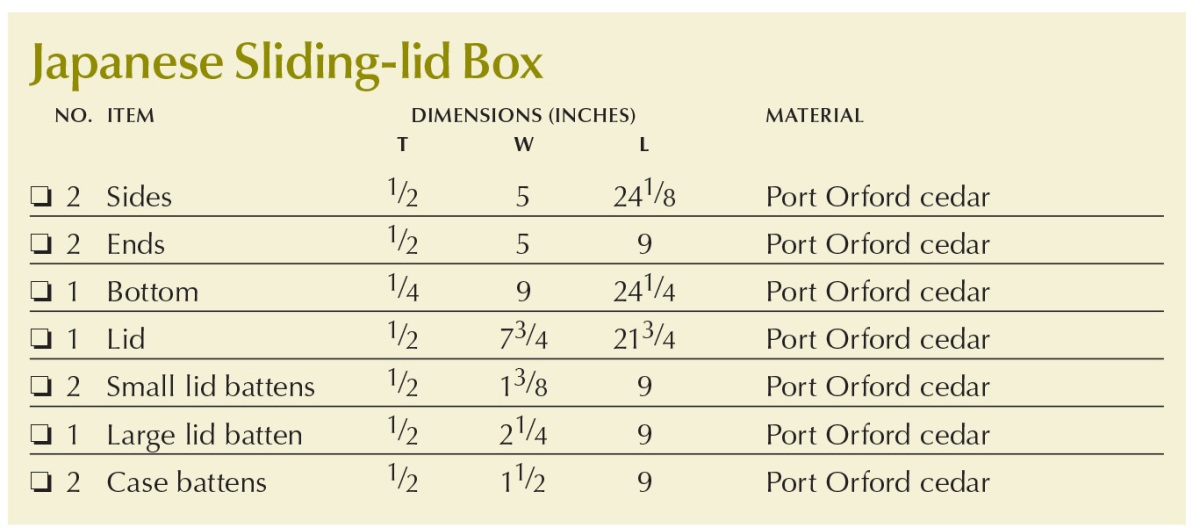
Japanese Sliding-lid Box Cut List
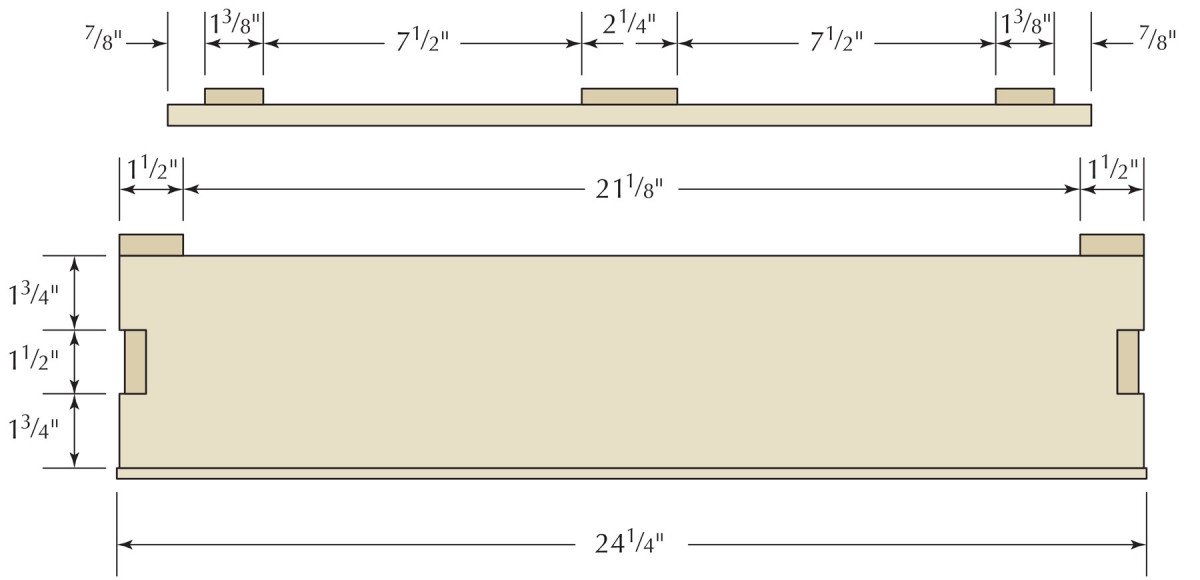
Profile
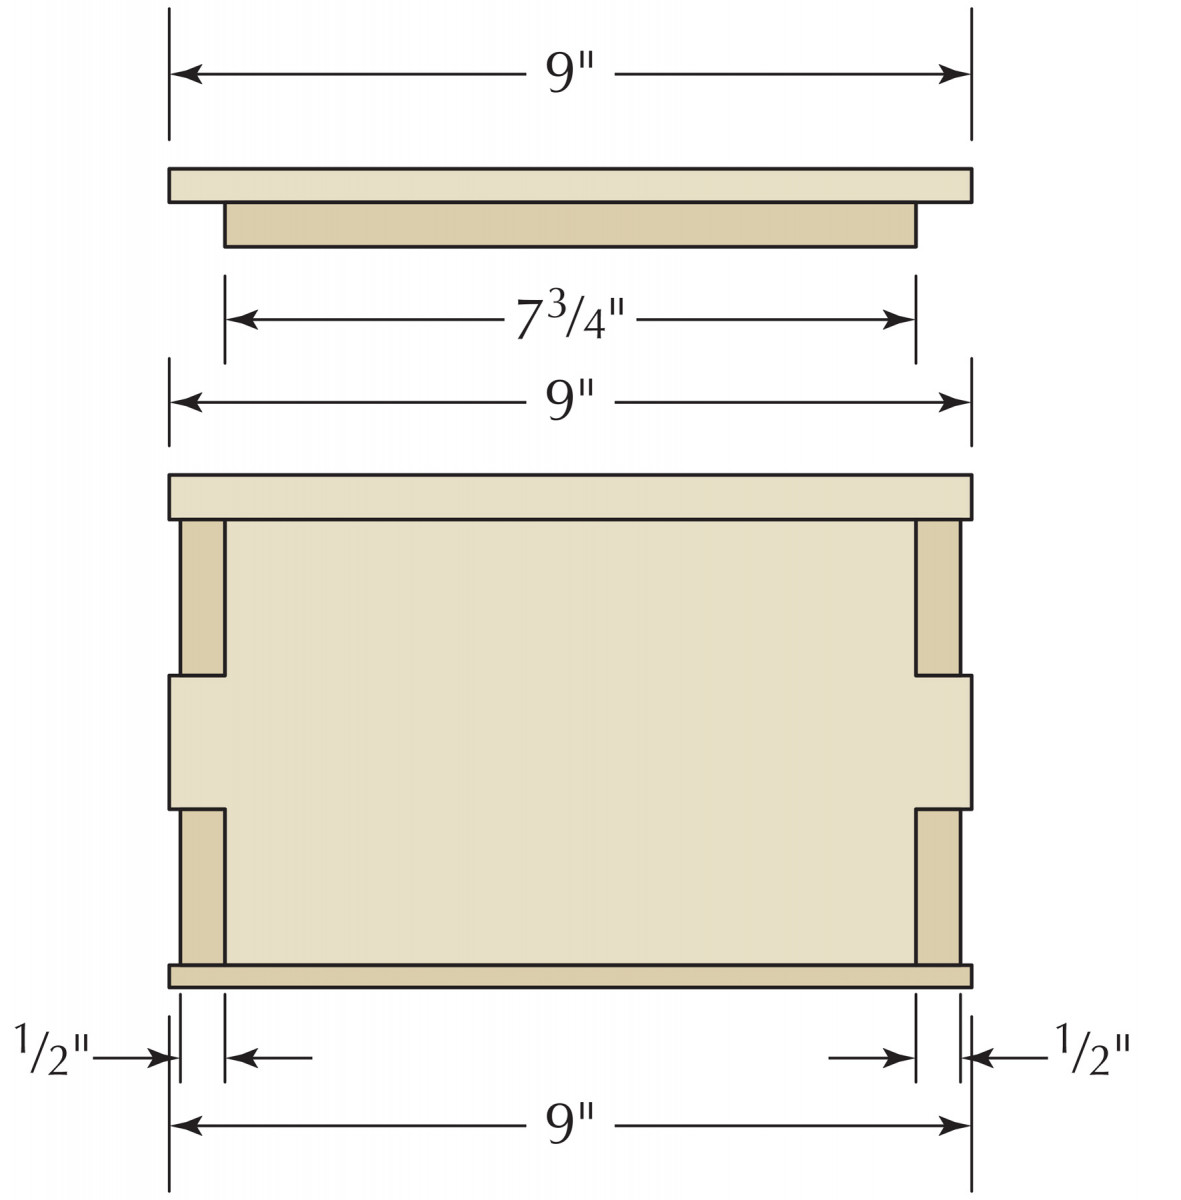
Elevation
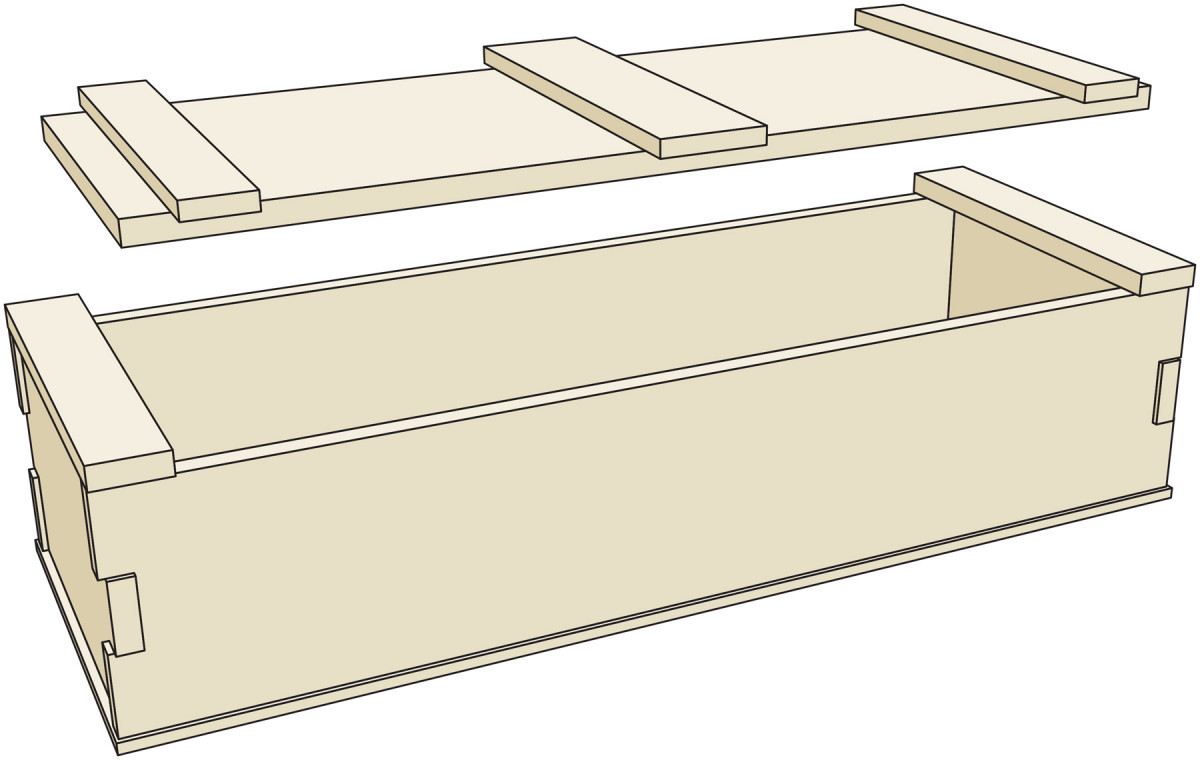
Exploded View
Assemble the Carcase
The original box was unfinished – its surfaces were left straight from the plane. Even if you want to apply finish to your box, the overlapping joints at the corners will make cleaning up glue squeeze-out difficult.
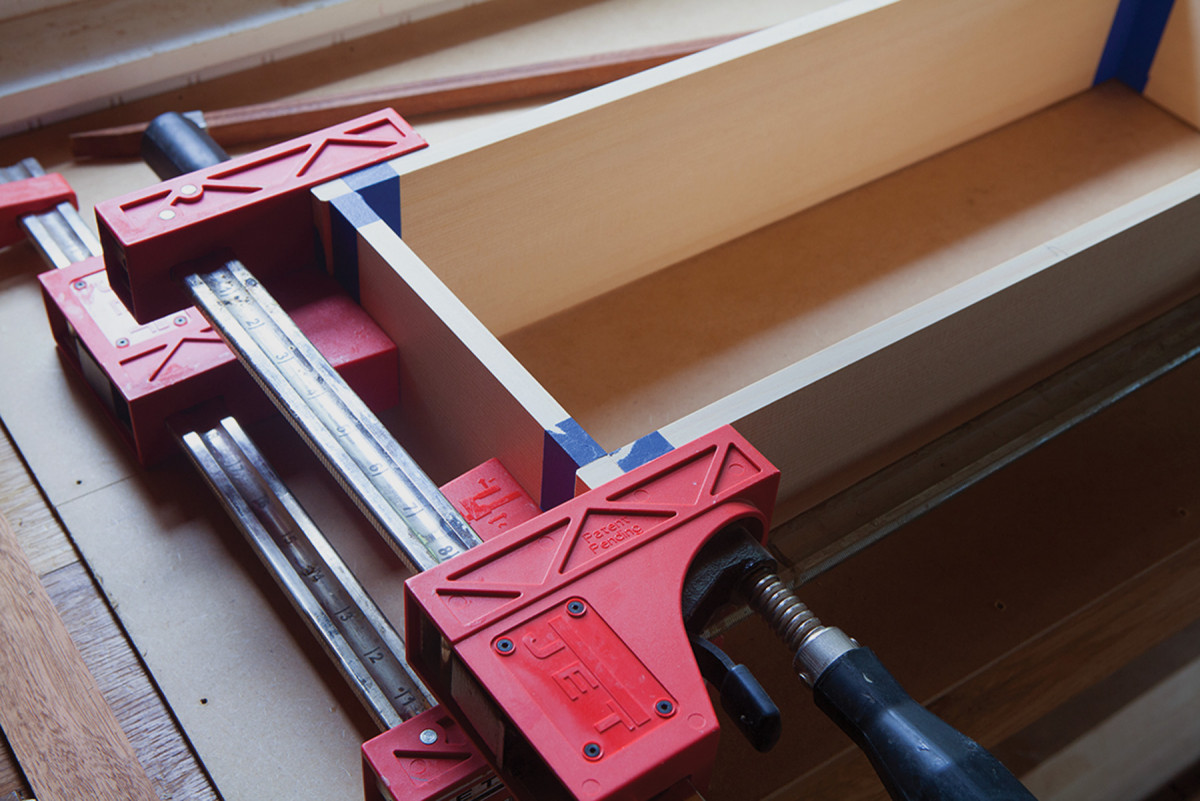
Tape & clamp. Painter’s tape protects your planed surfaces from glue. Clamps press the corners tight.
So the best thing to do is tape off the joints so that glue squeeze-out will end up on the tape. This takes only about 10 minutes and makes a world of difference.
Also, I use liquid hide glue, so clean-up is easy, even if the clamps prevent you from scouring every nook and cranny. After the clamps are off, a little hot water and a toothbrush can remove remaining bits of glue.
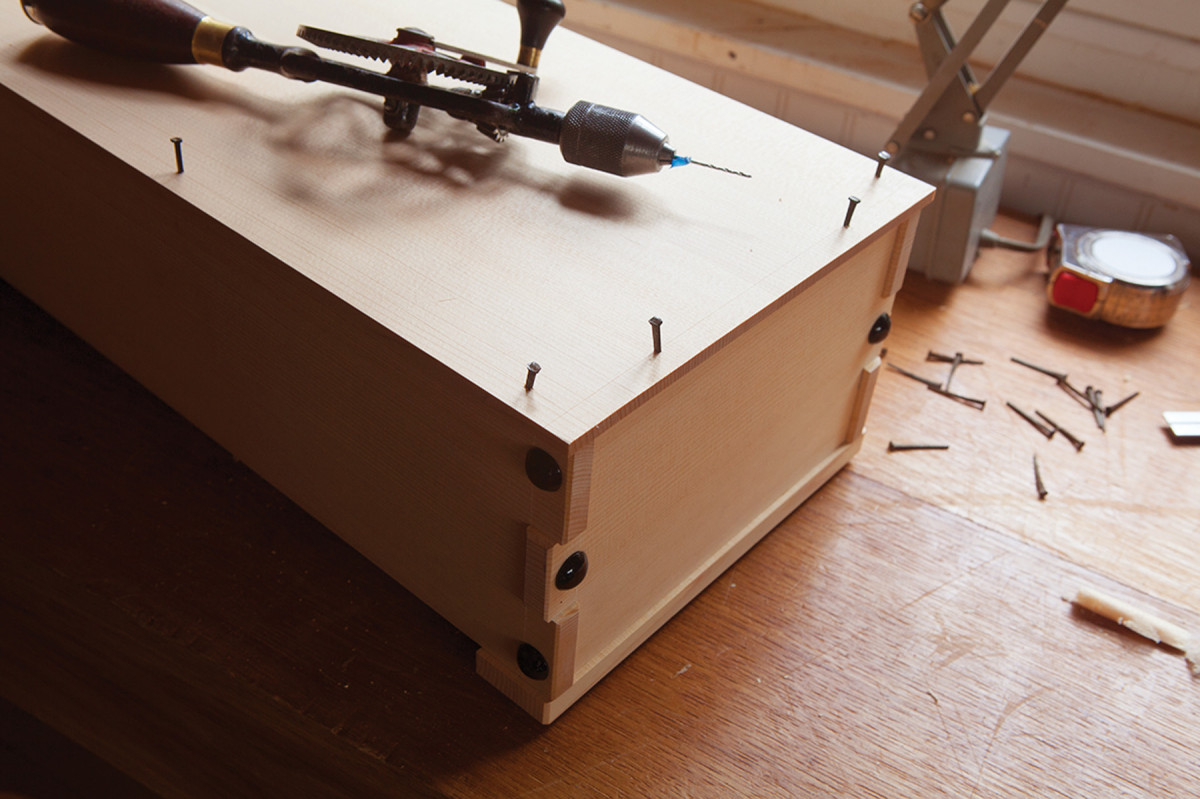
After the glue has cured, remove the clamps and the tape, then add the dome-head nails. The drum nails have a thin shank that is square in section. While you could drive these in without a pilot hole, I prefer to bore a 1⁄16“-diameter pilot hole for each nail to prevent its shaft from wandering.
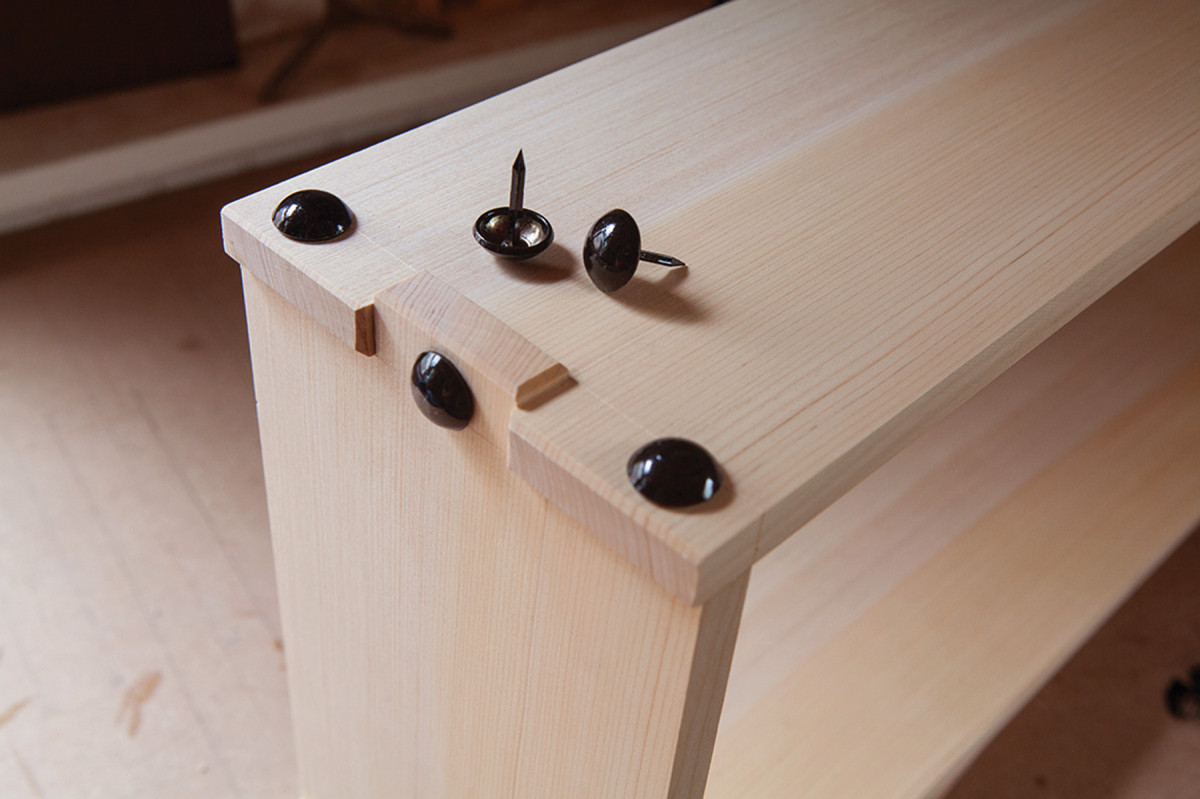
Decorative security. These dome-head nails don’t hold as well as a cut nail, but they do add strength and prevent the wood from getting scuffed.
As you can see from the photos, the nails on the side pieces are not centered; they are “cheated” a bit toward the top and bottom to add holding power to the joint. Drill each pilot hole 1⁄2” in from the long end of each side piece. The nails through the end pieces are centered on the pin.
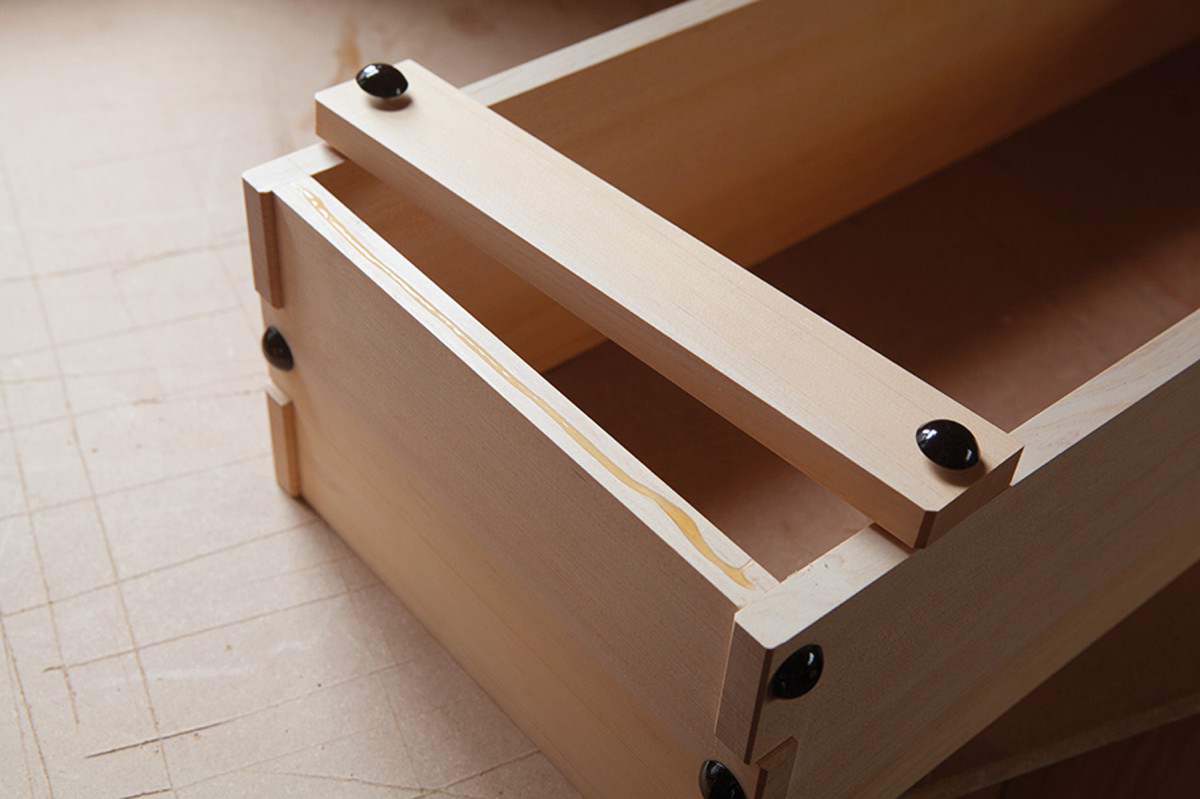
Here’s the point. To prevent the battens from sliding around, drive the dome-head nails into each batten so the tips protrude just a bit. Add the glue. Then press the batten in place. The tips of the nails will prevent the batten from sliding.
Now add the battens to the case that will capture the lid. These battens are glued and nailed to the ends.
Add the Bottom
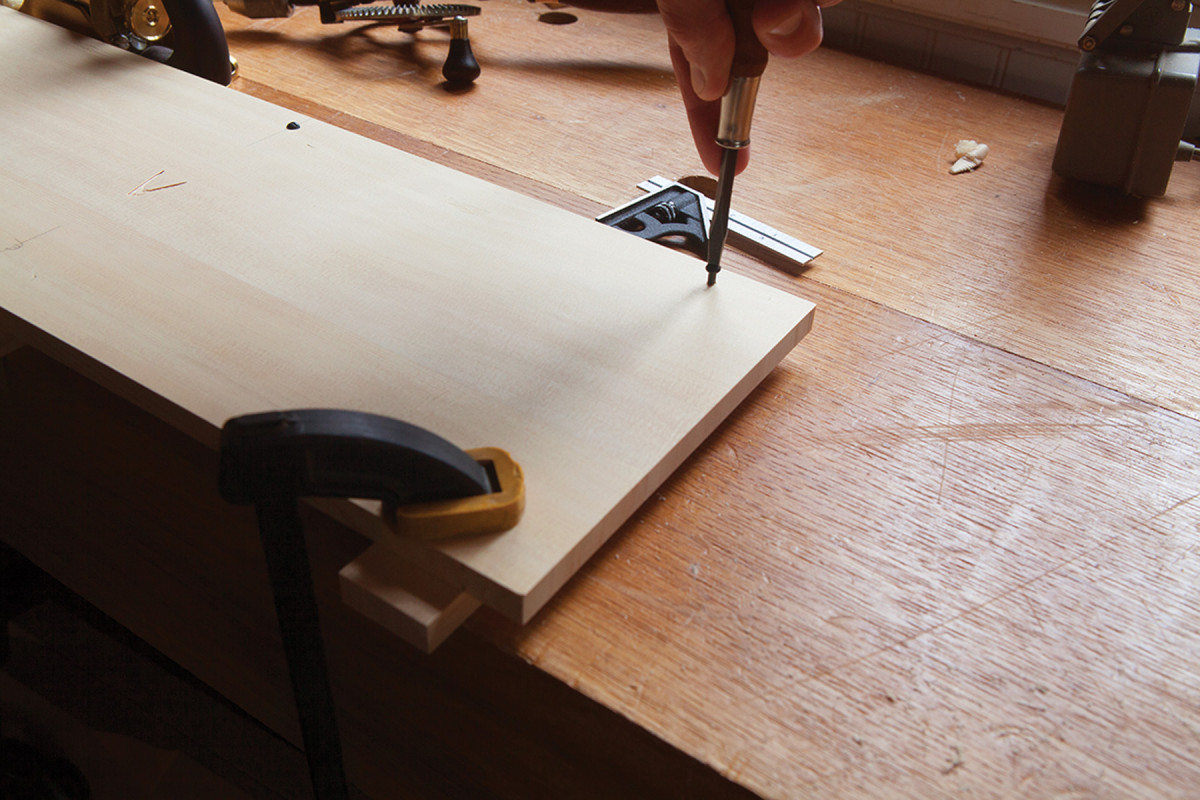
The bottom of the box is thin, nailed on and overhangs the assembled carcase just a tad. Plane up the bottom piece, then attach it to the carcase with 2d headed nails (1″ long). I used cut brads. Again, a 1⁄16” pilot hole is good insurance to prevent the nails from wandering.
Look close. The 2d brads are angled just a bit to add some wedging action. This keeps the bottom on through years of service.
The other detail about these brads is that each one is angled a bit – about 7° – to wedge the bottom on the carcase. This is sometimes called “dovetailing” your nails.
After driving the brads in, set the heads 1⁄32” below the surface to prevent the heads from scratching up a nicely finished tabletop.
Make the Lid
The lid slides and locks thanks to the battens that are fastened to the lid and the carcase. The dome-head nails alone do not offer enough holding power, so the three lid battens also are screwed to the lid.
I used 7⁄8” #4 roundhead screws to attach the battens from the inside of the lid. I chose roundhead screws because their heads’ shape mimicked the shape of the dome-head nails.
Screw the lid to the battens – two screws per batten – then flip the lid over and add the dome-head nails. Note that the dome-head nails are located a bit more toward the center of the lid than the remainder of the nails on the box. I put them 11⁄2” from the ends of each batten.
Reinforcements. The screws ensure the battens won’t come loose years from now. My stock is perfectly quartersawn, so there isn’t much of a concern with wood movement. If your lid will move a lot, you might want to ream out the screws’ clearance holes in the lid to allow for movement.
Add the pull to one end of the carcase and the box is complete. I left my boxes unfinished, though you could add a coat of wax to the exterior to give it some protection.
While the boxes look nice and crisp now, I look forward to seeing them in 20 years when their scars will make them look even better.
SUPPLIES
■ #5 taiko byo (tacks) 1,000
■ burnished brass tacks #02362511, $7.99/100
■ shiny nickel tacks #225060, $10.99/100
■ 2d standard brad #CRB2
■ tansu steel handles #00D
Click to download the PDF, with drawings and a cutlist: SlidingLidBoxPDF
Here are some supplies and tools we find essential in our everyday work around the shop. We may receive a commission from sales referred by our links; however, we have carefully selected these products for their usefulness and quality.


Love the idea, but are those tacks really over $100 / box???
Any alternative suppliers or smaller quantities available?
I have been wanting to make a few of these and hope to get them done soon. I intend to use rose head nails that have become much easier to source since the time this project was published.
After reading the article last December I had great fun building 2 of these beautiful boxes. They now have a permanent home in our living room. Guests like to look at them, but are often surprised to see the contents of these elegant boxes…..my son’s Lego collection in one and match box cars in the other!