


We may receive a commission when you use our affiliate links. However, this does not impact our recommendations.
Bending steel with only a grinder and a cutoff wheel to turn scrap into style.
If you have made it to this article, you must be interested in learning a new trade! So let me be the first to say, welcome to the mixed metal and woodworking club! I guarantee you wouldn’t be disappointed with the new adventures you can take traveling down this road. Let’s get started. With this article, I’ll walk you through the step-by-step process that I took to create my metal base and hardware that goes with the Industrial-Style Bookcase seen in the December 2021 issue of Popular Woodworking.
Getting Started with Metalwork
One of the main themes of the metalwork aspect of this bookcase was to not have to buy any specialized equipment other than a MiG welder and an angle grinder to supplement the tools that the average woodworker already has. A basic welder (meaning good quality, but without all the bells and whistles) can be bought new for a few hundred dollars and a 4-1/2” angle grinder is just about the most absurdly inexpensive tools I can think of, considering how fantastically useful and versatile it really is.
Almost all of the MiG welding in this project is done in the flat or horizontal position, simply because you can move the pieces around the bench and put them whenever it’s comfortable for welding. There’s no vertical or overhead welding required, which makes things a lot more straightforward. Therefore, my settings generally remain the same for every weld in this project – around 300 feet per second (FPS) wire speed, and about 19.6 volts, with 0.030 ER70-6 wire. Your settings may be a bit different, so it’s important to figure that out on a piece of scrap (or on anyone else’s but your own), like I do before I do any serious welding.
Use Your Resources
If you are new to welding and you’re still reading this, you are probably a bit overwhelmed by the idea, don’t be. There are so many free resources nowadays for learning that it boggles the imagination. You can find world class instruction and advice online that doesn’t cost you a dime. In terms of available resources there has literally never been a better time in human history for learning.
I’m mentioning this because when I first became interested in learning how to weld, I didn’t really know where to begin. I remember looking at YouTube videos and wondering what in the world those gas canisters were for, for example. It turns out that, like so many other things, the reality is pretty straightforward, once you understand a few concepts. It’s mainly just important to know where to start, and where not to start. For example, going to a big box store and asking them for advice is definitely not the place to start. Instead, find a store that specializes in providing welding equipment and be upfront with one of their employees about how clueless you are about welding. I did this myself when I first started at a local Airgas (one of those specialty welding companies) and was upfront. On multiple occasions, he spent a lot of time talking with me about equipment and setups.
Is going into a store and talking about how clueless you are with a complete stranger not your thing? Instead, go to the world’s largest library, aka the internet, and check out two titans of the industry. I am sure that they will put you on the right path to developing great practice habits. (I’d recommend checking them out even if you go and chat it up at a local welding store.) First, check out Jody Collier’s YouTube videos. He’s high skilled and experienced, as well as a great communicator, but what really stands out about his videos is his honesty. He messes up sometimes like we all do, and he doesn’t hide it with editing. In today’s autotuned, airbrushed, Photoshopped, and overproduced world that is like a cold beer on a hundred-degree day. Likewise, check out Bob Moffatt from weld.com.
Make Two Curved A-Beams
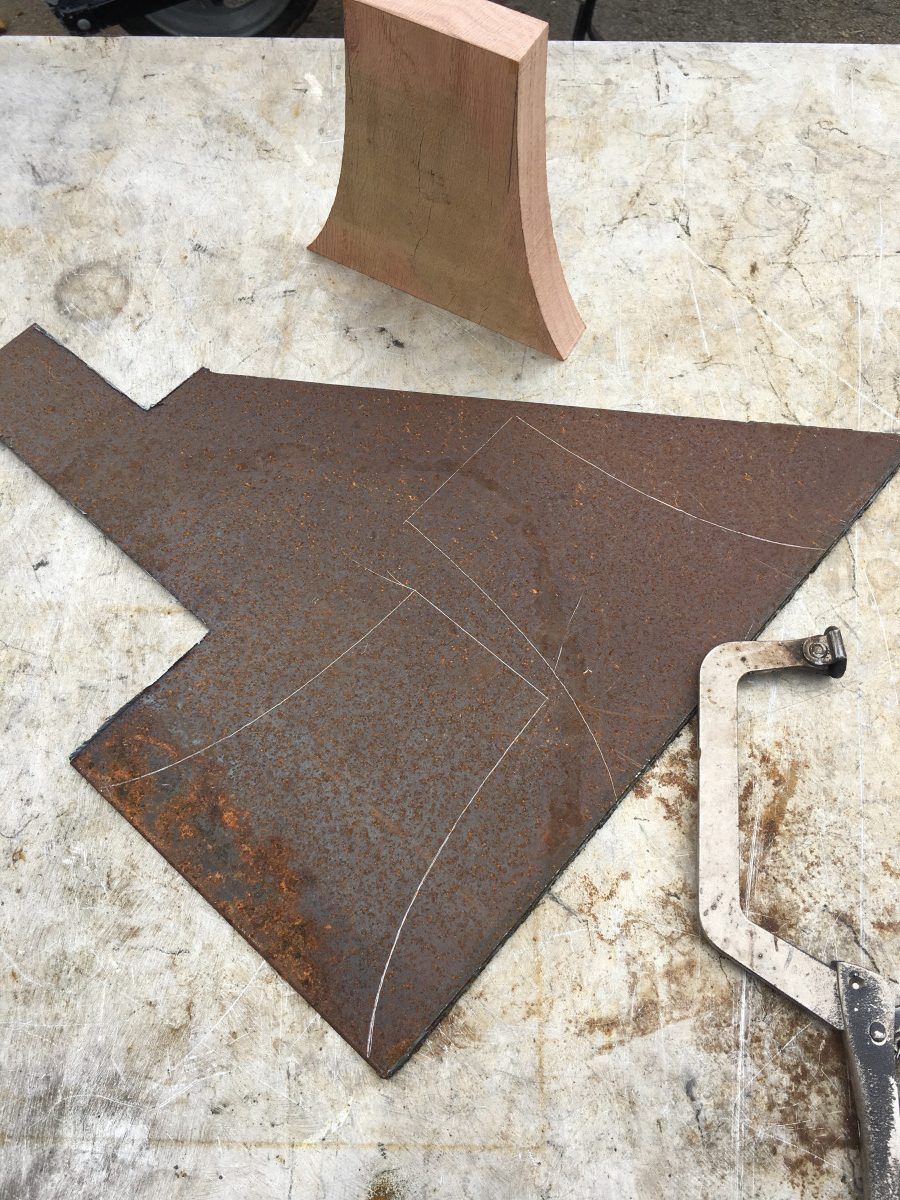
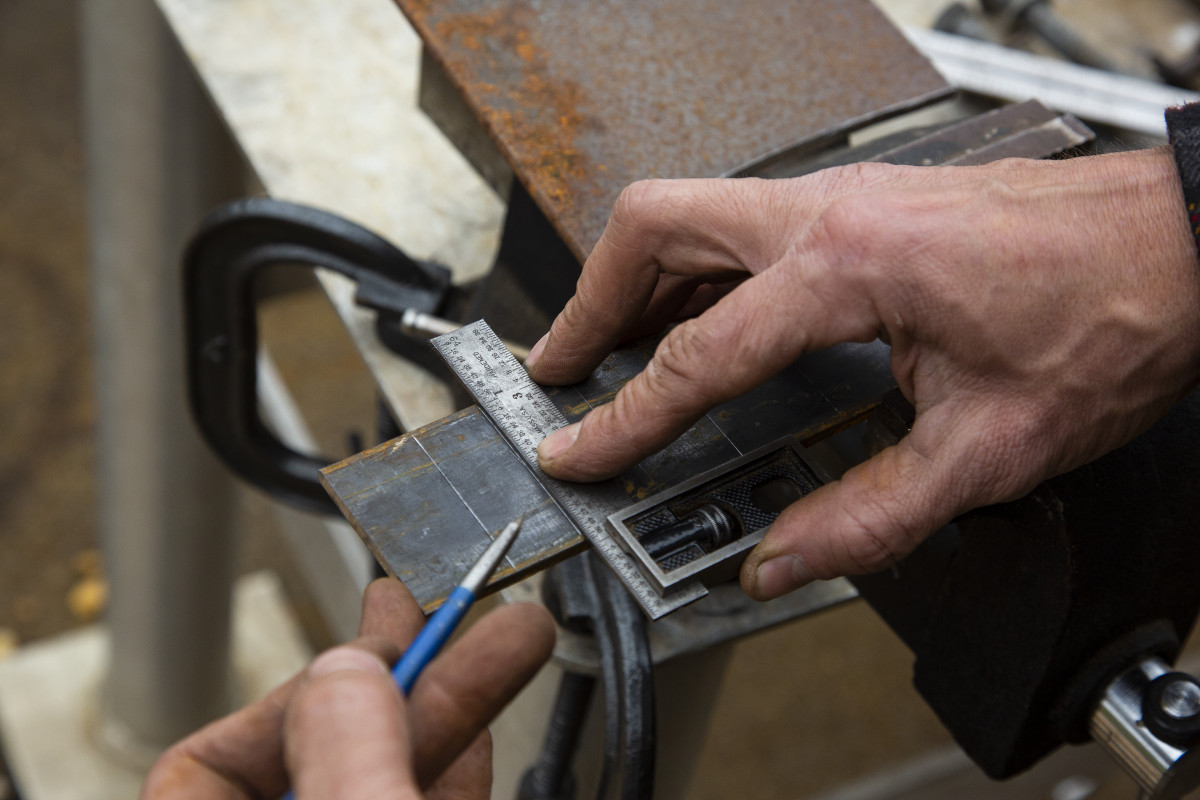
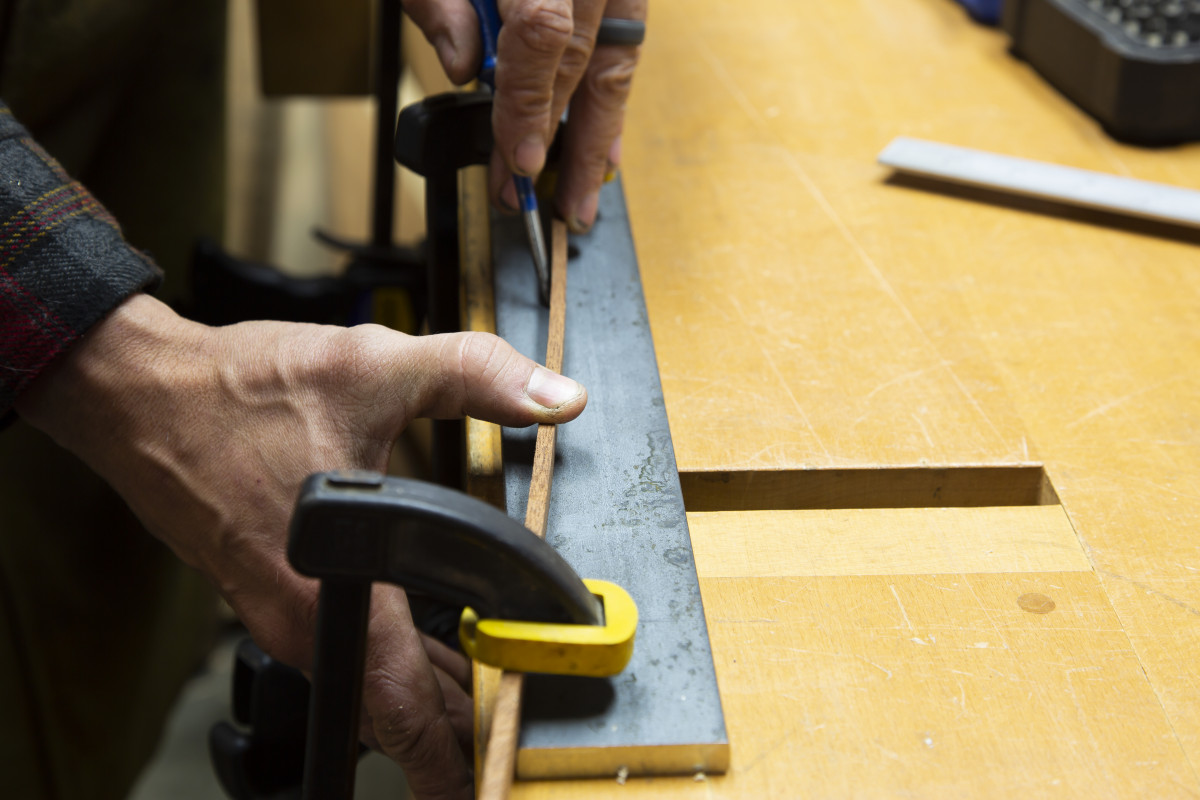
Begin by cutting the wooden form in the shape of the middle A-beam piece. Use that form along with a steel scribe to lay out the cut lines in the steel. That wooden form will be used to aid in positioning the two sides as well (this will become clear later).
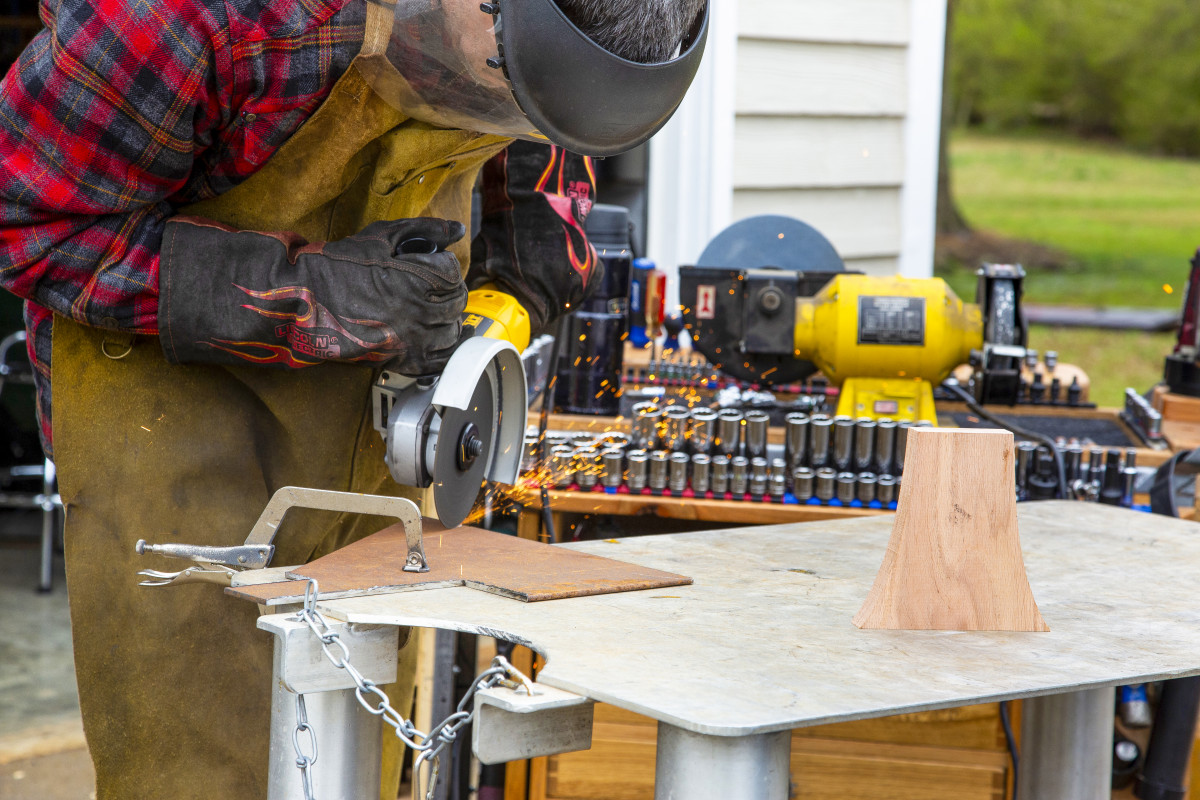
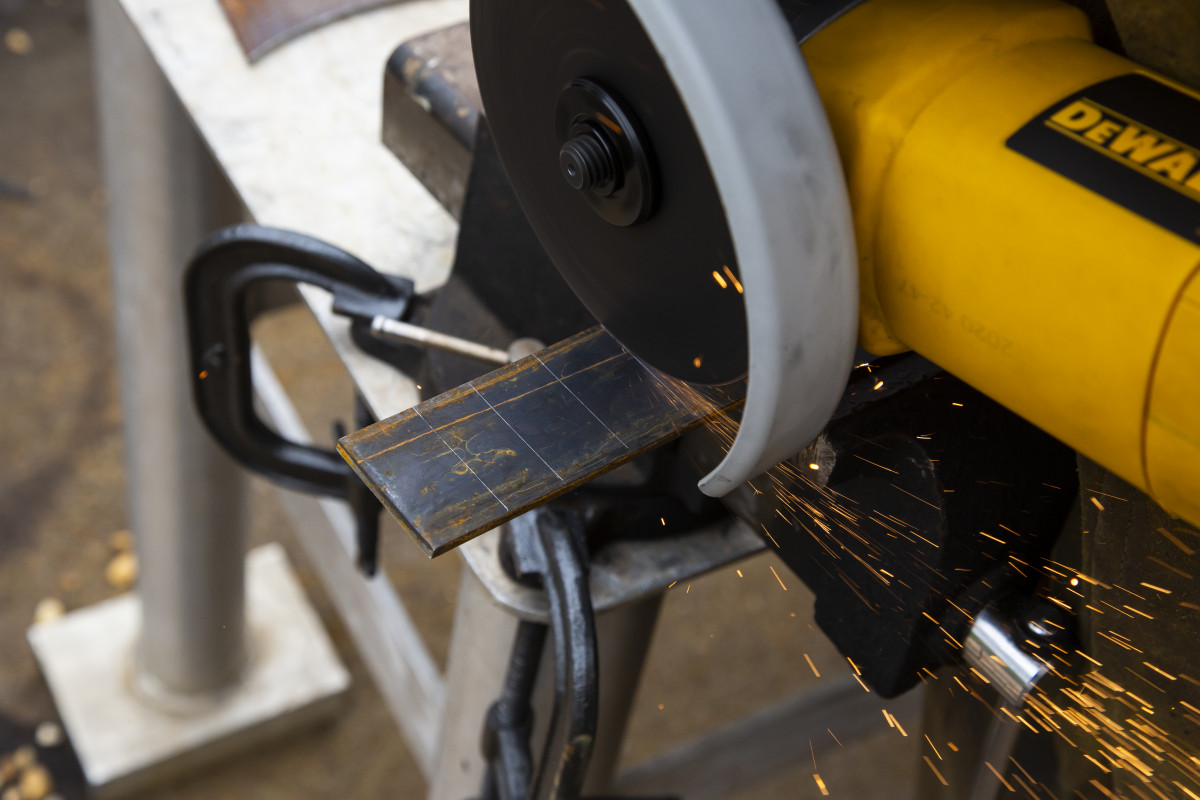
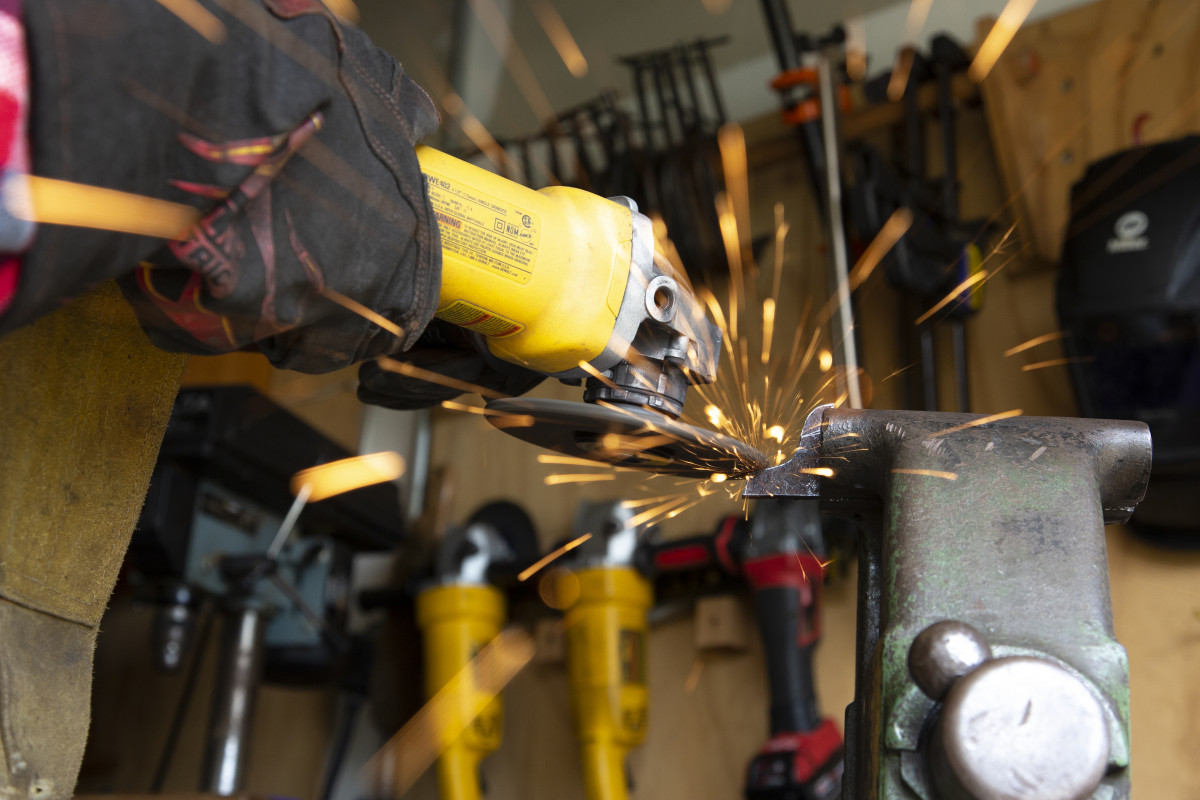
Now, cut the pieces out using an angle grinder and cutoff wheel. It’s easier than you may think.
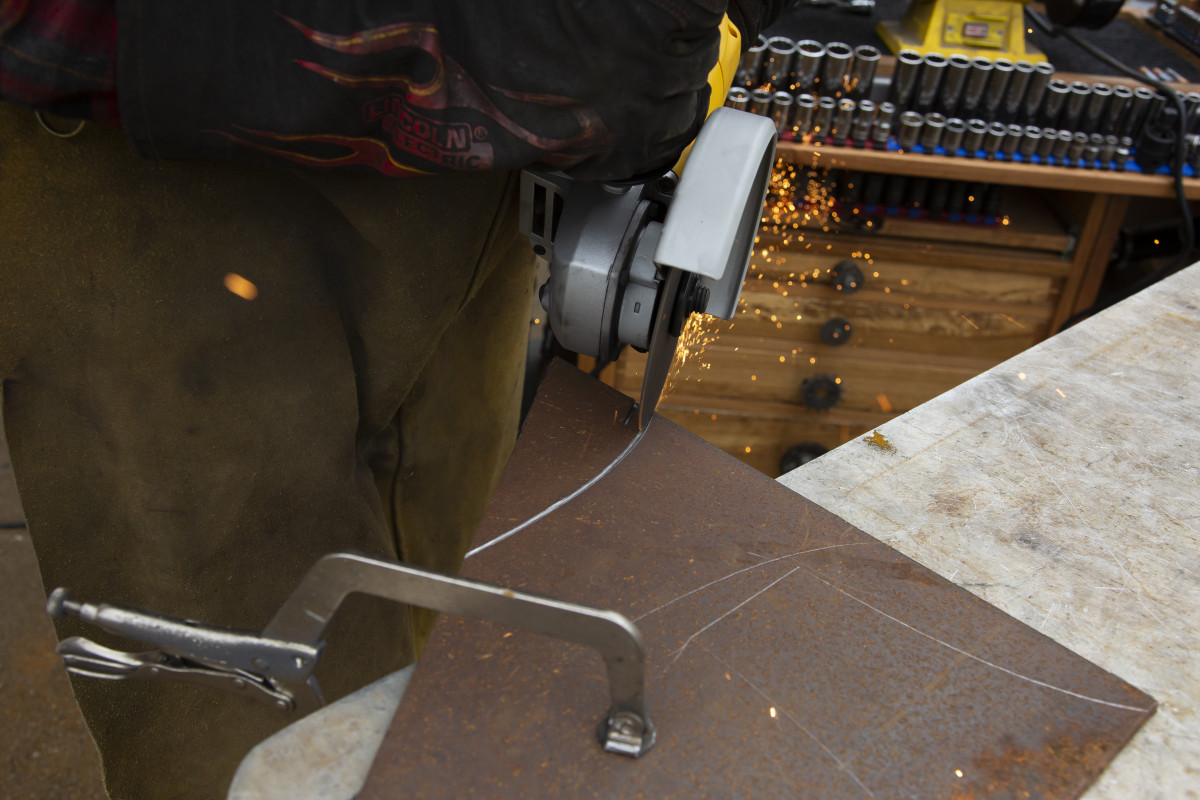

Just be patient and take light passes along the full length of the line; meaning, don’t try to cut all the way through in one specific area otherwise the straight cutoff wheel will bind and be impossible to control.
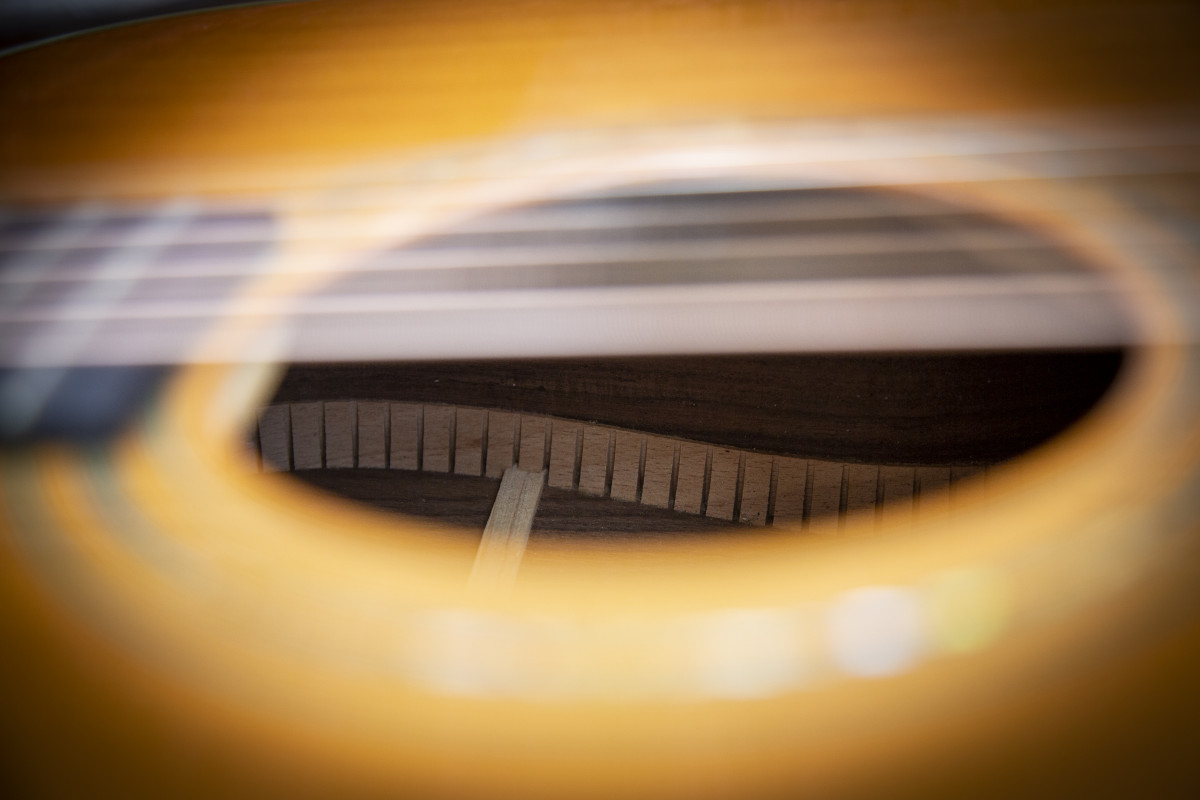
The next step is to add the sides to each A-beam by imitating the “kerfed lining” found inside acoustic guitars, such as the lining inside my favorite guitar. These kerfs permit all kinds of different bending options.
Mark and scribe your relief lines at regular intervals.
Use the cutoff wheel to cut almost all the way through the piece, leaving 1/16” of material in the bottom of the kerf. Once complete and before you begin welding, all rust must be removed from all surfaces to be welding. Grinding away all the rust is about as glamorous a task as emptying a box of cat littler, but it’s got to be done.
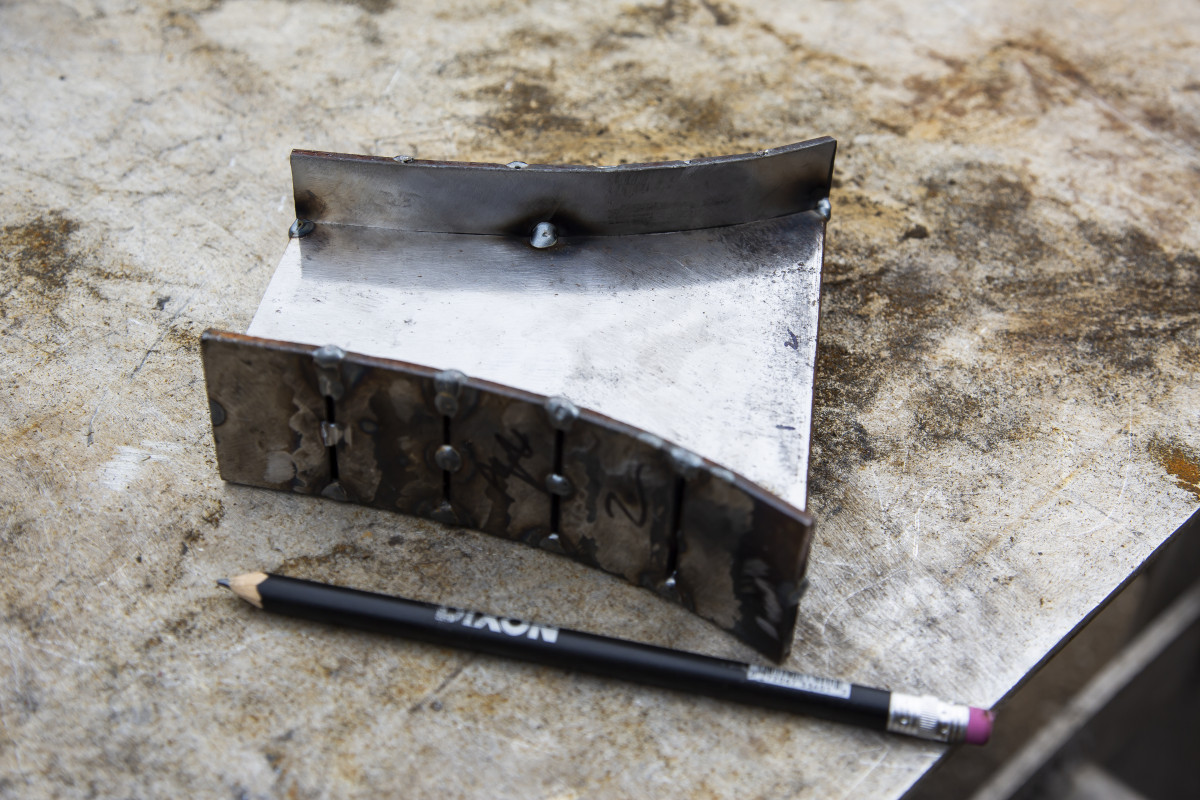
Form these two steel pieces around the piece you cut initially and tack weld them to the middle “a-shaped” piece so they retain their form.
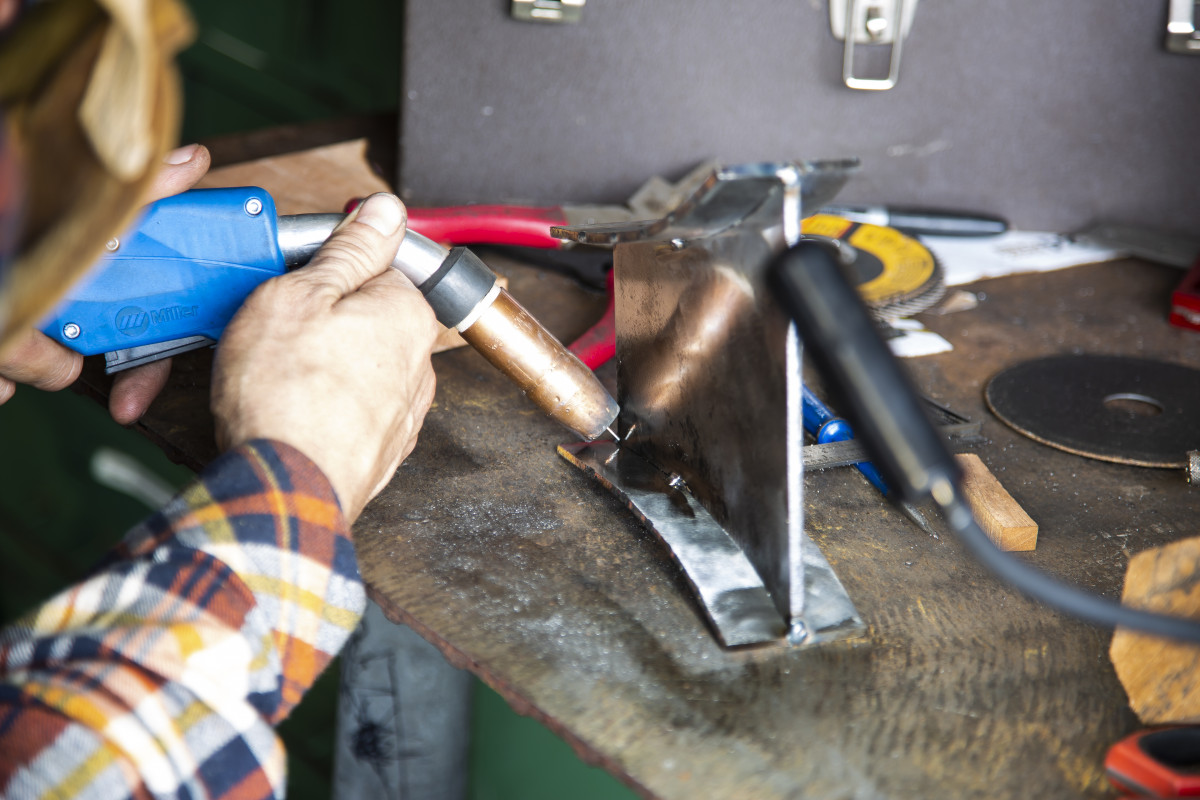
Weld the joints out.
Fill in these kerfs with welds and grind the welds flush to the surface (I haven’t done so yet in this photo.) Set aside
Making the Two Bottom I-Beams
Just like the “A-beams”, begin by cutting a wooden form to the middle I-beam shape. Trace this piece twice onto your scrap pieces of metal, cut, and grind off all of the rust. Prep the other I-beam pieces as well. Now let’s work with the bottom pieces. Begin by cutting kerfs at regular intervals starting 2.5” in from each end. Once finished, flip it over and cut one kerf on each side that is 1.5” in from the edge. You may ask yourself “Why am I doing this?” This is because of the shape we’re trying to achieve: the interval kerfs on the one side help to form our desired arch, while the two edge kerfs on the other side allows the established bend to straighten and resolve back to a level plane (relative to the floor).
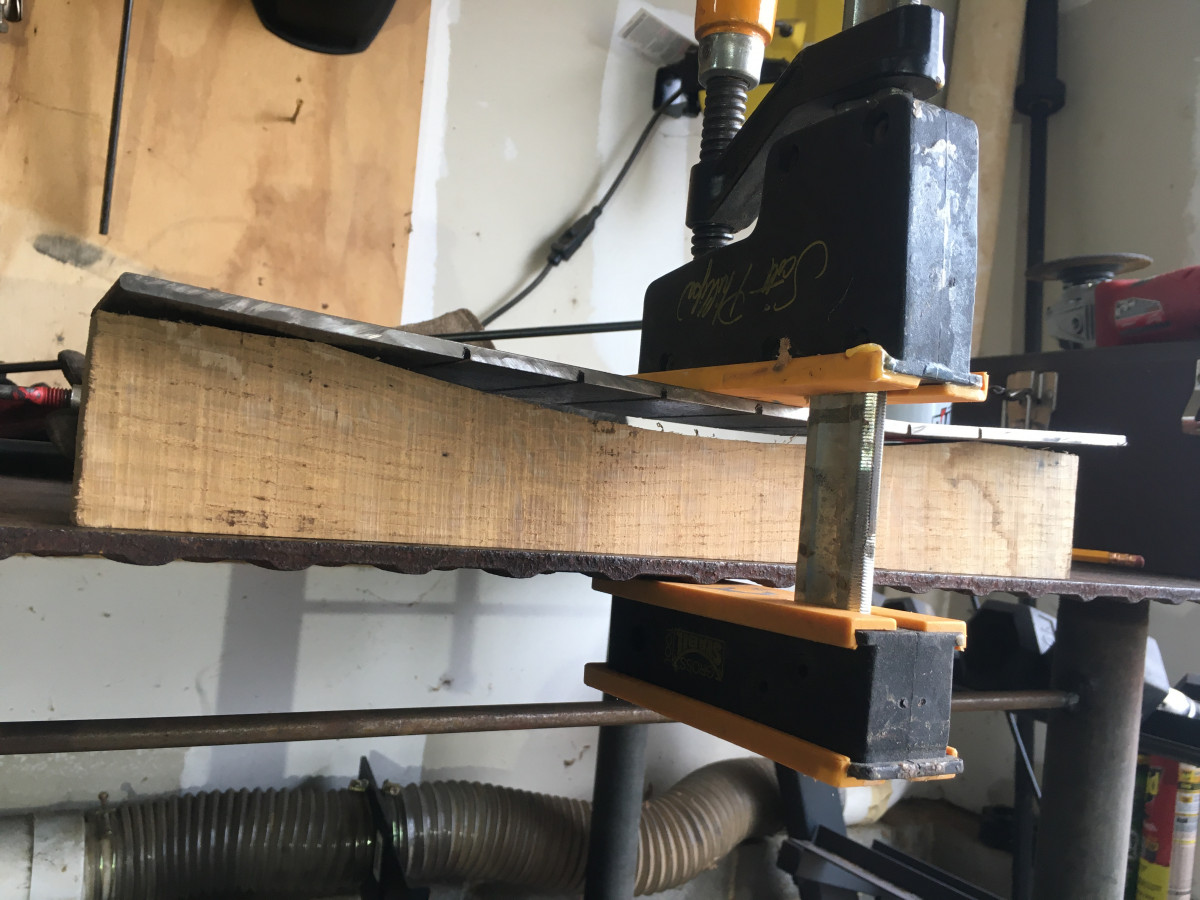
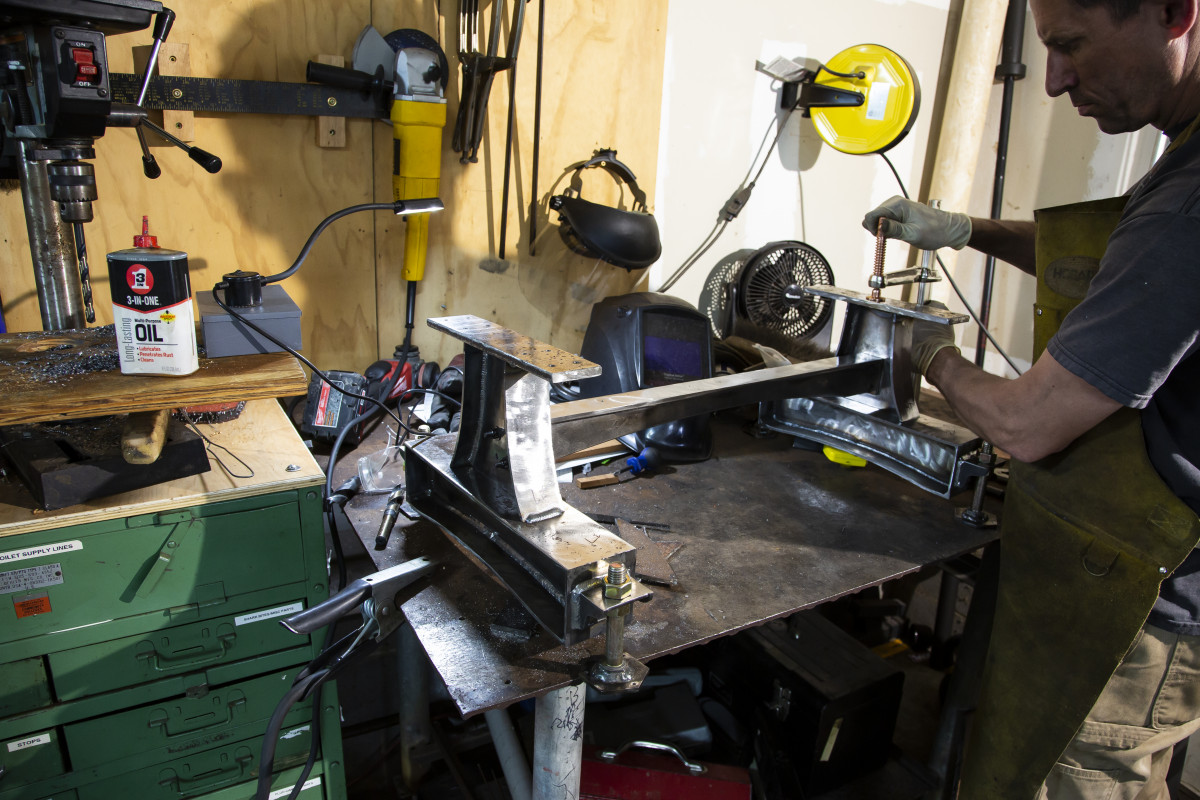
Now that all of the kerfs are cut, take your I-beam form and place it onto your workbench (arch facing up) and the bottom piece onto that block with the two kerfs you just cut facing up. Use a few clamps to bend the piece onto the I-beam form.
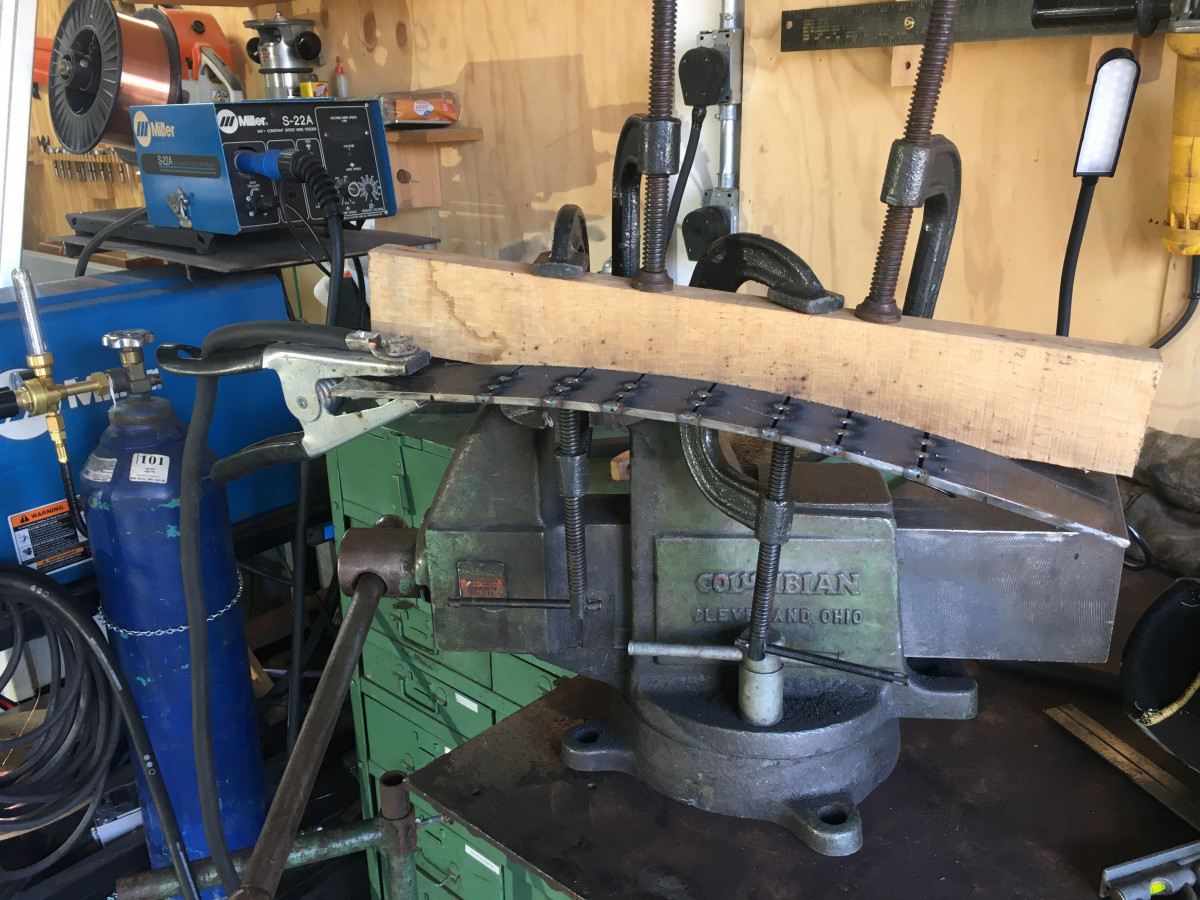
Once the piece takes the I-beam form, place tack welds in the kerfs. These tacks allow the metal piece to getain its general bent shape despite having been removed from the form. NOTE: Do not fully weld the kerf lines with the piece clamped to the wooden form. The art of tacking will only heat up the metal and the form so much. However, the art of welding out will put so much heat into the metal that wooden form would actually catch fire and burn your shop down.

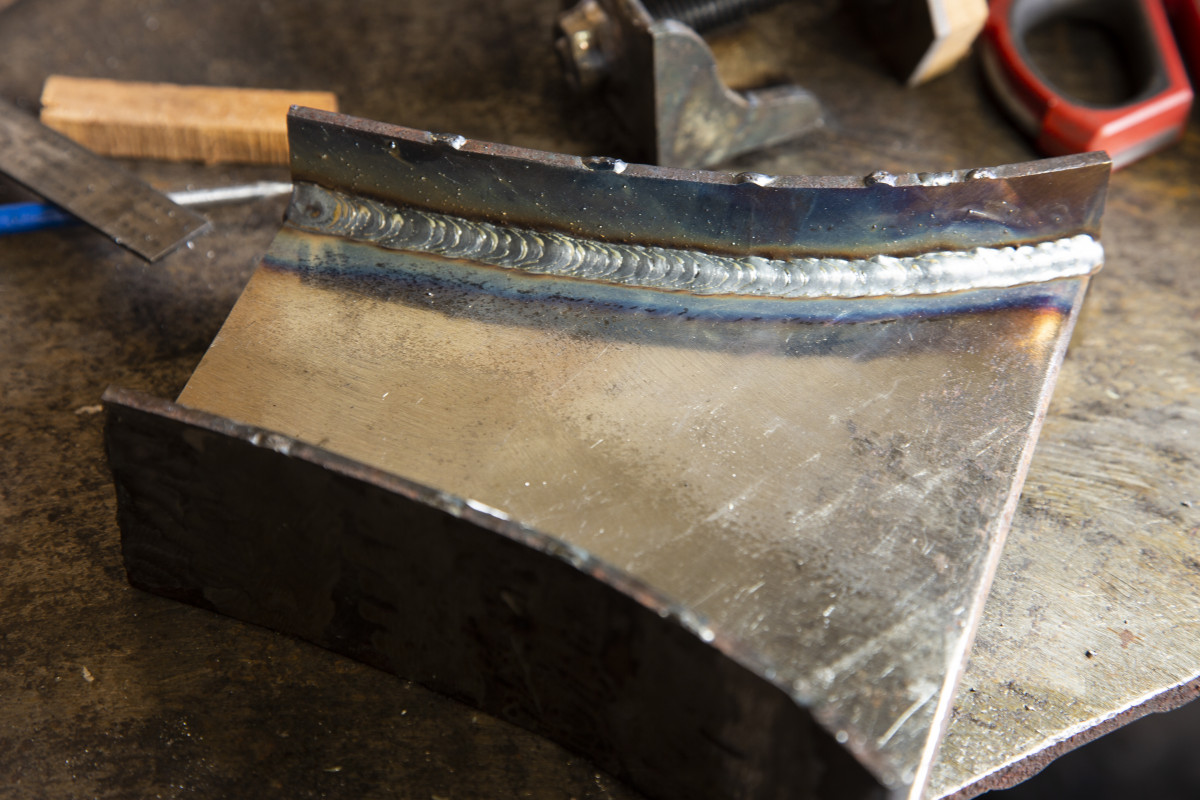
Before we attach our bottom piece to the middle piece, fill every kerf just proud of the surface and use your angle grinder to grind the welds flush for a smooth surface.

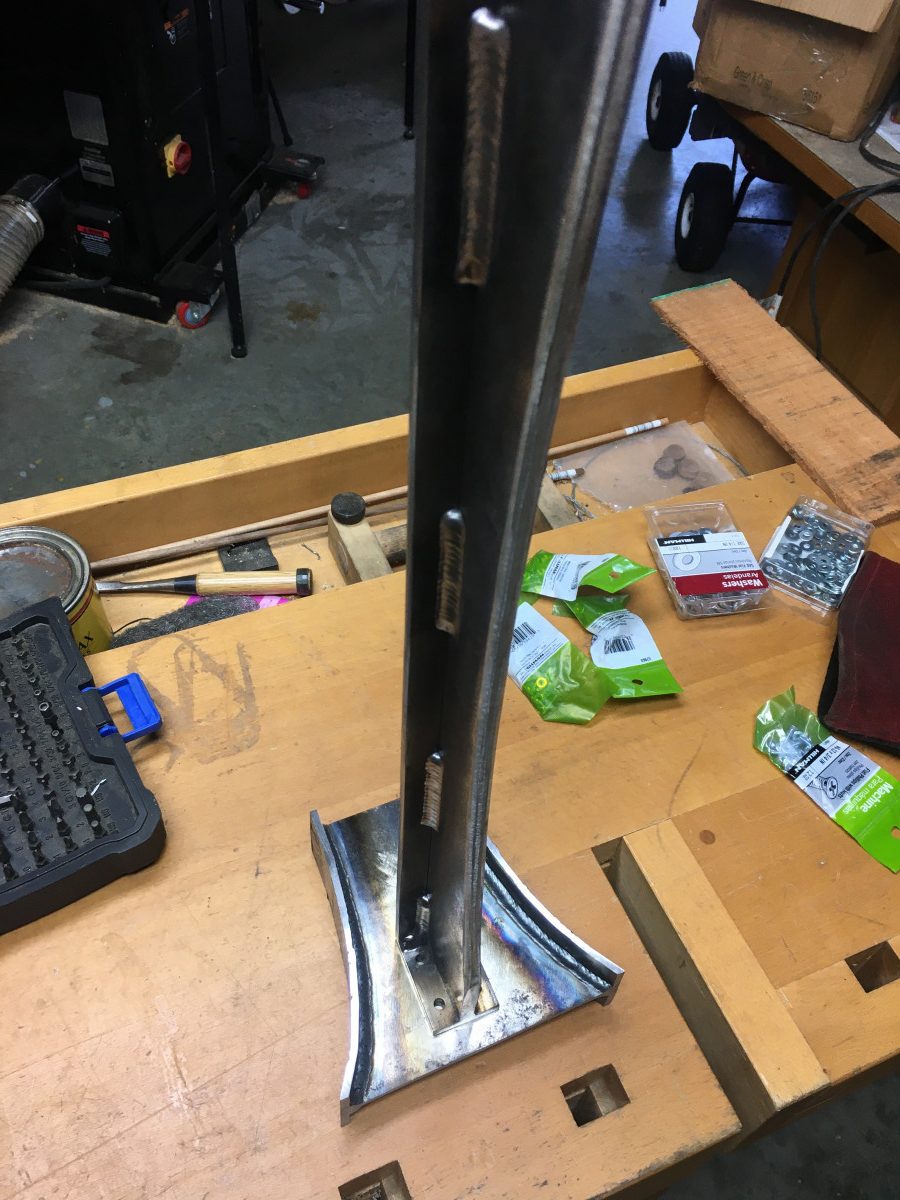
Then tack weld the middle piece in the center of bent bottom piece. At this point it would seem like a great idea to weld out these tacks because it would allow you the best freedom of movement as far as getting the welding electrode in there at the right angles. The problem with doing that at this point is the warping effects of the heat. If you make a weld that long before you’ve got your end caps tacked on, you’ll very likely lose the 90° angle between these two pieces you carefully took the time to set. Best to fit, tack, and weld the end caps first. As you can see from the photo, there’s an intentional overhang. You’ll want to trim it to fit with the cutoff wheel after it’s welded. The overhang makes welding much easier and cleaner. On that note, keeping your welds clean and ground down is a good practice to get into. You want to try and achieve an attractive and consistent final weld. If you don’t ground down the welds are you go, there could be a noticeably higher point in your final welds.

Spot weld the end caps.

Now it’s time to long weld the middle I-beam piece. I broke this long weld into two steps. Because I am using the MiG welding process, I prefer to push the electrode over pulling the electrode. Therefore, I start in the center and terminate in the corners. This also works well for two other reasons: it gives the metal time to cool off a bit and I can turn the piece around so I keep the electrode at the same angle as I approach each corner.

From here, it’s a simple matter of fitting, tacking, and welding out the top piece.
Onto the Arched Crosspiece
Cut the crosspiece to size, scribe an arc, cut that arc using the cutoff wheel, and then shape the edge of the arc with a flat disk on your grinder. (Flap discs are rather expensive, around $9 per disc, but they can produce a gorgeous surface.)
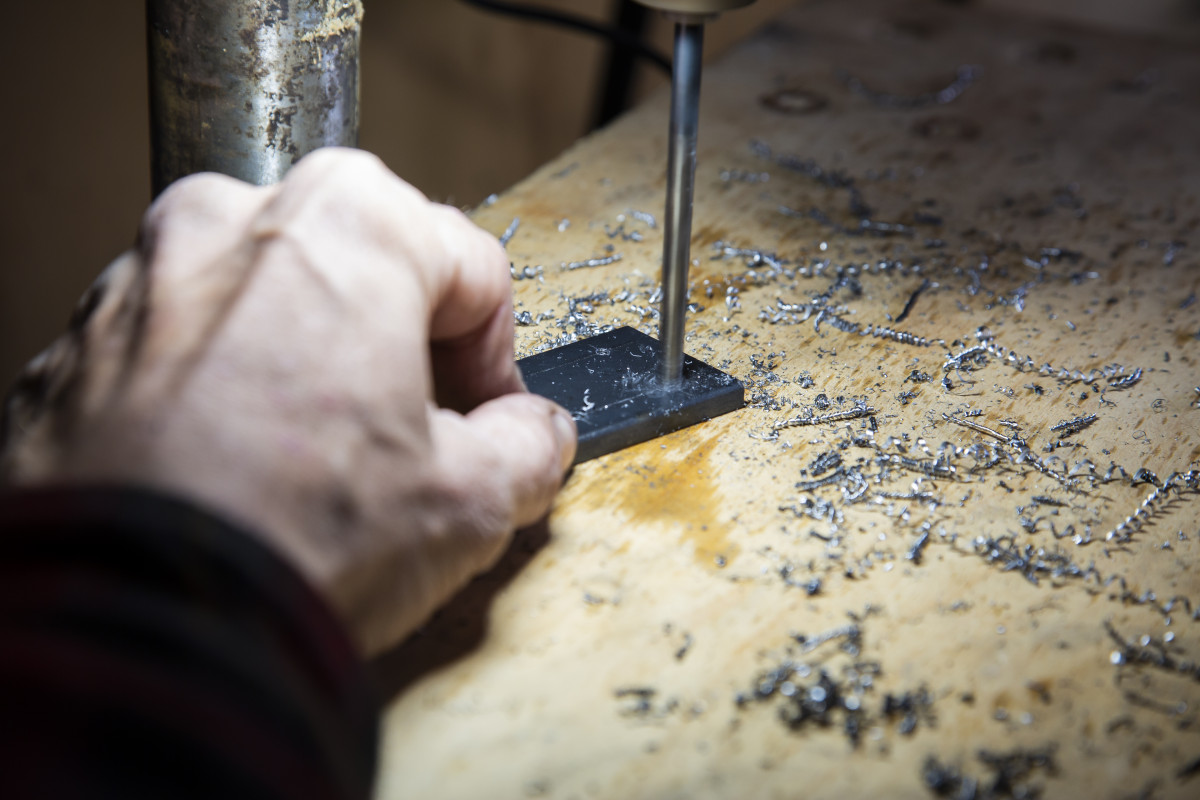
Then, cut the two end caps and drill four 1/4″ diameter holes in each piece using a drill press. These holes are what will attach the A-beam to the arched crosspiece. Next, weld the ends caps to the middle piece.

Lastly, attach the top piece. I chose to perform evenly-spaced intermittent welds because welding it completely out would have been serious overkill. It would also have injected a scary amount of heat into a relatively small amount of metal. TIP: Mark out these intermittent welds before you perform the actual welds – don’t just wing the spacing.
Final Assembly
At this point you have five pieces: 2 curved A-beams, 2 arched I-Beams, and 1 arched crosspiece. Let’s put them together.
First, place the A-beams flat on your workbench and place the crosspiece in the center. Mark the placement of the holes that you previously drilled in the crosspiece end caps. Drill all four holes on each A-beam. Assemble the A-beams to the crosspiece using 3/16” allen bolts that are 1” long and locknuts.
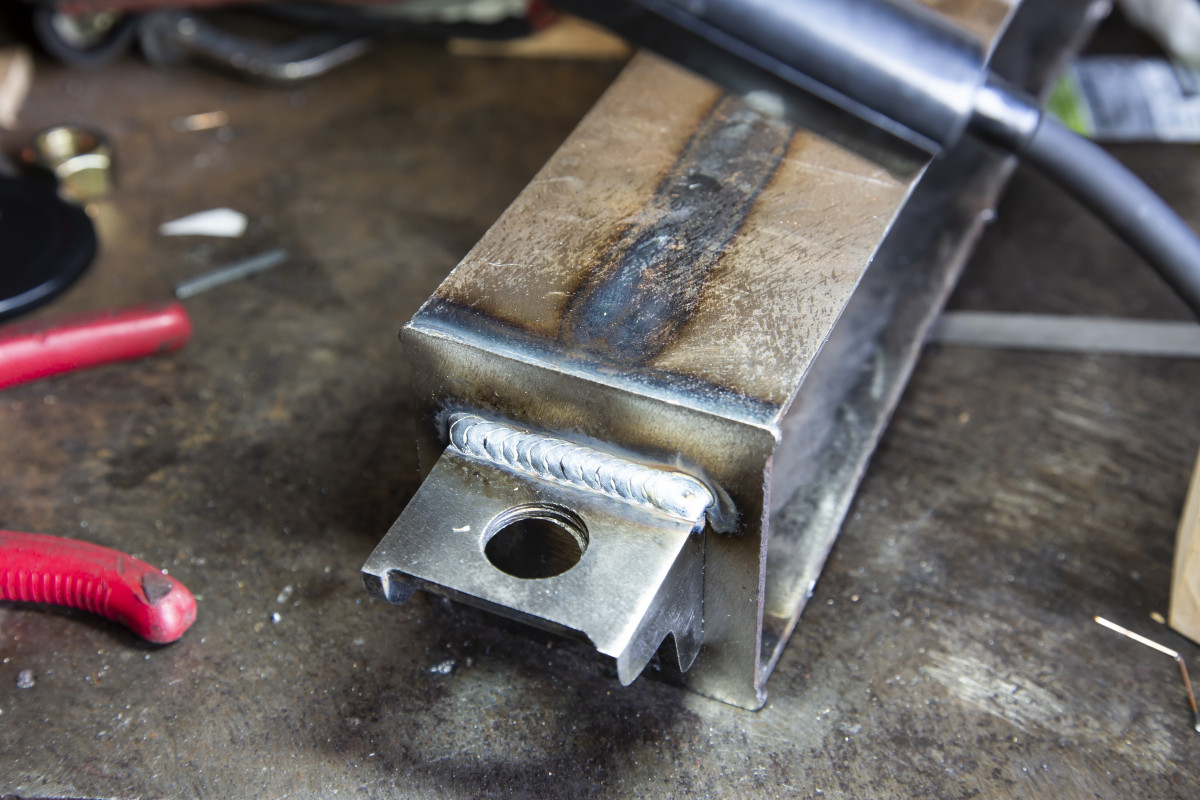
Onto the I-beams. We need to attach footers to both ends of each I-beam to hold the feet. Begin by laying out the angled footer and make a kerf 1-3/4” in from the edge.

Bend the metal to 90°, weld in place, and grind the welds flat on the sides. Onto the end caps – since the curves on these pieces are too tight to cut accurately with a cutoff wheel, I just roughed out the bulk of the waste with the cutoff wheel and then shaped them with a grinding wheel. Test fit the pieces to make sure everything went as planned.
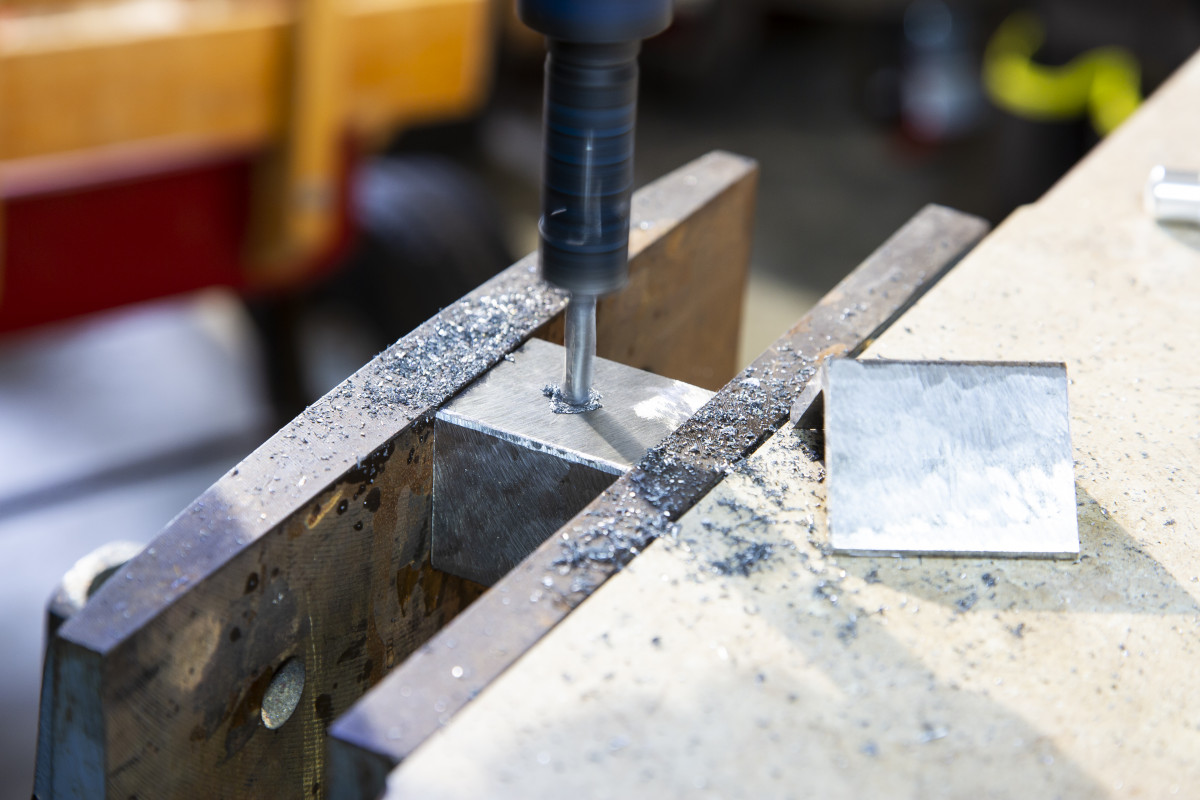
Before we tack weld the three pieces together, we need to mark and drill the hole that accommodates the giant bolts which serve as feet using a hole saw. The bolts I used were zinc-coated grade 8 bolts that are 4” in length.
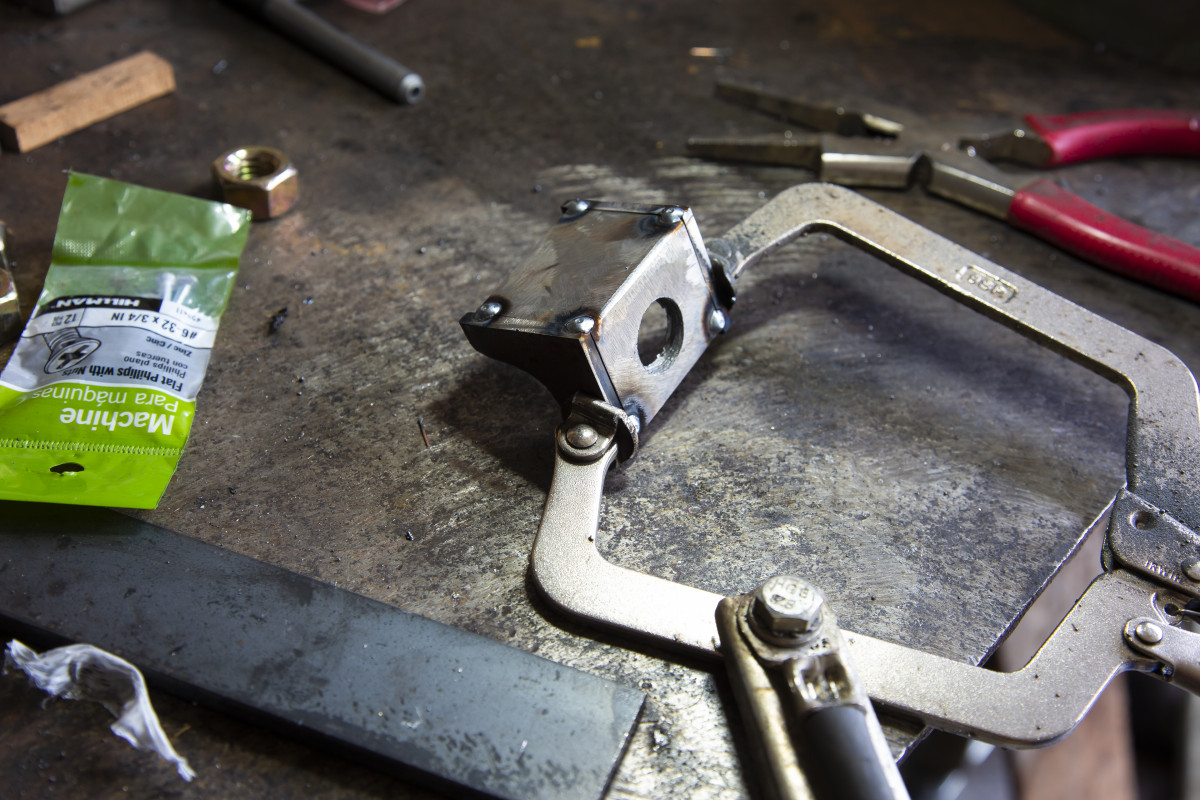
The hole should be drilled into the side that 1-3/4” square, otherwise, you will be drilling the hole in the side that is welded to the I-beam. Once the hole is drilled in each footer, carefully clamp the three-piece assembly and tack it together.
Then weld it out and flush grind the welds so that the final assembly looks like it’s one piece. Then weld each footer onto the ends of the I-beams.
There’s only a few small things left to do for the base itself. The first is to place and center the A-beams onto the I-beams and weld them in place. Next, we need to prep our base connectors. These rectangles will connect the base to the bottom of our bookcase.
Simply cut them to the size in the cutlist, use the diagram to determine the placement of the screw holes, and drill them on the drill press. Lastly, position them on the center of each A-beam and weld in place.
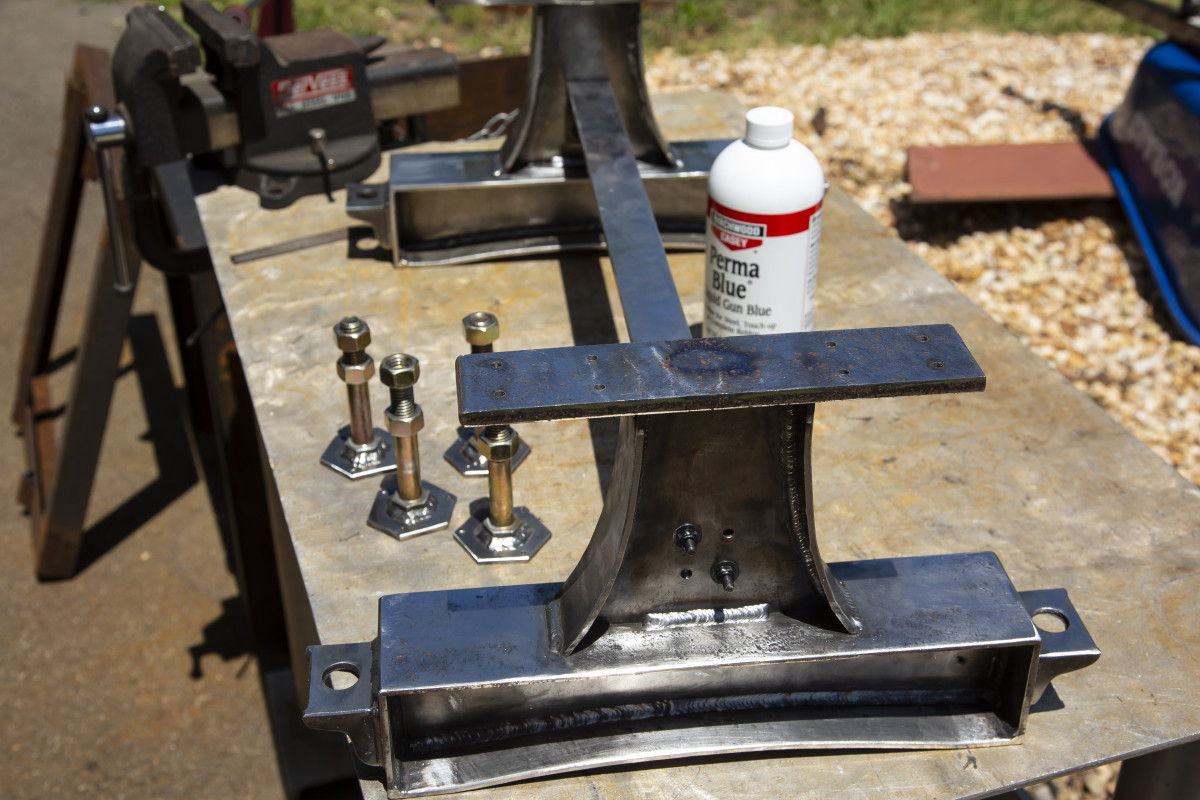
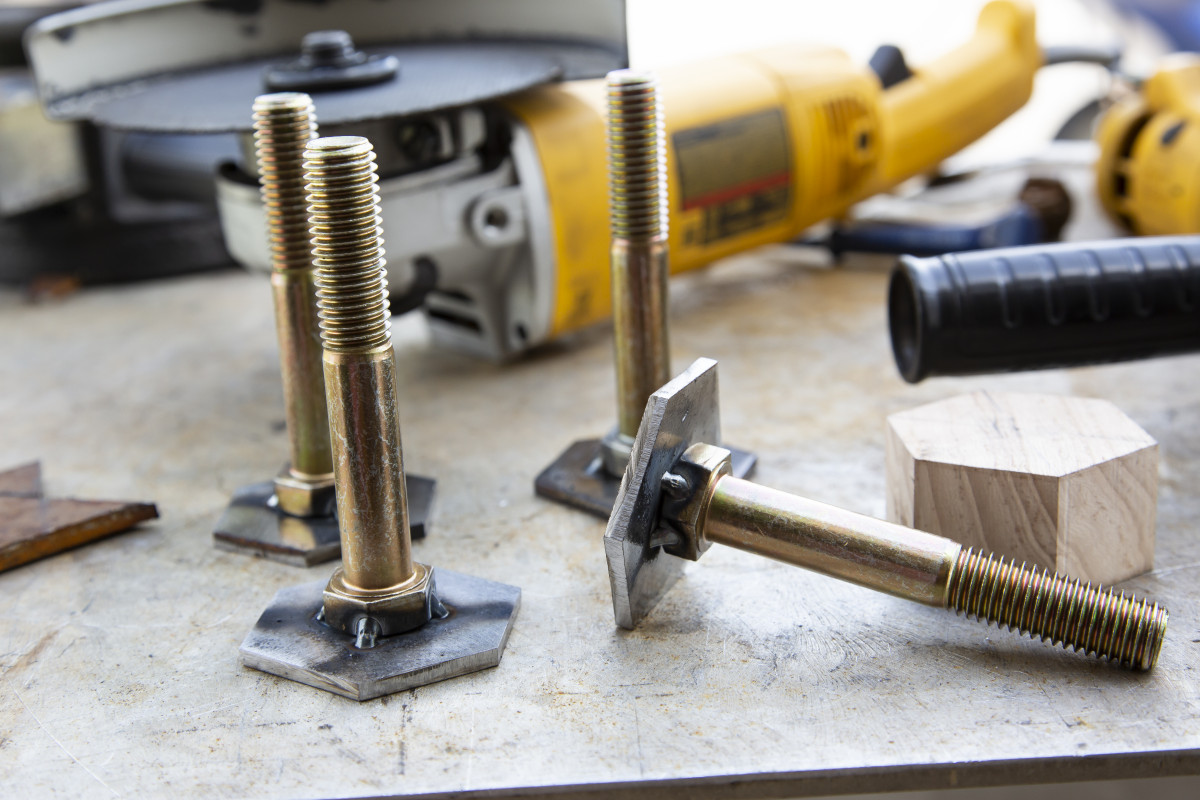
Creating the Industrial Feet
Let’s start with the industrial feet. I used bolts attached to two hexagon shapes, one metal and one wood. Using the bolts as feet gave me two advantages: they are easily adjustable, and they fit the industrial style I have been after with this project.
The decision to use bolts as feet came easily, but when it came to settling on what sort of bolts it wasn’t that easy. I eventually stopped looking for the perfect solution and settled on using simple zinc-coated grade 8 bolts, which can be found pretty much anywhere. I also agonized over how the wooden part of the feet would interact with the metal part. I definitely wanted the part of the cabinet that contacts the floor to be wooden, since, in a contest of strength between steel and whatever your living room floor is made of, steel wins every time. Then it came time to decide how to attach the metal potion to the wooden portion. I experimented with adhesive as a permanent solution but was certain that it would eventually fail! I eventually hit upon the idea of using tiny screws. This didn’t occur to me at first because for most of my woodworking life I’ve had the mindset of hiding unsightly bolts if they must be used. In this case, I thought well-placed bolts and other bolt-like objects (such as the end grain wooden plugs I included through the cabinet frame) are part of what lends the industrial charm to the cabinet.
With the design of the feet determined, it’s time to start creating them.
Lay out and cut your hexagonal steel pieces. Then drill the holes that will attach the two hexagons together.
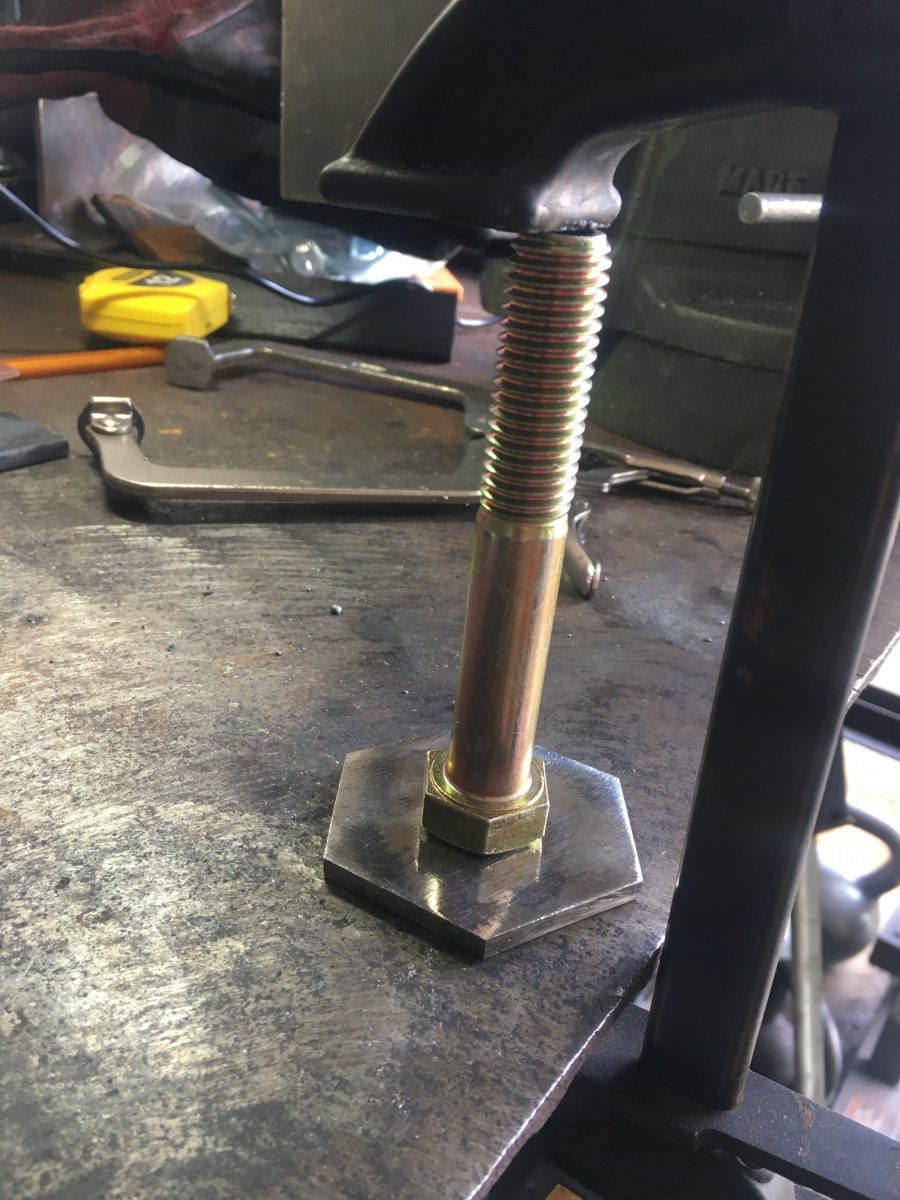
Carefully clamp the bolts to the metal hexagon, tack weld, and weld out.
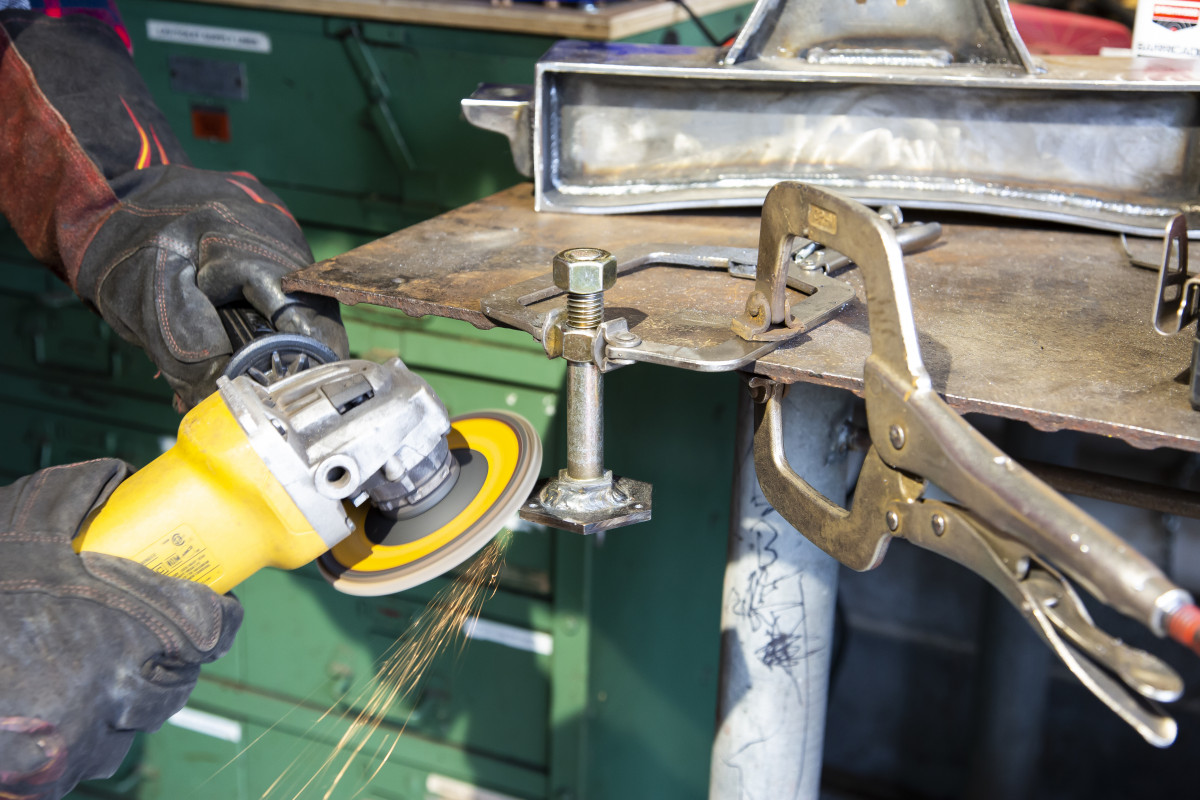
Next, bevel the edges of the metal hexagons.
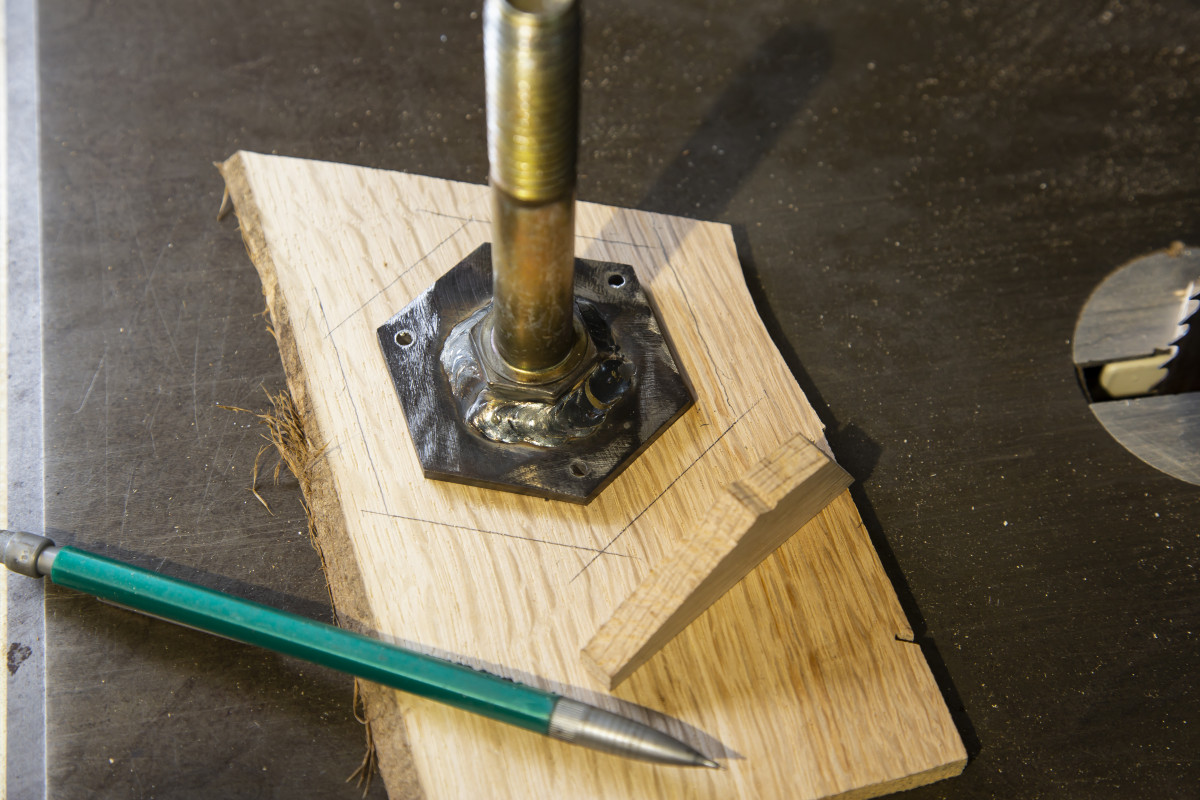
Once you have finished all four feet, lay out the wooden hexagon. I adjusted the spacing I desired by placing a scrap piece of wood next to the hexagon sides and tracing around each edge. I then cut them out out the band saw and used a block plane to remove the saw marks and bevel the edges. Assembly the metal feet with the wooden hexagons using the tiny screws.
Last Piece – Door Pulls
To pull the metal design into the bookcase, I wanted the door handles to resemble the body of an acoustic guitar when the doors are closed, so I shape the profiles accordingly. When it came to attaching the white oak potion to the metal, I first thought I might attach it using bolts as I’d done with the feet. That would have been visually interesting, but it would be unpleasant to the touch when opening and closing the doors. I still wanted the fasteners to be visible so I decided to tap the metal portion and countersink steel screws to attach the wooden pieces.
I began by creating the metal portion of the door pulls, which is a simple angled piece of metal that is profiled using the same techniques as the footers. Start with a piece of metal that is 2-1/2” wide by 3” high. Make a kerf so that you can “fold” the metal in half – each measuring 1-1/4” wide by 3” high. On one side, drill two holes which will attach the door pulls to the doors of the bookcase. On the other side, use the same process as you did with the footer ends caps to create the guitar shape profile. Repeat this one more time but make sure the sides are reversed so that when you place them together they form the desired guitar shape.
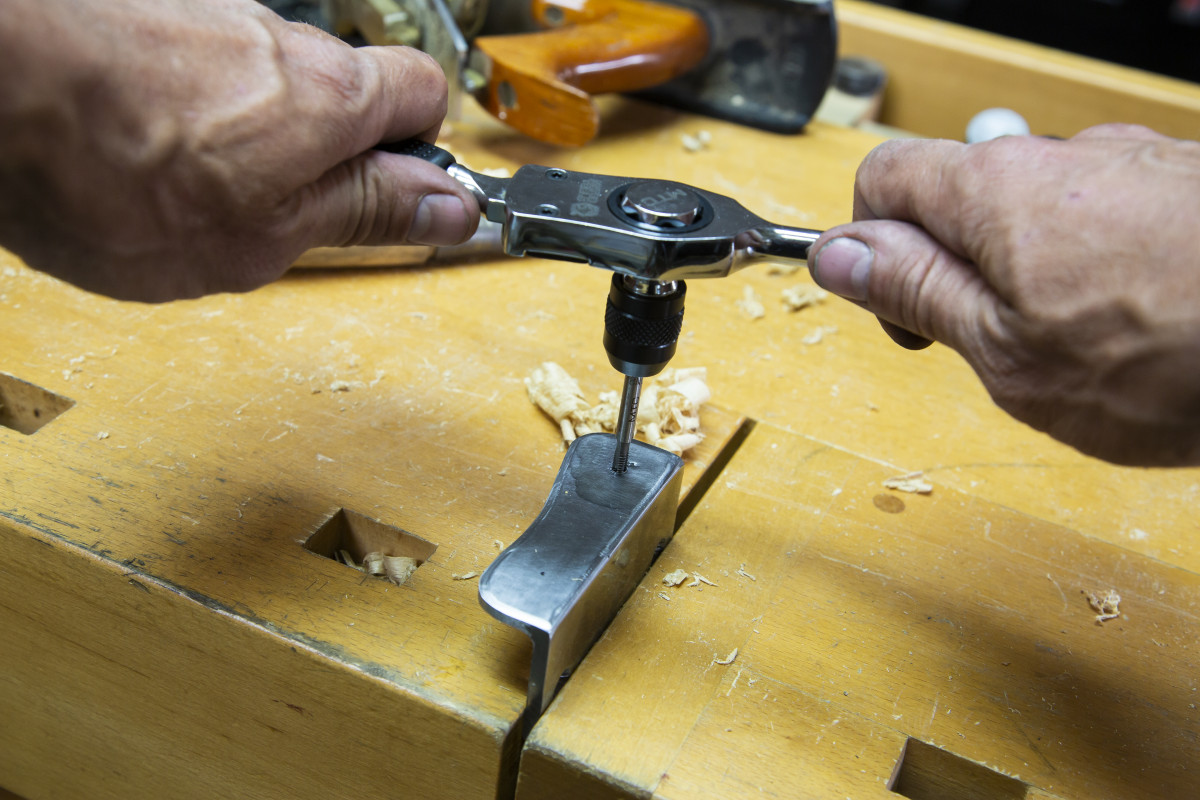
Drill two holes which will attach the door pulls to the doors
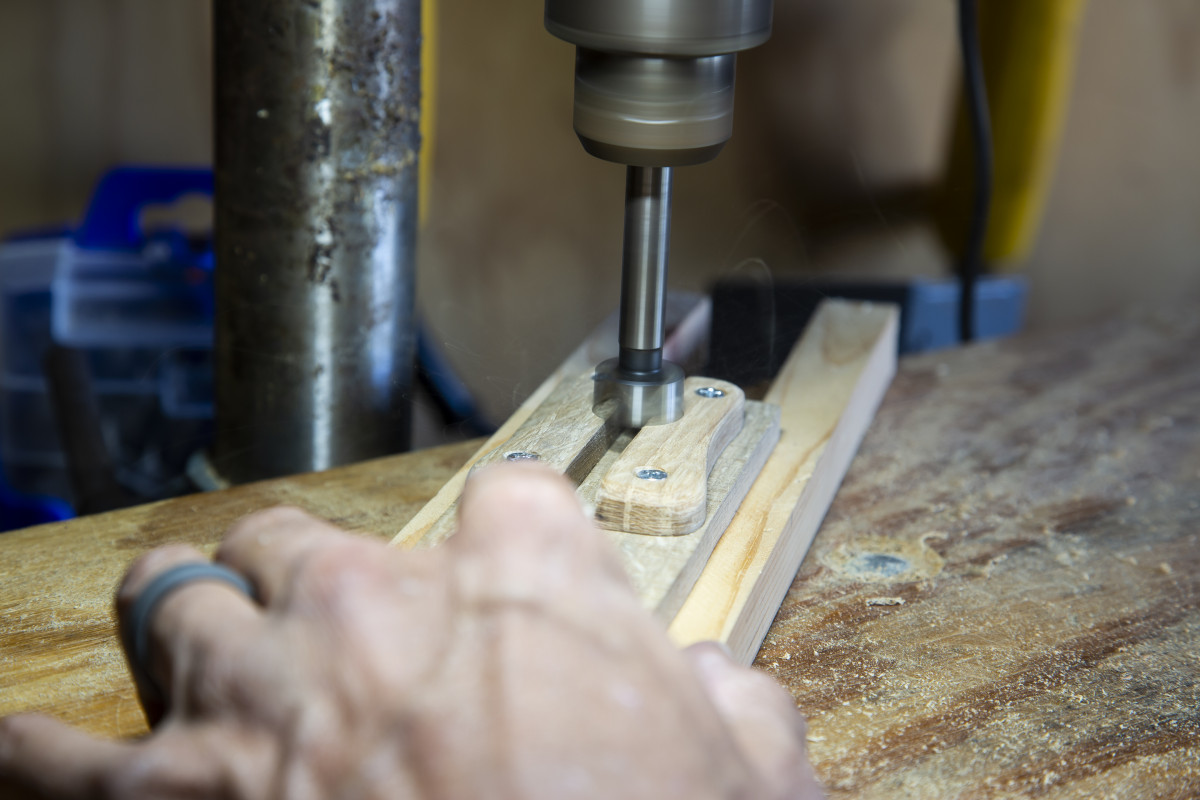
Next, I cut the profile of the guitar shape out of my white oak, cut in half, and rounded the edges. I then screwed them to a scrap piece of wood so I could accurately and safely use a Forstner bit to drill the guitar’s sound hole.

Then I attached them to the metal piece.
Final Details
I finished the metal in the cabinet with a technique called “blueing” and put it all together. Attach the door pulls and the base to the cabinet and place in your living room. 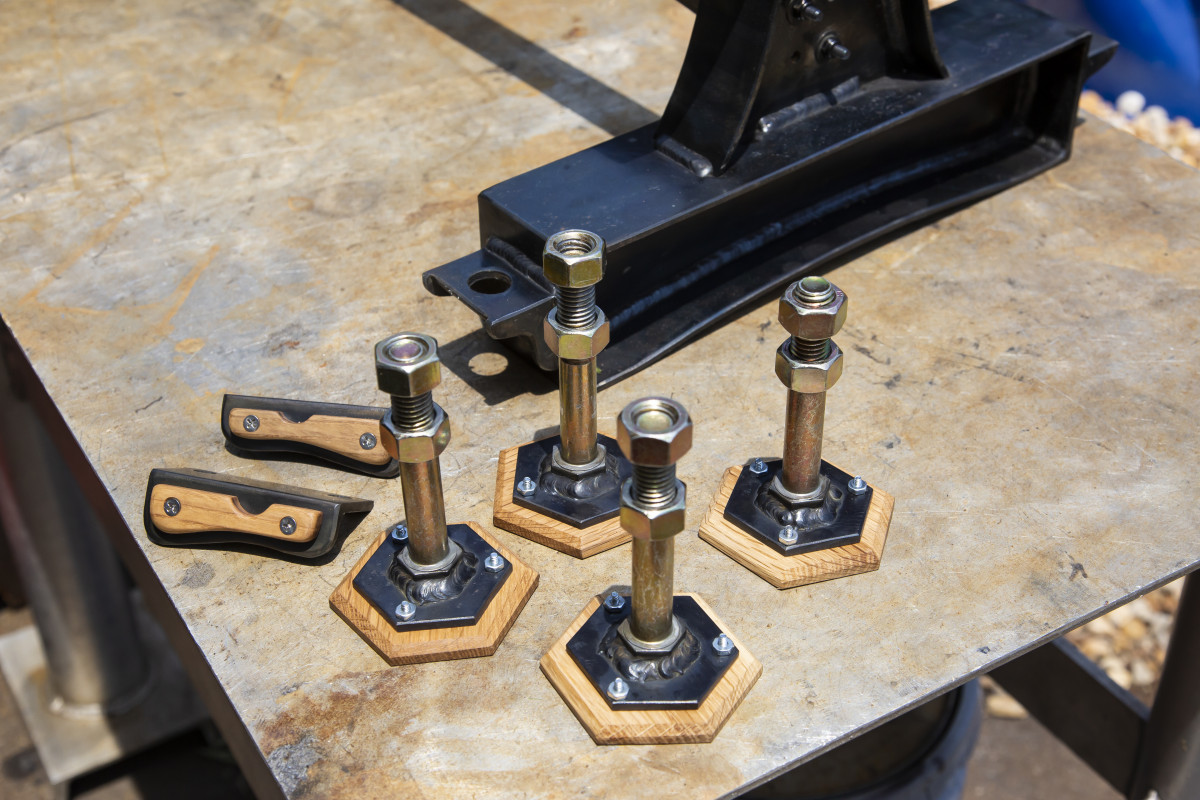
| No. | Items | W | L | |
| 2 | A | A-beam middle | 6 | 6-1/2 |
| 4 | B | A-beam sides* | 2 | ~6-1/2 |
| 2 | C | I-beam middle | 3 | 14 |
| 4 | D | I-beam top | 3 | 14 |
| 4 | E | I-beam end caps* | ~2-1/2 | 3 |
| 4 | F | I-beam bottom | 3 | 15 |
| 1 | G | Crosspiece middle | 2-3/8 | 24 |
| 1 | H | Crosspiece top | 1-1/2 | 24 |
| 2 | I | Crosspiece end caps* | 1-1/2 | ~2-1/8 |
| 4 | J | Angled footers* | ~1-3/4 | 3-1/8 |
| 8 | K | Footer end caps | 1-3/4 | 1-3/4 |
| 4 | L | Metal hexagons | 2-1/2 | 2-1/2 |
| 4 | M | Wooden hexagons | 3 | 3 |
| 2 | N | Base connectors | 2-1/2 | 10 |
* Size varies upon the thickness of the metal. All items listed here are based on the metal being 1/4″ thick.
| Supplies Needed: | |
| No. | Items |
| 8 | 3/16” allen bolts, 1” long locknuts |
| 4 | Grade 8, zinc-coated bolts, 4” long |
| 12 | 1/8” dia screws |
| 16 | Screws to attach base to bookcase |
| 4 | Screws to attach oak to metal door pull |
| 4 | Screws to attach door pull to bookcase doors |
| Blueing agent to finish the metal pieces | |
Here are some supplies and tools we find essential in our everyday work around the shop. We may receive a commission from sales referred by our links; however, we have carefully selected these products for their usefulness and quality.


