We may receive a commission when you use our affiliate links. However, this does not impact our recommendations.
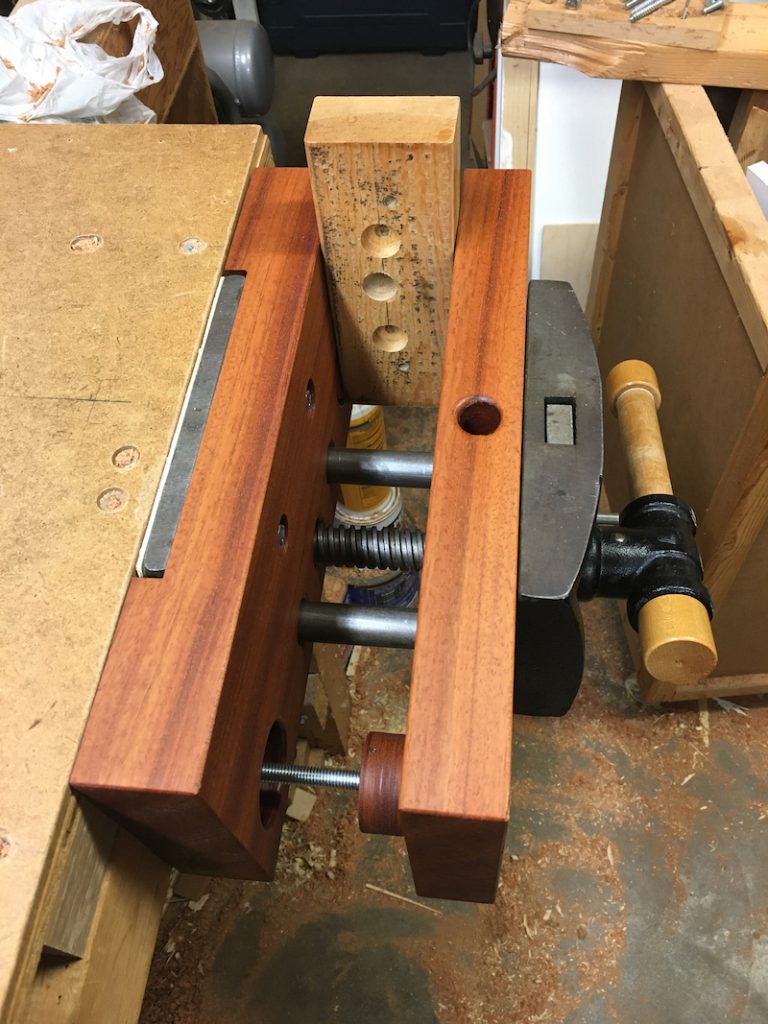
A few years ago I wrote about Ha-Khoret’s wooden bench vise and its embedded feature which prevents the notorious jaw racking syndrome. Vise racking happens when clamping a workpiece on the right (or left side) of the jaws, and while tightening the screw, the moving jaw pivot in the opposite direction. This condition prevents the workpiece from being adequately clamped, and it also puts a lot of destructive force on the vises mechanism. There are some shop-made jigs that you can build and drop in between the jaws to compensate for the asymmetric clamp, and there is this Lee Valley jig too. But Ha-Khoret’s integral feature is still the most impressive solution that I have seen.
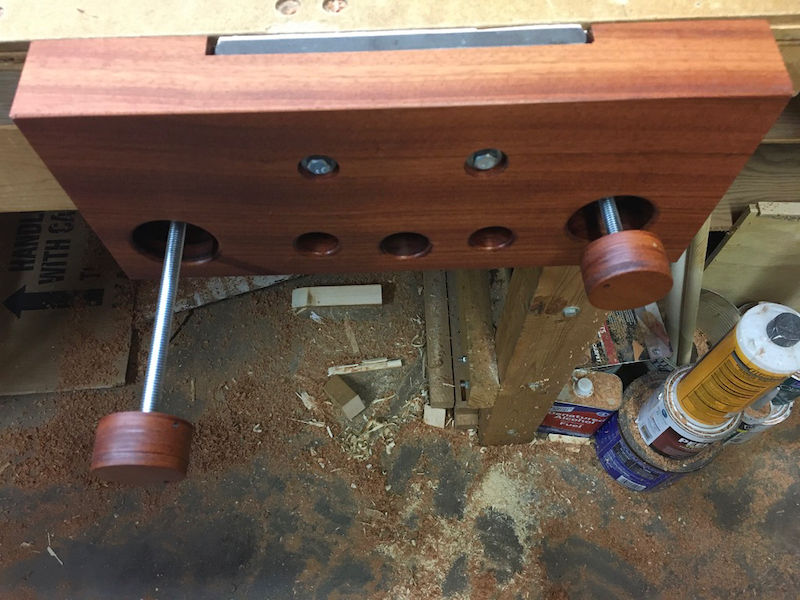
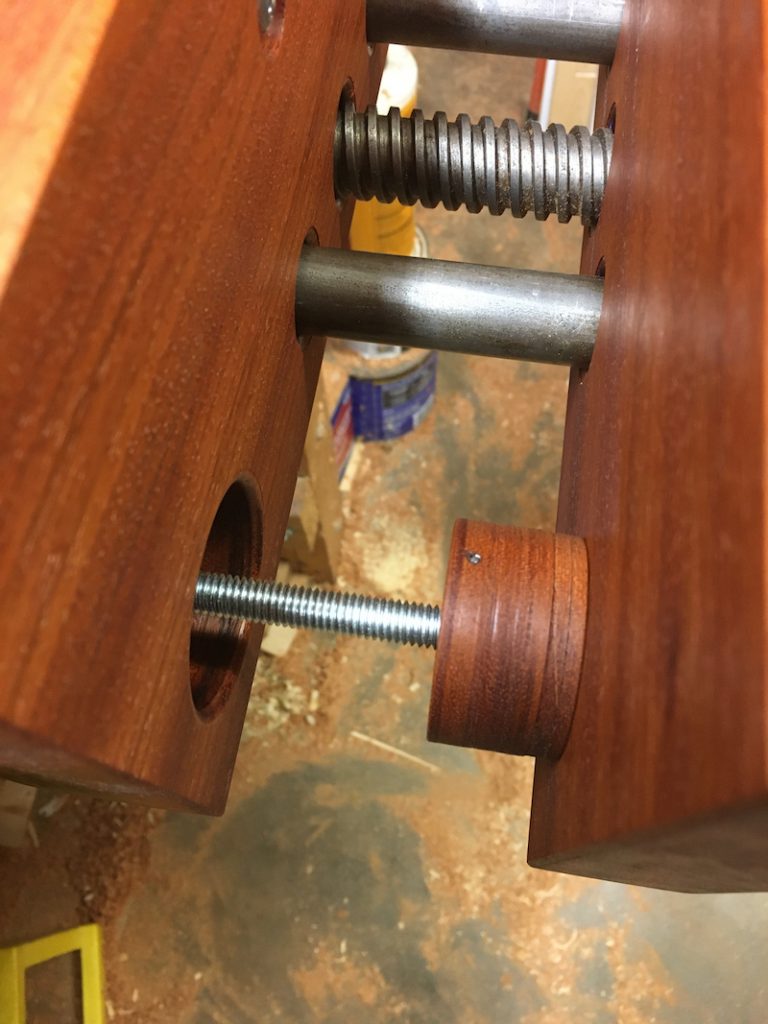
An industrious reader, John Adams, took on the challenge and came up with his take on the Ha-Khoret’s jig. John’s concept is interesting and can work well for many vises. He replaced the cast iron threaded knob with a mahogany knob that was built around a threaded rod. Most of the time the mahogany knob is nesting in a counterbore hole in the vises stationary jaw. But when John needs to clamp a narrow or an upright workpiece at the left or the right sides of the vise he can easily deploy one of the knobs out to balance the clamping pressure.
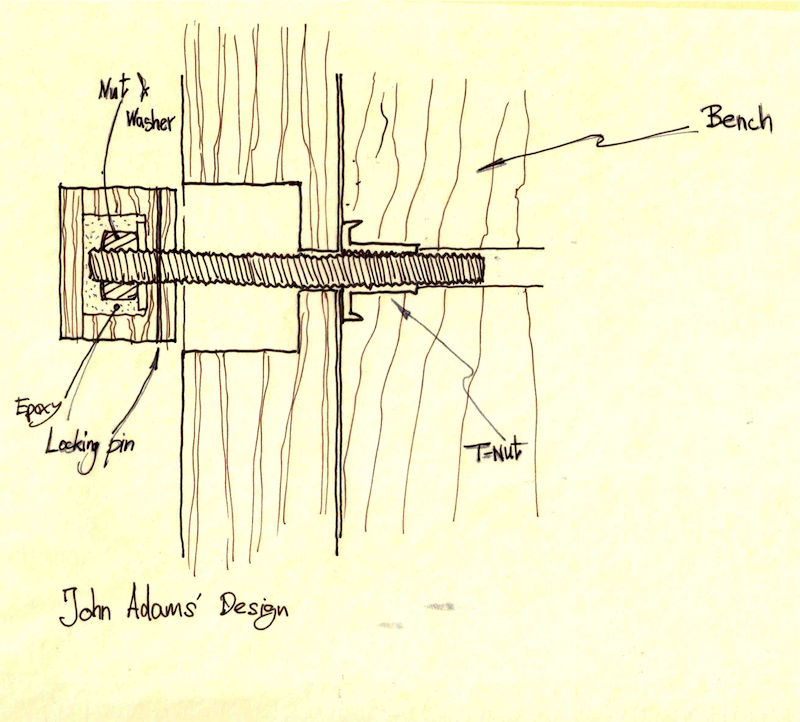
His knob is made of a mahogany cup and a threaded rod that travels through a T-nut that is anchored in the workbench side. The knob can be turned in or out of the counterbore with ease. John made the knob’s cup and lid using a cup saw. The 3/8″ threaded rod passes through the lower cup and is secured to it via a metal pin. The head of the threaded rod is tightened onto the cup with a nut and then surrounded with epoxy. Lastly, the cup is capped with a round mahogany lid shape disk.
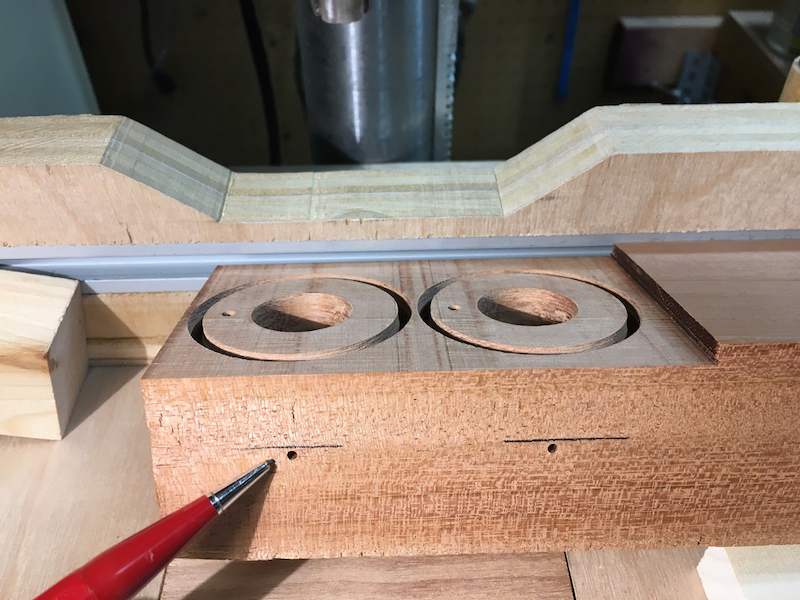
John drilled two centric holes through the side of the knobs’ blank. These holes were used to guide the drill that bored through the threaded rod that was glued into the cups. Then a pin was inserted through the hole and into the threaded hole to ensure the integrity of union between the threaded rod and mahogany knob.
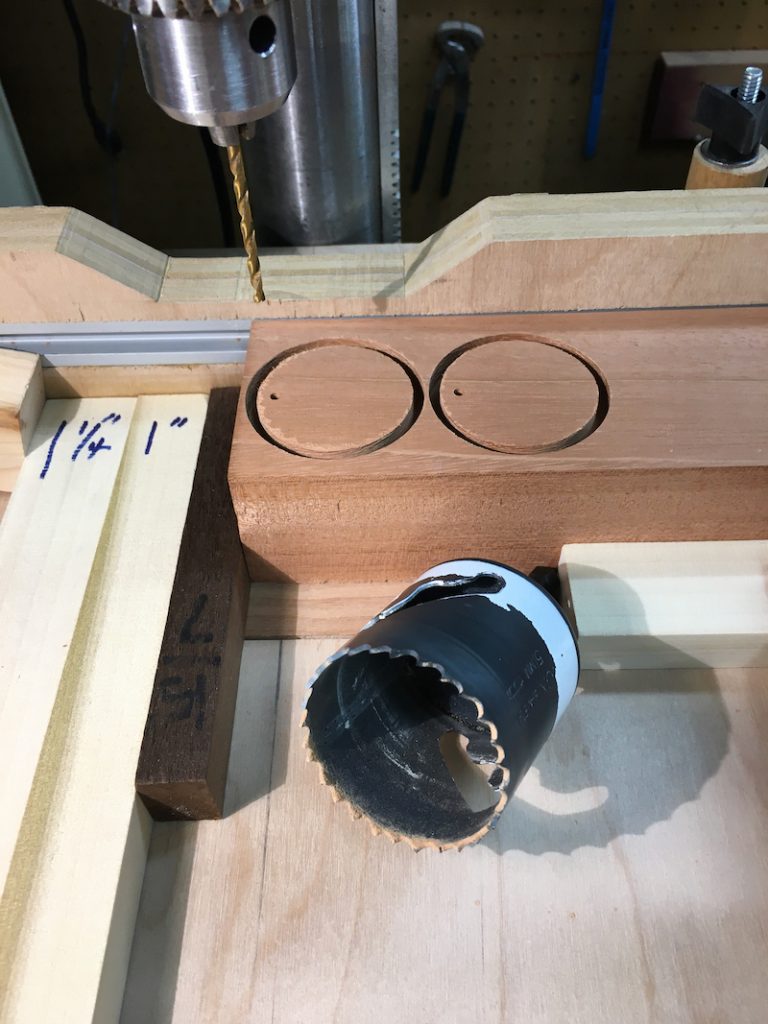
A cup saw was John’s tool of choice for shaping the knob’s cylinders.
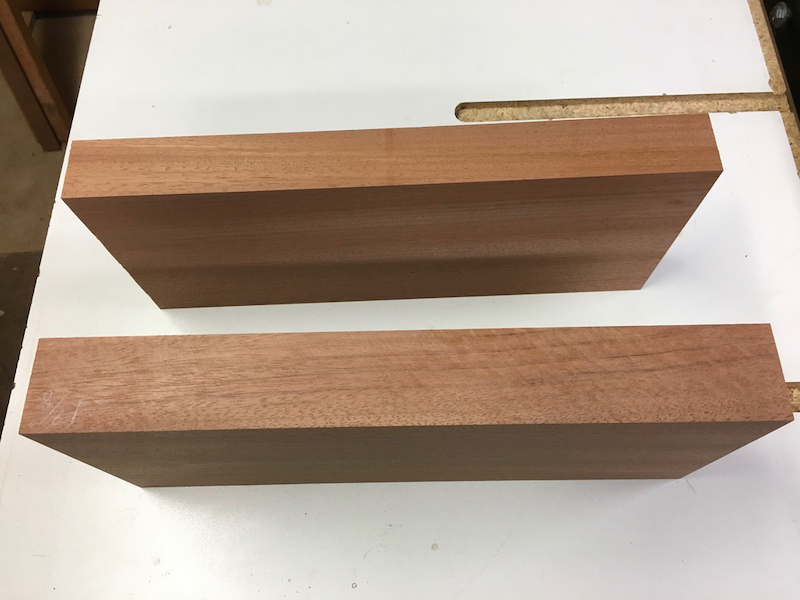
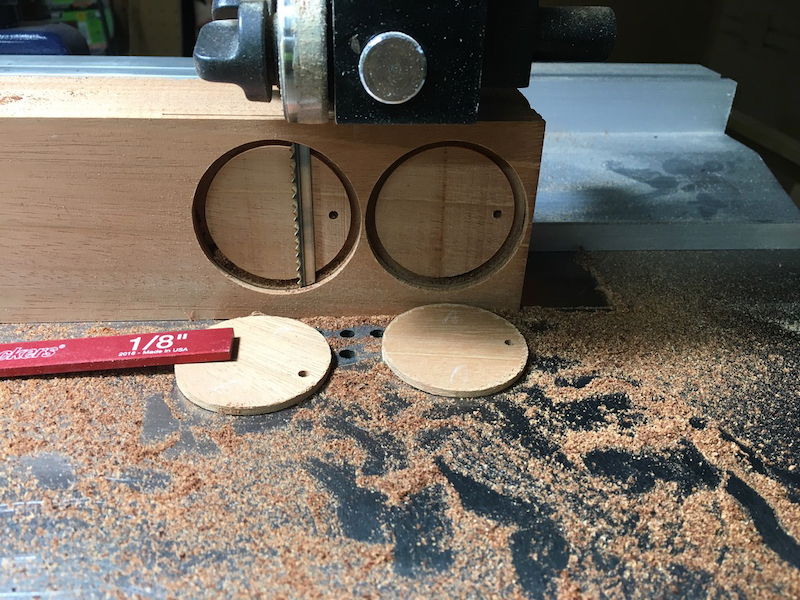
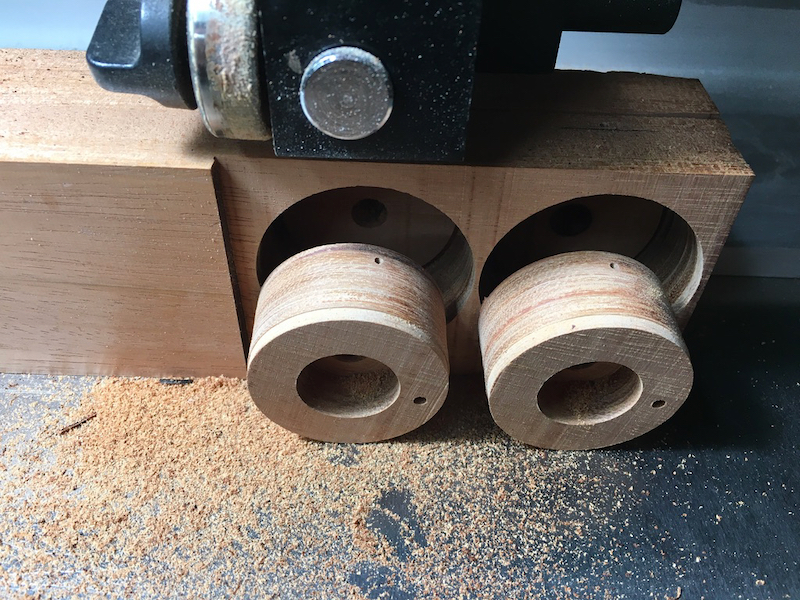
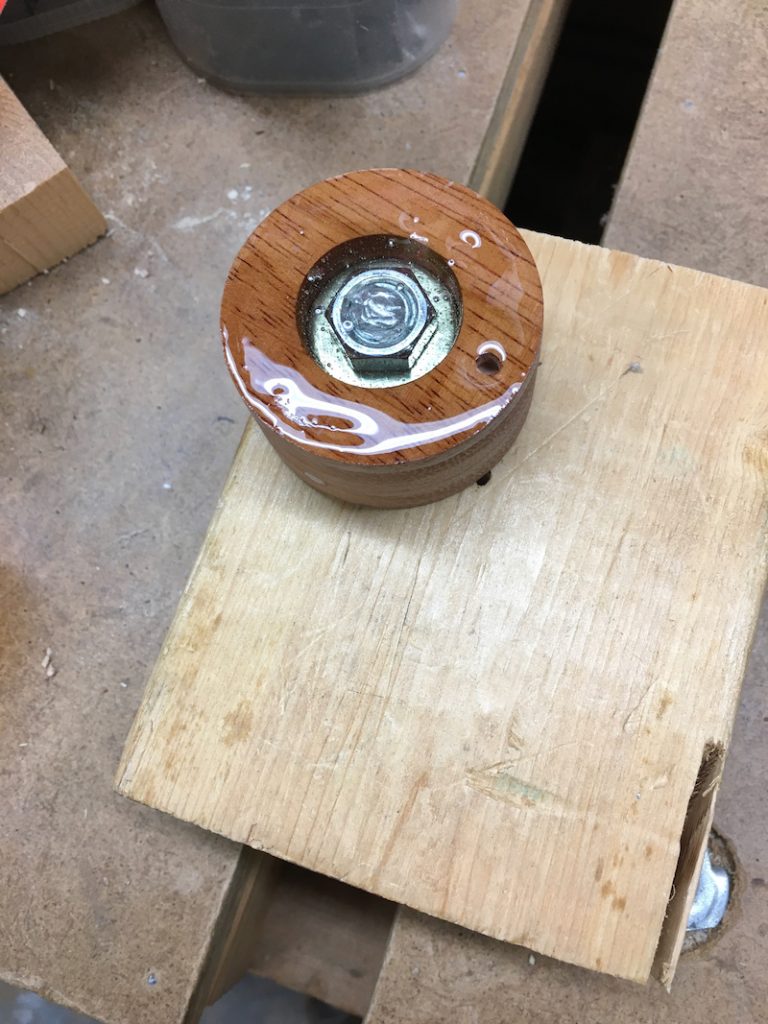
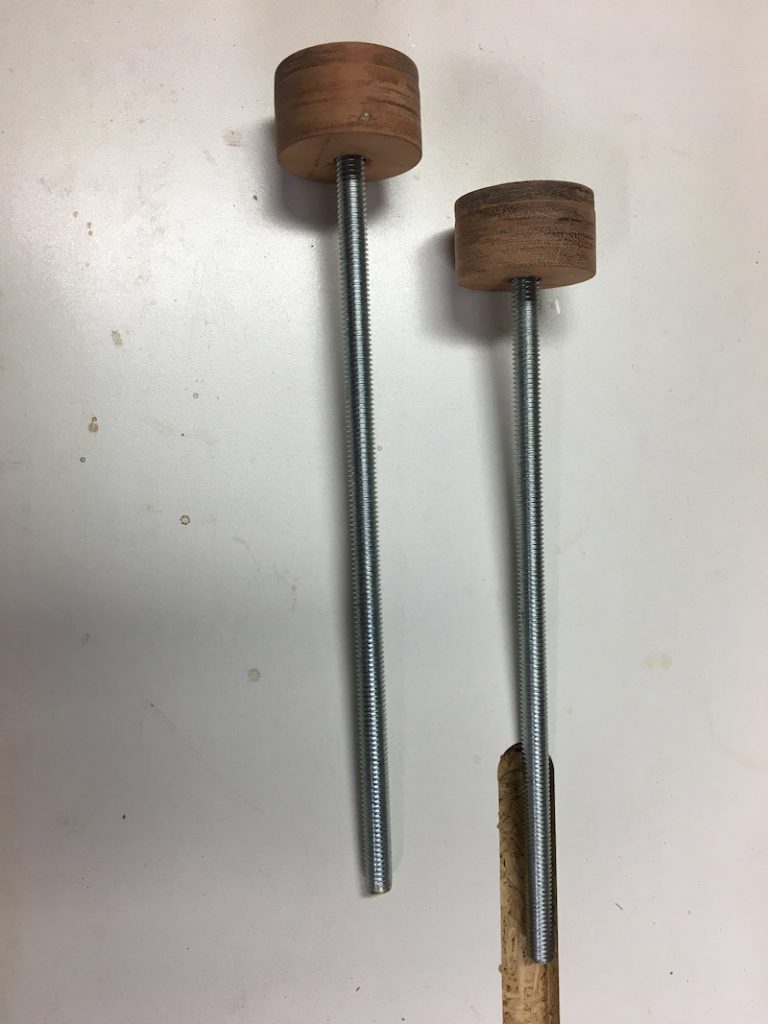
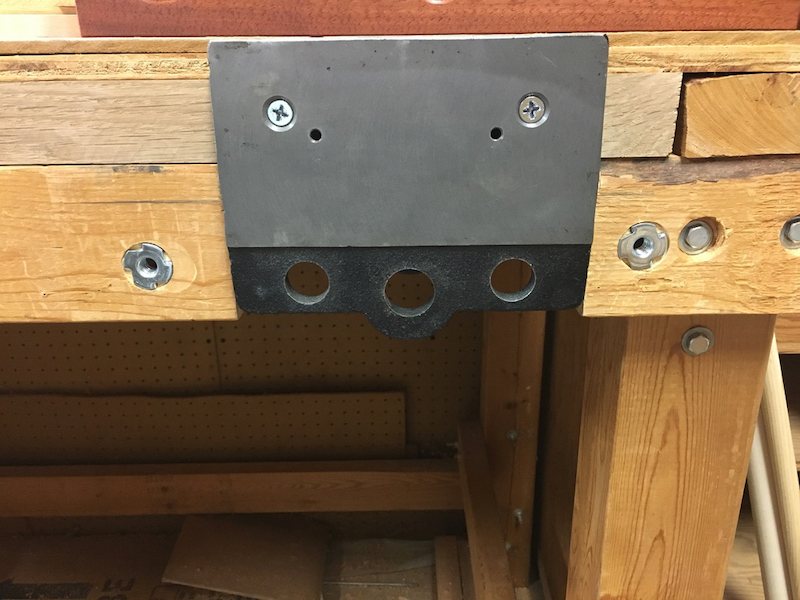
The T-Nuts are embedded to the right and to the left sides of his cast-iron stationary vise jaw.
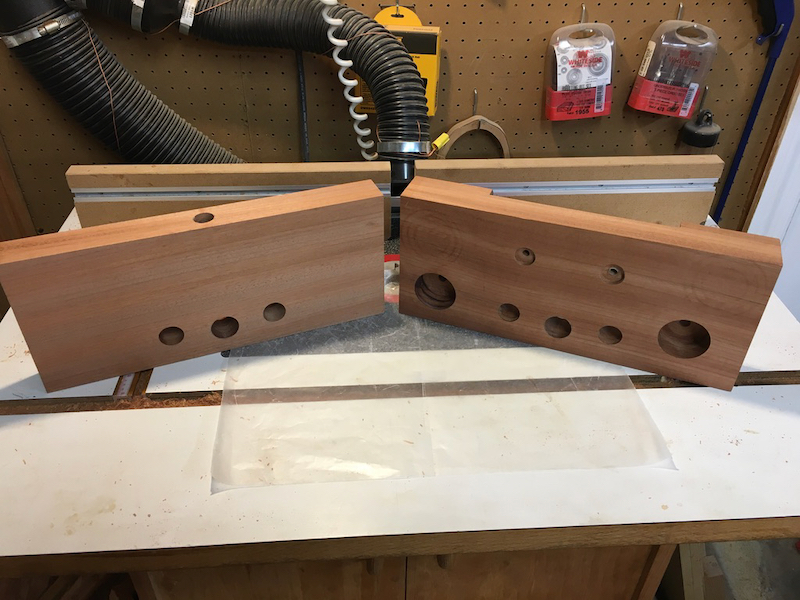
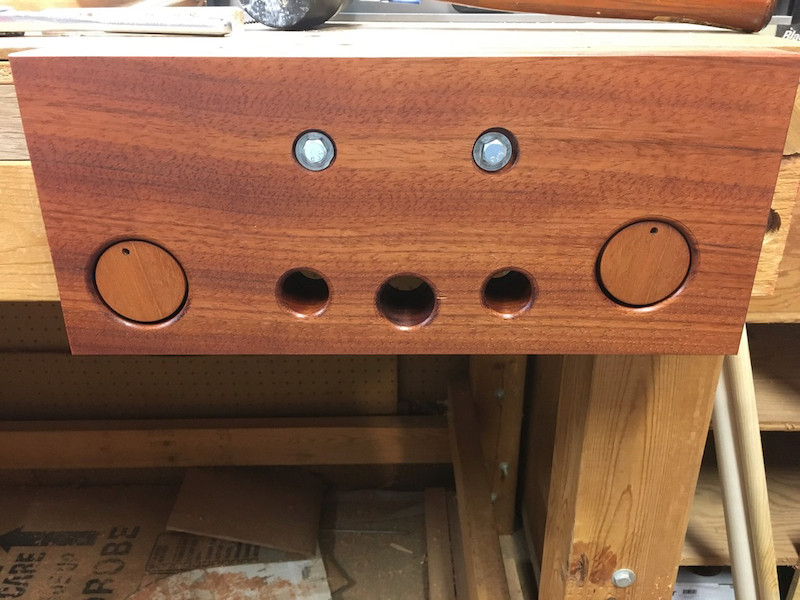
Note that John foresaw the challenge of threading out his round and smooth wooden knob from its nesting place. To help in engaging the concealed knob he predrilled an eccentric hole that accommodates a nail or an awl to initiate the knob’s turn.

Below I sketched a few alternatives to John’s design for those who prefer to use readymade hardware or are ok with taping their vises’ cast iron jaws instead of dealing with T-Nuts or Insert nuts.
In option, (A) I show a way to build the knob with a long bolt that is glued into the cup. Sketch (B) is intended for those how wished to use a readymade knob instead of a wooden cup.
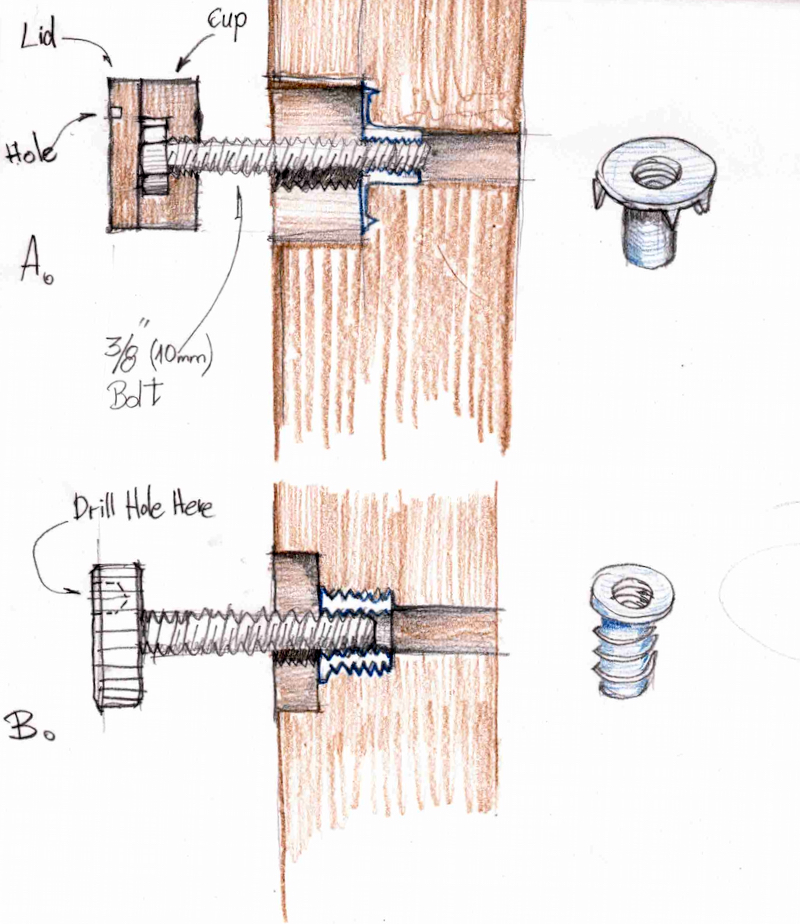
And in option (C) I show how to install this helper-jig on a vise with metal jaws.
- First, drill a wide hole in the stationary wooded axillary jaw to accommodate the store-bought Threaded-stud Knob.
- Drill and tap a second hole in the center of the first one to allow the knob to travel in and out.
- A “+” or a six-wing Threaded-stud Knob will be best here as it will be easy to conceal it in the counterbore hole and extend it out at will.

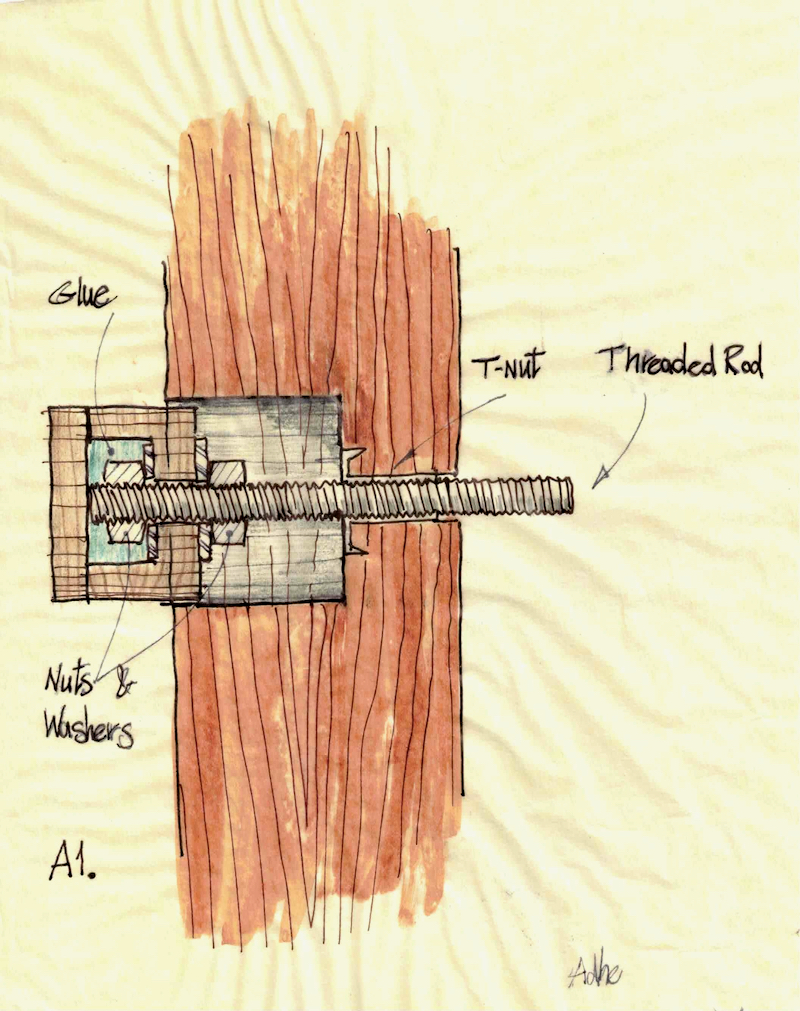
In this last drawing (A1) the knob’s head is made similarly to John’s idea but instead of a locking pin, I secured the knob with a nut and washer that sandwiched the assembly from the inner side.
Here are some supplies and tools we find essential in our everyday work around the shop. We may receive a commission from sales referred by our links; however, we have carefully selected these products for their usefulness and quality.


Hi Yoav
I have an anti-racking fixture build into my leg vise:
http://www.inthewoodshop.com/ShopMadeTools/AntiRacking.html
Note that this is only required on the outer side of the vise since it is the inner side which will hold a board.
I have been using this for a few years now.
http://www.inthewoodshop.com/ShopMadeTools/AntiRacking_html_m60bfac7.jpg
Regards from Perth
Derek
Hi Derek,
Thanks for sharing your original solution to the racking challenge. I am sure that folks who use a leg vise will be inspired to instal such a helper jig on their bench too.
Best,
Yoav
I do like the idea to stop the outer jaw from raking. It is one hundred % better than trying to hold a second piece of timber in the vice while clamping the work piece.
I will be modifying my vice now.
Thank you for sharing this article.
GeoffB
Thanks, GeoffB, I am so happy that John’s solution can be of help to you and other readers.
I discovered elevator bolts awhile ago and have found various ways of improving some of my projects by using them. The whole knob and screw construction could be simplified by using an elavator bolt instead. Glue a cork or leater cover to soften if needed and drill an eccentric hole in the head or just file a notch for starting rotation.
This is a great idea, thanks for sharing.
Best,
Yoav