


We may receive a commission when you use our affiliate links. However, this does not impact our recommendations.
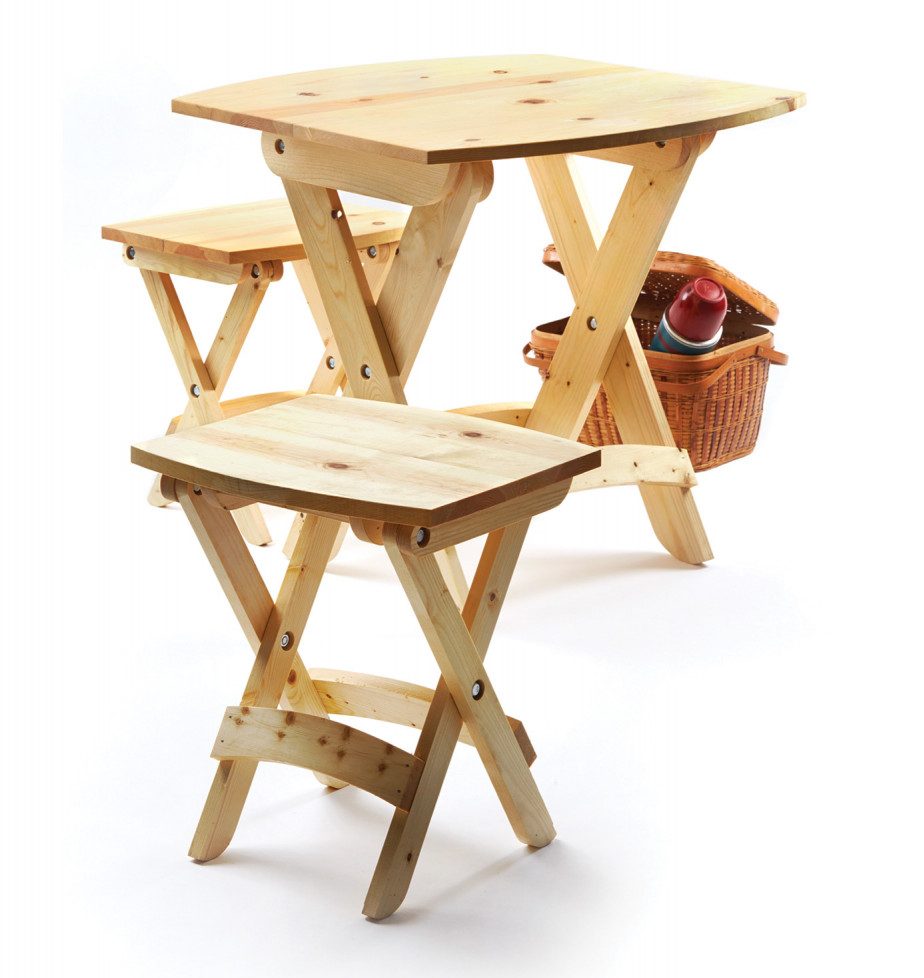
Perfect picnic. A folding stool or two is perfect for a picnic in the park – or your backyard. To make a matching table, just upsize the stool components.
This simple project made from two pieces of dimensional pine can help solve seating shortages at your next gathering – and it folds neatly away for the next get-together.
All you need is a 4′ 1×8, an 8′ 1×4, some 3⁄8″ x 1-1⁄4″ bolts and 3⁄8″ nuts and washers, and a basic set of tools – all from the home center.
Legs First
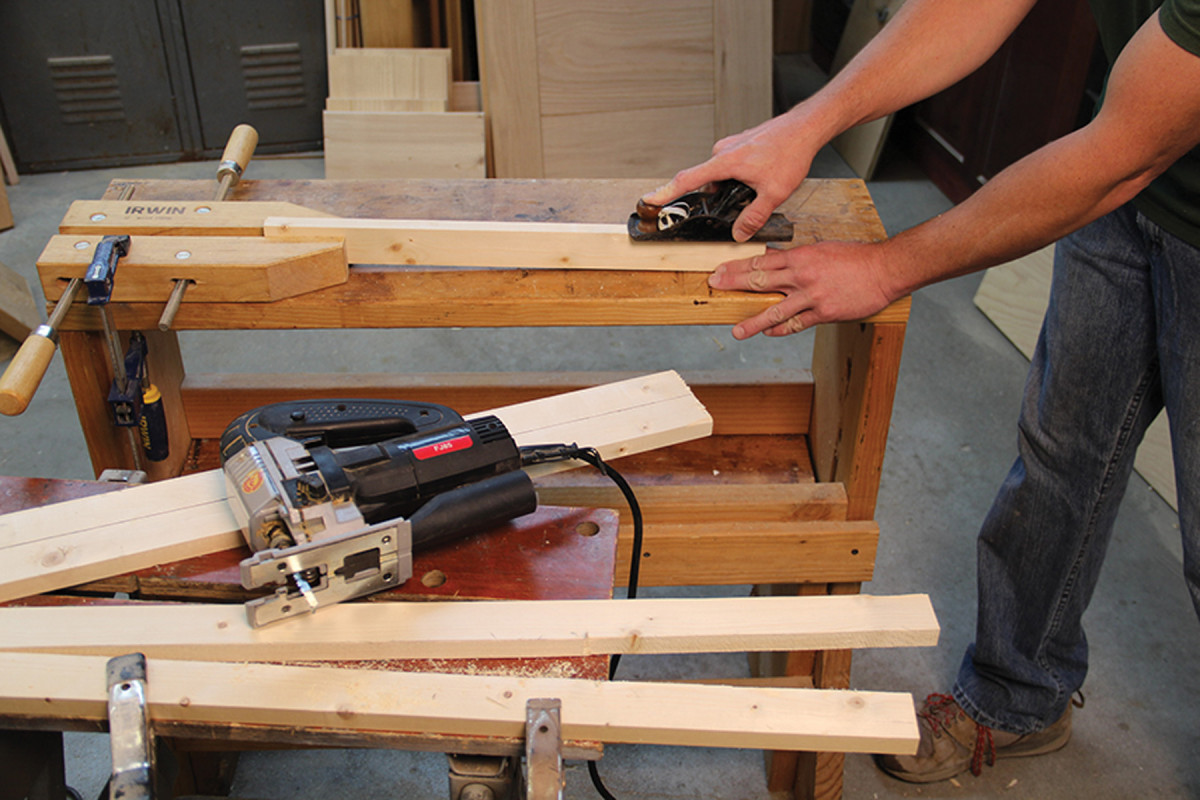
Smooth moves. After cutting the leg stock down the middle with a jigsaw, use a block plane to clean up the cuts.
Begin by marking a centerline along the length of the 1×4, then rip it in half for the legs, seat cleats, handle and brace.
This cut is a quick and easy task for a table saw, however, the jigsaw can do the job, too. Set the jigsaw blade for no orbit (for the cleanest cut), then take your time and go slow to cut a straight line as you make the cut. (You can also clamp a straightedge parallel to the cutline, offset the width of
the jigsaw’s shoe, then keep the shoe tight to the straightedge as you make the cut. But don’t be afraid to give it a go freehand.) Once the piece is ripped in half, use a block plane to smooth and clean up the saw marks. Each half will be approximately 1-3⁄4″ wide.
Using a miter saw, cut the four leg pieces to length. (Go ahead and cut the four cleats, handle and brace to length, too, and set them aside for now.)
The next step is the placement for the bolts for the stool to be able to pivot open and closed. Find the center (both length and width) of each leg and cleat and mark an “X.” Also mark 3⁄4″ in from one end of each piece and place another centered “X.” Make these marks on both sides of the legs and cleats. Decide now which end is up.
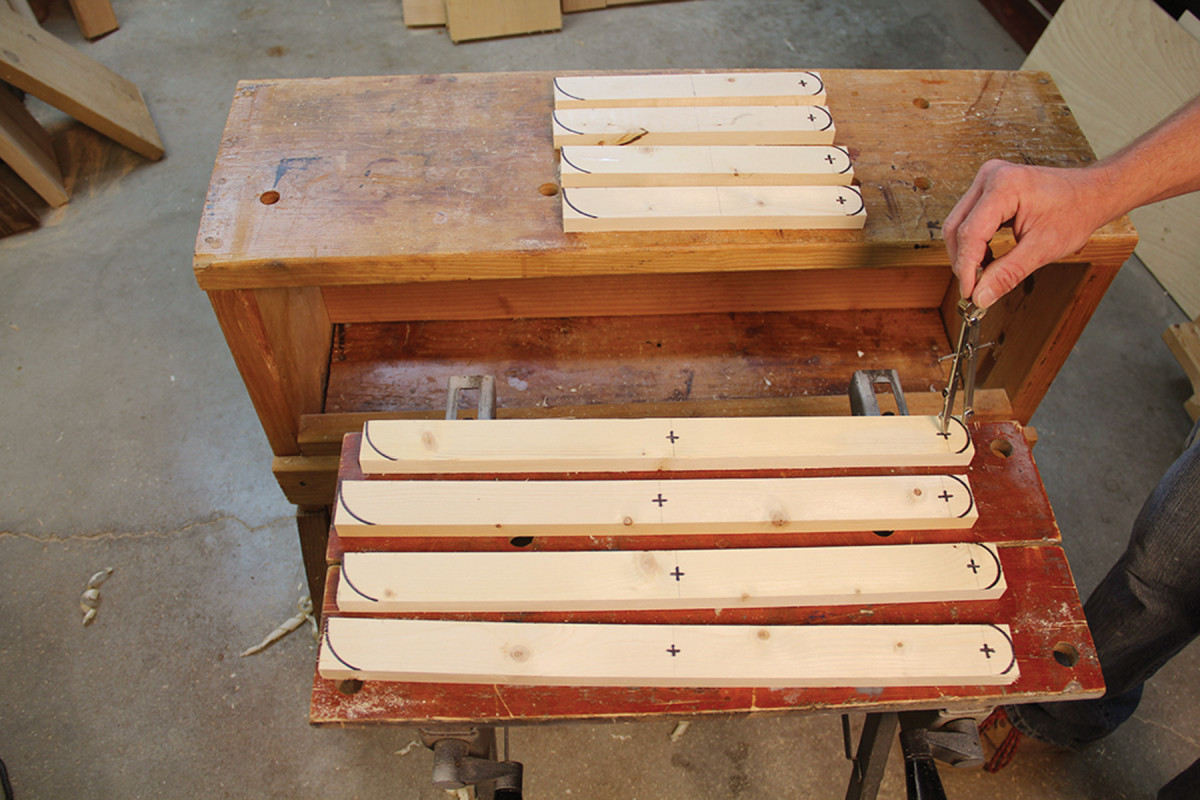
Cut corners. The legs and cleats need a half-circle curve at the top, and a quarter-circle curve at the bottom.
These pieces need half-circle curves cut on the top ends, and quarter-circle curves on the other to allow smooth folding operation. Set a compass to 3⁄4″ and with the point on the top “X,” mark a half-circle radius. For the bottom of the legs and seat cleats, reset the compass to the width of the leg and mark a quarter-circle radius.
Use a jigsaw to cut the curves – but because they’re likely too tight to stay perfectly on the line, cut a series of straight lines just proud of your arcs. Then, shape the curves using a rasp or random-orbit sander.
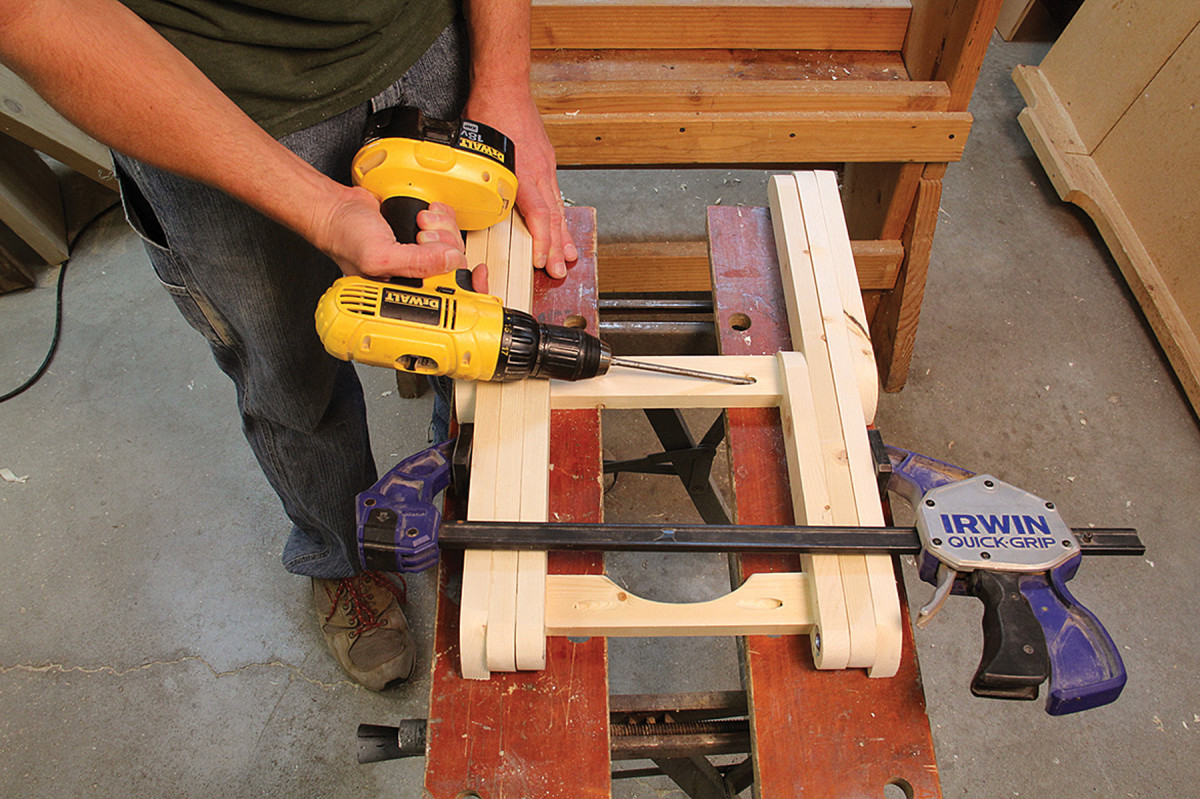
The legs and cleats need bolt holes, and all those on what will be exterior faces after assembly must be countersunk, so the bolt heads and nuts won’t interfere with the folding operation. Use a colored pen to mark the countersink locations.
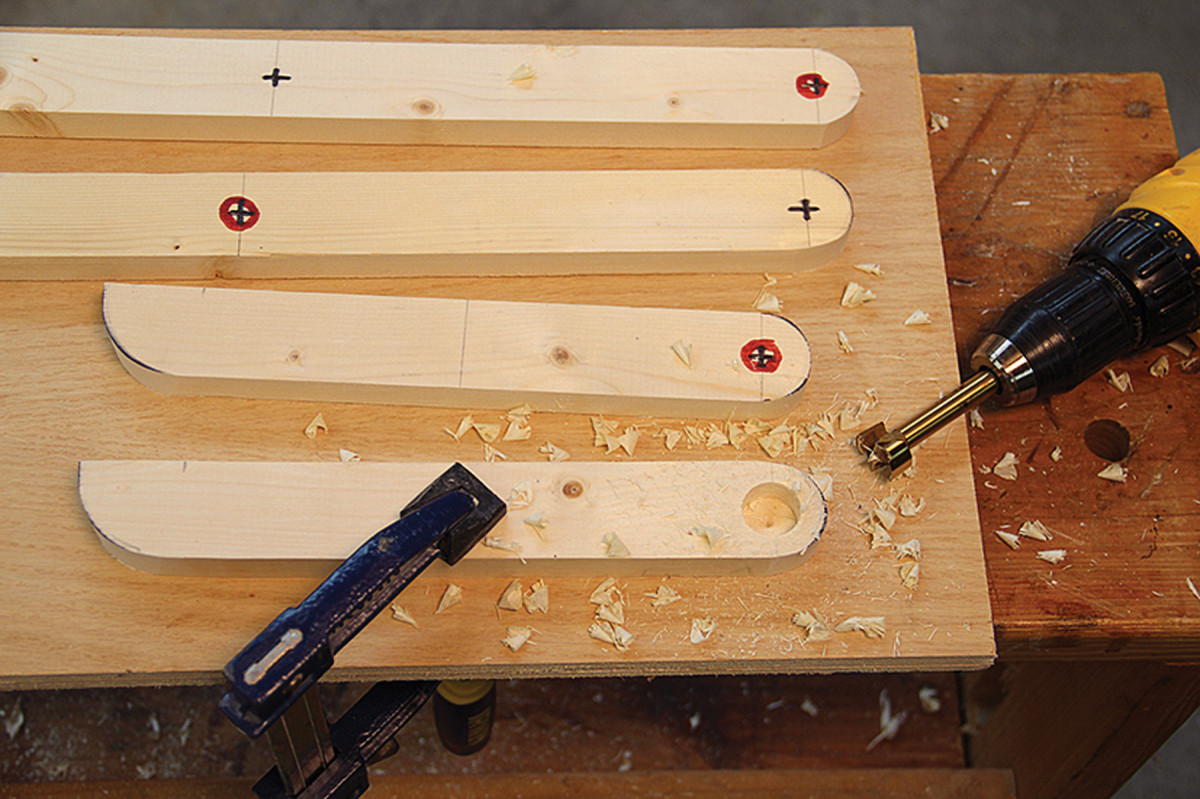
Clearly marked. The holes that get countersinks (all exterior-facing bolt holes) are marked with a different colored ink.
Use a 7⁄8″ Forstner bit to drill 1⁄2″-deep countersink holes. (A spade or paddle bit can be used, but a Forstner bit leaves a cleaner cut.) Verify that the hole is deep enough by placing a washer and the head of a bolt or a nut in it; the fasteners should sit below the face of the board. Now drill centered 3⁄8″ clearance holes to allow the bolts to go through.
Folding Stool Cut List
No.ItemDimensions (inches)Material
t w l
❏ 4 Legs 3⁄4 13⁄4 20 Pine
❏ 4 Seat cleats 3⁄4 13⁄4 111⁄2 Pine
❏ 2 Seat pieces 3⁄4 71⁄4 16 Pine
❏ 2 Handle & brace 3⁄4 13⁄4 71⁄2 Pine
❏ 1 Long stretcher 3⁄4 31⁄2 12 Pine
❏ 1 Short stretcher 3⁄4 31⁄2 101⁄2 Pine
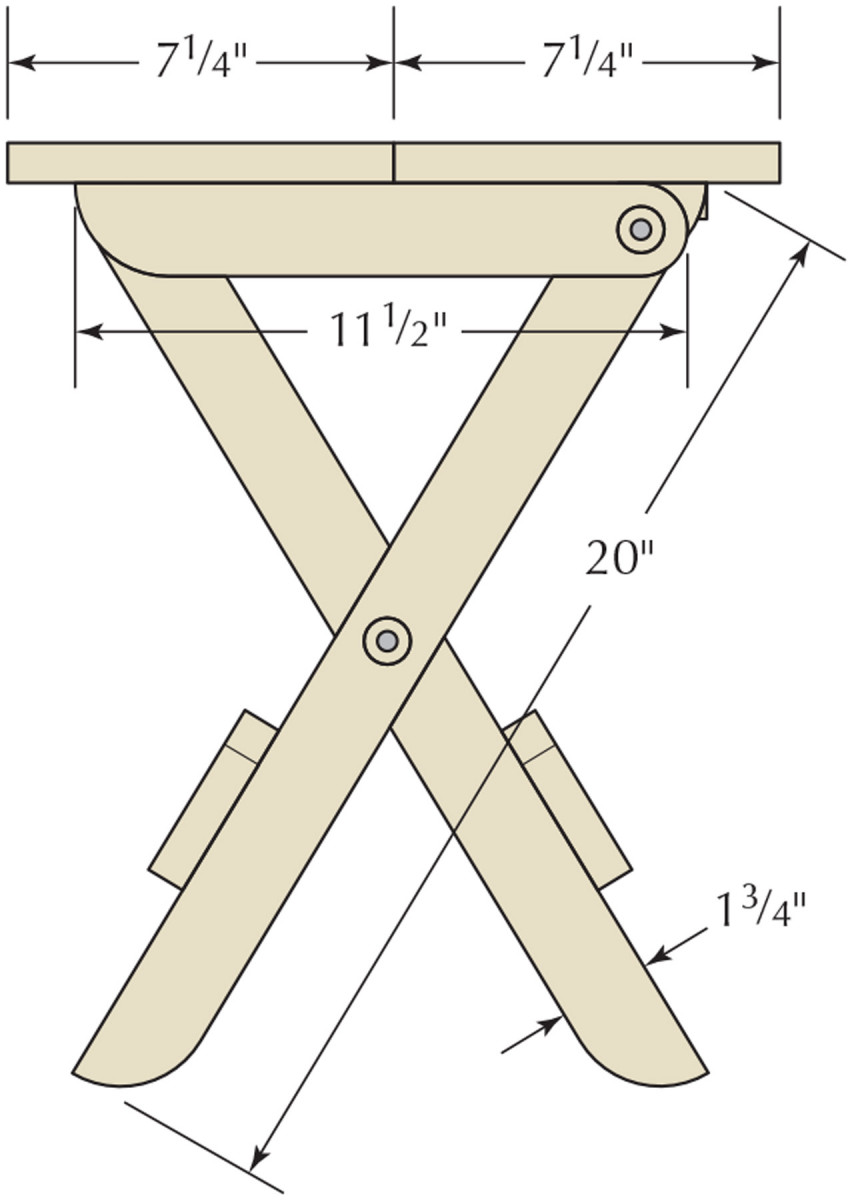
Profile
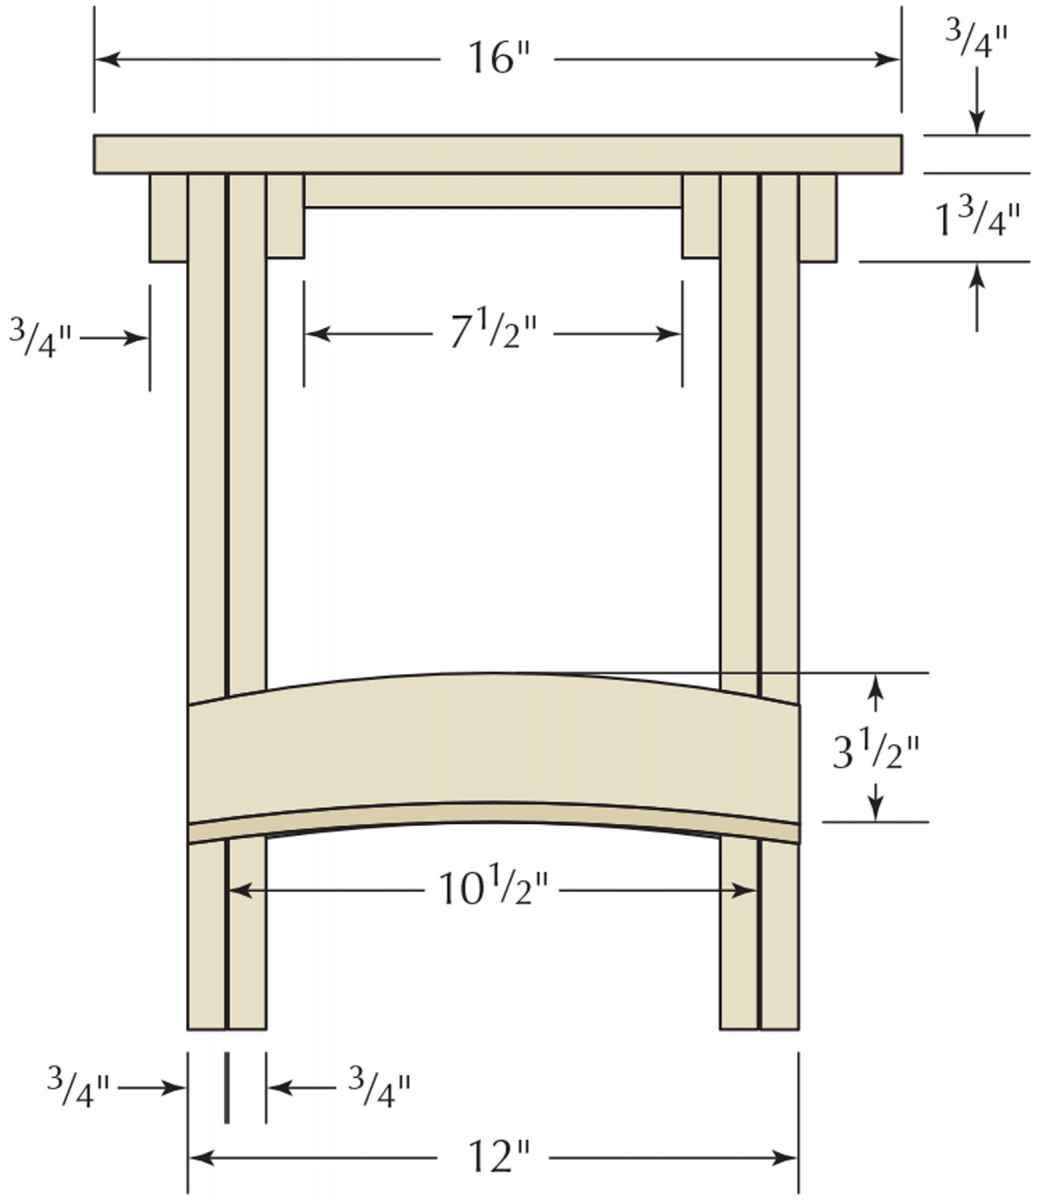
Elevation
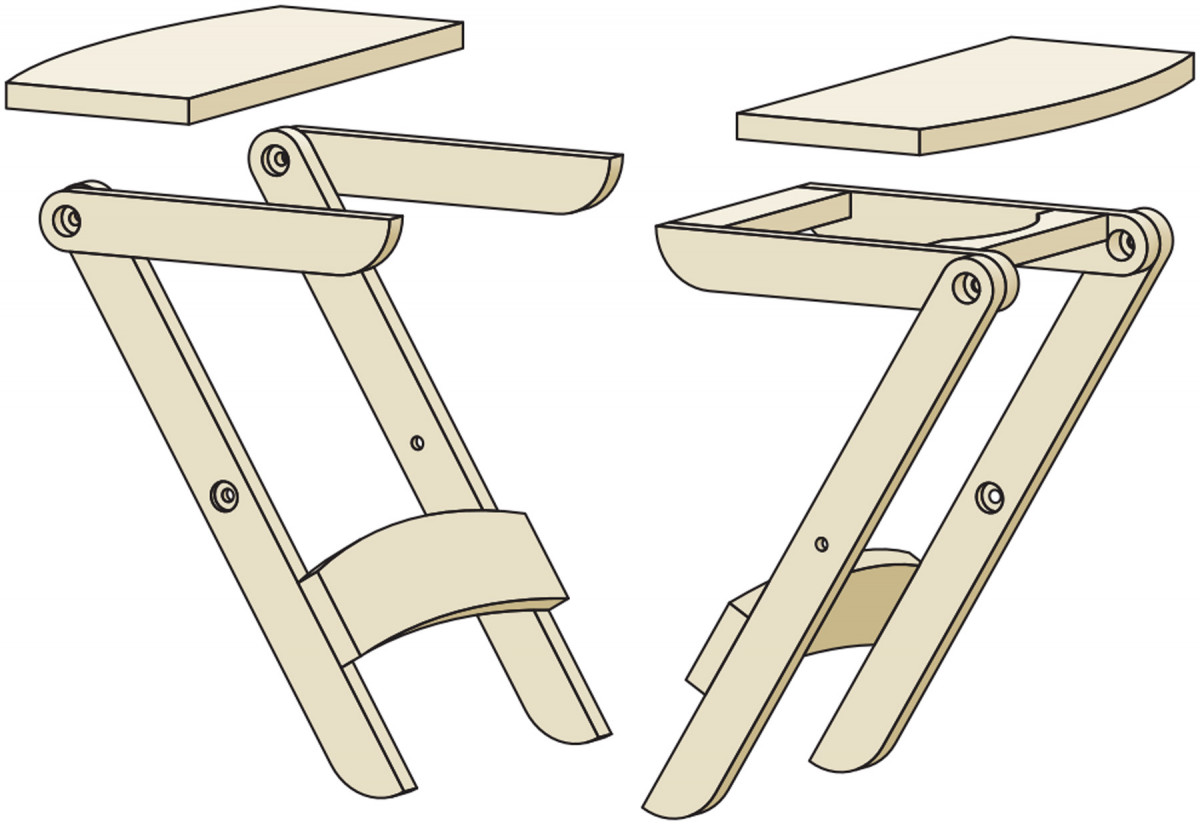
Exploded View
Leg Assembly
Assemble the legs and cleats together into pairs, with 3⁄8″ fender washers behind each nut and bolt,and between the legs. Lock the nuts in place with Loctite or other thread-locking product, so they don’t work themselves loose as you fold and unfold the stool.
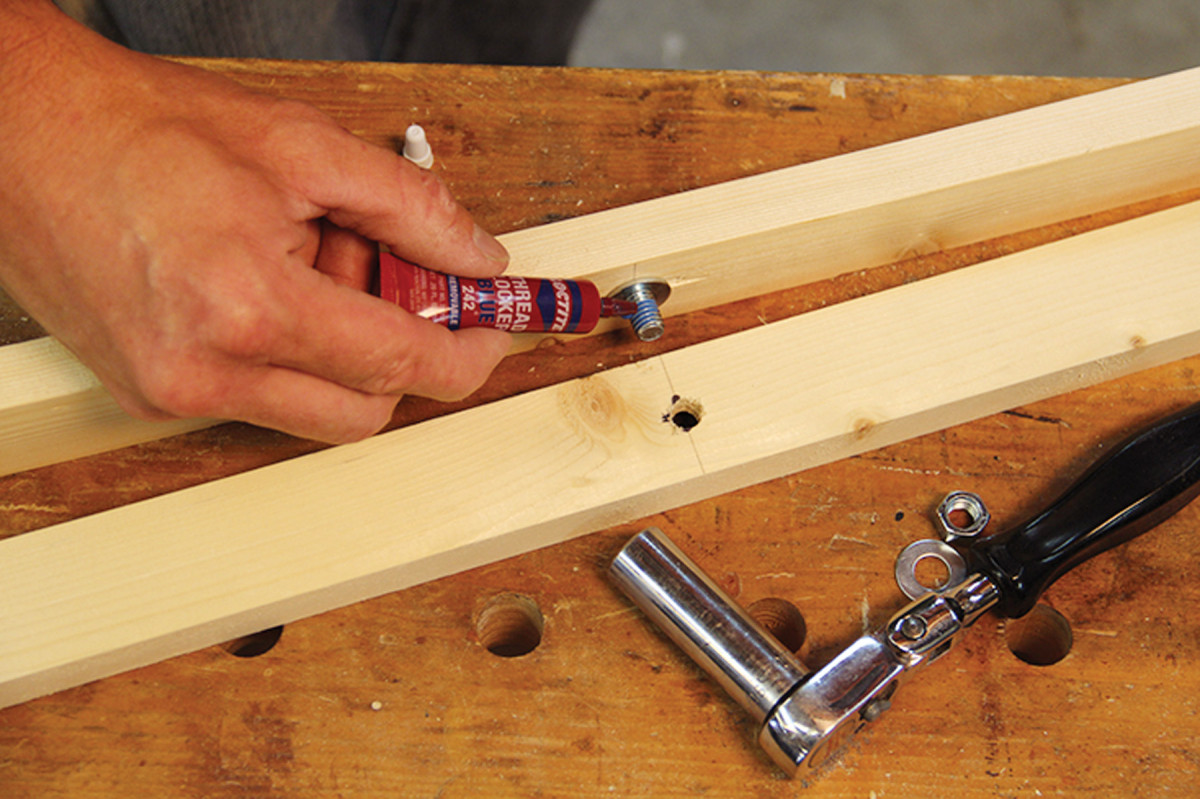
Lock it. A few drops of a thread-locking product will keep the bolts in place as you fold and unfold the seat.
The completed assemblies should mirror one another.
The leg assemblies are connected by the handle and brace. Both pieces are the same overall size, but use a jigsaw to cut a curve in the handle for comfortable grasping. Attach the handle and brace to the cleats with pocket screws.
Sitting Pretty
Screw it. Use pocket screws to attach the brace and handle to the cleats.
Set the leg assemblies aside and turn to the seat. First, cut the two seat pieces to length from the 1×8 at the miter saw.
Now it’s time to lay out the curved edges (if you leave the edges straight, the seat will bite into the back of the sitter’s legs). Because this curve is too large for most compasses, make a simple trammel (also known as a beam compass) from a thin strip of wood and a pencil. Drill a hole in one end of the strip for the pencil to go through, then measure 26-5⁄8″ to the other end, and hammer a nail through the strip at that point.
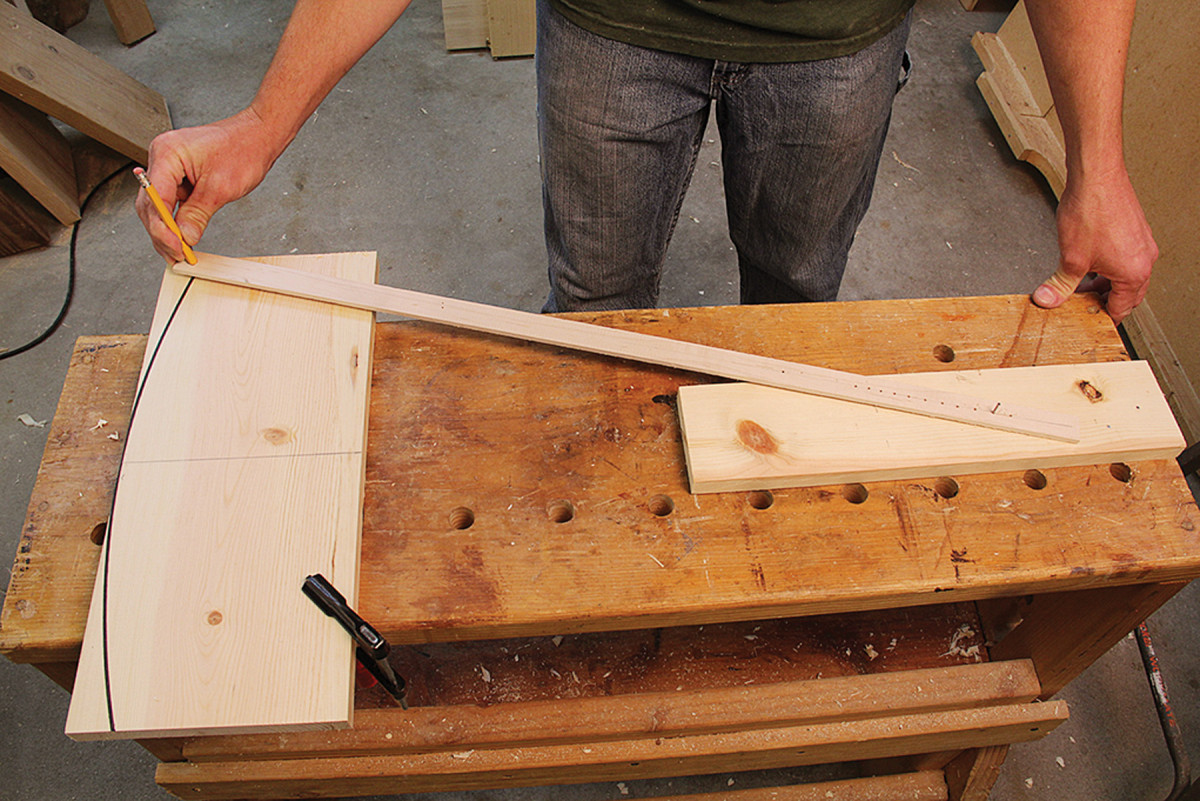
Trammel. A thin strip of wood, a nail and a pencil is all it takes to make a simple trammel for marking large curves.
Using the nail as a pivot point, mark the arc on the two seat pieces. Note in the photo above that I have an offcut supporting the trammel at the nail end, to keep it co-planar with the workpiece.
Mark the curve on both pieces, then cut them out with the jigsaw. Smooth the edges with a block plane and/or sandpaper.
Put it All Together
With the leg assembly upside down, place it atop the halves of the seat. The centers of the leg cleats should line up with where the edges of the two seat pieces come together. (To make it easier, you can mark the centerline on the edge of the cleats as I’ve shown here – but you’ll want to sand off those marks before you apply a finish.)
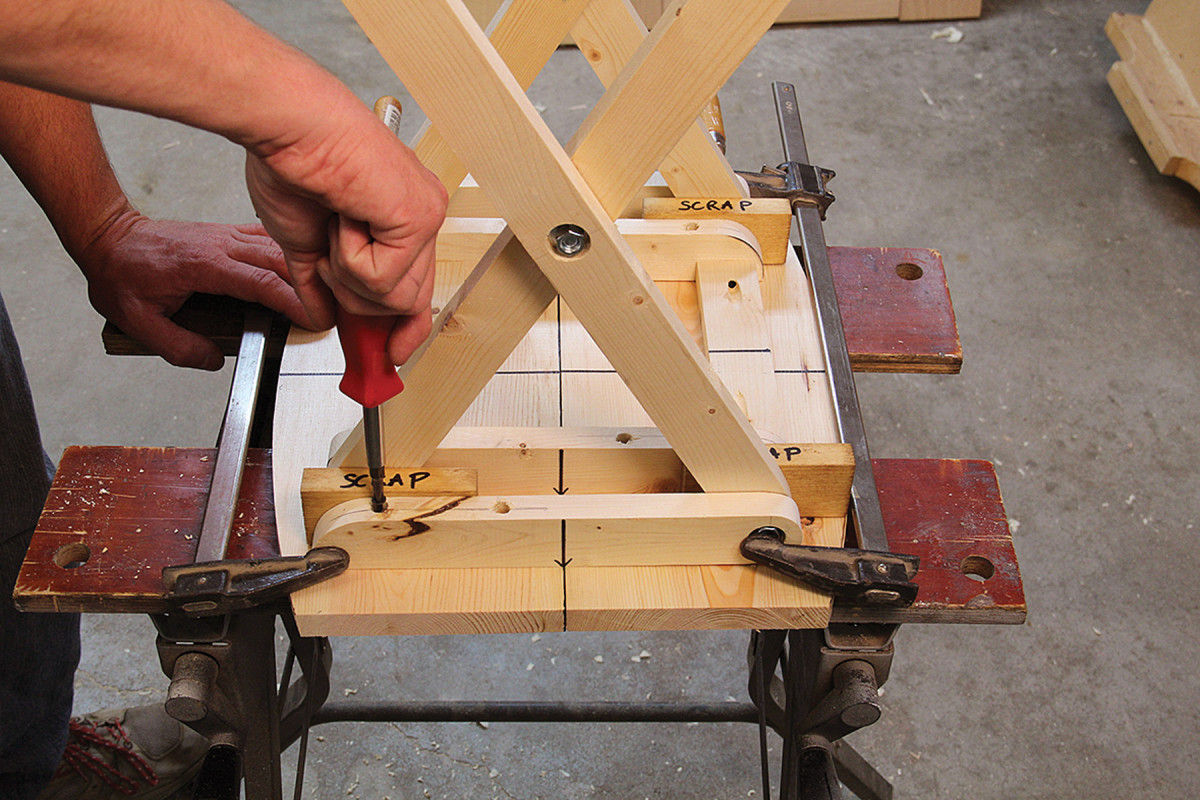
Perfect spacing. A scrap of wood helps to locate the cleat position to the seat as you screw them together.
Drill two 3⁄8″ countersink holes and two 3⁄16″ clearance holes on the toe end of each seat cleat.
It’s essential that there is no binding or pinching in order for your stool to fold smoothly. So use scrap pieces of wood (in the same thickness as the legs) as spacers, placing them between the cleat and legs as you locate the cleats on the underside of the seat pieces. Now use 2″-long #8 wood screws to attach the cleats to the seat.
The final pieces are the stretchers – without them, the stool could collapse under load.
Rip the remaining piece of your 1×8 (you should have a 16″-long piece left) in half, then smooth the edges with a block plane. You’ll end up with two pieces that are each approximately 35⁄8″ wide. After cleaning up the cuts with a block plane, you’ll be close to the 3-1⁄2″ width noted in the cutlist (the precise width is not critical).
Now cut them to length, and use your trammel to lay out curves that match those on the seat. Cut the curves with a jigsaw, and sand the edges smooth.
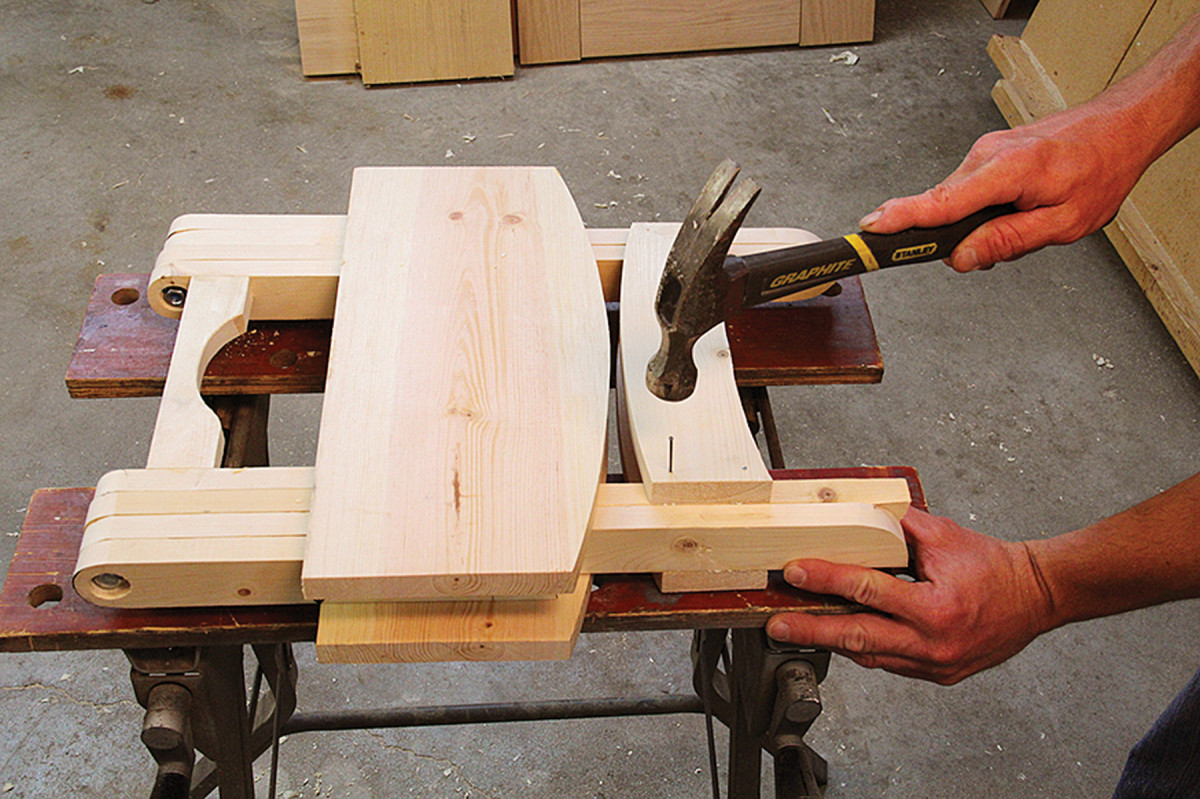
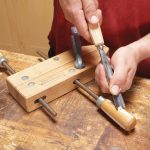
Nailed it. The final step in assembly is to nail the stretchers in place (after drilling pilot holes for the nails, of course).
With the seat folded and lying flat on the bench, align the stretchers to the legs, mark your nail locations, then drill 1⁄16″ pilot holes. Nail the stretchers in place using 1-1⁄4″ nails.
Stain & Finish
The smooth folding action of the legs has a tight tolerance; paint or a thick coat of polyurethane might interfere with that. So, I recommend using a stain (if you don’t like the looks of raw pine) and wipe-on poly. And don’t leave your stool out in the harsh weather – it does, after all, fold up for easy transport and storage.
In the opening photo, you might have noticed the matching table. That’s simply a scaled-up version of the stool. You’ll find a SketchUp model for it – along with the model for the stool right here.
Here are some supplies and tools we find essential in our everyday work around the shop. We may receive a commission from sales referred by our links; however, we have carefully selected these products for their usefulness and quality.


Should the top pieces in both the exploded view on p. 51 and in the sketch up model be rotated 180 degrees so that the curved part of the top is adjacent to the curved part of the stretcher when the stool or table is closed? I can’t see how this would work ulless they are reversed and and the picture on p. 52 shows him nailing the stretchers with this (reversed) orientation.